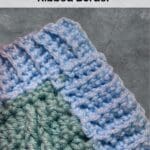
How to Crochet a back loop single crochet ribbed border
The back loop single crochet ribbed border is a simple yet effective technique that creates a stretchy, textured edge that mimics knitted ribbing. Perfect for a crochet blanket border. It gives a crochet project such a nice, polished look.
Equipment
- Crochet Hook:
- Scissors:
- Tapestry Needle
- Stitch markers (optional)
Materials
- Yarn Choose a yarn that complements your project. Worsted weight yarn is great for blankets, while a lighter weight is perfect for garments.
Estimated Cost 3
Instructions
Begin Crochet Pattern
- Start by making a slip knot and adding the loop on the hook.
- Start with the Sides of your Project. Join the yarn to a corner on one of the sides of your crochet project. Attach your yarn for the ribbing with the front side facing you.Yarn
- Chain your desired number of chains for your foundation chain.
- For the sample in the video tutorial, I made a small swatch using a chain of 6 stitches.
- Now we’ll work back down the chain toward the edge of the blanket or crochet project. Work a SC into the second chain and in each ST across. Work a SL ST back into the SP where we joined our yarn. Work 1 SL ST into the next 1 or 2 STs. (I used 2 stitches for a better foundation).
- Row 1 completed
Row 2
- Turn your work. SK the 2 or 3 SL STS (In my sample it is 3 SL STs). Work a SC BLO into each ST across. (Forward pass completed). Begin the return pass. CH 1, SC BLO into each ST across. Work a SL ST back into the base of the row in the body of the project. And work a SL ST into the next 1 or 2 STs. (I used 2 stitches).
- *For my sample there should be 5 SC BLO and 3 SL STs.
Rows 3 and Beyond
- Continue to repeat row 2. Working the forward and return rows as needed.
- Crocheting the Top and Bottom Borders. When you are finished with the sides.
- Fasten off and weave in ends securely with a tapestry needle.
- Join the yarn to a corner on either the top or bottom of your crochet project with the front side facing you. (The outer edge where you just worked your side ribbing border).
- Then continue working the forward and return passes of the pattern.
Finishing
- Leave a 10-12-inch-long yarn tail. Pull through the last loop on the hook. Using your tapestry needle. Weave the yarn back and forth in the same color yarn until snug. Trim off any excess.
Notes
Abbreviations
- Body = The main of your project that the ribbing is being applied to
CH = Chain
Forward Row = The rows worked moving away from the body
RS = Right Side. The front side of your project
Return Row = The rows worked moving toward the body
SC = Single Crochet
SC BLO = Single Crochet Back Loop Only
SL ST = Slip Stitch
SP = Space
ST = Stitch
STs = Stitches
WS = Wrong Side. The back side of your project
[ ] = Repeat Between
Pattern Notes
Turn at the end of each row.This pattern is written in U S Crochet Terms.
There are links for video tutorials below the written pattern.
When working the stitches on the sides of the crochet project, ease the stitches along with side about the same width as you would be working in the stitches in the top and bottom of the project.
Count the stitches. Be sure you don’t accidentally omit stitches or add them. I found it necessary to count as I crocheted each row.
Helpful Tips Before We Get Started
Right Side and Wrong Side. This ribbing technique creates a distinct right and wrong side (or front and back side) to your fabric. Therefore, if your project has a distinct right and wrong side to it, you’ll need to attach your yarn for the ribbing with the front side facing you. If you use the same yarn color for the ribbing as you did for the body, this might not matter. But if you use a different color, it will be less attractive on the back side.Therefore, I recommend attaching the yarn and working the ribbing pattern on the front side or right side of your crochet project. Forward Rows and Return Rows. The forward rows are the rows worked while moving away from the body of the project. Return rows are those worked moving back toward the body.
Slip Stitches. Work 2 or 3 slip stitches at the end of the return rows. One is to anchor the return row and the next one or two are to set up for the next forward row.
Changing the Width of the Ribbing. For this sample, I used a starting chain of 5 + 1 = 6. You can make this pattern using any desired number of chain stitches. Chain the desired length of ribbing +1 for the turning chain. For this sample, my beginning chain of 6 stitches will result in 5 single crochets. Just make sure that you start with the right side or front side of your work facing you and attach your ribbing yarn to the stitch you plan to begin your ribbing.
