How to Make a Classic Double Monkey Wrench Quilt Block
The Double Monkey Wrench quilt block is simple yet striking in design. Its bold geometric design stands out, whether you’re making a single block or incorporating it into a larger quilt.
Equipment
- Sewing Machine
- Cutting tools
- Ruler.
Materials
- Fabric
- Thread
Estimated Cost 5
Instructions
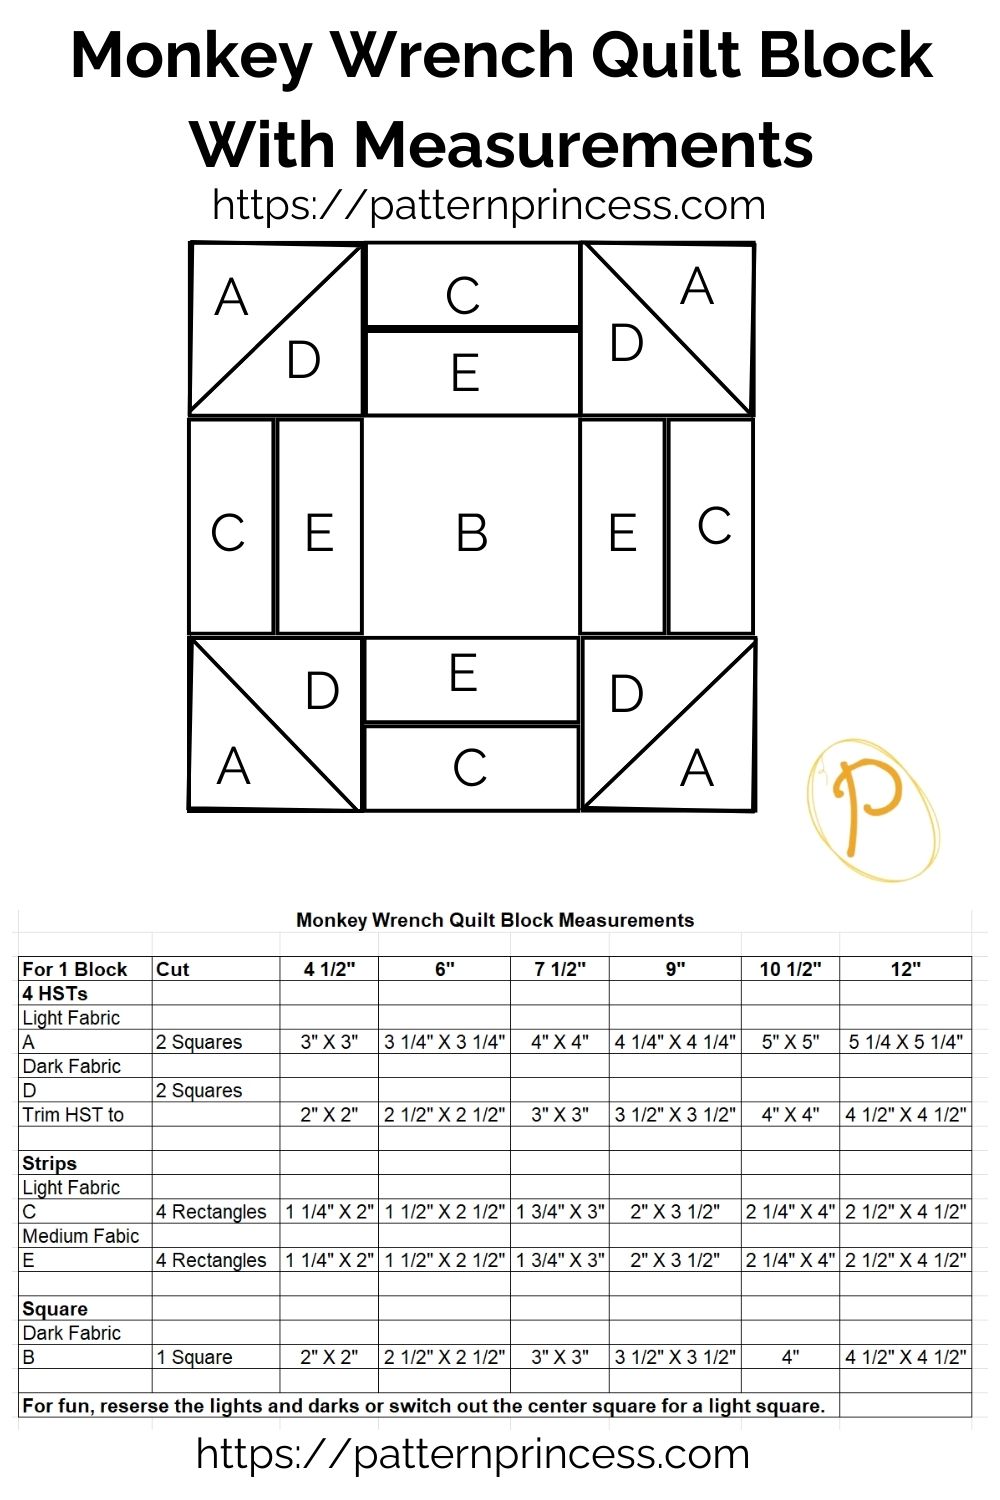
Cutting the Fabric:
- Start by cutting the following pieces:
- B = (1) 4 1/2" x 4 1/2" square from your dark fabric (for the center)
- A and D = (2) 5 1/4" x 5 1/4" squares from both the light and dark fabrics (for Half Square Triangles, HSTs)
- C = (4) 2 1/2" x 4 1/2" rectangles from your light fabric (for the outer bars)
- E = (4) 2 1/2" x 2 1/2" squares from your dark fabric or medium fabric (for the corners)
- Make sure your cuts are as precise as possible to ensure your block comes together cleanly.
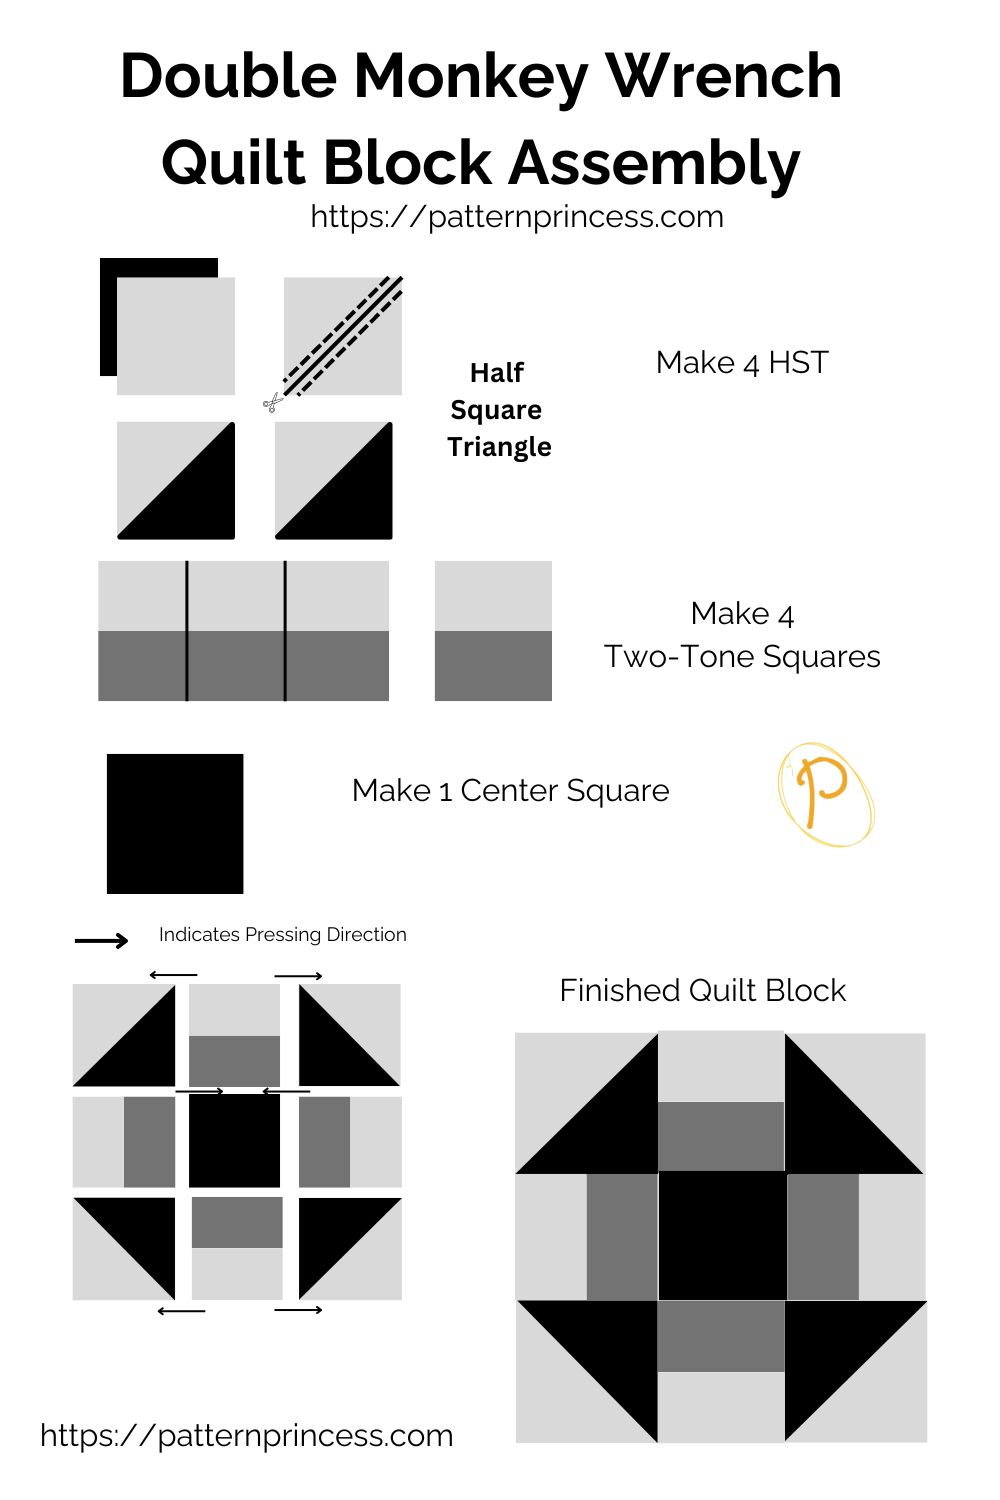
- Making the Half-Square Triangles (HSTs) for the Corner Units:
- Take the 5" squares from both the light and dark fabrics. Place them right sides together and draw a diagonal line from one corner to the other on the back of the lighter fabric.
- Sew a quarter-inch seam on both sides of the drawn line.
- Cut along the drawn line to create two HST units.
- Press the seams toward the darker fabric and trim the HSTs to 4 1/2" x 4 1/2".
- Repeat this process with the other two squares. You should have a total of (4) half square triangles.
Sewing the Two-Tone Blocks: Sometimes Called Bar Units:
- Take one 2 ½” X 4 ½” light rectangle and one 2 ½” X 4 ½” medium fabric rectangle and sew together lengthwise using ¼” seam allowance. Press seams to the darker fabric.
- Repeat this process three more times.
- You should have a total of (4) two-tone units.
Alternative method of making the two-tone units using strip sets.
- Cutting the Fabric using the Strip method for the two-tone blocks.
- Cut (1) 2 ½” X 18” strip of light fabric.
- Cut (1) 2 ½” X 18” strip of dark or medium fabric.
- With the right sides together, sew the strips lengthwise using ¼” seam allowance. Press the seam to the darker fabric.
- Sub cut the strip into (4) 4 ½” segments.
Assembling the Block:
- Refer to diagram for visual assistance.
- Place the dark 4 1/2" square in the center.
- Position a HST on each corner with the darker fabric on the inside.
- Place the 2 1/2" x 4 1/2" two-tone squares on each side of the center square with the darker fabric on the inside.
- With the right sides together, sew the blocks together in rows.
- Press each row as you go to ensure neat seams. The top and bottom row press seams out. Center row, press seams in.
Building the Final Block:
- Once you’ve sewn each row, join the rows together to form the final block. With the right sides together, pin and nest the seams to ensure everything lines up neatly.
- Sew the rows using a quarter-inch seam allowance. Press the seams flat for a crisp, professional finish.
Notes