How to Make Twisted Fringe for Crochet Projects
Adding twisted fringe to your crochet work is a creative way to enhance projects with a polished, textured finish. This looks great on a cozy winter scarf, a colorful shawl, or a statement wall hanging, twisted fringe adds a beautiful, professional touch.
Equipment
- Crochet Hook:
Materials
- Yarn. Use the same yarn as your project or mix it up with a complementary color for contrast.
Estimated Cost 5
Instructions
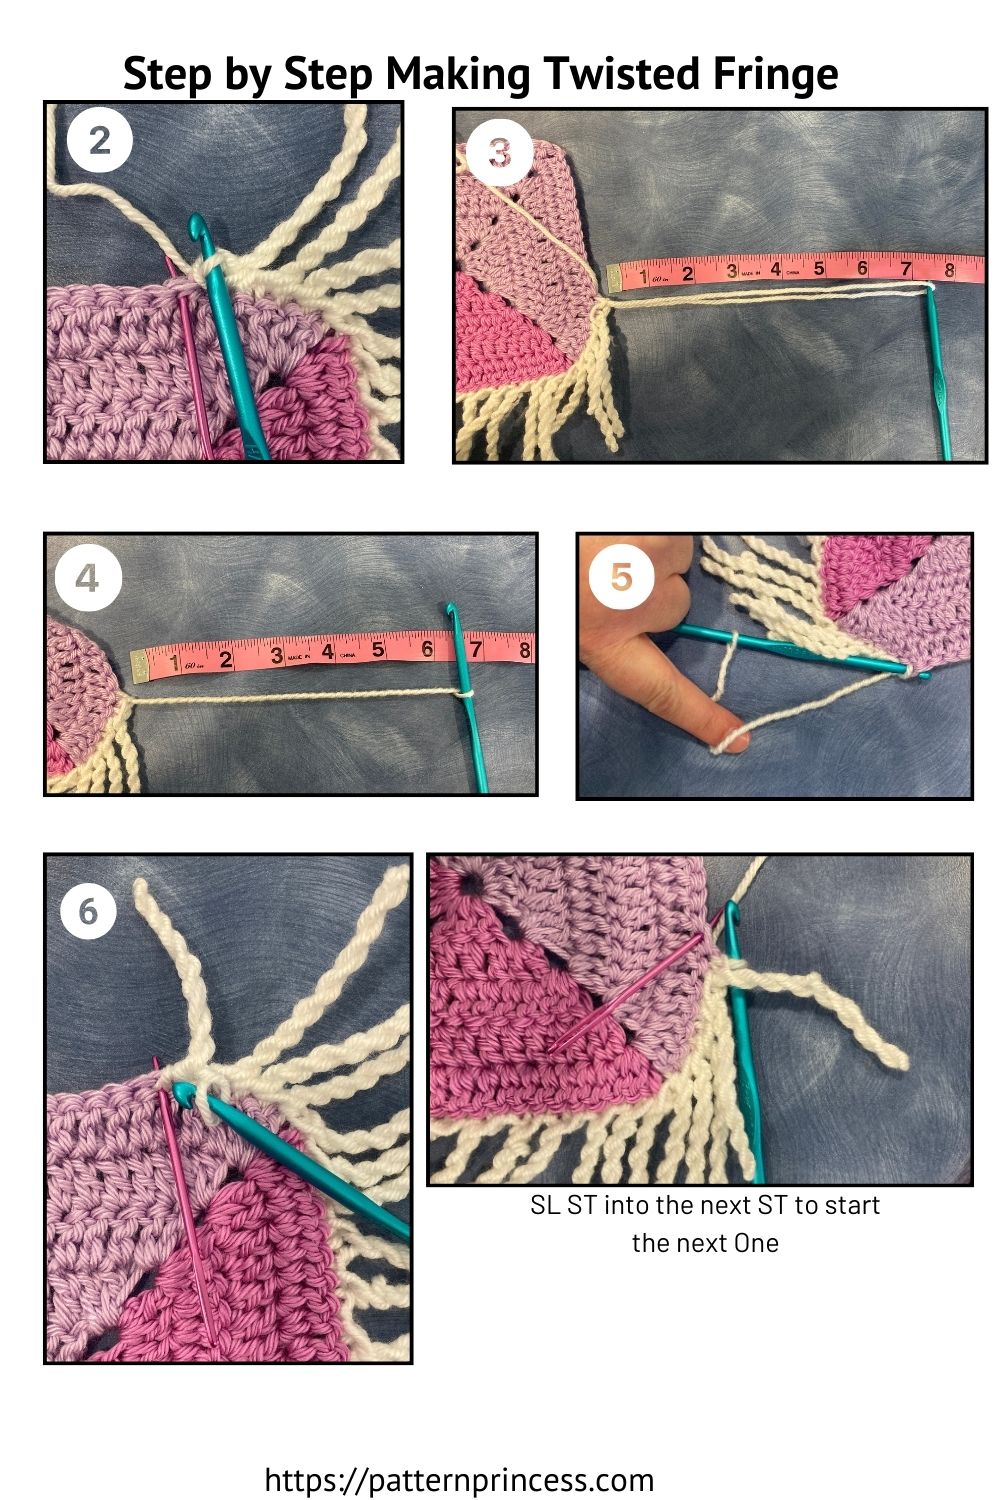
- Begin with a Slip Knot. Create a slip knot and place it on your crochet hook.
- In the first stitch, work a slip stitch. Yarn over and pull the yarn through the stitch and loop on the hook.
- Pull up a loop to your desired length, measuring if you’d like each fringe loop to be consistent. My example was approximately 7 inches.
- Twist the Loop. Pinching the slip knot at the base so it doesn’t stretch out, rotate the hook twisting the loop.
- Optionally, use your index finger to twist the loop. If you’re twisting with your finger, remove the hook temporarily and keep the loop secure by holding the end. Then reinsert the hook for the next step.
- Count the number of twists according to your pattern or until the fringe has the desired tightness.
- Complete the Fringe. Fold the twisted loop in half holding taught. I like to place a finger in the middle to hold taught. Work another slip stitch back into the original stitch to secure the twisted fringe.
- Fluff the fringe gently to encourage it to lay nicely and add fullness if desired.
- Continue Adding Fringe
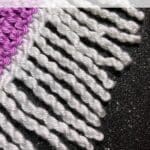
- Slip stitch to the next stitch in your project to begin the next twisted fringe, repeating steps 1–6 for each section. Note. If choosing the spaced fringe, you’ll do one extra slip stitch before working the twisted fringe steps.
Notes
Pattern Notes
Written in US Crochet Terms. Using the same type of yarn helps the fringe flow seamlessly into your project’s edge. However, a different color will help the fringe stand out. Twisted fringe is not cut at all, it is just twisted onto itself. The coiling causes it to naturally twist along itself and stay twisted. The length of the loop and the number of times that you rotate the yarn twist will make a difference in how the final twist will look. Plan on the length of the twisted fringe being about half of the length of loop that you start with. Approximately 3-4 twists per inch.• 4 inches about 12-16 twists.
• 5 inches about 15-20 twists.
• 6 inches about 18-24 twists.
• 7 inches about 21-28 twists.
• 8 inches about 24-32 twists.
• 9 inches about 27-36 twists.
• 10 inches about 30-40 twists. Video showing how to make the twisted fringe