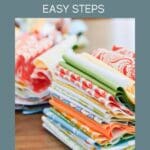
How to Make a Quilt from Start to Finish 8 Easy Steps
We'll take you through the rewarding process of making a quilt from start to finish in just eight easy steps. Where you turn pieces of fabric into cherished heirlooms and beautiful gifts.
Perfect for a beginner, but no matter what your skill level is, you can master the art of quilting with this comprehensive guide.
Equipment
Materials
- Fabric for quilt top
- Fabric for backing
- Fabric for binding
- Batting quilt filling
- Thread
- Quilting ruler and rotary cutter
- Sewing machine
- Pins and needles
- Iron and ironing board
- Quilting gloves optional but helpful
Estimated Cost 50.00
Instructions
- Choose the pattern design. Decide on a quilt design and pattern. You can find patterns in books, magazines, online, or create your own design.
- Select the fabrics and gather the supplies. It’s fun to select fabric for the quilt top, backing and binding. Choose fabrics that match your pattern and color scheme. Having the correct materials and supplies helps the whole process easier.
- Cut your pieces. Begin by working on the quilt top following the directions on the quilt pattern or designing your own. Use a quilting ruler and rotary cutter to cut fabric pieces according to your pattern's specifications.
- Sew fabric pieces together. Using your chosen pattern, sew the smaller fabric pieces back together to create designs for the quilt top. Use precise seam allowances for perfect seam matching.
- Add Borders. Not all quilts have a border, if yours does, add the border before moving onto the next step.
- Making a Quilt Sandwich. Create a quilt sandwich by adding batting and backing fabric. Lay the quilt backing right side down, place the batting on top, and then add the quilt top right side up. Baste or pin the layers together to create the "quilt sandwich."
- Quilt the Layers. There are three layers to a quilt. Use quilting stitches to hold the layers together. Stitch through all three layers (top, batting, and backing) to secure them. You can use various quilting techniques, such as straight line quilting, free-motion quilting, or hand quilting.
- Trimming and Binding the Edges. Trim the excess batting and backing to match the quilt top's size. Then create your binding strip. Sew on the long strip to the edges of your quilt to finish and bind it.
- Optional Steps
- Add a label with your name, date, a memorable saying, and other details to the back of the quilt.
- Embellish your quilt with additional elements like embroidery or appliqué if desired.
