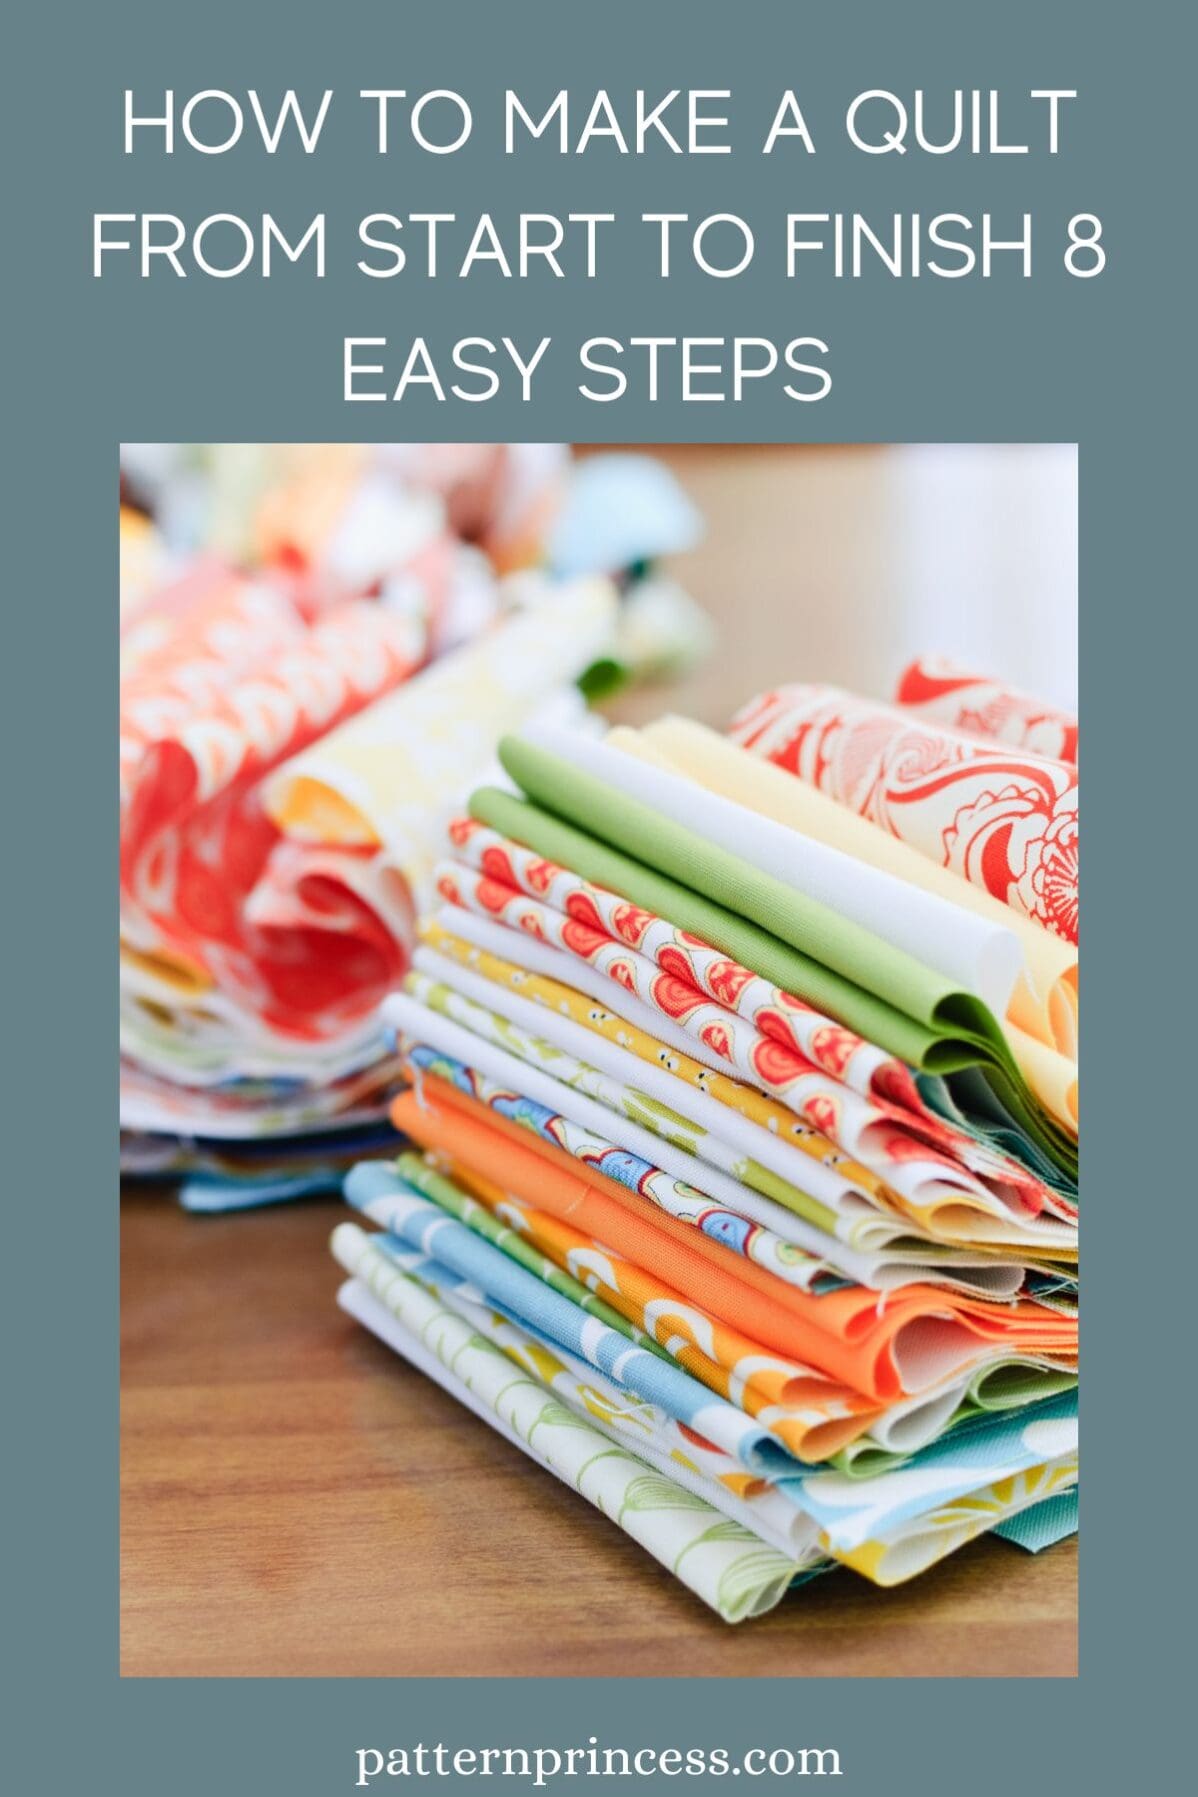
Last updated on July 4th, 2024 at 11:31 pm
We’ll take you through the rewarding process of making a quilt from start to finish in just eight easy steps. Where you turn pieces of fabric into cherished heirlooms and beautiful gifts.
Perfect for a beginner, but no matter what your skill level is, you can master the art of quilting with this comprehensive guide.
There’s something truly magical about wrapping yourself in a handmade quilt, isn’t there? The warmth, comfort, and the sense of nostalgia that a quilt can provide are unparalleled.
Whether you’re an experienced quilter or a new quilter, embarking on a journey to create your very own quilt is an endeavor that promises both creativity and satisfaction.
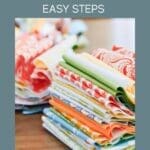
Selecting the perfect fabric for the quilt top design and stitching it all together.
Quilting is a journey, it tells a story and is a lasting testament to your creativity, patience, and the timeless craft of sewing.
Post contains affiliate links, and we earn commissions if you shop through the links on this page. For more information, please read the disclosure section under the About Us page.
Steps to Making a Quilt
Let’s dive into the world of quilting. Get ready to transform ordinary fabric into extraordinary art, one stitch at a time. Below is an overview of the 8 steps involved in making a quilt from start to finish.
1. Choose the pattern design.
Decide on a quilt design and pattern. You can find patterns in books, magazines, online, or create your own design.
2. Select the fabrics and gather the supplies.
It’s fun to select fabric for the quilt top, backing and binding. Choose fabrics that match your pattern and color scheme. Having the correct materials and supplies helps the whole process easier.
3. Cut your pieces.
Begin by working on the quilt top following the directions on the quilt pattern or designing your own. Use a quilting ruler and rotary cutter to cut fabric pieces according to your pattern’s specifications.
4. Sew fabric pieces together.
Using your chosen pattern, sew the smaller fabric pieces back together to create designs for the quilt top. Use precise seam allowances for perfect seam matching.
5. Add Borders.
Not all quilts have a border, if yours does, add the border before moving onto the next step.
6. Making a Quilt Sandwich.
Create a quilt sandwich by adding batting and backing fabric. Lay the quilt backing right side down, place the batting on top, and then add the quilt top right side up. Baste or pin the layers together to create the “quilt sandwich.”
7. Quilt the Layers.
There are three layers to a quilt. Use quilting stitches to hold the layers together. Stitch through all three layers (top, batting, and backing) to secure them. You can use various quilting techniques, such as straight line quilting, free-motion quilting, or hand quilting.
8. Trimming and Binding the Edges.
Trim the excess batting and backing to match the quilt top’s size. Then create your binding strip. Sew on the long strip to the edges of your quilt to finish and bind it.
Optional Steps
Add a label with your name, date, a memorable saying, and other details to the back of the quilt.
Embellish your quilt with additional elements like embroidery or appliqué if desired.
Your quilt is now complete. Share it with loved ones or proudly display it in your home.
Quilting is a skill that improves with practice, so don’t be discouraged if your first quilt isn’t perfect.
Enjoy the creative process and the satisfaction of creating a beautiful, functional work of art. With each of your own quilts you make, your skills will grow, and your blankets and table runners will become even more impressive and cherished.
Let’s talk more in-depth about all the steps involved in making a quilt.
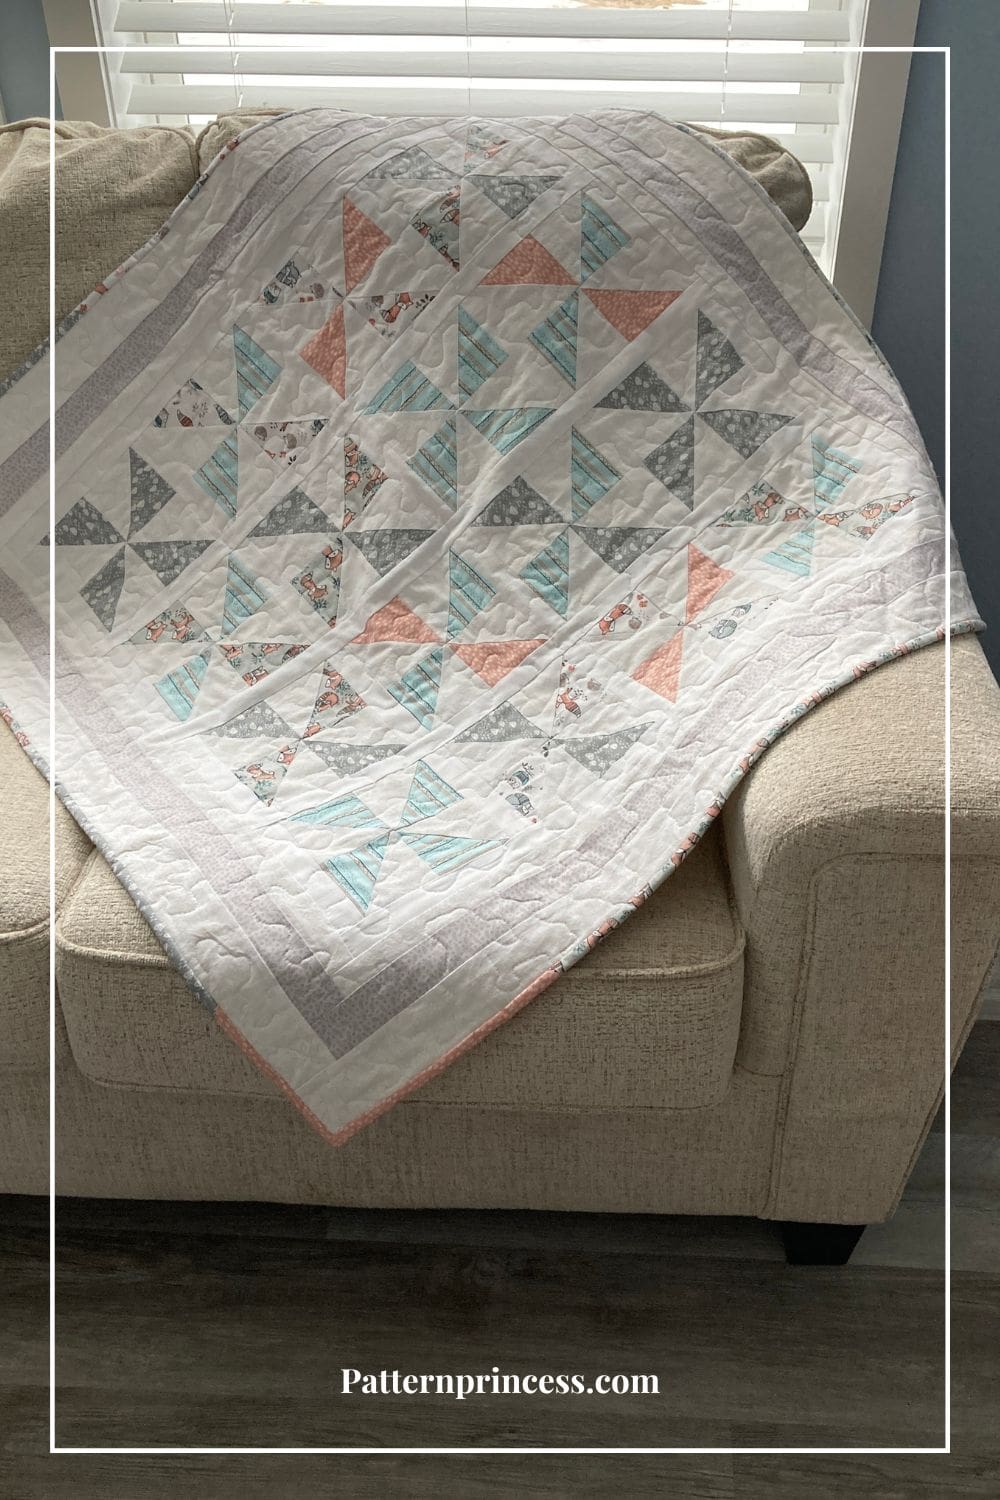
Photo is the free Charleston Beginner Pinwheel Quilt Pattern.
How to Make a Quilt for Beginners
So, you want to make a quilt. Great! If you are making your first-ever quilt, this guide can help you work through all the steps.
Choosing Quilt Patterns. Start with something small to help you learn the basic techniques. Start with a table runner, lap quilt, or even coffee mug rug to get the basics down.
Then progress to larger projects. Baby quilts are perfect for beginning quilters. Use one of these tutorials or pick a very basic block like a four patch or half-square triangles to begin. Triangles are a popular option for quilters because there are so many different possibilities.
There are numerous resources available for finding patterns, including quilting books, magazines, and websites. Some patterns are simple and perfect for beginners, while others are more complex. Choose one that matches your skill level and preferences.
Simple Blocks Beginning Quilt Pattern
Sweet Dreams Easy Quilt Pattern
Elaine Simply Done Quilt Pattern
Easy Reversible Quilted Table Runner Pattern
Charming Pastel Half Square Mini Quilt Pattern
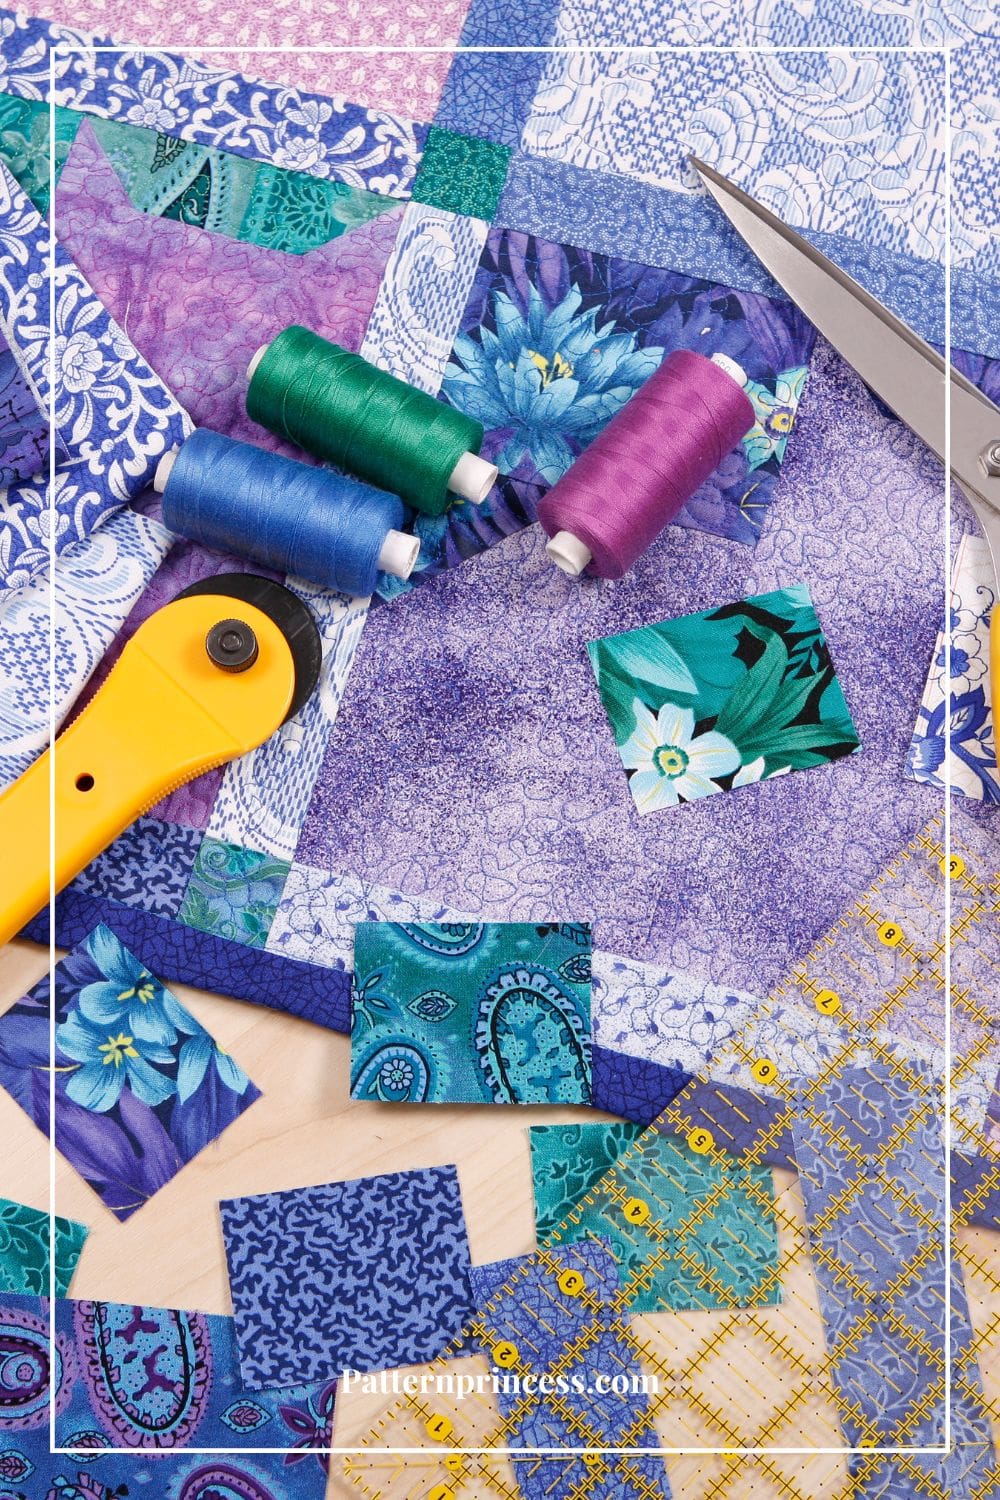
Selecting the Fabric and Tools for Making a Quilt.
Selecting the fabric for the quilt is one of the most exciting parts of quilting. Often, I find myself purchasing fabric for a future pattern just because I love the look of it so much. Yes, I have a little fabric stash.
Fabric: Choose high-quality 100% cotton fabric for your quilt. You’ll need fabric for the quilt top, backing, and binding. Consider colors and patterns that match your design.
When choosing fabrics, consider color coordination and fabric quality. Decide on a color scheme that appeals to you. Some quilters use a color wheel or swatches to help them plan. Invest in high-quality quilting cotton. Wash and press your fabric before cutting to prevent shrinkage.
Batting: Select batting made from cotton, polyester, or a blend. The thickness (loft) of the batting affects the quilt’s warmth and appearance, so choose one that suits your preferences.
Thread: Use 100% cotton thread for quilting. Select thread colors that complement your fabric choices.
What Sizes do Pre-Cut Fabric Come In?
Pre-cut fabric, often referred to as “quilting fabric precuts,” comes in various standard sizes, each with its own name and typical use in quilting and crafting projects. These pre-cuts are popular among quilters because they save time on cutting.
Often, they come in a coordinated selection of fabrics for a project. If you are a newer quilter, it is a great idea to use precuts to help get your first project going.
Here are the more common pre-cut fabric sizes.
Fat Quarters (FQ)
Size: Approximately 18 inches by 22 inches (46 cm x 56 cm)
Use: Fat quarters are versatile and can be used for a wide range of quilting and sewing projects. They are a favorite for quilters as they offer more fabric than a standard quarter-yard cut and can be used for larger pieces or smaller patchwork blocks.
Charm Packs
5 inches by 5 inches (12.7 cm x 12.7 cm)
Use: Charm packs contain a collection of coordinating fabric squares, making them ideal for small patchwork projects, such as quilt blocks, table runners, and small craft items.
Layer Cakes
10 inches by 10 inches (25.4 cm x 25.4 cm)
Use: Layer cakes consist of larger squares of coordinating fabric. They are perfect for making bigger quilt blocks, quilts with larger pieces, and various other sewing projects.
Jelly Rolls
Typically, 2.5 inches by the width of the fabric bolt (usually 40-44 inches or 6.35 cm x 101-112 cm)
Use: Jelly rolls are long strips of fabric, rolled up like a jelly roll cake. They are commonly used for strip quilting, where you sew the strips together to create quilt blocks and borders.
Honey Buns
Typically, 1.5 inches by the width of the fabric bolt (usually 40-44 inches or 3.8 cm x 101-112 cm)
Use: Honey buns are like jelly rolls but feature narrower strips. They are often used for intricate strip quilting and narrow borders.
Mini Charm Packs
2.5 inches by 2.5 inches (6.35 cm x 6.35 cm)
Use: Mini charm packs contain very small fabric squares, suitable for tiny patchwork projects, quilting blocks, and doll quilts.
Ten-Inch Squares
10 inches by 10 inches (25.4 cm x 25.4 cm)
Use: Ten-inch squares are larger than charm packs and are ideal for creating quilt blocks with fewer seams or for showcasing large-scale fabric prints.
Five-Inch Squares
5 inches by 5 inches (12.7 cm x 12.7 cm)
Use: Five-inch squares are often used for smaller quilt blocks and projects that require smaller fabric pieces.
These pre-cut fabric sizes are convenient for quilters and crafters, as they reduce the time spent on cutting and ensure that fabric coordinates well within a project.
What is a Quilting Ruler?
A quilting ruler is a specialized measuring and cutting tool used in quilting and other fabric-related crafts. Quilters rely on these rulers to ensure accurate and precise measurements and to assist with cutting fabric pieces with straight edges, angles, and various shapes needed for quilting projects.
Accurate Measurements. Quilting rulers have clearly marked measurements, typically in inches and sometimes in centimeters, along their edges. These markings help quilters measure and cut fabric pieces accurately to the desired size.
Many quilting rulers include grid lines or a grid pattern of squares or rectangles that make it easier to align the ruler with the fabric and ensure straight cuts. These grid lines are especially helpful for cutting strips and squares.
Quilting rulers often have markings for common quilting angles, such as 45-degree and 60-degree angles, as well as shapes like triangles, hexagons, and diamonds. These markings help quilters cut fabric pieces with specific angles or shapes required for quilting patterns.
Some quilting rulers feature a non-slip surface on the bottom to prevent the ruler from shifting or sliding on the fabric while cutting. This enhances safety and accuracy.
Clear and See-Through. The clear acrylic material of quilting rulers allows quilters to see the fabric underneath, making it easier to align the ruler with specific design elements or patterns on the fabric.
Quilting rulers come in various sizes and shapes, with the most common size being 6 inches by 24 inches. Smaller and larger sizes are also available to accommodate different quilting needs. Additionally, specialty rulers may have unique markings or shapes tailored to specific quilting techniques or patterns.
Quilting rulers are an essential tool for quilters of all skill levels. They help ensure that fabric pieces are cut accurately, resulting in well-constructed and visually appealing quilts.
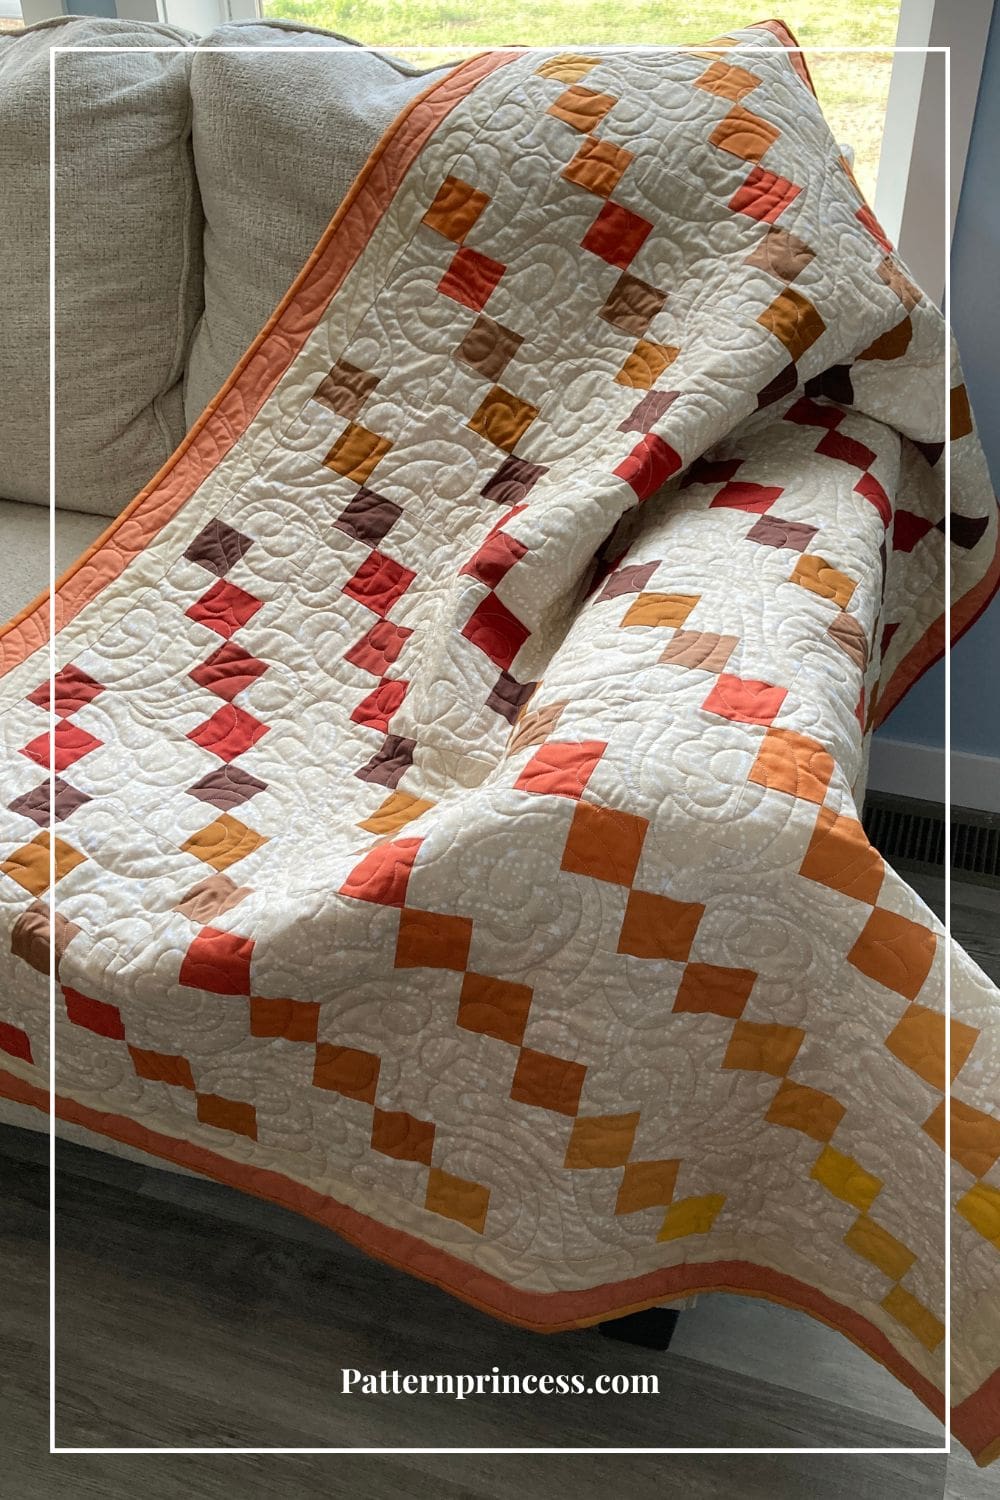
Photo is of the free Easy Four Patch Quilt Pattern Ombre Sunset.
What is a Rotary Cutter?
These tools help you accurately measure and cut fabric pieces. It consists of a circular blade attached to a handle, which allows for precise and efficient cutting of fabric, paper, or other materials.
Rotary cutters are a valuable tool for those who require clean and accurate cuts, especially when working on quilts or other sewing projects.
Precision Cutting. Rotary cutters are known for their precision. The circular blade can easily cut through multiple layers of fabric or other materials in one pass, creating clean and straight edges.
The ergonomic handle of a rotary cutter is designed for comfort and control, making it easy to cut along straight lines or curves. Many rotary cutters also feature safety mechanisms to prevent accidental blade exposure.
Speed and Efficiency. Rotary cutters are much faster than traditional scissors or shears, making them ideal for projects that require a lot of cutting, such as quilting or garment construction.
Accurate Measurements. Many rotary cutters come with built-in rulers or grid lines on the handle or a separate ruler, allowing for precise measurements and consistent cutting.
Compatible Accessories. Rotary cutters often work in conjunction with self-healing cutting mats and clear acrylic rulers to provide a complete cutting system. The mat protects your work surface, and the ruler helps guide the cutter along straight lines.
Variety of Blade Sizes. Rotary cutters come in various blade sizes, typically ranging from 18mm to 60mm or more. Smaller blades are suitable for intricate cuts and curves, while larger blades are better for straight lines and bulk cutting.
Rotary cutters are a versatile tool used by quilters, sewers, and crafters to streamline the cutting process and achieve professional-quality results. However, it’s essential to use them safely and keep the blade covered when not in use to prevent accidents and injuries.
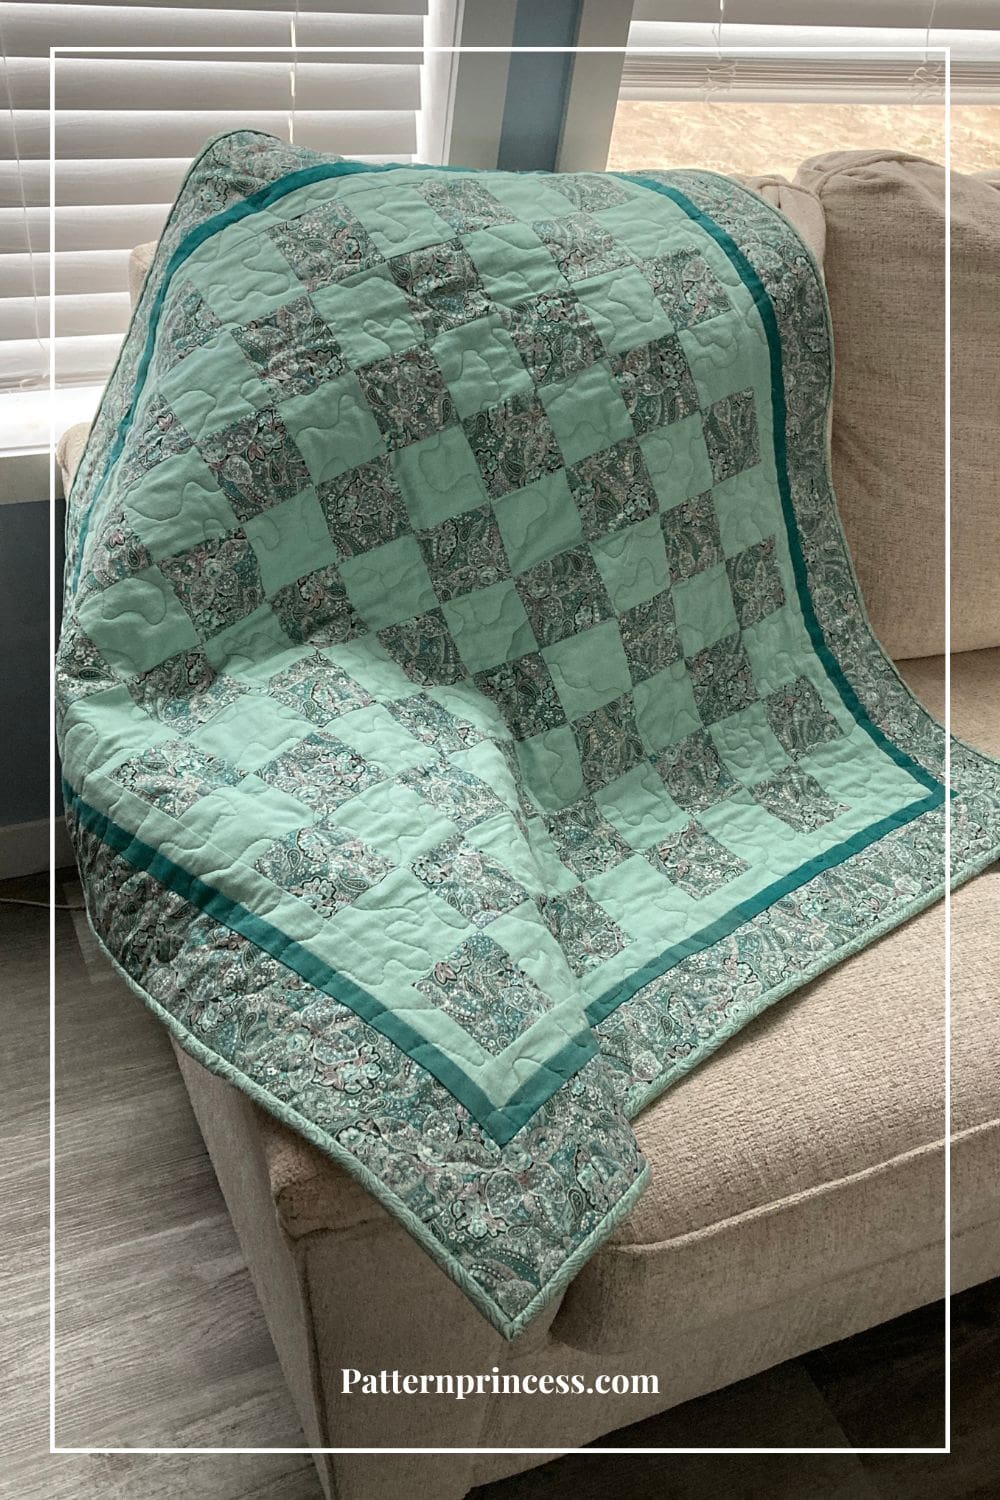
Photo is of the free Elaine Simply Done Quilt Pattern.
Self-healing Cutting Mat
A self-healing mat, often referred to as a cutting mat, is a specialized type of mat used in various crafting and hobby activities, such as quilting, sewing, paper crafting, and model making. These mats are designed to protect the underlying work surface while providing a durable, resilient cutting surface that can withstand the repeated use of cutting tools like rotary cutters, utility knives, and craft blades.
Self-healing mats come in various sizes, with grid lines and measurements marked on their surfaces, which are particularly useful for precise cutting and measuring tasks. They are an essential tool for crafters, artists, and anyone who needs a reliable and resilient surface for cutting and crafting without damaging their worktable or desk.
The term “self-healing” refers to the mat’s ability to repair or “heal” the small cuts or grooves created by cutting tools over time. This characteristic is a result of the mat’s material composition, typically made of multiple layers of PVC or other synthetic materials. When you make a cut on the mat’s surface, the material gives way slightly and then, to some extent, closes back up, minimizing the visible damage and preventing further cuts from becoming deeper or more pronounced. This feature prolongs the mat’s lifespan and ensures a smooth cutting surface, even after frequent use.
And although these mats are called “self-healing,” over time they will get ridges and grooves in places where you cut most frequently.
Sewing Machine:
While hand quilting is an option, most beginners prefer using a sewing machine for speed and consistency.
Pins and Needles:
Straight pins with glass heads are ideal for pinning fabric layers together. You’ll also need hand-sewing needles for attaching the binding. Stainless steel safety pins are a great way to baste the quilting sandwich layers together.
Iron and Ironing Board:
Pressing is crucial in quilting to create crisp seams and flat blocks.
What are Quilting Gloves?
These gloves provide a better grip while free-motion quilting. Without wearing gloves, my hands begin to slip on the fabric. This makes it hard to guide the layers of fabric under the sewing foot. Therefore, I use quilting gloves to help in moving quilt layers smoothly through the sewing machine, ensuring that quilting stitches are even and well-executed.
Quilting gloves often have textured surfaces or rubberized grips on the fingertips and palms. These features provide a better grip on the fabric, allowing the quilter to maintain control and prevent slippage while guiding the quilt through the sewing machine.
Wearing quilting gloves can help reduce hand and wrist fatigue during extended quilting sessions. The enhanced grip means quilters can exert less effort to hold and maneuver the quilt layers.
Making more precise and controlled movements is crucial when quilting intricate designs or stitching in tight spaces.
While quilting gloves are not a strict requirement for quilting, many quilters find them to be a valuable tool that enhances the overall quilting experience.
They are especially beneficial for quilters working on larger quilts, as the extra control and reduced hand fatigue can make a significant difference in the quality of the finished quilt.

How to Cut the Fabric
You need to do a few things before cutting the fabric. First press the fabric to remove any wrinkles. This helps ensure better measurements.
Choose a clean, flat, and well-lit workspace where you can spread out your fabric comfortably. Ensure that you have enough space to lay out your cutting mat and have ample room to maneuver the fabric and tools.
Refer to your quilt pattern or design to determine the required measurements for the fabric pieces you need to cut. Take note of any seam allowances specified in the pattern (usually 1/4 inch in quilting).
Place your self-healing cutting mat on your work surface. These mats are designed to protect your work surface and allow for precise cutting with a rotary cutter.
Fold your fabric in half lengthwise, aligning the selvage edges. Which is the tightly woven edges of the fabric. Smooth out any wrinkles or folds in the fabric.
Lay your quilting ruler on top of the fabric, aligning one edge of the ruler with the folded edge of the fabric. Ensure that the ruler is straight and that the measurement lines on the ruler match the dimensions you need for your fabric piece.
Hold the ruler firmly in place with one hand while using the rotary cutter with the other. Press the rotary cutter down firmly and smoothly along the edge of the ruler to make a clean, straight cut. Be sure to keep your fingers away from the cutting path of the rotary cutter to avoid accidents.
By following these steps and practicing precision, you’ll be well on your way to cutting fabric accurately for your quilt. Remember that practice improves your cutting skills, and with time, you’ll become more proficient at this essential quilting task.
Other Tips on Cutting Fabric
If you need multiple pieces of the same size, continue to make additional cuts along the folded fabric, using the same ruler and measurements. Keep the cuts as precise as possible.
After cutting your fabric pieces, double-check their measurements to ensure they match your pattern or design specifications.
Pro Tip. If your quilt pattern requires specific placement of fabric pieces, label and organize your cut pieces accordingly. This will help you keep track of which pieces go where in your quilt design. Especially when you have a more involved quilt design.

Does it Matter What Direction You Cut the Fabric?
Yes, the direction in which you cut fabric can matter, especially when working with certain fabrics or specific quilting techniques.
Fabric Grain
Fabric has two main grain directions. The lengthwise grain which is parallel to the selvage edges. And the crosswise grain which is perpendicular to the selvage edges.
The lengthwise grain is typically more stable and less stretchy than the crosswise grain. When you cut fabric strips or pieces along the lengthwise grain, they are less likely to stretch or distort. This is important for maintaining the shape and accuracy of your quilt blocks.
Bias Cutting
The bias of the fabric refers to a 45-degree angle across the fabric, and it has the most stretch. Cutting along the bias is useful when you need fabric strips or pieces with stretch, such as for binding or when sewing curved seams. However, it’s important to be cautious when using bias-cut pieces, as they can be prone to stretching and distorting if not handled carefully.
Pattern Direction
If your fabric has a specific pattern, motif, or directional print, consider how you want the design to appear on your quilt. When cutting fabric for quilt blocks, ensure that the pattern elements align as desired. You may need to cut your pieces in a specific orientation to achieve the desired look.
Selvage Edges
Selvage edges are the tightly woven, finished edges of the fabric. They are typically not used in quilt blocks because they can be stiffer and may not behave the same way as the rest of the fabric. It’s common practice to trim off the selvage edges before cutting fabric for quilting.
While it’s important to cut fabric accurately for quilting, the direction in which you cut can impact the stability, stretch, and appearance of your quilt blocks.
Pay attention to the grain of the fabric and any pattern considerations to achieve the best results in your quilting projects. When in doubt, consult your quilt pattern instructions for guidance on the direction to cut your fabric pieces.
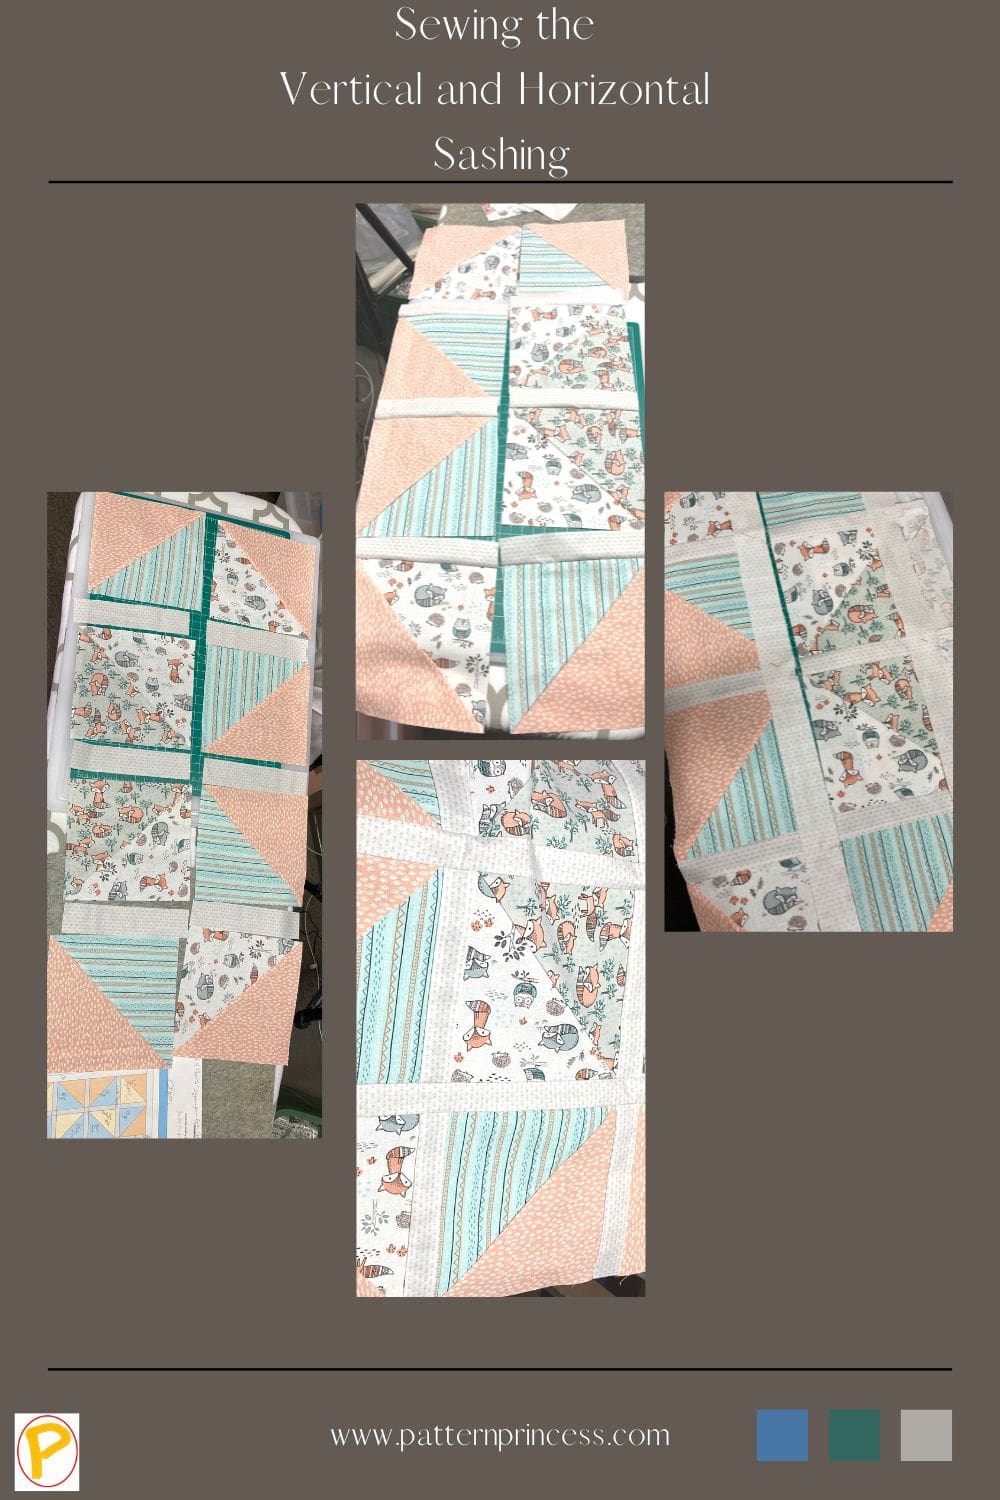
Photo from the Sweet Dreams Easy Quilt Pattern.
Best Practices in Sewing the Fabric Pieces Together
Sewing the fabric pieces together is a critical step in quilting, and achieving precise and neat seams is essential for a beautiful quilt. Here are some tips to help you sew fabric pieces together effectively.
Use Accurate Seam Allowances
Use a 1/4-inch seam allowance for most quilting projects. Many sewing machines have a 1/4-inch foot or a guide to help you maintain this consistent seam allowance.
Press Seams
After sewing each seam, press the seam allowances flat. Pressing sets the stitches and ensures that your seams lie flat, reducing bulk. Press, Don’t Iron. Press by using a hot, dry iron and lifting and lowering the iron. Ironing is where you slide the iron across the fabric. Don’t do this as it can stretch and distort the fabric.
Set the Seams
Before opening the seam allowance with your iron, first press the seam as it is with the fabric pieces closed. This helps set the stitches.
Nest the Seams
When joining blocks or rows, try to nest the seams. This means pressing the seam allowances in opposite directions so that they interlock. This reduces bulk and helps seams match up precisely.
Chain Piecing
Chain piecing is a technique where you sew multiple seams one after the other without cutting the thread between each piece. It’s efficient and saves time.
Use Quality Thread
Use good-quality cotton thread for quilting. It’s strong and won’t create lint buildup in your machine.
Stitch Length
Adjust your machine’s stitch length to a medium setting; around 2.5 mm. This provides a secure stitch without making the fabric too tight or hard to sew through.
Pin or Use Clips
Consider using pins or clips to hold fabric pieces together while sewing. This helps prevent shifting during stitching.
Backstitch at the Beginning and End
Not all quilters do this, but I always backstitch or lock your stitches at the beginning and end of each seam to secure them.
Quilting is a creative and enjoyable craft. Don’t rush; savor the process and take pride in your work.
If you are new, don’t worry, practice makes perfect. As you gain experience, your sewing skills will improve. Quilting is not just about creating a beautiful, finished product but also about enjoying the journey and the sense of accomplishment with each block you complete.

Photo from the Sweet Dreams Easy Quilt Pattern
How to Make a Quilt Sandwich?
Creating a quilt sandwich is a crucial step in the quilting process, as it involves layering the quilt top, batting (quilt filling), and backing fabric together before quilting.
Here’s a step-by-step guide on how to create a quilt sandwich.
Clear a large, flat workspace, such as a clean table or the floor, where you can lay out your quilt layers. Ensure that the area is clean and free of debris that could transfer onto your quilt.
Lay your backing fabric, right side down, on your workspace. Smooth it out to eliminate wrinkles and ensure it lies flat. The backing fabric should be a few inches larger than the quilt top all the way around.
Unroll or unfold your batting over the backing fabric. Align it with the edges of the backing fabric. Make sure it is flat and smooth with no wrinkles or folds.
Place your quilt top, right side up, on top of the batting. Center the edges of the quilt top with the edges of the batting and backing fabric. Ensure it’s centered and evenly positioned with the backing and batting sticking out a few inches all the way around.
Basting the Layers Together
To hold the layers of the quilt sandwich together, you can use either basting pins or basting spray.
Basting Pins. Start in the center of your quilt and work outward. Use curved safety pins or large straight pins to secure the layers. Place pins every few inches across the entire quilt to prevent shifting while quilting. Pin generously to ensure the layers are secure.
Basting Spray. Alternatively, you can use basting spray to temporarily adhere the layers together. Spray a light, even layer of basting spray on the batting, and then carefully lay the quilt top on it, smoothing it out as you go. Be sure to follow the manufacturer’s instructions on the spray can.
As you work each layer, carefully smooth out any wrinkles or bubbles in the layers, working from the center outward. Check that all layers are flat and taut, without any slack or excess fabric.
Baste the Borders (Optional)
If you prefer extra security or have a large quilt, you can also baste along the edges of the quilt, either by hand or with your sewing machine. This extra step helps keep the layers firmly together during the quilting process.
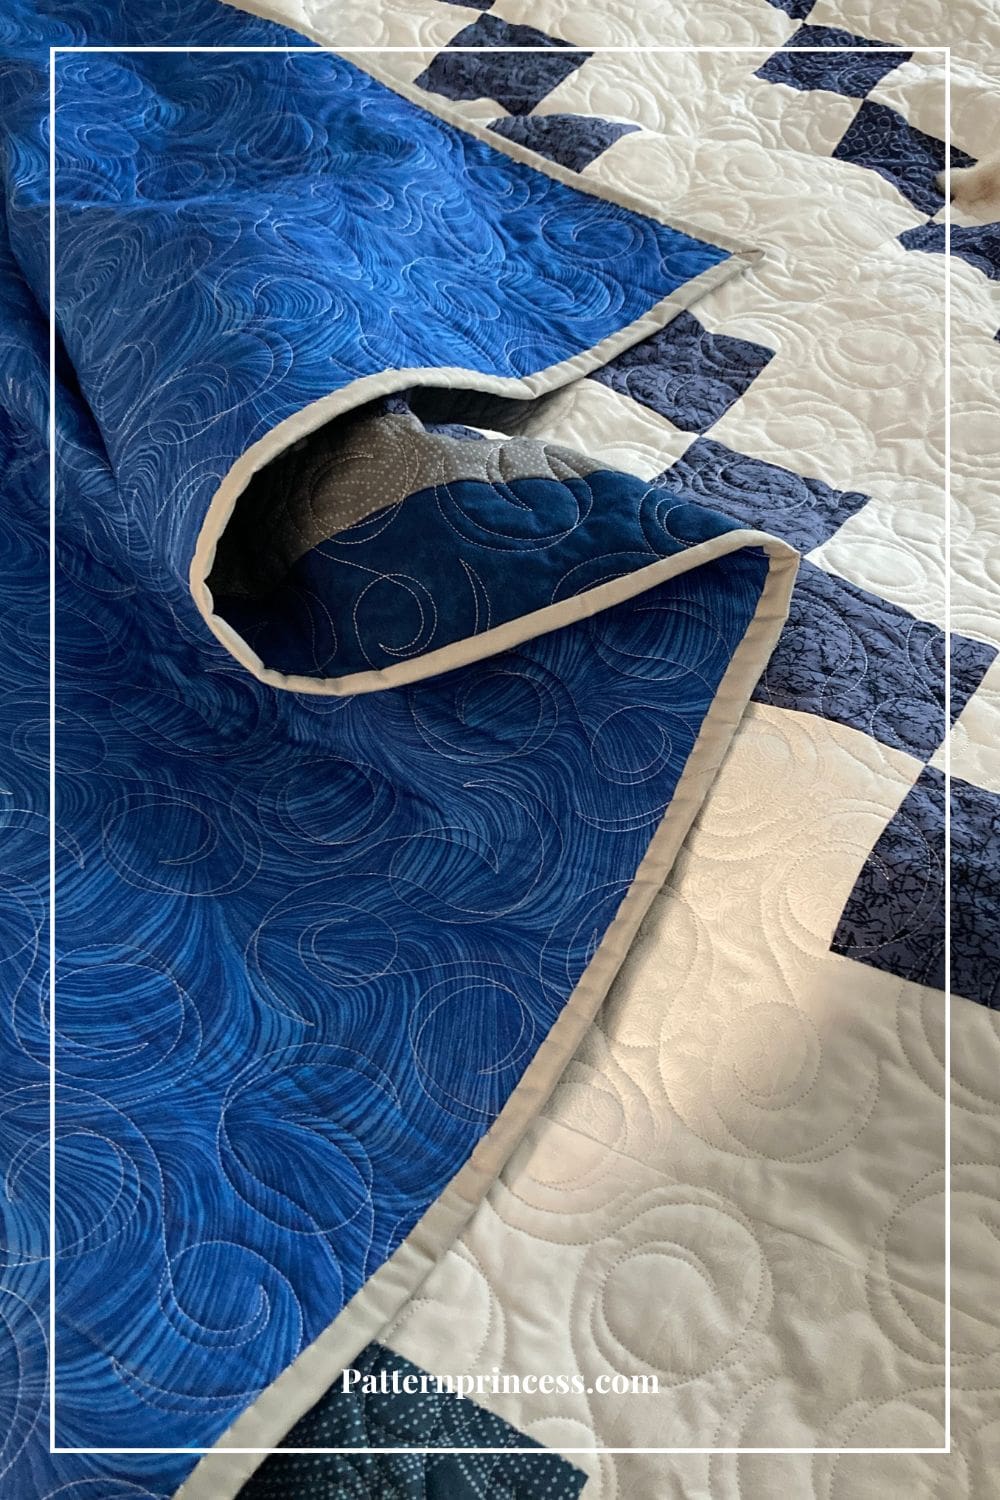
Quilt the Layers
With your quilt sandwich successfully created, you’re now ready to start quilting. There are different ways to sew the three layers of a quilt together. You can do machine quilting or hand quilting or a combination for this process. Is there a best way, you might be wondering. Not really, it is all personal preference.
Start from the center and work your way outward, gradually quilting the entire quilt top.
You can choose from various quilting techniques:
Straight-Line Quilting: Sew straight lines using your sewing machine, following a quilting pattern you’ve marked on the quilt top.
Free-Motion Quilting: This technique involves moving the quilt under the needle in any direction to create intricate designs.
Hand Quilting: Sewing quilting stitches by hand in a pattern or design.
Ensure that the layers remain smooth and taut as you quilt to avoid puckering.
Pattern from the Afternoon Tea Four Patch Table Runner
Trimming and Binding
Trim the excess batting and backing to match the quilt top’s size.
Making the Binding.
You can cut your own long strips of fabric or use jelly roll strips sewn together to create your binding. Create binding strips from fabric, usually 2 ½ inches by the circumference of the quilt plus additional length to account for the mitered corners and joining.
Fold the binding strip in half lengthwise with the wrong sides together and press.
You can find out more about making binding: How to Make Your Own Quilt Binding Tutorial
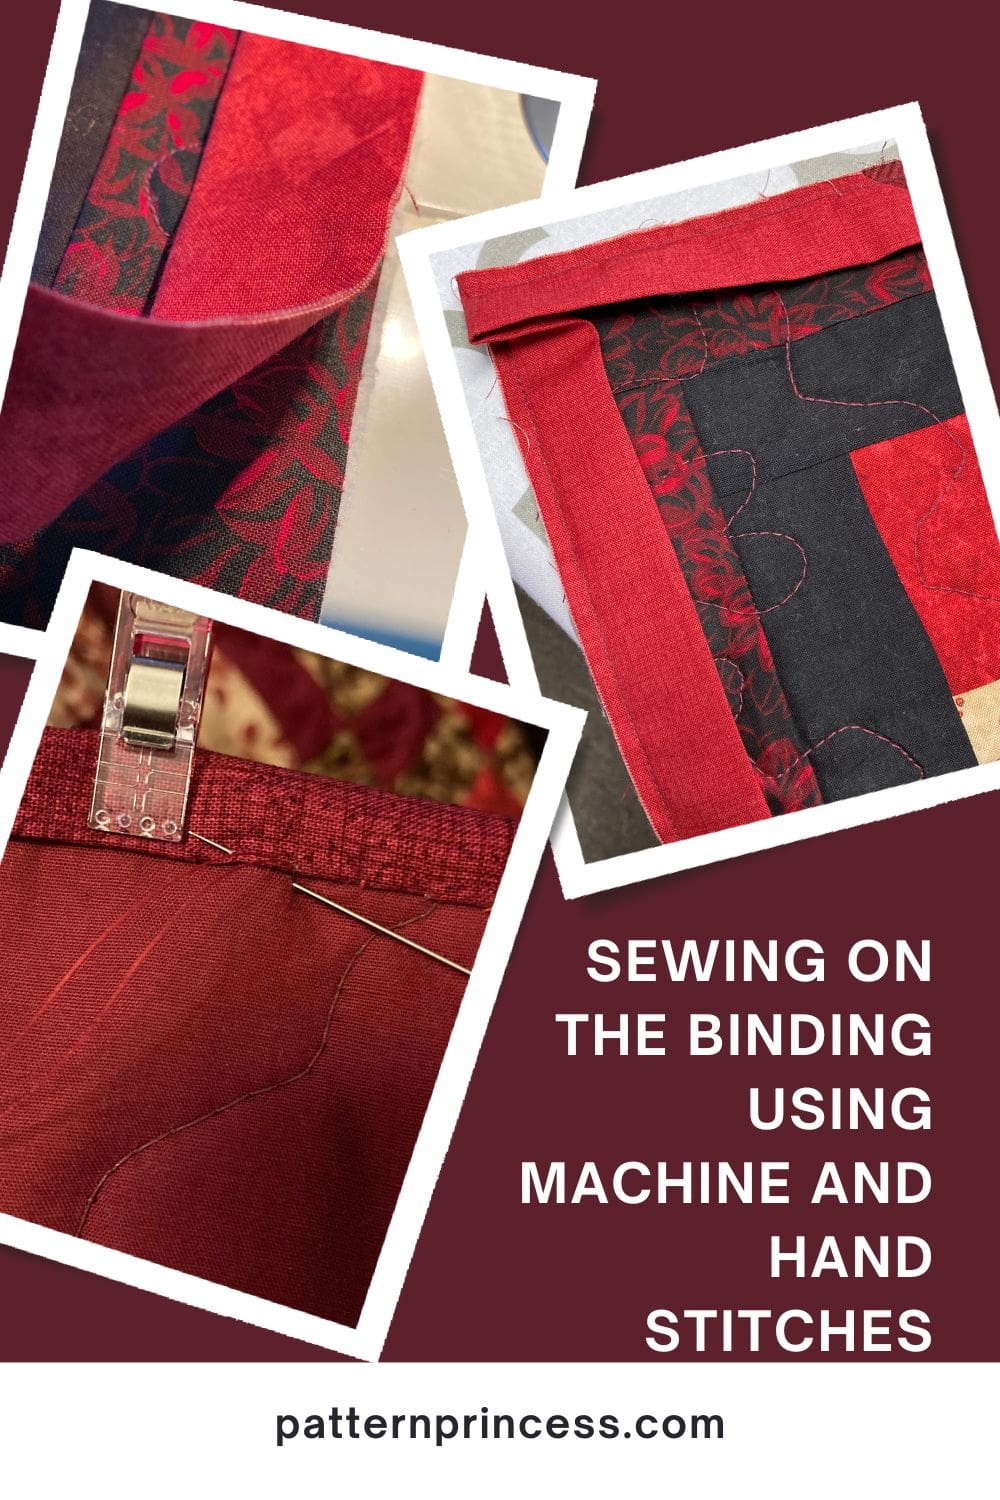
How to Sew Binding on a Quilt?
Binding is the final step in finishing a quilt, and it gives your quilt a polished and professional look while also securing the edges. Here’s a step-by-step guide on how to bind a quilt:
Step 1: Prepare the Binding Strips
Cut your binding fabric into strips. The width of the strips depends on your preference, but a common size is 2.5 inches wide. You’ll need enough strips to cover the perimeter of your quilt, plus a little extra for joining the ends.
Step 2: Join the Strips
To create one continuous binding strip, sew the strips together end-to-end at a 45-degree angle. Place two strips at right angles, right sides together, and sew from the top left corner to the bottom right corner. Trim the excess fabric, leaving a 1/4-inch seam allowance. Press the seams open.
Step 3: Prepare the Binding
Fold the binding strip in half lengthwise, wrong sides together, and press it with your iron. This creates a double-fold binding with raw edges encased.
Step 4: Attach the Binding to the Quilt
Starting in the middle of one side of your quilt, leave a tail of the binding (approximately 6-8 inches) unsewn. Align the raw edges of the binding strip with the raw edge of the quilt top. Use straight pins or binding clips to secure the binding in place.
Sew the binding on using a walking foot as this will help ease the top of the fabric through and reduce puckering.
Step 5: Miter the Corners
When you reach a corner, stop sewing 1/4 inch from the edge. Fold the binding strip up, creating a diagonal fold that aligns with the corner of the quilt. Then, fold the binding strip back down over itself, aligning it with the next edge of the quilt. This creates a mitered corner. Pin the fold in place and continue sewing along the next edge.
Step 6: Join the Ends
When you return to your starting point, overlap the binding strip with the tail you left unsewn. Trim any excess binding, so the two ends overlap by about 2-3 inches. Open up the ends of the binding strips and lay them flat, right sides together. Sew across the diagonal, from corner to corner, using a 1/4-inch seam allowance. Trim the excess fabric, press the seam open, and refold the binding.
Step 7: Finish Sewing
Complete sewing the binding to the quilt, continuing around all sides. Stop a few inches before reaching your starting point, leaving a small gap.
Step 8: Join the Ends (Part 2)
To join the ends neatly, tuck the unsewn tail inside the binding strip. Align the raw edges of the binding strip, sew the remaining gap closed, and secure the tail inside.
Step 9: Finish the Binding
Fold the binding strip over the edge of the quilt to the back, covering the raw edges. Use straight pins or binding clips to hold it in place.
Step 10: Stitch the Binding Down
Hand-sew or use your sewing machine to stitch the binding down along the backside of the quilt. You can do this by stitching in the ditch (the seam between the binding and the quilt top) or by stitching slightly to the inside or outside of the binding for a decorative finish.
Step 11: Final Pressing
Once the binding is securely stitched down, give your quilt a final press to make sure everything lays flat and looks neat.
Your quilt is now bound and ready to be enjoyed or gifted!
Find Free PDF Pattern Downloads
How to Make a Quilt from Start to Finish 8 Easy Steps
Equipment
Materials
- Fabric for quilt top
- Fabric for backing
- Fabric for binding
- Batting quilt filling
- Thread
- Quilting ruler and rotary cutter
- Sewing machine
- Pins and needles
- Iron and ironing board
- Quilting gloves optional but helpful
Instructions
- Choose the pattern design. Decide on a quilt design and pattern. You can find patterns in books, magazines, online, or create your own design.
- Select the fabrics and gather the supplies. It’s fun to select fabric for the quilt top, backing and binding. Choose fabrics that match your pattern and color scheme. Having the correct materials and supplies helps the whole process easier.
- Cut your pieces. Begin by working on the quilt top following the directions on the quilt pattern or designing your own. Use a quilting ruler and rotary cutter to cut fabric pieces according to your pattern's specifications.
- Sew fabric pieces together. Using your chosen pattern, sew the smaller fabric pieces back together to create designs for the quilt top. Use precise seam allowances for perfect seam matching.
- Add Borders. Not all quilts have a border, if yours does, add the border before moving onto the next step.
- Making a Quilt Sandwich. Create a quilt sandwich by adding batting and backing fabric. Lay the quilt backing right side down, place the batting on top, and then add the quilt top right side up. Baste or pin the layers together to create the "quilt sandwich."
- Quilt the Layers. There are three layers to a quilt. Use quilting stitches to hold the layers together. Stitch through all three layers (top, batting, and backing) to secure them. You can use various quilting techniques, such as straight line quilting, free-motion quilting, or hand quilting.
- Trimming and Binding the Edges. Trim the excess batting and backing to match the quilt top's size. Then create your binding strip. Sew on the long strip to the edges of your quilt to finish and bind it.
- Optional Steps
- Add a label with your name, date, a memorable saying, and other details to the back of the quilt.
- Embellish your quilt with additional elements like embroidery or appliqué if desired.

You can find Victoria crocheting, quilting, and creating recipes. She has cooked in restaurants for over 20 years, including many larger parties. She learned to crochet when she was just 11 years old and has been crocheting ever since; over 50 years now. Over 40 years ago, she loved her first class in sewing and continues to hone her skills in quilting. Many have enjoyed the handmade gifts over the years. In her professional career, she has worked in management in a wide variety of businesses including higher education as a dean of a division. All the while attending college part-time to achieve her doctorate in higher education with an emphasis in e-learning.