Last updated on March 24th, 2025 at 05:06 pm
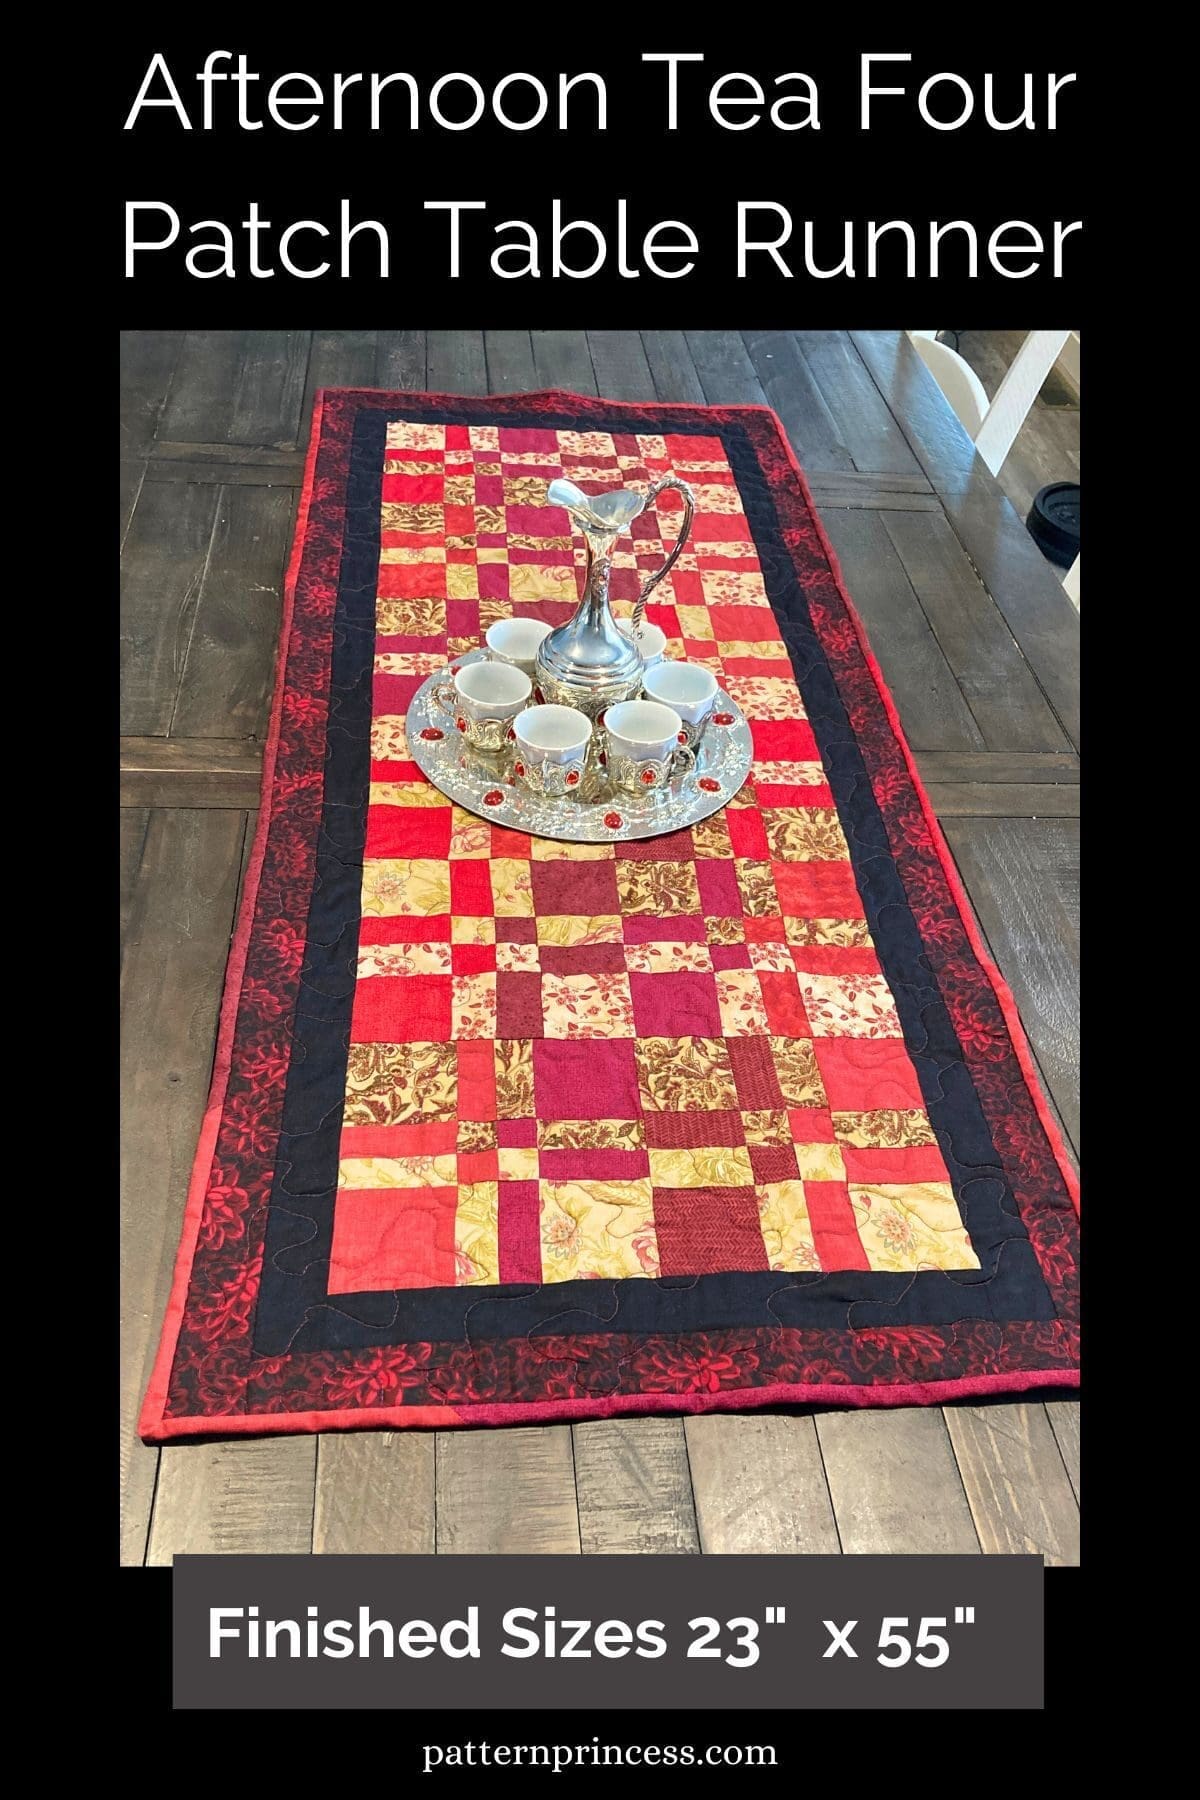
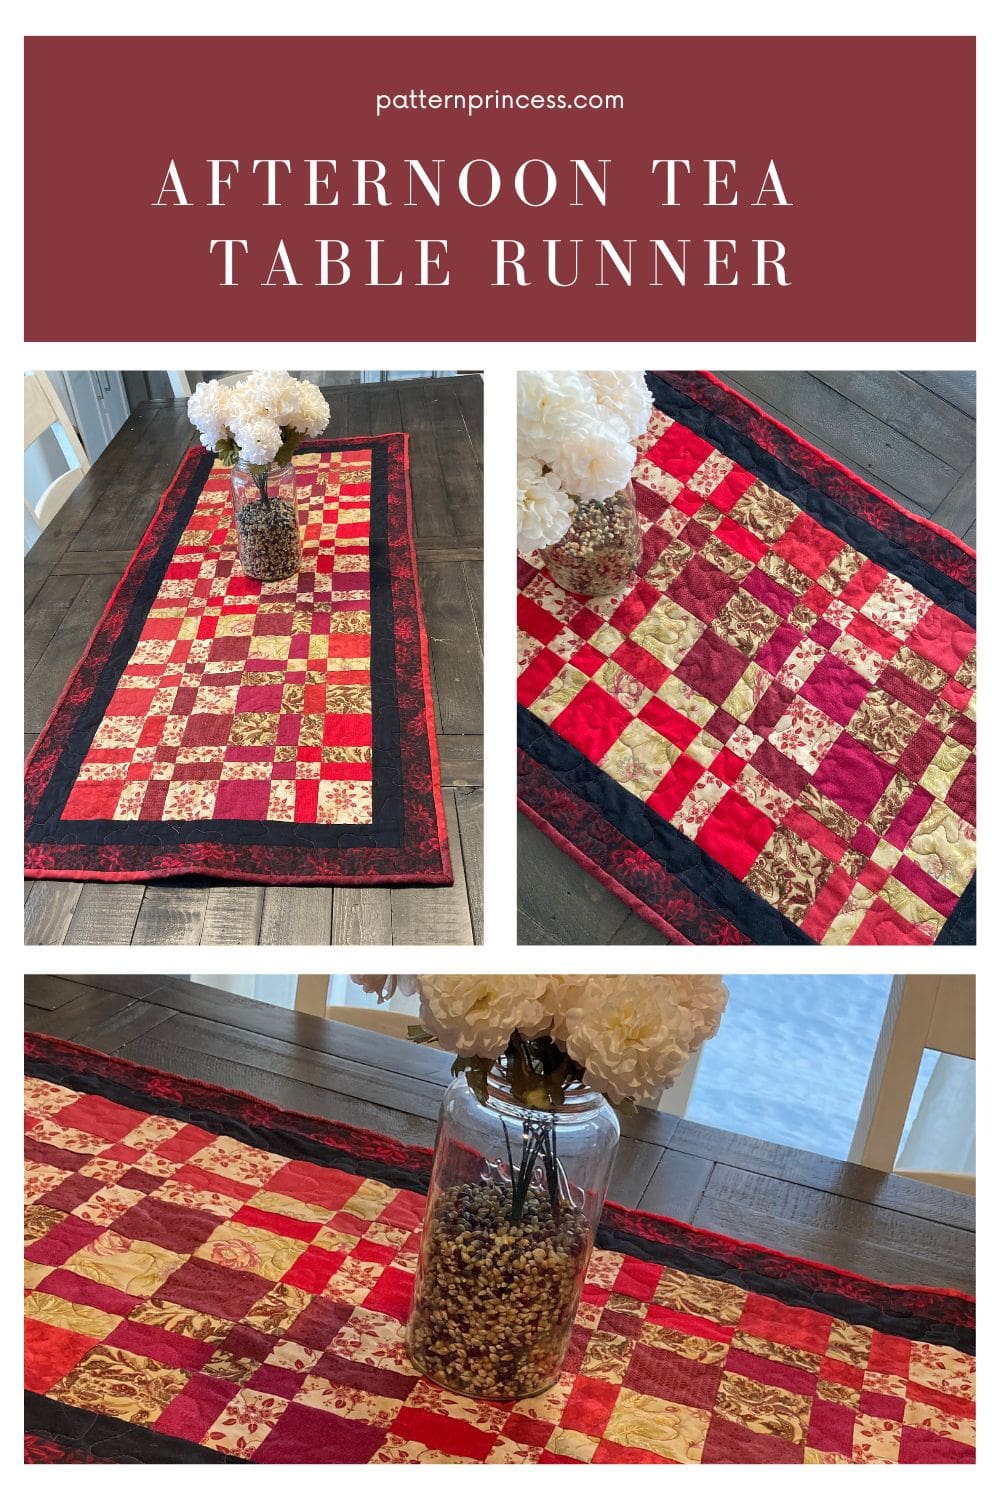
A quilted Afternoon Tea Four Patch Table Runner is a charming addition to any dining room. The four patch design is a classic quilting pattern that adds a touch of vintage charm to your space.
This table runner is also a great way to showcase your quilting skills. With a disappearing four patch design, you can experiment with different fabrics and colors to create a unique look that suits your style.
Quilted Table Runner Quality
The durability of a quilted table runner is also a significant advantage. Unlike a traditional tablecloth, a quilted runner can withstand spills and stains without showing signs of wear and tear. Plus, it’s easy to clean and maintain, making it a practical choice for everyday use.
Additionally, a quilted table topper is a thoughtful gift for family and friends. Handmade gifts are always appreciated, and a personalized table runner can add a special touch to their home decor.
With its timeless design and practicality, this table runner is sure to be a cherished addition to anyone’s home.
Fabric Color Considerations
Whether you choose bright and bold colors or soft pastels, the quilted table runner is sure to impress your guests.
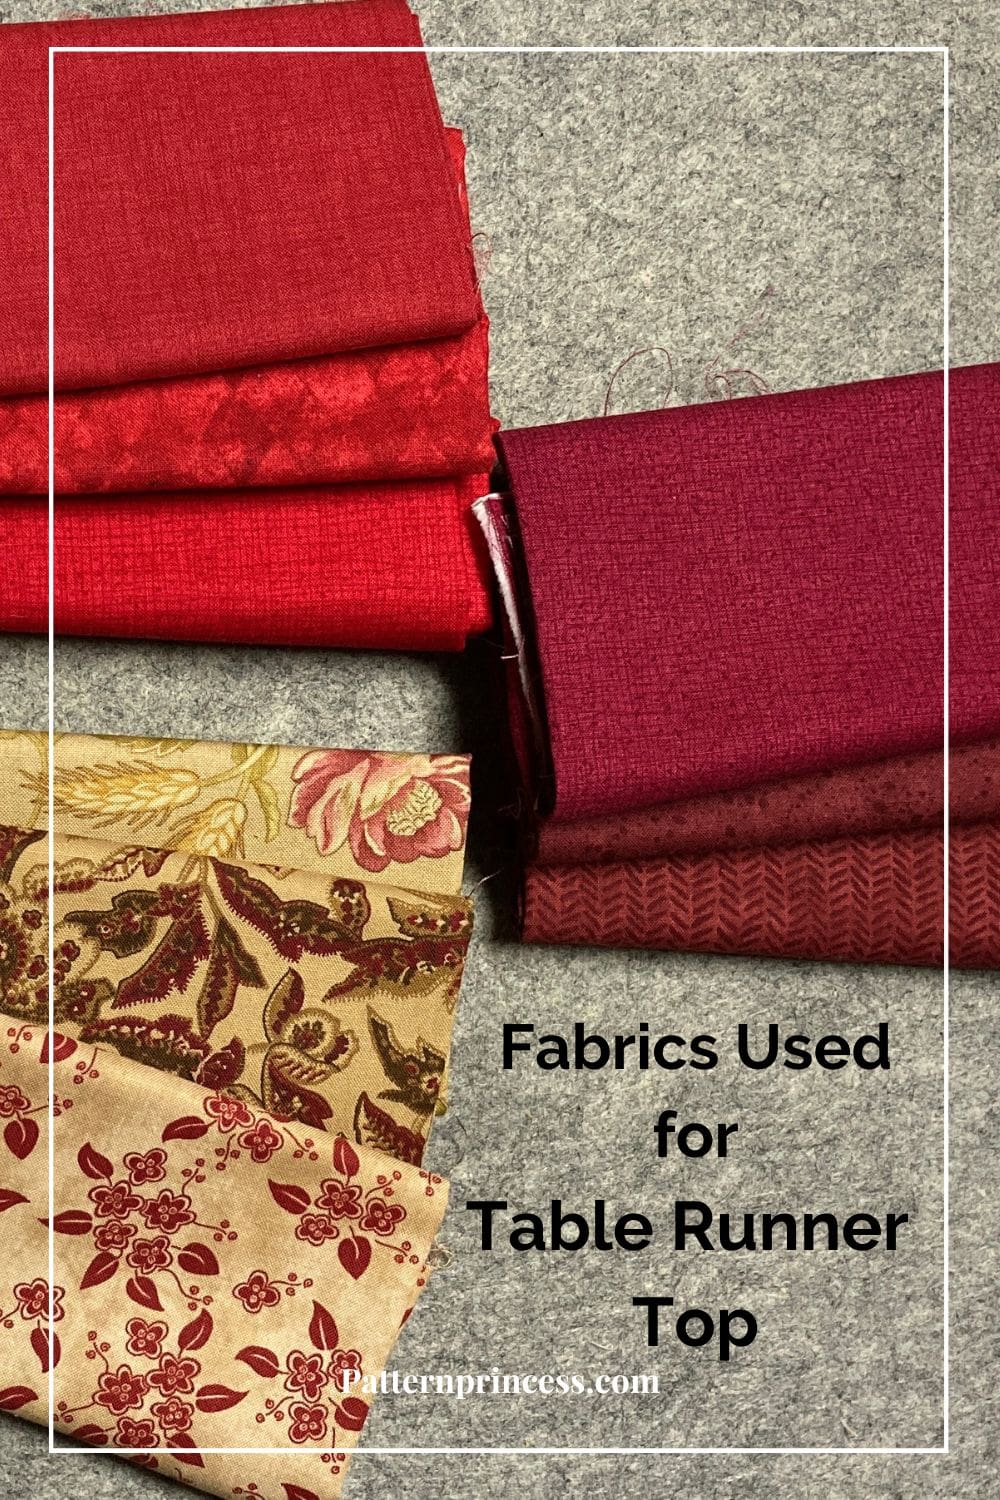
For this pattern, it is nice to pair at least 1 bold color and 1 light color. It is quite versatile and will work with pastels, prints, and solids too.
It is important to have contrasting fabrics for the disappearing four patch square design.
I chose various colors of reds and complimentary print fabric in red color tones. The runner is perfect for afternoon tea, adding a cozy and inviting atmosphere to your gathering.
Quilt Block for Pre-Cuts
This quilt block is perfect for any size pre-cuts you want to use. While I cut my own 5-inch squares for this pattern today, you could just as easily used pre-cut 10-inch squares for a larger version. Therefore, it is wonderful for a layer cake or charm pack.
Directions: Afternoon Tea Four Patch Table Runner
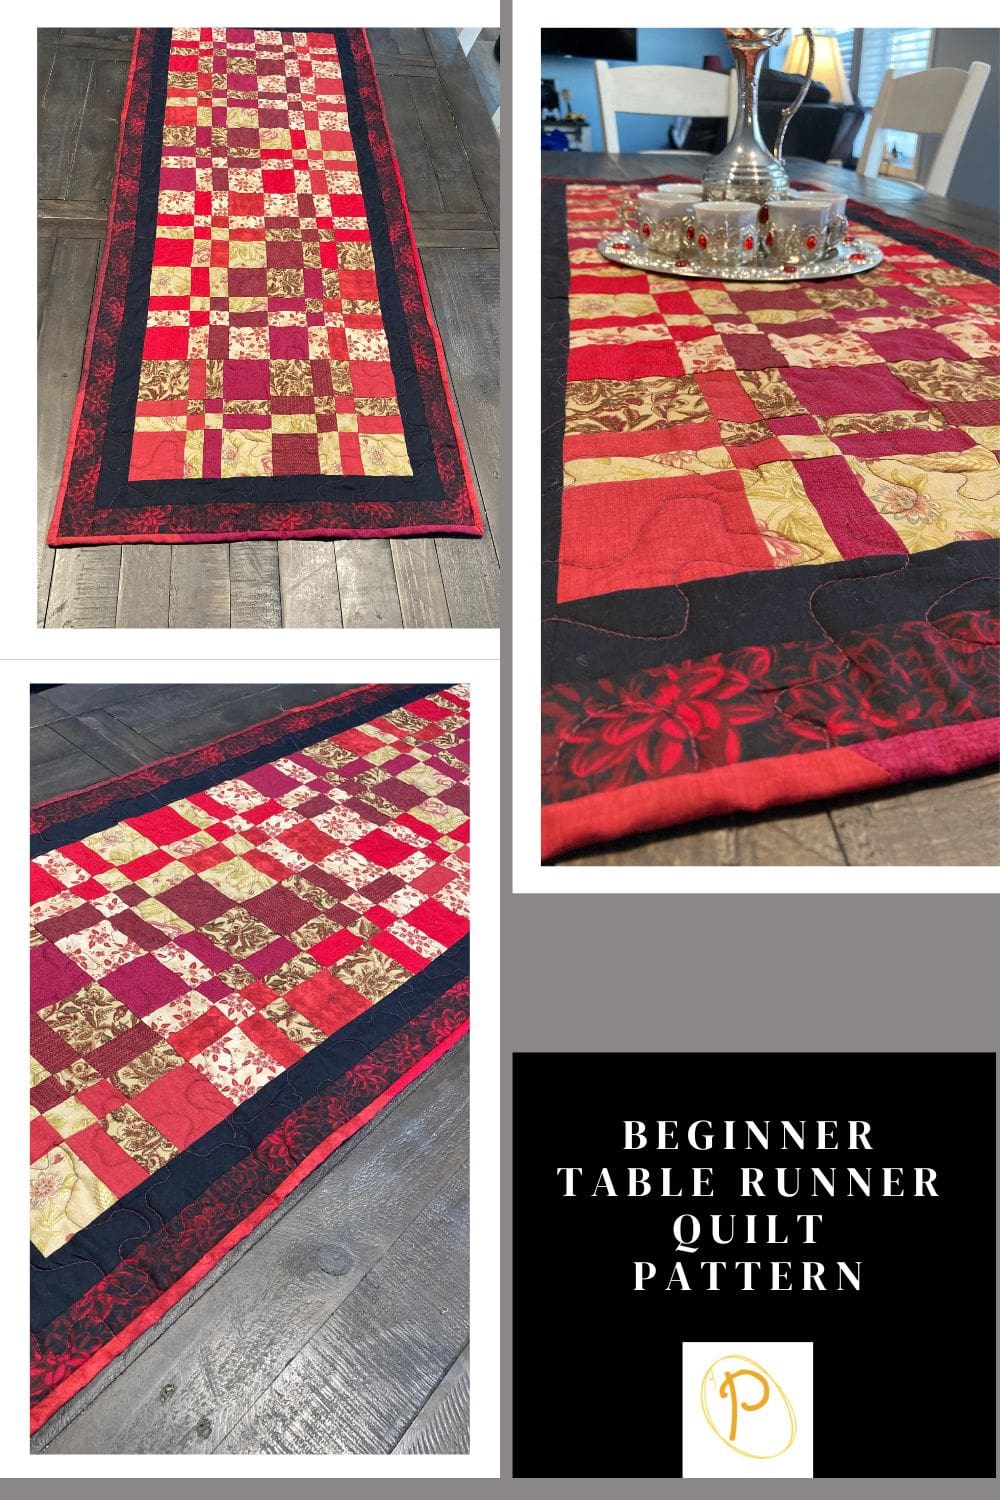
Skill Level
This quilt block is perfect for a beginner.
You should be comfortable sewing squares together. Measuring and using a rotary cutter. Nesting seams together and pressing seams.
Finished Size
23 inches wide x 55 inches long.
Materials
Fabric requirements
A = 1 yard bold fabric, or solid fabric
B = 1 Yard contrasting fabric, or print fabric
For this pattern, you will need 48, 5” X 5” Squares. Making sure that there were 24 solid colors and 24 print colors.
I used 9 fat quarters for this quilt pattern. Six different solid red fabrics and three print fabrics for this table runner.
The leftover solid color fabrics I used for the border fabric.
Choose a coordinating fabric for the borders, binding and for the backing.
Black Border Fabric 3/4 yard – First Border. Cut strips of fabric as needed and join for the length. If you would rather not join fabric for the length, use 1 ½ yards.
Cut 2, 2 x 16 ½ inch strips. (Horizontal sashing on the top and bottom).
Cut 2, 2 x 51 ½ inch strips. (Vertical sashing on the sides).
Print Border Fabric 1 yard – Second Border. Cut strips of fabric as needed and join for the length. If you would rather not join fabric for the length, use 1 ¾ yards.
Cut 2, 2 ½ x 19 ½ inch strips. (Horizontal sashing on the top and bottom).
Cut 2, 2 ½ x 55 1/2 inch strips. (Vertical sashing on the sides).
Backing Fabric
26” X 58” piece of coordinating fabric or 1 ¾ yards.
Binding Fabric
1/2 yard. I used leftover fabric from the fat quarters to make this binding.
Make the binding 2 ½ x 172 inches long. Cut strips of fabric as needed and join for the length.
Batting
1 ½ yards. 26” X 58” piece. Cotton batting (like Warm & Natural) to make this quilt.
Thread
Equipment/Tools
Rotary Cutter
Quilting Ruler
Cutting Mat
Rotating Cutting Mat
Iron
Ironing Board or Pressing Mat
Pins
Sewing Machine
Post contains affiliate links, and we earn commissions if you shop through the links on this page. For more information, please read the disclosure section under the About Us page.
Quilt Pattern Notes
Use a ¼-inch seam allowance. I recommend using a special presser foot with a ¼-inch guide if you have one for your machine. This will help you get uniform seams, and matching seams.
Nest your seams. This means that the seams of each row are aligned, and the pieces fit together almost like the pieces of a puzzle.
Right Sides Together. Sew fabric together with right sides together.
Disappearing Four Patch Quilt Block Instructions
You can find more photos on the disappearing four patch quilt block on the website.
Begin with pre-cuts or cut your own fabric squares the same size.
You will be making 4 disappearing four patch quilt blocks.
Fabric requirements
A = 1 yard bold fabric, or solid fabric
B = 1 Yard contrasting fabric, or print fabric
For this pattern, you will need 48, 5” X 5” Squares. Making sure that there were 24 solid colors and 24 print colors.
I used 9 fat quarters for this quilt pattern. Six different solid red fabrics and three print fabrics for this table runner.
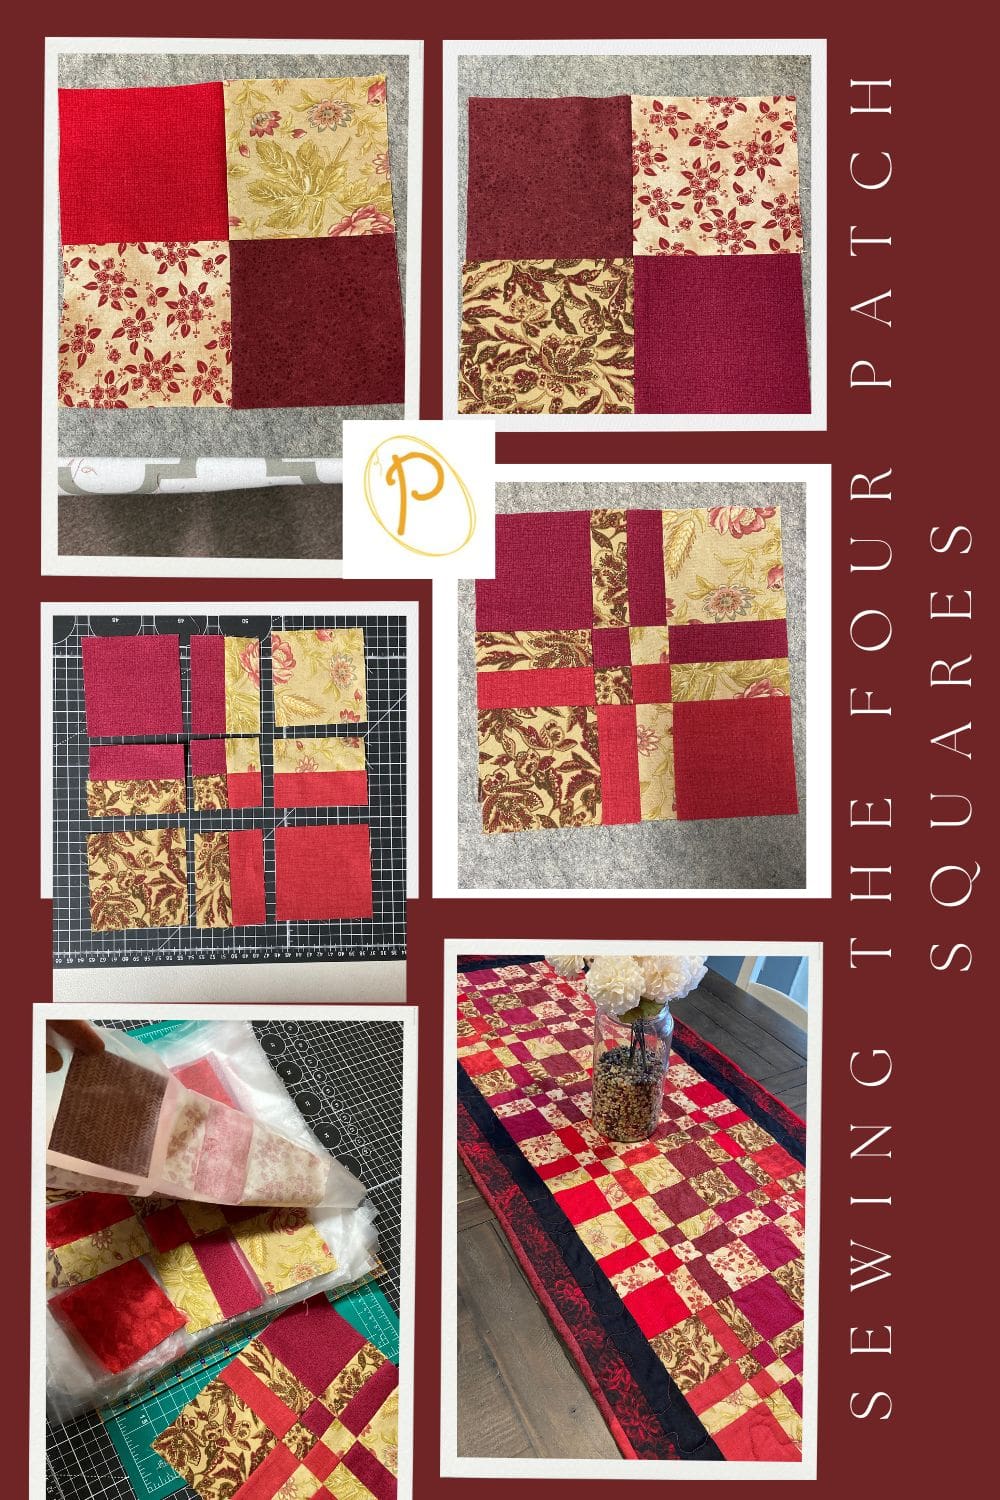
Hint: I wanted to sew all the four patch squares at once and I didn’t want the pieces of each square to get mixed up. Putting them between sheets of self stick plastic wrap like a Press and Seal worked great.
It allowed me to see through to make sure I was laying out the squares correctly and move the pile from the ironing board to the sewing machine area without mixing things up.
This is pictured on the bottom left in the photo above.
Sew the Four Patch Quilt Square
Place a print and solid color square on top. Next place another print and solid color square on the bottom. Opposite of how they are placed on top.
Join the four squares together.
Using ¼-inch seam allowance, with right sides together, sew the top two squares together, press the seams to the right. Next, sew the bottom two squares together, press the seams to the left.
Sew the top row and the bottom row together making sure to nest the seams aligning your seams.
Press your seams to one side or open.
Cut the Four Patch Quilt Square
When using 5-inch squares to start with, your cutting line should be 1 ¼-inches.
You will be cutting a line on each of the four sides using the center seams.
First cut. Line up the ruler with the center line vertically, make the first cut 1 ¼-inches from the center line through both squares.
Second cut. Next, turn the rotary cutting mat a quarter turn. Line up the ruler with the center line vertically, make the second cut 1 ¼-inches from the center line.
Third cut. Turn the rotary cutting mat a quarter turn. Line up the ruler with the center line vertically, make the third cut 1 ¼-inches from the center line.
Fourth cut. Finally, Turn the rotary cutting mat a quarter turn. Line up the ruler with the center line vertically, make the fourth cut 1 ¼-inches from the center line.
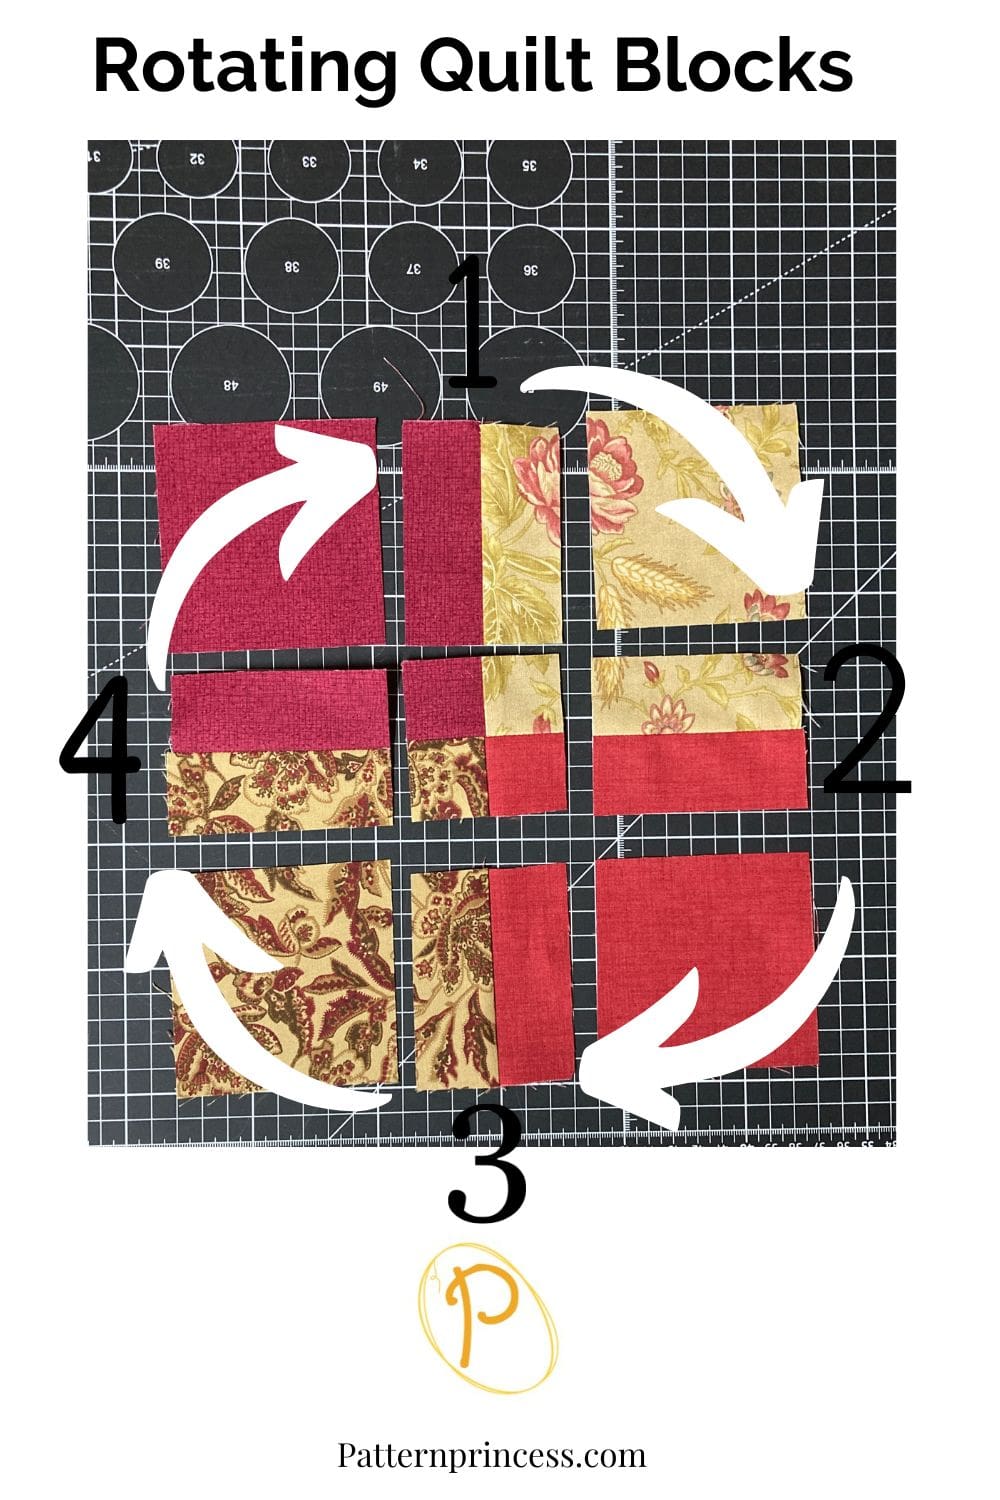
Creating the Magic Four Patch also known as the Disappearing Four Patch
Now that the cuts are made, there are a few ways you can rearrange the squares. This is the way I rearranged my blocks.
Using the four rectangle pieces, move them over one space to the right.
Step 1. The 12 O’clock piece moves to the 3 O’clock space.
Step 2. The 3 O’clock piece moves to the 6 O’clock space.
Step 3. The 6 O’clock piece moves to the 9 O’clock space.
Step 4. The 9 O’clock piece moves to the 12 O’clock space.
See the photo for placement.
Sew the Pieces Back Together
Sew together the top three blocks using a quarter inch seam allowance with right sides together. Aligning seams as needed.
Press the seams to the right.
Sew the bottom three blocks together using a quarter inch seam allowance.
Press the seams to the left.
Next align the top and bottom block sets so that the middle seam nests together. This allows the seam points to line up nicely.
Sew the top to the bottom, using a quarter inch seam allowance.
Press the seam open or to one side.
Trim Blocks.
Trim your block to 8 ½” X 8 ½” as needed.
Repeat this process for the next 15 disappearing four patch blocks.
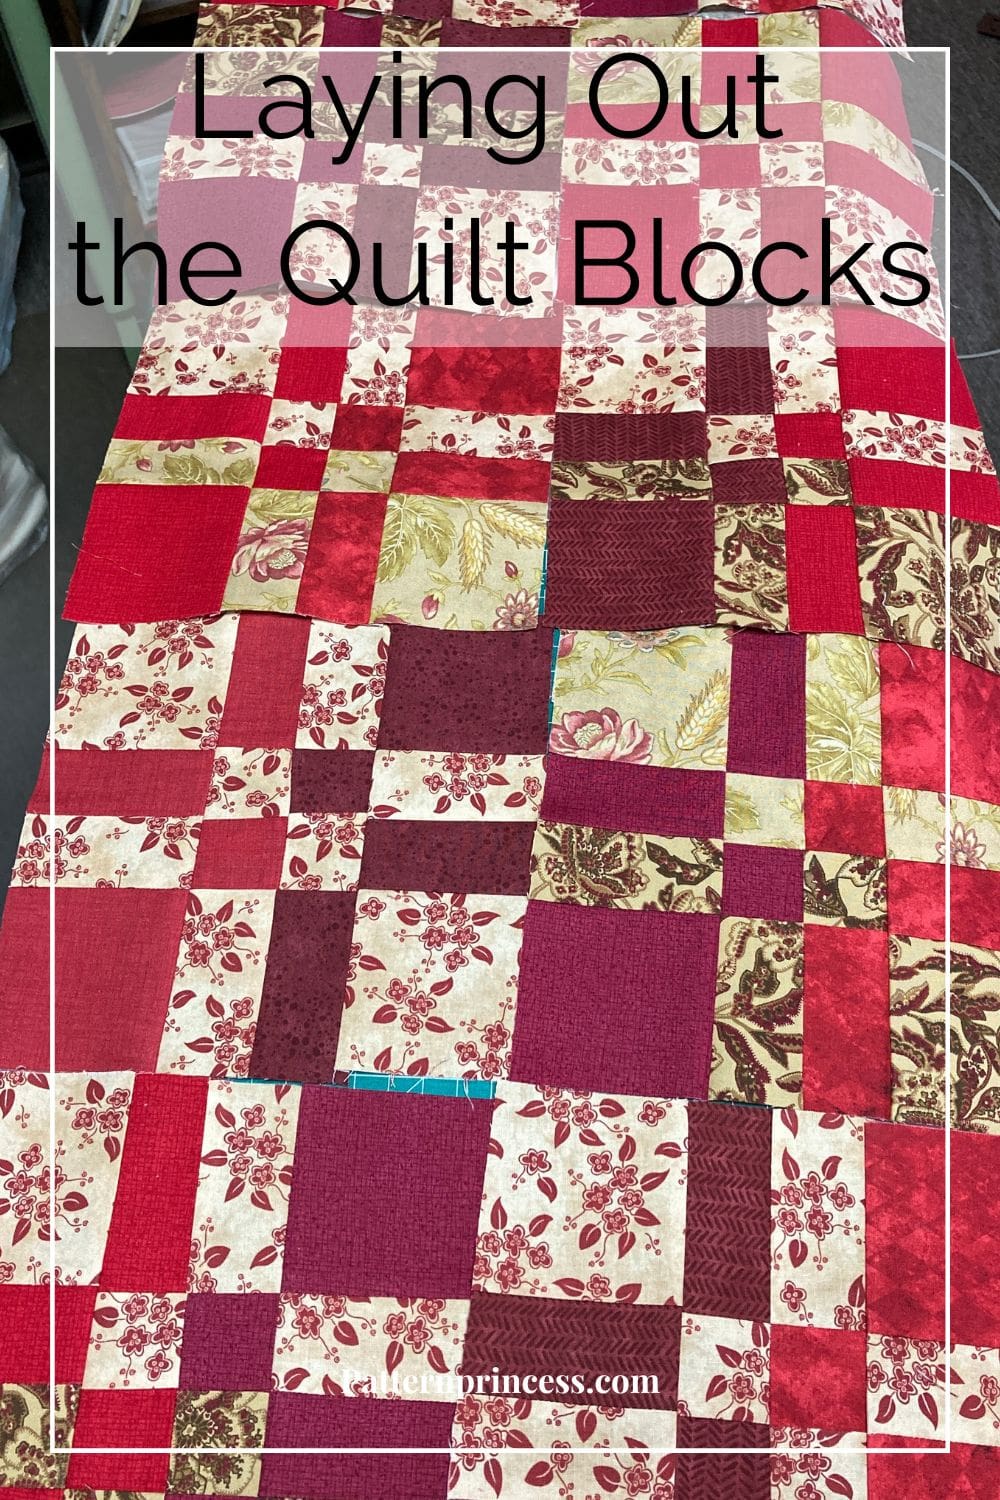
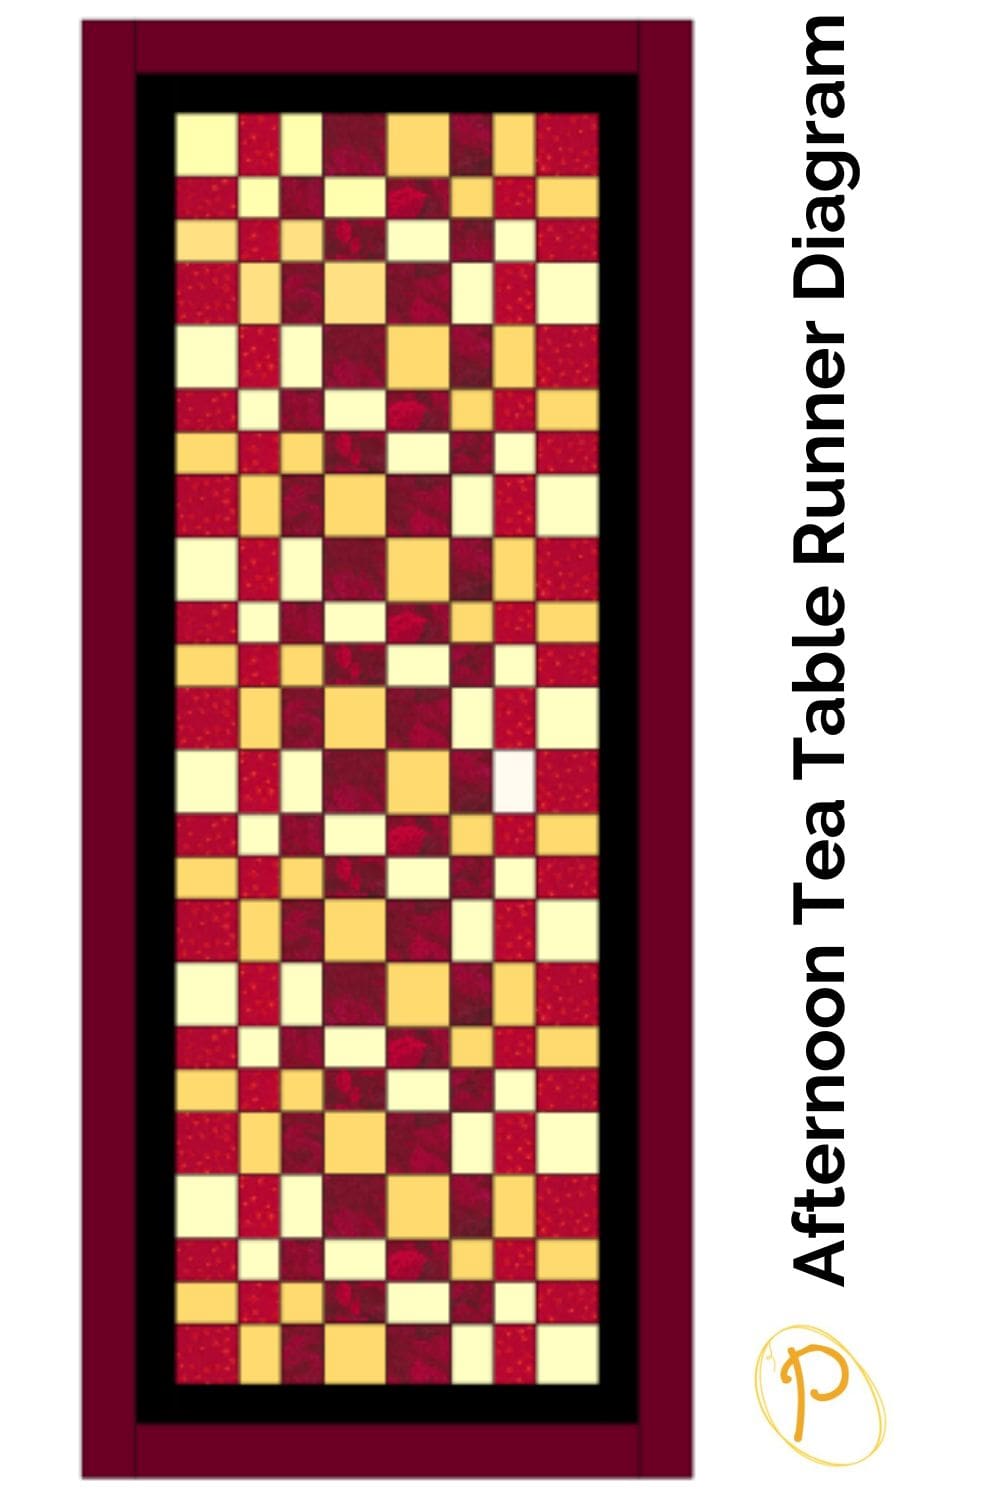
Laying out the Quilt Blocks
Just as there are other ways to move the center pieces from the previous step, there are other ways to lay out the quilt blocks.
Once you have your favorite look. Join the 8 ½” X 8 ½” quilt blocks together.
There should be 6 rows of 2 blocks.
With the right sides together using ¼” seam and aligning the seams, join two blocks and press the seam to the right. Join the next two blocks to the left.
The third row of two blocks press to the right. The fourth row to the left, and the last row to the right.
This will help you nest your seams for the next step.
Now join the sets of two squares together into 5 rows.
Press the seams to one side or open.
First Border
Black Border Fabric 3/4 yard – First Border. Cut strips of fabric as needed and join for the length. If you would rather not join fabric for the length, use 1 ½ yards.
Cut 2, 2 x 16 ½ inch strips. (Horizontal sashing on the top and bottom).
Cut 2, 2 x 51 ½ inch strips. (Vertical sashing on the sides).
With the right sides together pin a 2 x 16 ½ inch strip horizontal sashing to the top and bottom. Aligning the seams.
Sew together using ¼” seam allowance.
Press the seams to the outside.
Next pin the 2 x 51 ½ inch strip vertical sashing to each side. Aligning the seams as needed.
Sew together using ¼” seam allowance.
Press the seams to the outside.
Second Border
Print Border Fabric 1 yard – Second Border. Cut strips of fabric as needed and join for the length. If you would rather not join fabric for the length, use 1 ¾ yards.
Cut 2, 2 ½ x 19 ½ inch strips. (Horizontal sashing on the top and bottom).
Cut 2, 2 ½ x 55 1/2 inch strips. (Vertical sashing on the sides).
With the right sides together pin a 2 ½ x 19 ½ inch strip horizontal sashing to the top and bottom. Aligning the seams.
Sew together using ¼” seam allowance.
Press the seams to the outside.
Next pin the 2 ½ x 55 1/2 inch strip vertical sashing to each side. Aligning the seams as needed.
Sew together using ¼” seam allowance.
Press the seams to the outside.
Prepare the Table Runner Back, Binding, and Batting
Table Runner Back. Fabric requirement is just 1 ¾ yards of a 44” wide cotton fabric that coordinates with the colors of the quilt top. Cut a rectangle 26” X 58” of fabric for the back. This will allow for approximately 3-inches of fabric to extend all around the edges of the table runner top.
Binding. You will need 2 ½” X 172” of binding. Plan on approximately 1/2 of a yard. To make your own binding. Cut 4 or 5 – 2 1/2” X 44” strips of fabric. Trim the ends of each strip at apposing 45-degree angles.
Take the binding strips and sew them together aligning the 45-degree ends. Press the seams open.
Fold the binding strip in half with the wrong sides together and press.
Batting. 1 ½ yards. Use a thin cotton batting such as warm and natural. Trim the batting to measure a 26” X 58” piece. The same size as the quilt back. This will allow the batting to also extend beyond the edges of the table runner top.
Pin the Layers Together
Now it is time to make the quilt sandwich. This is the term that is often used to describe placing the backing fabric on the bottom, the batting in the middle, and the top decorative fabric on the top.
On a large surface, place the backing fabric face down. Use masking tape or painter’s tape to tape the backing fabric down. Making sure to smooth out any wrinkles, yet not stretching the fabric.
Next lay the batting over the backing fabric. Again, smooth out any wrinkles.
Finally, place the quilt top fabric on the top with the right side up. Center the top fabric in the middle of the two bottom layers making sure that a few inches extend out beyond the quilt top on all sides.
Once all three layers are in place, make sure to smooth out any wrinkles. Use basting spray or stainless-steel safety pins to baste the quilt layers together. Place one pin every 4-5 inches.
Quilting the Layers Together
While you can sew the layers together by hand, I prefer to use my sewing machine for quilting the layers together.
Once you choose your design, set up your sewing machine for quilting by using a darning foot and dropping the feed dogs on the sewing machine. This will allow you to free motion quilt your design.
Trimming the Batting and Backing Fabric
Trim the batting and backing fabric to the edge of the quilt top. Use a ruler and rotary cutter to complete this.
Binding the Quilted Table Runner
Once the layers are quilted, it is time to add the binding strip to the quilt.
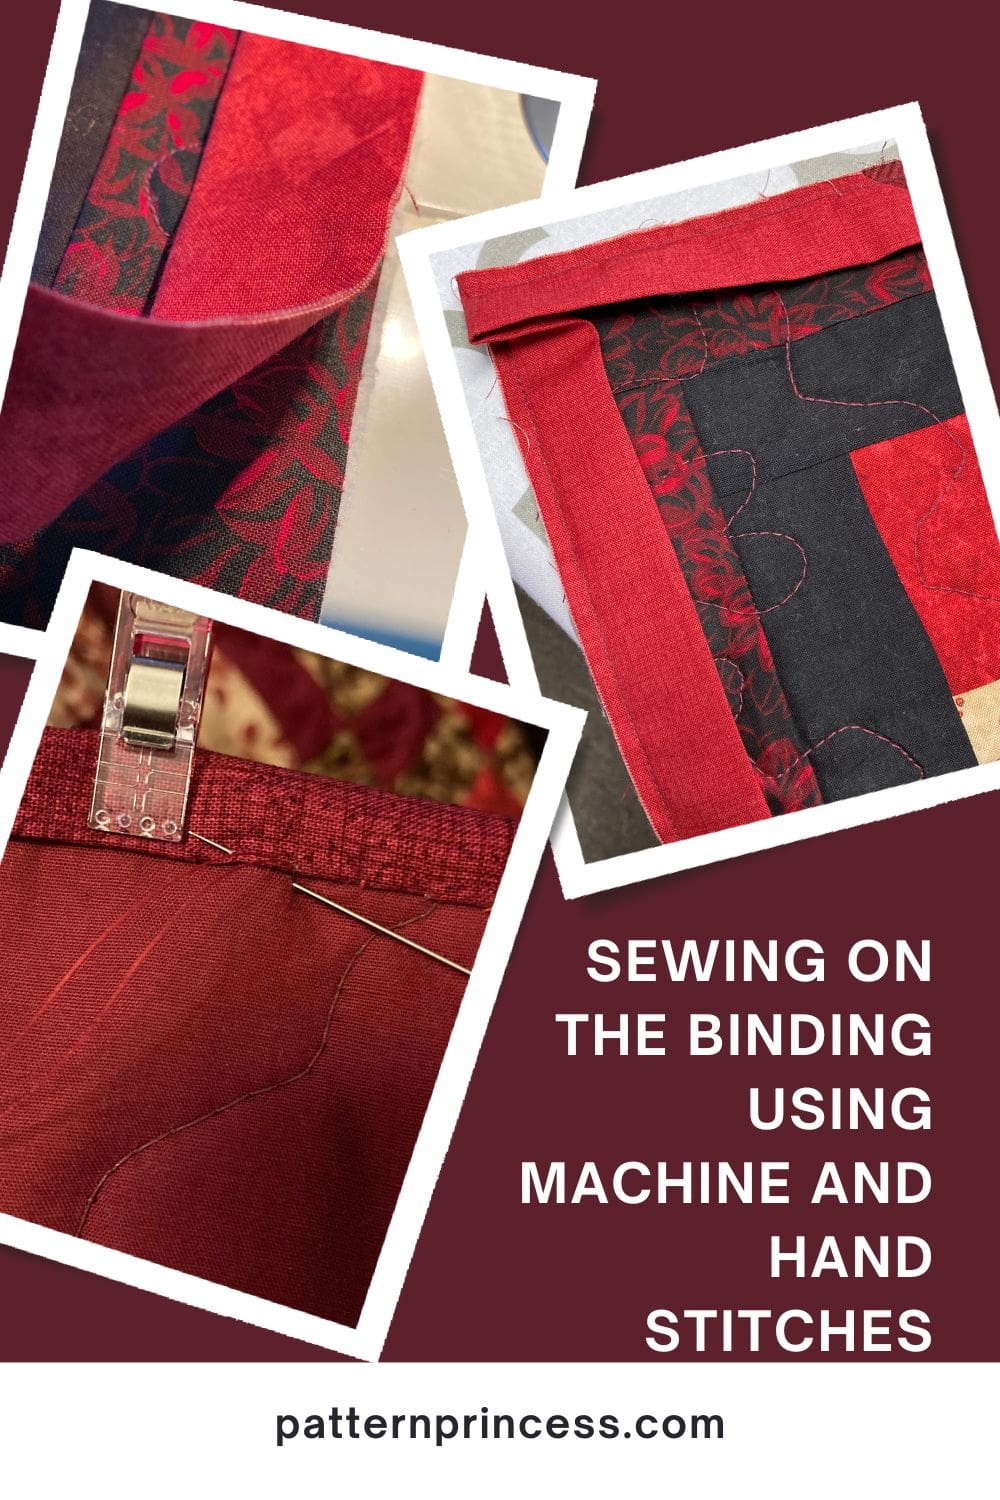
Sew Binding onto the Quilt
Pin the raw edge of the binding onto the top quilt fabric edge. I generally start in the middle of a side. Leave approximately a 5” tail hanging. This hanging part will be used to sew to the other end of the binding strip when you have finished sewing all four sides of the table runner quilt.
Sew the binding onto all four sides of the table runner quilt making sure to miter the corners.
Miter the Corners
To miter the corners, stop 1/4 inch from the corner. Use a ruler and pencil to make the location on the binding. Once you reach the 1/4 inch mark, turn your square and just sew a few stitches right off the corner. Trim your thread, not the binding strip though.
Folding the Mitered Corner
Fold the binding strip away from the direction you were just sewing at a 45° angle. Then fold the binding strip back down upon itself and match it to the edge of the square that you just sewed making sure that aligns with the raw edge of the next side that you will be sewing.
Begin stitching at the edge using the same 1/4 inch seam allowance. Repeat this process for the next 3 corners.
Connecting the Binding Ends
Stop stitching approximately 4” from the side where you started. Complete a few backstitches and snip the thread (but not the binding). Remove the quilt from the sewing machine so you can join the two tails of the binding.
To join the tails so there is a continuous strip of binding to finish sewing down on the quilt edge. Measure the amount of binding that is needed to finish the quilt edge, plus 1/4″. Cut a straight line on each of the binding edges the making sure to correctly measure the amount that is needed yet. With the right sides together, sew the ends together with a 1/4” seam allowance. Now you can continue to sew the binding onto the quilt.
Attaching the Binding to the Backing Fabric
Fold the binding over the edge and hand-stitch the folded edge of the binding strip to the backing fabric. For each corner make sure to make a mitered corner and add a few extra stitches to hold it securely.
Washing your Table Runner
When washing my quilts, I like to use a few color catchers in the wash. This will help ensure that all the colors stay crisp, and nothing bleeds onto the next color.

You can find Victoria crocheting, quilting, and creating recipes. She has cooked in restaurants for over 20 years, including many larger parties. She learned to crochet when she was just 11 years old and has been crocheting ever since; over 50 years now. Over 40 years ago, she loved her first class in sewing and continues to hone her skills in quilting. Many have enjoyed the handmade gifts over the years. In her professional career, she has worked in management in a wide variety of businesses including higher education as a dean of a division. All the while attending college part-time to achieve her doctorate in higher education with an emphasis in e-learning.
Hi. I was thinking of making a table runner with my pieces of fabric that I have. Then I came across these instructions. How wonderful. Lorraine
I love this one. Great way to make a pretty table runner that looks harder than it is. Enjoy!
Vicky