Last updated on July 4th, 2024 at 11:35 pm
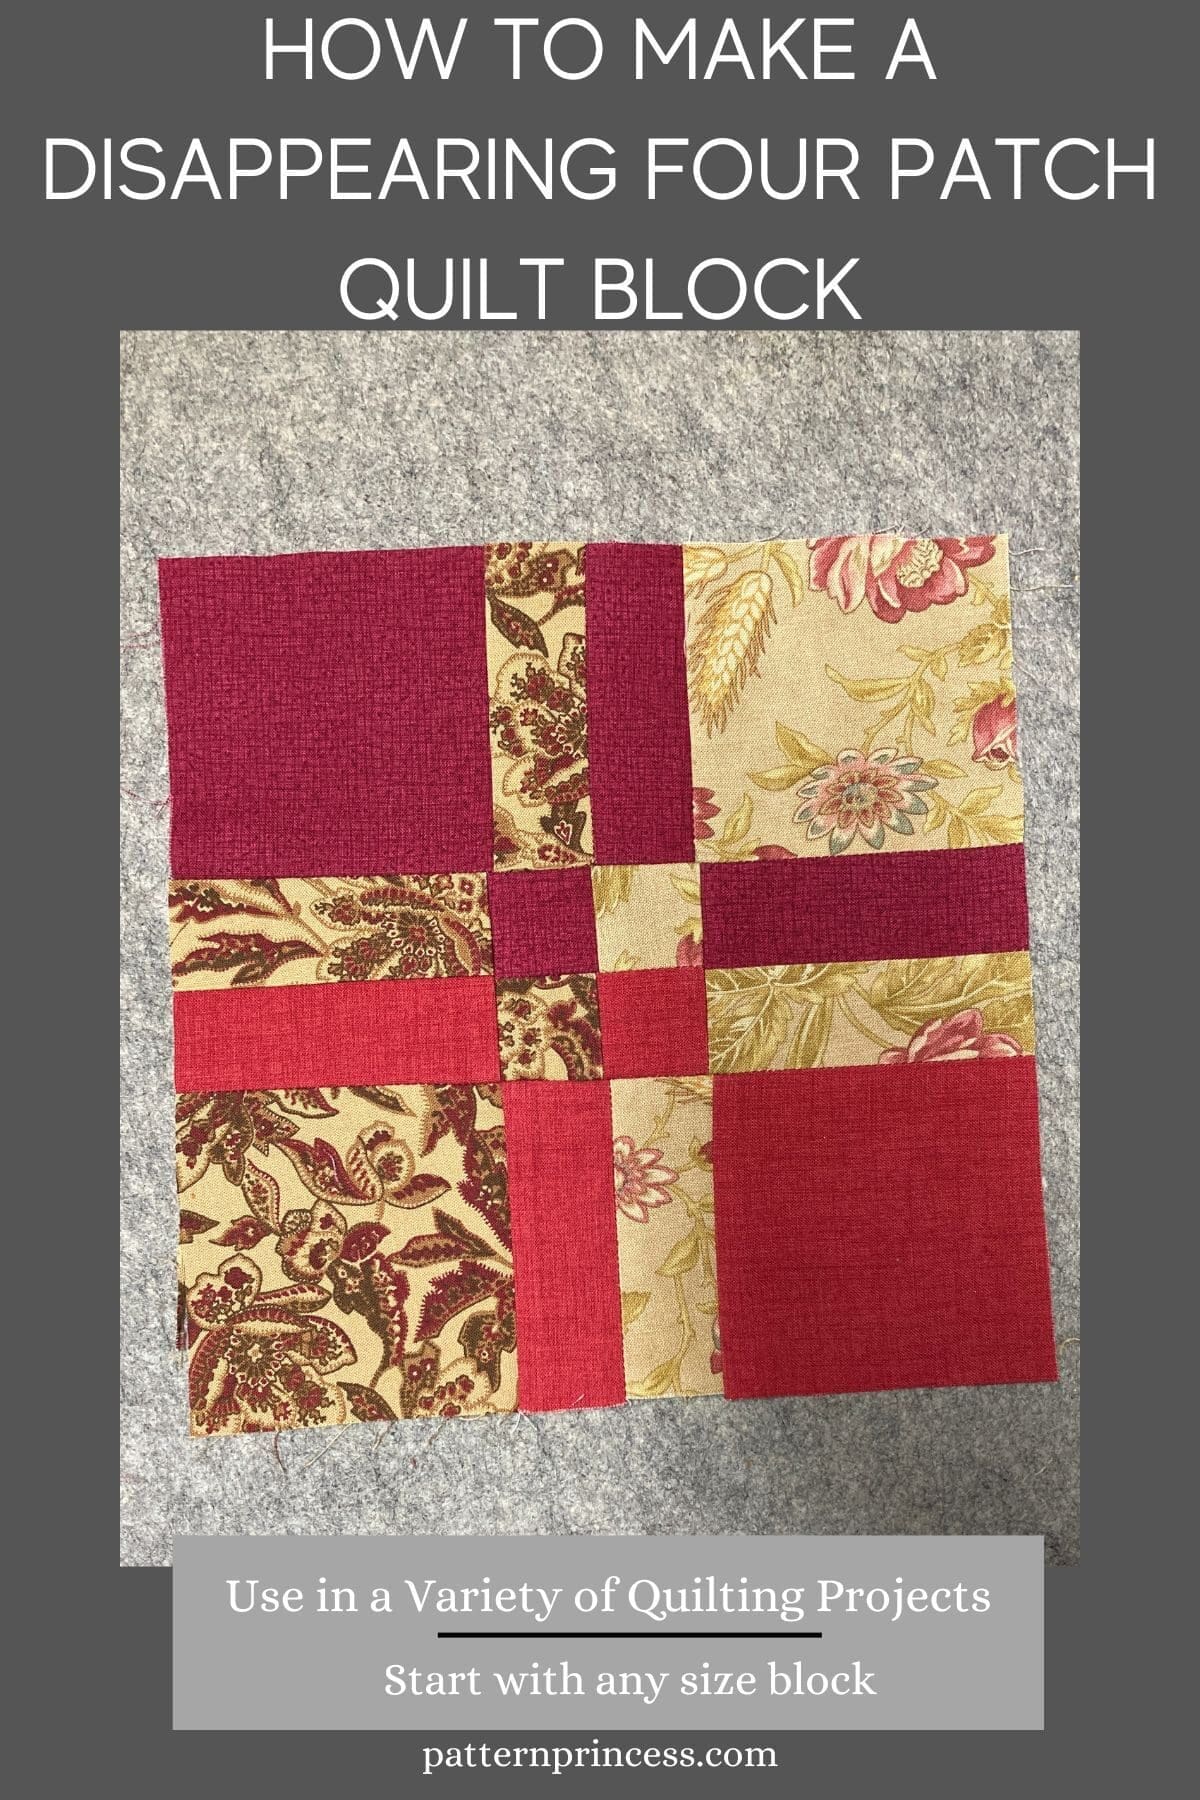
This classic disappearing four patch quilt block is a fun and satisfying sewing project. Whether you are a beginner or a pro quilter, this unique design is sure to become a favorite.
The disappearing four patch block uses just four squares of fabric to create an interesting block. With a few simple steps and some patience, you will have a gorgeous, finished product that looks much more complicated than it is.
Use this easy quilt block for table runners, pillow covers, baby quilts, larger quilts, or any other quilting project that you can think of.
With some sewing smarts and patience, even a beginner quilter can master this eye-catching pattern.
Follow along as we guide you through the steps of how to make this eye-catching quilt block today!
Post contains affiliate links, and we earn commissions if you shop through the links on this page. For more information, please read the disclosure section under the About Us page.
What is a Disappearing Four Patch Block?
If you’ve been quilting for any amount of time, you have probably heard of the popular Disappearing Four Patch quilt block. This technique involves taking four squares, sewing them together, cutting them apart with a rotary cutter, rearranging the fabric pieces, and sewing them back up into a beautiful square where the original four squares “disappear” into a totally different look.
This is a perfect quilt block for beginners who want more details in their quilt blocks.
Quilt Pattern for Pre-Cuts
The beauty of this quilt block is that you can use any size square that you like, a layer cake, charm pack, or smaller squares.
This quilt block is perfect for any size pre-cuts you want to use. While I cut my own 5-inch squares for this pattern today, you could just as easily used pre-cut 10-inch squares.
Further, this simple quilt block is perfect for using up fabric scraps. Take various colors of fabric to make this square. In fact, I think this looks nicer with contrasting fabric choices.
Versatile Quilt Block
There are several ways to make this quilt block with different cuts to the original block. I’m going to share with you one way to cut a four patch and rearrange them back into a lovey square that looks so much harder than it is.
How do you make a Magic Four Patch?
Just by taking your original 4 patch block, giving it a few cuts, rearranging the pieces and it has disappeared into a more complex quilt block!
The first method I’ll show you is very common. You can use two, three or four fabrics. The tutorial uses four fabrics, and then I show how it looks with four fabrics.
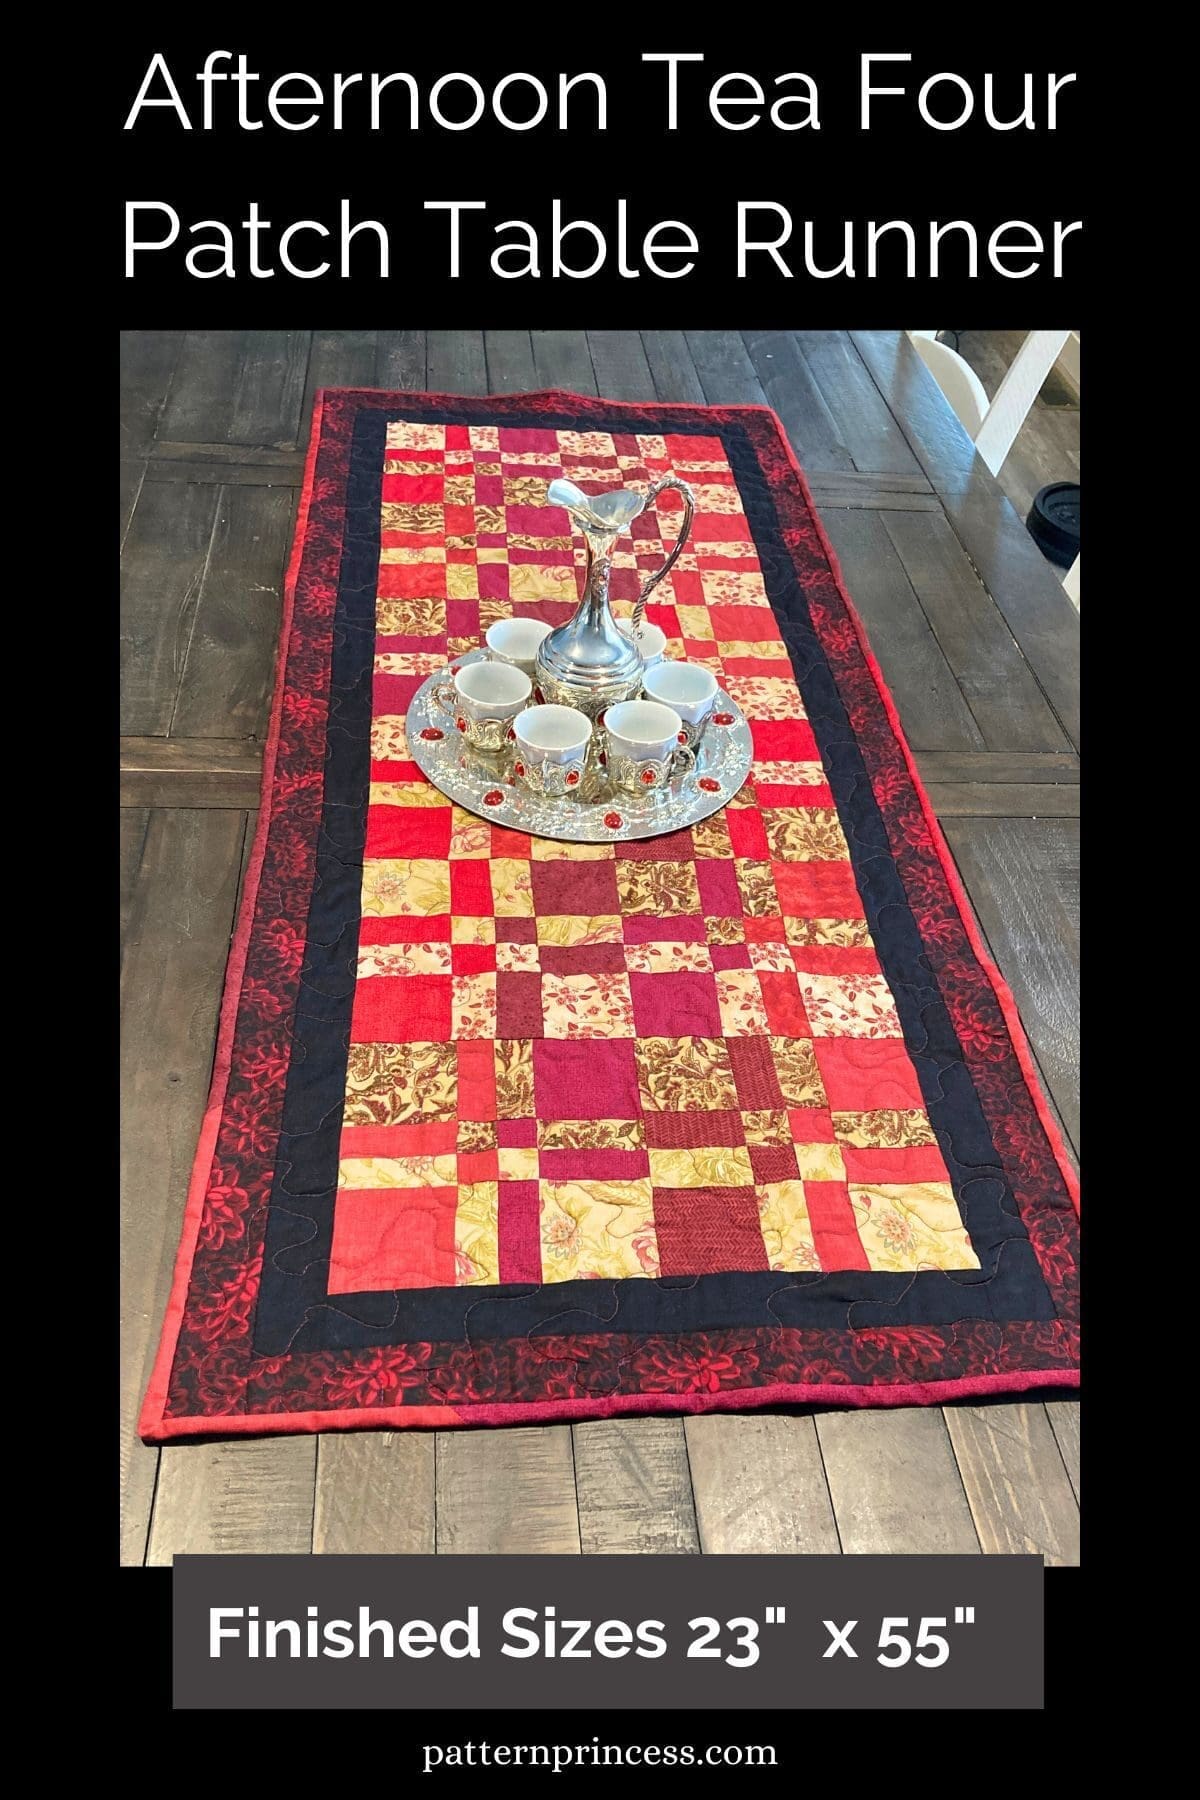
Make a Table Runner using this Quilt Block
Here is a photo of an easy table runner using this square. You can get the full free sewing pattern for the Afternoon Tea Quilted Table Runner.
Directions: How to Make a Disappearing Four Patch Quilt Block
Skill Level
This quilt block is perfect for a beginner.
You should be comfortable with sewing squares together. Measuring and using a rotary cutter. Nesting seams together and pressing seams.
Finished Size
Today, I started with 5-inch quilt blocks. The finished quilt square will end up being 8 ½ inches square ready to sew into your quilt.
However, you can make this using any size square you wish.
Materials
Four Squares Fabric, the same size
Thread
Equipment/Tools
Rotary Cutter
Quilting Ruler
Cutting Mat
Rotating Cutting Mat
Iron
Ironing Board or Pressing Mat
Pins
Sewing Machine
A few of my Favorite Quilting Supplies
Quilt Block Notes
Use a ¼-inch seam allowance. I recommend using a special presser foot with a ¼-inch guide if you have one for your machine. This will help you get uniform seams, and matching seams.
Nest your seams. This means that the seams of each row are aligned, and the pieces fit together almost like the pieces of a puzzle.
Right Sides Together. Sew fabric together with right sides together.
Quilt Block Instructions
Begin with pre-cuts or cut your own fabric squares the same size. You can use four squares of different colors, or just two different colors if you wish. However, contrasting colors work nicely for this sewing pattern.

Sew the Four Patch Quilt Square
Join the four squares together, two on the top and two on the bottom to form a square.
Using ¼-inch seam allowance, with right sides together, sew the top two squares together, press the seams to the right. Next, sew the bottom two squares together, press the seams to the left.
Sew the top row and the bottom row together making sure to nest the seams aligning your seams.

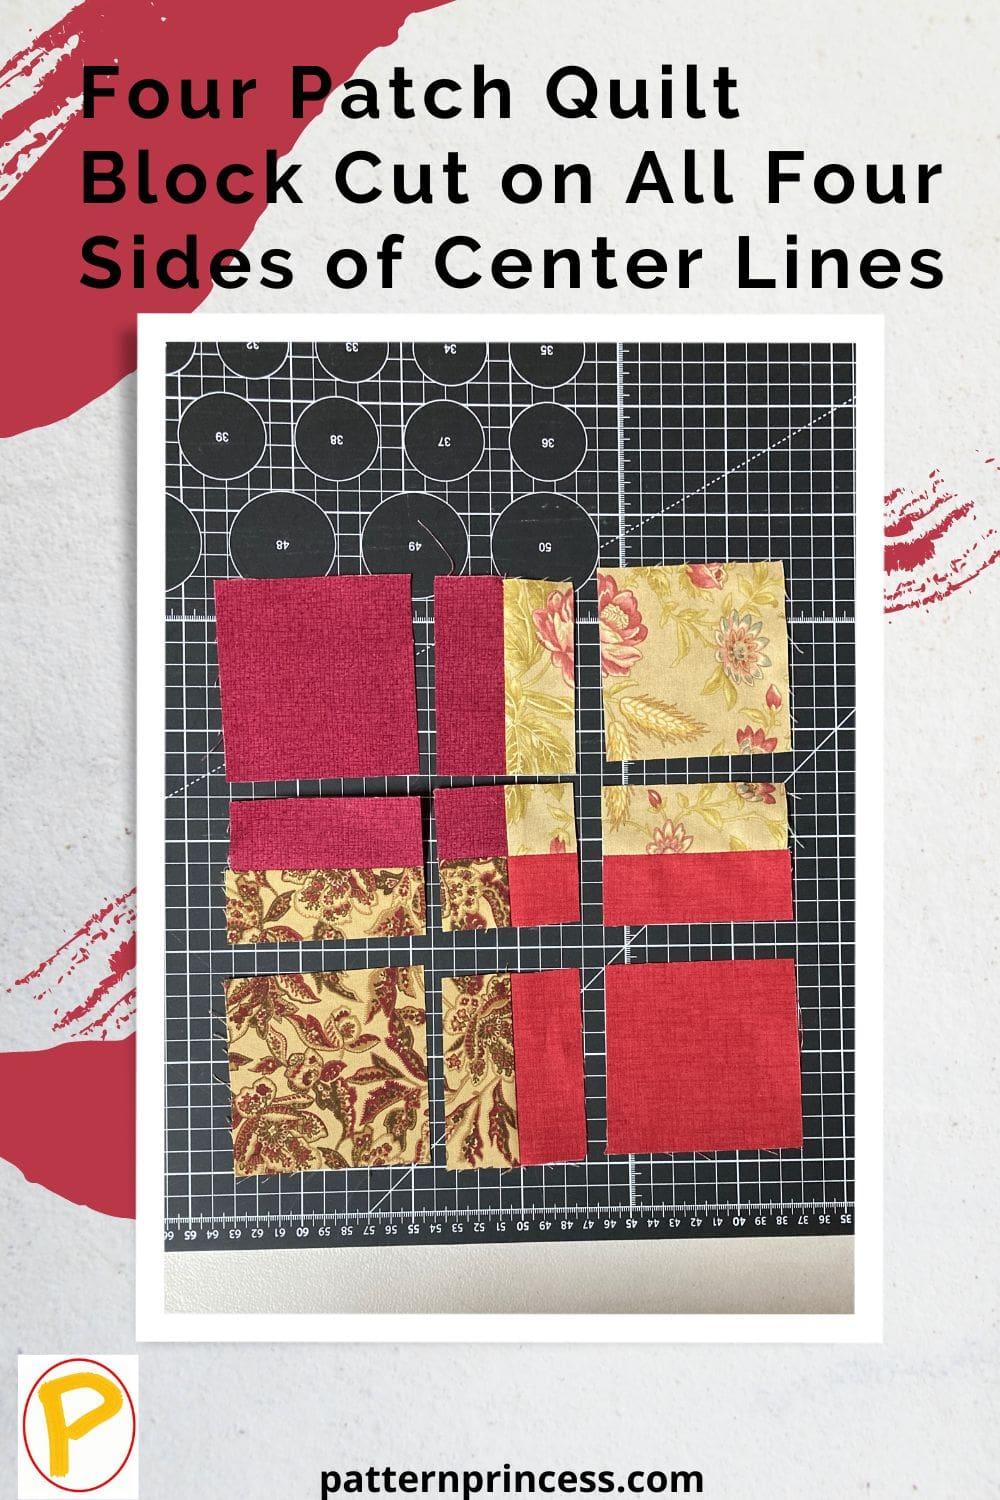
Cut the Four Patch Quilt Square
When using 5-inch squares to start with, your cutting line should be 1 ¼-inches.
You will be cutting a line on each of the four sides using the center seams.
Pro Tip. If using a larger square, adjust your cutting line accordingly. For instance, a 10-inch square your cutting line would be 2 ½-inches. (The cut line should be about ¼ of the size of the square you are using).
Line up the ruler with the center line vertically, make the first cut 1 ¼-inches from the center line.
Next, turn the rotary cutting mat a quarter turn. Line up the ruler with the center line vertically, make the second cut 1 ¼-inches from the center line.
Turn the rotary cutting mat a quarter turn. Line up the ruler with the center line vertically, make the third cut 1 ¼-inches from the center line.
Finally, Turn the rotary cutting mat a quarter turn. Line up the ruler with the center line vertically, make the fourth cut 1 ¼-inches from the center line.
Creating the Magic Four Patch also known as the Disappearing Four Patch
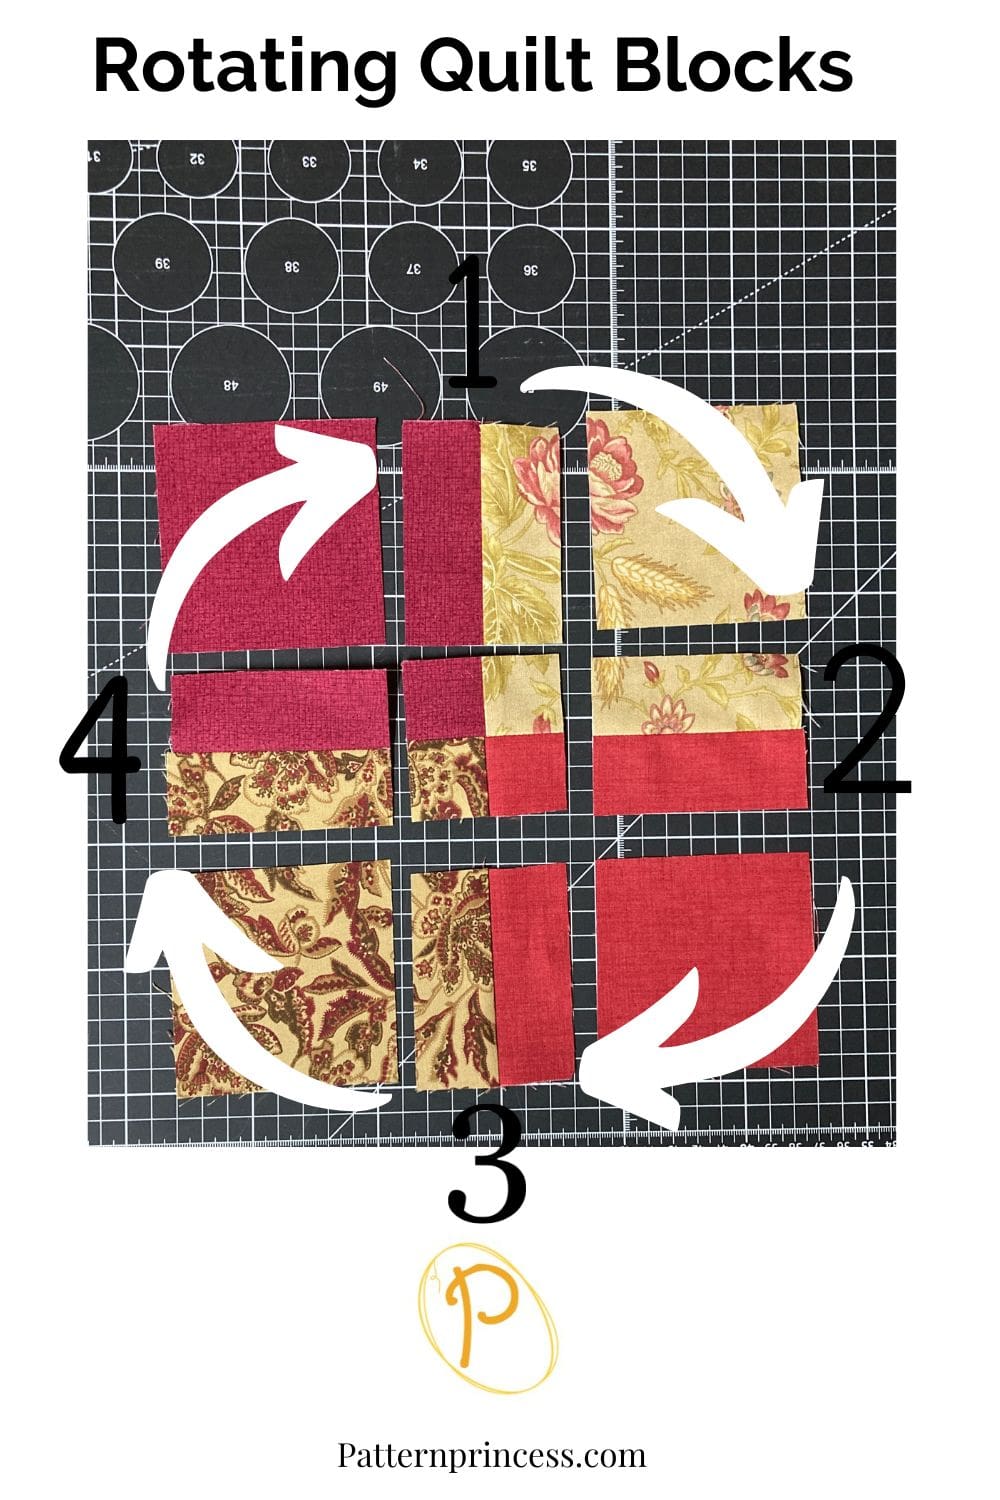
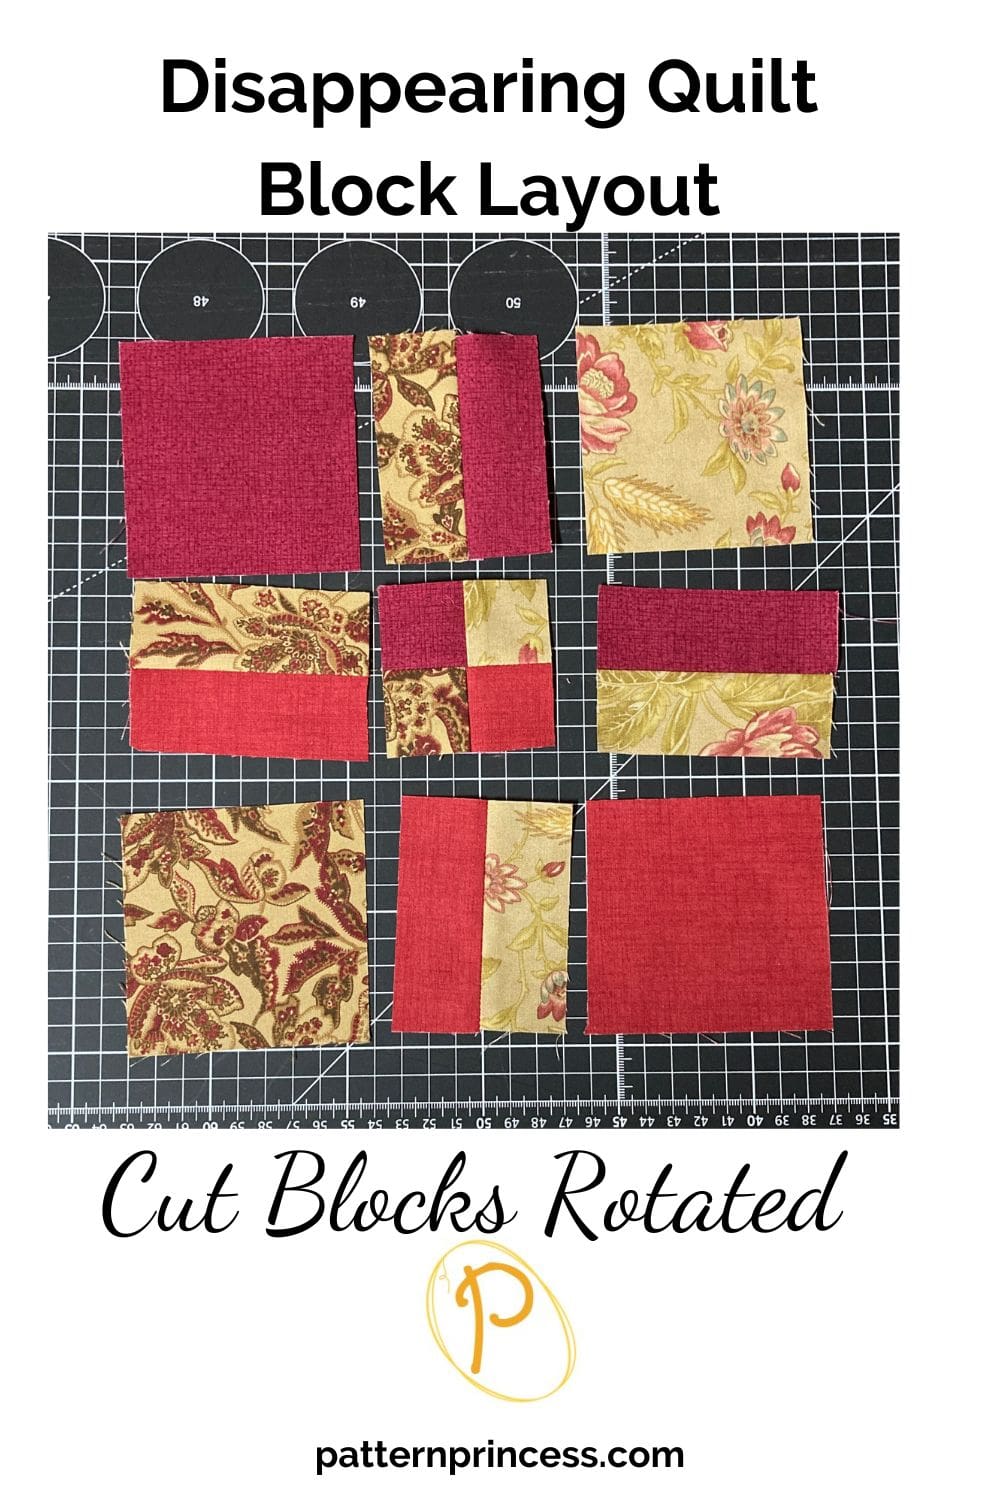
Now that the cuts are made, there are a few ways you can rearrange the squares. This is the way I rearranged my blocks.
Using the four rectangle pieces, move them over one space to the right.
Step 1. The 12 O’clock piece moves to the 3 O’clock space.
Step 2. The 3 O’clock piece moves to the 6 O’clock space.
Step 3. The 6 O’clock piece moves to the 9 O’clock space.
Step 4. The 9 O’clock piece moves to the 12 O’clock space.
See the photo for placement.
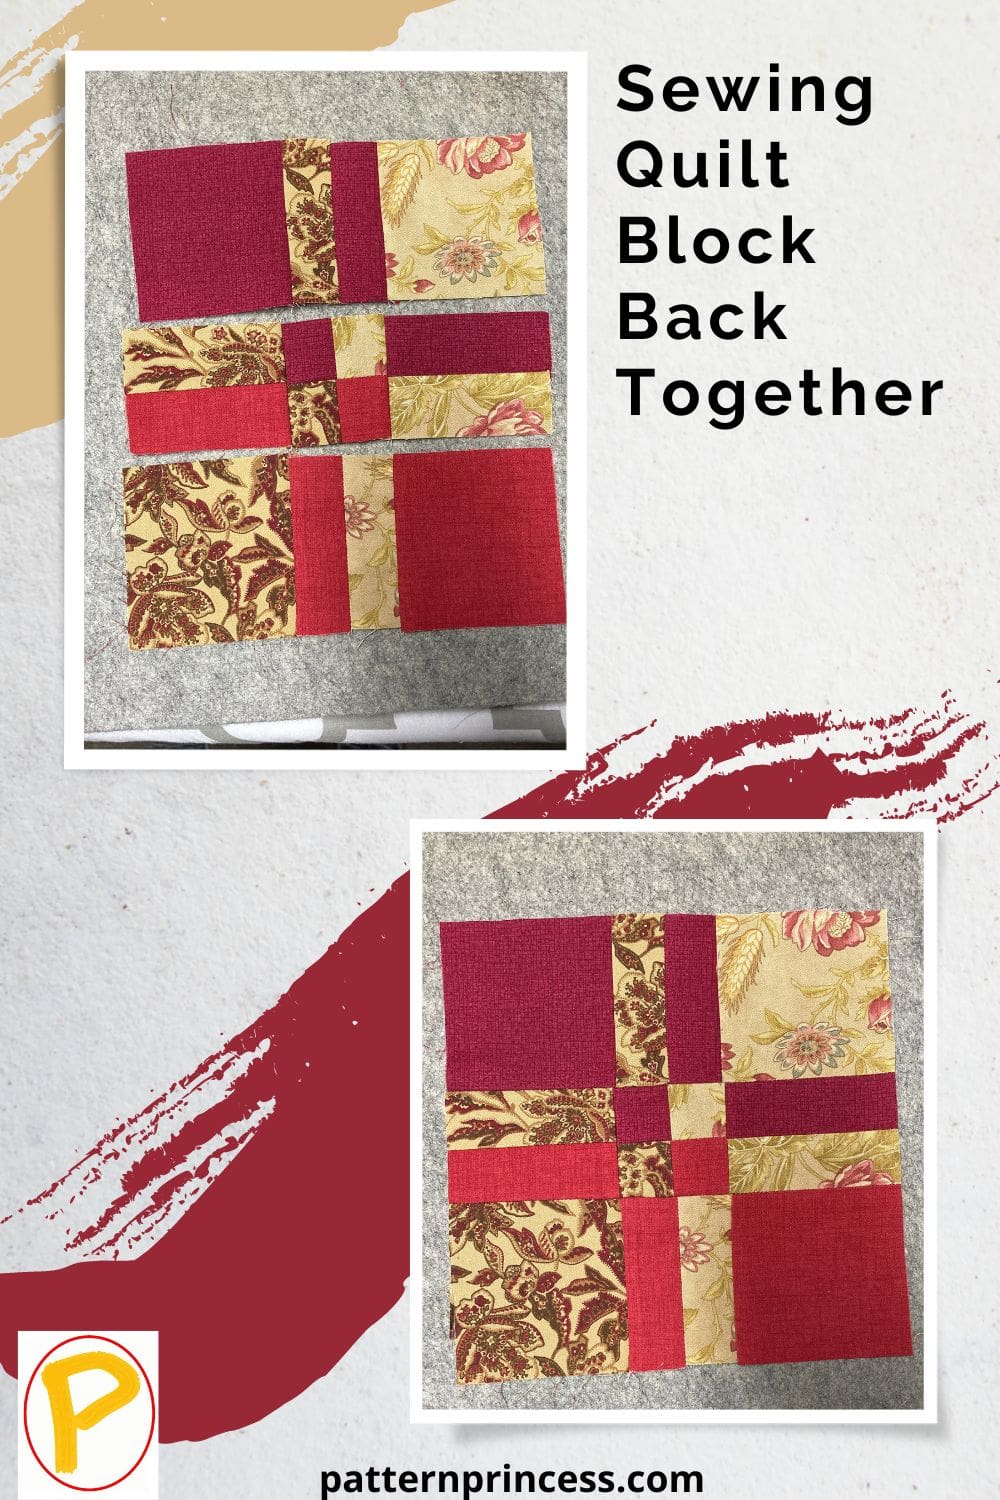
Sew the Pieces Back Together
Sew together the top three blocks using a quarter inch seam allowance with right sides together.
Press the seams to the right.
Sew the bottom three blocks together using a quarter inch seam allowance.
Press the seams to the left.
Next align the top and bottom block sets so that the middle seam nests together. This allows the seam points to line up nicely.
Sew the top to the bottom, using a quarter inch seam allowance.
Press the seam open or to one side.
If necessary, trim your block to the square size specified in the quilt pattern you are working on.
That’s it, you have a beautiful disappearing four patch quilt block with lots of detail ready to use in your pattern.
Once you learn how to sew this fun quilt block, the possibilities are just endless.

You can find Victoria crocheting, quilting, and creating recipes. She has cooked in restaurants for over 20 years, including many larger parties. She learned to crochet when she was just 11 years old and has been crocheting ever since; over 50 years now. Over 40 years ago, she loved her first class in sewing and continues to hone her skills in quilting. Many have enjoyed the handmade gifts over the years. In her professional career, she has worked in management in a wide variety of businesses including higher education as a dean of a division. All the while attending college part-time to achieve her doctorate in higher education with an emphasis in e-learning.