Last updated on July 4th, 2024 at 11:43 pm
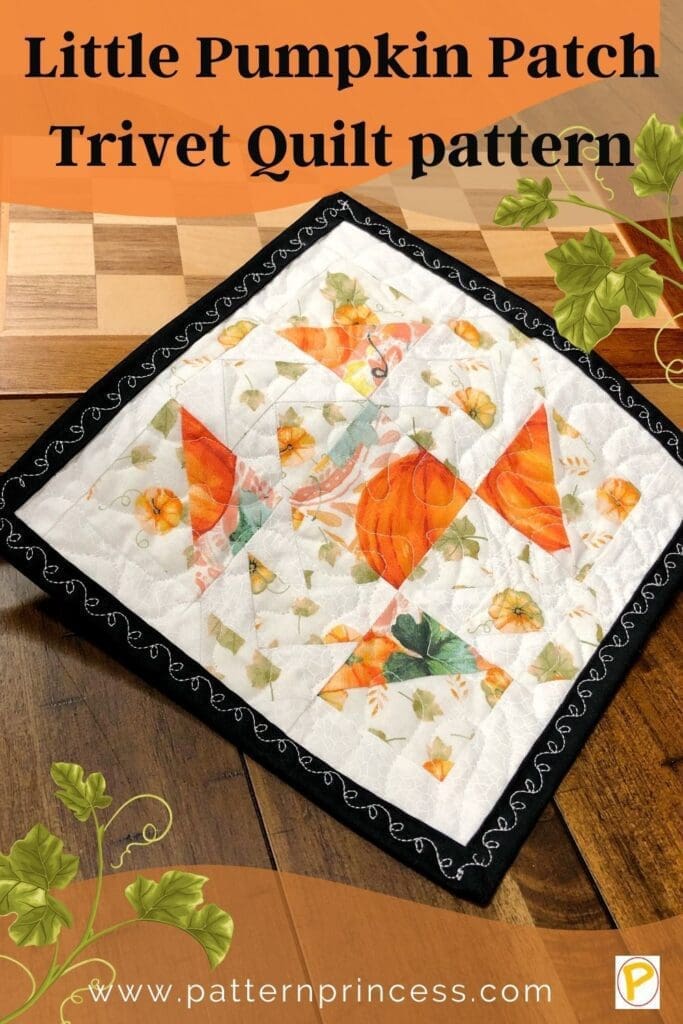
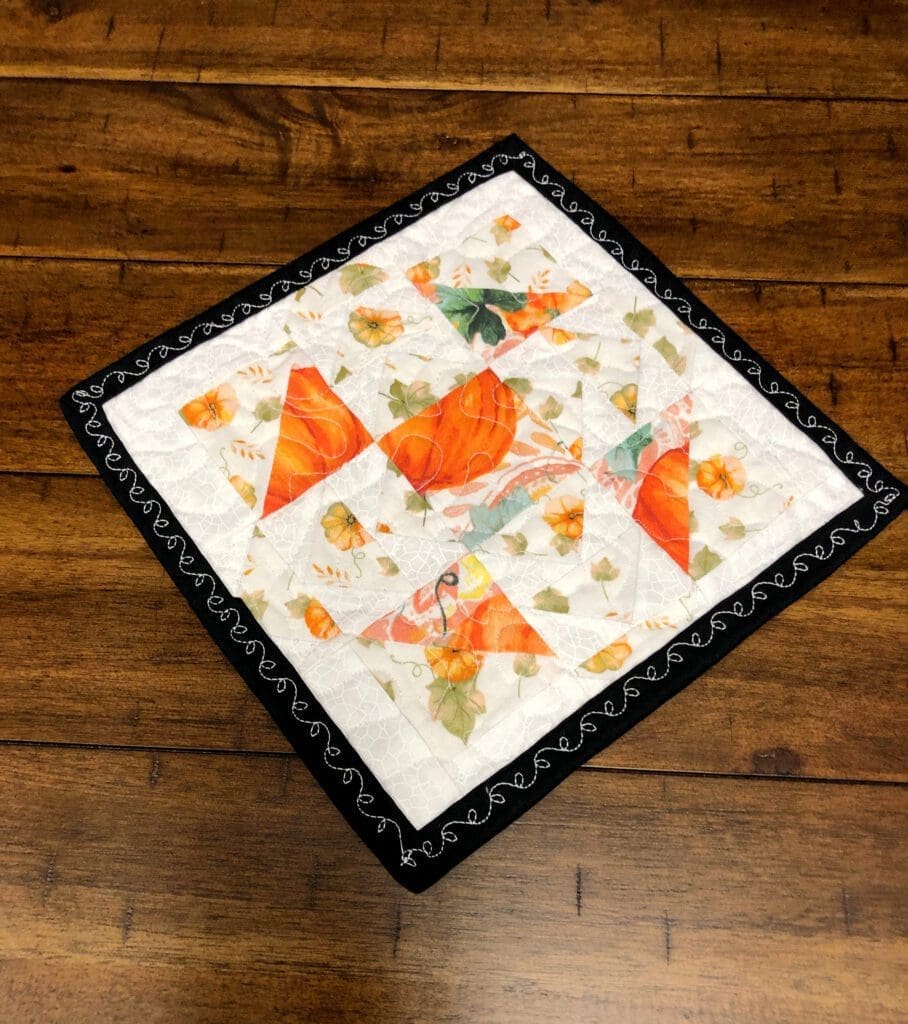
This Little Pumpkin Patch Trivet Quilt Pattern would look lovely in a kitchen or dining room, but it’s also the perfect size for a coffee table. This little quilt is a reminder that autumn has arrived. With the leaves turning yellow and orange, it’s time to start thinking about fall decorations, Thanksgiving dinner and fun fall activities with family and friends.
Post contains affiliate links, and we earn commissions if you shop through the links on this page. For more information, please read the disclosure section under the About Us page.
This cute mini quilt will keep your table protected from hot dishes without being too overbearing on your décor. The finished product is an adorable 9 inch trivet quilt.
Quilting is one of my new favorite pastimes because I love creating something beautiful from fabric scraps. This Little Pumpkin Patch Trivet Quilt uses fat quarters, which are small enough to be manageable.
In this blog post I’ll walk you through how to make a Little Pumpkin Patch Trivet Quilt step-by-step. Let’s get started.
Directions: Little Pumpkin Patch Trivet Quilt
Materials Needed for Block
1/8 yard of medium print material
8-inch square of dark print material
1/4 yard of light print material

Backing Fabric
You’ll need 1/2 of a yard.
Binding Fabric
About 1/4 of a yard or approximately 42-inches of a 2 1/2-inch wide binding strip is needed.
Batting
The pattern requires a piece of 10-inch x 10-inch thin cotton batting (like Warm & Natural) to make this trivet quilt.
Finished Block Size
9 inch square
Quilt Pattern Notes
All seams are sewn with 1/4 inch seam allowance.
Sew with right sides together unless otherwise states.

Fabric Preparation – Cut Fabrics to the Following Sizes
I suggest using a cutting mat, plastic ruler, and a rotary cutter to prepare the following pieces to make this Little Pumpkin Patch Trivet Quilt.
Light Print
Cut 4 rectangles 1 5/8 X 3 7/8 inches
Cut 4 rectangles 1 5/8 X 2 3/4 inches
Cut 24 squares 1 5/8 inches
Medium Print
Cut 2 squares 3 1/8 inches. Cut each in half diagonally = 4 triangles.
Cut 12 rectangles 1 5/8 X 2 3/4 inches
Dark Print
Cut 2 squares 3 1/8 inches. Cut each in half diagonally = 4 triangles.
Cut 1 Square 2 3/4 inches.
Binding
In total, you will need a binding strip that covers all four sides of the 9 inch trivet. However, you will need additional length for connecting and trimming the ends.
You can purchase a Pre-cut Fabric Roll for binding. You can also make your own fabric for binding using fat quarters to cut and sew together enough fabric to create a 42-inch long X 2 1/2 inch wide strip to go around the entire quilt.
When making your own binding sew and trim the ends of each strip at apposing 45-degree angles.
Fold in half and press the binding before using as a quilt binding.
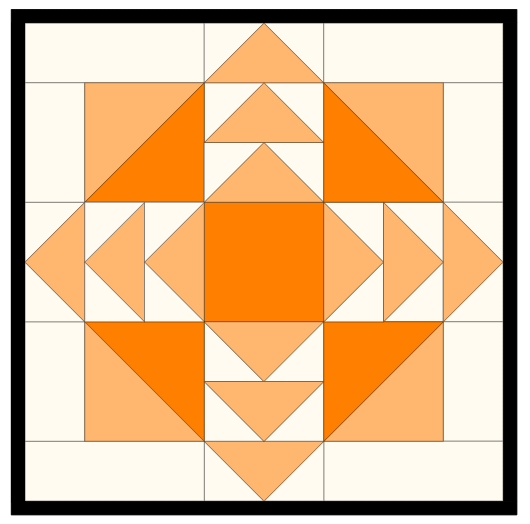
Little Pumpkin Patch Trivet Quilt Block Assembly
Make the Corner Blocks
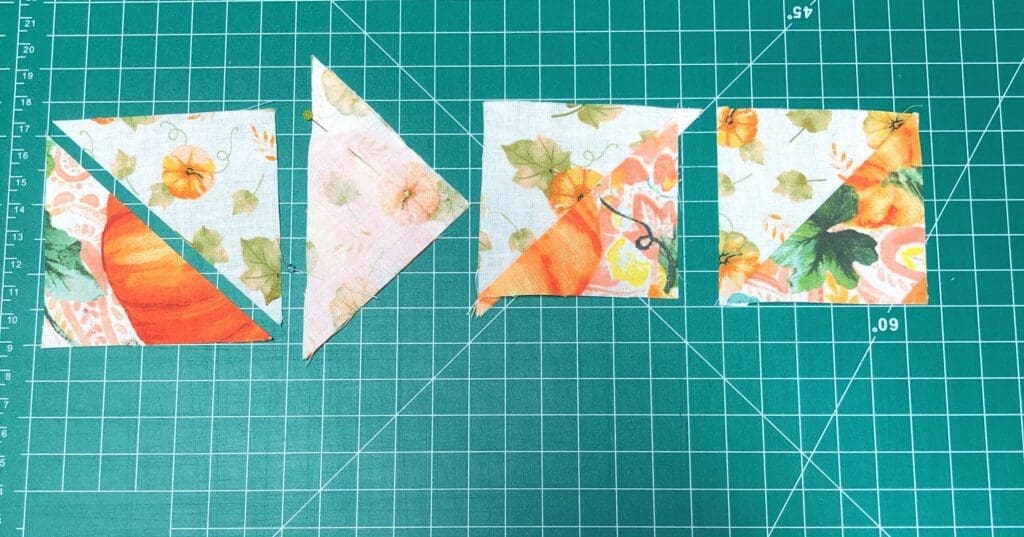
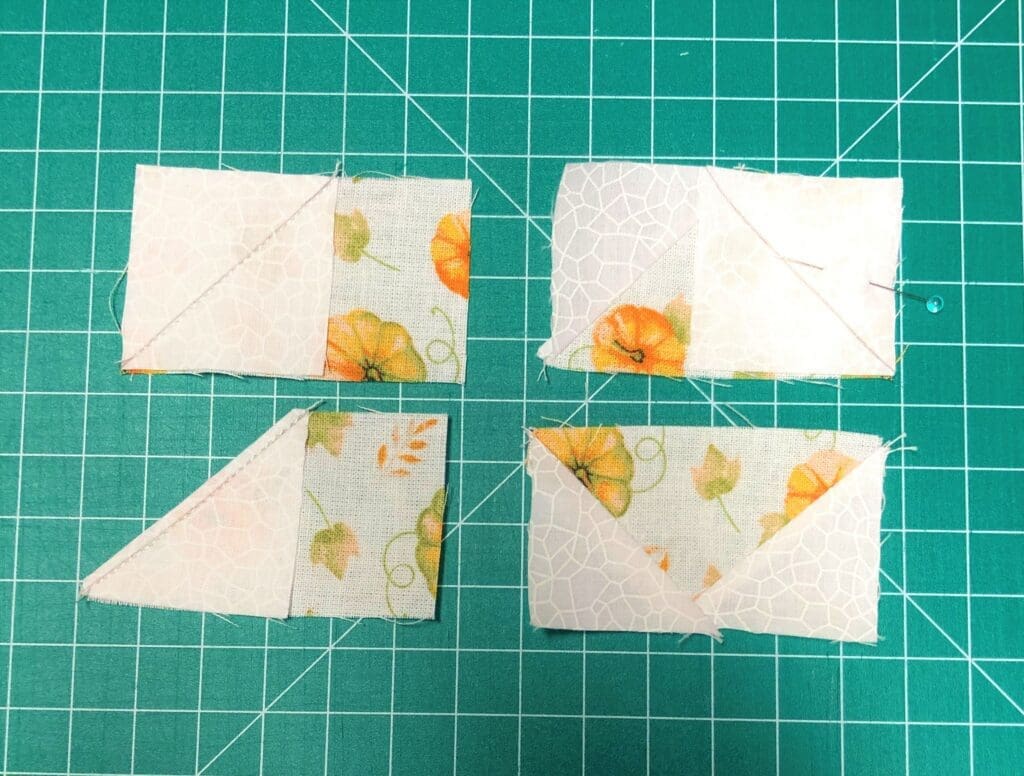
Sew a medium print triangle and a dark print triangle together to make a square. Continue the process to make four squares total.
Press the seam toward the dark print material. Trim to 2 3/4 inches if needed.
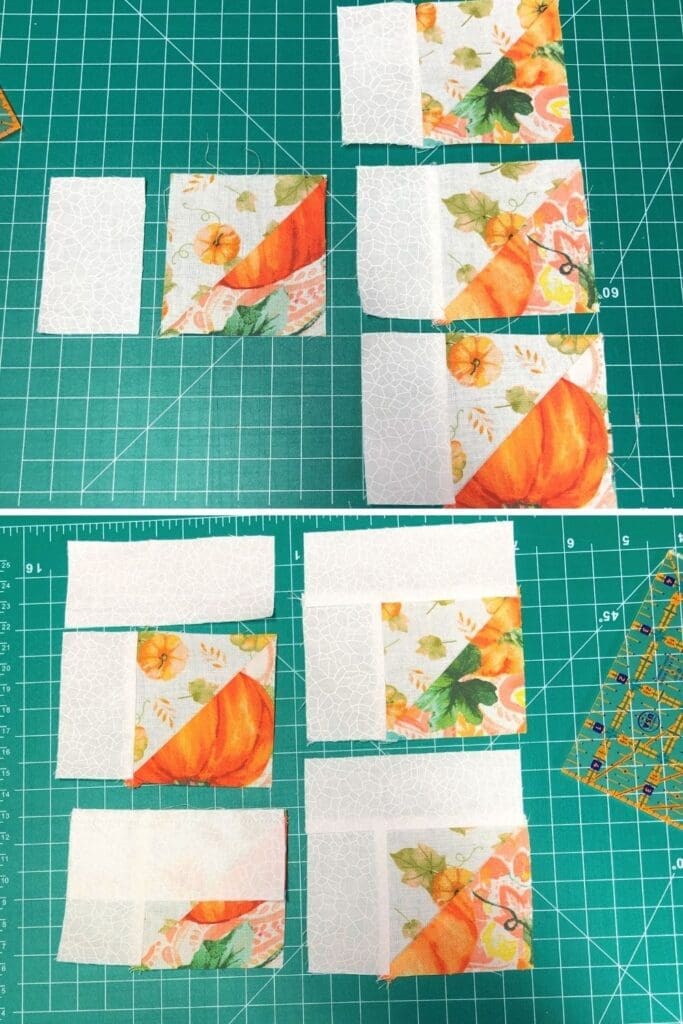
Sew a light print 1 5/8 X 2 3/4 inch rectangle strip to a medium print edge of a triangle square. Add a light print 1 5/8 X 3 7/8 inch rectangle strip to the remaining medium print edge of the triangle square. This will make a square for the corner.
Repeat to make the next corner and repeat (reversed) to make the opposite corners. (4 corners total).
Press the seams toward the rectangle strips. Trim to 3 7/8 inch square if needed.
Make 12 Flying Geese
Use a pencil or chalk to draw a diagonal line on the wrong side of each of the 1 5/8 inch squares.
Align a marked light print square with one end of a medium print 1 5/8 X 2 3/4 inch rectangle. (The marked line should angle from the center to the outside corner). Sew on the marked line. Trim the excess material leaving 1/4 inch seam allowance.
Press the triangle open and the seams to the outside.
Align another marked light print square on the opposite end of the medium print rectangle. (Making sure that the line is angled from the center to the opposite outside corner). Sew on the marked line. Trim the excess material leaving 1/4 inch seam allowance.
Trim to 2 3/4 x 1 5/8 inches if needed.
Repeat this process to make 11 more Flying Geese – 12 total.
Joining the Flying Geese as a Trio
Join three of the Flying Geese rectangles in a row. Press the seams toward the bottom Flying Geese rectangle.
Repeat this process 3 more times to make a total of 4 sets of Flying Geese rectangles.

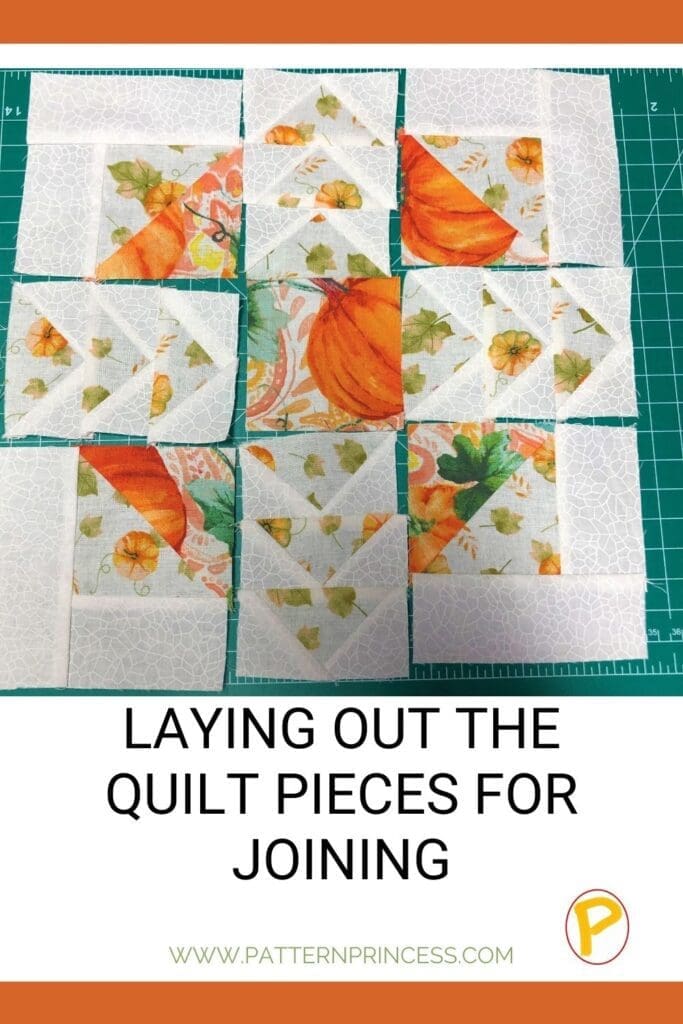
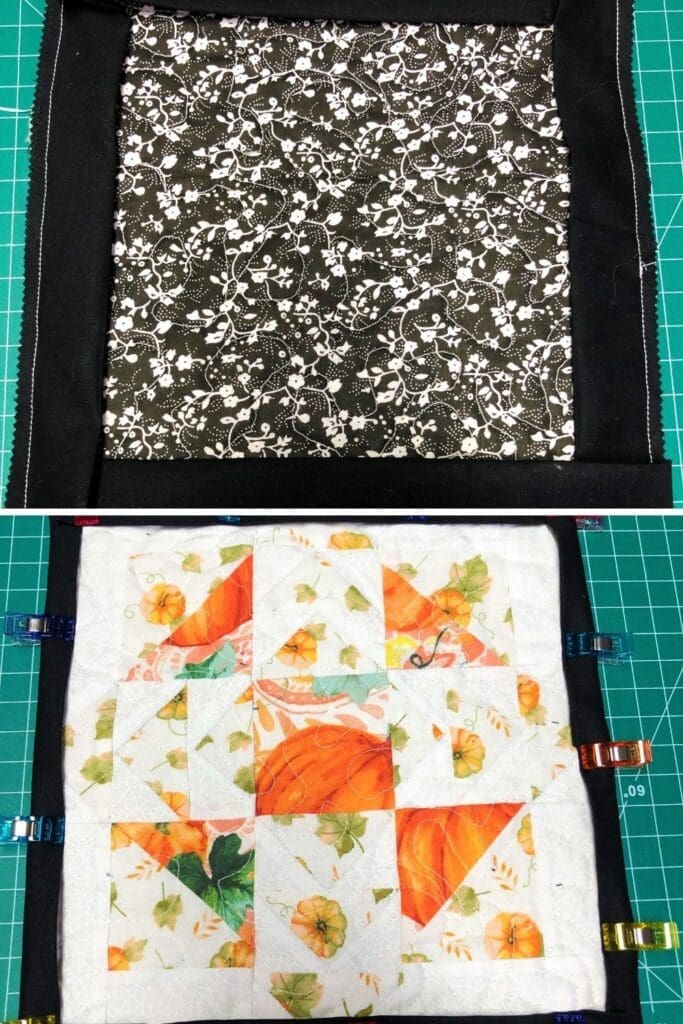
Lay Out the Trivet Quilt Pieces
Refer to the diagram to lay out the trivet quilt pieces.
The Dark 2 3/4 inch square in the middle
The Flying Geese rectangles in the middle top, middle bottom, and middle sides.
The corner units should have the light colored rectangles to the outside.
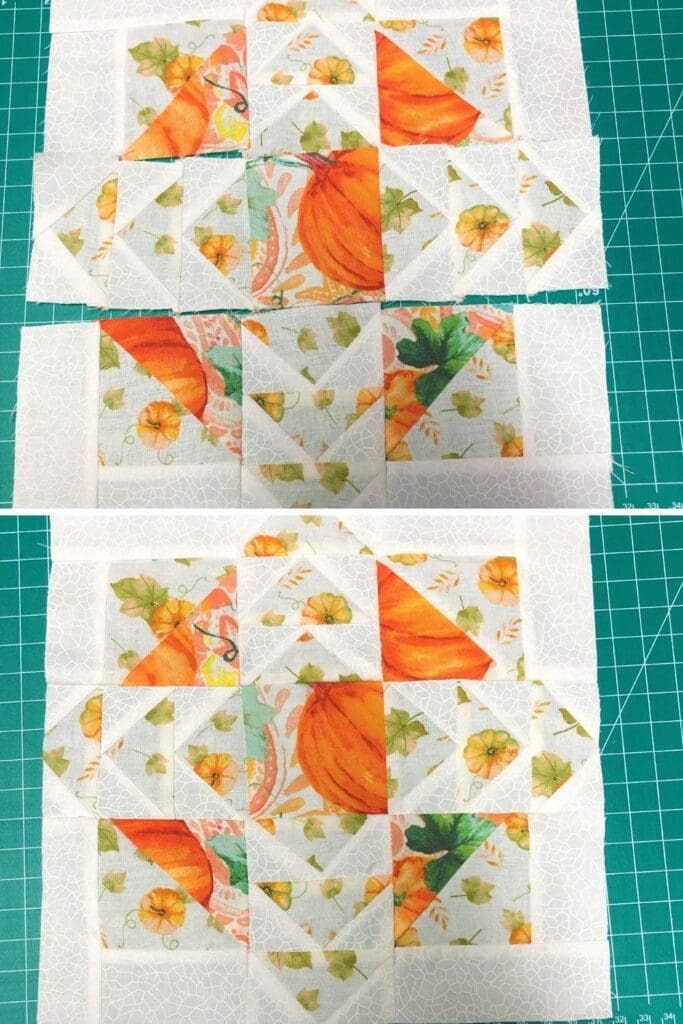
Good Practice to Lay the Pieces Out Before Sewing Together
Good thing that I am laying it out first! Notice the block on the left in the photo above? It is upside down. Good Grief. So glad I fixed it before I sewed things together.
Sew the pieces together in each row. Press the seams away from the Flying Geese rectangles. Join the rows to complete the block. Press the seams in one direction or open.
Finishing the Little Pumpkin Patch Trivet Quilt
Now that you have sewn all the pieces together for the top, it is time to finish the little trivet quilt
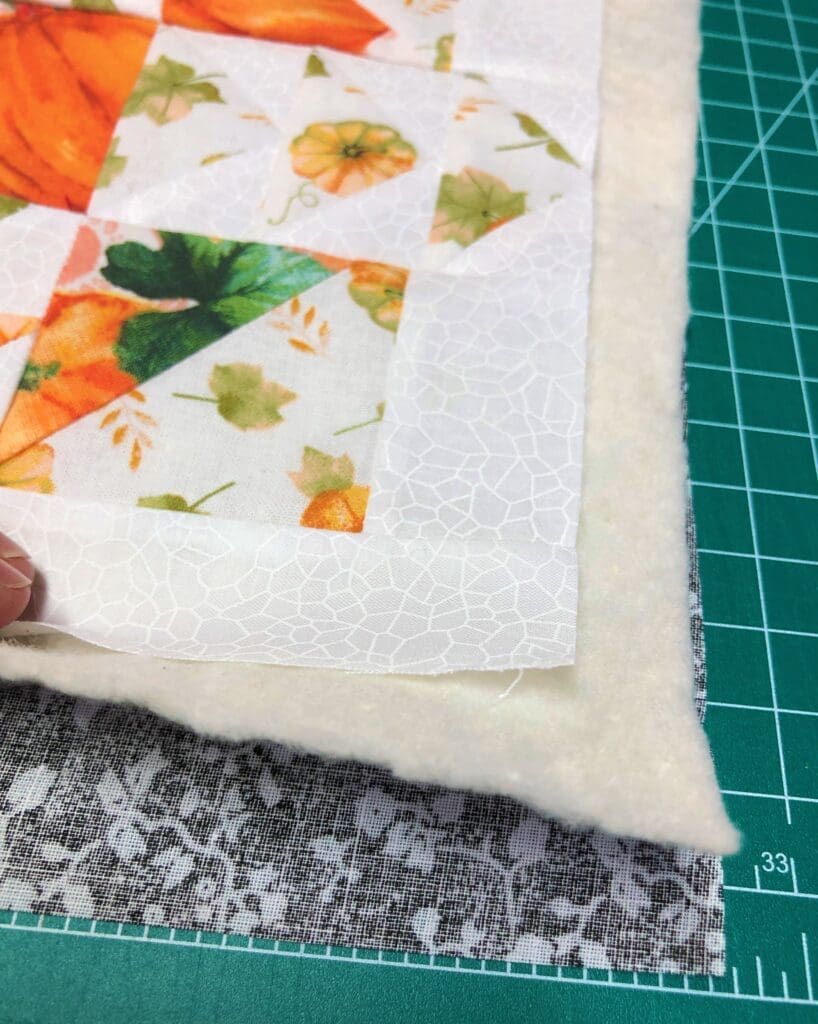
Layer the batting and the backing.
I sandwich the batting between the top and bottom fabric. Note: the backing or bottom fabric and backing are both a little larger than the completed trivet quilt top that you just assembled. The batting and the backing fabric should extend at least 1 inch. This will all be trimmed to the trivet quilt size before adding the binding.
Begin with ironing out any wrinkles in the bottom fabric. On a flat surface, tape down the backing fabric right side down. Make it is flat and smooth without any wrinkles.
Next, lay the batting on top of the taped-down fabric. Make sure that this is laying flat and smooth.
Finally, lay the trivet quilt top on top of the batting making sure it is centered and the right side is facing up.
Baste the Trivet Quilt in Place
I use 1 1/2 inch safety pins to baste all three layers together. Place a pin in each corner, one in the middle, and a couple more here and there. I used about 8 safety pins total. Just enough to hold things in place while you quilt, but not too many that they get in the way of your quilting.

Quilting the Layers Together
I used a stippled or meander type of quilting technique on this trivet quilt today. However, you can use a wide variety of quilting designs to finish off this beauty.
To quilt, you will need a darning foot and your sewing machine set up to complete the free-motion quilting. Make sure that your machine thread tension is set correctly for the top and bottom threads and the feed dogs are down or covered with a little plate.
Trim the Fabric and Batting to Size
Once you have completed the free-motion quilting process, it is time to use your ruler and rotary cutter to trin the batting and the backing fabric to the trivet quilt top size.
Adding Binding to the Trivet Quilt
It is time to add the finishing touch, which is the binding.
Here is a happy little accident.
I meant to sew the binding on the front so I could then hand-sew the binding on the back of the quilt. Well, that didn’t happen!
Instead, I sewed the binding raw edge to the back of the quilt and stood there wondering what to do now that the binding edge would be folded over to the front.
I decided to add a decorative stitch to secure the binding in place and it turned out just lovely!
So, here is my happy little accident that I think really adds that special touch to this trivet quilt.
Adding the Binding
The binding is folded in half and pressed. I aligned the raw edges of the binding with the edge of the block on the bottom fabric side of the trivet quilt.
I started in the middle of one of the edges leaving about 2-inches of the binding tail hanging. This will be used to sew the ends of the binding strip together once you have completed sewing the binding to all sides of the trivet quilt.
Sew on the binding with a 1/4 inch seam allowance.
Making the Folded Mitered Corner
At each corner here is a great way to miter the corner. Stop 1/4 inch from the corner. Use a ruler and pencil to make the location on the binding. Once you reach the 1/4 inch mark, turn your trivet quilt and just sew a few stitches right off the corner. Trim your thread – Not the binding strip though.
Folding the Mitered Corner
Fold the binding strip away from the direction you were just sewing at a 45° angle. Then fold the binding strip back down upon itself and match it to the edge of the quilt that you just sewed making sure that aligns with the raw edge of the next side that you will be sewing.
Begin stitching at the edge of the quilt using the same 1/4 inch seam allowance. Repeat this process for the next 3 corners.
Connect the Ends of the Binding
The goal in joining the binding ends is to have a nice-looking binding strip to finish the quilt and connecting the ends can be a bit tricky.
Since this is such a small quilt project, it is hard to leave a 3-4-inch tail on the starting and ending pieces of the binding. Therefore, I just used a scant 2-inches to help me with joining the binding.
Stop stitching about 2-inches from where you started making sure not to trim the binding yet.
I trimmed the binding an extra inch past the beginning binding. Turn the beginning binding edge under. Place the ending binding under the beginning binding edge that has been turned under and continue sewing the 1/4 inch seam allowance.
Top Stitching the Binding
Since I joined the binding to the quilt backing, the binding is folded over the edge and aligned with the 1/4 inch seam allowance on the front. I used small clips (I used Clover Wonder Clips) to hold the binding in place.
The corners will just about automatically miter for you. Use a decorative stitch to machine sew the binding edge to the quilt.
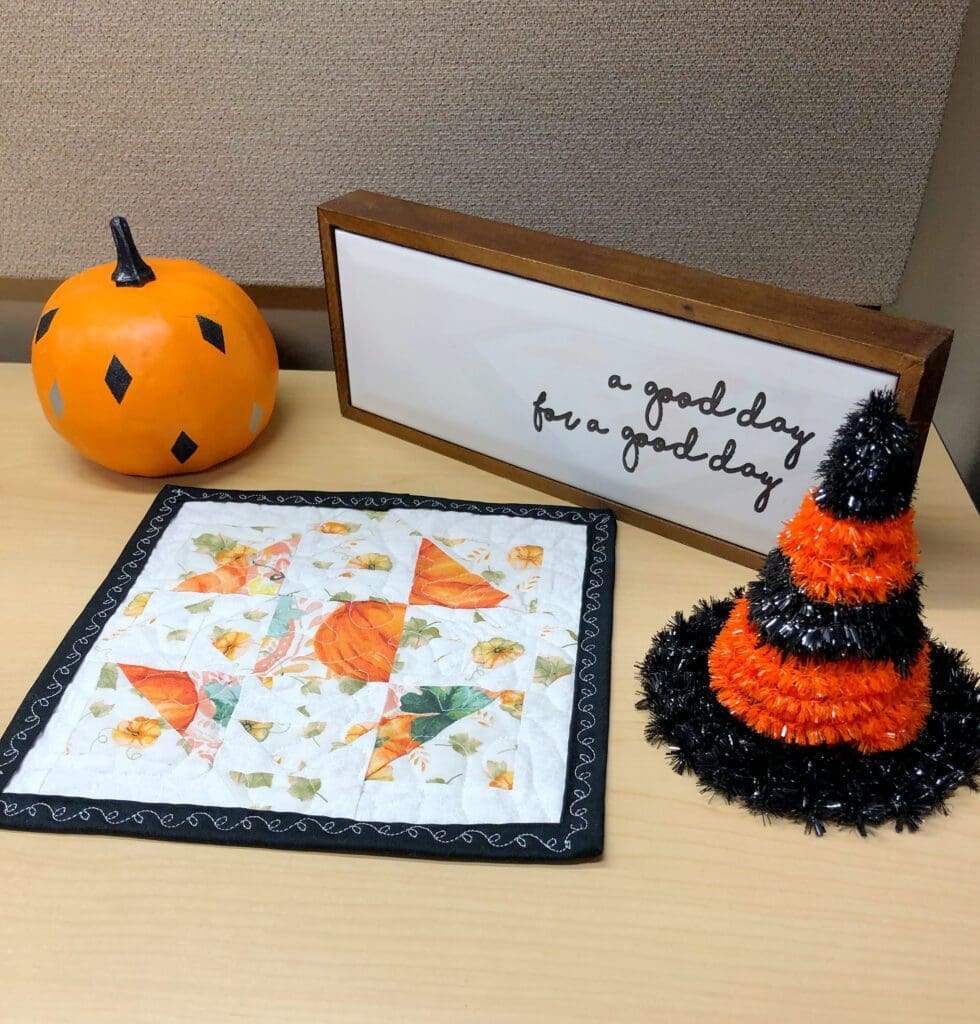
Enjoy using your Little Pumpkin Patch Trivet Quilt or giving it as a gift.
I gave this one to my sister for her birthday.

You can find Victoria crocheting, quilting, and creating recipes. She has cooked in restaurants for over 20 years, including many larger parties. She learned to crochet when she was just 11 years old and has been crocheting ever since; over 50 years now. Over 40 years ago, she loved her first class in sewing and continues to hone her skills in quilting. Many have enjoyed the handmade gifts over the years. In her professional career, she has worked in management in a wide variety of businesses including higher education as a dean of a division. All the while attending college part-time to achieve her doctorate in higher education with an emphasis in e-learning.