Last updated on July 4th, 2024 at 11:37 pm
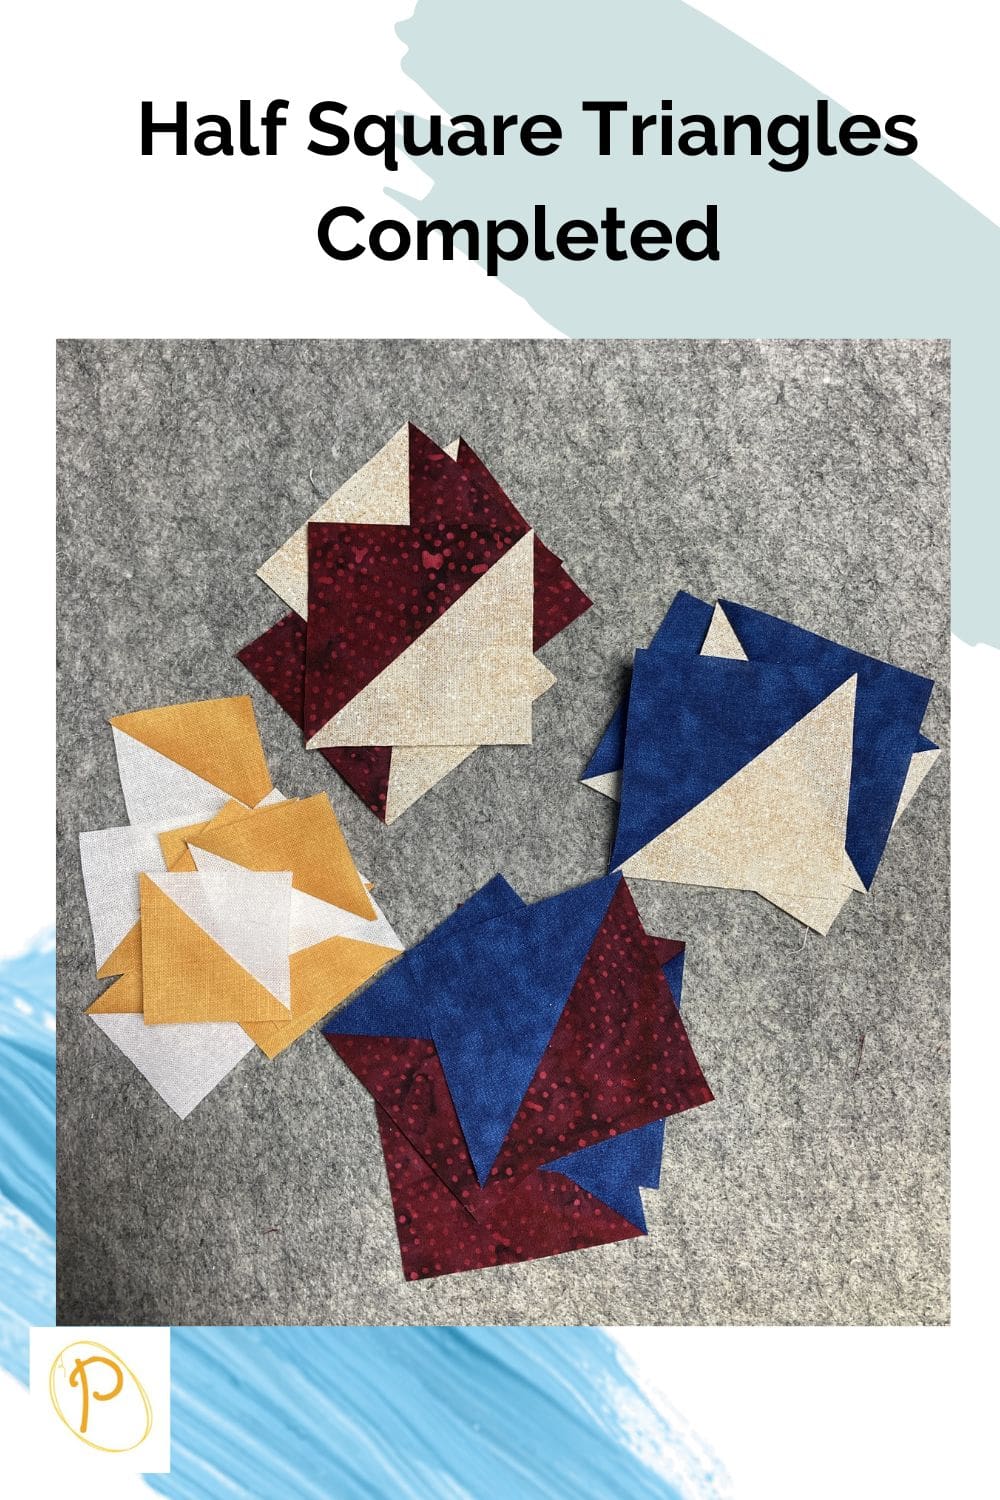
Learn how to make half square triangles in just a few easy steps. They are a favorite of quilters everywhere as they are easy to sew once you have mastered the steps.
Because they are so popular, there are all sorts of half square triangle quilt patterns to choose from that use this design. Half Square Triangles are used to make pinwheel blocks, card trick, maple leaf, trailing star, and broken dishes to name a few.
Play with the arrangement in different ways of these versatile quilt blocks to make new designs. It is amazing how changing the fabric colors and layout can create a whole new look.

Post contains affiliate links, and we earn commissions if you shop through the links on this page. For more information, please read the disclosure section under the About Us page.
What is a Half Square Triangle?
A half square triangle often abbreviated in quilt patterns as HST, are two triangles sewn together to make a square.
Often, they are made using contrasting fabrics, such as a light and dark or patterned fabric and solid fabric, or colors that complement each other.
Additional quilt pattern abbreviations that I have seen for the half square triangle are hst blocks, hst triangles, and hst units.
What Does “Finished Size” of a Block Mean?
In simple terms, it is the term used to describe the size of a quilt block once it has been sewn into a project on all 4 sides with 1/4-inch seam allowance. In other words, the finished square minus the seams.
For instance, if you need a 2-inch finished quilt square, you will need to start with a 2 ½-inch quilt square to begin with. Once it is sewn on all 4 sides with 1/4-inch seam, the final finished size will be 2-inches.
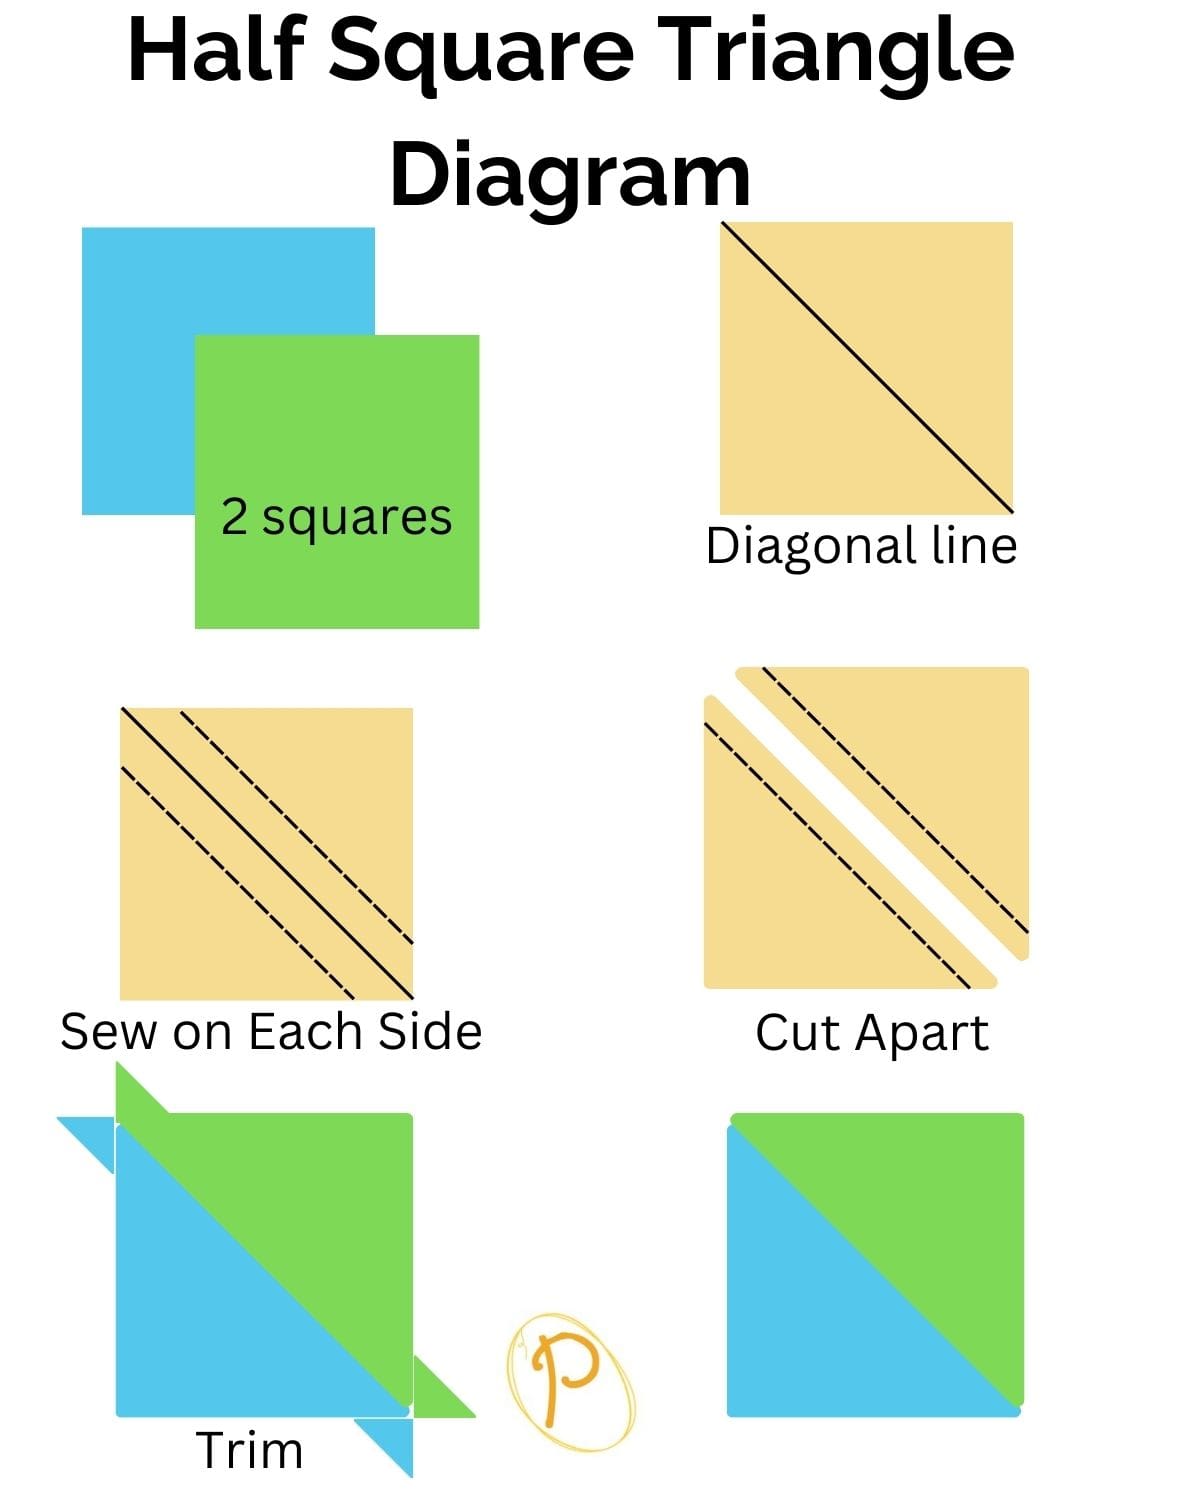
How to Make Half Square Triangles?
There are a few methods that can be used to make half square triangles. Today, we are going to show you the basic method of sewing half square triangles from two squares of fabric. If you are a new quilter, this method is a great way to make them with accuracy for a successful quilt project.
Whether you’re new to quilting or just brushing up on you skills, this Half Square Triangle tutorial is quick and to the point with photographs to guide you along the way.
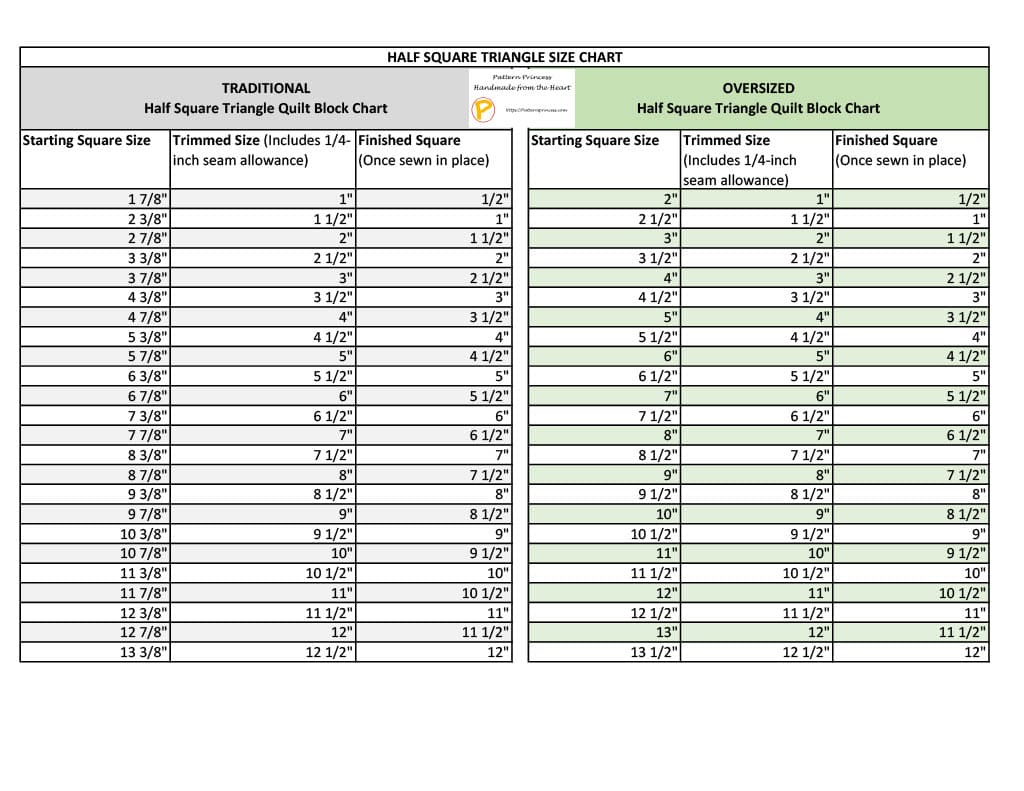
Below the Instructions you will find a Half Square Triangle Size Chart to help you determine your starting square size.
Materials
Fabric
Equipment / Tools
- Pencil
- Scissors
- Quilting Ruler
- Rotary Cutter
- Straight pins
- Iron
- Ironing board with a pad
- Sewing Machine
Instructions
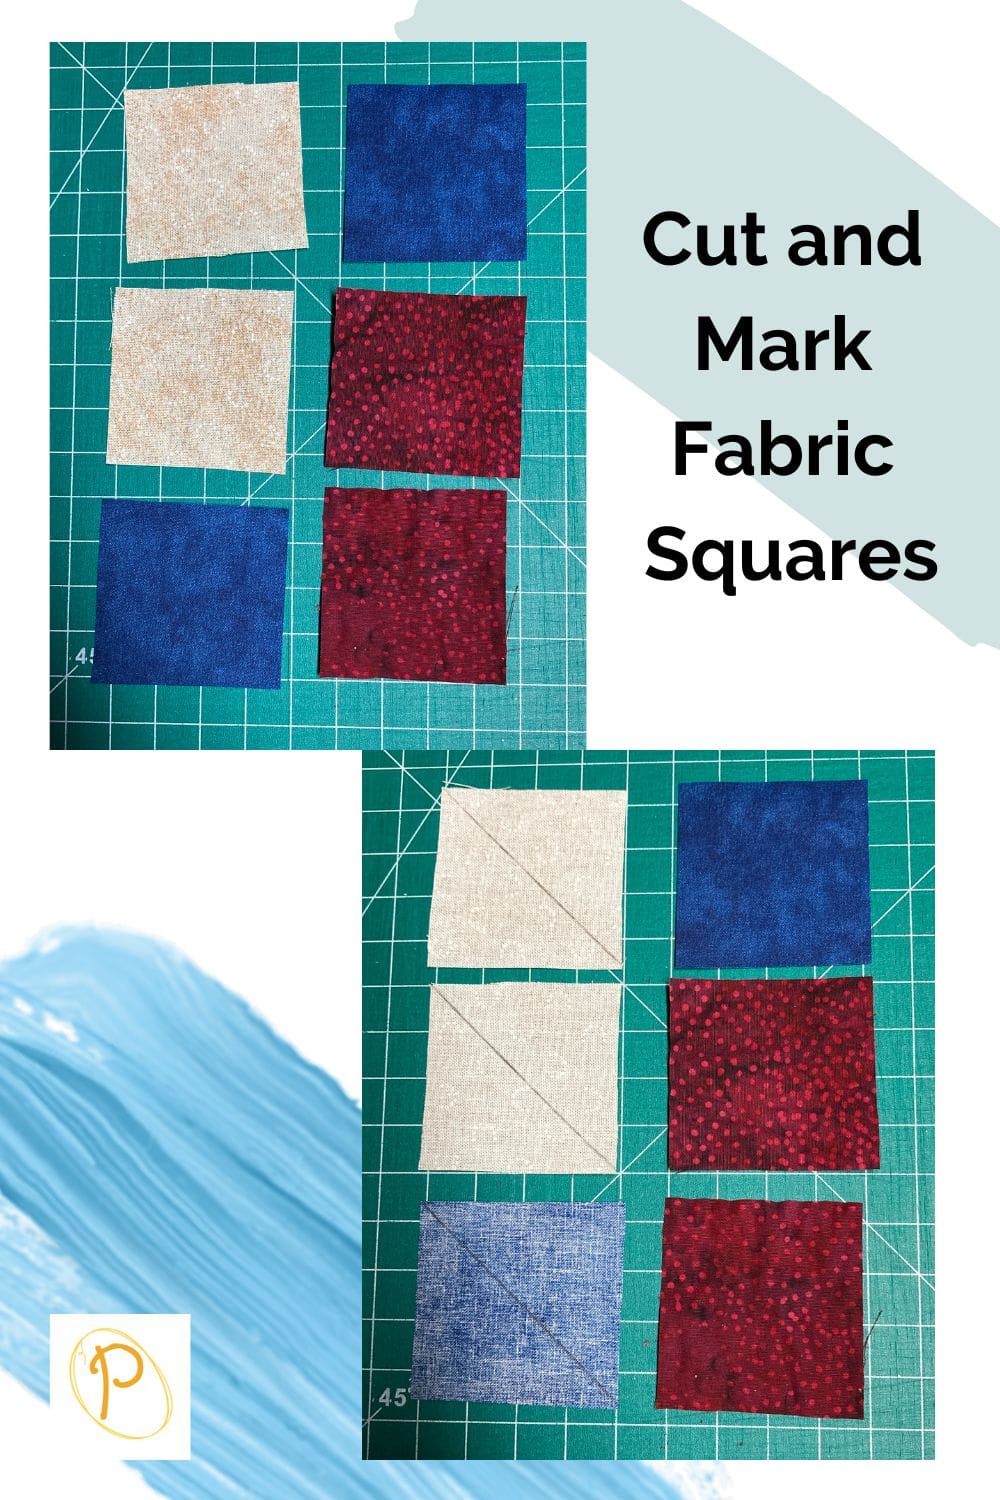
1. Cut fabric Squares
Refer to your quilt pattern for the triangle square size and number of units required.
If you prefer to create your own pattern using the half square triangle, add 7/8-inches to the size of the beginning square.
PRO TIP. Improve accuracy. Make the beginning squares oversized and trim to size after. Therefore, add 1-inch to be the begging square size rather than the 7/8-inches.
Each pair of squares makes two finished triangle square units.
2. Mark Squares
Starting with equal size squares of fabric, place the ruler diagonally on the back side of the lightest square. Use a pencil to draw a diagonal line from one corner to the opposite corner.
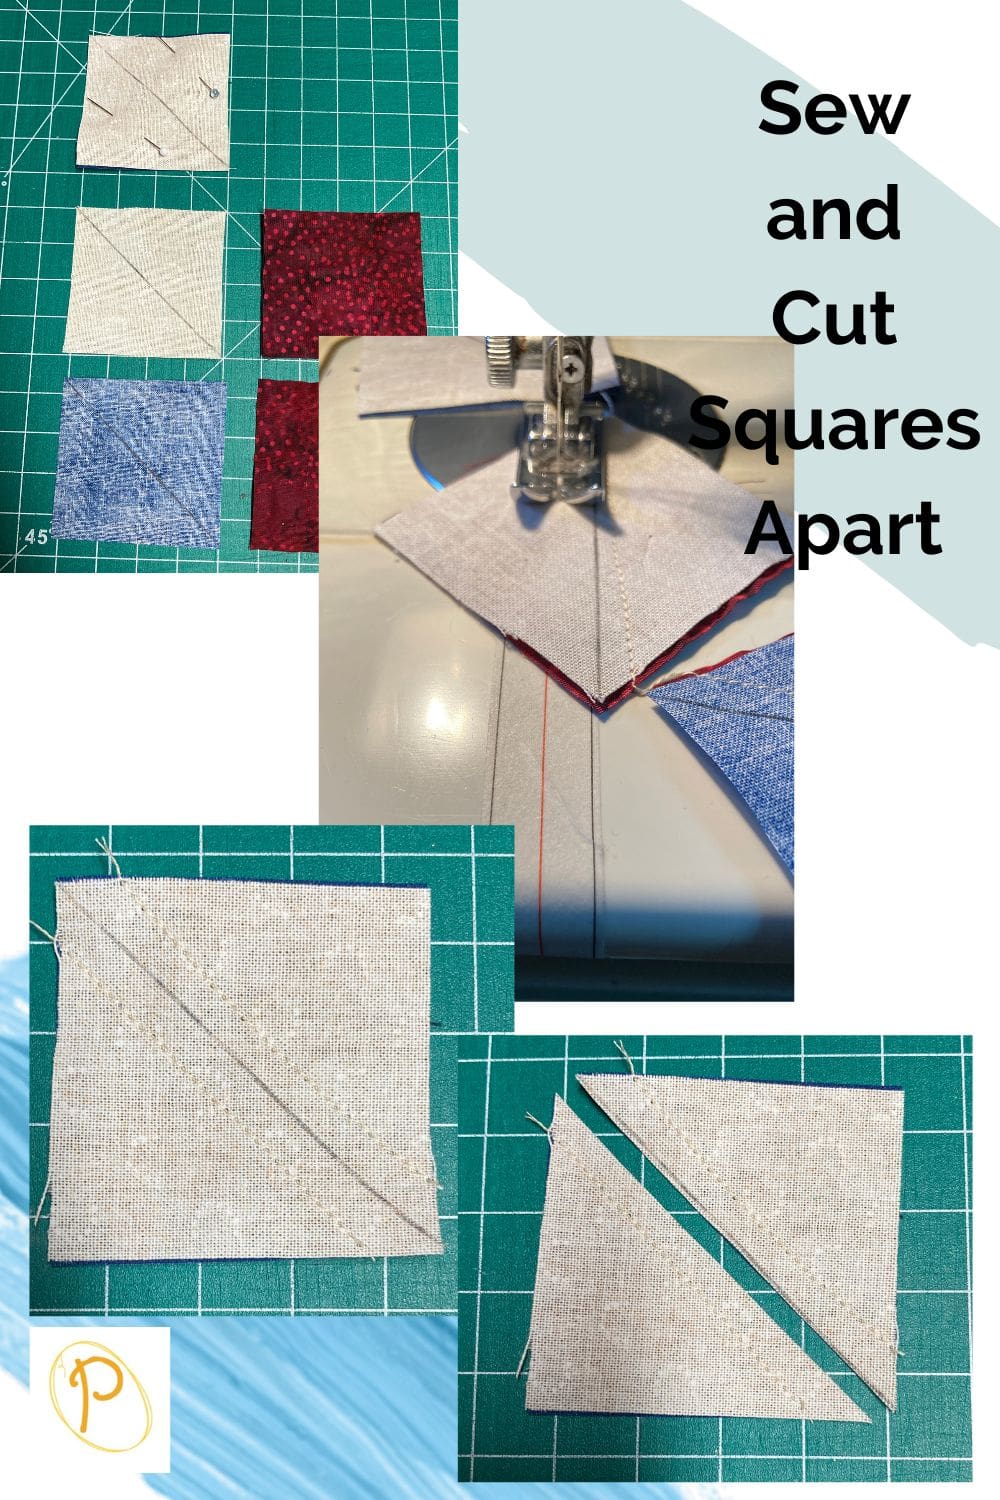
3. Sewing Squares and Cutting Apart the Half Square Triangle Units
Place the lighter square on top of the darker square with the right sides together matching the edges all the way around. Secure with straight pins.
Sew a scant 1/4-inch seam allowances on each side of the marked line.
Separate Triangles. Align a ruler alongside of the marked center line and using a rotary cutter, cut through both layers of the squares along the center line.
4. Pressing the Half Square Triangles
There are two ways you can press your half square units. 1. Press to the dark fabric. 2. Press the seam open. Place the half square triangle units on your ironing board and use the iron to press the fabric using one of the two methods.
How to Press Seams. Use the hottest setting for the fabric you are using without steam. Hold the iron on the fabric, lift and move to another section in 1/2 second presses. Continue pressing, lifting, and moving to another section until the seam is pressed.
PRO TIP. Pressing Seams. Place the fabric you plan on pressing with the seam facing away from you. This way you are always pressing away from your body and there is less of a chance in burning yourself.
5. Trimming the Triangle Squares
If you have started with squares that were 7/8-inch larger than your desired half square triangle, you just have little dog ears on each end of the squares to trim off. Note. If you press the seam to one side the dog ears will be on one side of the square; therefore, you will have just two areas to trim. Pressing the seams open will result in dog ears being on both sides of the square and you will have four areas to trim.
Make sure to use a square ruler and keep the square shape as you trim.
Trimming Oversized Blocks. However, if you have started with squares there are oversized, then trim them back to their exact, unfinished size before assembly. This does take longer, but you will also have more accuracy.
Using your square quilting ruler and rotary cutter trim up the triangle square. On the right side of the fabric, align the ruler so that its diagonal line is lined up exactly with the diagonal line between fabrics. You will also see that the ruler numbers increase from the left to the right.
You will be trimming the square on all 4 sides.
Therefore, when squaring up block to trim the top and right edge make sure that there is fabric hanging out on the bottom and left as you measure.
Your square should measure 2 ½-inches x 2 ½-inches.
Trim away the little bits of fabric along the top and right edges of the block.
Next rotate the triangle square and place the newly trimmed edges to the edge of the square ruler aligning the seam with the diagonal line on the ruler. Now trim the remaining two edges to the correct size of 2 ½-inches x 2 ½-inches.

Would you like to download this HST Size Chart? Use this link for the free PDF download. You will be asked to sign up with your email to the newsletter.
The most important thing to remember is to read the quilting pattern directions carefully.

You can find Victoria crocheting, quilting, and creating recipes. She has cooked in restaurants for over 20 years, including many larger parties. She learned to crochet when she was just 11 years old and has been crocheting ever since; over 50 years now. Over 40 years ago, she loved her first class in sewing and continues to hone her skills in quilting. Many have enjoyed the handmade gifts over the years. In her professional career, she has worked in management in a wide variety of businesses including higher education as a dean of a division. All the while attending college part-time to achieve her doctorate in higher education with an emphasis in e-learning.
How do I print these instructions to make Half Square Triangles & not all the advertising?
Hello Pat,
At the moment, I don’t have a printable PDF. Just the free half square triangle tutorial on the website.
Vicky
I just made my first as well,thank you for helping us beginners.
So happy for you. We all continue to learn each day.
Vicky
I am a very new quilter and.would like to thank you for explaining very clearly how to make the half square triangle. So clear that I understand how to do this and the chart is an absolute godsend. Although I joined a quilt group they often forget just how much of a beginner I am. Again a big thanks.
Hi Christine,
Thanks for taking the time to let me know. We were all Beginners at one time and it is so easy to forget all the little things we didn’t know. I am so happy this helped you. Keep Creating!
Vicky