Last updated on July 4th, 2024 at 11:40 pm
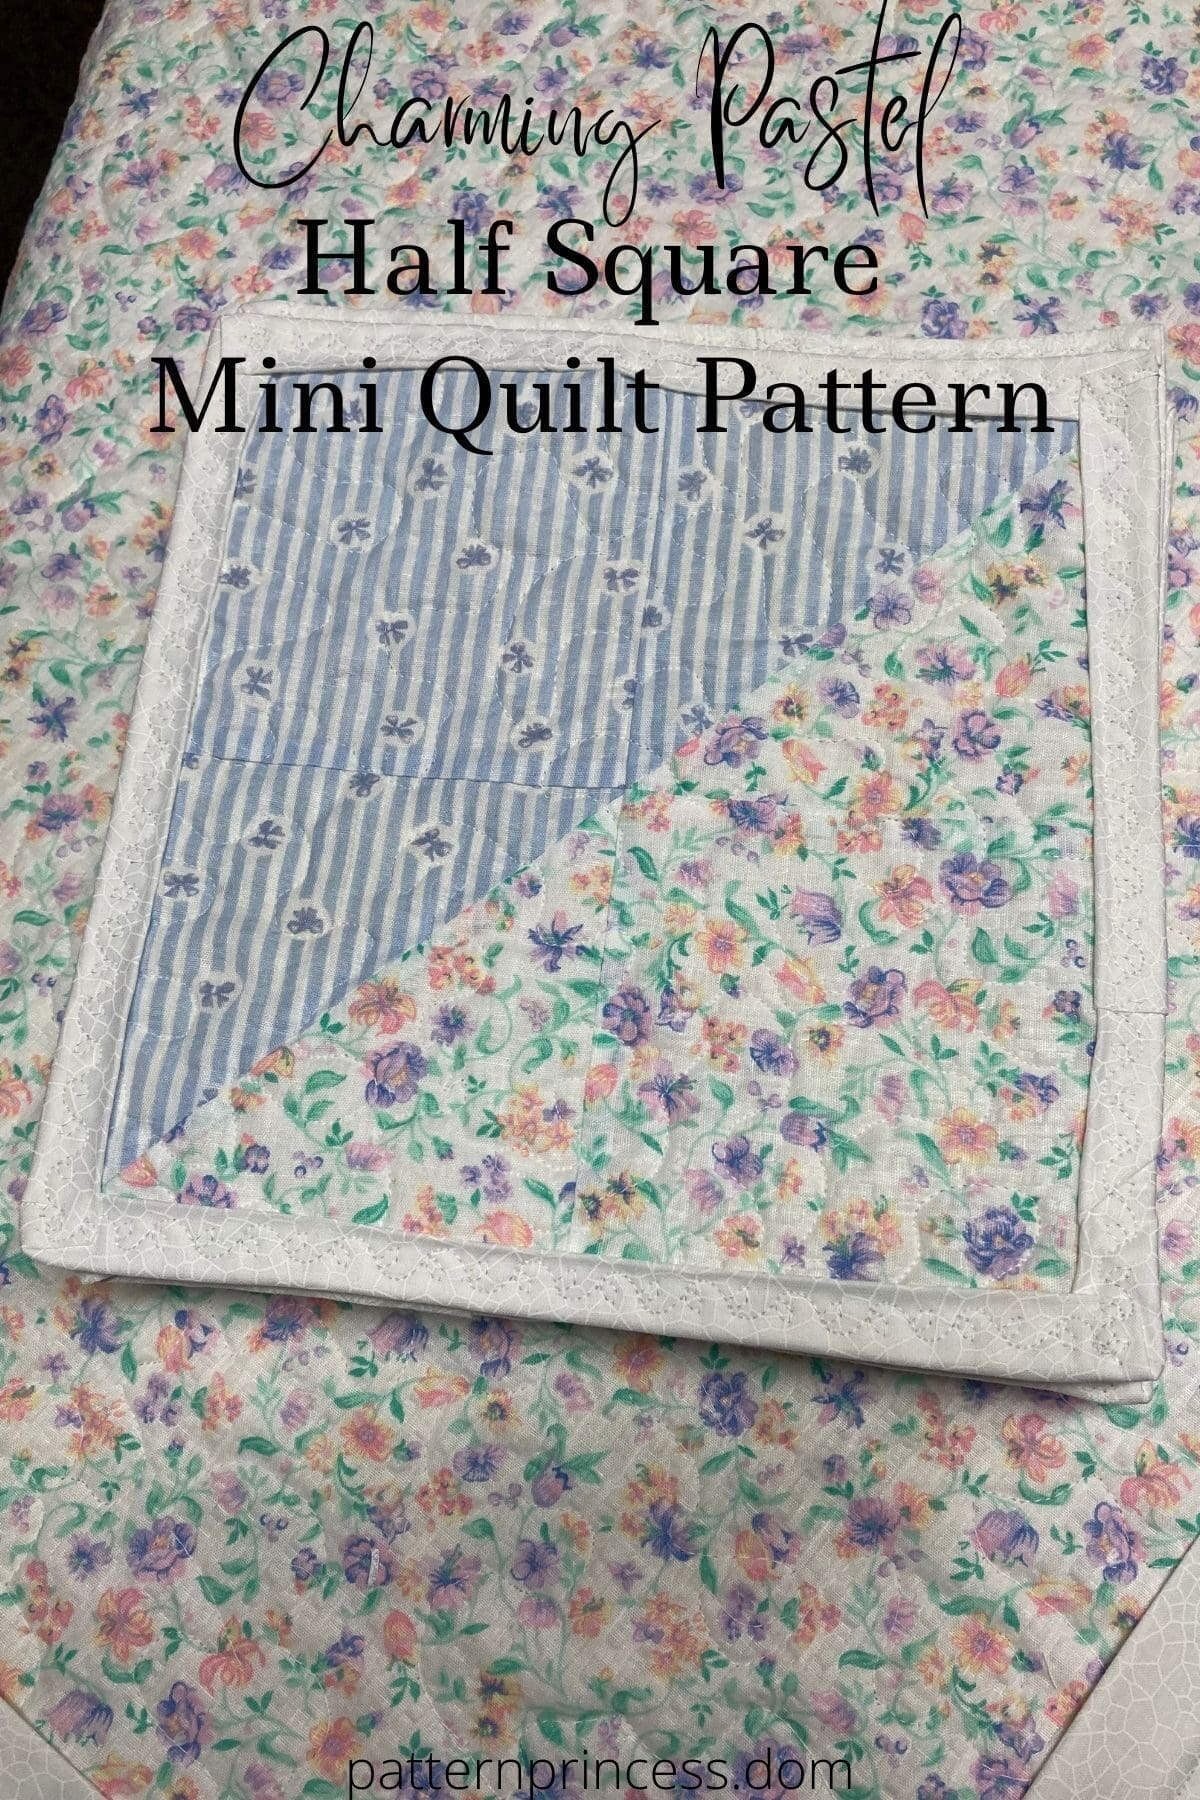
Make this charming pastel half square mini quilt pattern in any colors to match the nursery theme. This quick and easy project can be completed in just a few hours, and it’s sure to be a hit with the new mom-to-be.
Beginner 9-inch Quilt Block Pattern
This beginner 9-inch quilt block pattern is perfect for those just getting started. With minimal piecing and straightforward instructions, you’ll be able to create this pretty block in no time.
Since this mini quilt block just uses squares and half square triangles, it is a perfect choice for a beginner quilter. It’s a really cute block that you can use in all sorts of different projects.
Post contains affiliate links, and we earn commissions if you shop through the links on this page. For more information, please read the disclosure section under the About Us page.
Handmade Baby Shower Decoration
My daughter is the expecting mom, and I am happily starting to make a few items for the baby shower. The mini quilt table topper can be used at the shower and afterwards.
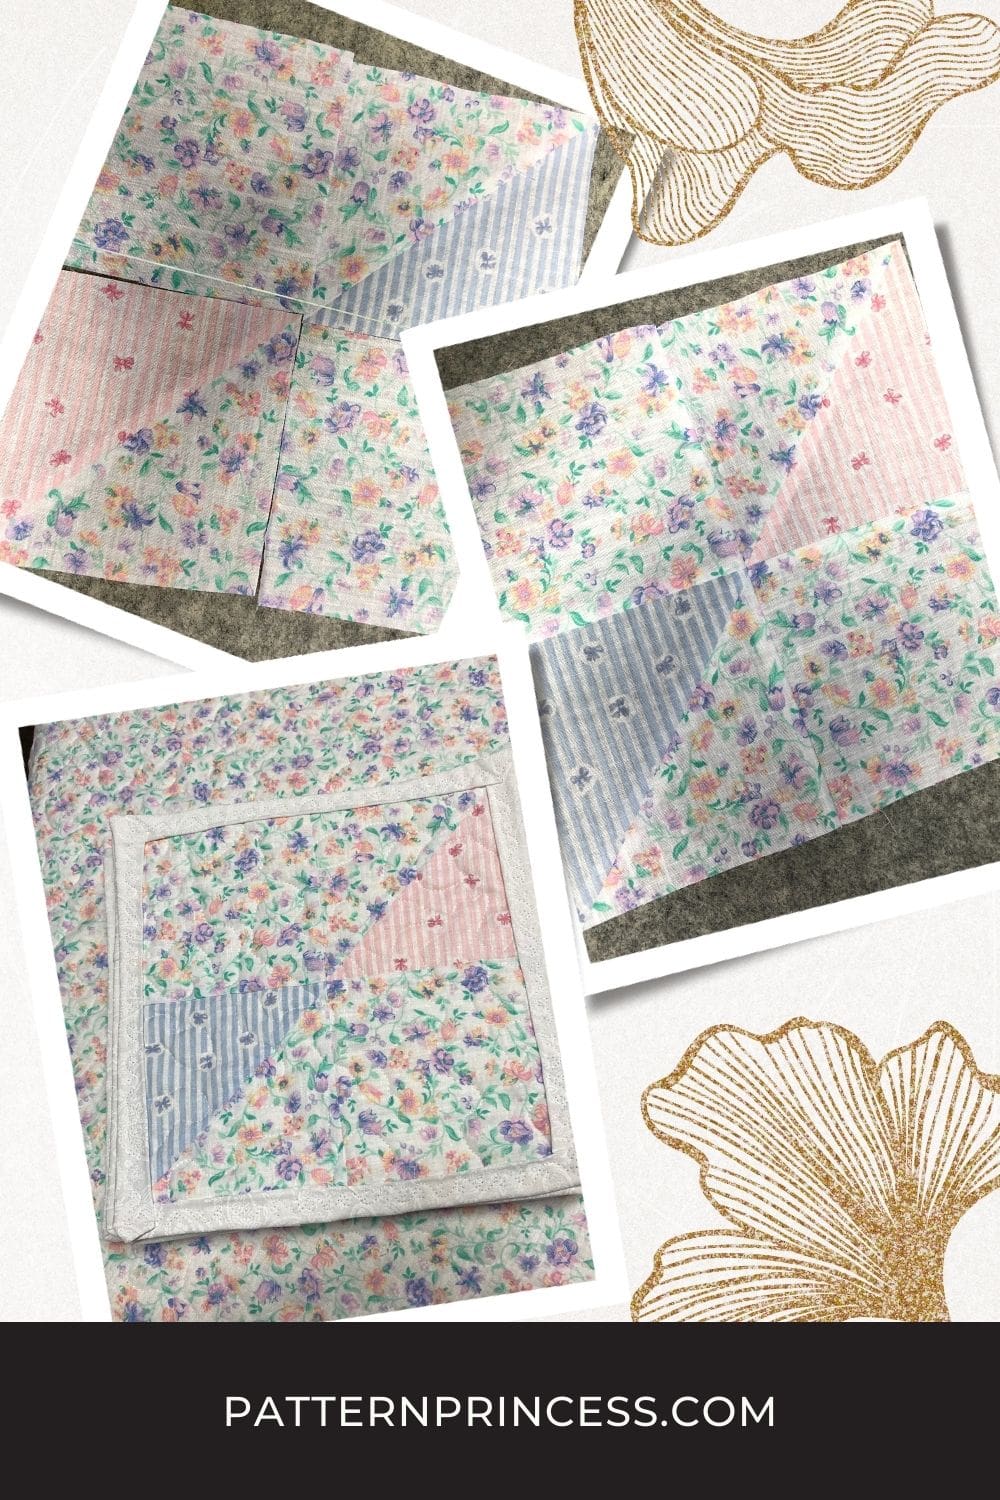
Today, I used pastel fabrics that were gifted to me by my sister. The top side has two fabrics, a blue side, and a flowery side. One half uses blue and white striped fabric with delicate bows. The other side uses a flowery pastel fabric. This flowery fabric is the backing fabric too.
General Sewing Directions
The directions for this Mini Quilted Tablecloth Pattern are for rotary cutting, machine piecing, machine quilting, machine sewing the binding to the quilt top.
Pin pieces before sewing them together to help align seams.
Accurately measure and cut fabric pieces as it will enhance the finished table runner.
All seams are sewn with 1/4″ inch seam allowance.
Seams can be pressed open or you can press seams to one side or the other, I will have those suggestions within the instructions.
The beginning measurements for the half square triangles are a bit larger than the finished block size needed. I like to make them a bit larger because the result is a crisp and clean edge. This helps align all the seams and points better.
If you use a striped fabric like I did, when aligning the stripes for the half square triangles, make sure whatever direction you choose to use for the stripes, you continue that direction for each square. I think it looks a bit nicer.
When the batting is trimmed 1/4″ from the seam, the finished mini quilt measures 9” X 9”.
Supplies Needed
- Fabric
- Thread
- Batting
- Cutting mat
- Quilting ruler
- Rotary cutter
- Clips
- Pins
- Sewing machine
- Iron and Ironing Board
My favorite quilting supplies

Fabric Requirements for 1 9-inch Quilt Block
I suggest using 100% cotton quality fabric. For some of the sizes, you could get a fat quarter and have some fabric leftover for your next quilt project.
However, this is a great pattern for using those leftover fabric pieces. That is what I did.
Quilt Top. I used two fabrics for the top.
Blue colored fabric 1/8 yard. (Today, I used a blue and white striped fabric).
Purple flower fabric 1/4 yard.
Backing fabric . One single piece measuring 12” X 12”. This will allow the batting to extend beyond the edges of the quilt top.
Batting. A piece measuring 12” X 12”, the same size as the quilt back. This will allow the batting to extend beyond the edges of the quilt top.
Binding. A length of fabric measuring 42” long and 2 1/2” wide. I made my own piecing white fabric scraps together.
Let’s Begin the Charming Pastel Half Square Mini Quilt Pattern
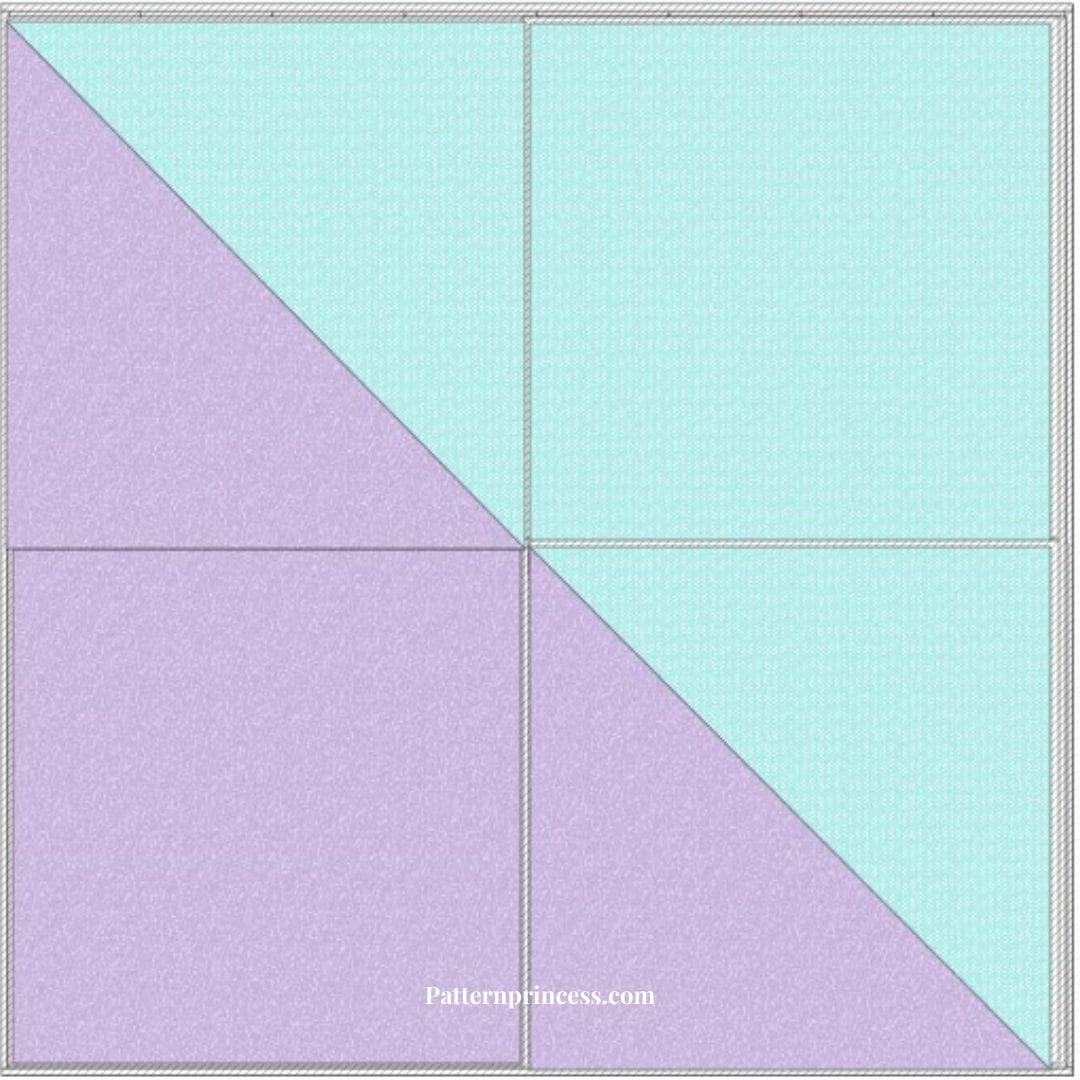
- Blue Stripe Fabric Cut 1 4 1/2” X 4 1/2” square.
- Purple Flower Fabric Cut 1 4 1/2” X 4 1/2” square.
For the half square triangles
- Blue Stripe Fabric Cut 1 5 7/8” X 5 7/8” square.
- Purple Flower Fabric Cut 1 5 7/8” X 5 7/8” square.
Use a fine pencil to draw a diagonal line on the wrong side of the 5 7/8” X 5 7/8” purple flower squares.
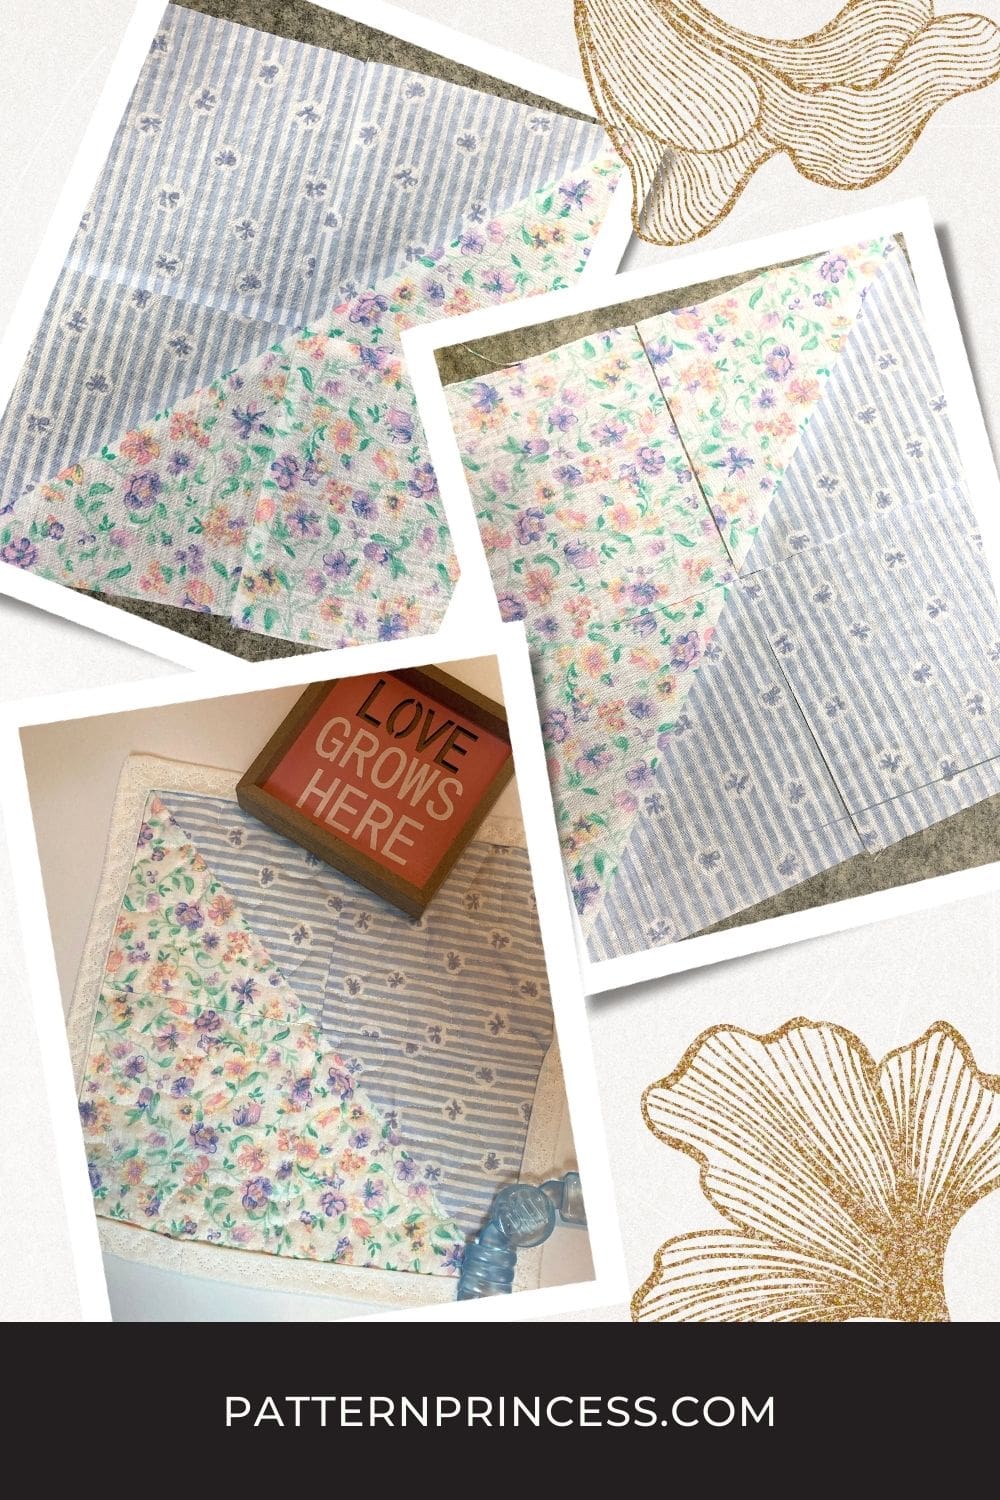
Place a purple flower square on top of a blue square with right sides together and sew 1/4” seam on both sides of the diagonal line. Align a ruler with the pencil line and cut the fabric apart on the drawn line to create two half square triangles.
Press each half square triangle toward the darker side or press the seams open. Trim the half square triangle blocks to measure 4 1/2 X 4 1/2″.
Assembling the Block
Layout the half square triangles in opposite corners. Place the blue square in the corner where the blue side of the half square triangles are pointing. Place the purple flower fabric in the opposite corner where the purple flower side of the half square triangles are pointing. (See the photo to help with placement).
Sew the top two blocks with the right sides together. Press seam to the right. Sew the bottom two blocks with the right sides together. Press seam to the left.
Sew the top and bottom row with the right sides together, making sure to line up the seams. Press the seams open.
Half Square Mini Quilt Pattern with Bow Tie
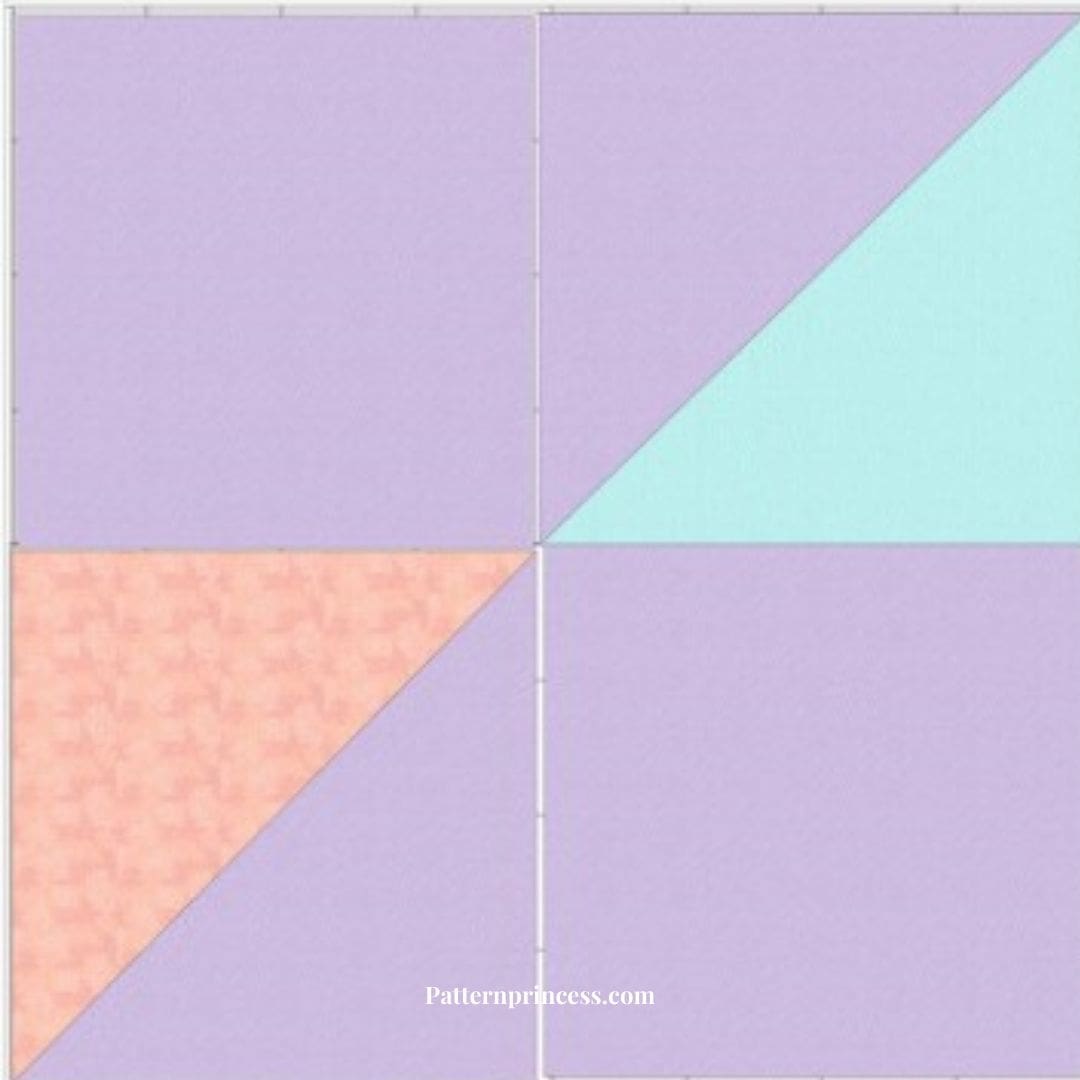
- Purple Flower Fabric Cut 2 4 1/2” X 4 1/2” squares.
For the half square triangles
- Blue Stripe Fabric Cut 1 5 7/8” X 5 7/8” square.
- Pink Stripe Fabric Cut 1 5 7/8” X 5 7/8” square.
- Purple Flower Fabric Cut 1 5 7/8” X 5 7/8” square
Use a fine pencil to draw a diagonal line on the wrong side of the 5 7/8” X 5 7/8” purple flower squares.
Place a purple flower square on top of a blue square with right sides together and sew 1/4” seam on both sides of the diagonal line. Align a ruler with the pencil line and cut the fabric apart on the drawn line to create two half square triangles.
Place a purple flower square on top of a pink square with right sides together and sew 1/4” seam on both sides of the diagonal line. Align a ruler with the pencil line and cut the fabric apart on the drawn line to create two half square triangles
Press each half square triangle toward the darker side or press the seams open. Trim the half square triangle blocks to measure 4 1/2 X 4 1/2″.
Assembling the Block
Layout the half square triangles in opposite corners. Place a 4 1/2” X 4 1/2” square in each corner (see the photo for placement).
Sew the top two blocks with the right sides together. Press seam to the right. Sew the bottom two blocks with the right sides together. Press seam to the left.
Sew the top and bottom row with the right sides together, making sure to line up the seams. Press the seams open.
Finishing the Quilt
Now it is time to add the backing, batting, and binding to the quilt.
For each quilt block, complete the following steps.
Backing. Cut a square 12” X 12” of fabric for the back. This will allow for approximately 3-inches of fabric to extend all around the edges of the table runner top.
Batting. Use a thin cotton batting such as warm and natural. Cut a square 12” X 12” of fabric for the back. This will allow for approximately 3-inches of fabric to extend all around the edges of the table runner top.
Binding. You will need a length of fabric measuring 42” long and 2 1/2” wide. I made my own piecing white fabric scraps together.
Pin the Layers Together
Now it is time to make the quilt sandwich. Lay the backing fabric down first with the right side facing down. Make sure there are no wrinkles.
Next, add the batting layer. Finally, add the mini quilt top layer with the right side facing up.
Center the top fabric in the middle making sure that a few inches extend out beyond the quilt top on all sides.
Once all three layers are in place, make sure to smooth out any wrinkles. Place a few safety pins in to secure or you would use another method such as basting spray to hold it together.
Quilting the Layers Together
While you can sew the layers together by hand, I prefer to use my sewing machine for quilting the layers together. Once you choose your design, set up your sewing machine for quilting by using a darning foot and dropping the feed dogs on the sewing machine. This helps with the free motion quilting.
Once the layers are quilted, it is time to add the binding strip to the quilt.

Sew Binding onto the Quilt
Prepare the binding by folding it in half lengthwise with the wrong sides facing each other. Use the iron to press the seam.
Pin the raw edge of the binding onto raw edge of the back of the mini quilt. I generally start in the middle of a side. Leave approximately a 3” tail hanging. This hanging part will be used to sew to the other end of the binding strip when you have finished sewing all four sides of the binding onto the mini quilt.
Sew the binding onto all four sides of the tablecloth making sure to miter the corners.
Trimming the Batting and Backing Fabric
Trim the batting and backing fabric to 1/4″ from the edge of the quilt top. I use a ruler and rotary cutter to complete this.
Attaching the Binding to the Front
Fold the binding over the edge (this will be the folded side). Use clips to hold it into place. I used a decorative stitch on my sewing machine to sew the binding into place.
Your Charming Pastel Half Square Mini Quilt Pattern is complete.

You can find Victoria crocheting, quilting, and creating recipes. She has cooked in restaurants for over 20 years, including many larger parties. She learned to crochet when she was just 11 years old and has been crocheting ever since; over 50 years now. Over 40 years ago, she loved her first class in sewing and continues to hone her skills in quilting. Many have enjoyed the handmade gifts over the years. In her professional career, she has worked in management in a wide variety of businesses including higher education as a dean of a division. All the while attending college part-time to achieve her doctorate in higher education with an emphasis in e-learning.