Last updated on July 4th, 2024 at 11:41 pm
Learn how to make your own quilt binding. It’s a really easy process, and it’ll save you a lot of money in the long run. In this tutorial, I’ll show you how to make your own quilt binding using just a few simple easy steps.
You can purchase pre-made binding in the store, but it is so simple to make your own and it does not take that long at all. Additionally, you can choose your own fabric to make your quilt pop with just that right finishing touch.
Knowing how to make your own quilt binding tape is a great skill to have.
If you are like me, when I made my first quilt and finished with the final step of sewing on my own quilt binding, I was so happy and pleased with the results. That quilt will always have a special place in my heart.
Post contains affiliate links, and we earn commissions if you shop through the links on this page. For more information, please read the disclosure section under the About Us page.
What is Quilt Binding?
Before we get talking about how to make your own binding, we should cover what is quilt binding. Quilt binding is the fabric strip that wraps around the outer edges of your quilt sandwich. The term quilt sandwich refers to the three layers of the quilt; top, batting & backing sandwiched together.
Cutting Quilt Binding
Before we get to cutting the binding, it is important to know where to measure and cut the fabric.
There are two ways to cut your fabric when you make you binding; on the bias and cross grain which is also referred to as crosswise grain or straight grain. Each have their pros and cons.
Understanding Fabric Grainlines
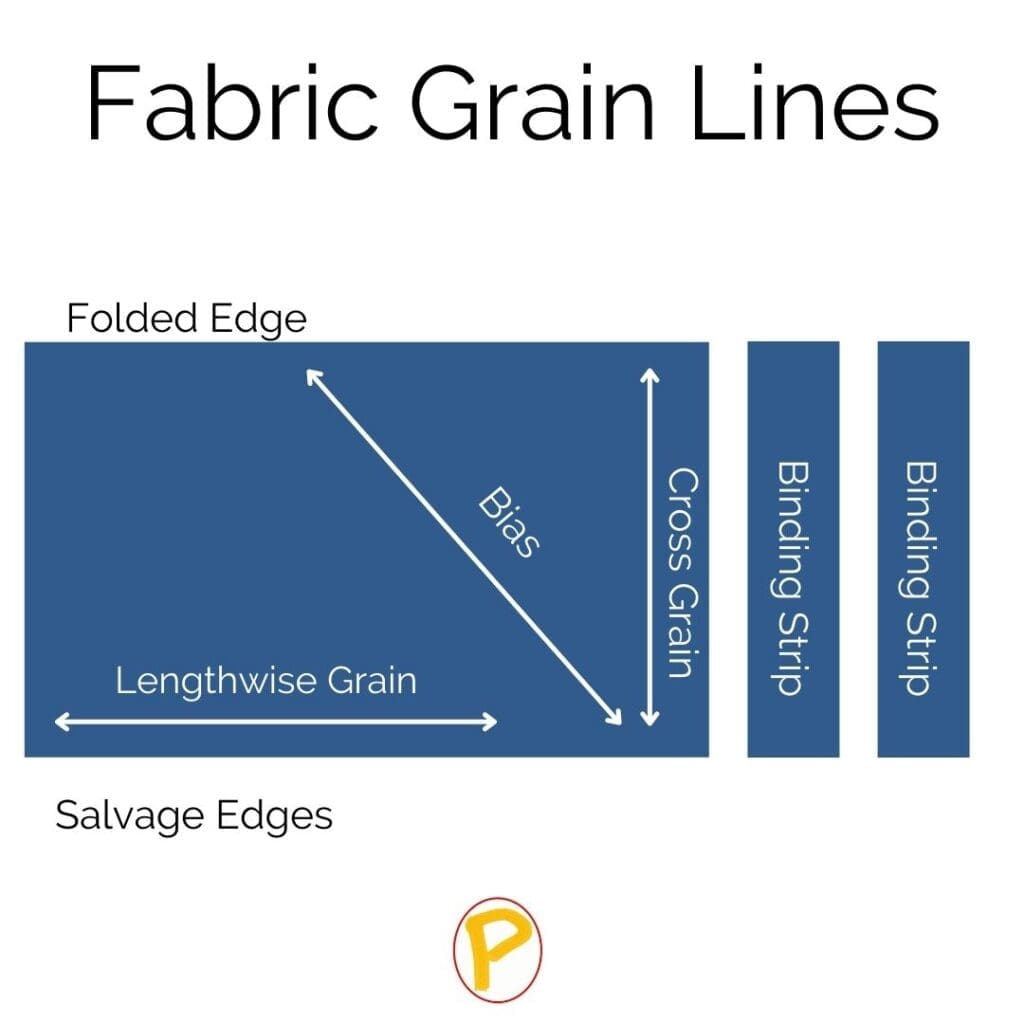
Before we get into the process of cutting the fabric, let’s cover the fabric grainlines. The photo shows a fabric folded and the various grainlines.
Lengthwise grain. This grainline is parallel with the selvedge. Fabric strips cut from the fabric this way will not have much flexibility. Additionally, it is the least efficient way to cut strips from a length of fabric.
Bias cut. The bias cut runs at a 45-degree angle. Since you are not cutting along a grain line, there is more stretch. This is ideal for binding projects that require stretch. If you need to bind projects that have a curved edge, such as a rounded quilt corner, the binding tape will stretch slightly to ease around the curve. However, often quilts have a mitered corner and the stretch is not needed. This does waste more fabric but is great for the right project.
Cross grain. This grainline is perpendicular to the salvage, yet along the grain of the fabric. It has less stretch than bias cut, but when you’re binding straight edges, you don’t need the fabric to stretch much. Most often when quilting patterns call for several strips to be cut to make the binding, they are cutting in this manner because of its ease of use and limited fabric waste.
How wide do you cut strips for quilt binding?
Cut enough fabric strips on the bias or cross grain to cover the top, bottom, both sides and an extra 14-inches for the corners and seams. The most common width of the strip will vary from 2-inches to 2 ½-inches. However, the width can vary depending on how wide you want the binding to be.
How Much Binding to Cut for a Quilt?
To calculate how long to make the binding strip for the size of your quilt, the easiest way is to add up the measurements of the quilt perimeter; top, bottom, and both sides, plus 14-inches.
In mathematical terms: (Quilt length in inches X 2) + (Quilt width in inches X 2) + 14-inches.
The additional 14-inches in length is for the four corners and 2-inches for joining the ends.
Supply List
Cotton Fabric for Quilting
Rotary Cutter or Scissors
Ruler
Cutting Mat
Iron and Ironing Board

Cut the Binding Strips
I like to use a rotary cutter, a ruler, and a cutting mat to cut the fabric strips. Since this is the most common method used to fold the fabric and make the strips, I will detail the cross grain method.
Fold the fabric in half with the wrong sides together and the selvage edges aligned together.
Fold the fabric again and align the folded edge with the selvage edges.
Trim the edge of the fabric so the edge of the fabric is squared with the fold. This will help give you straight strips.
Place the ruler on the fabric measuring your desired width from the folded edge to the selvage edges. Hold the ruler in place and begin cutting the strips.
Make sure to recheck every few strips to make sure that the edge of the fabric is straight. If it has gotten out of square, just square up the edge again before continuing to cut more strips.
Time Saving Tip: You can purchase precut packages of 2 ½-inch strips of fabric. Once you know how to sew them together into a continuous binding, it makes quilting just that much more fun and creative.
Sewing the Quilt Binding Together
Quilt binding strips are generally sewn together with a diagonal seam for the most inconspicuous joining. This is often referred to as the tape, which refers to the continuous length of strips that you sew together to make binding. In simple terms, it is a long piece of fabric.
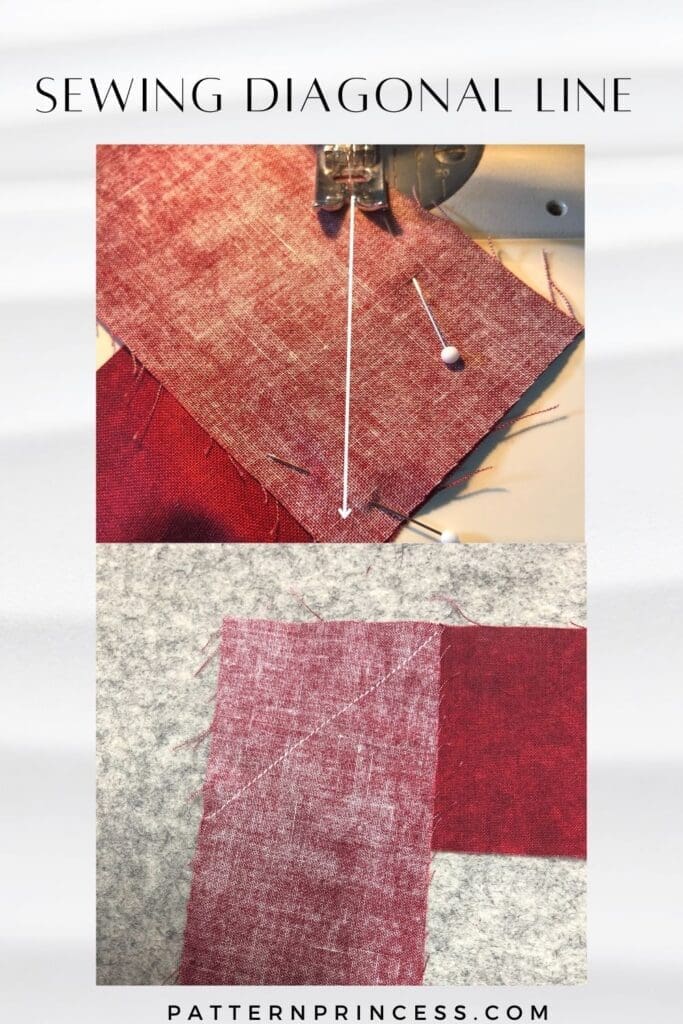
To sew a continuous binding strip, take the strips of fabric that you cut and lay them in an L shape with the right sides together.
Pin the pieces together to hold the fabric in place. Then using a sewing machine, sew a straight line at a diagonal line from one corner to the opposite corner of the overlapping section.
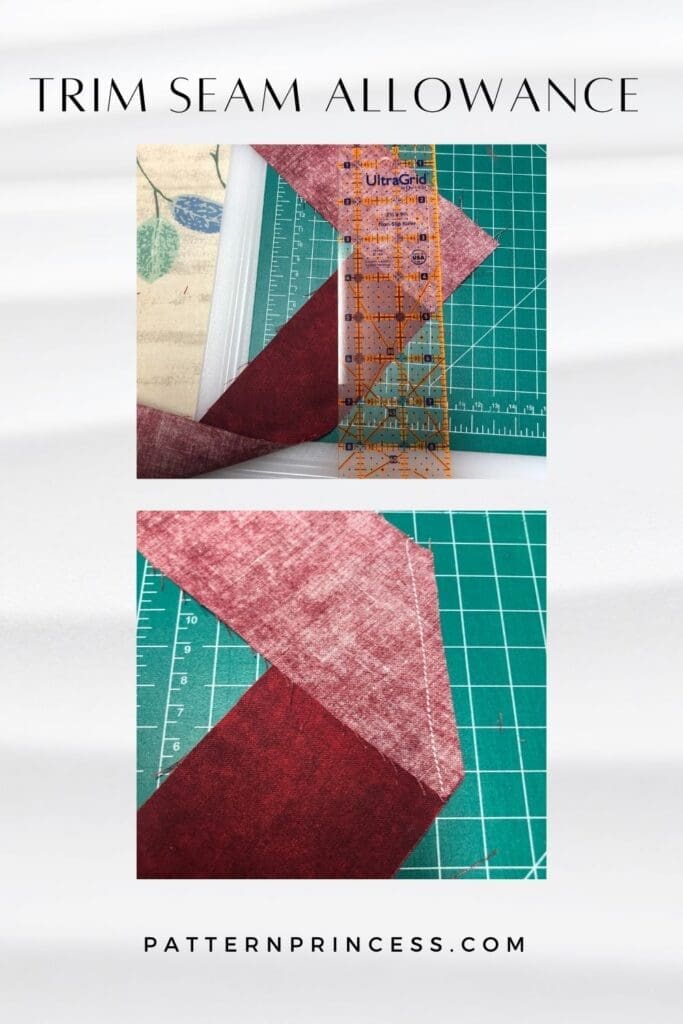
Trim the seam allowance to a quarter inch seam; some people prefer a half inch seam on this. You can use a rotary cutter or a scissors to trim this fabric.
Press the seam open.
Continue joining the fabric strips.
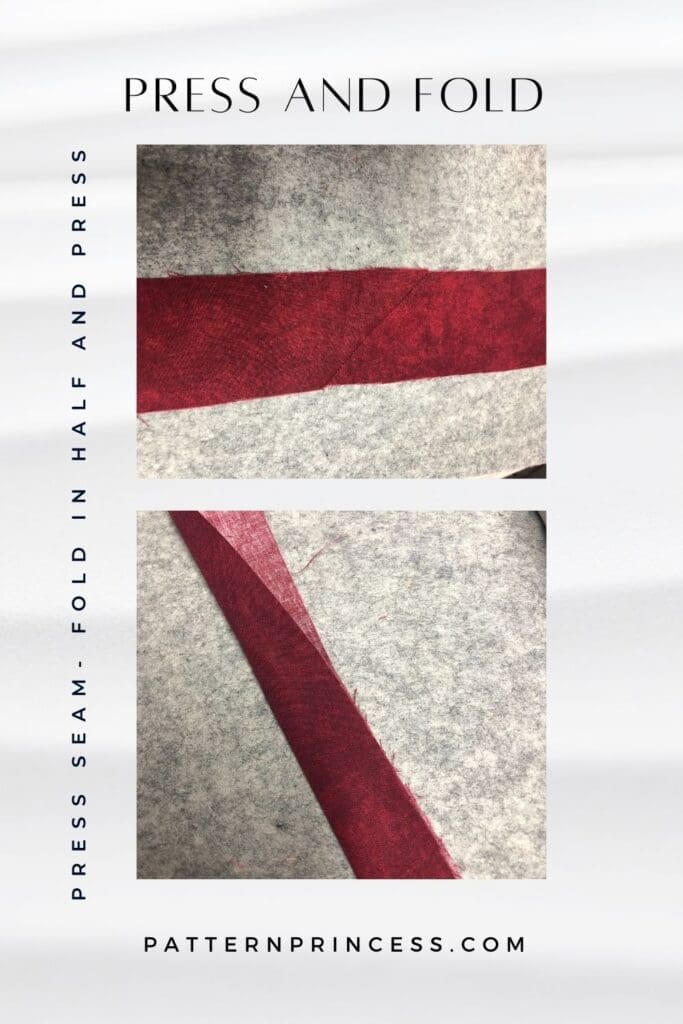
Once your binding strips are all joined, fold them in half with the wrong sides together and the cut raw edges aligned. Use your iron to press the seam. This is also called double-fold binding.
Now you have a long strip of quilt binding fabric ready to sew onto a quilt.
Save your excess fabric as this is a great way to use up those fabric scraps. Sometimes, it is fun to make a scrappy binding out of smaller strips joined together.
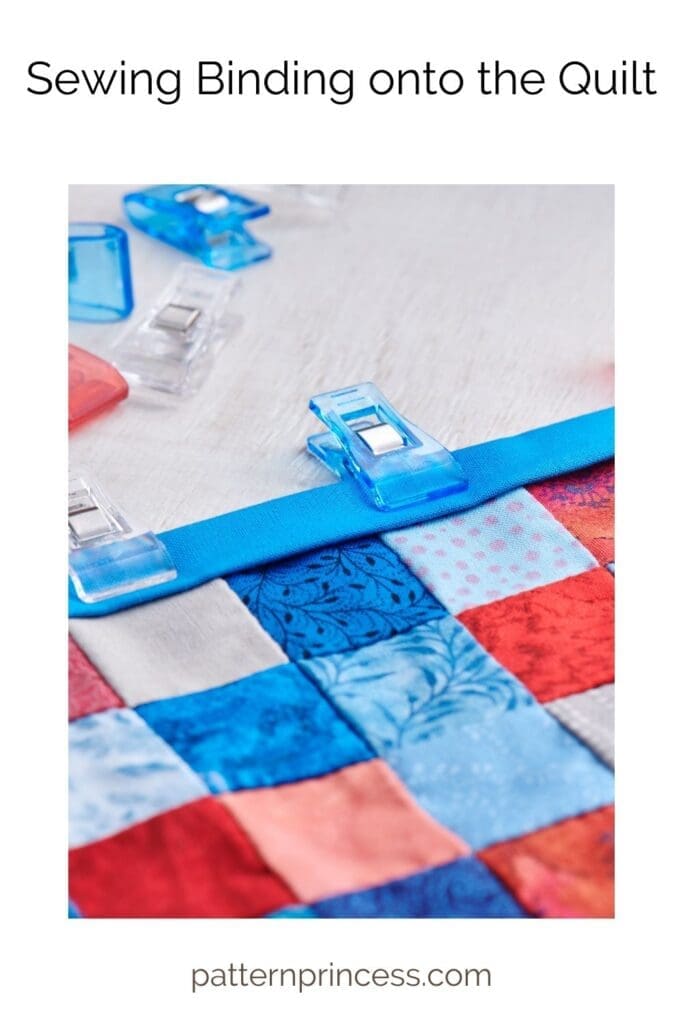
Sewing the Binding onto the Quilt
If you have quite a lot of binding to sew onto a larger quilt, it is easier to handle if you wind the binding strip into a roll. It is not ready to sew on a quilt edge.
If you plan on hand sewing the binding to the back of the quilt, then sew the binding onto the front of the quilt on the raw edge of the quilt.
If you plan on using a sewing machine to add a decorative stitch on the front of the binding, them sew the binding onto the back of the quilt.
A finished quilt with a beautiful binding is so striking.
Video Tutorial on How to Make Your Own Quilt Binding
You can find more help for new quilters here on our quilting basics page.

You can find Victoria crocheting, quilting, and creating recipes. She has cooked in restaurants for over 20 years, including many larger parties. She learned to crochet when she was just 11 years old and has been crocheting ever since; over 50 years now. Over 40 years ago, she loved her first class in sewing and continues to hone her skills in quilting. Many have enjoyed the handmade gifts over the years. In her professional career, she has worked in management in a wide variety of businesses including higher education as a dean of a division. All the while attending college part-time to achieve her doctorate in higher education with an emphasis in e-learning.