Last updated on July 4th, 2024 at 11:42 pm
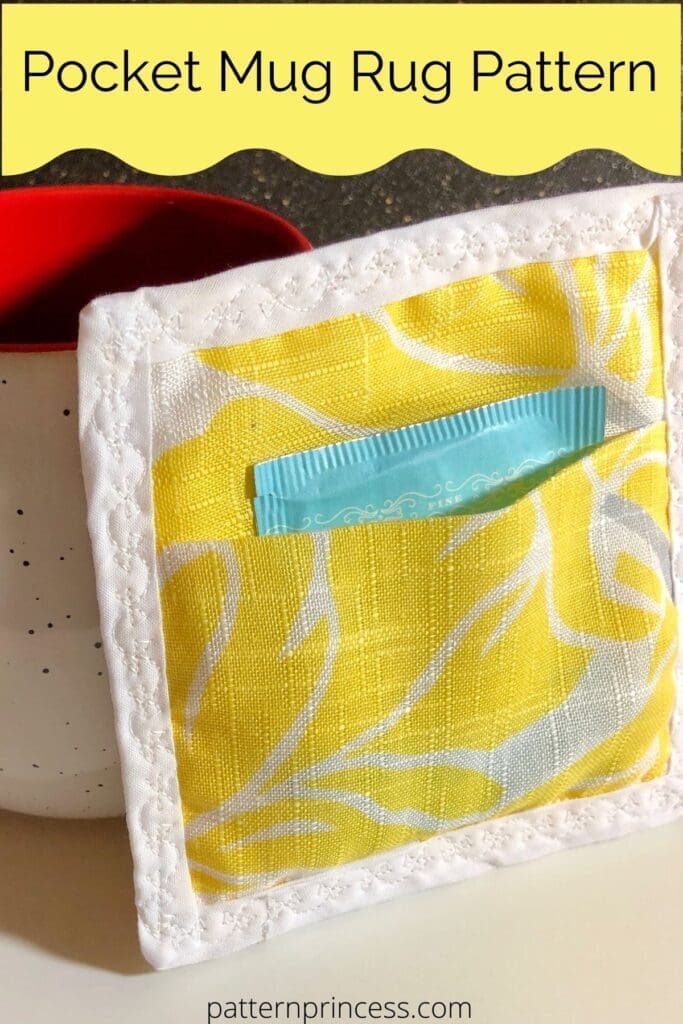
If you’re looking for an easy and fun sewing project, check out this pocket mug rug pattern. This project is perfect for beginner sewers, and it’s a great way to use up fabric scraps. Plus, it makes a handy addition to your kitchen décor.
It’s perfect for keeping your beverages close by while you work on your next project. Plus, it’s really easy to make; even if you’re a beginner sewer.
The finished product is an adorable 4 ½- inch mug rug with a pocket.
Post contains affiliate links, and we earn commissions if you shop through the links on this page. For more information, please read the disclosure section under the About Us page.
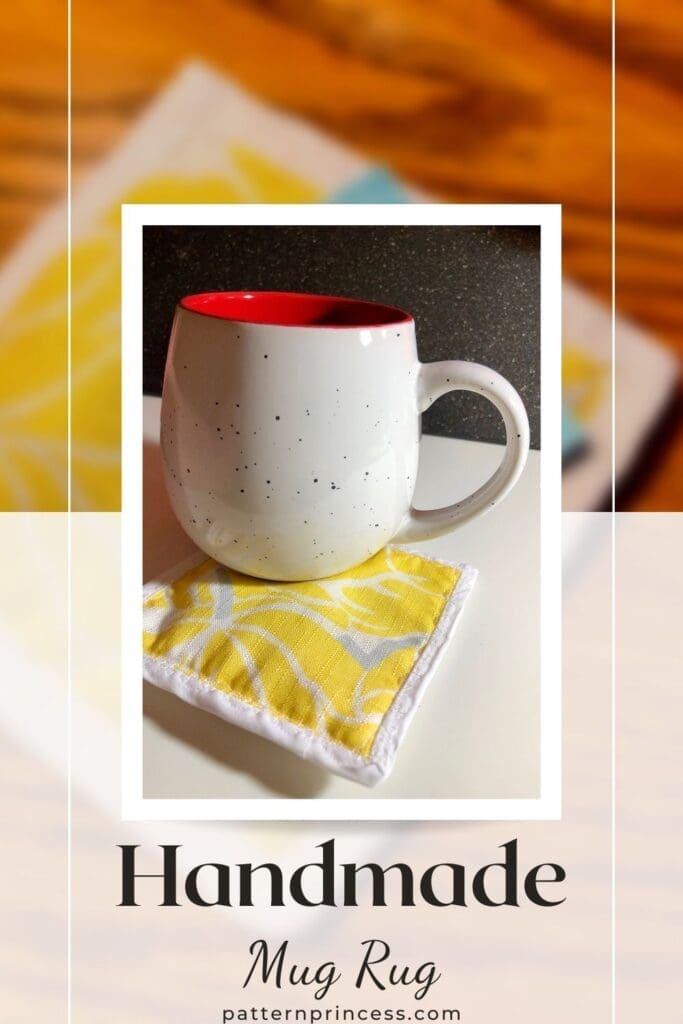
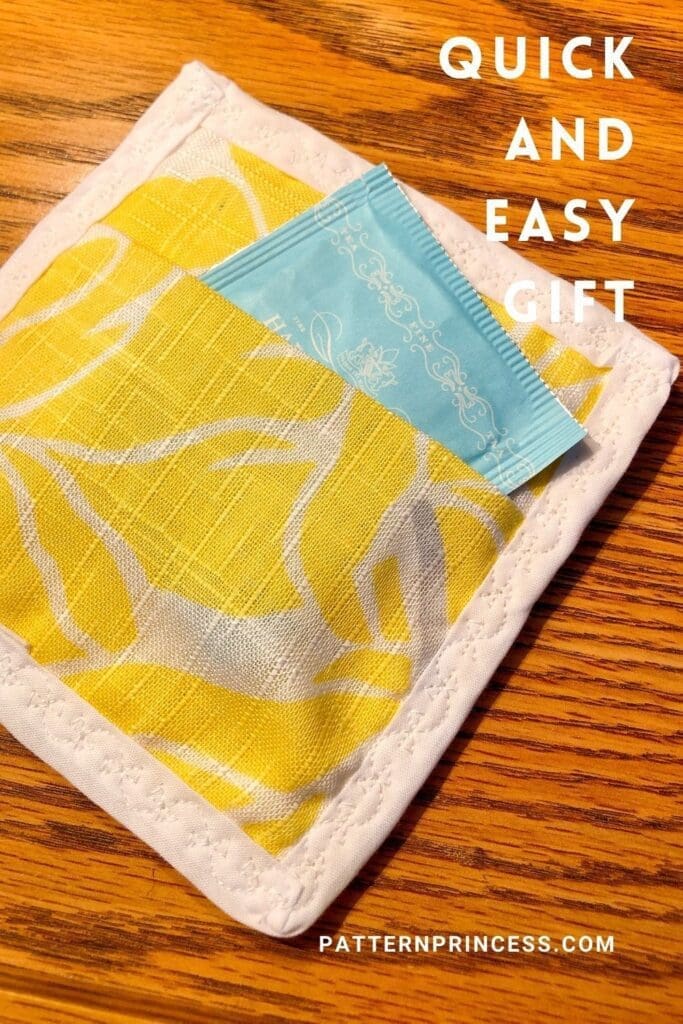
Quick and Easy Handmade Gift
In fact, this is so quick to make, I made mine in less than 30 minutes. We were invited to go out to dinner this evening with some friends. Our friend’s mother is celebrating her birthday today and they will be joining us for dinner tonight. I wanted to give her a small yet thoughtful gift. I made this quick little coaster and will be giving her a few tea bags too. Just a little something to brighten her day.
These make great hostess, teacher, co-worker, and birthday gifts.
A mug rug is a great way to use your scraps. If you are a quilter, odds are, you always have fabric scraps.
Mug Rug with a Pocket
Adding a pocket on one side of the coaster is a great space to slip in a tea bag, gift card, a candy bar, or even a little bag of peanuts. A small present tucked in this mini quilt is a nice alternative to a card or a bag with tissue paper. Remove the gift and you have a perfect little trivet for a cup of tea, coffee, or hot chocolate.
If you have never heard of a mug rug before, you might be wondering…
What is a mug rug?
In general, a mug rug is a coaster that is a bit larger than just a coaster as it is also meant to hold a little snack. Sometimes, it is called a snack mat, mug mat, pocket mug rug, or quilted mug rug. They vary in size from 4 X 7-inches to a bit larger size that is almost as large as a placemat 8 X 12-inches.
What are mug rugs used for?
A mug rug can be used to protect surfaces from damage from liquids. Use it like a coaster to catch any moisture from a cup of hot liquid or a sweating glass filled with ice.
They can be used as a decorative addition to a dressing table, end table, or any surface in the house.
How to Make a Simple Mug Rug?
Materials Needed
Fabric = 3 squares of fabric 4 ½ X 4 ½ – inches
Batting = Cotton batting 4 ½ X 4 ½ – inches
Binding = Half inch bias tape 20-inches long
Finished Size
4 ½ square
Pattern Notes
All seams are sewn with 1/4-inch seam allowance.
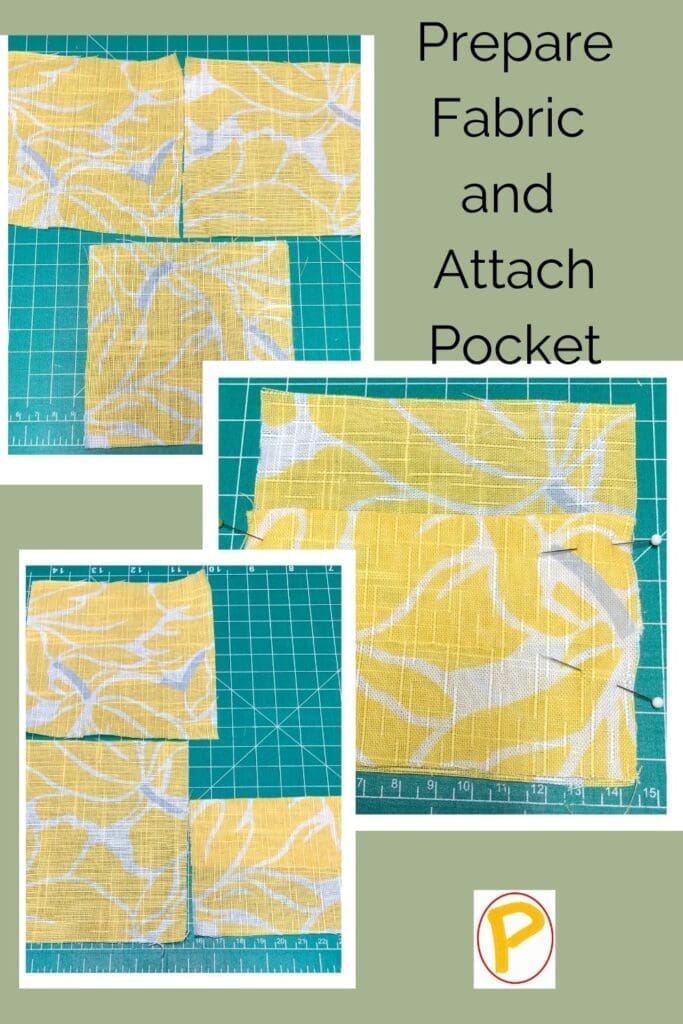
Fabric Preparation – Cut Fabrics and Batting to the Following Sizes
I suggest using a cutting mat, plastic ruler, and a rotary cutter to prepare the following pieces to make this Pocket Mug Rug Pattern.
Cut 3 pieces of fabric 4 ½ X 4 ½ -inches
Cut 1 piece of batting 4 ½ X 4 ½ -inches
Binding
In total, you will need a binding strip that covers all four sides of the 4 ½ inch trivet. However, you will need additional length for connecting and trimming the ends. Therefore, I recommend a length of 20-inches
I used premade bias tape because I had it on hand. However, you can certainly make your own binding and use that.
Mug Rug Assembly
Fold over one of the 4 ½ – inch fabric squares by 1 ½-inches. Wrong sides together. Iron flat.
Place the folded fabric right side up on another 4 1/2 – inch fabric square right side up. Pin in place and sew ¼ – inch seam allowance along both sides and the bottom.
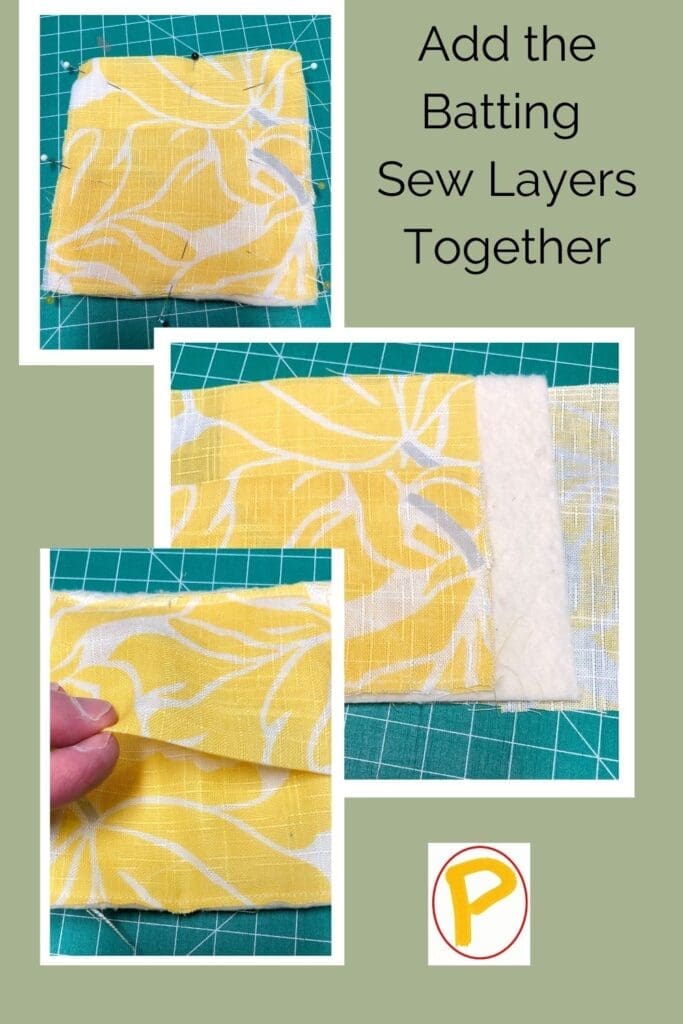
Layering the Fabric with the Batting
Place the remaining fabric square on the bottom with the right side facing down. Add the batting on top of the fabric square. Place the fabric square with the pocket facing up on top of the batting. Pin in place and sew along all four sides.
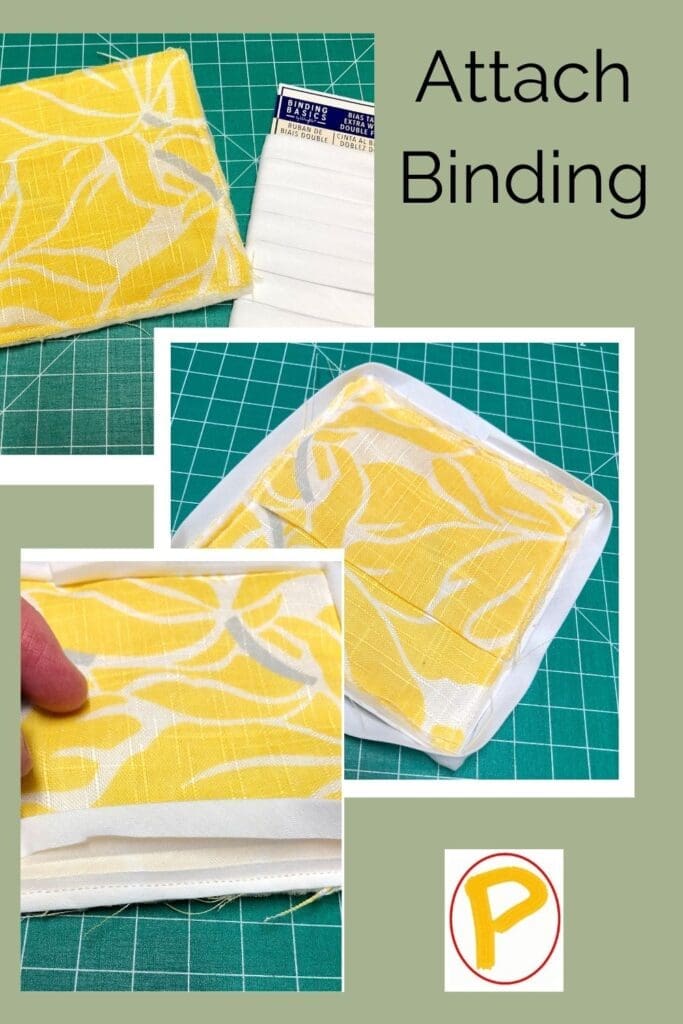
Adding Binding to the Mug Rug
The bias tape is already folded in half and pressed. I aligned the edge of the binding with the edge of the mug rug on the bottom fabric side without the pocket.
I started in the middle of one of the edges leaving about 1-inch of the binding tail hanging. This will be used to sew the ends of the binding strip together once you have completed sewing the binding to all sides of the trivet quilt.
Sew on the binding with a 1/4-inch seam allowance.
Making the Folded Mitered Corner
At each corner here is a great way to miter the corner. Stop 1/4-inch from the corner. Use a ruler and pencil to make the location on the binding. Once you reach the 1/4-inch mark, turn your square and just sew a few stitches right off the corner. Trim your thread – Not the binding strip though.
Folding the Mitered Corner
Fold the binding strip away from the direction you were just sewing at a 45° angle. Then fold the binding strip back down upon itself and match it to the edge of the square that you just sewed making sure that aligns with the raw edge of the next side that you will be sewing.
Begin stitching at the edge using the same 1/4-inch seam allowance. Repeat this process for the next 3 corners.
Connect the Ends of the Binding
The goal in joining the binding ends is to have a nice-looking binding strip to finish the mug rug and connecting the ends can be a bit tricky.
Since this is such a small project, it is hard to leave a 3-4-inch tail on the starting and ending pieces of the binding. Therefore, I just used a scant 1-inch to help me with joining the binding.
Stop stitching about 1-inch from where you started making sure not to trim the binding yet.
I trimmed the binding an extra inch past the beginning binding. Turn the beginning binding edge under. Place the ending binding under the beginning binding edge that has been turned under and continue sewing the 1/4-inch seam allowance.
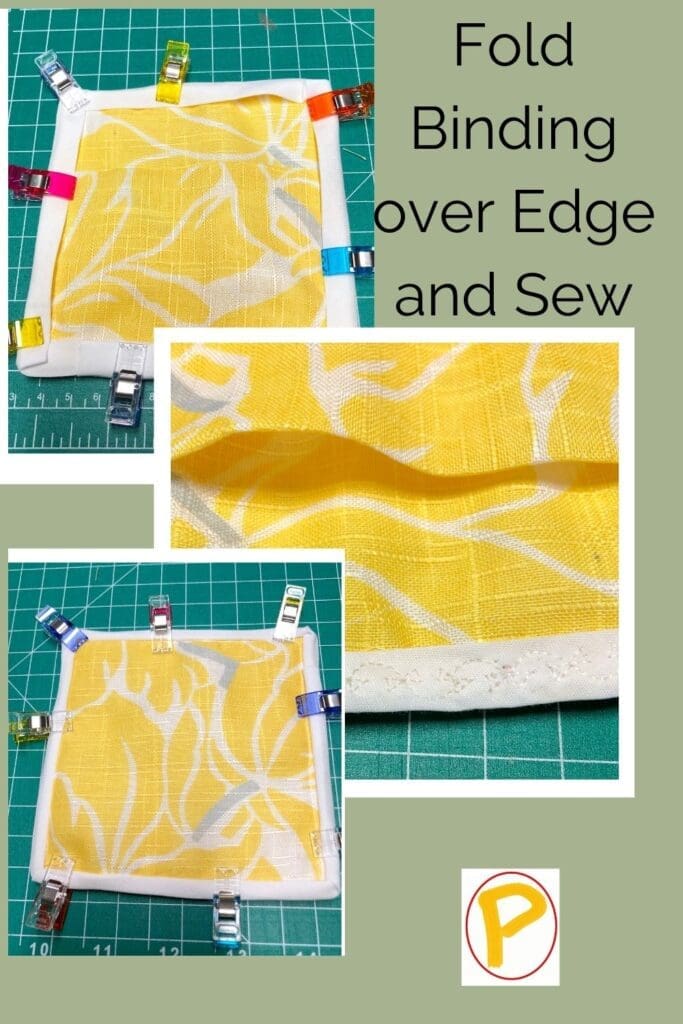
Top Stitching the Binding
Since I joined the binding to the back, the binding is folded over the edge and aligned with the 1/4-inch seam allowance on the front. I used small clips (I used Clover Wonder Clips) to hold the binding in place.
The corners will just about automatically miter for you. Use a decorative stitch to machine sew the binding edge.
Enjoy using your Pocket Mug Rug or giving it as a gift.

You can find Victoria crocheting, quilting, and creating recipes. She has cooked in restaurants for over 20 years, including many larger parties. She learned to crochet when she was just 11 years old and has been crocheting ever since; over 50 years now. Over 40 years ago, she loved her first class in sewing and continues to hone her skills in quilting. Many have enjoyed the handmade gifts over the years. In her professional career, she has worked in management in a wide variety of businesses including higher education as a dean of a division. All the while attending college part-time to achieve her doctorate in higher education with an emphasis in e-learning.