Last updated on July 5th, 2024 at 12:22 am
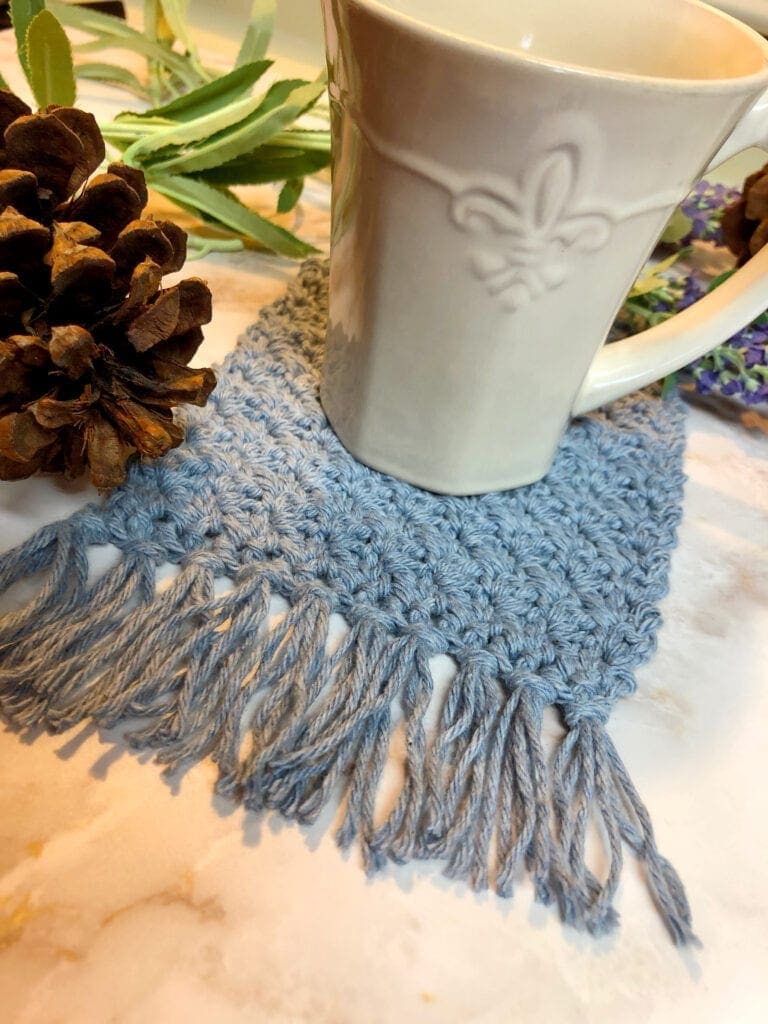
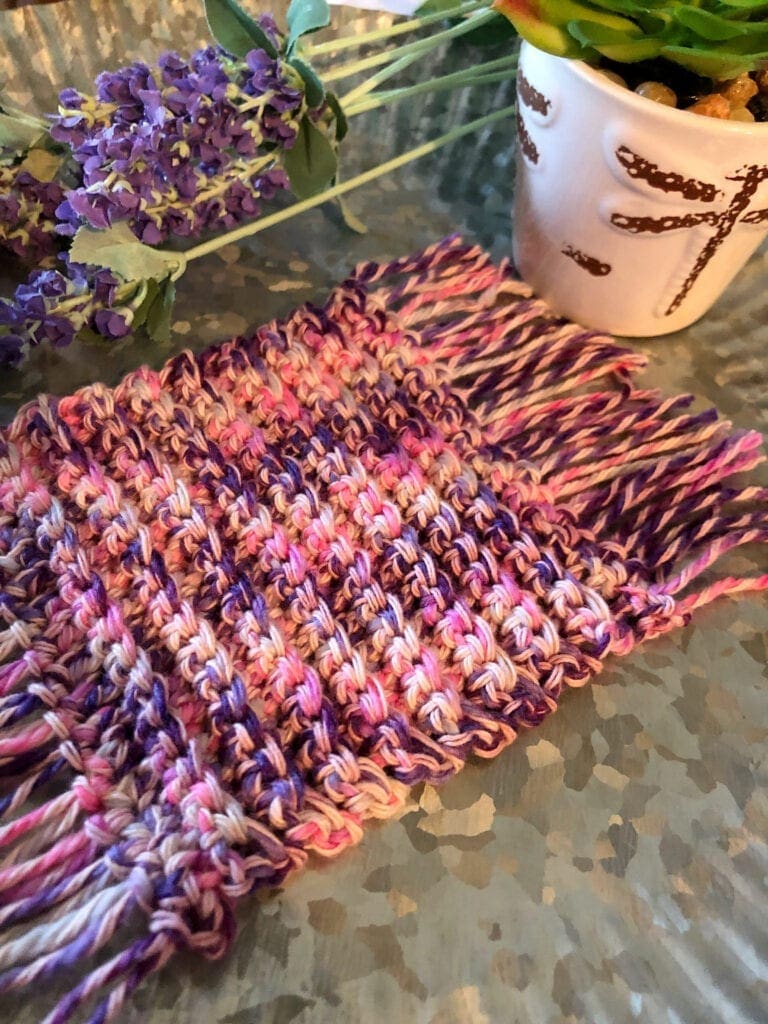
This textured mug rug coaster is a cute way to keep things clean. Whether you are using this for coffee, tea, or a cold drink that can sweat on your best furniture; these coasters are a lovely way to protect your furniture.
Post contains affiliate links and we earn commissions if you shop through the links on this page. For more information please read the disclaimer on the About Us page.
Boho Style Crochet Coaster
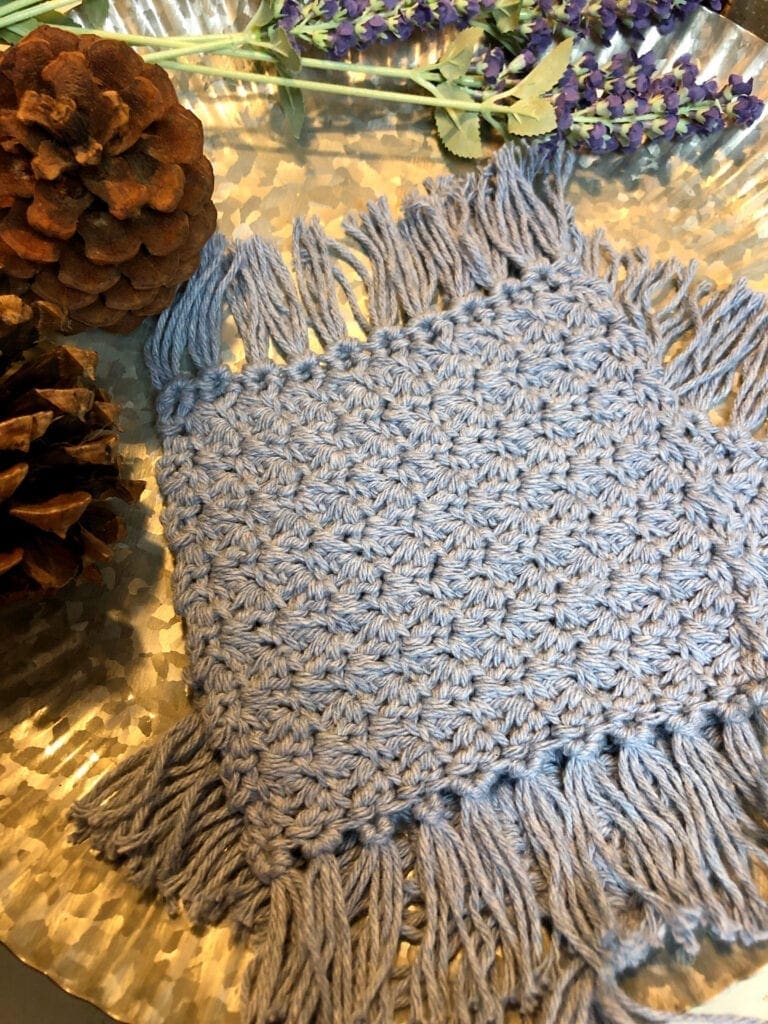
The square design and textured crochet pattern paired with the fringe make for a fun project. Make an entire set of four in an afternoon. These work up so quickly.
What is Boho Style?
Generally, “boho” is a slang term for the the dress style of hippies and vintage fashion. Often the element of fringe is included in the look. However, the modern boho chic appearance, which became popular in the 1950s, ’60s, and ’70s, has a bit more of a classic and vintage look to the pieces.
Quick and Easy Crochet Pattern
If you are a beginner or have been crocheting a while, this pattern works up very quick and is easy too. Actually, it takes me longer to add the fringe than it does to crochet the coaster portion.
Perfect gifts for family and friends. Additionally, they are a great pattern for craft fairs.
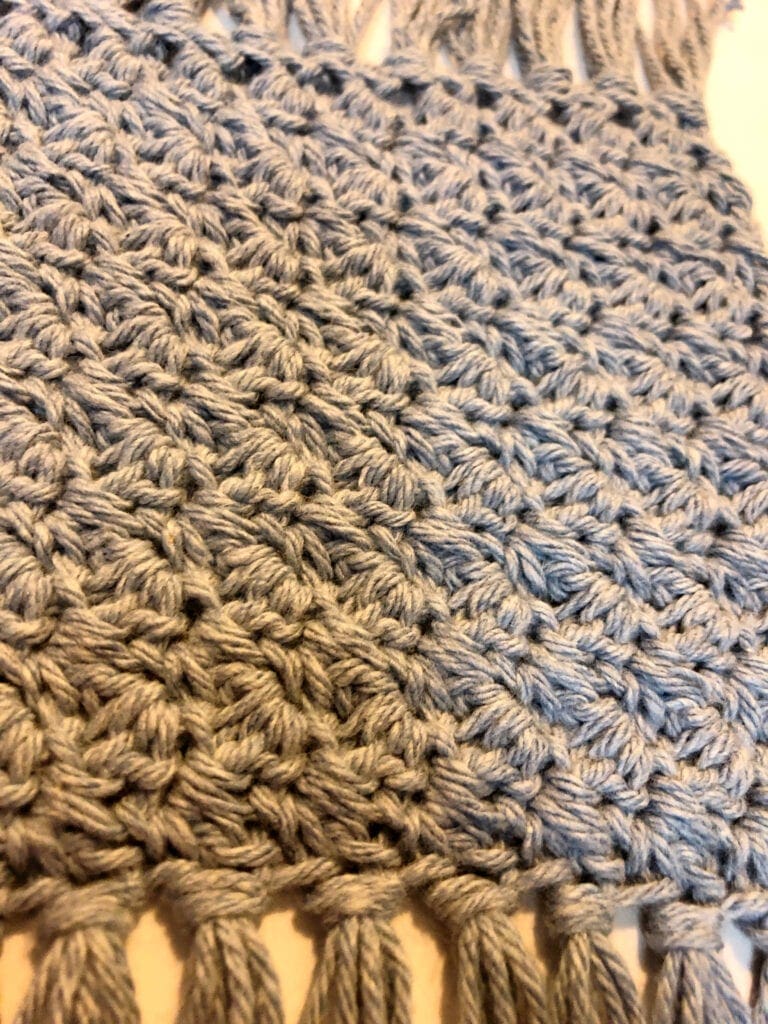
SC and DC Same Stitch
This lovely texture in this pattern comes from the SC and DC stitches. Making something small like this is a great way to learn something new and practice. The stitch is lovely for so many patterns; blankets, shawls, cowls, washcloths, or even hand towels. Enjoy creating once you learn this easy stitch.
The stitch is a combination of two of the most basic crochet stitches: the single crochet and double crochet. The texture is created by alternating the stitches across each row; single and double, single and double, and so on.
Mug Rug Style
If you like the style of a mug rug, here are a few others that I have made. I hope you find a few that you would like to make. Sometimes, these smaller projects are just perfect for breaking up that large crochet blanket you are working on.
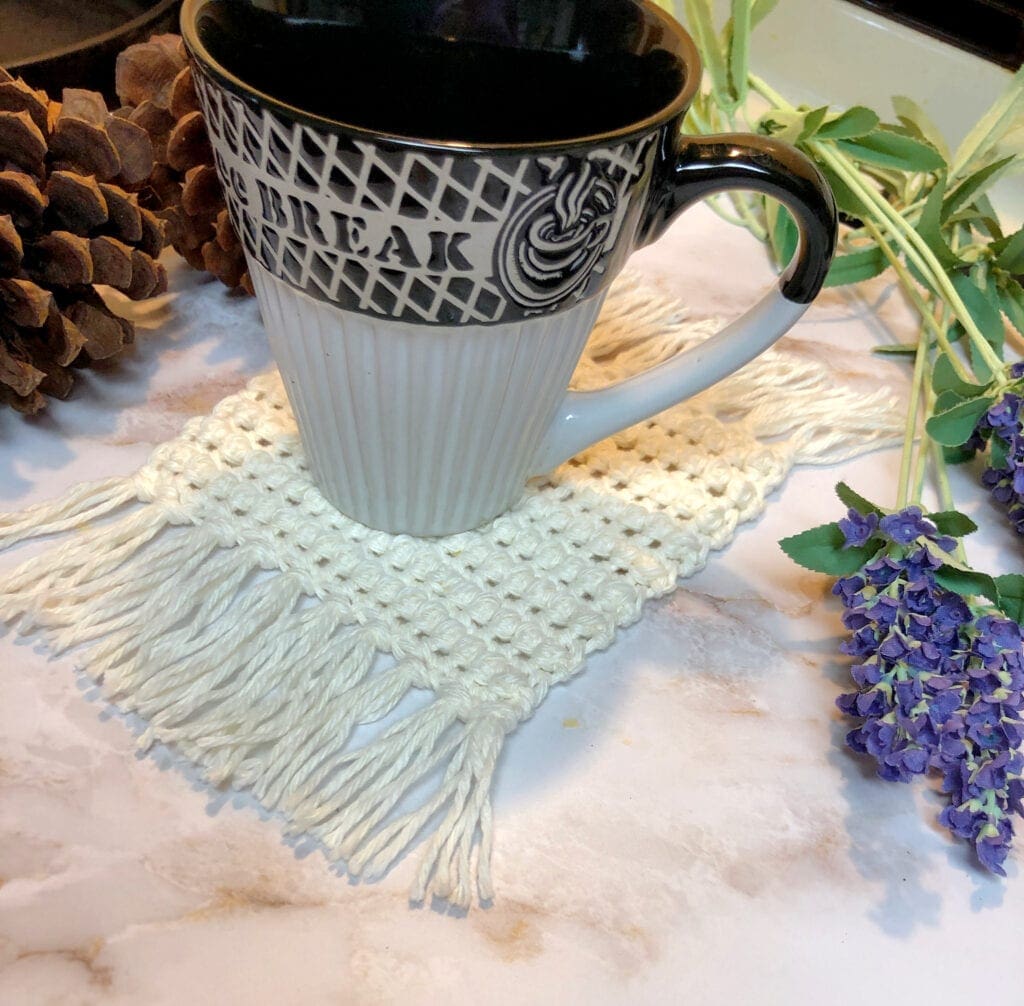
Puff Stitch Boho Coaster
This puff stitch boho coaster is a lovely crochet pattern that is just perfect for any time of the year. Pair the texture with fringe and you have a quick project with fabulous results.
Ribbed Crochet Mug Rug Coaster
This ribbed crochet mug rug coaster is so fun to make. Use up your yarn scraps and create these pretty little squares. Stylish home decor.
They are all quick and simple to make. A wonderful way to use up your yarn stash. I like to use cotton yarn for these because it soaks up the condensation the best. It washes up well too.

Directions: Textured Mug Rug Coaster Crochet
Gauge
Gauge is not super critical for this crochet pattern. However, there are approximately 13 stitches per 4 inches.
Size
The size of this square coaster is approximately 5 1/2 inches X 5 1/2 inches without the fringe. With the addition of the fringe, add 2 inches to the length on both sides. I trimmed my fringe to 2 inches.
Materials
Blue Jeans Lily Sugar ‘N Cream Cotton yarn. Each coaster uses approximately 100 yards including the fringe. If you are not able to find this yarn locally, it is available here.
Size H Crochet Hook
Yarn Needle
Scissors
Abbreviations
CH = Chain
DC = Double Crochet
SC = Single Crochet
SK = Skip
ST = Stitch
STs = Stitches
Pattern Notes:
I used the Chainless Foundation Single Crochet for this crochet pattern If you are not familiar with this technique, I have provided the links to that video below the pattern.
This pattern can be started with the usual chain stitch. If you prefer to use this method yet, you certainly can. Rather than starting with 18 stitches, begin with 20 and work the first stitches in the 4th chain from the hook.
While, I have made this using the chain stitch, I used the back bump. This way, there is less stretching and pulling when the fringe is added. It keeps the beginning row snug. if you are a new crocheter, I have photos below showing where the back bump is.
Directions
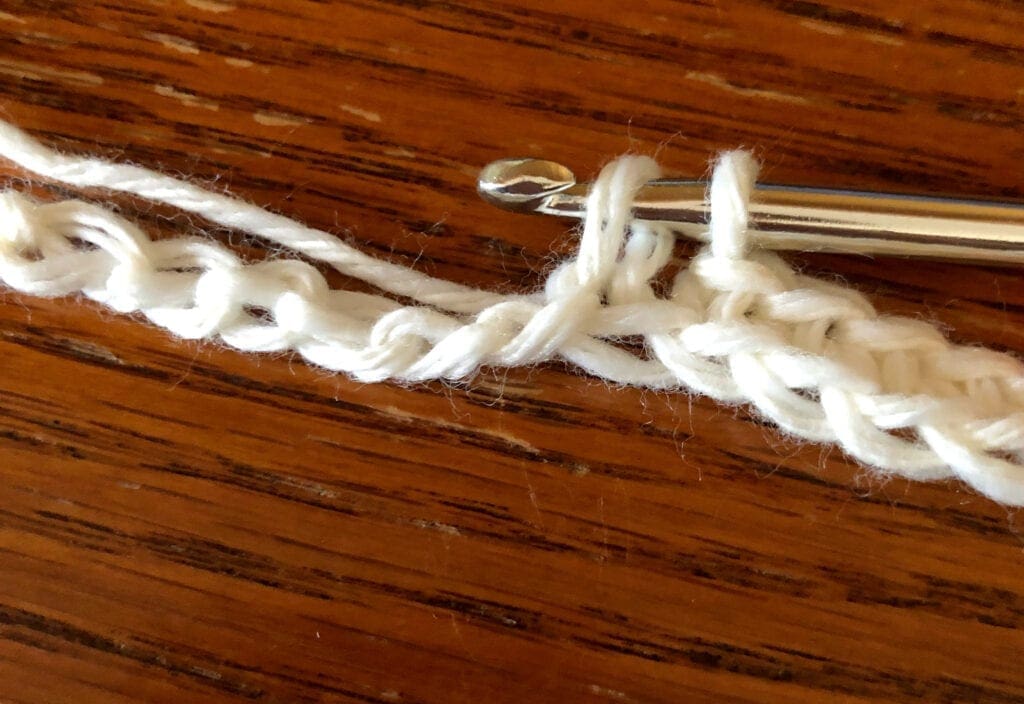
Begin
18 Chainless Foundation Single Crochet Stitches
Row 1
CH 2, SC and DC into the second ST from the hook. [SK 1, SC and DC into the next ST]. Repeat across between [ ]. End with SC and DC in the last ST. Turn
Row 2
CH 2, in the first SC from the row before, complete a SC and DC. [SK 1, SC and DC in the next ST]. Repeat across between the [ ]. End with a SC and DC in the last SC ST. Turn (In essence, each SC and DC is worked in the previous row SC ST).
Rows 3 – 14
Repeat row 2
Finishing
Weave in yarn ends and cut off excess yarn.
Adding Fringe to the Mug Rug
To create the fringe, cut 6-inch pieces of yarn. You will need 3 pieces of yarn for each fringe. Add one fringe on each corner stitch and every other stitch between.
Once the fringe is added, I trimmed it to approximately 2 inches.
To attach the fringe, use your hook to push through the foundation chain two loops.
Fold the yarn in half and loop the middle onto the hook and pull through. Bring the strands of yarn through the loop and pull snug.
If you already understand how to complete the Single Crochet and Double Crochet Stitches and just want to learn about the chainless foundation single crochet, those videos are here.
Right Hand: Chainless Foundation Single Crochet – also sometimes called the no chain single crochet.
Left Hand: Chainless Foundation Single Crochet – tutorial for the beginning row.
Crocheting into the back bump of the chain stitches
If working in the back bump of the chain stitch is new to you, here are a few photos to help you.
In the photo below, the needle is pointing at the back bump of the chain stitch.
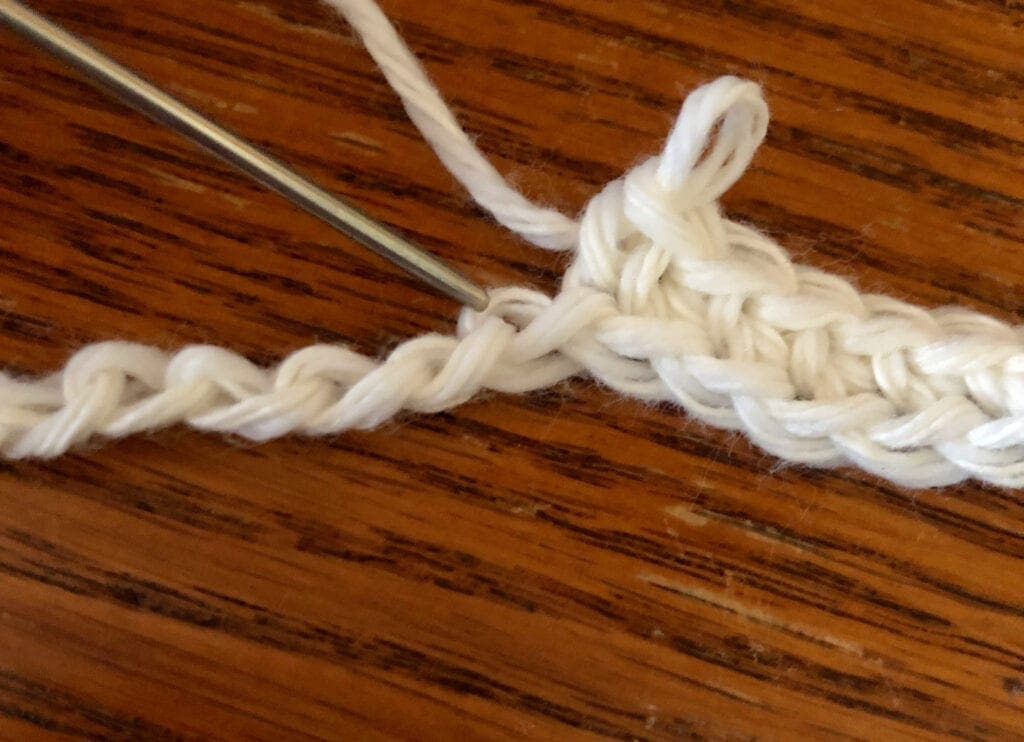
Insert the hook into the back bump and complete the desired crochet stitch.
Video of the Textured Mug Rug Coaster Crochet Pattern
This link is for the right hand crochet tutorial.
This link is for the left hand crochet tutorial.
If you loved this post, please share. It helps to show me that these types of posts are helpful – thank you!
I hope that you liked this pattern. If you are looking for more ideas for crocheted projects, here are a few others you may enjoy.

You can find Victoria crocheting, quilting, and creating recipes. She has cooked in restaurants for over 20 years, including many larger parties. She learned to crochet when she was just 11 years old and has been crocheting ever since; over 50 years now. Over 40 years ago, she loved her first class in sewing and continues to hone her skills in quilting. Many have enjoyed the handmade gifts over the years. In her professional career, she has worked in management in a wide variety of businesses including higher education as a dean of a division. All the while attending college part-time to achieve her doctorate in higher education with an emphasis in e-learning.
I changed from chain 2 at the end of each row to only doing chain 1, that made a straighter edge without bumps. I really enjoyed learning the chainless foundation, and it does indeed get rid of the holes. Thanks for the great pattern and videos.
Thanks for the tip. So glad you liked the pattern. Take care.
Vicky
I have another question. If I use the regular chain and chain in back loop am I doing a sc all the way across first before starting the pattern?
Thanks
Yes, if you work the SC in the back loop that would be a great way to start this. I think it will work out just fine.
Love your pattern for the textured mug rug. I want to make this for gifts. I do have a question. In the pattern it says to ch1, skp, sc, dc, in the next st. but on your video you don’t ch1. Did I miss something? Do I ch1 ?
Thanks
Thank you for catching this. Can’t believe I typed that in there. Yes, no CH 1.
Thanks for the pattern. If we want to make it a rectangular dining plate coaster , what would be the chain length and number of row? Thanks again.
I am not sure if there is a standard size to placemats, but I think 18 or 20 inches wide would be a nice size and maybe 13 or 14 inches long. Therefore, depending on your gauge when you work the stitches I would do a gauge swatch first then determine the stitches from there. However, if I were to use the gauge that I had when working this pattern I ended up with a square that is 5 1/2 X 5 1/2 by starting with 18 stitches using the chainless foundation single crochet. If you wanted to have the 18 inches wide placemat, I would start with 58 or 60 stitches. Then just work the rows until your desired length. Hope this helps. I would love to see them if you do make this. Take care.
Vicky