Last updated on July 5th, 2024 at 12:30 am
It’s the Holiday Season and it is time for a crochet simple snowflake coaster pattern. Make one in less than 30 minutes and that includes sewing in the yarn ends.
Just four rounds and a bit of yarn and you’re done. I prefer cotton yarn for this project as it holds up well to various cups and glasses. These are perfect to use all Winter long. We love getting them out during Christmas time.
Post contains affiliate links, and we earn commissions if you shop through the links on this page. For more information, please read the disclosure section under the About Us page.
Hot Cocoa and Coffee In the Cold Weather
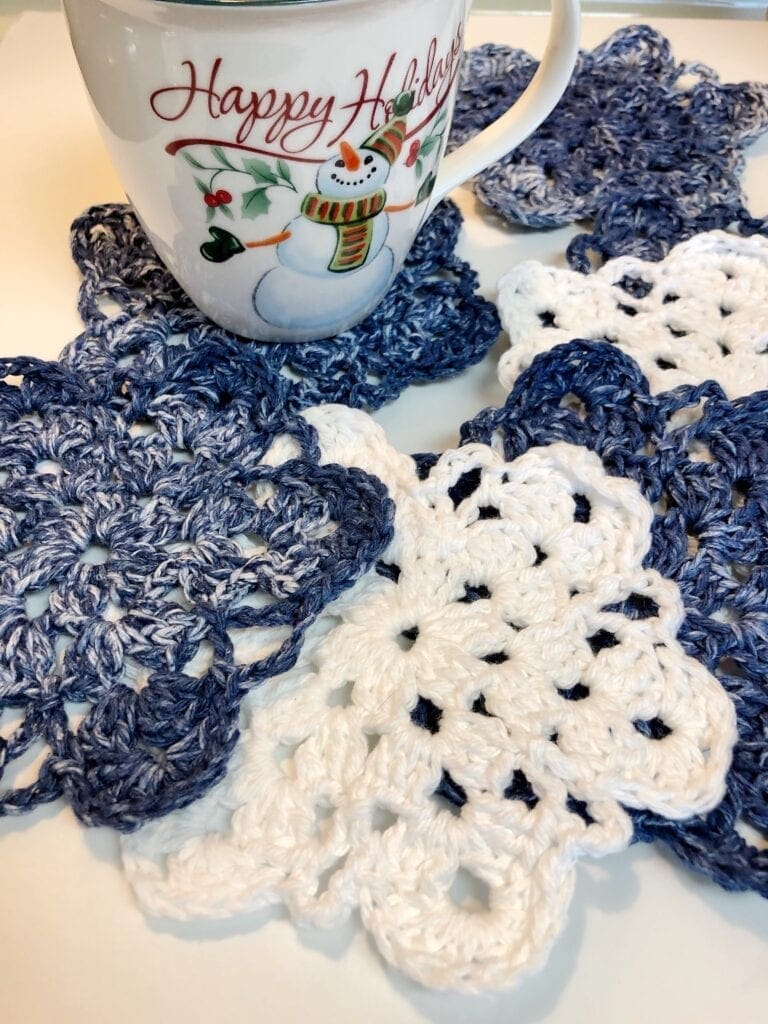
Go ahead and rest that mug of Holiday cocoa on a Pretty Handmade Coaster. This free crochet coaster pattern is simple and not as cold as the real thing.
Video Tutorial
There is a 2 part video tutorial on all 4 rounds of this crochet coaster; including the magic circle and how to weave in ends. This is located near the bottom.
Spread the Holiday Cheer in Your Home
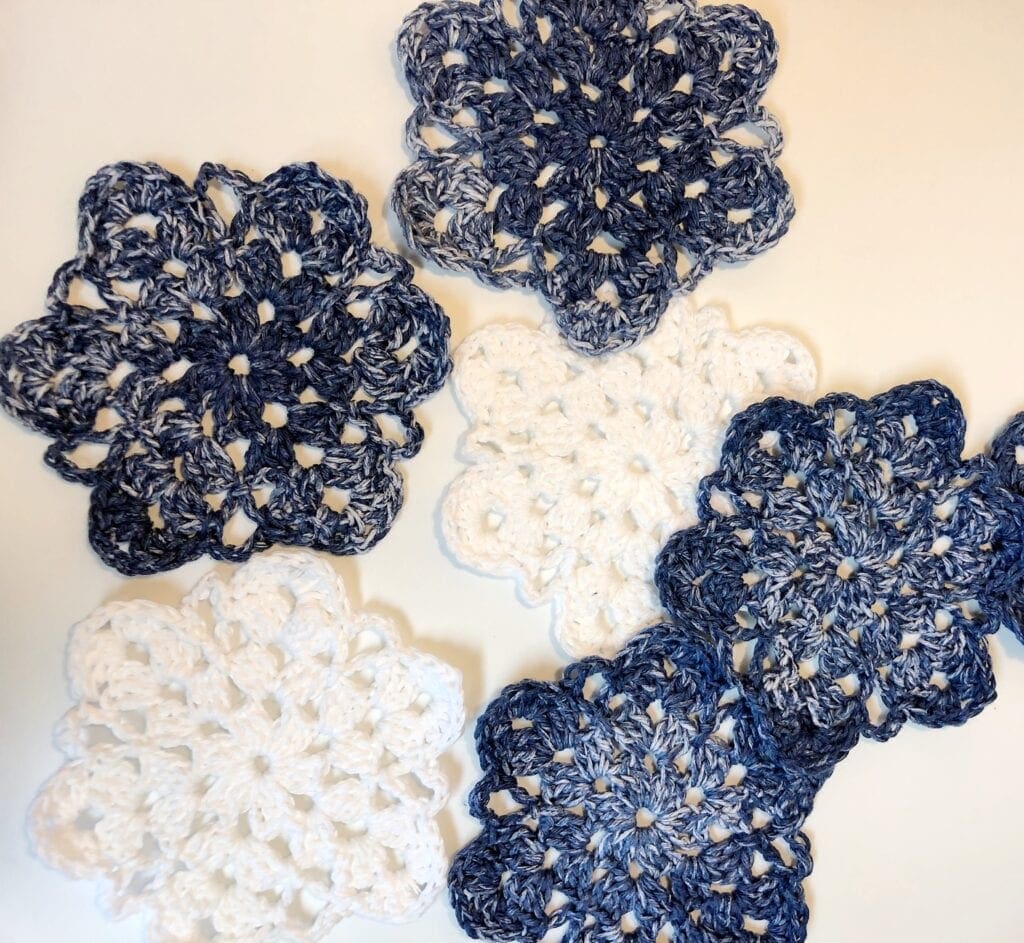
It is easy with festive crochet patterns. The blue and white snowflakes would look so cute with a country home decor. No matter what the color scheme is in your house, you can quickly create a coaster for yourself.
Four rounds and you are done!
Once you get the hang of it, you will enjoy making these over and over again.

Late Minute Handmade Gifts
Help others feel special during this holiday season. Be sure to make a lot of extra coasters to give as last-minute gifts. Anyone that you can think of can use a cute snowflake coaster. If you have children in school and are looking for that perfect handmade teacher gift, this would be lovely on a school desk. How about an elderly person living near you, make them feel special with a gift made just for them.
Handmade Hostess Gift
Quickly crochet these snowflakes in the morning and be ready for a party in the afternoon or evening. If you are like me, you always want to make sure that the hostess has something special too.
Holiday Coasters for Home Decor Style
The last few years, I have been making different crochet coasters for the holiday and other seasons throughout the year. Get some inspiration to make your quick home decor festivity.
Get Your Ad Free Printable Pattern PDF in our Etsy Shop
Directions: Crochet Simple Snowflake Coaster
Skill Level
Confident Beginner Crocheter
Crochet Coaster Size
The coaster is approximately 6 inches around.
Materials
Denim Splash cotton yarn, Less than 60 yards per snowflake. I actually used the yarn off of a cone of yarn because I plan on making quite a few for gifting. If you are not able to find this yarn locally, you can purchase it here on Amazon.
White cotton yarn. Less than 60 yards per snowflake. If you are not able to find this yarn locally, you can purchase it here on Amazon.
Size F Crochet Hook 3.75 mm
Yarn Needle
Scissors
Abbreviations
CH = Chain
DC = Double Crochet
SC = Single Crochet
SL ST = Slip Stitch
SPs = Spaces
ST = Stitch
[ ] = Repeat Between
Pattern Notes
Pattern is written in US crochet terms.
This snowflake coaster is worked in the round. Do Not turn with each round.
Directions
Start with Magic Circle. If you are not familiar with how to complete the magic circle, also called a magic ring, here is another post with a video on how to complete the magic circle.
Round 1
CH 3 (Counts as first DC), 2 DC, CH 3, [3DC, CH 3] repeat between [ ] 4 more times. SL ST into top chain or (3rd CH) of the starting CH 3 ST. Gently tighten magic circle to close the hole. See the first round in the photo below. (There should be a total of 6 CH 3 SPs around).
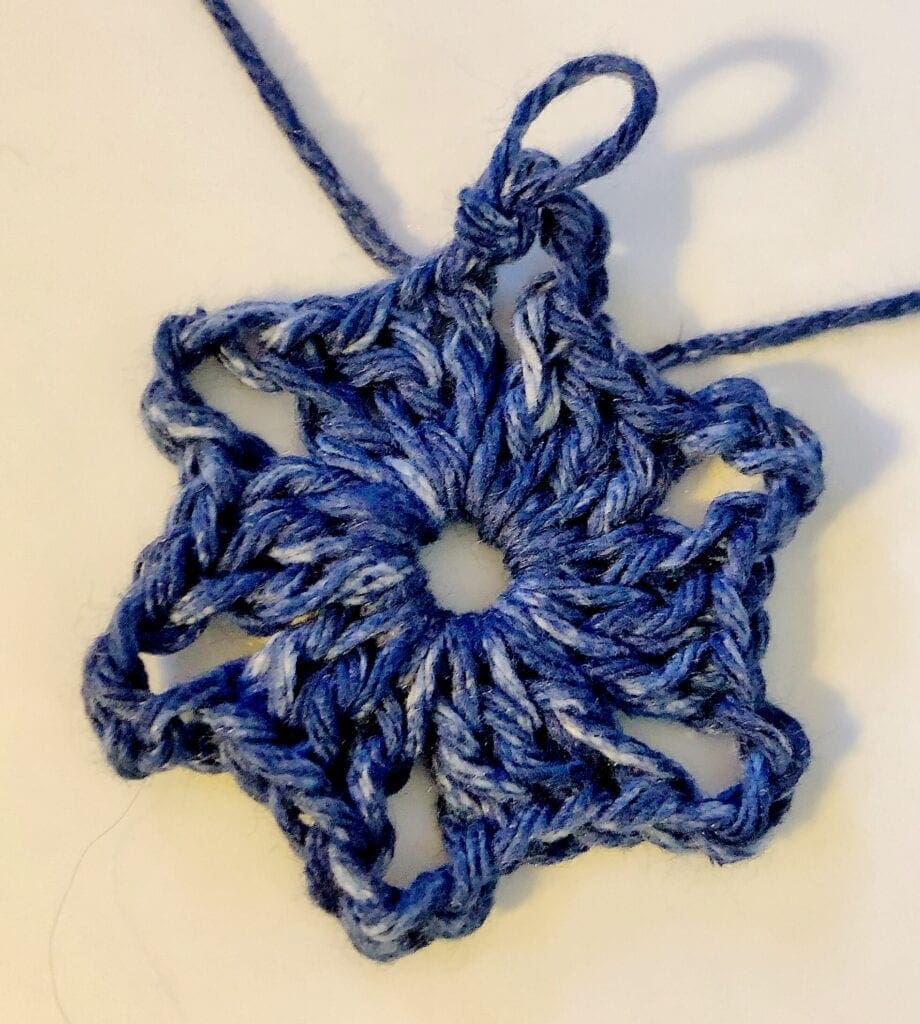
This photo below shows the SL ST into the two DC and CH 3 SP. (which starts the round 2 below).
Round 2
SL ST into next 2 DC and into the CH 3 SP of the previous row. (see the photo above for the visual on this). CH 3 (Counts as 1st DC), 2 DC in the CH 3 SP. CH 3, 3 DC into the same SP. Skip the 3 DC Stitches, work just in the CH 3 Spaces. [3 DC, CH 3, 3 DC] Repeat between [ ] 4 more times. SL ST into the top CH of the starting CH 3 ST. See the first two rounds in the photo below.

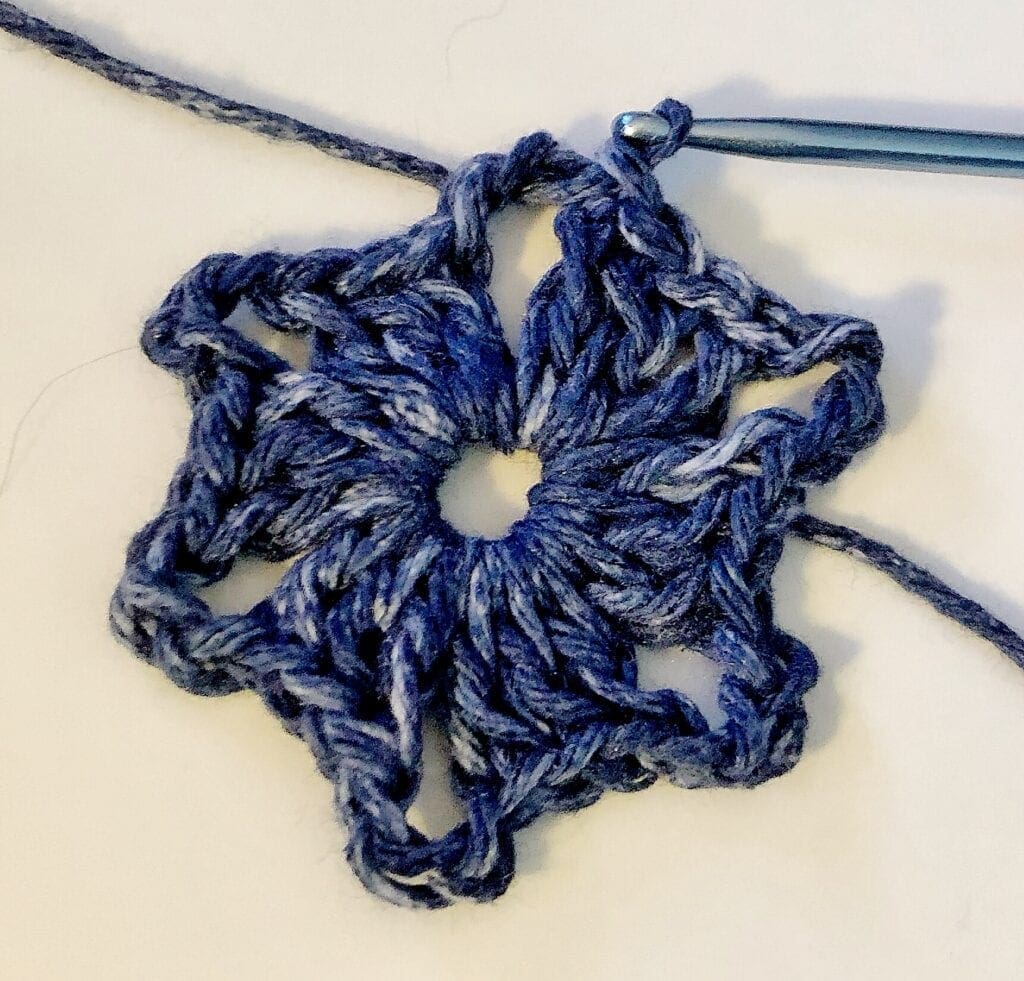
Round 3
SL ST into next 2 DC and into the CH 3 SP of the previous row. CH 3 (Counts as 1st DC), 2 DC, CH 3, 3 DC in the same SP. Next, CH 2, SL ST in the Space between the 2 sets of 3 DC of the previous row, CH 2, [3 DC, CH 3, 3 DC in the previous row CH 3 SP. CH 2, SL ST into the Space between the 2 sets of 3 DC of the previous row, CH 2,] Repeat between [ ] 4 more times. SL ST into the top CH of the starting CH 3 ST. See the first three rounds in the photo below.
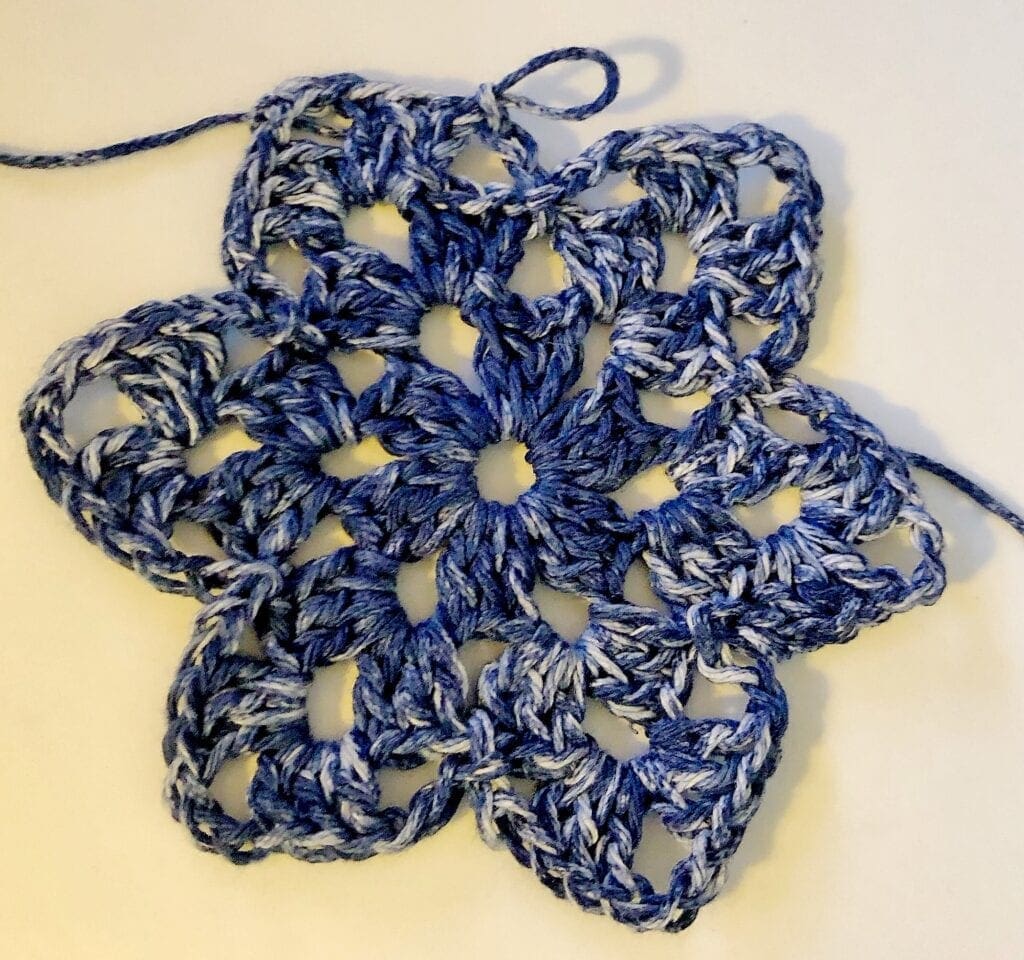
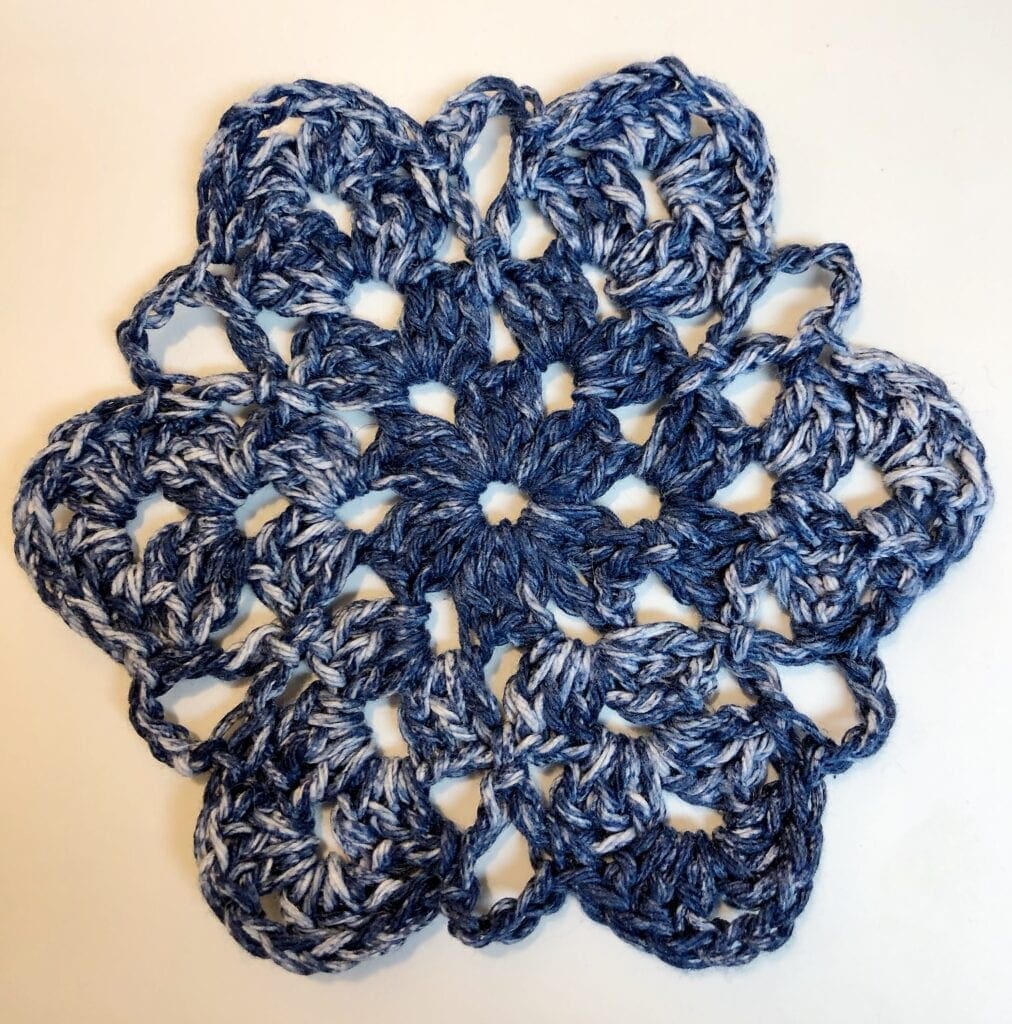
Round 4
SL ST into next 2 DC and into the CH 3 SP of the previous row. CH 3 (Counts as first DC), 2 DC, CH 2, 3 DC in the same SP. SC in previous row CH 2 SP. CH 4, SC in previous row CH 2 SP. [3 DC, CH 2, 3 DC in the previous row CH 3 SP, SC in previous row CH 2 SP. CH 4, SC in previous row CH 2 SP]. Repeat between [ ] around. End with a SL ST into the top CH of the starting CH 3 ST.

Finishing
Snip yarn leaving about a 12-inch tail. Pull the tail through the last loop on the hook. Snug up the center hole, weave in yarn ends. Remove excess yarn.
Crochet Video Tutorial Part 1 of 2
Crochet Video Tutorial Part 2 of 2
Enjoy using or gifting your handmade crochet Christmas coasters. Add this to your free crochet pattern mug rug collection for the Winter Season.
If you loved this post, please share. It helps to show me that these types of posts are helpful – thank you!
I hope that you liked this crochet snowflake coaster. If you are looking for more ideas for crocheted projects, here are a few other free patterns you may enjoy.

You can find Victoria crocheting, quilting, and creating recipes. She has cooked in restaurants for over 20 years, including many larger parties. She learned to crochet when she was just 11 years old and has been crocheting ever since; over 50 years now. Over 40 years ago, she loved her first class in sewing and continues to hone her skills in quilting. Many have enjoyed the handmade gifts over the years. In her professional career, she has worked in management in a wide variety of businesses including higher education as a dean of a division. All the while attending college part-time to achieve her doctorate in higher education with an emphasis in e-learning.
Pingback: Textured Mug Rug Coaster Crochet – Pattern Princess
ok so how do i get my download of snowflake pattern I paid for
Hi, It should be in your inbox on Etsy. They send a paid invoice for your order and there is a link to download your pattern right away. However, I sent you an email in Etsy too with a PDF of the pattern, just in case you are not able to find the other email. Thanks for letting me know. Hope you enjoy making a bunch. Vicky