Last updated on July 4th, 2024 at 11:37 pm
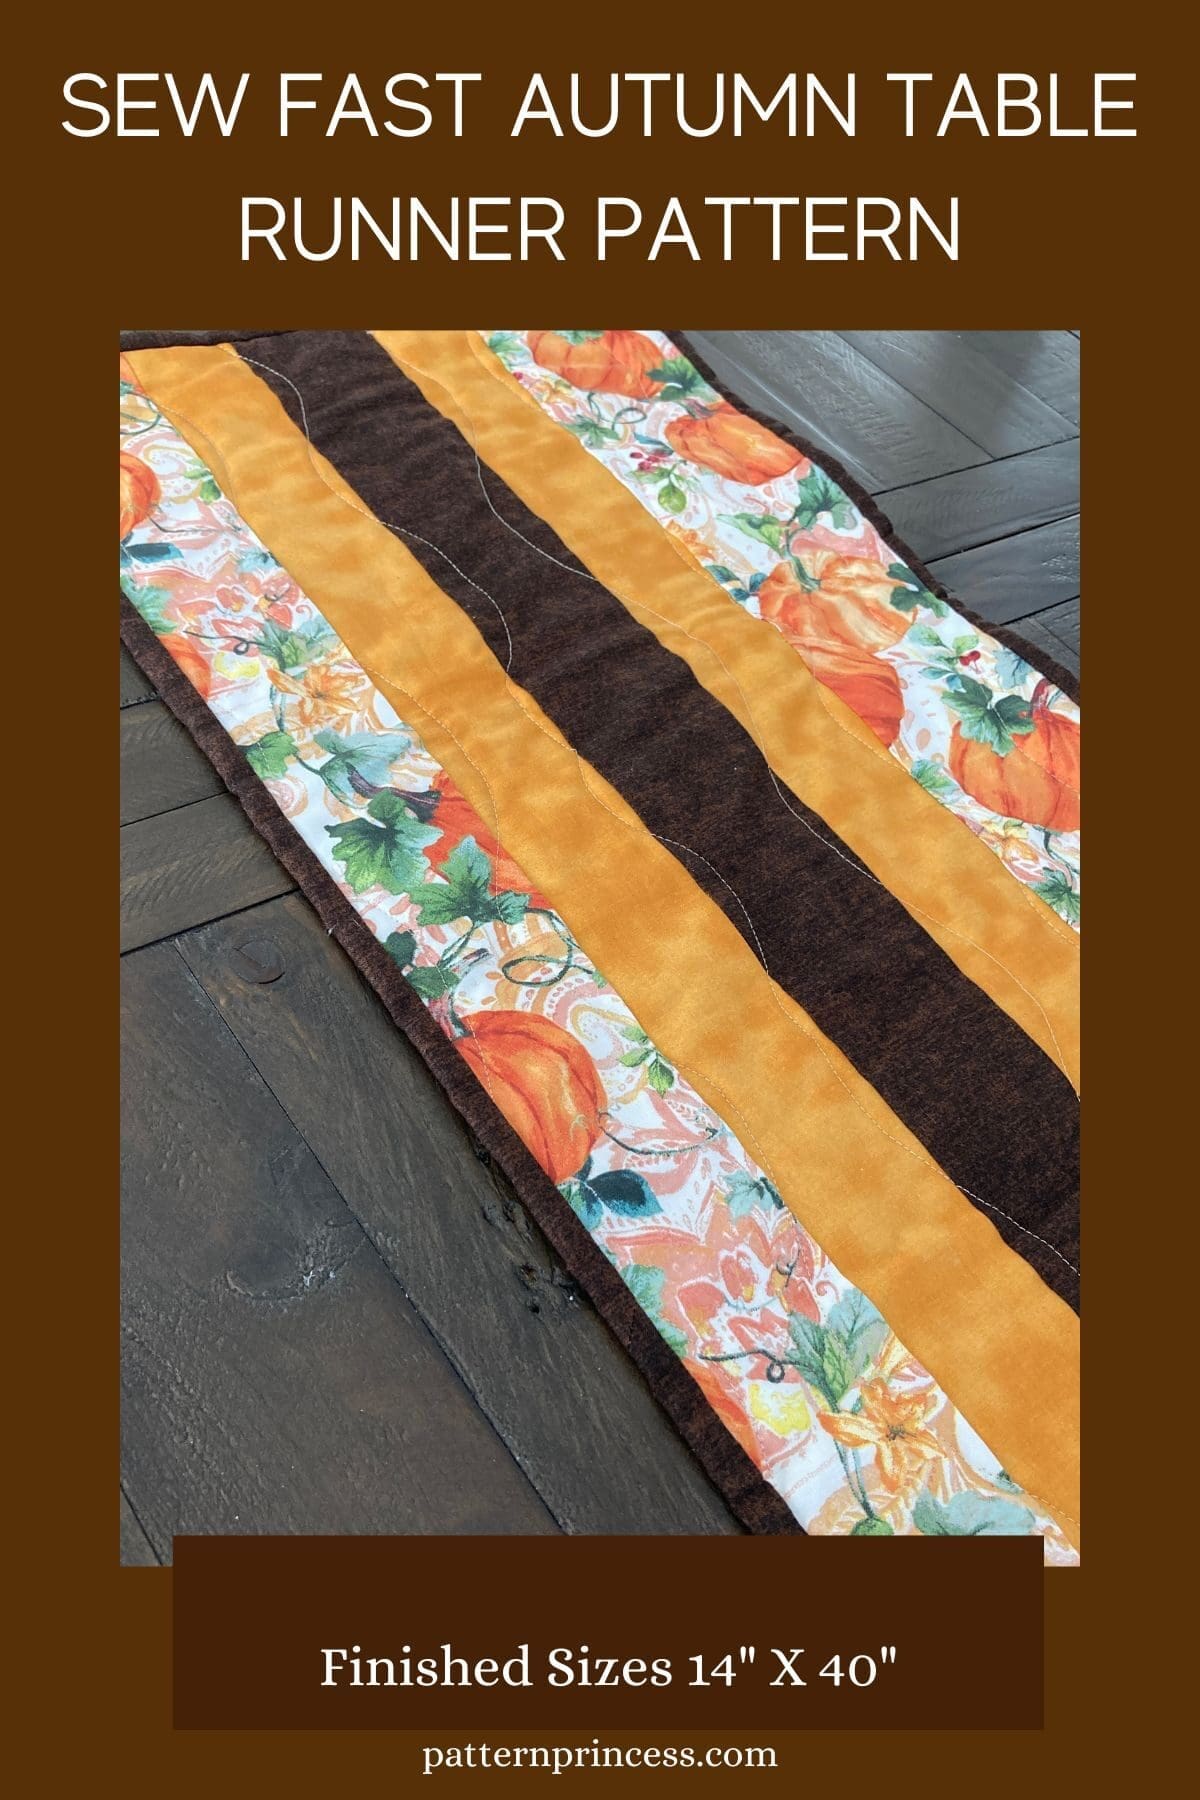
This easy sew fast Autumn table runner is perfect for fall and can be completed in just a day. As the leaves start to turn and the weather gets cooler, Autumn officially begins. It’s time to start thinking about autumn décor and your Thanksgiving table.
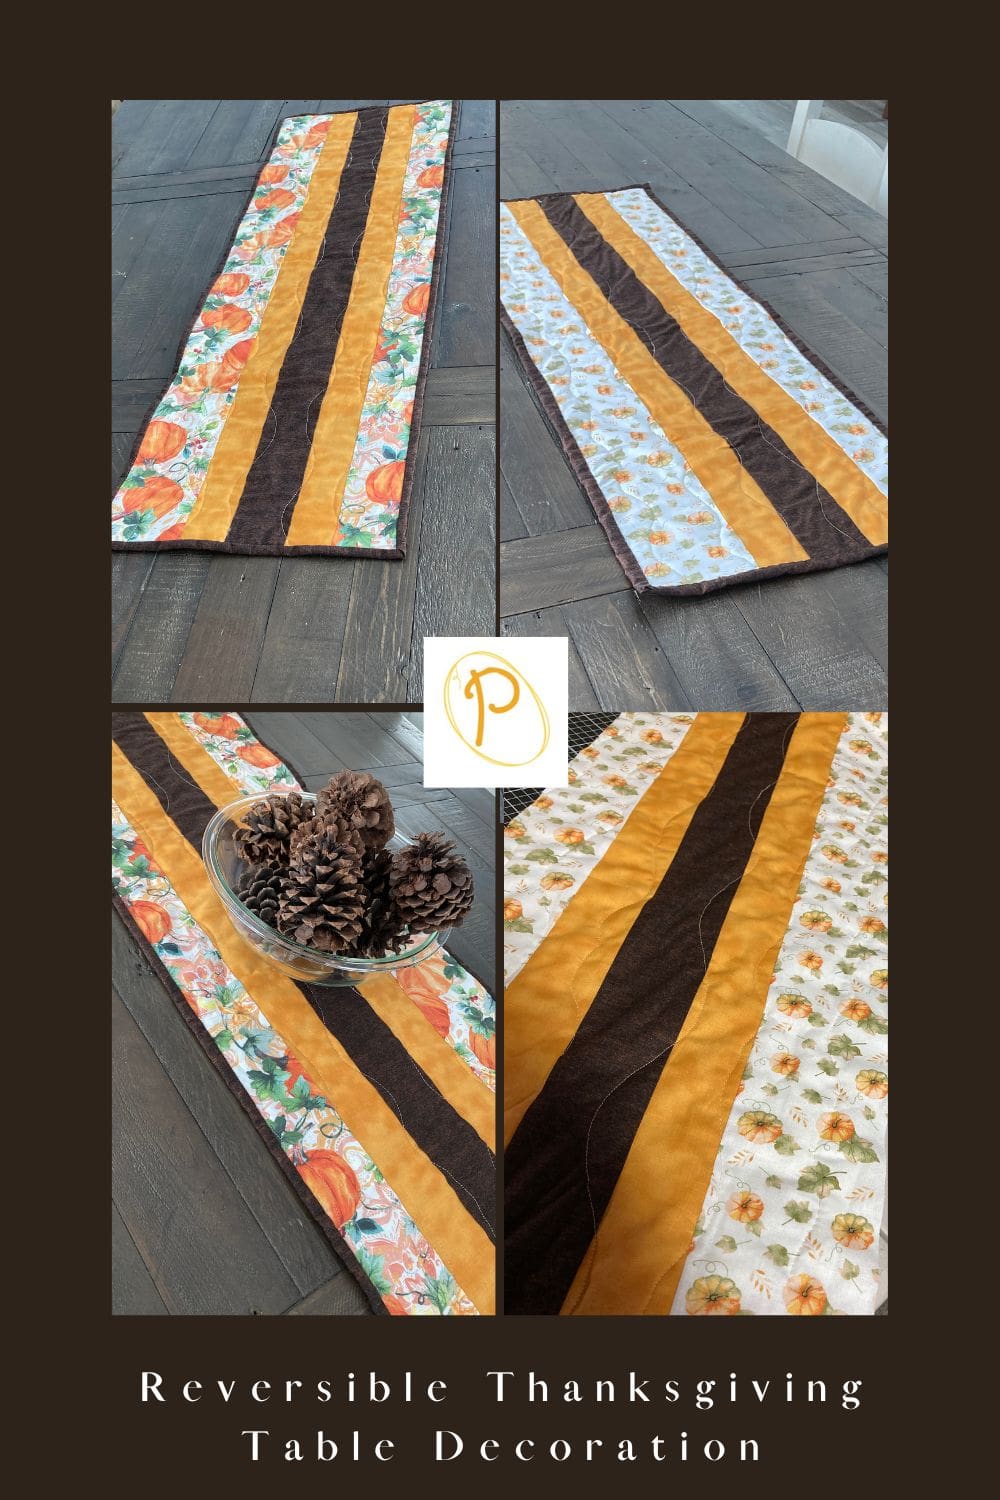
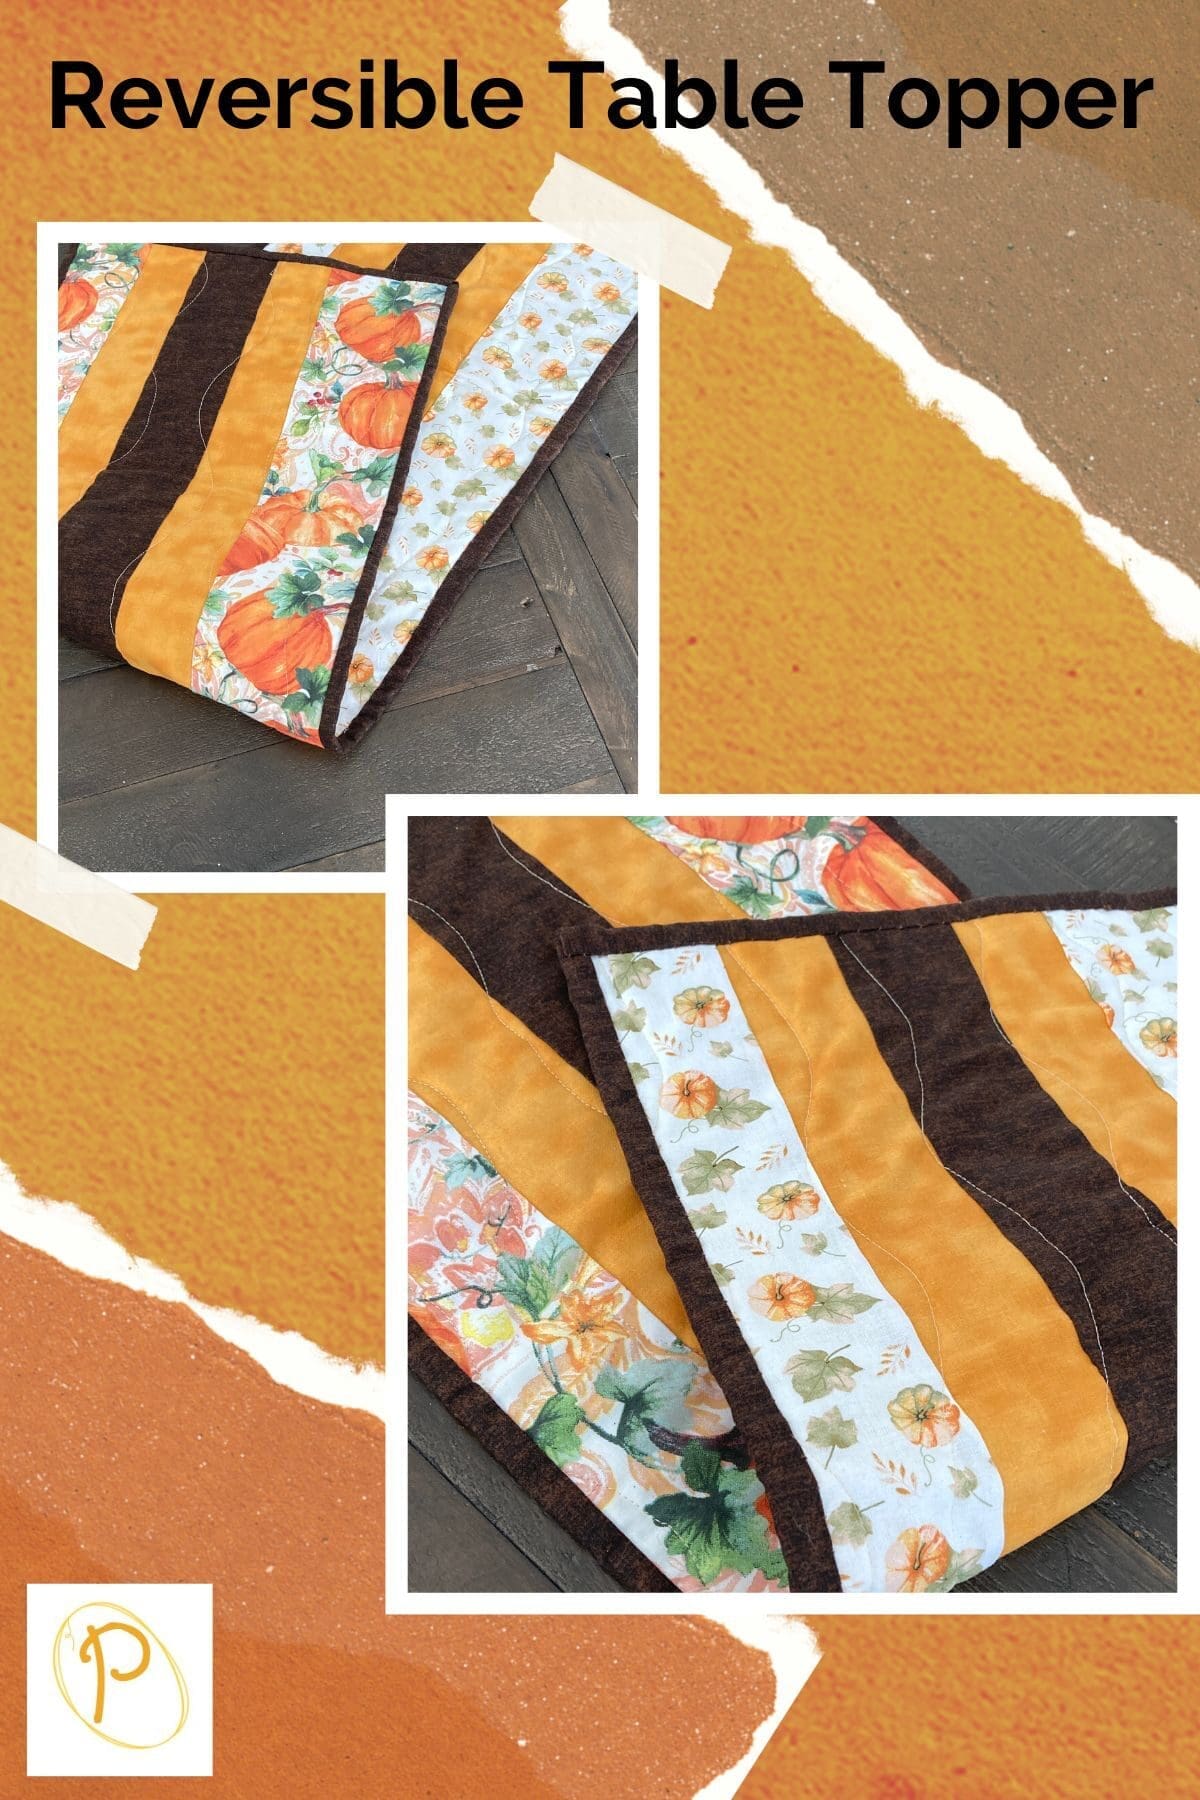
This easy table runner is reversible and a great way to get your home ready for the holiday. With just a few simple seams, you’ll have a beautiful piece that will last for years.
Make-in-a Day Sewing Pattern
Super-fast and fun to make. Finished runner will measure 14″ wide x 40″ long. Great to show off those beautiful feature fabrics.
Holiday Table Runner
Dress your tables for any holiday or season with this quilted table topper. Today I chose pumpkin pattern fabrics paired with dark brown, and gold fabrics. This adds quick color and style to your home, and it is a breeze to sew and assemble.
Previously, I made a mini quilted trivet using the pumpkin pattern fabric. I had purchased 2 yards of each fabric print and I still have fabric left over after making the Little Pumpkin Patch Trivet Quilt and this Autumn Table Runner.
Post contains affiliate links, and we earn commissions if you shop through the links on this page. For more information, please read the disclosure section under the About Us page.
Easy Quilt Pattern for Beginners
It is easy to sew the fabric strips together for this reversible table runner. The hardest part of sewing this is aligning the top and bottom panels when you make the quilt sandwich with the batting between.
It is easy to sew the layers together by just sewing vertical wavy lines, which makes this very beginner friendly. A walking foot is wonderful for going through all the layers with no bunching of the fabric.
Directions: Sew Fast Autumn Table Runner Pattern
Skill Level
Easy
Finished Size
14 inches wide X 40 inches long
Materials and Supplies Requirements
Fabric Requirements
Fall color fabric 1.
- 1 piece trimmed 4.5” X 40”.
- 1 piece trimmed to 3.5” X 40”.
Fall color fabric 2.
- 1 piece trimmed 4.5” X 40”.
- 1 piece trimmed to 3.5” X 40”.
Gold fabric 4 pieces trimmed to 2.5” X 40”.
Dark brown 2 pieces trimmed to 3” X 40”.
Binding fabric. You will need a strip approximately 124 inches long X 2 ½ inches wide of binding fabric. I made mine using the dark brown fabric that was used in the table runner.
Batting
You’ll need a piece of 15” x 41” thin cotton batting like Warm & Natural to make this quilt.
Supplies
- Cutting Mat
- Iron
- Ironing Board
- Painters Tape
- Pins
- Quilting Ruler
- Rotary Cutter
- Safety Pins; 1 ½ inch stainless steel
- Scissors
- Sewing Needle
- Thread
Pattern Notes
The directions for this easy beginner quilt pattern are for rotary cutting, machine piecing, machine quilting, and the binding is hand-stitched to the quilt back.
Use a ¼” seam allowance.
Use fabric 1 with the gold and brown fabric strips for one side of the table decoration. Fabric 2 should be sewn with the remaining gold and brown fabrics for the reversible side of this sewing project. (In other words, fabric 1 and 2 are not used together on the same side).
Sew the Table Runner Top
Use the photo to help with fabric placement while sewing the sections together.
Begin Sewing Sections. With right sides together using ¼ inch seam allowance, sew fabric 1, the brown fabric, and the gold fabric together pressing the seams to one side or open.
Next Sew the Reversible Side Together. With right sides together using ¼ inch seam allowance, sew fabric 2, the brown fabric, and the gold fabric together pressing the seams to one side or open.
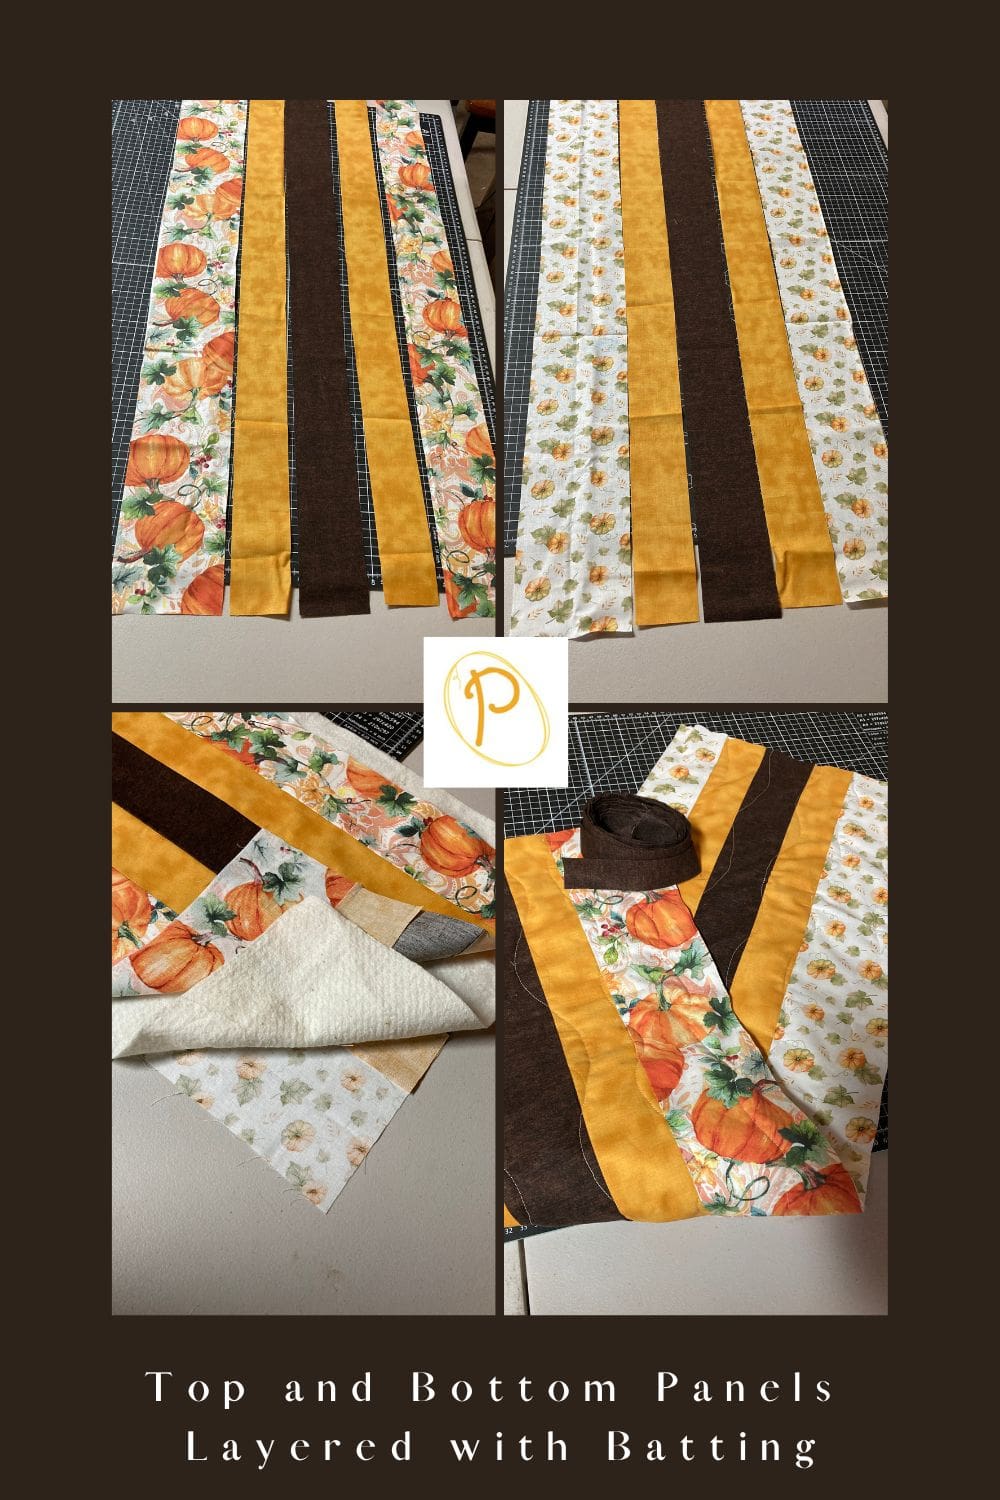
Layer the Top, Batting, and Back
Sandwich the back, batting, and top. For a smaller quilt, this is much easier to achieve; however, since the top and back are the same size, make sure to align the edges of both the top and bottom panels.
Begin by placing the backing fabric on a flat solid surface, right side down facing out. Smooth out any wrinkles. You may want to use painters’ tape to secure the edges of the fabric down. This will help hold it in place and reduce the chance of a wrinkle developing as you place on the next two layers.
Next, place the batting on top of the backing fabric smoothing out any wrinkles.
Finally, place the table runner top on the batting, centering it with the right side up. Make sure that the top panel mirrors the bottom panel. I aligned one side and checked the top and bottom edges as I was smoothing out the fabric to the other side. I made many slight adjustments along the way. Smooth out any wrinkles.
Baste the Quilt Together
Once you have the top fabric all smoothed out, use large safety pins to baste all three layers together. I like to use 1 ½” stainless pins.
Put a pin in each corner and around the entire table runner about every 5-6 inches or so through all three layers. This holds things in place, so they don’t move around while you are quilting the layers together.
Quilting the Easy Reversible Quilted Table Runner
To highlight the simple lines in this quilt and to keep this easy, I used my walking foot and sewed a vertical wavy line about every 1 to 2 inches.
However, you could do any type of free motion quilting design on this project.
How to Trim the Batting and Backing Fabric Before Binding
Today for accuracy, I trimmed the batting right to the fabric panels on one side. Then I flipped it over and made sure that no batting was sticking out on the other side. I did have to trim off an additional ¼” to have things align.
To trim the batting and backing, use a longer ruler and a rotary cutter on a large cutting mat. Lay the quilt flat. Place the ruler along the edge of the quilt and use it as a guide to use your rotary cutter to trim your quilt batting and backing. Do this on all four sides.
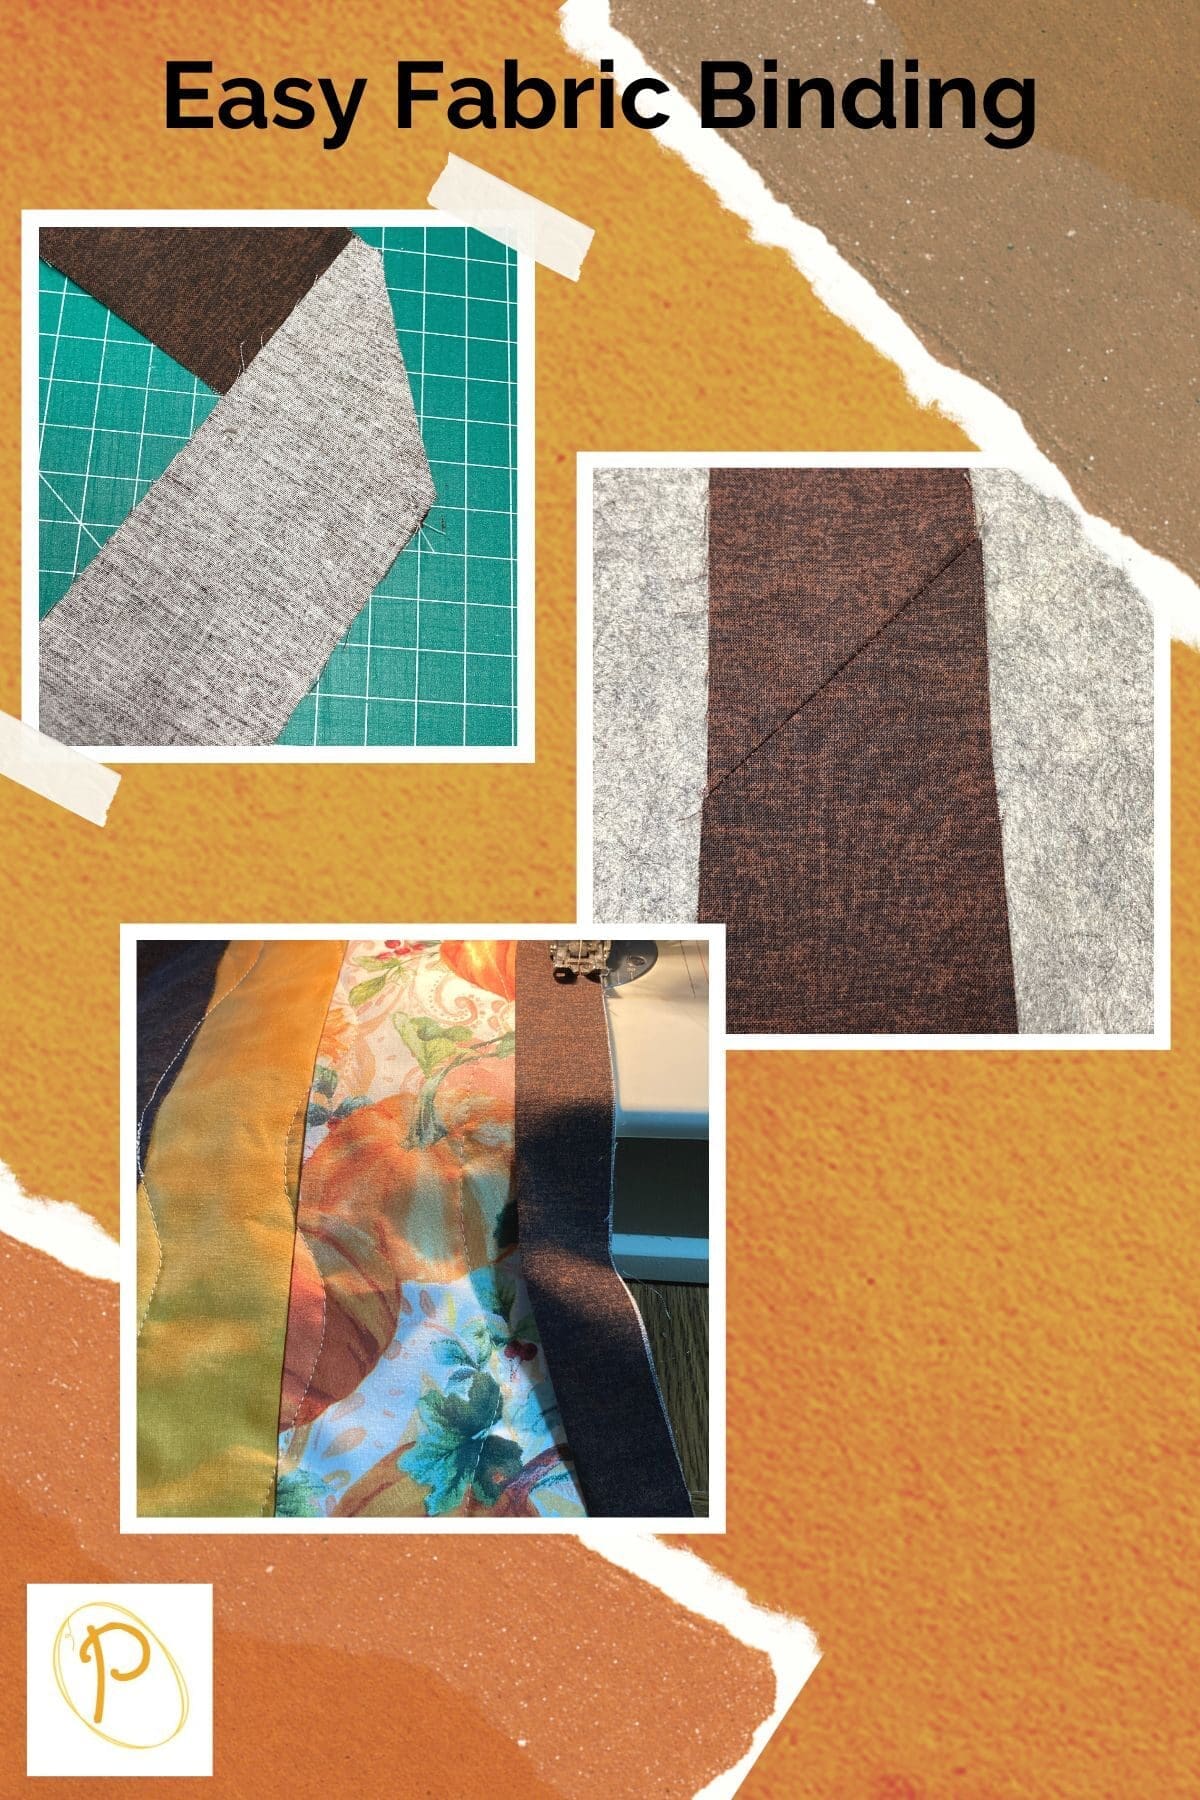
Sew the Binding to the Table Runner
First, prepare the binding strips. I used the dark brown fabric and cut 6 pieces 2 ½” x 22 long and sewed them together for my binding. I have a tutorial on how to make your own binding if this is new to you.
Once the strips are sewn together, fold in half lengthwise with wrong sides together and press.
Pin the raw edge of the binding onto raw edge of the quilt top. I generally start in the middle of a side. Leave approximately a 3” tail hanging.
Note: This hanging part will be used to sew to the other end of the binding strip when you have finished sewing all four sides of the binding onto the quilt.
Sew the binding onto all four sides of the tablecloth making sure to miter the corners.
How to Miter Corners
As you are sewing on your binding, stop sewing ¼ inch from the corner. You may want to mark this spot with a pin ahead of time. Back stitch a few stitches and cut the thread making sure NOT to cut the quilt or the binding.
Remove the quilt from the sewing machine and fold the binding strip up straight so it is vertical from the side you were just sewing on.
Next, fold the binding strip back down on itself and align it to the edge of the side of the quilt you just sewed and the edge of the quilt you are going to sew next.
Continue sewing the binding on the quilt edge.
Repeat this process until all four sides and corners have the binding sewn on. When you are on the last side of the quilt close to where you started with the binding it is time to connect the ends of the binding.
If you know how to join the binding to make a continuous strip, go ahead and do that process. To be honest, I have tried many times and have yet to master this.
Here is what I do.
Stop stitching a few inches away from where you started. Overlap the starting and ending binding about 2 inches. Cut the ending binding at this point.
Fold the end of one of the binding strips over about 1 inch. Then tuck the raw edge of the other binding inside. Continue stitching until you meet up with the starting point.
Hand-Stitch the Binding to the Quilt Back
The last part of making a quilt is to hand-stitch the folded edge onto the back of the quilt.
I like to use a few small clips to hold the binding as I sew. Continue moving them along just ahead of where you are sewing.
When you get to the corners, turn them right side out and miter the corner.
I sew right into the corners to help hold the binding in place.
Once all the sides and corners are stitched, you are done.
It is ready to use or give as a gift.

You can find Victoria crocheting, quilting, and creating recipes. She has cooked in restaurants for over 20 years, including many larger parties. She learned to crochet when she was just 11 years old and has been crocheting ever since; over 50 years now. Over 40 years ago, she loved her first class in sewing and continues to hone her skills in quilting. Many have enjoyed the handmade gifts over the years. In her professional career, she has worked in management in a wide variety of businesses including higher education as a dean of a division. All the while attending college part-time to achieve her doctorate in higher education with an emphasis in e-learning.