Last updated on July 4th, 2024 at 11:37 pm
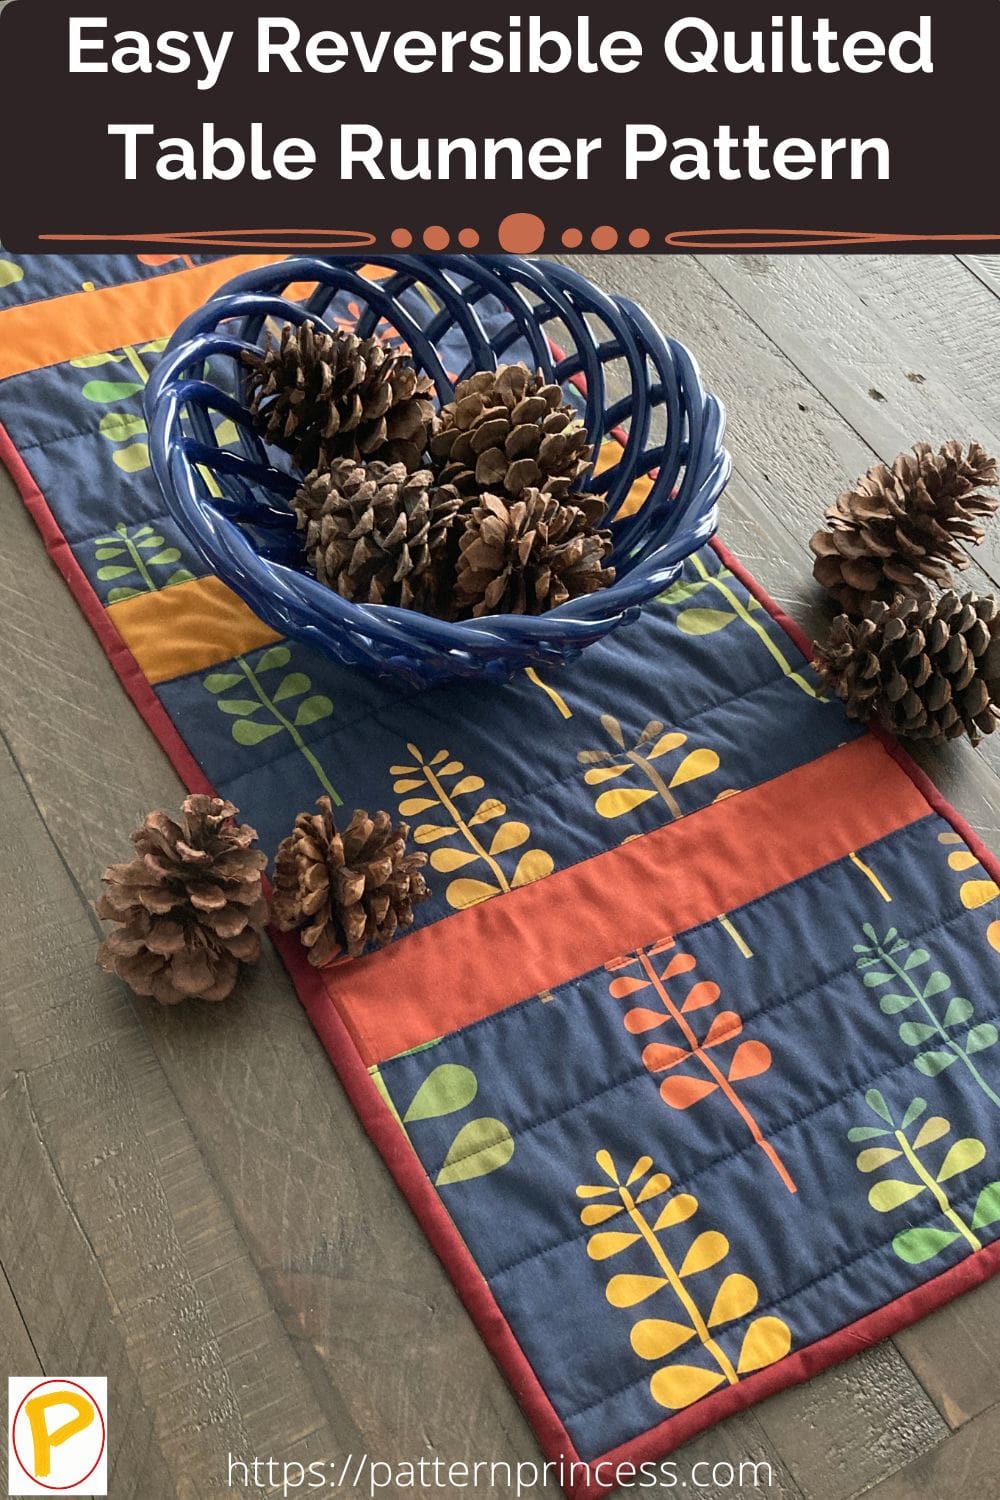
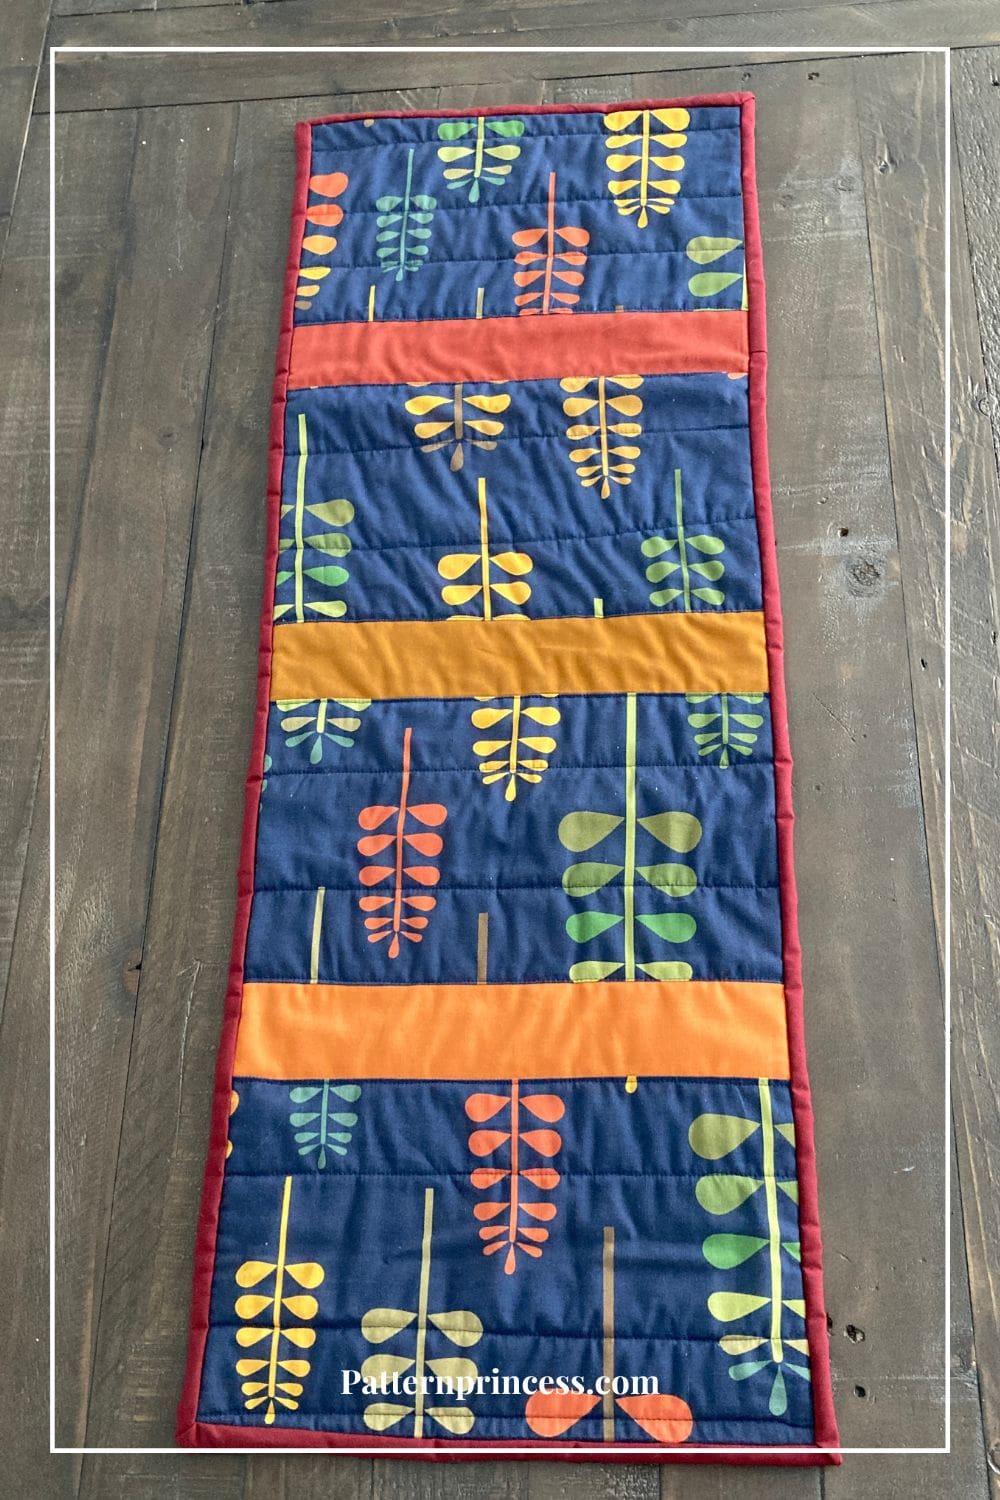
This Autumn easy reversible quilted table runner pattern is perfect for beginning sewers, and it can be completed in just a few hours. Plus, you can make it in any size you like.
This is a great holiday quilt pattern to make in a weekend too. Measuring 12” x 34”, this quilt is the perfect size to decorate a table.
There’s nothing like a handmade table runner to add a touch of personality to your dining room furniture. With just a few simple steps, you can create a table runner that will complement any color scheme or style.
The pattern includes the instructions you need to make this quilted table runner.
Post contains affiliate links, and we earn commissions if you shop through the links on this page. For more information, please read the disclosure section under the About Us page.
Woodsy Table Runner Inspiration
Today, I made this table runner for my sister for her birthday. The inspiration for this reversible table runner came from a cabin in the woods.
This past year, my brother-in-law and sister built a cabin on their land. It’s just lovely, and it is decorated just like you would imagine an upscale hunting cabin would be. My sister has such an eye for decorating, on the cheap too.
There are lots of warm color tones in the wood trim. The furniture has the outdoors cabin color theme. They have a small coffee table and I made note of the measurements when I was there for a picnic a few weeks ago.
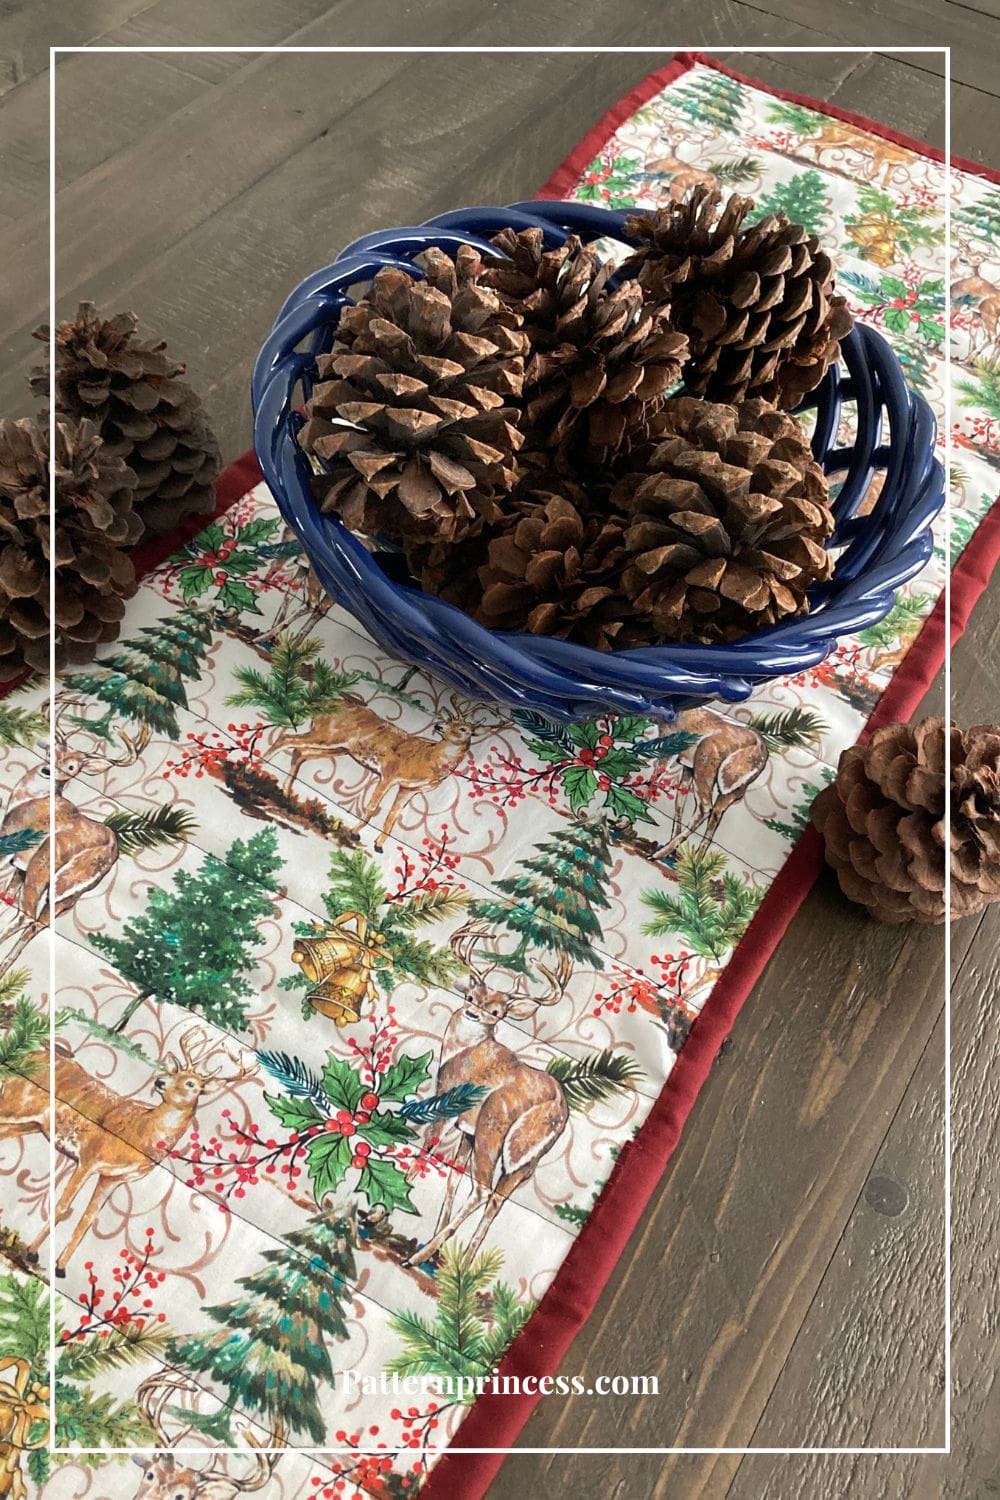
I chose a holiday fabric for the back of my table runner that would complement the woodsy theme. For the everyday side of the table décor, I found a fabric with a tree design that resembles pine trees in fall colors. To highlight the fall colors, I used strips of coordinating fabric from a jelly roll.
Easy Quilt Pattern for Beginners
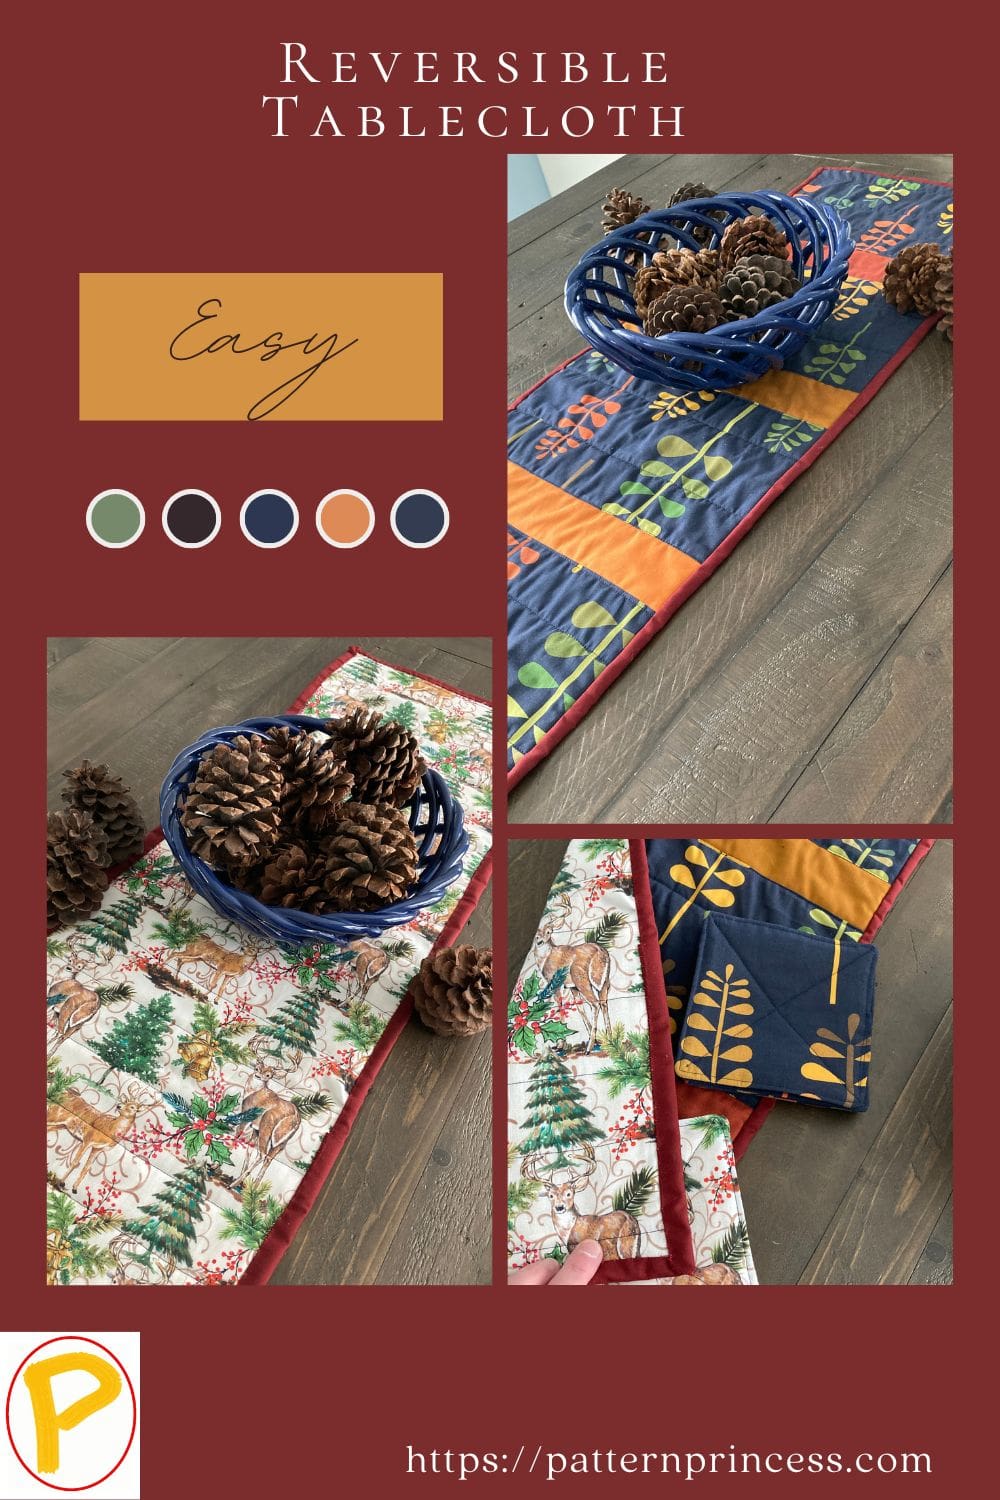
The best part was how fast this went together. This pattern would look great in any cotton fabric color combination. I used an autumn fabric with fall hues for the front of the table topper and Winter deer in the woods Christmas fabric for the back.
If you are new to quilting or just looking for a quick and simple project, this will work up in a day. Once the top pieces are sewn together, make your quilt sandwich with the backing fabric, batting, and the top of the table runner.
It is easy to sew the layers together by just sewing in strips across, which makes this very beginner friendly. A walking foot is wonderful for going through all the layers with no bunching of the fabric.
Make Your Own Binding
I used pieces of the jelly roll sewn together to make my own binding in complimentary colors. Since the fabric is already in strips that are 2 ½ inches wide, it went really fast.
Directions: Easy Reversible Quilted Table Runner Pattern
Skill Level
Easy
Finished Size
12 inches wide X 34 inches long
Materials and Supplies Requirements
Fabric Requirements
Backing fabric is a solid piece of fabric cut slightly larger than the top. 14 inches wide X 36 inches long. I used Winter Deer in the Woods Christmas Cotton Fabric.
Quilt top fabrics
4 rectangles trimmed to 12 ½ inches X 7 ½ inches
I used Autumn Herbalism Navi Cotton Fabric.
Between the 4 rectangles I used
3 strips of the jelly roll Autumn Hues 40-Piece Cotton Fabric Roll 2 ½ X 12 ½ inches
Binding fabric
You will need approximately 100 inches long X 2 ½ inches wide of binding fabric.
I used 3 pieces of the jelly roll strips sewn together.
Batting
You’ll need a piece of 14” x 36” thin cotton batting like Warm & Natural to make this quilt.
Supplies
- Cutting Mat
- Iron
- Ironing Board
- Painters Tape
- Pins
- Quilting Ruler
- Rotary Cutter
- Safety Pins; 1 ½ inch stainless steel
- Scissors
- Sewing Needle
- Thread
My favorite quilting supplies
Pattern Notes
The directions for this easy beginner quilt pattern are for rotary cutting, machine piecing, machine quilting, and the binding is hand-stitched to the quilt back.
Use a ¼” seam allowance.
Sew the Table Runner Top
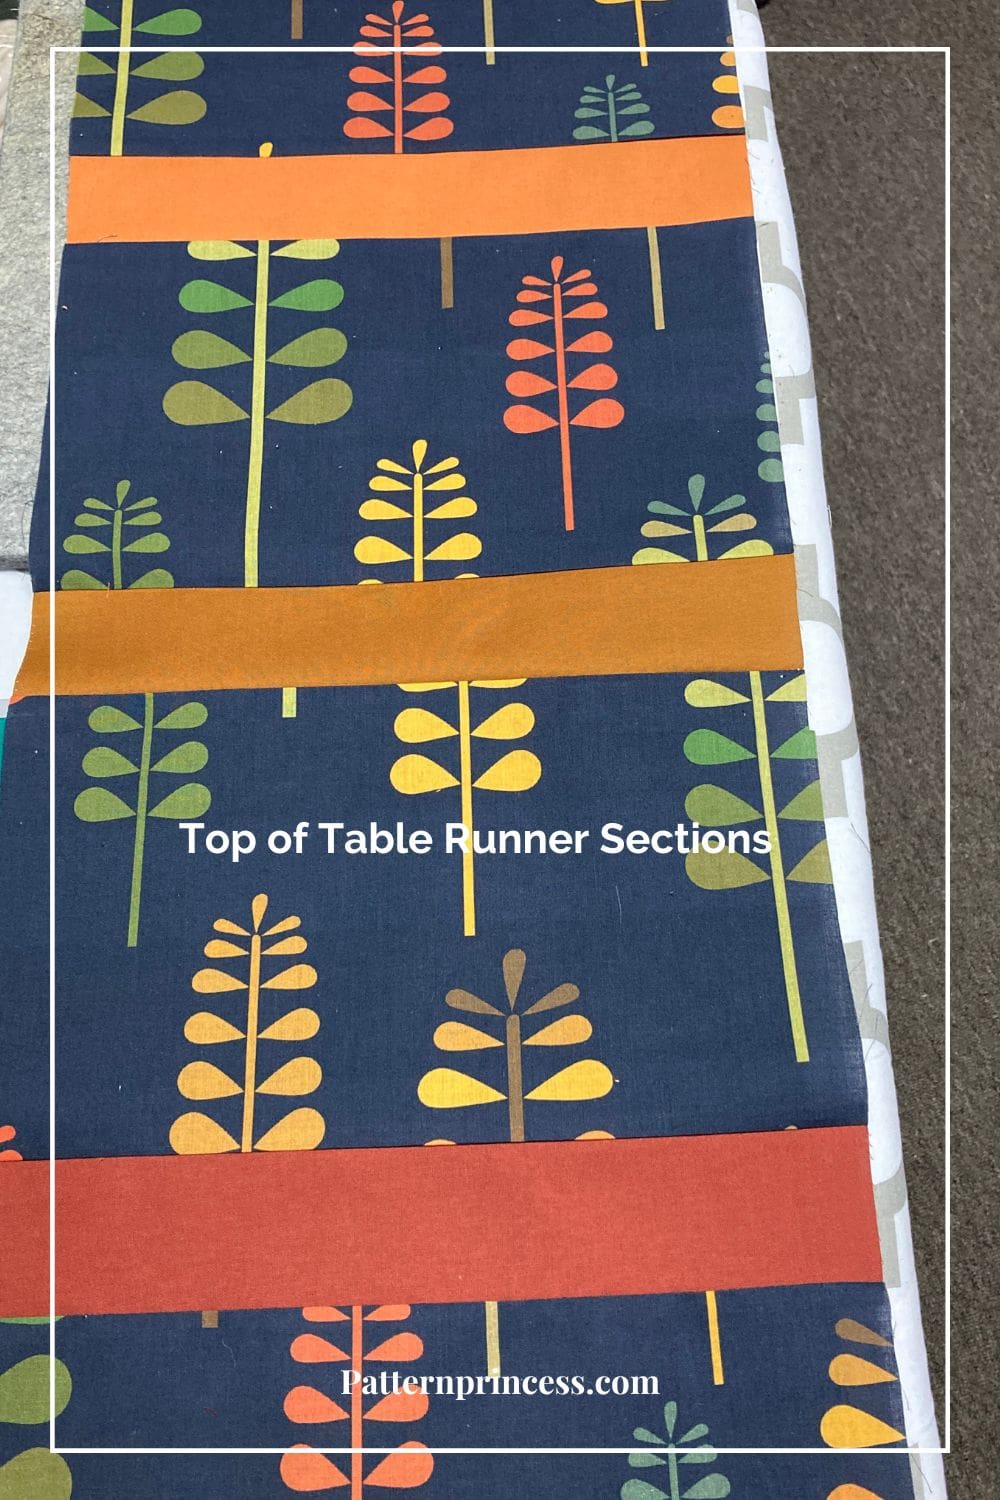
Use the photo to help with fabric placement while sewing the sections together.
Begin Sewing Sections. With right sides together using ¼ inch seam allowance, sew one of the rectangles 7 ½ inches X 12 ½ inches to one of the jelly roll strips 2 ½ inches X 12 ½ inches. Press seams to the darker fabric.
Next Sew the Sections Together. With right sides together, using 1/4 inch seam allowance, sew the rectangles from one section to the 2 ½ X 12 ½ strips from the first section. Press seams to the darker fabric.
Repeat this process one more time.
Sew on the Last Rectangle. With right sides together, using the ¼ inch seam allowance, sew the last rectangle onto the 2 ½ X 12 ½ strip. Press seam to the darker fabric.
Layer the Top, Batting, and Back
Sandwich the back, batting, and top. For a smaller quilt, this is much easier to achieve.
Begin by placing the backing fabric on a flat solid surface, right side down facing out. Smooth out any wrinkles. You may want to use painters’ tape to secure the edges of the fabric down. This will help hold it in place and reduce the chance of a wrinkle developing as you place on the next two layers.
Next, place the batting on top of the backing fabric smoothing out any wrinkles.
Finally, place the table runner top on the batting, centering it with the right side up. Smooth out any wrinkles.
Note: you will notice that the two bottom layers of the quilt (the back and the batting) are extending about 2 inches all around the outside edges of the table runner quilt top.
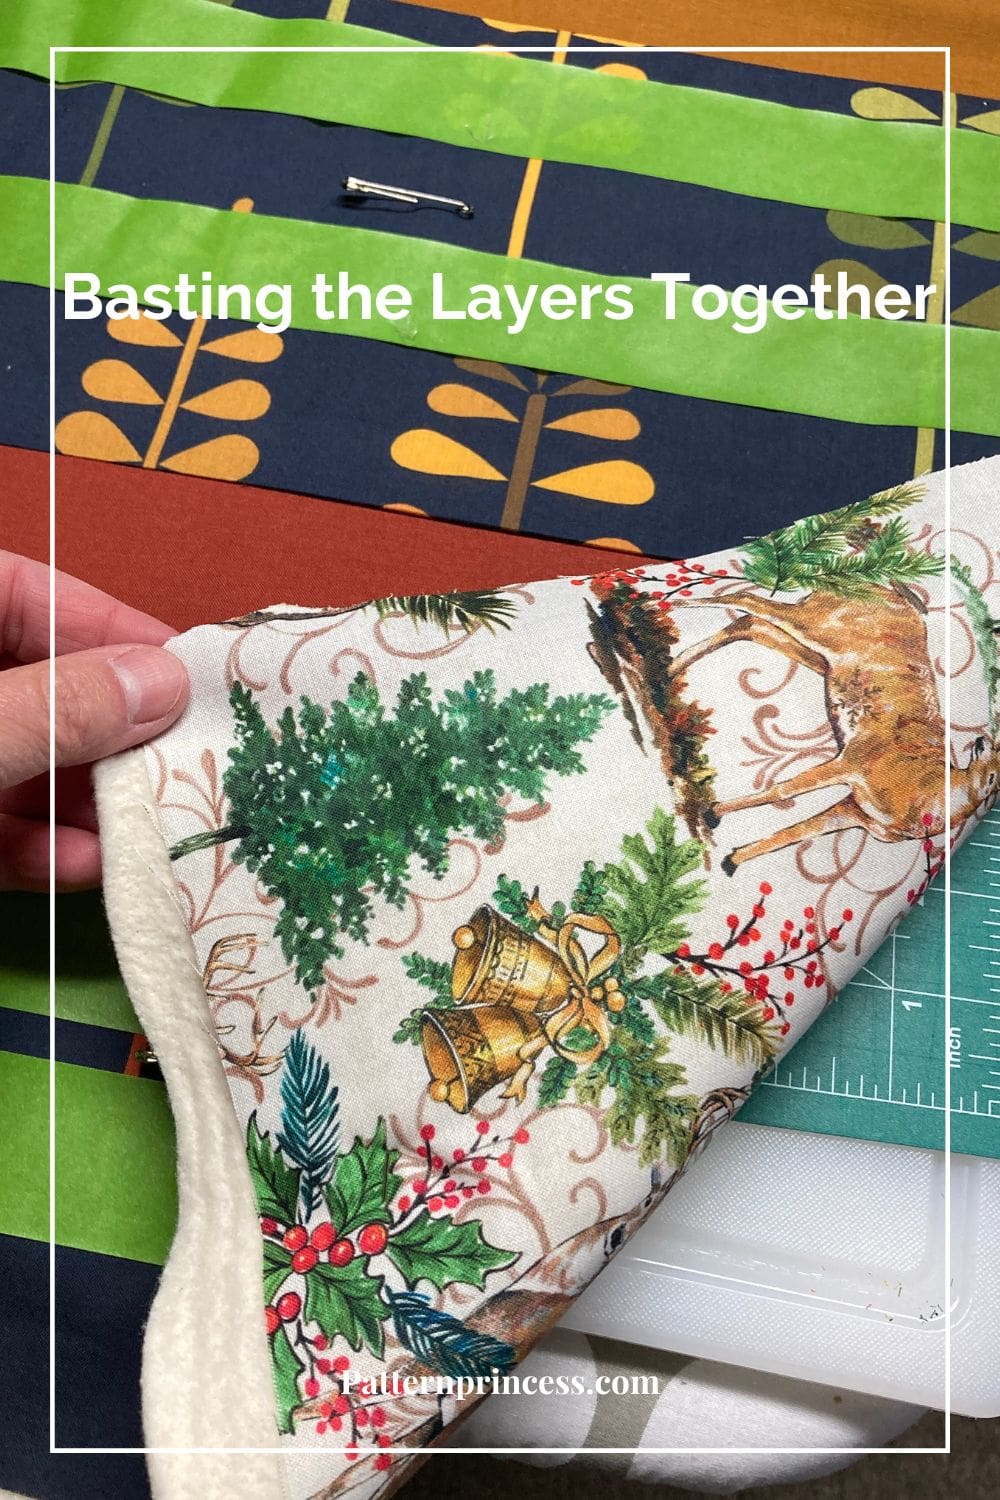
Baste the Quilt Together
Once you have the top fabric all smoothed out, use large safety pins to baste all three layers together. I like to use 1 ½” stainless pins.
Put a pin in each corner and around the entire table runner about every 5-6 inches or so through all three layers. This holds things in place, so they don’t move around while you are quilting the layers together.
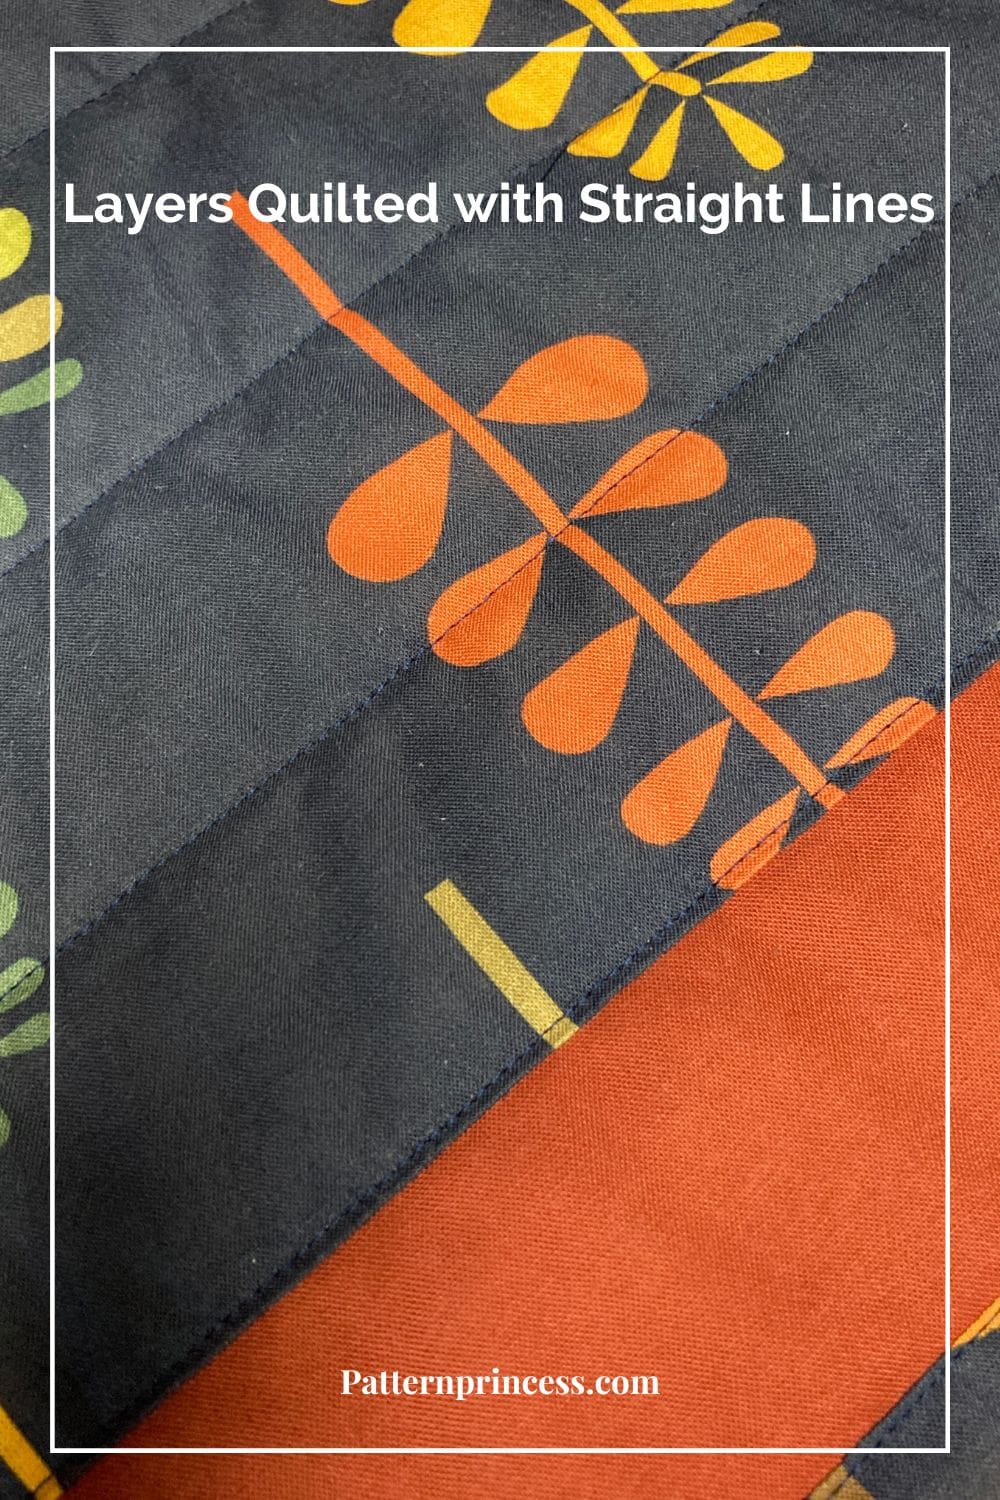
Quilting the Easy Reversible Quilted Table Runner
To highlight the simple lines in this quilt and to keep this easy, I used my walking foot and sewed from one side to the other through all three layers. To help with sewing straight lines, I used painters tape placed about 1 ½ inches apart and I also sewed along the right and left sides of the jelly roll seams.
However, you could do any type of free motion quilting design on this project.
How to Trim the Batting and Backing Fabric Before Binding
I have seen patterns detail trimming the quilts all the way from exactly on the edge of the quilt to ¼ inch. I have found that I like to trim the batting and backing fabric to about 1/8 inch of the outside edge of the quilt top.
By having a little extra batting and backing fabric beyond the quilt top, the binding seems to help the binding lay a bit better all the way around the quilt once it is sewn on.
However, during the construction of the quilt, some of the blocks may end up with edged that have pulled in a bit. If this is the case, it is best to trim the quilt exactly on the edge. Therefore, look over your whole quilt and evaluate each block to determine if you can trim a bit outside the edge or not.
To trim the batting and backing, use a longer ruler and a rotary cutter on a large cutting mat. Lay the quilt flat. Place the ruler along the edge of the quilt and use it as a guide to use your rotary cutter to trim your quilt batting and backing. Do this on all four sides.
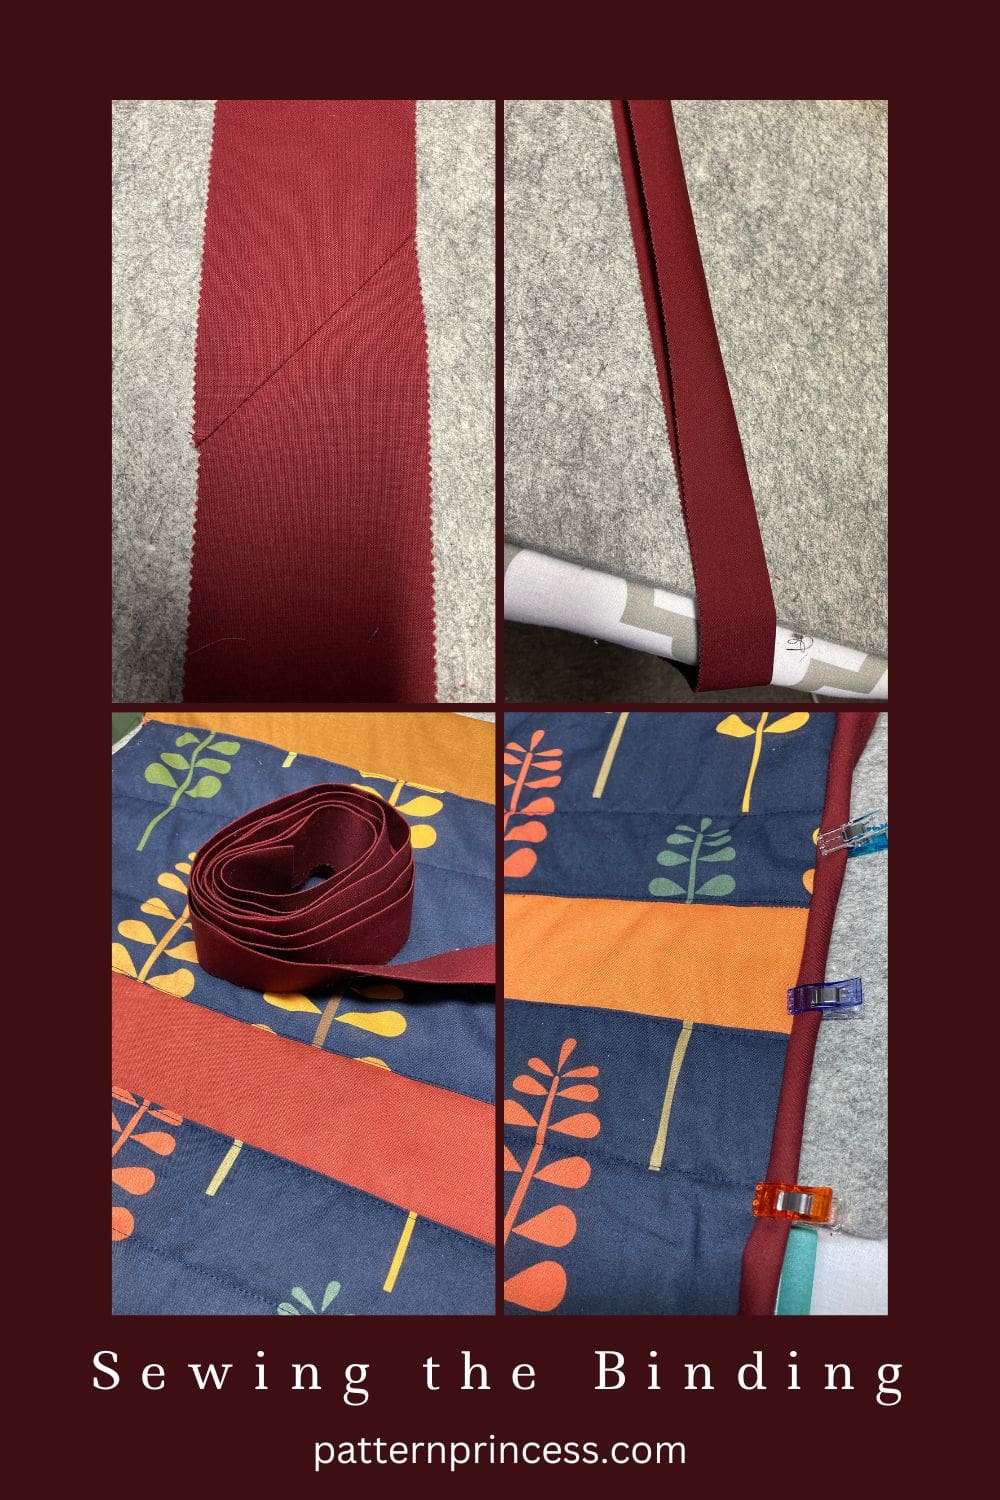
Sew the Binding to the Table Runner
First, prepare the binding strips. I used three of the jelly roll cake pieces and sewed them together for my binding. I have a tutorial on how to make your own binding if this is new to you.
Once the strips are sewn together, fold in half lengthwise with wrong sides together and press.
Pin the raw edge of the binding onto raw edge of the quilt top. I generally start in the middle of a side. Leave approximately a 3” tail hanging.
Note: This hanging part will be used to sew to the other end of the binding strip when you have finished sewing all four sides of the binding onto the quilt.
Sew the binding onto all four sides of the tablecloth making sure to miter the corners.
How to Miter Corners
As you are sewing on your binding, stop sewing ¼ inch from the corner. You may want to mark this spot with a pin ahead of time. Back stitch a few stitches and cut the thread making sure NOT to cut the quilt or the binding.
Remove the quilt from the sewing machine and fold the binding strip up straight so it is vertical from the side you were just sewing on.
Next, fold the binding strip back down on itself and align it to the edge of the side of the quilt you just sewed and the edge of the quilt you are going to sew next.
Continue sewing the binding on the quilt edge.
Repeat this process until all four sides and corners have the binding sewn on. When you are on the last side of the quilt close to where you started with the binding it is time to connect the ends of the binding.
If you know how to join the binding to make a continuous strip, go ahead and do that process. To be honest, I have tried many times and have yet to master this.
Here is what I do.
Stop stitching a few inches away from where you started. Overlap the starting and ending binding about 2 inches. Cut the ending binding at this point.
Fold the end of one of the binding strips over about 1 inch. Then tuck the raw edge of the other binding inside. Continue stitching until you meet up with the starting point.
Hand-Stitch the Binding to the Quilt Back
The last part of making a quilt is to hand-stitch the folded edge onto the back of the quilt.
I like to use a few small clips to hold the binding as I sew. Continue moving them along just ahead of where you are sewing.
When you get to the corners, turn them right side out and miter the corner.
I sew right into the corners to help hold the binding in place.
Once all the sides and corners are stitched, you are done.
It is ready to use or give as a gift.
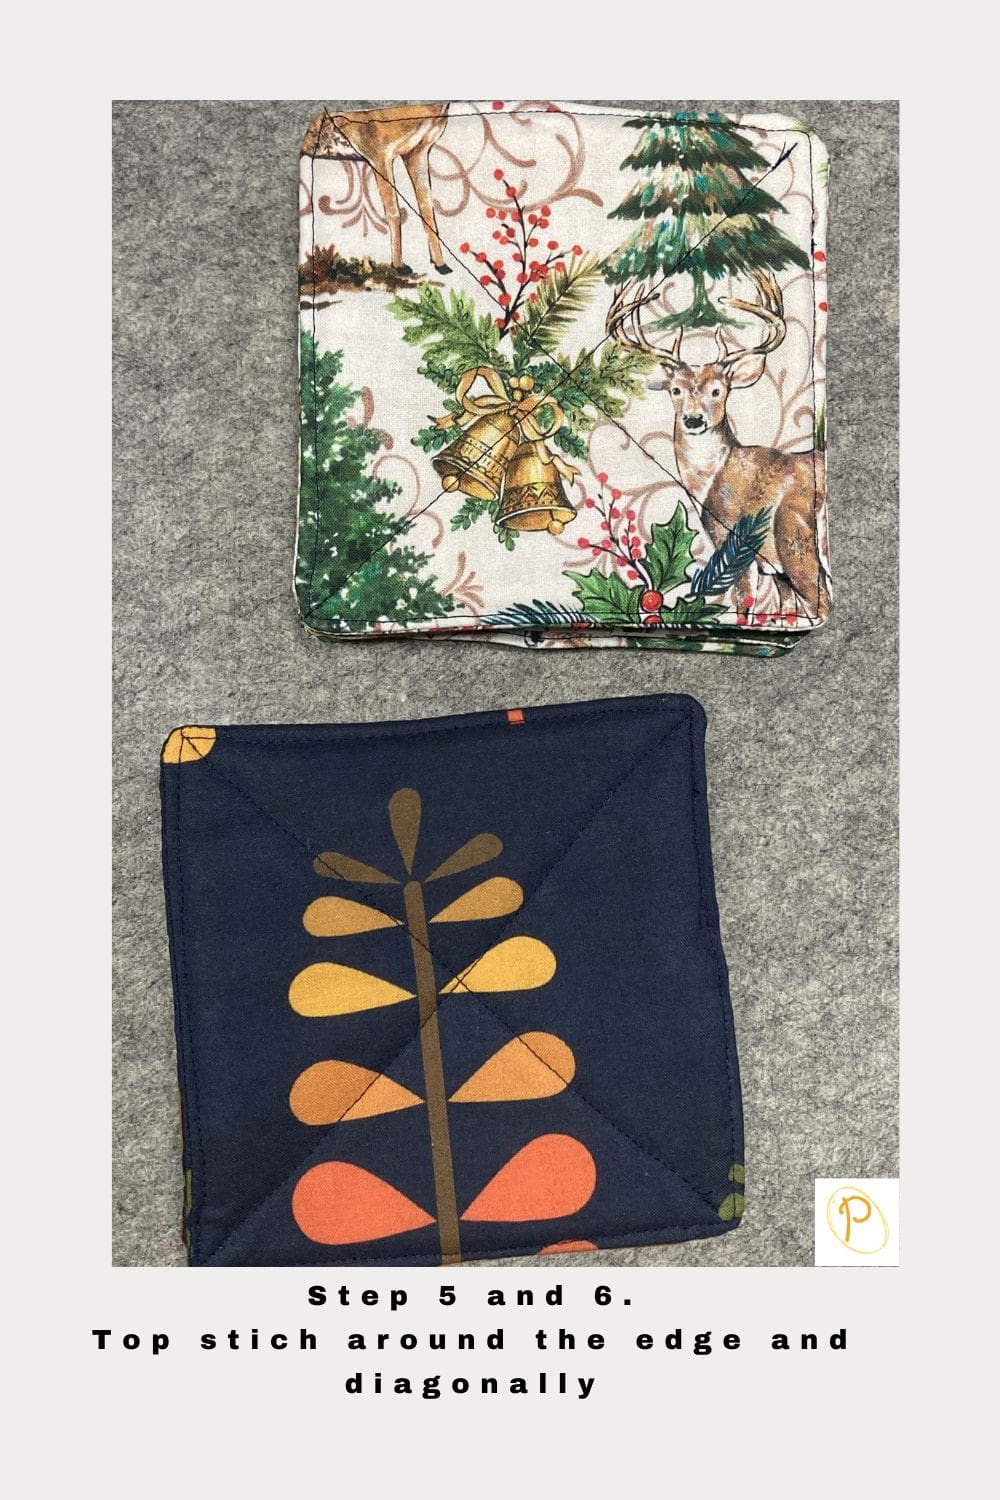
What to do With Leftover Fabric?
After completing this reversible quilted table runner, I had some leftover fabric. I made my sister some coasters too. They were super easy, and I made all 8 in an afternoon. I made four of the fabric used on the top and four of the back Holiday fabric. That way, when she flips the tablecloth for the seasons, she can swap out the coasters too.

You can find Victoria crocheting, quilting, and creating recipes. She has cooked in restaurants for over 20 years, including many larger parties. She learned to crochet when she was just 11 years old and has been crocheting ever since; over 50 years now. Over 40 years ago, she loved her first class in sewing and continues to hone her skills in quilting. Many have enjoyed the handmade gifts over the years. In her professional career, she has worked in management in a wide variety of businesses including higher education as a dean of a division. All the while attending college part-time to achieve her doctorate in higher education with an emphasis in e-learning.