Last updated on July 4th, 2024 at 11:34 pm
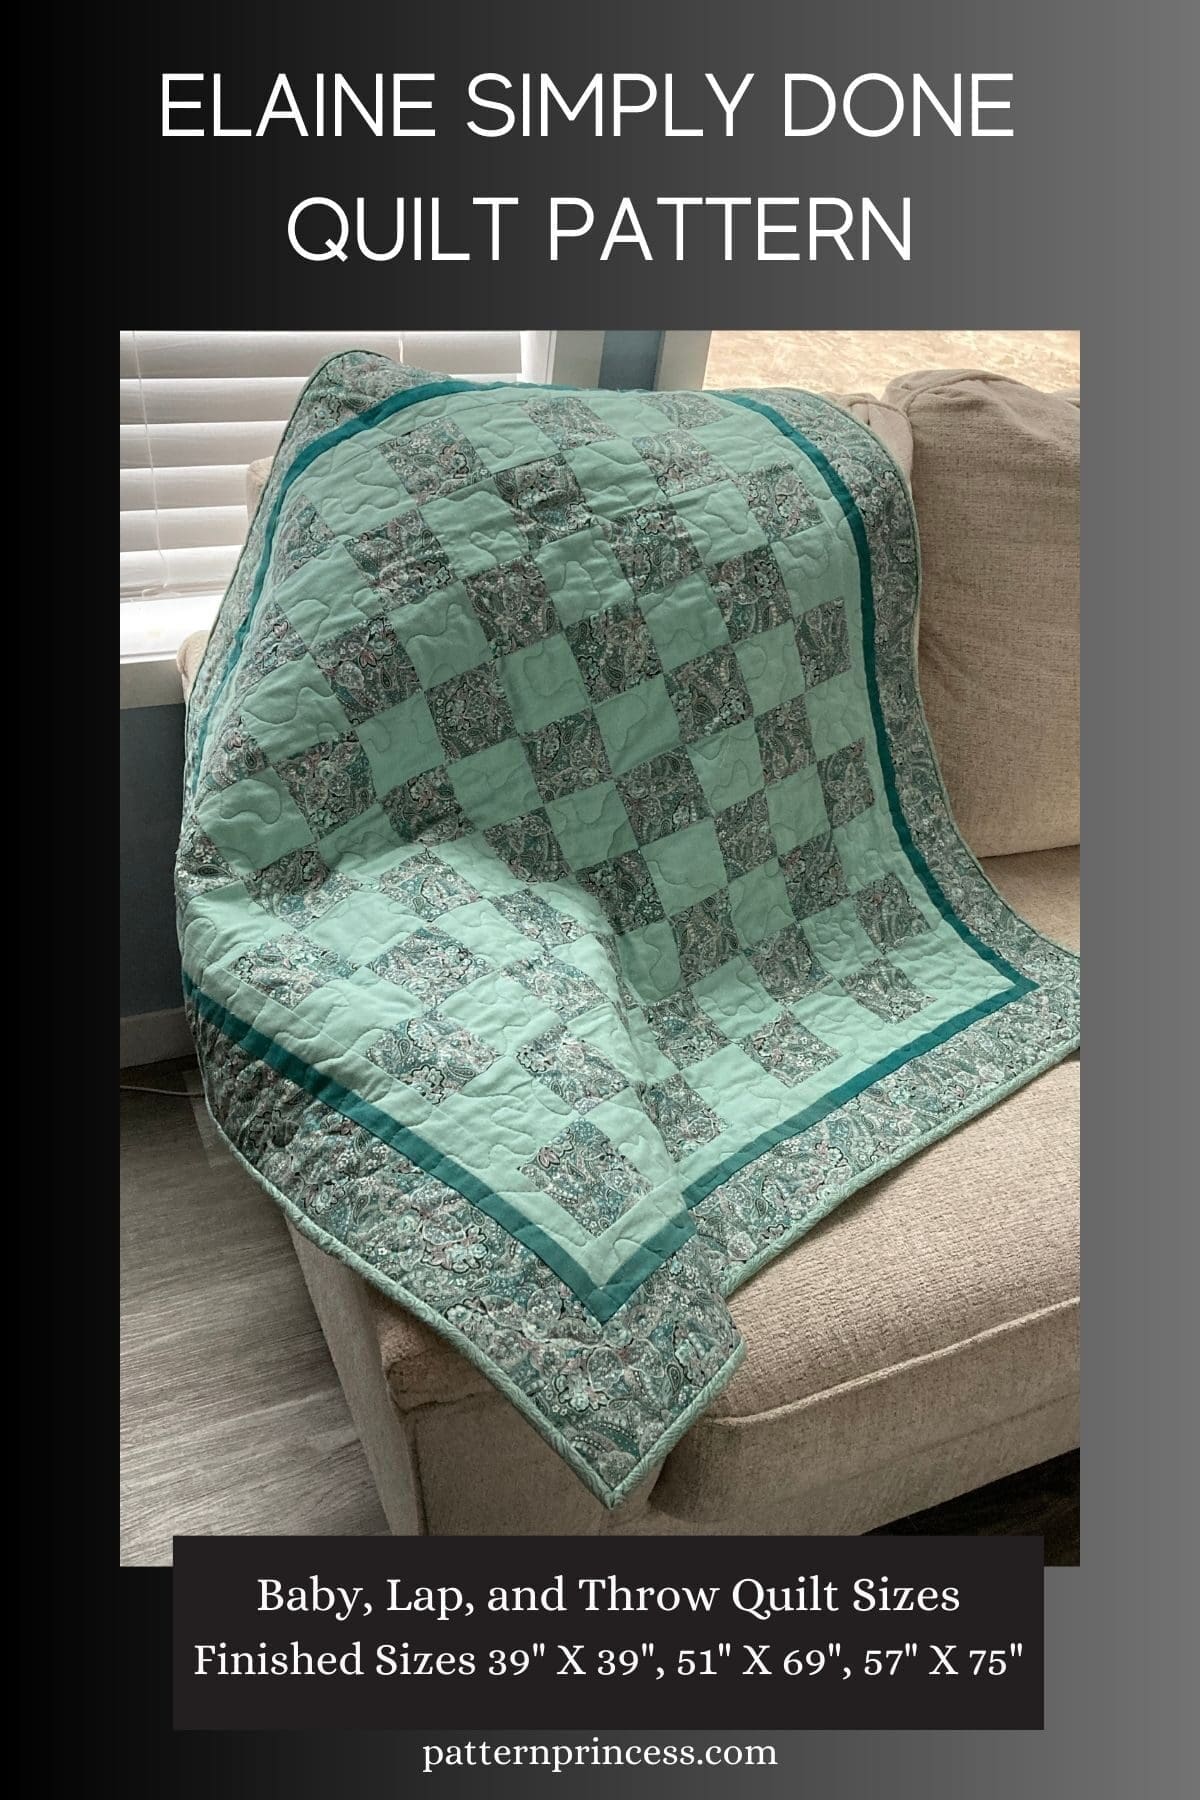
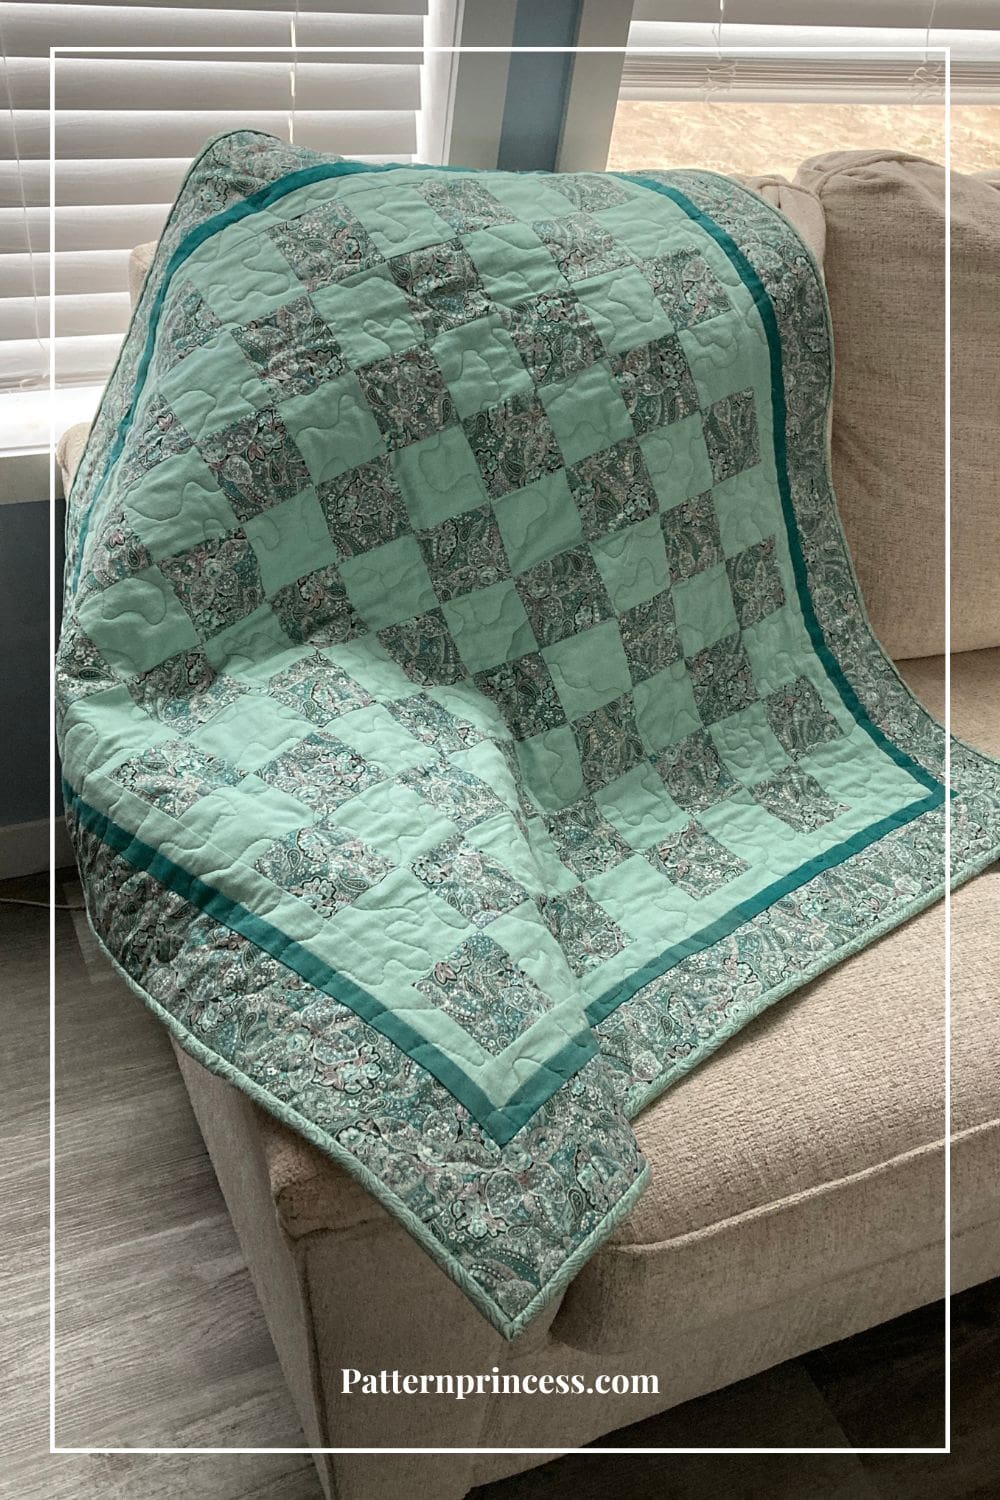
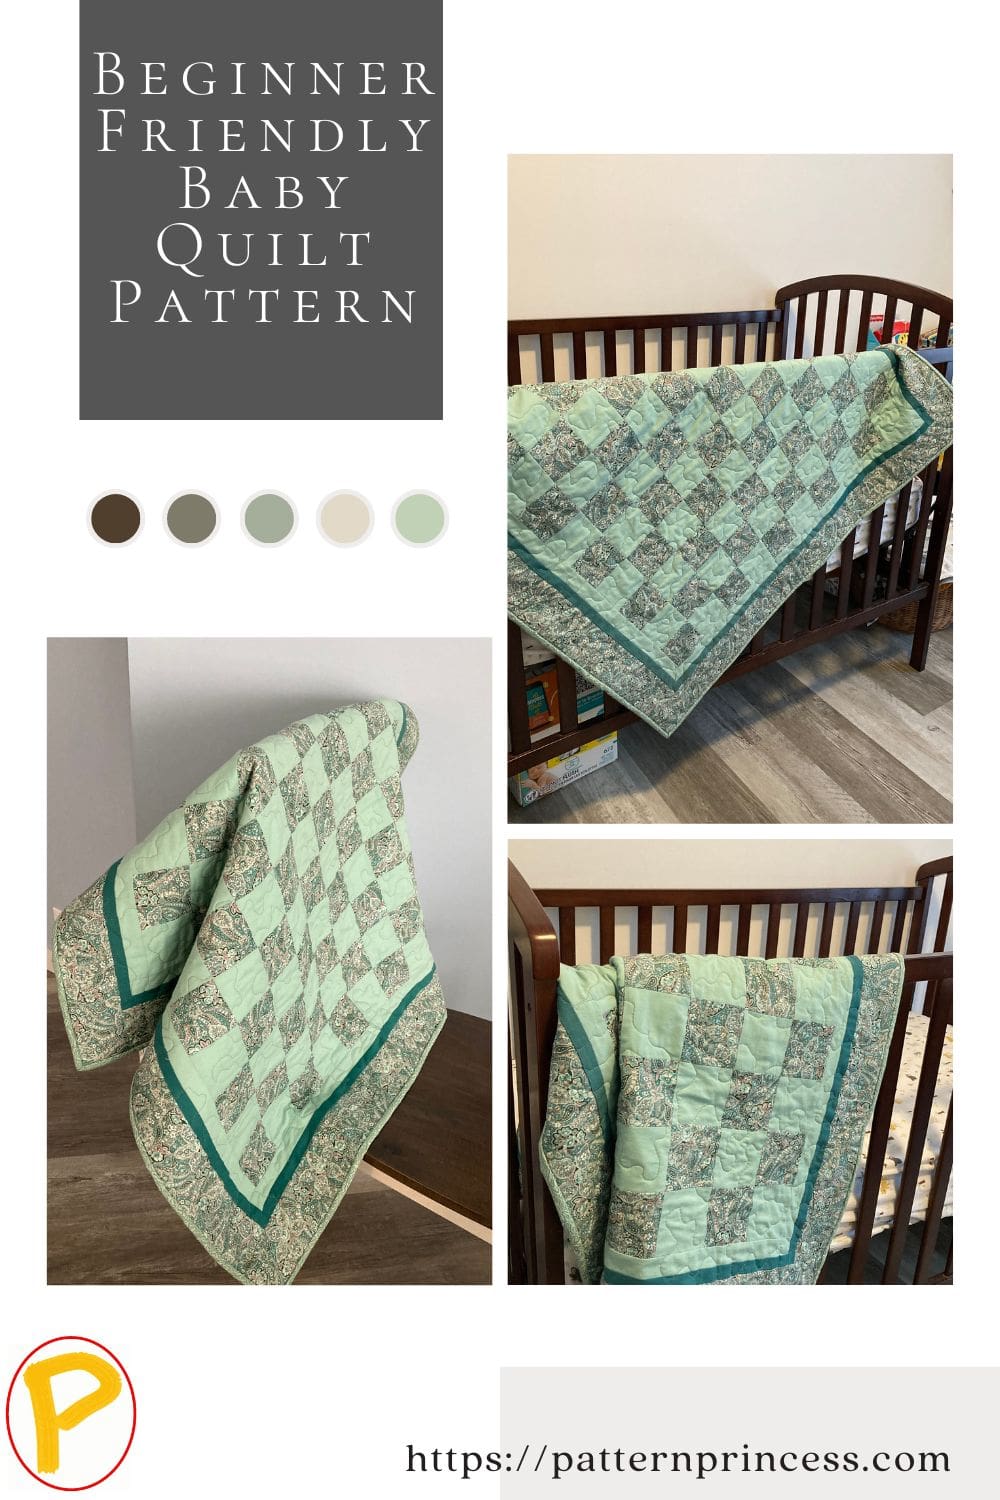
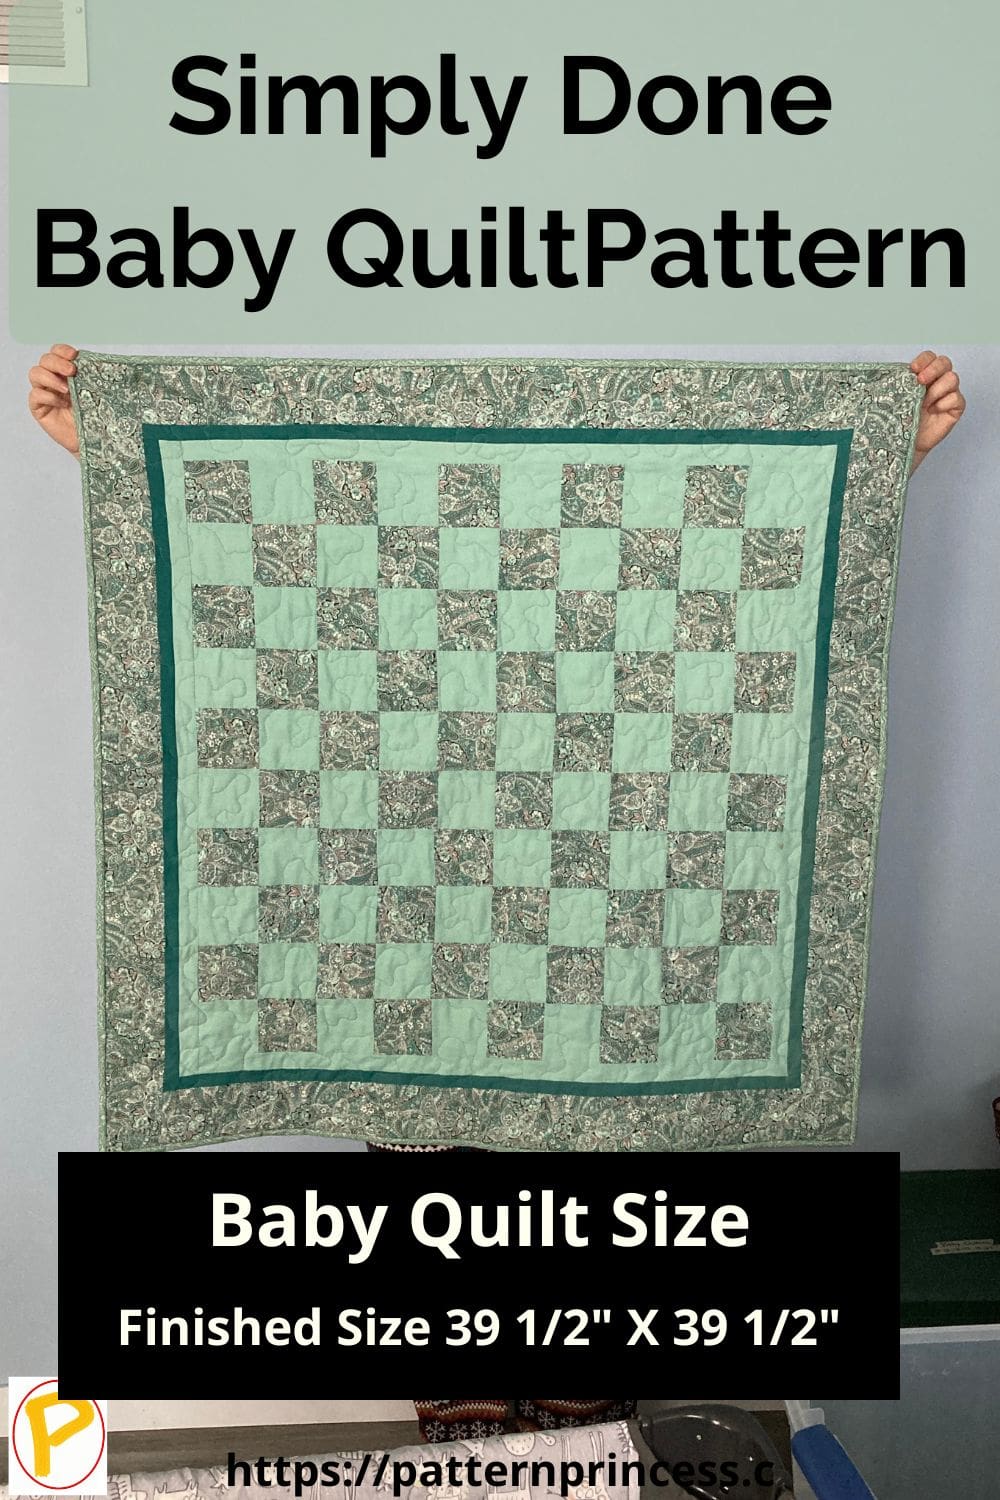
This Elaine Simply Done Quilt Pattern is a versatile design that features an attractive combination solid fabric and print fabric in a simple solid squares pattern that can be used to make any size of quilt up to a king. With easy instructions, creating this beautiful quilt has never been easier.
The attractive mix of colors, shapes, and fabrics makes this quilt pattern both captivating and eye-catching. Perfect for any size. It can be used for a lap quilt or baby blanket. Add a few more squares for larger sizes.
Whether you’re just getting started in quilting or a seasoned vet looking for something new, the quilting is a great way to make your own stunning masterpiece.
Post contains affiliate links, and we earn commissions if you shop through the links on this page. For more information, please read the disclosure section under the About Us page.
Finishing Quilt Patterns
Quilting is one of the most popular forms of needlework and has provided comfort, connection, beauty, and joy for thousands of years. This ancient art allows us to take materials like fabric and thread. Often seen as everyday items and turn it into something beautiful.
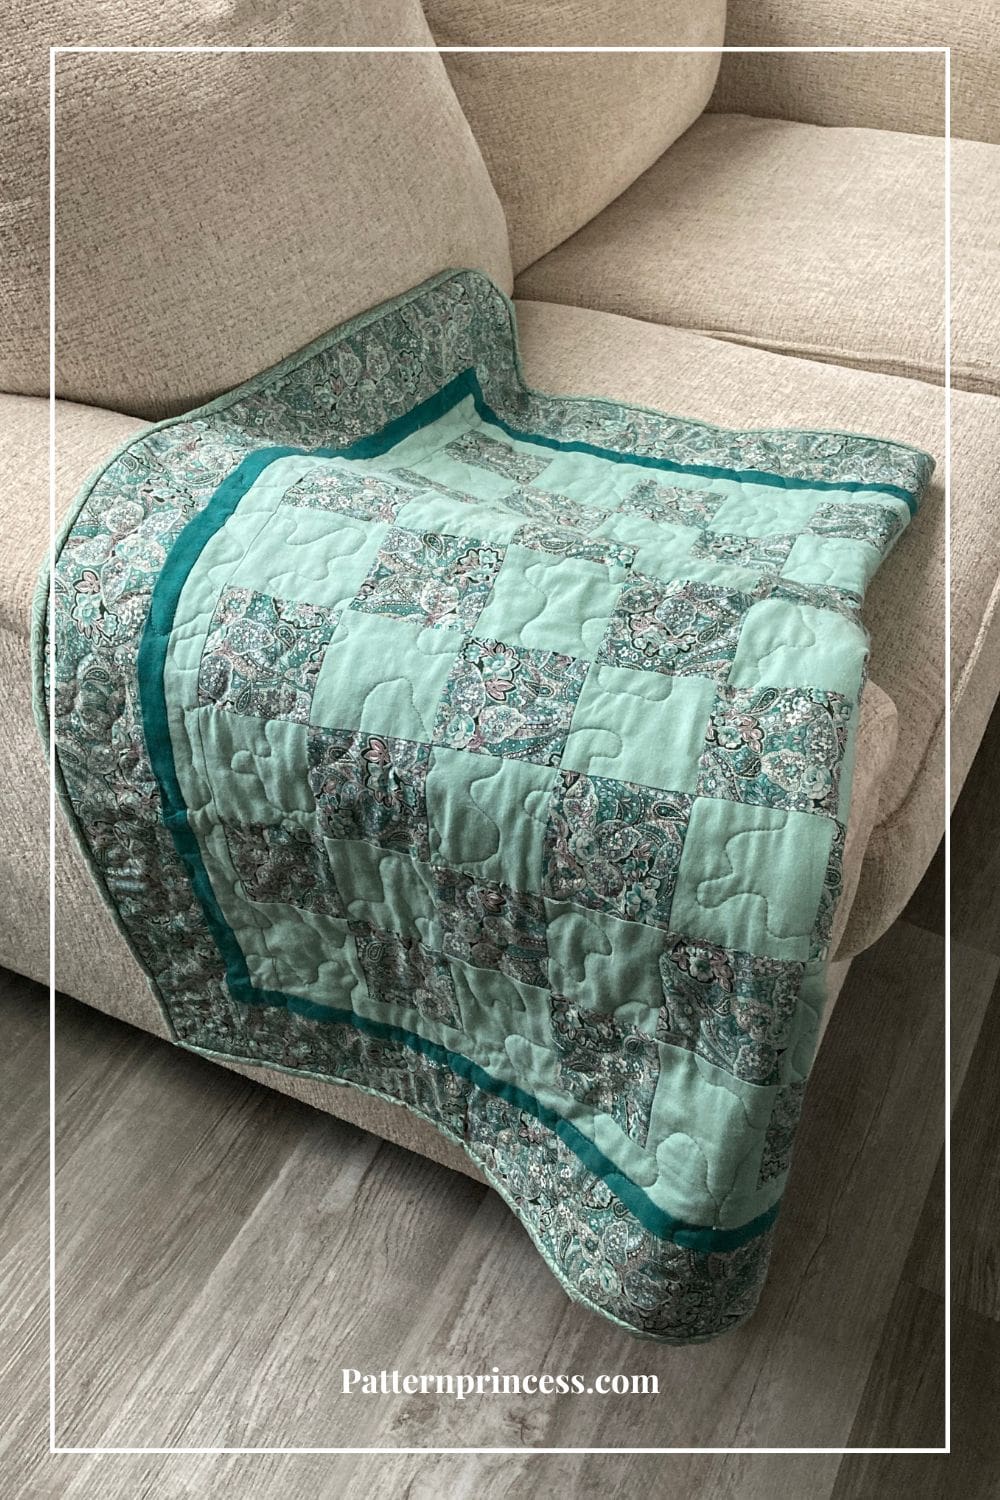
Recently, my brother-in-law had his aunt pass away. She was a fabric crafter, and she did embroidery and quilting. Her work was beautiful. My sister brought me a few containers of her fabric and this quilt was in amongst the scraps. It was partially finished and after looking through her fabric stash, I realized what she meant to have as a backing fabric. The borders were already cut and folded with the quilt top.
This lap quilt is the result of her project that she started. Now I will give this back to my brother-in-law as a keepsake from his aunt.
A few years ago, I had a similar situation with my brother-in-law’s mom. She was a crocheter. She had just purchased some yarn before she passed. My sister knew I would make good use of it. She even gave me her crochet hook. I ended up using her yarn to make a continuous granny square afghan using her crochet hook and yarn.
Then with the leftover yarn, I made a granny square tablecloth for each of her four grandchildren.
I gave the crochet pieces along with her crochet hook back to my sister and her family to cherish for years to come.
My quilty friend told me about an organization that connects unfinished craft projects with people that volunteer their time to finish the projects they’ve left behind. The organization is called Loose Ends, finishing projects that loved ones left behind.
Make this Easy Quilt Pattern in Three Sizes
If you’re anything like me, one of your favorite activities is to sit down with a good quilt project and just lose yourself in its beauty and complexity. There’s something so fulfilling about producing an intricate work of art out of textiles; it’s almost therapeutic. It also helps that the entire process, from piecing together the design to admiring the finished product, is incredibly satisfying. Whether you are an experienced quilter, or a complete newbie, sewing and quilting are activities that everyone can enjoy.
Baby blanket, shown
39 ½ inches x 39 ½ inches
Lap quilt
51 ½ x 69 ½ inches
Throw Quilt
57 ½ X 75 ½ inches
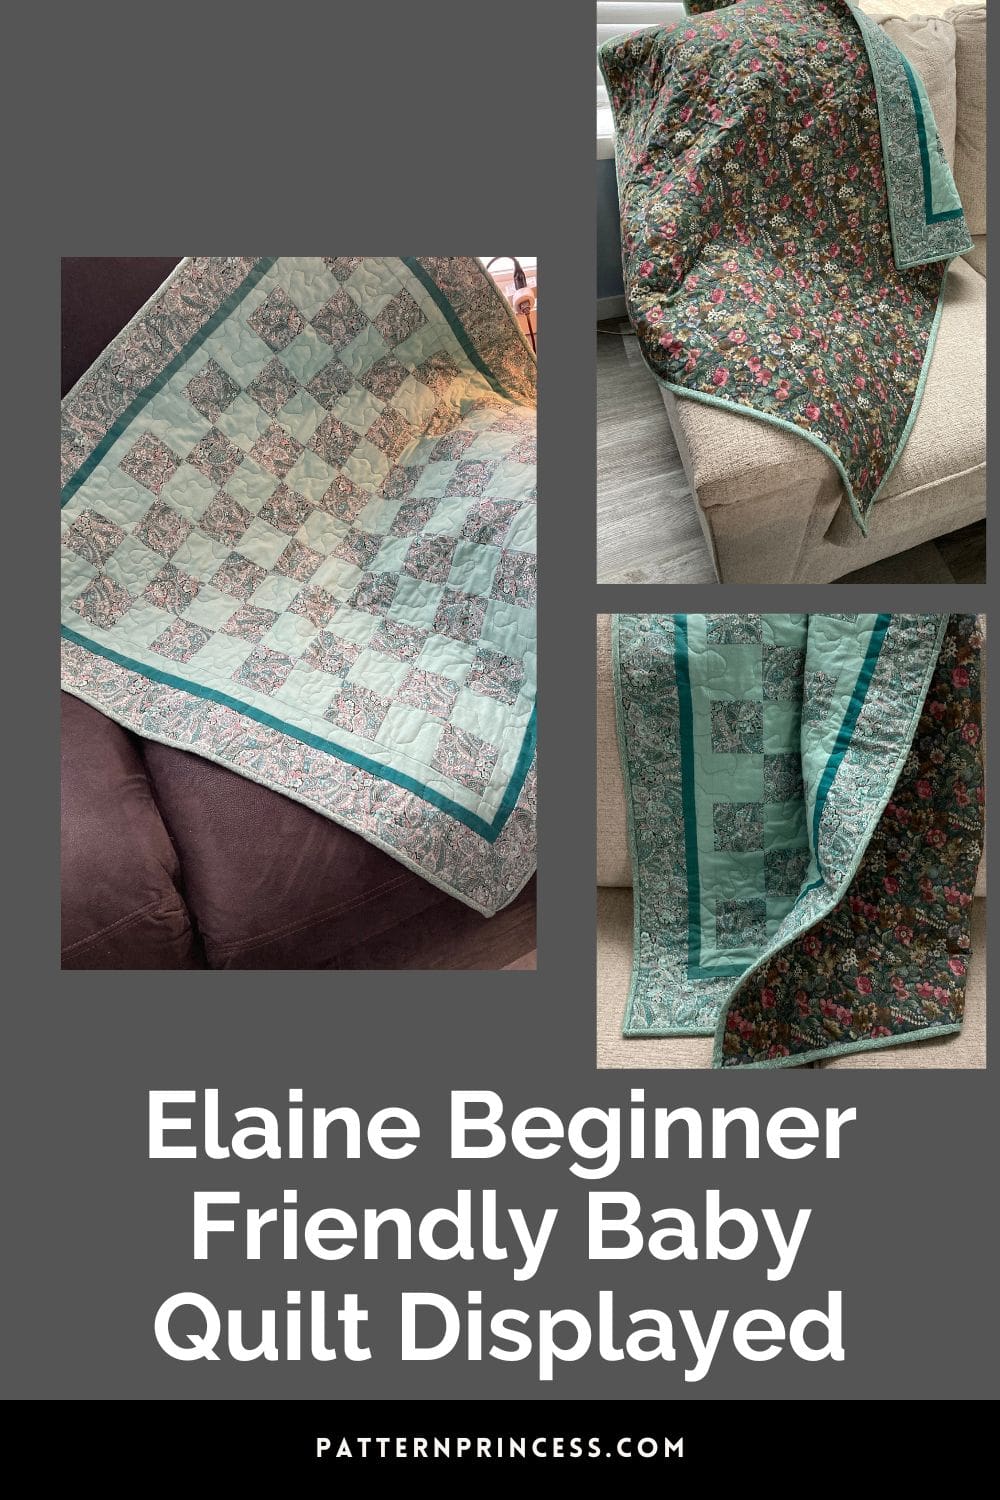
Easy Quilt Pattern for a Beginner
If you’re anything like me, one of your favorite activities is to sit down with a good quilt project and just lose yourself in its beauty and complexity.
There’s something so fulfilling about producing an intricate work of art out of textiles; it’s almost therapeutic. It also helps that the entire process, from piecing together the design to admiring the finished product, is incredibly satisfying.
Directions: Elaine Simply Done Quilt Pattern
Skill Level
Beginner. This pattern is easy to make.
Finished Size
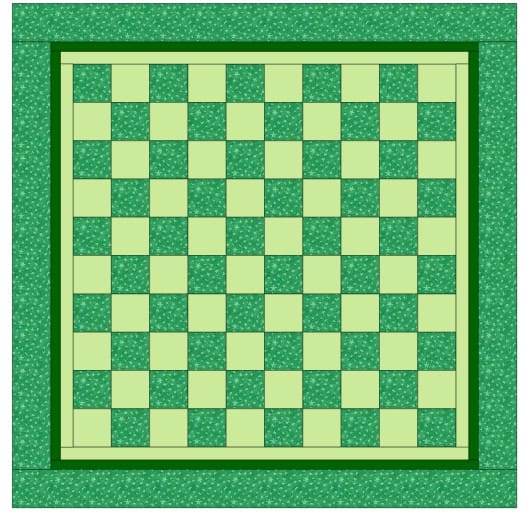
Baby blanket, shown
39 ½ inches x 39 ½ inches (10 squares across, 10 squares long)
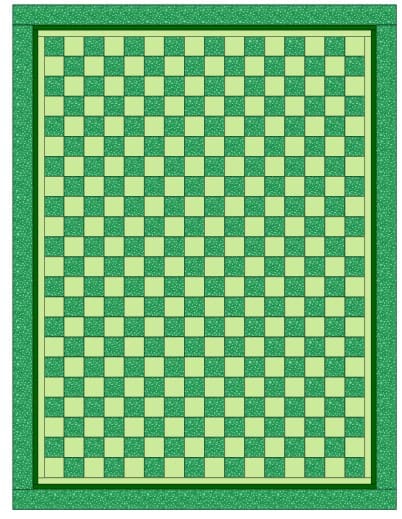
Lap quilt
51.5 x 69.5 inches (14 squares across, 20 squares long) 12 inches wider or 4 more squares on the sides. 30 inches longer or 10 more squares on the bottom.
Throw Quilt
57.5 X 75.5 inches (16 squares across, 22 squares long) 6 inches wider or 2 more squares on the sides. 6 inches longer or 2 more squares on the bottom.
Pattern Notes
Simple Done Quilt is perfect for a precut, fat quarter, fat eighth, and cut yardage quilt pattern that makes four quilt sizes.
I like to make the borders a smidge bit longer and trim to size after sewn into place. I always worry that I will have this long strip of fabric that is a bit too short. Therefore, you may find that the borders need to be trimmed by ¼ to ½ inch.
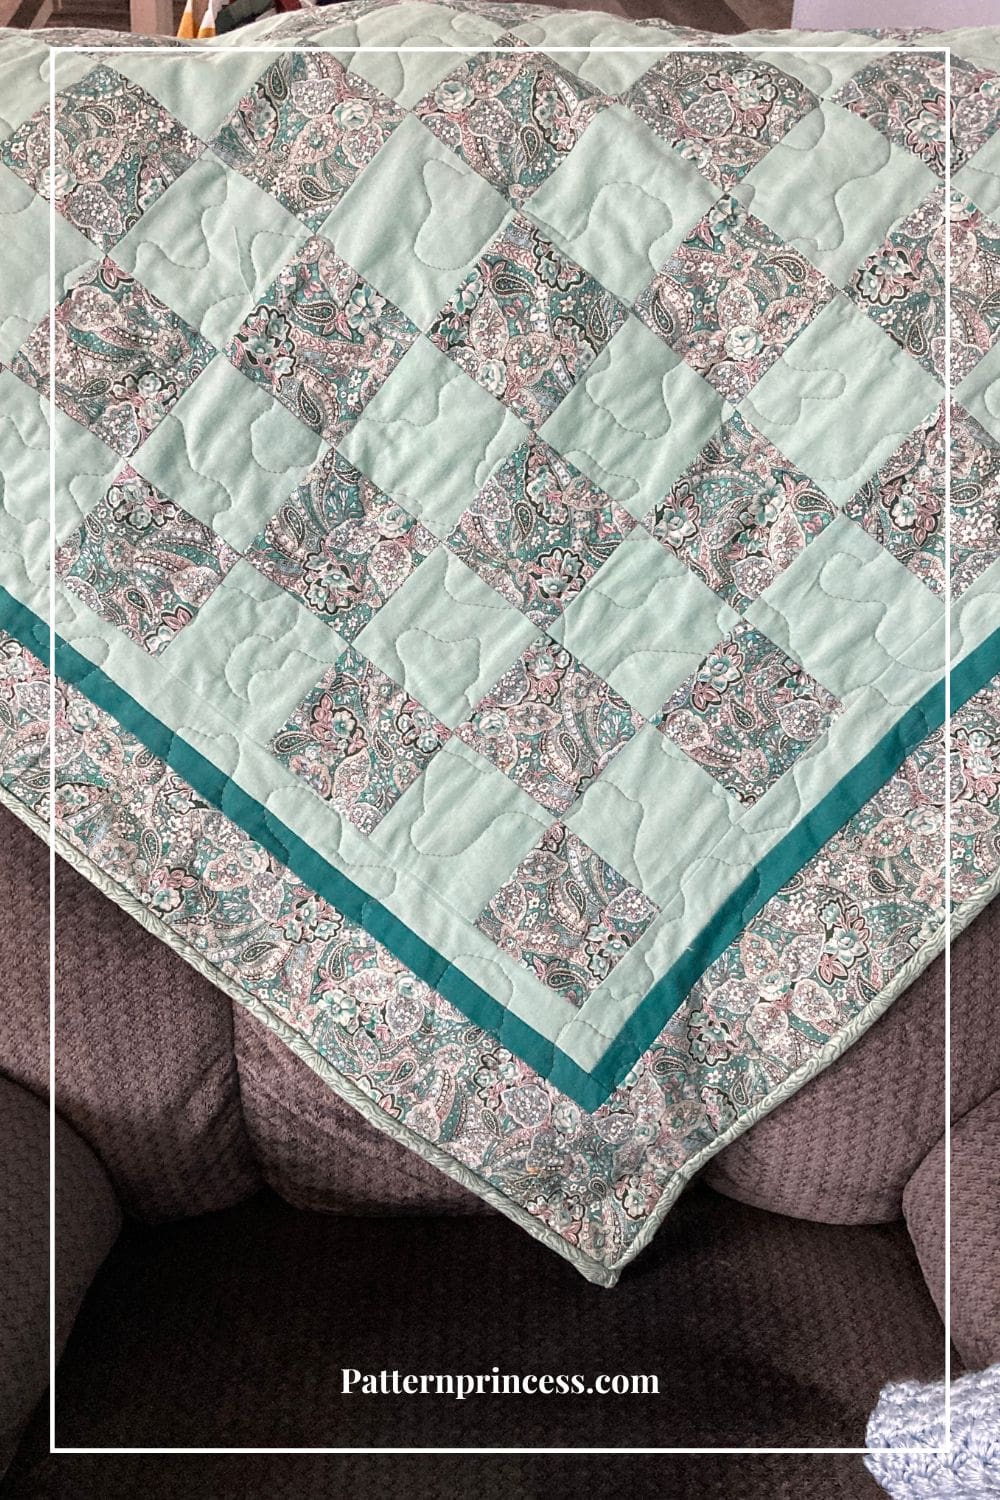
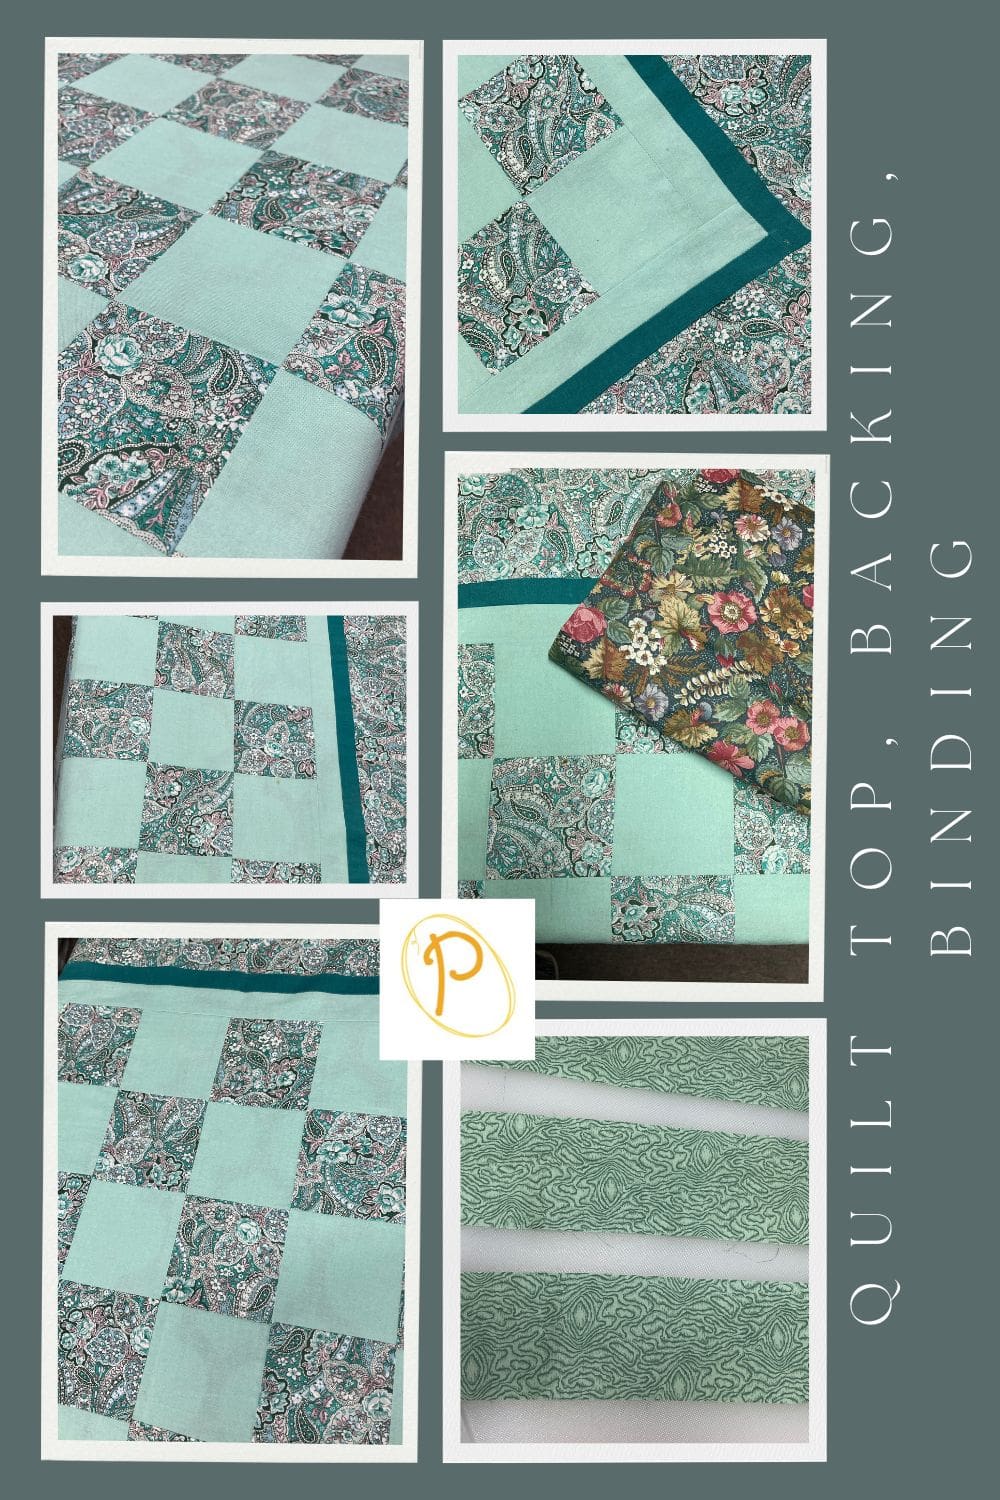
This simple quilt pattern works well with two solid colors or print fabrics.
The first border just happens to be in the same solid color as the quilt block. It could certainly be a different complimentary color.
For each quilt size the steps for completing the quilt project are the same. You will be using more squares and the sizes of the three borders are different. But the quilting process itself is the same.
Use a ¼-inch seam allowance. I recommend using a special presser foot with a ¼-inch guide if you have one for your machine. This will help you get uniform seams, and matching seams.
Nest your seams. This means that the seams of each row are aligned, and the pieces fit together almost like the pieces of a puzzle.
Right Sides Together. Sew fabric together with right sides together. Unless otherwise noted.
Fabric Cutting Tip. When cutting your squares, leave a long side for the borders. Or cut out the borders first, then cut your squares.
The directions for this quilt are for rotary cutting, machine piecing, machine quilting, and the binding is hand-stitched to the quilt back.
Accurate cutting and sewing enhances your final product. Pin your pieces together before sewing them to ensure proper seam alignment.
Materials and Equipment/Tools
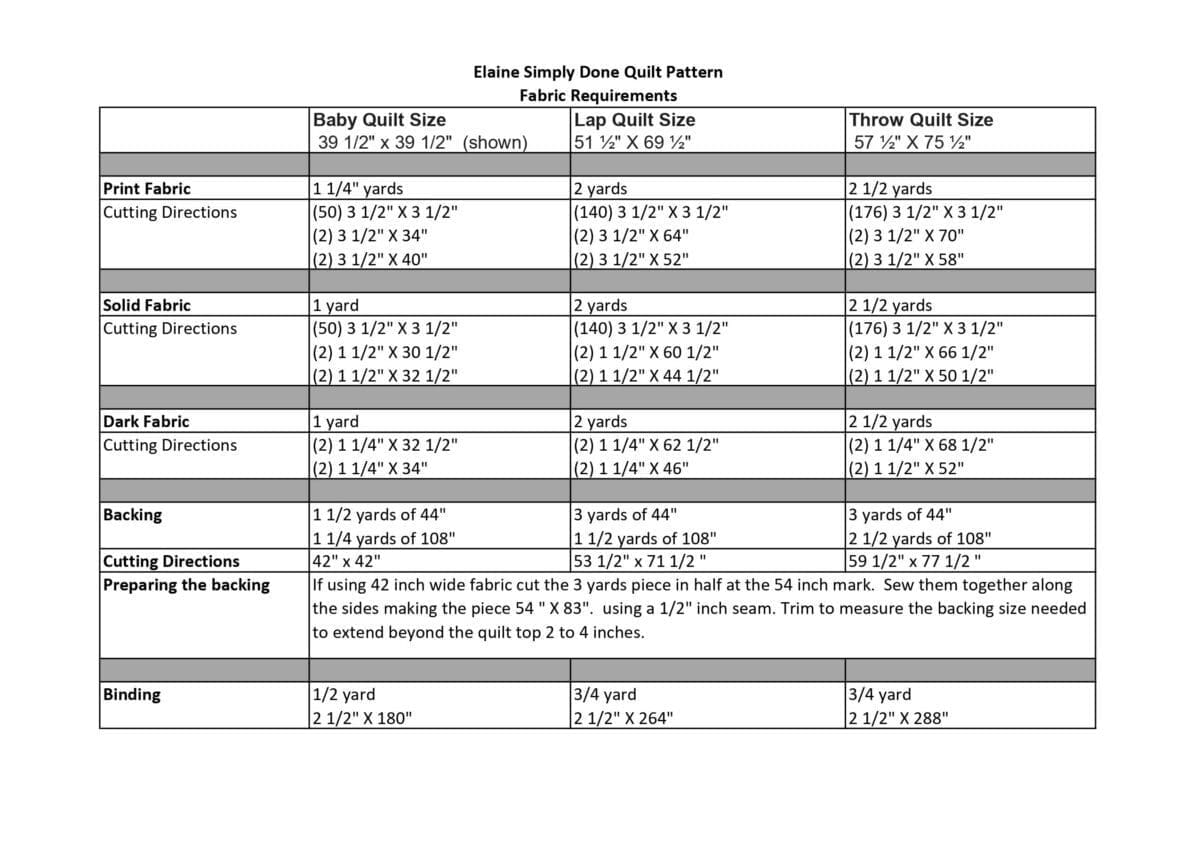
The fabric requirements for the quilt tip, backing, binding, and the batting needed are noted by each quilt size below.
However, all the quilts will use the following materials and tools to complete.
Thread
Rotary Cutter
Quilting Ruler
Cutting Mat
Rotating Cutting Mat
Iron
Ironing Board or Pressing Mat
Pins
Clips
Sewing Machine
Baby Quilt
39 ½ inches x 39 ½ inches (10 squares across, 10 squares long)
Fabric Requirements
The following fabric requirements take into consideration the longer pieces needed for the borders. You can use less yardage if you piece your borders. With the sizes listed, you will be able to get a long solid piece to sew on.
Print Fabric 1 ¼ yards
Solid Fabric 1 yard
Dark Fabric 1 yard
100 Total Squares, 50 of each 3 ½ x 3 ½ square
- Cut 50 Solid color squares 3 ½ X 3 ½ inches
- Cut 50 Print color squares 3 ½ X 3 ½ inches
Three Borders
First one the same color as the solid color squares.
Sides Vertical borders 1 ½ X 30 ½ inches
Top and Bottom Horizontal borders 1 ½ x 32 ½ inches
Second border darker color
Sides Vertical borders 1 ¼ X 32 ½ inches
Top and Bottom Horizontal borders 1 ¼ X 34 inches
Third border
Same color as the 3 ½ X 3 ½ inch print squares.
Sides Vertical borders 3 ½ X 34 inches.
Top and Bottom Horizontal borders 3 ½ x 39 ½ inches.
Backing Fabric
1 ¼ yards of coordinating fabric in 108” width or 1 ½ yards at the 44” width.
Cutting directions. 42″ x 42”
Binding Fabric
1/2 yard. I used leftover fabric from the fat quarters to make this binding.
Make the binding 2 ½ x 180 inches long.
Batting
1 ¼ yards. Cotton batting.
Lap Quilt

51.5 x 69.5 inches (14 squares across, 20 squares long) 12 inches wider or 4 more squares on the sides. 30 inches longer or 10 more squares on the bottom.
Fabric Requirements
Print Fabric 2 yards
Solid Fabric 2 yards
Dark Fabric 2 yards
280 Total Squares, 140 of each 3 ½ x 3 ½ square
- Cut 140 Solid color squares 3 ½ X 3 ½ inches
- Cut 140 Print color squares 3 ½ X 3 ½ inches
Three Borders
First one the same color as the solid color squares.
Sides Vertical borders 1 ½ X 60 ½ inches
Top and Bottom Horizontal borders 1 ½ x 44 ½ inches
Second border darker color
Sides Vertical borders 1 ¼ x 62 ½ inches
Top and Bottom Horizontal borders 1 ¼ X 46 inches
Third border
Same color as the 3 ½ x 3 ½ inch print squares.
Sides Vertical borders 3 ½ X 64 inches.
Top and Bottom Horizontal borders 3 ½ x 52 inches.
Backing Fabric
3 yards of 44″ wide coordinating fabric joined or 1 1/2 yards of 108″ wide fabric.
Cutting Directions. 53 1/2″ x 71 1/2 “
Binding Fabric
3/4 yard. I used leftover fabric from the fat quarters to make this binding.
Make the binding 2 ½ x 264 inches long.
Batting
2 yards. Cotton batting.
Throw Quilt
57.5 X 75.5 inches (16 squares across, 22 squares long) 6 inches wider or 2 more squares on the sides. 6 inches longer or 2 more squares on the bottom.
Fabric Requirements
Print Fabric 2 ½ yards
Solid Fabric 2 ½ yards
Dark Fabric 2 ½ yards
352 Total Squares, 176 of each 3 ½ x 3 ½ square
- Cut 176 Solid color squares 3 ½ X 3 ½ inches
- Cut 176 Print color squares 3 ½ X 3 ½ inches
Three Borders
First one the same color as the solid color squares.
Sides Vertical borders 1 ½ X 66 ½ inches
Top and Bottom Horizontal borders 1 ½ x 50 ½ inches
Second border darker color
Sides Vertical borders 1 ¼ x 68 ½ inches
Top and Bottom Horizontal borders 1 ¼ X 52 inches
Third border
Same color as the 3 ½ x 3 ½ inch print squares.
Sides Vertical borders 3 ½ X 70 inches.
Top and Bottom Horizontal borders 3 ½ x 58 inches.
Backing Fabric
2 ½ yards of extra wide coordinating fabric or 3 yards of the 44” wide fabric joined.
Binding Fabric
3/4 yard. I used leftover fabric from the fat quarters to make this binding.
Make the binding 2 ½ x 288 inches long.
Batting
2 1/2 yards. Cotton batting.
Quilt Top Sewing Directions
Begin with the 3 ½ X 3 ½ inch squares.
Row 1 Instructions. For the first horizontal row, with right sides together using ¼-inch seams, sew one solid fabric and one print fabric 3 ½ x 3 ½ inch square together. Continue sewing the squares together until you have 5 solid and 5 print squares sewn together. (The number of squares and rows completed in this first part will depend on the quilt size you chose to make).
For row 2, start with the opposite block of what you started with for row 1. If the first block in row 1 was a solid, start this row with a print. Then continue joining the squares alternating between the print and solid. Repeat this process for the rest of the horizontal rows.
Press the seams for the top row to the right, the next row to the left, the next row to the right, the next row to the left, and so on. Alternating the direction of the seams will help you nest your seams together for squaring up your pattern. You can also press your seams open if preferred.
Attach Rows Together. Once the horizontal rows are sewn together. It is time to join them.
With the right sides together using ¼” seam allowance, nest the seams together and pin in place. Sew each of the horizontal rows together.
Press the seams to one side or open.
Add the First Border
First Border in the Solid Color
Using the strips indicated for the size quilt you are working on, place the vertical sashing on either side of the quilt top.
Pin on the sides of the quilt top with the right sides together. Using ¼-inch seam allowance, sew 1 strip to each side of the quilt.
Trim as needed.
Press all seams to the outside or open.
Horizontal Sashing Pieces on the Top and Bottom
Pin on the top and bottom of the quilt top with the right sides together. Using ¼-inch seam allowance, sew 1 strip to the top and bottom of the quilt.
Trim as needed.
Press all seams to the outside or open.
Second Border in Darker Color
Using the strips indicated for the size quilt you are working on, place the vertical sashing on either side of the quilt top.
Vertical Sashing Pieces on the Sides
Pin on the sides of the quilt top with the right sides together. Using ¼-inch seam allowance, sew 1 strip to each side of the quilt.
Trim ad needed.
Press all seams to the outside or open.
Horizontal Sashing Pieces on the Top and Bottom
Pin on the top and bottom of the quilt top with the right sides together. Using ¼-inch seam allowance, sew 1 strip to the top and bottom of the quilt.
Trim as needed.
Press all seams to the outside or open.
Third Border Print Fabric
Using the strips indicated for the size quilt you are working on, place the vertical sashing on either side of the quilt top.
Vertical Sashing Pieces on the Sides
Pin on the sides of the quilt top with the right sides together. Using ¼-inch seam allowance, sew 1 strip to each side of the quilt.
Trim ad needed.
Press all seams to the outside or open.
Horizontal Sashing Pieces on the Top and Bottom
Pin on the top and bottom of the quilt top with the right sides together. Using ¼-inch seam allowance, sew 1 strip to the top and bottom of the quilt.
Trim as needed.
Press all seams to the outside or open.
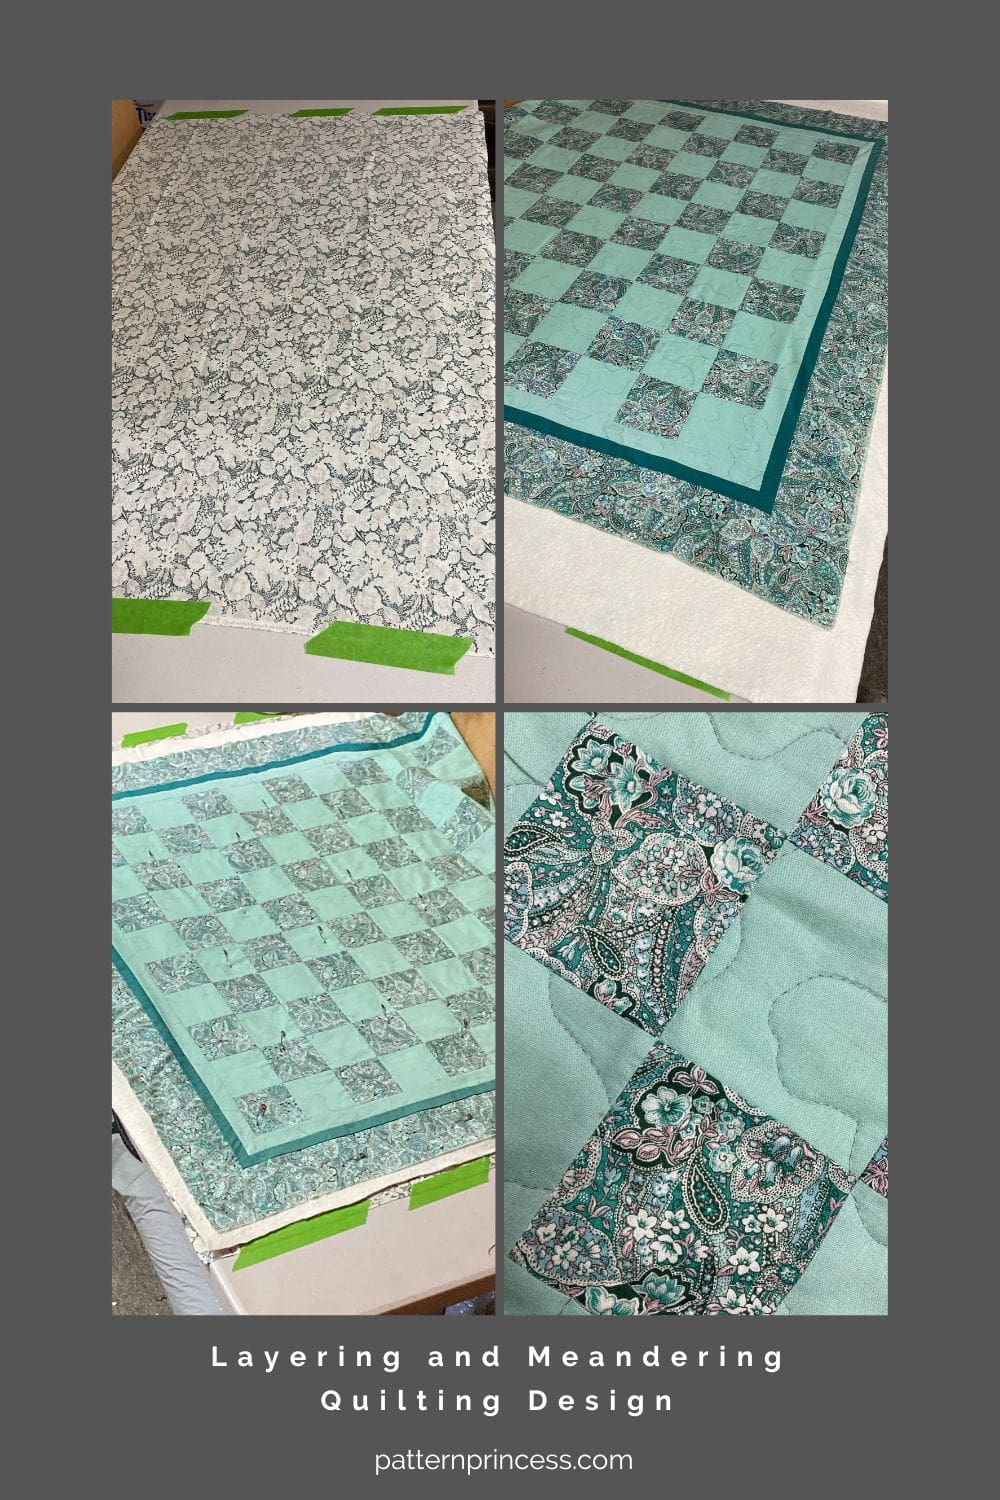
Layer the Top, Batting, and Back
Sandwich the quilt backing fabric, batting, and the quilt top. For a smaller quilt like the baby quilt or lap quilt, it is much easier to achieve.
The backing fabric and the batting should be a few inches larger all the way around than the quilt top. This makes sure that there is backing and batting covering the entire quilt top fabric. If you cut it too close and there is any slippage, you might end up with an edge that does not have the bottom part of the quilt sandwich.
Therefore, the two bottom layers of the quilt (the back and the batting) are extending about 2 inches all around the outside edges of the quilt top.
Begin by placing the backing fabric on a flat solid surface, right side down facing out. Smooth out any wrinkles. Use painters’ tape to secure the edges of the fabric down. This will help hold it in place and reduce the chance of a wrinkle developing as you place the next two layers.
Next, center the batting on top of the backing fabric smoothing out any wrinkles.
Finally, place the quilt top on the batting, centering it with the right side up. Smooth out any wrinkles.
Baste the Quilt Together
Once you have the top fabric all smoothed out, use large safety pins to baste all three layers together. Use a good quality 1 ½” stainless steel pin for this.
Put a pin in each corner and around the entire quilt about every 5-6 inches or so through all three layers. This holds things in place, so they don’t move around while you are sewing the layers together using a quilting design of your choice.
Quilting the Elain Simply Done Quilt Pattern
To be honest, I am not very good at quilting by freehand. Therefore, I use a plastic template and heat erasable marker to draw the sewing lines on ahead of time. This makes it so much easier to quilt and when I am done, the marker lines disappear with the heat of an iron.
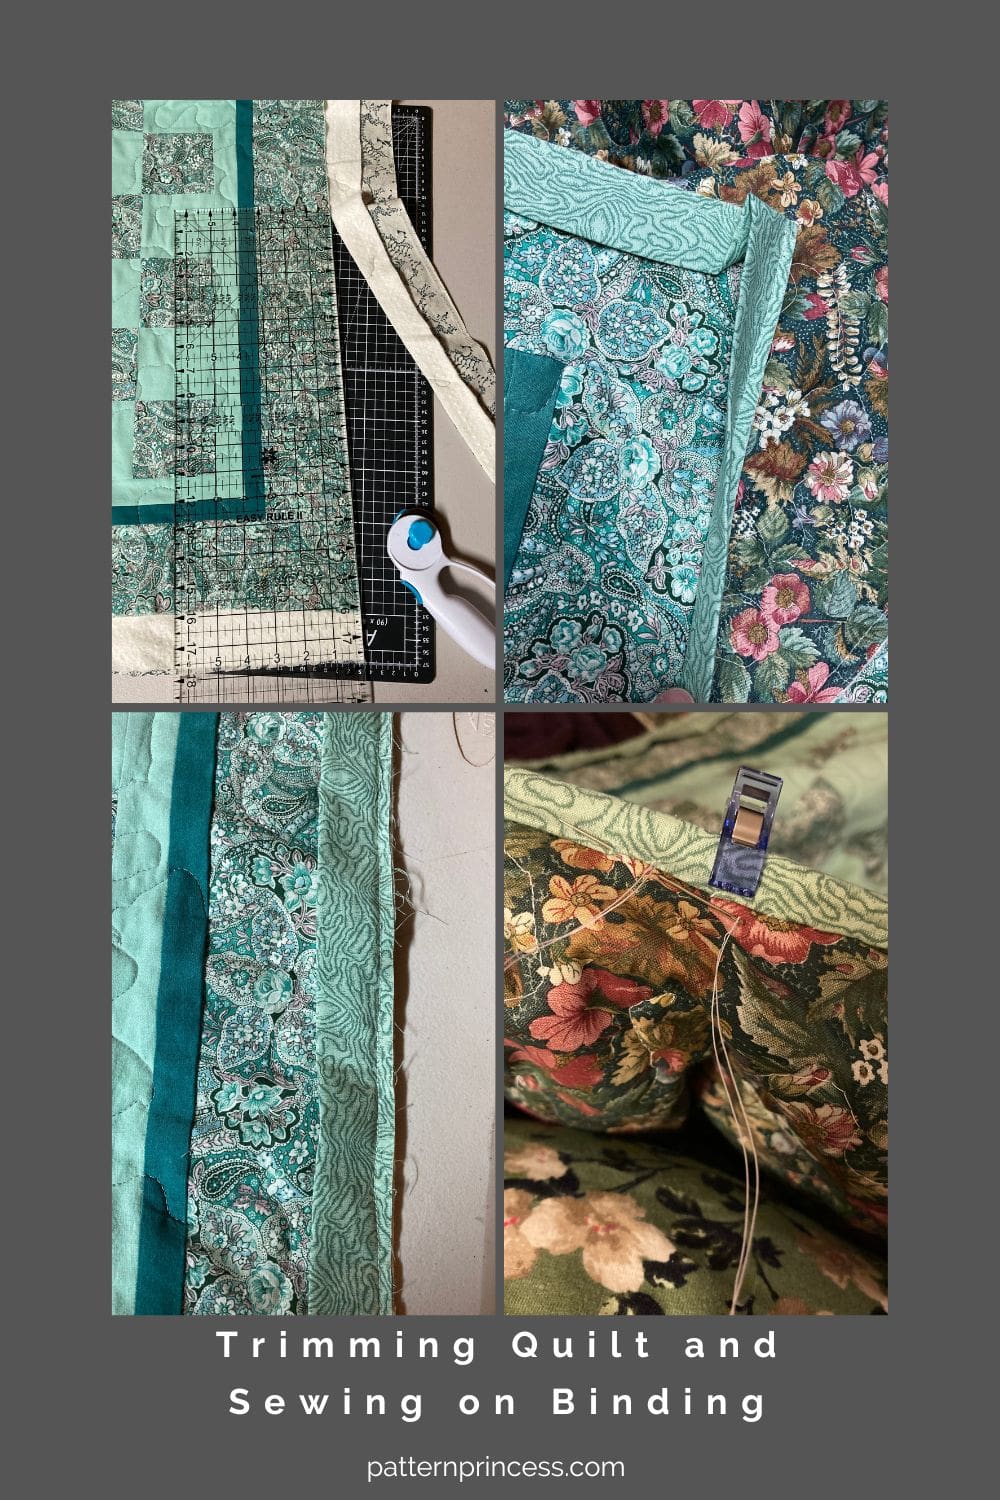
How to Trim the Batting and Backing Fabric Before Binding
To trim the batting and backing, use a large cutting mat, a longer ruler, and a rotary cutter.
Lay the quilt flat. Place the ruler along the edge of the quilt and use it as a guide to run your rotary cutter against to trim the quilt batting and backing to the size of the quilt top. Do this on all four sides.
Sew the Binding to the Quilt
First, prepare the binding strips. I used some leftover fabric I had in my stash.
Make the binding 2 ½ x by the length indicated for the size quilt you are making.
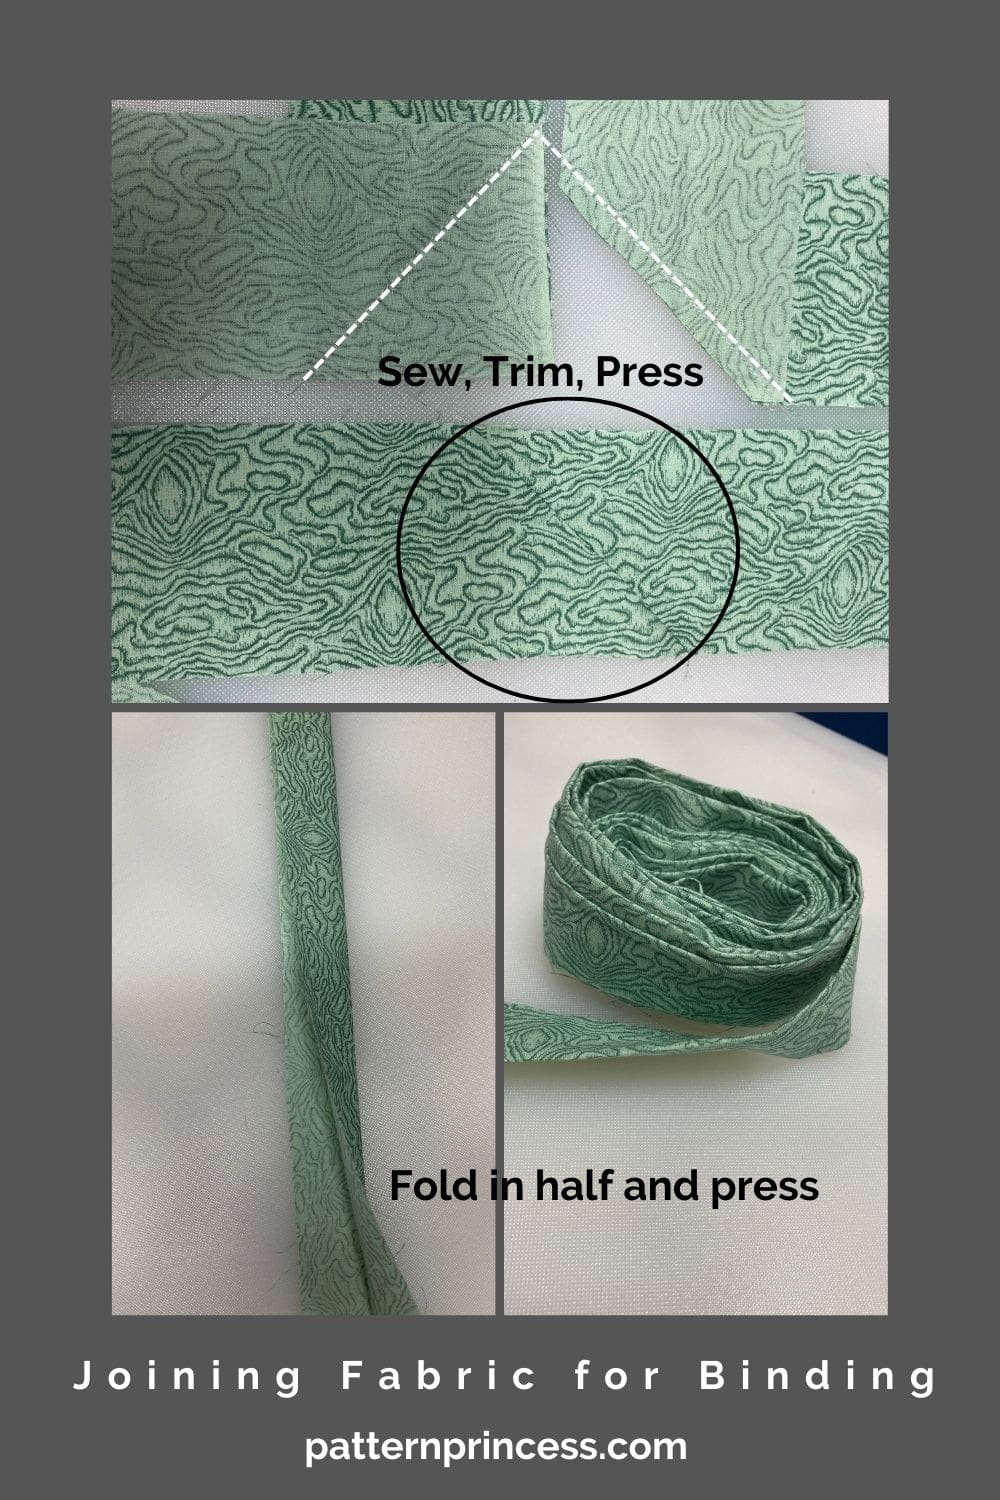
You can find a tutorial for how to make quilt binding.
Once the strips are sewn together, fold in half lengthwise with wrong sides together and press.
Pin the raw edge of the binding onto raw edge of the quilt top. I generally start in the middle of a side. Leave approximately a 3” tail hanging.
Note: This hanging part will be used to sew to the other end of the binding strip when you have finished sewing all four sides of the binding onto the quilt.
Sew the binding onto all four sides of the easy quilt making sure to miter the corners.
How to Miter Corners
As you are sewing on your binding, stop sewing ¼ inch from the corner, turn the quilt and sew off the corner. You may want to mark this spot with a pin ahead of time or a pencil. Cut the thread making sure NOT to cut the quilt or the binding.
Remove the quilt from the sewing machine and fold the binding strip up straight so it is vertical from the side you were just sewing on.
Next, fold the binding strip back down on itself and align it to the edge of the side of the quilt you just sewed and the edge of the quilt you are going to sew next.
Continue sewing the binding on the quilt edge.
Repeat this process until all four sides and corners have the binding sewn on. When you are on the last side of the quilt close to where you started with the binding it is time to connect the ends of the binding.
Joining the Binding
If you know how to join the binding to make a continuous strip, go ahead and do that process. To be honest, I have tried many times and have yet to master this.
Here is what I do.
Stop stitching a few inches away from where you started. Overlap the starting and ending binding about 2 inches. Cut the ending binding at this point.
Fold the end of one of the binding strips over about 1 inch. Then tuck the raw edge of the other binding inside. Continue stitching until you meet up with the starting point.
Hand-Stitch the Binding to the Quilt Back
The last part of making a quilt is to hand-stitch the folded edge onto the back of the quilt.
I like to use a few small clips to hold the binding as I sew. Continue moving them along just ahead of where you are sewing.
When you get to the corners, fold the edges over to miter the corner on the back side of the quilt.
I sew a few stitches right into the corner to help hold the binding in place.
Once all the sides and corners are stitched, you are done.
It is ready to use or give as a gift or use.

You can find Victoria crocheting, quilting, and creating recipes. She has cooked in restaurants for over 20 years, including many larger parties. She learned to crochet when she was just 11 years old and has been crocheting ever since; over 50 years now. Over 40 years ago, she loved her first class in sewing and continues to hone her skills in quilting. Many have enjoyed the handmade gifts over the years. In her professional career, she has worked in management in a wide variety of businesses including higher education as a dean of a division. All the while attending college part-time to achieve her doctorate in higher education with an emphasis in e-learning.