Last updated on March 27th, 2026 at 09:10 am
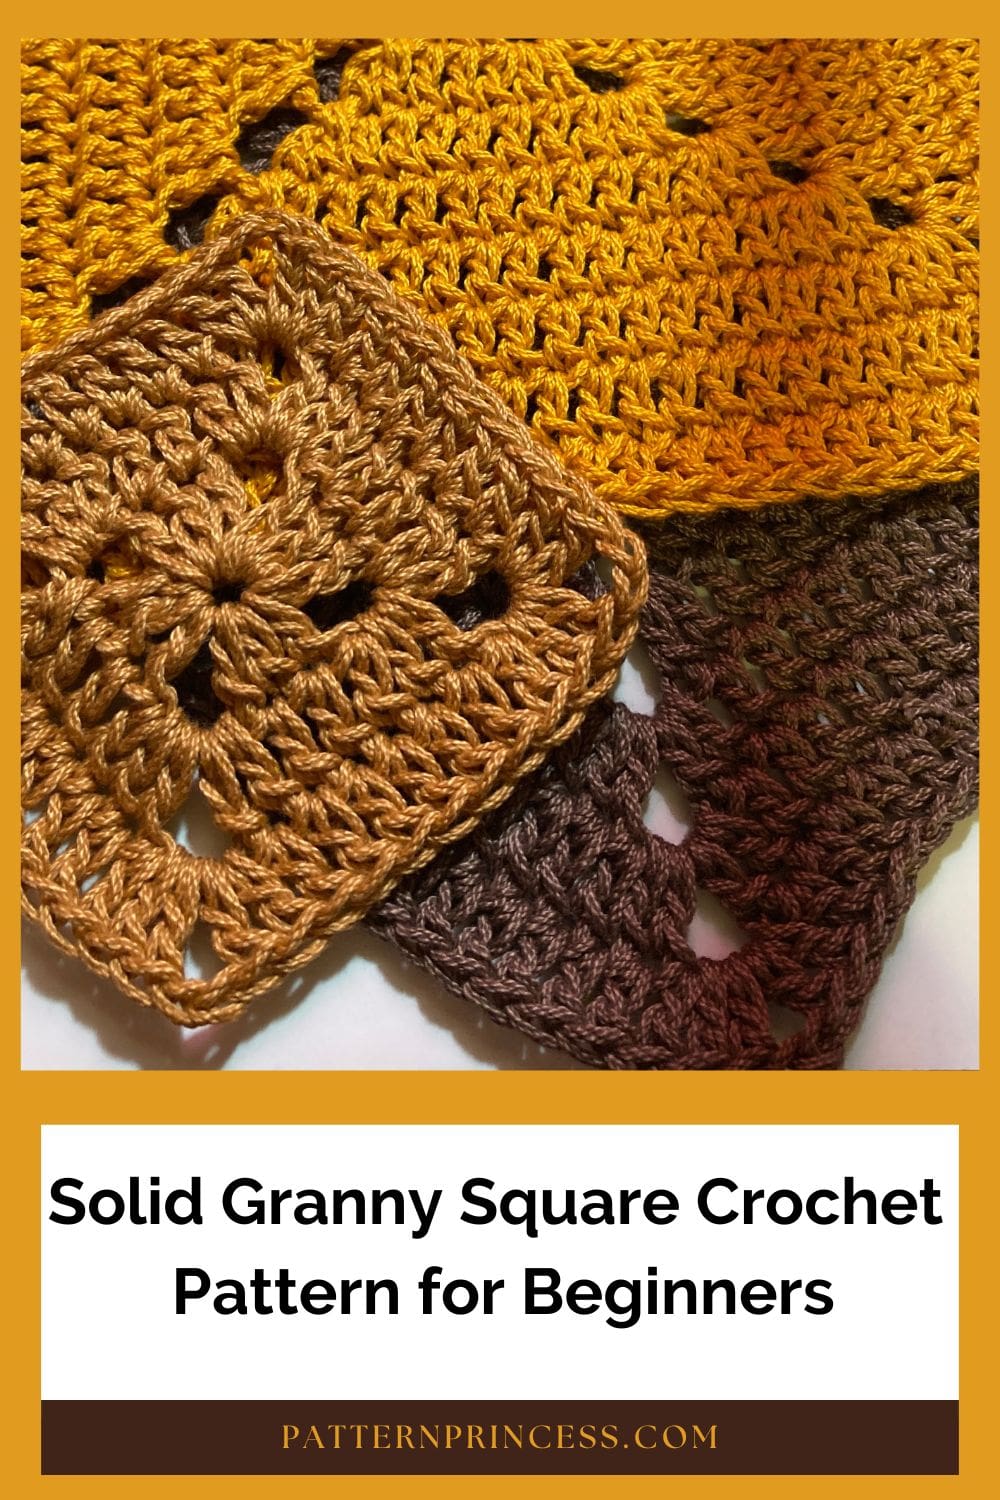
This solid granny square crochet pattern for beginners is unique because it does not have seams! It is a game changer for me. For quite some time, I have been trying to figure out how to crochet a solid granny square without that unsightly seam on one of the sides.
The solid granny square is an excellent introduction to crochet, offering a balance of simplicity and sophistication that allows you to master essential techniques while creating something truly beautiful.
How to Crochet a Solid Granny With No Gaps?
You might be familiar with a crochet pattern that has the turning chain stitches running up the middle of one side. While it is an effective way to do it, I find the turning chain seem to be visually distracting. Therefore, I went on a quest to find a solid granny square without a seam on a side.
Post contains affiliate links, and we earn commissions if you shop through the links on this page. For more information, please read the disclosure section under the About Us page.
Solid Granny Square Without a Seam
Creating this technique for crocheting a granny square without a visible seam has taken months and months of trial and error. In a traditional granny square where there are clusters of three double crochet and a chain one between the clusters, the seam is much less noticeable. However, when crocheting a solid granny square, that is all I was able to see.
I have spent hours scouring the internet for the solution. There is a crochet project that I have had in my head for a long time. I wanted to be able to crochet solid squares and solid squares in two different colors on each half. P.S. I figured that out too! That pattern will be coming soon.
I finally got around to tackling this mystery. So, I have started and restarted this granny square over and over the past few months. Then I finally got a design that worked.
I am so excited about this and so happy to share this crochet tutorial for the perfect solid granny square with you!
If this crochet technique has existed before now, it never came up in all the Internet searches.
Simple Stitches for this Modern Solid Granny Square
There is a step-by-step photo tutorial and a video tutorial to help even a beginner be able to master this beautiful granny square.
This crochet pattern uses the chain stitch, double crochet stitch, and the slip stitch. Therefore, even if you are a beginner at crochet, you can easily master this solid granny square.
Alternative to the Magic Circle
Another unique thing about this crochet project is that it does not start with a magic circle. Rather, all the round 1 stitches are worked into one of the crochet loops. It creates a wonderful small hole in the middle of the square.
How do you make a half solid granny square?
We have that free pattern for you too. Once I mastered this solid color granny, I spent some time working on figuring out how to change color and create a half square triangle granny square. Half Square Triangle Solid Granny Square
What Kind of Yarn Works for a Solid Granny?
When choosing yarn for a solid granny square, consider the yarn that will best suit your project’s needs. You can take a basic pattern and change the yarn for a whole new look. It’s a great way to have fun with yarn. Here are some yarn options that work well for crocheting solid granny squares.
Worsted Weight Yarn: Worsted weight acrylic yarn is a popular choice for beginners and experienced crocheters alike. It’s widely available, affordable, and comes in a vast array of colors. Acrylic yarn is easy to care for and durable, making it suitable for projects like blankets and home decor.
Cotton Yarn: Cotton yarn is a great option if you’re aiming for a natural fiber that’s breathable and ideal for warm weather. It provides a lovely drape and is excellent for projects like lightweight blankets, dishcloths, and summer accessories.
Bamboo Yarn: Bamboo yarn offers a smooth and silky texture, creating a soft and elegant finished piece. It’s an eco-friendly option that’s perfect for projects where drape and comfort are key, such as scarves and shawls.
Sport or DK Weight Yarn: If you’re looking for finer details and a more delicate appearance, sport or DK weight yarns are a good choice. They’re great for projects like baby blankets, lightweight scarves, and garments.
Chunky or Bulky Yarn: For a quick and cozy project, consider using chunky or bulky yarn. These yarns are thicker and create larger stitches, making your solid granny squares work up faster. They’re perfect for blankets and scarves.
Gradient Yarn
Gradient or Self-Striping Yarn: To add visual interest without changing colors manually, opt for gradient or self-striping yarn. These yarns create beautiful color transitions as you crochet, adding depth to your squares.
Keep in mind the different ways you can use yarn with the following pattern. Whether it’s a cozy blanket, a delicate shawl, or a decorative piece. With the right yarn in hand, you’ll be ready to create stunning and versatile crocheted creations.
Directions: Solid Granny Square Crochet Pattern for Beginners
Skill Level
Beginner Crocheters
Gauge
The gauge will depend on the type of yarn that you choose to use.
Finished Size
The finished size depends on how many granny squares you choose to make and the number of rounds you do and the type of yarn and hook size used.
Materials
Any yarn weight will work for this pattern
Use a crochet hook to match your yarn
Tapestry Needle
Scissors
Abbreviations
CH = Chain
DC = Double Crochet
SL ST = Slip Stitch
SP = Space
ST = Stitch
STs = Stitches
[ ] = Repeat between
Pattern Notes
This crochet square is worked in the round.
Each round is joined at the end with a slip stitch into the top chain three of the previous row.
The Chain Spaces are the corners. Each corner consists of a (2 DC, CH 2, 2 DC). However, if you prefer a completely solid granny square without any holes for the corners, we have another solution for you. Work three treble crochet in the corner stitches with each round. This will help the corners lay flat as you continue to work your rounds.
Double crochet stitches are the stitches on the sides. Rather than work double crochet clusters as you would in a traditional crochet granny, you will double crochet in each stitch across the sides. The number of double crochet stitches on each side will grow by 4 each side for the round or 16 total each round.
Crochet Pattern is written in US Terms.
Crochet Pattern Directions
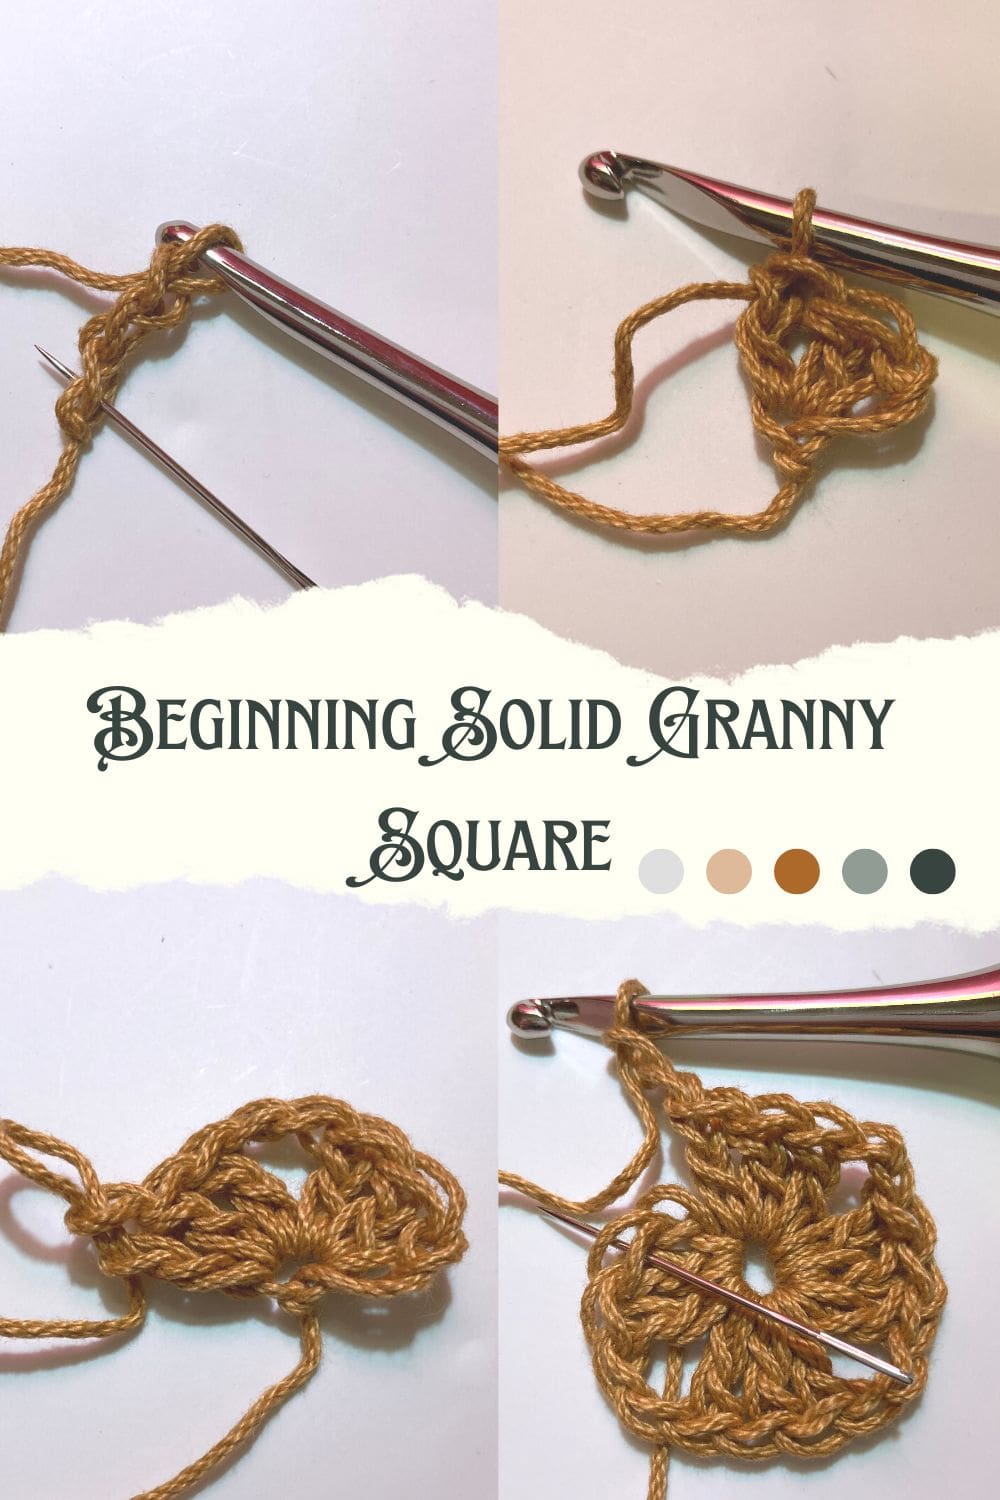
Begin
Round 1
CH 3 (Counts as DC). In the 3rd ST from the hook work (2 DC, CH 2, 3 DC, CH 2, 3 DC, CH 2, 3 DC, CH 2). Join to the top DC ST with a SL ST.
Alternatively, you could start off with a magic ring also called a magic circle and work the stitches inside the circle.
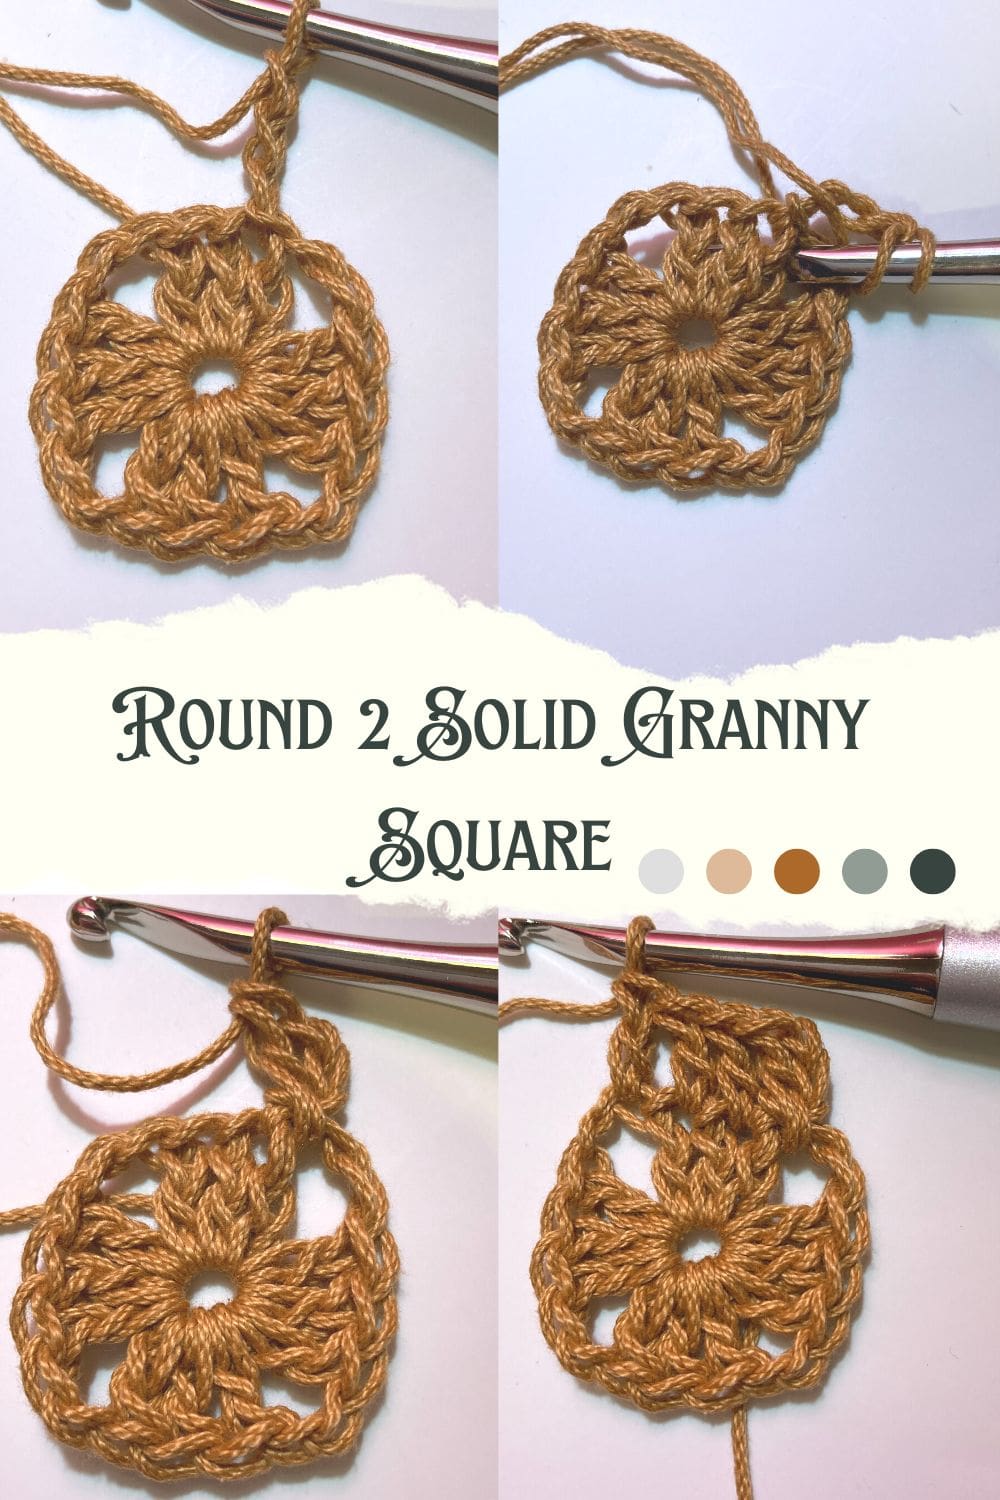
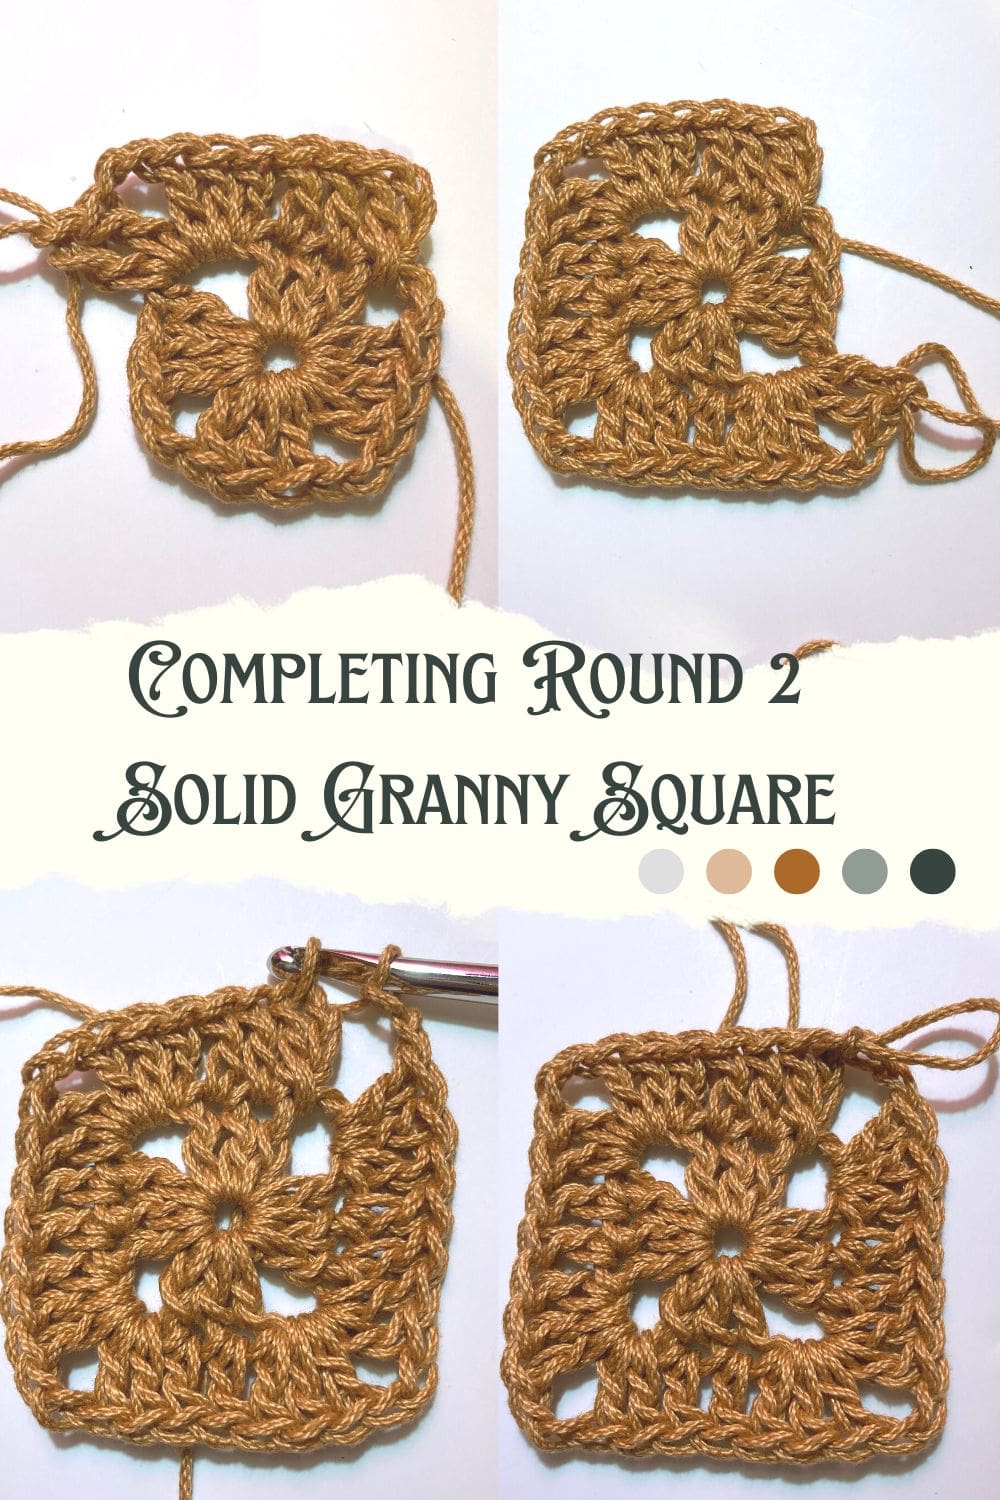
Round 2
CH 3 (Counts as DC). DC in the same corner CH 2 SP. DC in each ST across (3 DC). Work in the corner CH 2 SP (2 DC, CH 2, 2 DC). Continue working a DC in each ST across and in each corner CH 2 SP work (2 DC, CH 2, 2 DC) 2 more times. Continue working the DC in each ST across the last side (3DC). When you get to the final corner work (2 DC, CH 2) then a SL ST into the top of the first CH 3 to close the round.
Round 3 and Beyond
Continue repeating round 2. The only difference is that each round will have more double crochet stitches on each side.
Here is how round 3 would look.
CH 3, DC in the same corner CH SP. DC in each ST across (7 DC). Work into the next corner CH SP (2 DC, CH 2, 2 DC). Continue working a DC in each DC ST around and in the corner CH 2 SP work the (2 DC, CH 2, 2 DC). When you get to the final corner work 2 DC, CH 2, and SL ST into the top of the first CH 2 to close the round.
For round 4 there will be 11 DC STs to work on each side.
Round 5 there will be 15 DC STs to work on each side, and so on.
Finish by weaving in yarn ends and removing the excess yarn.
YouTube Video Tutorial
Right Hand Crochet Video
Left Hand Crochet Video
Other free crochet patterns you may enjoy
What Can Solid Granny Squares be Used For?
Solid granny squares are incredibly versatile and can be used for a wide range of projects. These squares, with their classic and simple design, offer a timeless charm that suits various styles and purposes. Here are some ideas for how you can use solid granny squares:
Granny Square Blanket and Afghans
Creating a blanket or afghan using solid granny squares can be a wonderful way to showcase the beauty of the stitch while keeping your project manageable in smaller sections.
Pillows and Cushions
Solid granny squares can be stitched together to form beautiful pillow covers or cushion covers, adding a touch of handmade elegance to your home decor.
Table Runners
Stitch several solid granny squares together to create a lovely table runner that adds a pop of color and texture to your dining area.
Tote Bags
Crochet a few larger solid granny squares and transform them into the front and back panels of a stylish tote bag. The squares can be joined and then folded to create a bag shape.
Scarves and Cowls
For a cozy accessory, consider making a scarf or cowl using solid granny squares. You can join them together lengthwise to create a unique design.
Coasters
Smaller solid granny squares can make charming coasters that protect your surfaces while adding a decorative touch to your home.
Place Mats
Similar to coasters, larger solid granny squares can be used as place mats, adding a touch of handmade charm to your dining table.
Granny Baby Blankets
The simplicity of solid granny squares makes them perfect for baby blankets. You can choose soft pastel colors for a delicate touch.
Wall Hangings
Stitch together a series of solid granny squares to create a wall hanging. You can play with color placement and arrangement to achieve different visual effects.
Patchwork Clothing
Incorporate solid granny squares into your clothing projects, such as vests, sweaters, or cardigans, to add texture and interest to your garments.
Home Accents
Use solid granny squares as decorative elements by attaching them to lampshades, incorporating them into dreamcatchers, or making them into framed art pieces.
Pet Blankets
Create cozy blankets for your furry friends using solid granny squares. The squares can be easily customized to match your pet’s personality.
Remember that the choice of yarn, color palette, and the arrangement of squares can greatly influence the overall look of your project.
Whether you’re aiming for a modern or vintage vibe, a project made with solid granny squares can carry a sense of tradition and creativity that adds a personal touch to your space.

You can find Victoria crocheting, quilting, and creating recipes. She has cooked in restaurants for over 20 years, including many larger parties. She learned to crochet when she was just 11 years old and has been crocheting ever since; over 50 years now. Over 40 years ago, she loved her first class in sewing and continues to hone her skills in quilting. Many have enjoyed the handmade gifts over the years. In her professional career, she has worked in management in a wide variety of businesses including higher education as a dean of a division. All the while attending college part-time to achieve her doctorate in higher education with an emphasis in e-learning.