Last updated on January 19th, 2026 at 10:05 pm
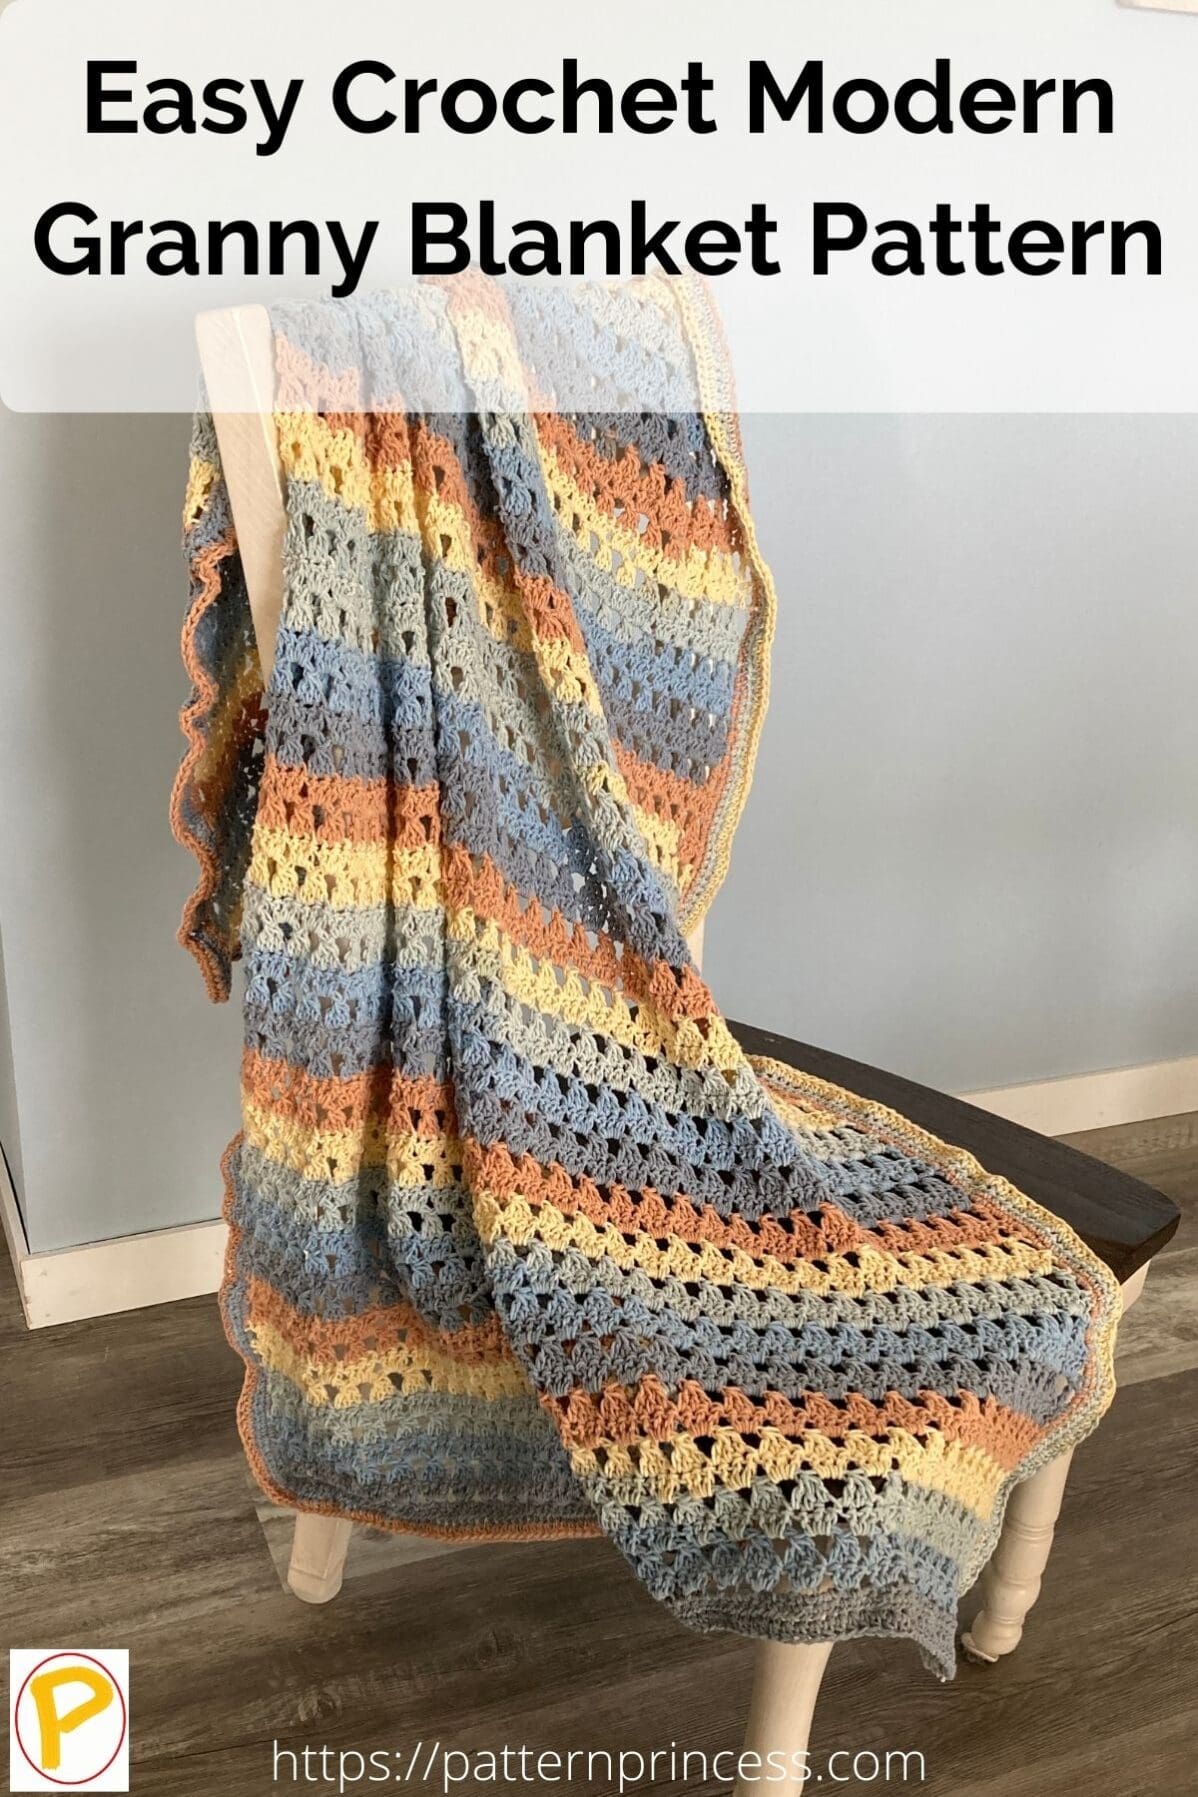
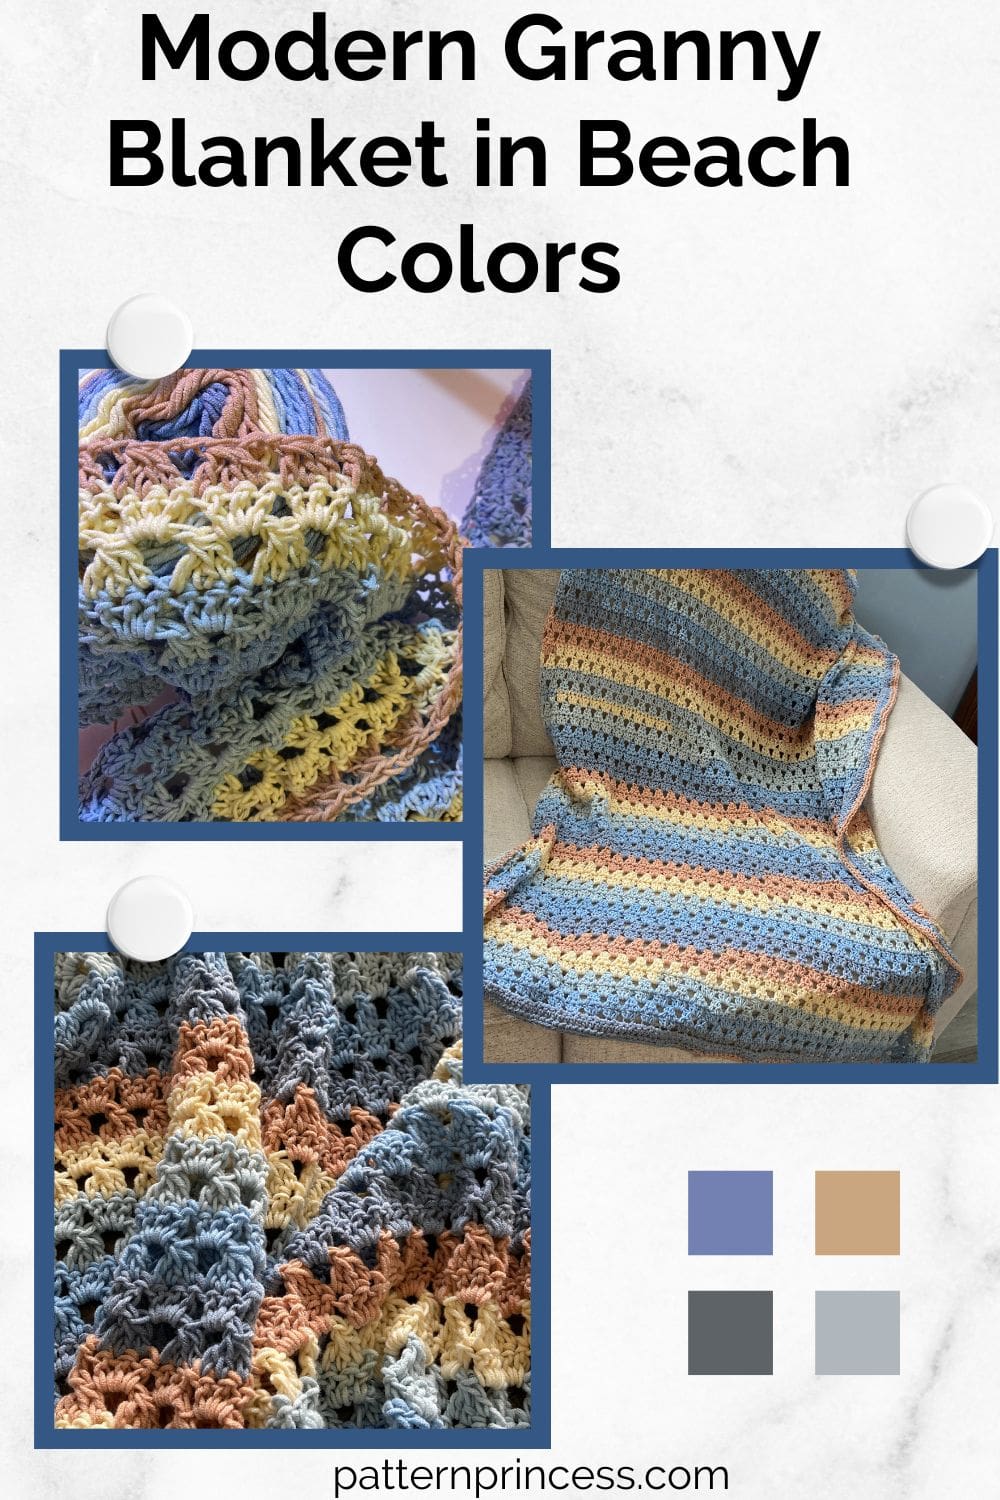
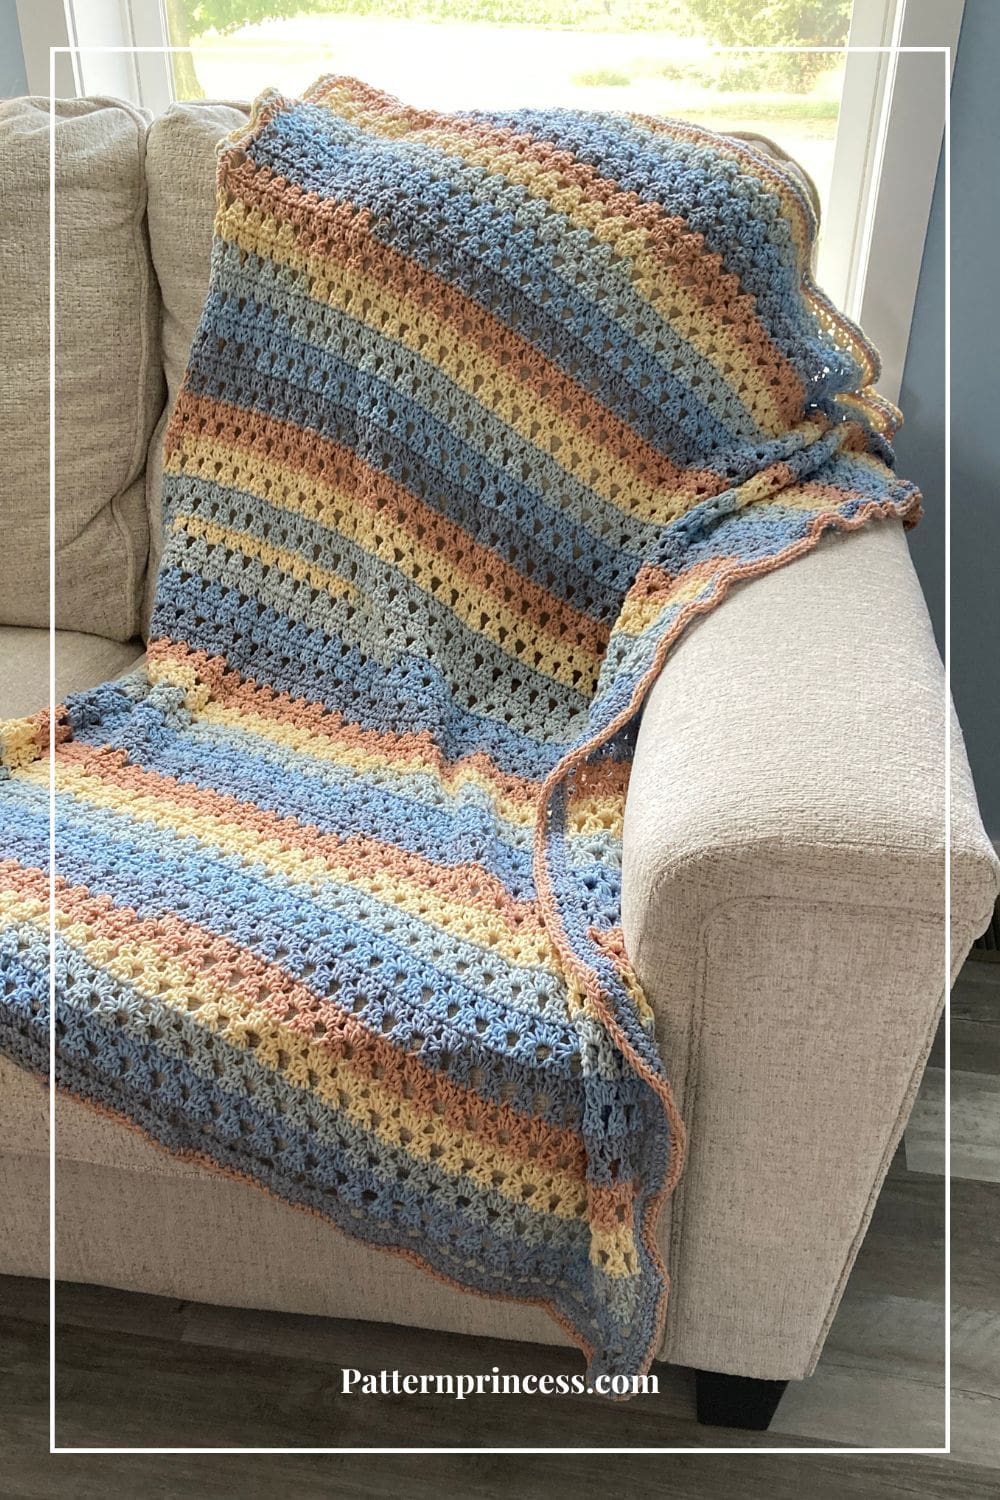
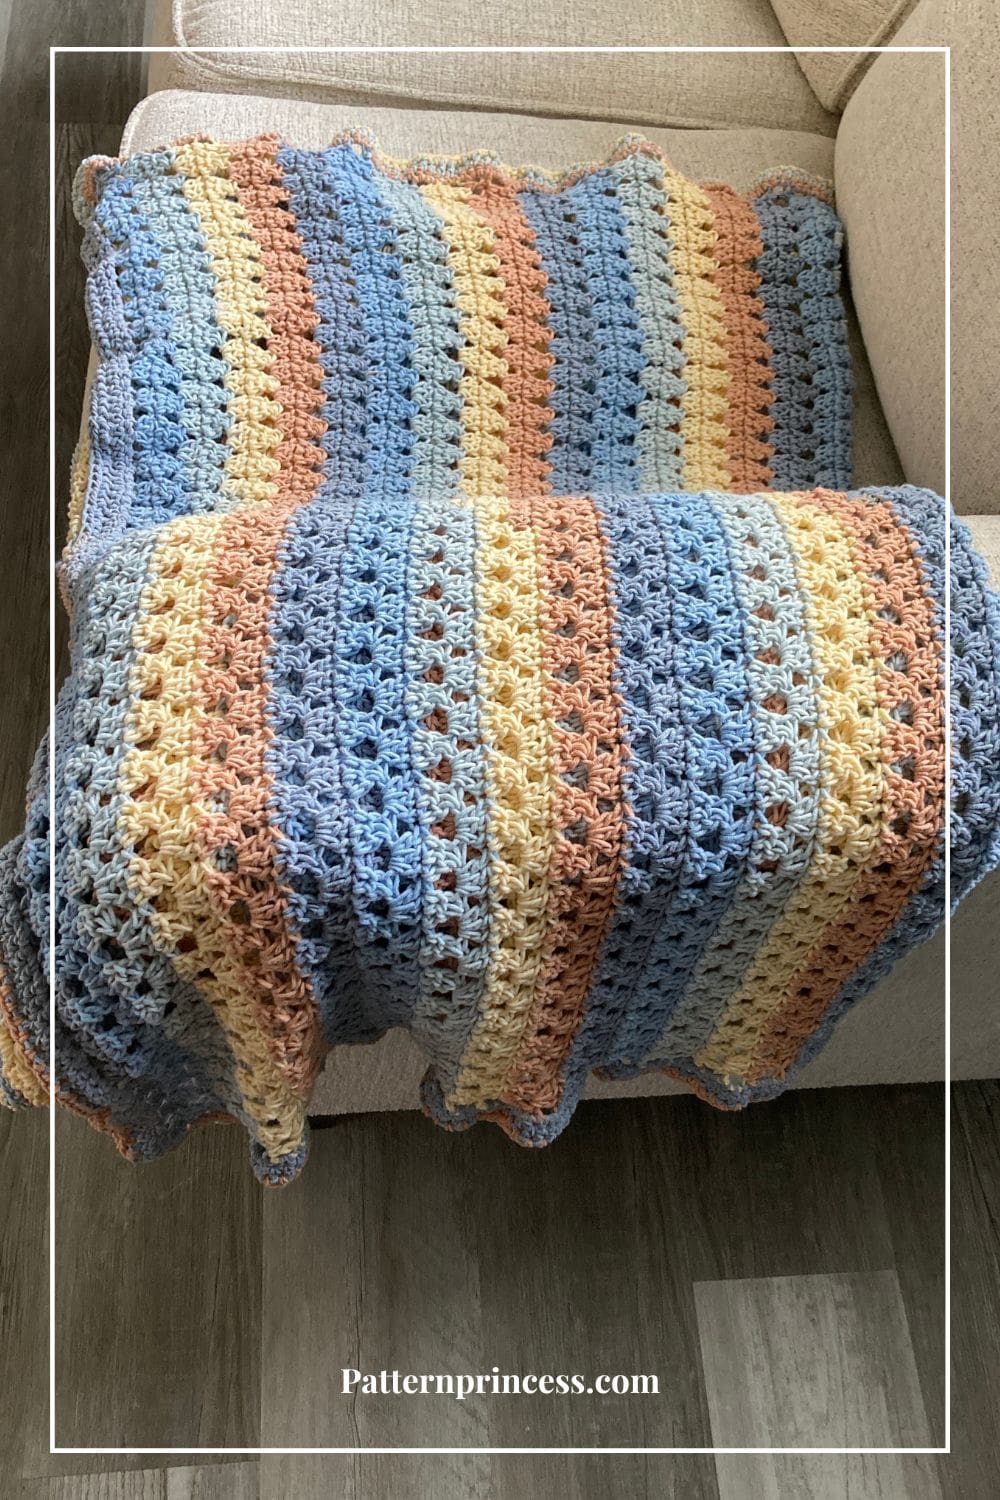
Today, I made this modern granny blanket using a few variegated yarn cakes in beach view colors. It is wonderful to have such lovely colors in this afghan without having to weave in a lot of yarn ends.
In the realm of crafting, few things evoke a sense of warmth and nostalgia quite like a handmade blanket.
Crocheting, an age-old art form, has been passed down through generations, preserving the spirit of creativity and love in every carefully woven stitch. At Pattern Princess, we believe that there’s no better way to infuse your home with comfort and style than with a beautifully crafted blanket.
This free pattern Embraces the timeless charm of the classic granny square, this pattern infuses it with a contemporary twist, making it perfect for both crochet enthusiasts and beginners alike.
Whether you’re seeking a weekend project or an opportunity to hone your crochet skills, this pattern is bound to become your new favorite go-to.
Post contains affiliate links, and we earn commissions if you shop through the links on this page. For more information, please read the disclosure section under the About Us page.
Add a Touch of Contemporary Elegance to Your Home Décor
Granny square blankets have been a staple in the world of crochet for decades, but this classic pattern has been given a modern makeover in recent years.
You can find lots of free patterns for traditional granny squares, solid granny, spiked granny, and a wonderful half square triangle. It is a how-to pattern using the solid granny square. Come find your next free granny stitch pattern on the blog. My daughter even has her first granny square blanket pattern on the blog. However, you can find lots more crochet patterns too.
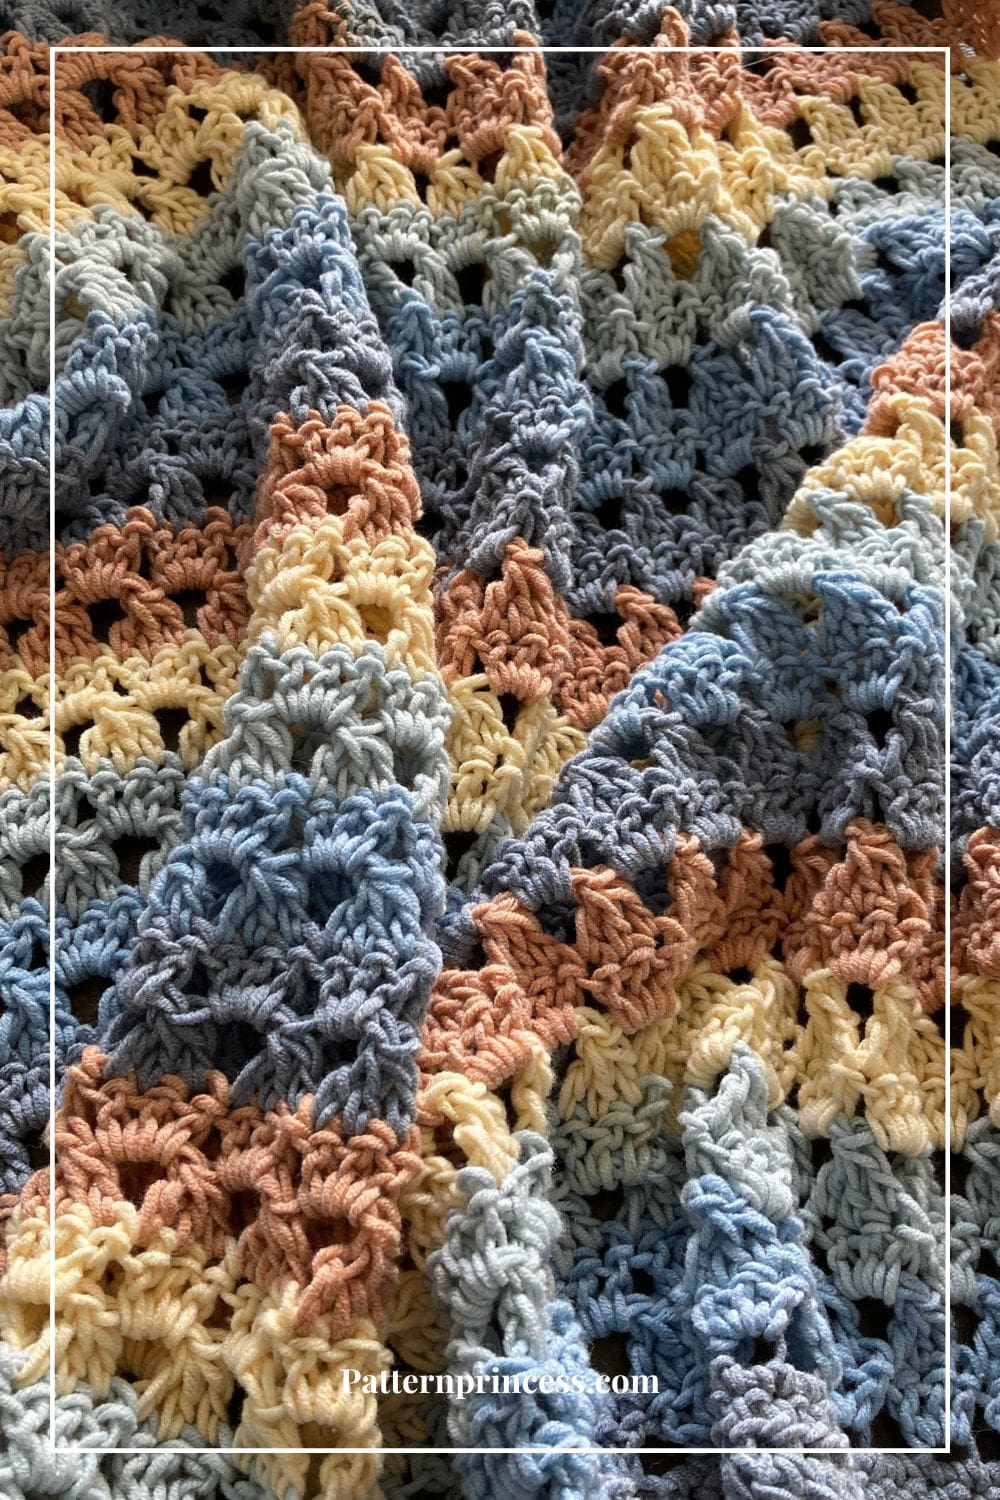
The traditional granny square has been updated with new textures, colors, and designs that bring a contemporary twist to this timeless favorite.
This updated version of the granny square pattern is perfect for those who want to add a touch of elegance to their home. It’s easy to follow, and the end result is a beautiful and cozy blanket that you’ll cherish for years to come.
If you are looking for a handmade gift to give, this is a great way to customize the yarn colors and yarn weight for someone special. It works up quickly and the result is a beautiful blanket that anyone would love to receive.
Whether you’re a seasoned crocheter or a confident beginner, grab your hook and yarn and get ready to create a blanket that’s both classic and modern at the same time.
Photos and Video Tutorials
You can find photos and video tutorials in the blog post on How to Crochet Modern Granny Stitch. The video tutorial for crocheting the border on this lovely blanket is located below the written directions.
Yarn for Crochet Blanket
I used a Caron Cotton Cakes yarn in Beach View color. It was nice to just keep crocheting without stopping and changing yarn color. However, this pattern would work well using a solid yarn, or you could switch out the yarn and do a color change every other row.
Experimenting with different yarns can add a unique touch to your Modern Granny Blanket, so feel free to mix and match to create a blanket that perfectly suits your style and needs.
Worsted Weight Acrylic Yarn.
This is a versatile and affordable option, perfect for beginners and those looking to create a budget-friendly blanket. Acrylic yarn is easy to care for, making it ideal for everyday use and regular washing. It comes in a wide array of colors, allowing you to customize your blanket to match your home decor.
Cotton Yarn.
If you prefer a more natural fiber, cotton yarn is an excellent choice. It has a soft and breathable texture, making it great for lightweight blankets that can be used in all seasons. Cotton yarn also comes in various weights, so you can choose a thinner option for a more delicate look or a thicker yarn for a chunkier and cozier feel.
I used cotton yarn to make a sweet granny baby blanket. My grandson loves to put his fingers through the holes and hold it. It has quickly become his favorite blanket to use.

Using chunky yarn for the Easy Crochet Modern Granny Blanket Pattern is a fantastic idea too.
Chunky yarn can add a beautiful and cozy touch to your blanket, making it extra warm and snuggly. Here are some reasons why chunky yarn is a great choice for this pattern:
The larger thickness of chunky yarn means that each row will work up faster, allowing you to complete your blanket in less time compared to using thinner yarn. This is especially appealing if you’re looking for a satisfying and quick crochet project.
Chunky yarn creates a plush and thick fabric, resulting in a blanket with superior warmth and comfort. It’s perfect for cuddling up on the couch during chilly evenings or for adding an extra layer of coziness to your bedding.
The Easy Crochet Modern Granny Blanket Pattern already embraces a contemporary twist on the classic granny square. By using chunky yarn, you can enhance this modern aesthetic, giving your blanket a trendy and stylish appearance.
The thickness of the yarn will add a lovely texture to the finished blanket, creating depth and interest in the overall design. This textured look can elevate the visual appeal of your crochet creation.
No matter your choice of yarn, the free crochet Pattern is sure to result in a beautiful and cherished creation. Have fun experimenting with different yarn options to make a blanket that perfectly reflects your style and keeps you warm for years to come.
Crochet Pattern Directions: Easy Crochet Modern Granny Blanket Pattern
Skill Level
Confident Beginner. You should be able to work the Double Crochet stitch, half double crochet, and single crochet.
Size
42 X 48 inches.
The size of your project can easily be adjusted using multiples of 3 plus 1. That means your initial chain should be divisible by 3. Then add one more chain stitch.
If you want a baby size blanket, start with 106 foundation chain stitches. Then work the rows until you are satisfied with the length.
Gauge
10 stitches and 12 rows of single crochet every 4 inches.
Materials
Caron Cotton Cakes in Beach View. 3 skeins or 1,590 yards. I used about half a skein on the last one.
Crochet Hook Size L 8.0 MM
Tapestry Needle
Scissors
Abbreviations
CH = Chain
DC = Double Crochet
DC3TOG = Double Crochet Three Together
HDC = Half Double Crochet
SC = single Crochet
SK = Skip
SL ST = Slip Stitch
SP = Space
ST = Stitch
STs = Stitches
[ ] = Repeat Between
Crochet Pattern Notes
Turn at the end of each row.
The chain three at the beginning of each row counts as a double crochet.
Repeat rows 3 through 6 throughout the pattern.
When the double crochet three together stitches are worked over the cluster of three double crochet below, they are worked directly over the top. Working in the top two loops of each double crochet.
The next row of granny stitches is worked between the triangle shaped
This pattern is written in U S Crochet Terms.
I used a larger hook than the recommended hook on the packaging, for a loose stitch pattern.
Alternative Beginning
A reader asked what the pattern would look like if you started with a row of single crochet for the first row rather than the current directions below. She preferred starting this way so that the beginning row would look just like the ending row.
If you want to use this method, I have my suggestion in the comments. However, I thought if there was one person that wanted to start this way, it would be better if I made sure you had this option.
So, this alternative beginning is just if you want to have Row 1 be a row of single crochet. This bumps back all the other rows, so the current row 1 below will become row 2 and so on.
I worked it a few times. I keep coming out with multiples of 3 plus 2 for a starting chain.
Assuming I am working the first single crochet into the second chain from the hook.
Once the SC row is complete, that changes how you would start Row 1 which has now become Row 2 with this alternative beginning method.
The stitches would now be CH 3 (Which counts as a DC). Work a DC in the same ST. [SK 2 STs, work 3 DC into the next ST] repeat between [ ] across. End with SK 2 STs and work 2 DC in the last ST.
Stitches Used
Double Crochet (DC). Yarn over, insert the hook through both loops and pull up a loop. Next, yarn over and pull through two loops on the hook. Lastly, yarn over again and pull through the last two loops on the hook.
Double Crochet 3 Together (DC3TOG). This decreases the stitches by two double crochet stitches each time this is worked.
First. Yarn over, insert hook into next stitch and pull up a loop. There will be three loops on the crochet hook. Yarn over, pull through two loops on the hook. There should now be just two loops left on the hook.
Second. Yarn over and insert the hook into the next stitch and pull up a loop. There will be four loops on the hook. Yarn over, pull through two loops. There should now be just three loops on the hook.
Third. Yarn over and insert the hook into the next stitch and pull up a loop. There will be five loops on the hook. Yarn over, pull through two loops. There should now be just four loops on the hook.
Lastly yarn over and pull through the remaining four loops.
Half Double Crochet (HDC)
Yarn over, insert the hook through both loops of the next stitch and pull up a loop. Yarn over and pull through all three loops on the hook. For height, this stitch is between the single crochet and double crochet.

Crochet Pattern Directions
Begin
For the foundation row, Chain 121.
Row 1
1 DC in the 4th CH from hook (Counts as 2 DC). [SK next 2 CH, 3 DC in the next CH]. Repeat across between [ ]. End with 2 DC in the last CH. Turn
Row 2
CH 3 (Counts as DC) 1 DC in the next DC. [CH 2, DC3TOG]. Repeat across between [ ]. End with CH 2, DC in the next ST. DC into the top ST of the turning CH. Turn
Row 3
CH 3 (Counts as DC). SK 1 DC, 3 DC in the CH 2 SP between the last DC3TOG and 2 DC of the previous row. [3 DC into next CH 2 SP]. Repeat across between [ ]. End with SK 1 DC, and 1 DC into the top ST of the turning CH. Turn
Row 4
CH 4 (Counts as DC and CH 1). [DC3TOG in top of each 3 DC ST of the previous row, CH 2]. Repeat across between [ ]. End with a CH 1 and DC into the top ST of the turning CH. Turn
Row 5
CH 3 (Counts as DC). 1 DC into the CH 1 SP below. [3 DC in the next CH 2 SP]. Repeat across between [ ]. Ending with 1 DC in the CH 1 SP, and 1 DC into the top ST of the turning CH. Turn
Row 6
CH 3 (Counts as DC). 1 DC into the next DC ST. [CH 2, DC3TOG] Repeat across between [ ]. Ending with a CH 2, DC into the next DC ST, and 1 DC into the top ST of the turning CH. Turn
Rows 7 Through 71
Work the pattern repeat, rows 3-6
Finishing
Weave in yarn ends and remove excess before starting the crochet border.
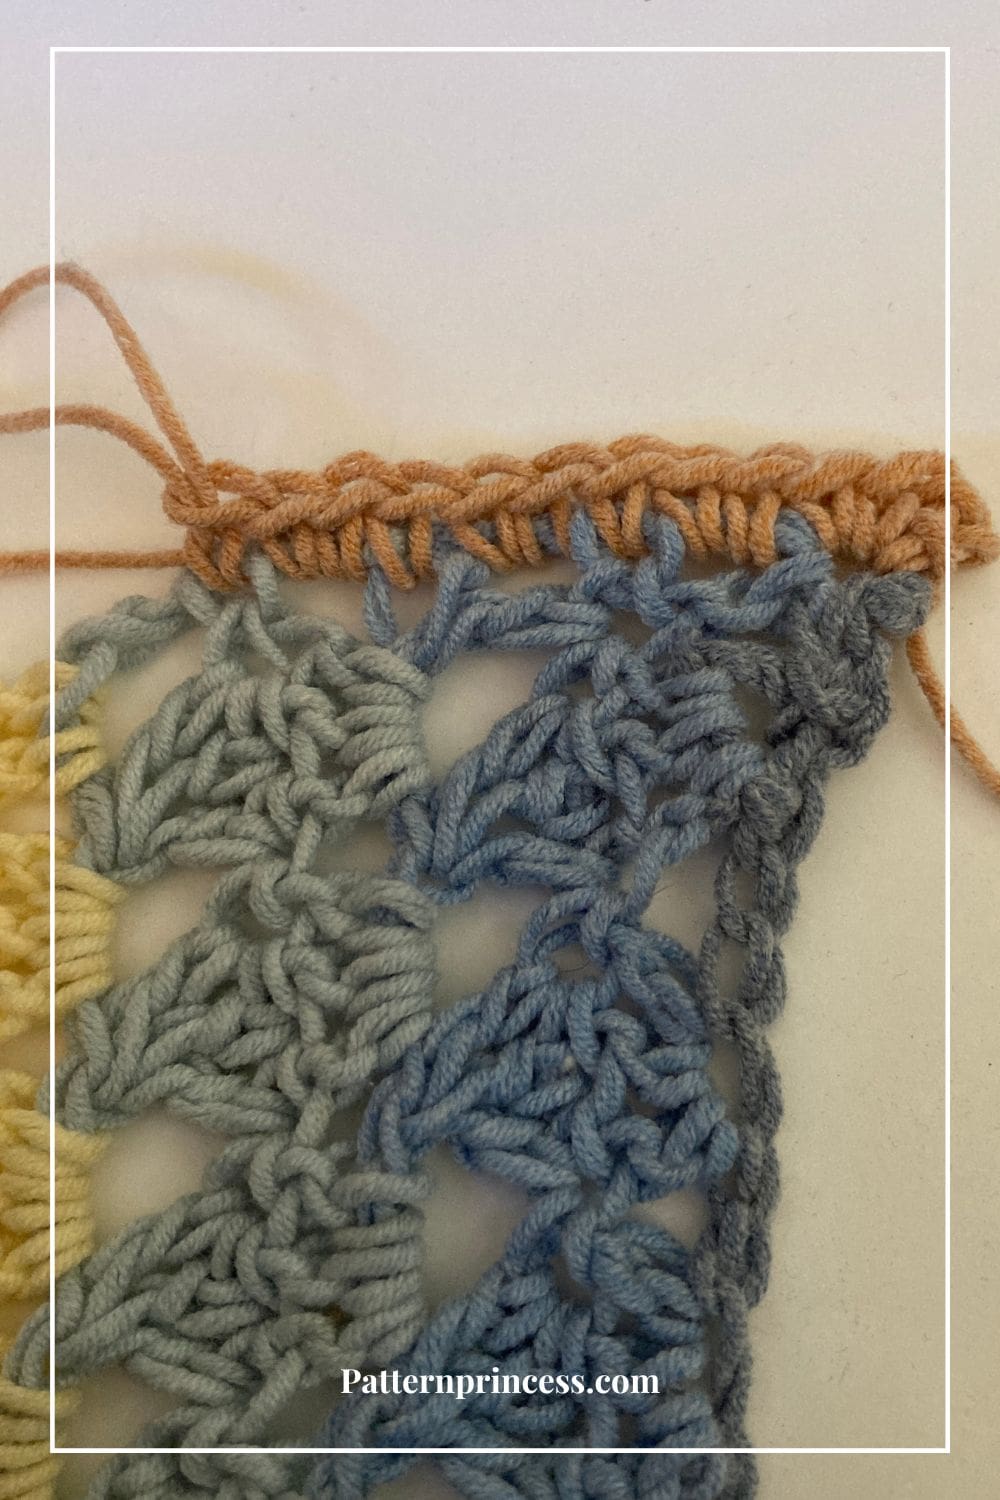
Crochet Border
Below are the directions for the border I decided to add around my blanket. I made helpful videos on crocheting the border. Remember, you can find the video tutorials for the modern granny stitch itself in the blog post for how to crochet the modern granny square.
Notes
For me, it is easy to crochet the first round of the border stitches on the top and bottom. However, figuring out where to put the stitches on the sides can be a bit harder to figure out. Sometimes, it will pull and pucker and become too wavy.
You can work 2 or 3 stitches on the sides depending on your preference. If you notice the blanket side becoming wonky, remove the stitches and add less for each row.
I have photos of the finished blanket to help you see what I did too.
You don’t have to turn after each round. I did just to change up the visual appeal so this blanket looks the same on both sides for a pretty reversable blanket.
Round 1
Join yarn in a corner. CH 2 then work a SC in each ST around with 3 SC in each corner.
For the top I worked 1 SC in each ST. For the sides, I worked 2-3 STs in each row. The bottom I worked 1 SC where the 3 DC clusters were worked and 2 SC where the chain stitches were skipped. Working the 3 SC stitches in each corner helps them lay flat. Join with a SL ST into the first CH 2 SP. Turn
Round 2
CH 1, HDC in each ST around working 3 HDC in each corner ST. Join with a SL ST into the first HDC. Turn
Round 3
Repeat Round 2
Finishing
Weave in all yarn ends and remove the excess.
Crochet Video Tutorial for the Border
Video Tutorials for the Modern Crochet Granny Stitch
Looking for more free crochet projects? Here are a few ideas. Take a bit and browse around. You just might find your next crochet project.

You can find Victoria crocheting, quilting, and creating recipes. She has cooked in restaurants for over 20 years, including many larger parties. She learned to crochet when she was just 11 years old and has been crocheting ever since; over 50 years now. Over 40 years ago, she loved her first class in sewing and continues to hone her skills in quilting. Many have enjoyed the handmade gifts over the years. In her professional career, she has worked in management in a wide variety of businesses including higher education as a dean of a division. All the while attending college part-time to achieve her doctorate in higher education with an emphasis in e-learning.
I prefer to begin with a foundation row of Sc – then the top & bottom are the same and easier to work when adding a border. Do I need to modify the number of chains before starting the pattern stitches?
A very lovely variation on the traditional Granny pattern that would be a wonderful gift made up in a friend’s favorite colors. Definitely putting this in my notebook of favorite patterns. Thank you for sharing.!
Hi,
I worked it a few times. I keep coming out with multiples of 3 plus 2 for a starting chain. Assuming I am working the first single crochet into the second chain from the hook. Also, once the SC row is complete, that changes how you would start row 1 which has now become row 2 with this alternative beginning method. So, the stitches would now be CH 3 (Which counts as a DC). Work a DC in the same ST. [SK 2 STs, work 3 DC into the next ST] repeat between [ ] across, End with SK 2 CH and work 2 DC in the last ST.
Hope this helps. Enjoy the pattern.
Vicky
@patternprincess1,
Just getting back to your pattern and wanted to thank you for going the extra mile in figuring out the stitches with a beginning Sc. Appreciate your effort. Oops! Just had a pretty strong earthquake here in San Jose, CA @ 2.50 AM. Felt like a 5.5. No wonder my cats have been acting crazy for two days! Again, thank you so much.
My pleasure, so glad to help. I hope you and your furry friends stay safe.
Vicky