Last updated on November 3rd, 2024 at 08:21 am
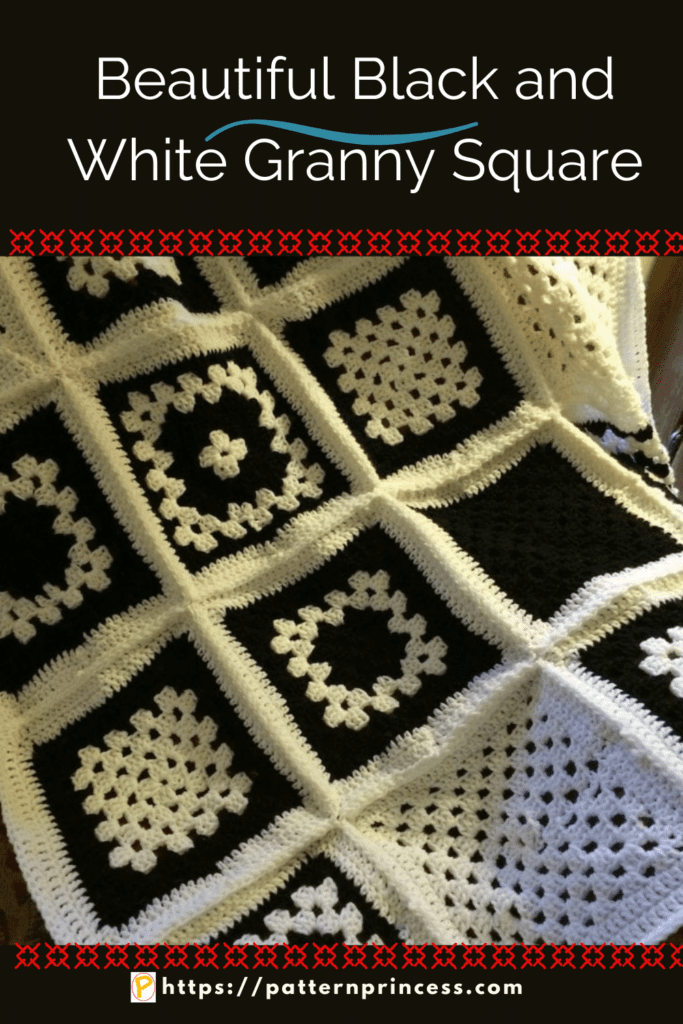
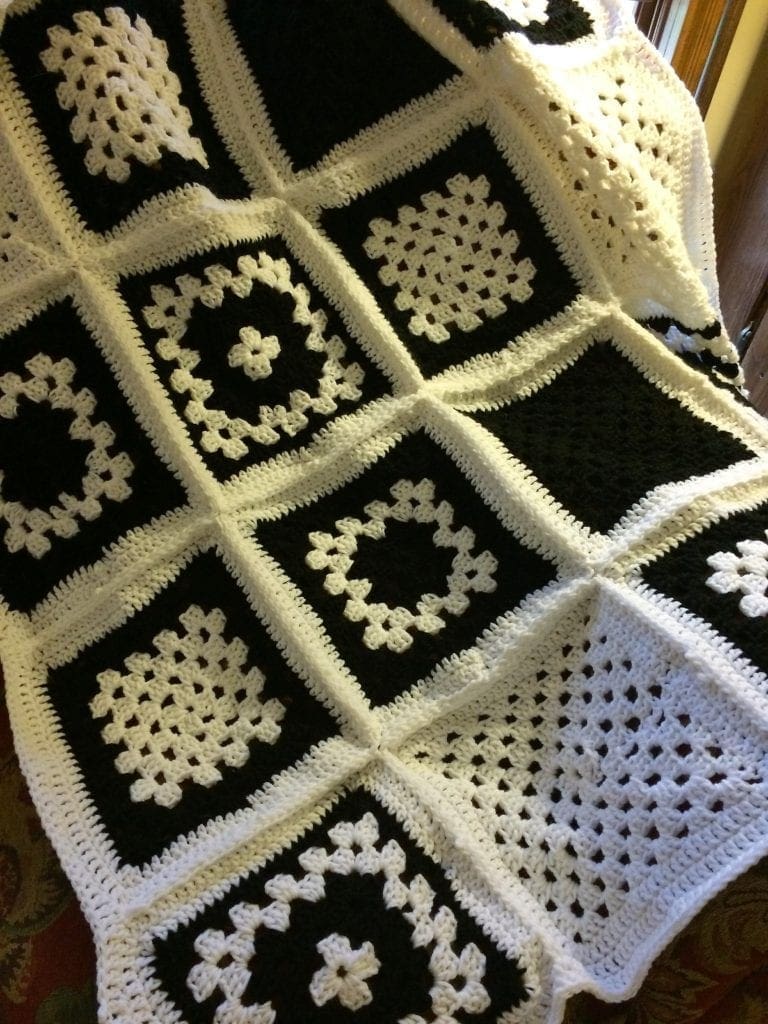
This beautiful black and white granny square afghan is easy to crochet. It was made for my daughter. I made her a baby afghan many years ago. This will be the second afghan that I made for her.
A granny square afghan is one of the most timeless and beautiful patterns out there. It can be used as a stunning display piece or a cozy throw blanket that adds warmth, comfort, and beauty to any room. With just basic crochet knowledge and some colorful yarn, you can tackle this project with confidence
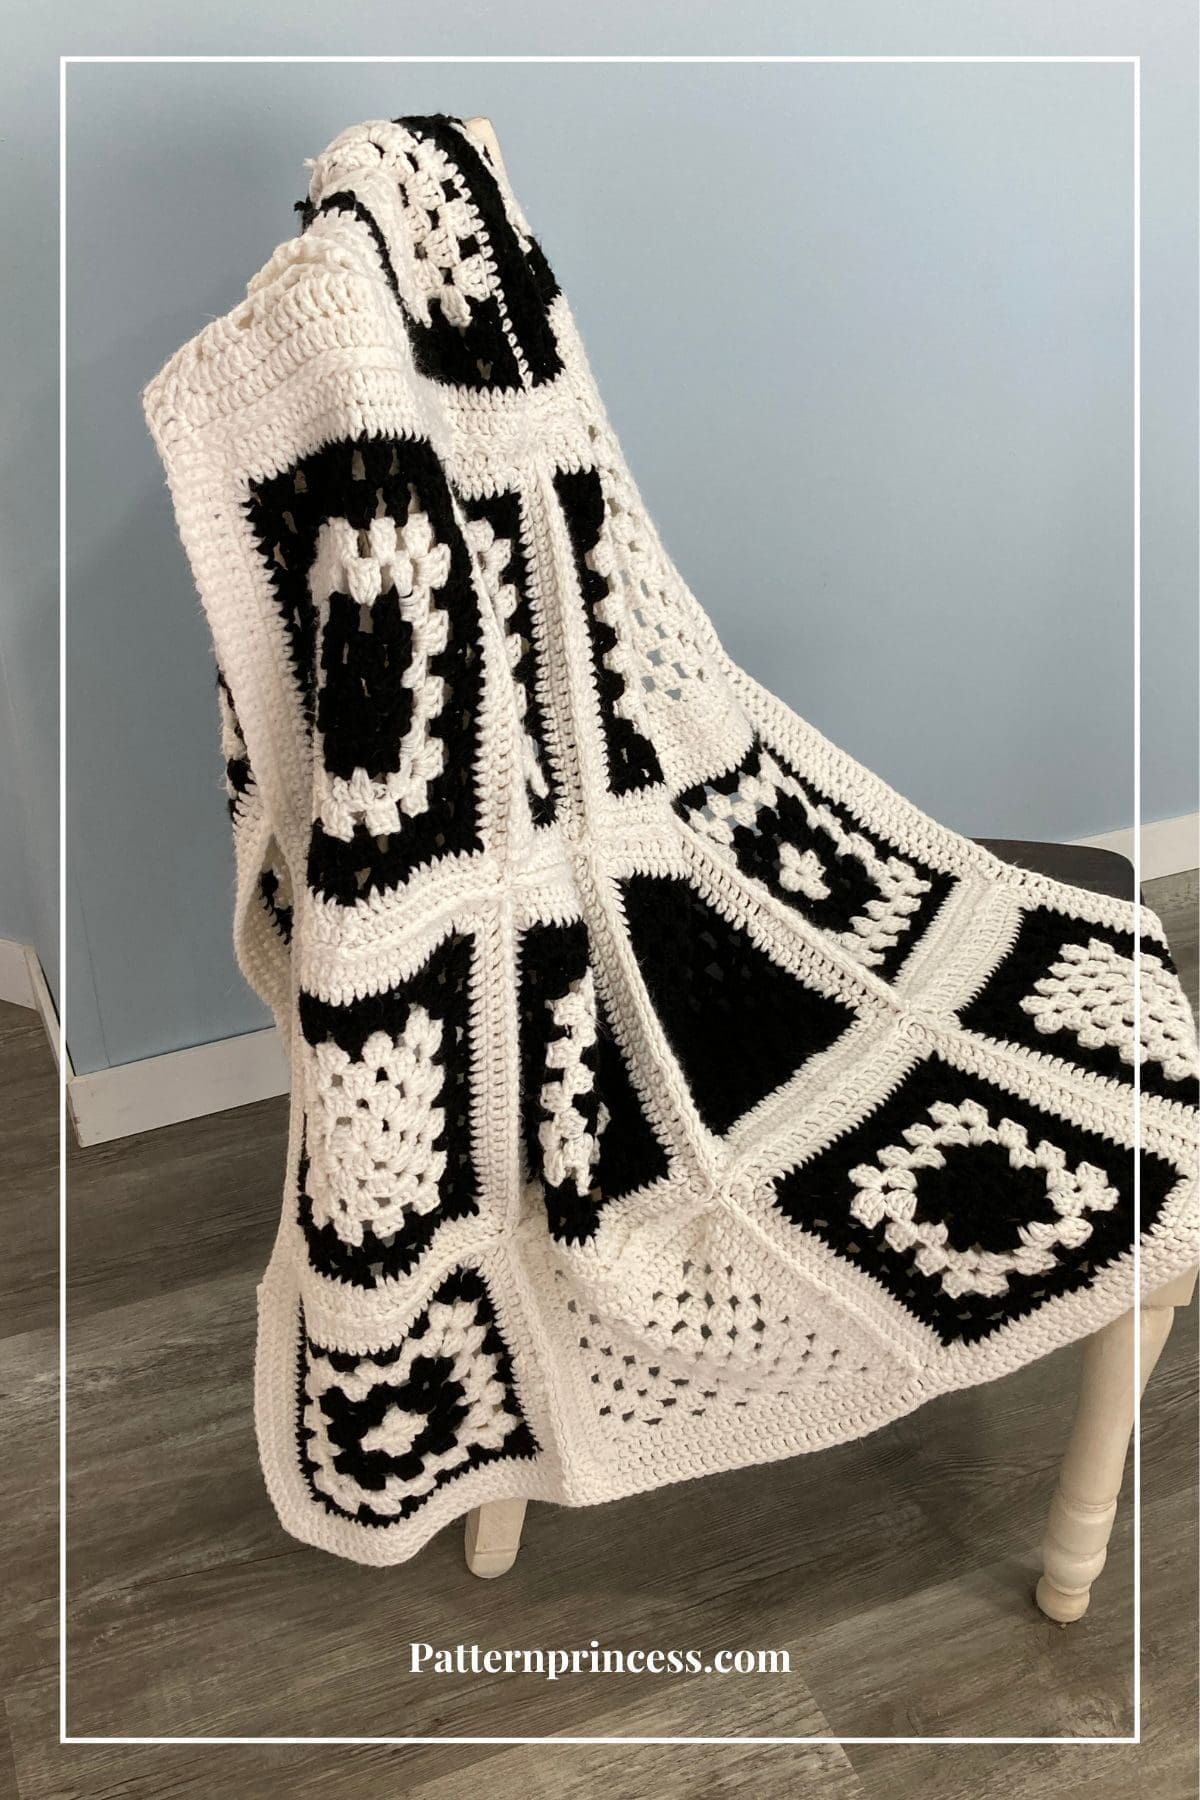
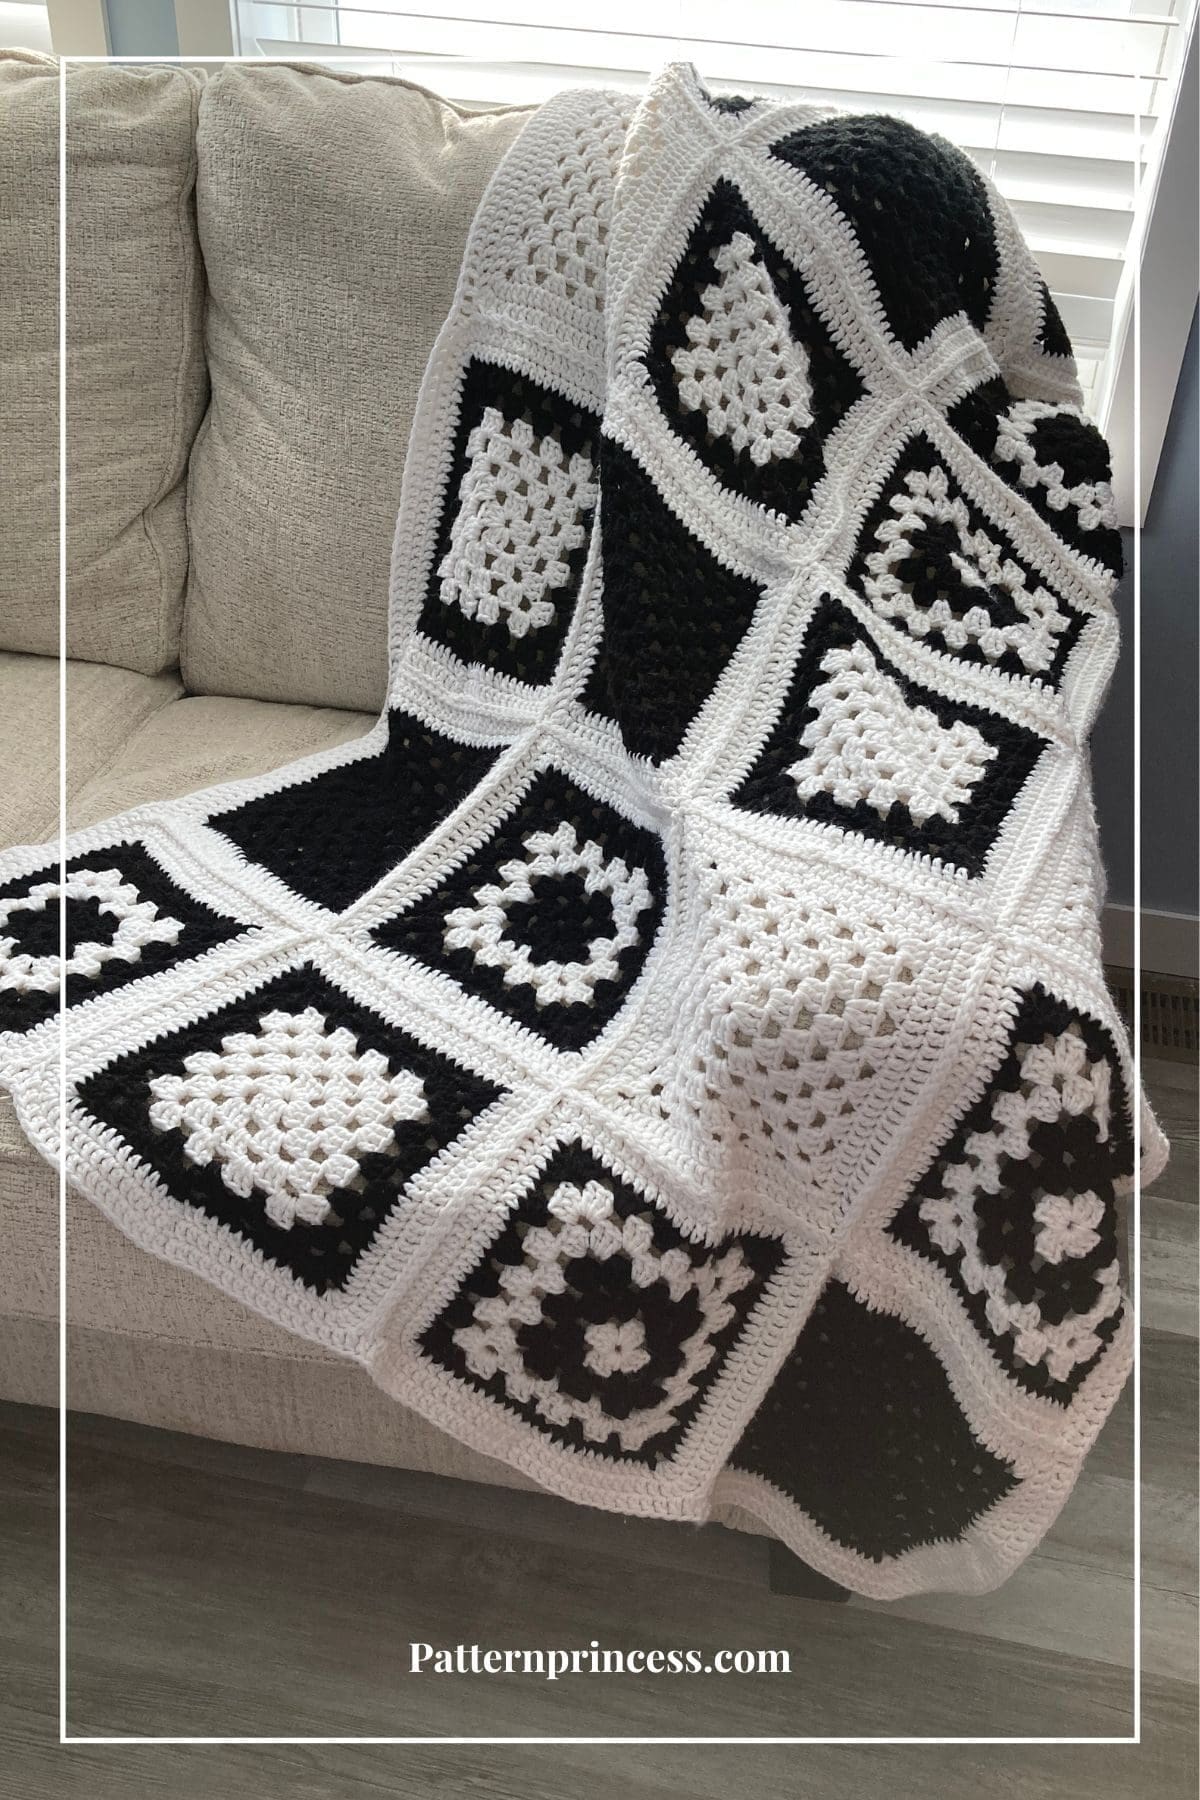
This black and white granny square afghan is finally done.
I have been working on this blanket on and off for quite a few months now. So happy with the results.
This traditional crochet style has been around for generations and is still just as popular today. A granny square afghan combines texture, color, and warmth into one timeless piece that can compliment any home. With its easy-to-follow instructions and endless design possibilities, this classic blanket is sure to be your favorite winter companion year after year.
I planned the look using black and white yarn; however, this is a great way to use up leftover yarn from other projects as you make something both pretty and practical.
Easy Crochet Granny Square Blanket Throw
The granny square is one of the most easy and versatile crochet patterns around. It can be used to make crochet blankets, scarves, bags, tops, cardigans and a myriad of easy crochet patterns.
Whether you swatch small squares together as a sampler project or create one large design, learning how to make a blanket will gain appreciation from family friends alike.
You can add color and style to your wardrobe and home alike when you learn to crochet a granny square.
This was my second granny square blanket I had ever made.
Therefore, I think this would be great for anyone to master. While black and white yarn was used for this pretty throw, it would look great in other color combinations too. There are also video tutorials to help with understanding the directions. They can be found at the bottom of this post below the written directions.
This beautiful black and white granny square afghan is easy to crochet. This blanket consists of 5 different black and white designs. Making 4 of each square.
When I started making this blanket, there was no end plan in mind. Once I got the hang of crocheting a granny square, I just started pairing the black and white in different styles. I love how they turned out.
Have fun laying them out to create a unique look. Add a double crochet border to each granny square, then join the squares.
Free Crochet Granny Square Afghan Patterns
Since making this blanket, I have made several baby blankets using squares joined together. There is a continuous granny square, and even lacy doilies using the granny stitch. One is rectangle and the other is a square doily.
10 Crochet Baby Blankets using the granny stitch
Winter Holiday Season Colors Granny Square Afghan – very popular
Christmas Crochet Rectangle Tablecloth Pattern
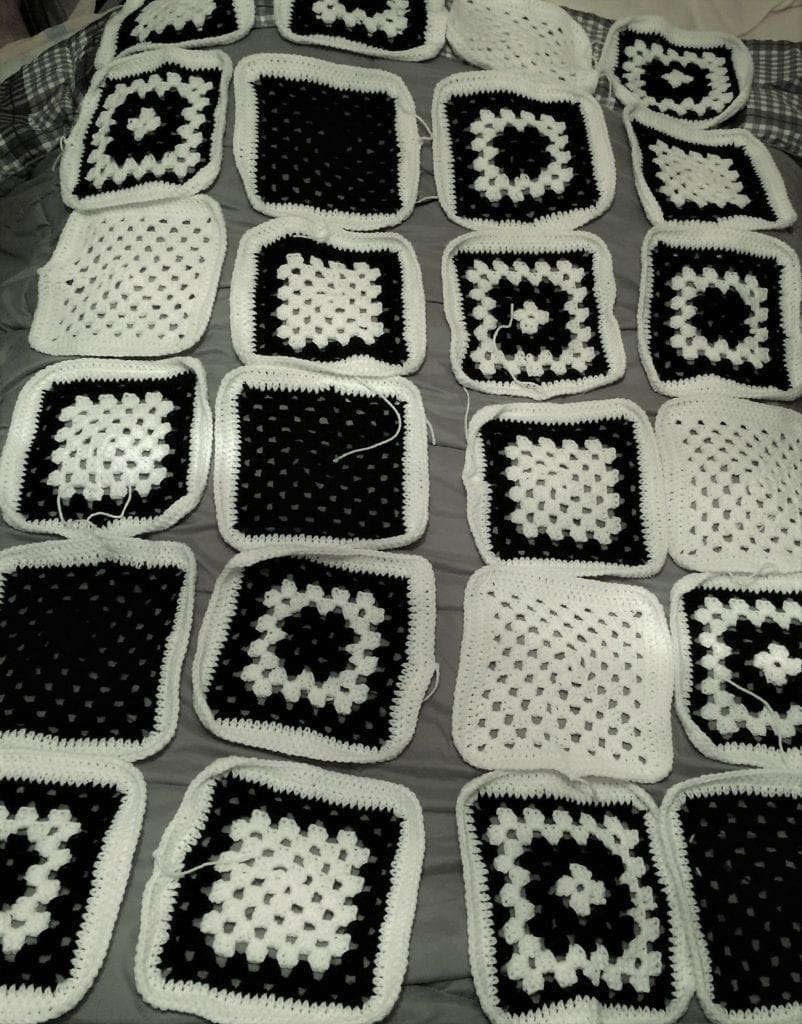
Determining the Layout of the Squares for the Crochet Blanket
She liked the black and white granny squares that I was making. So, I decided to have her help me lay it out. We had fun doing that. There were many variations, but we finally found one we both liked.
How to Crochet the Basic Granny Square Step-By-Step
Learning how to crochet the classic granny square is one of the first patterns that a beginner at crochet often learns how to make. The granny square is a design that can be used to create all kinds of fun projects. Here is a wonderful tutorial for a beginner at this.
Directions: Granny Square Afghan
Skill Level
Easy – confident beginner
Gauge
Approximately 12 double crochet per 4 inches
Size
With the crochet border around each granny square and the border, my afghan was approximately 34 X 50 inches.
Supplies
- Size J Crochet Hook 6mm
- Red Heart Super Saver yarn White color (3 skeins) or 708 yards
- Red Heart Super Saver yarn Black color (2 skeins) or 472 yards
- Scissors
- Tapestry Needle
Abbreviations:
CH = Chain
DC = Double Crochet
SC = Single Crochet
SL ST = Slip Stitch
SP = Space
ST = Stitch
STs = Stitches
YO = Yarn Over
[ ] repeat between
Crochet Pattern Notes
Written in US Terms.
For the specific colors in each square, I have detailed each one below the directions for the granny squares.
Each round is joined with a slip stitch.
The squares are 6 rounds of the granny stitch. Then I worked 2 rounds of double crochet.
Squares were joined using the invisible join method. There are videos for this after the written directions.
Crochet Granny Square Directions:
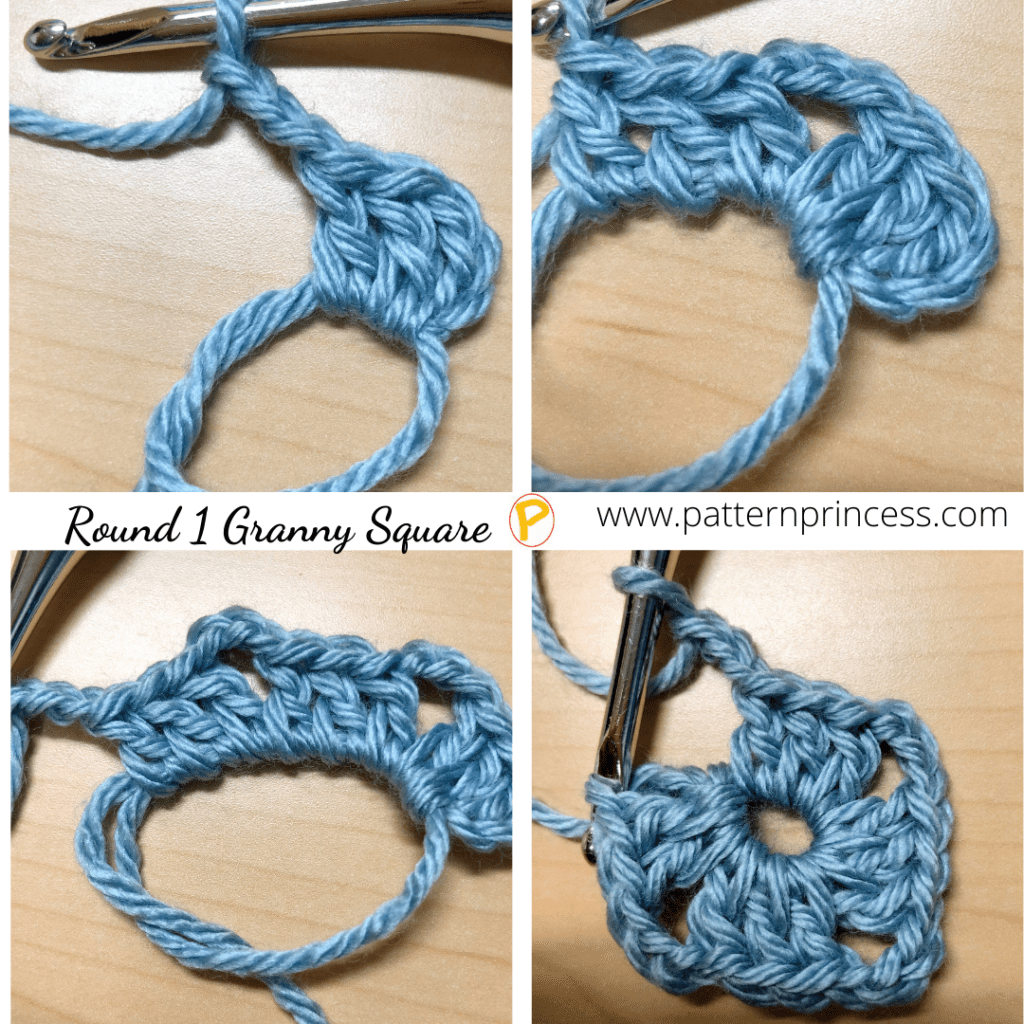
Begin by making 5 chains (ch), join with a slip stitch to the 5th chain from hook to form a ring.
Round 1:
For this round, you will be working inside the ring. chain 3 and count this chain 3 as your first DC of this round and throughout the entire pattern. Continuing working in the ring, work 2 DC. Then chain 3. 3 DC, CH 3. 3DC, CH3. 3DC, CH3. Join into the top of the beginning CH 3. This join completes the first shell of the first round. (note, you should have 4 clusters of 3 DC with 4 areas of CH 3 between)
Round 2:
CH 4 (This will count as your first DC plus a 1 CH). Then in the first CH 3 SP, [3 DC, 3 CH, 3 DC and CH 1]. Continue the stitch pattern between the [ ] until the last CH 3 SP. In the last CH 3 SP, work the 3 DC, 3 CH, then work only 2 DC and join with a SL into the 3rd chain of the beginning CH STs. This join will complete the round. (You should have 8 shells, 4 chain 3 spaces, and 4 CH 1 spaces).
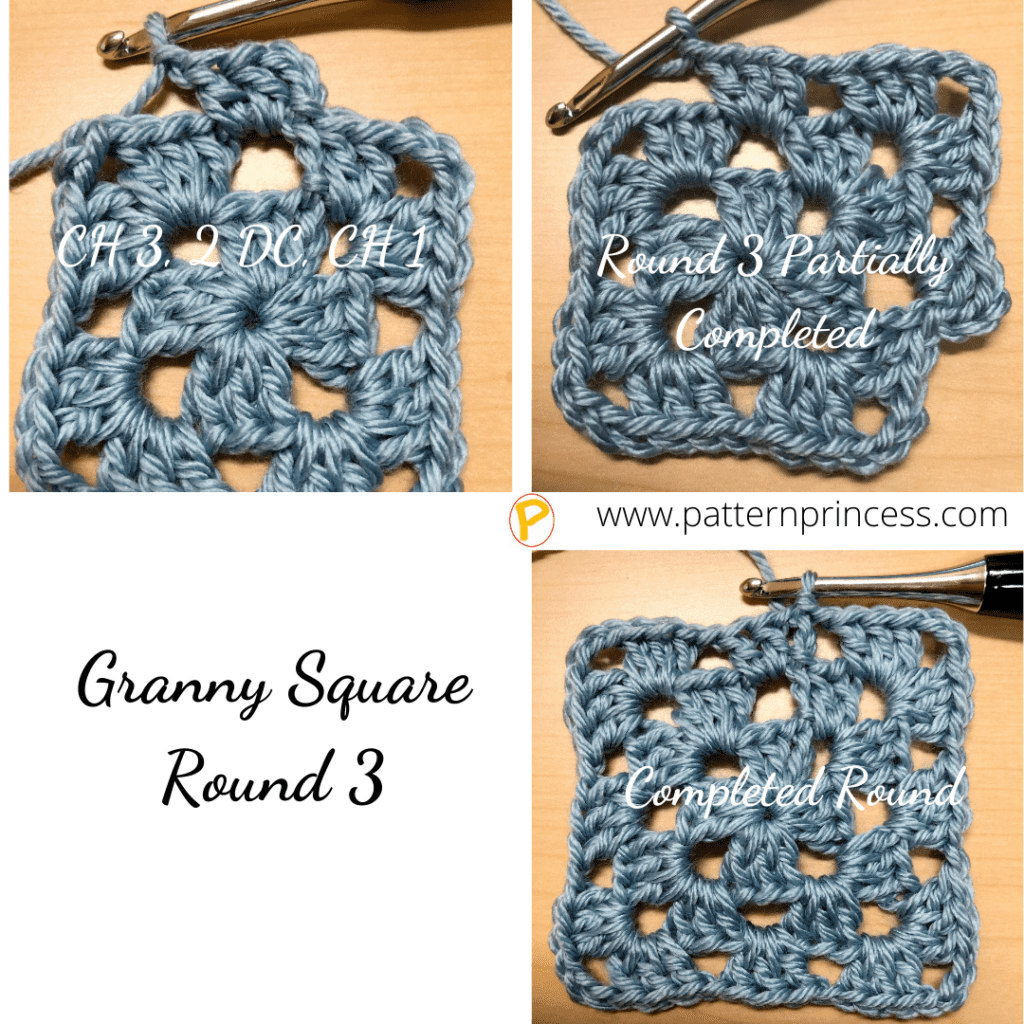
Round 3:
CH 3 (Counts as a DC), Insert the hook into the CH 1 SP from the previous row, (Should be right where the previous row ended). YO and work a DC, Insert hook again, YO and DC. (This completes your first 3 DC in the round). CH 1. [In the corner CH 3 SP work (3 DC, 3 CH, 3 DC. and CH 1)]. In the next CH 1 SP work 3 DC and 1 CH]. Repeat between [ ] 3 more times until all 4 sides are complete. After the last DC in the CH 3 space CH 1 and SL ST into the top ST of the first DC of this round. (You should have 12 shells and 12 spaces after the completion of this round).
Rounds 4-6 and Beyond:
Continue Rounds 2 and 3 until the granny square is the size you wish.
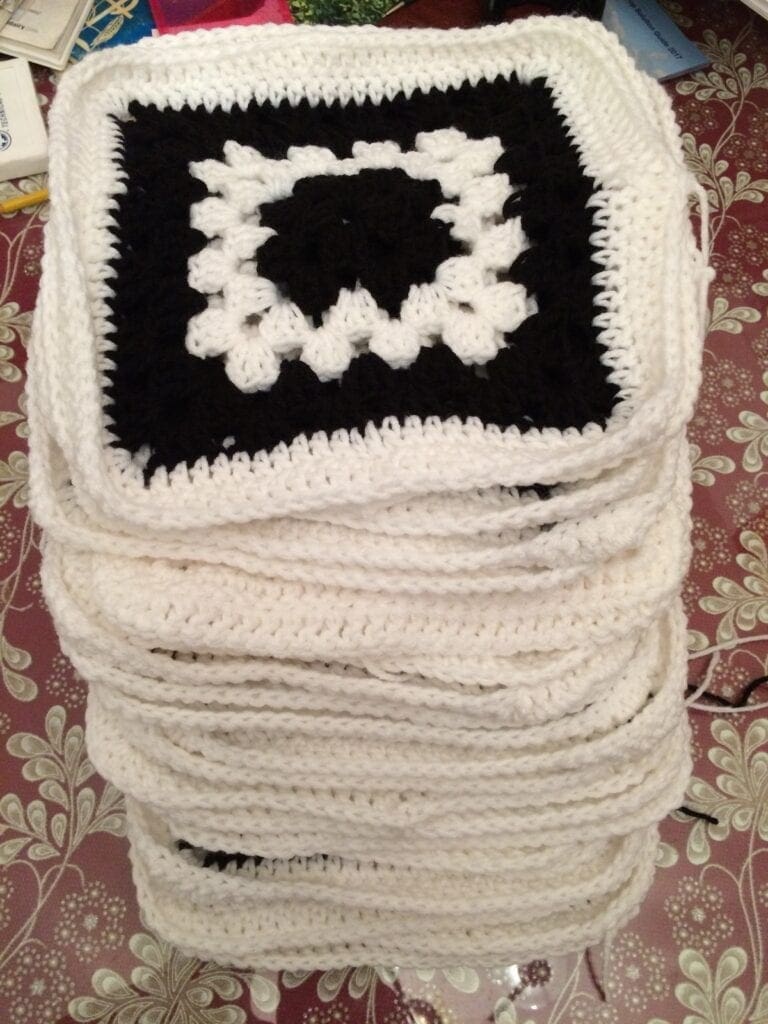
I made mine 6 rounds and finished it off with 2 rows of DC.
Before adding the crochet edge to the square, I weaved in all the yarn ends.
View the Specific Rounds of Each Yarn Color for the Five Granny Squares
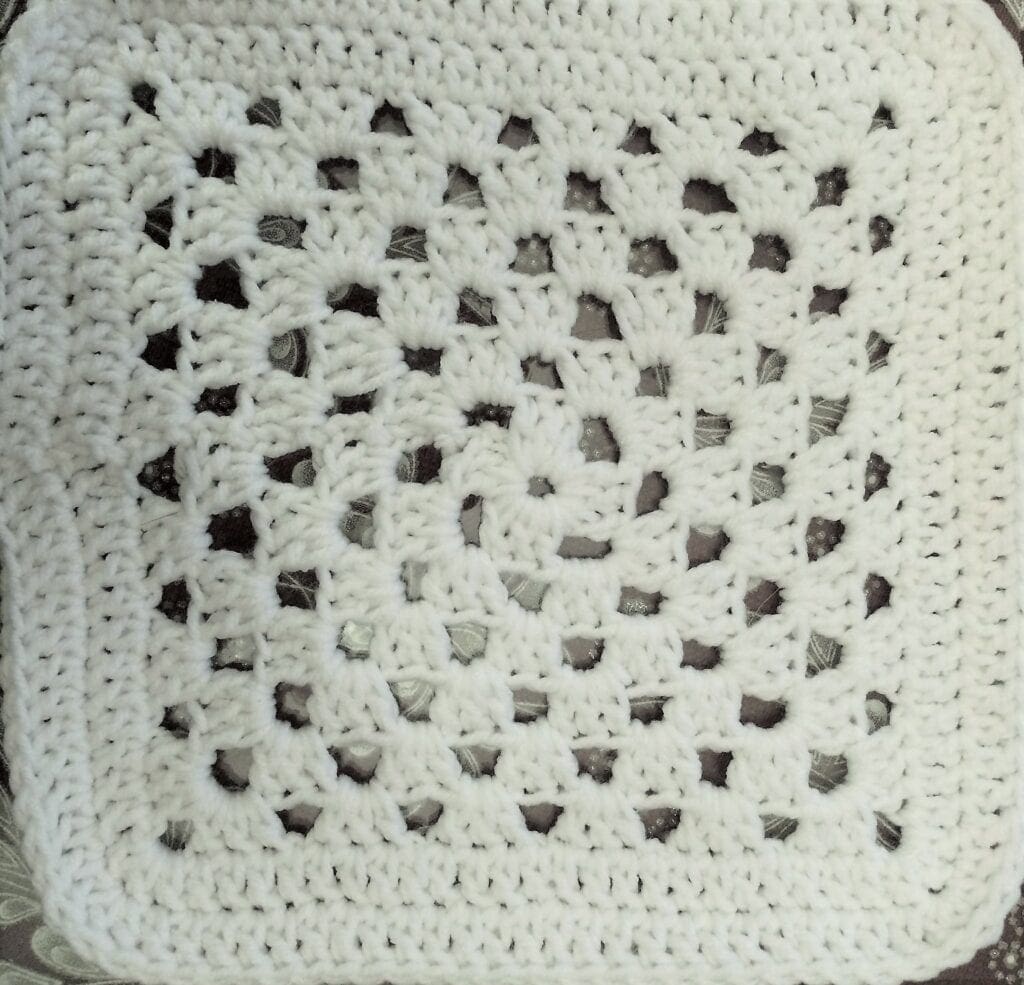
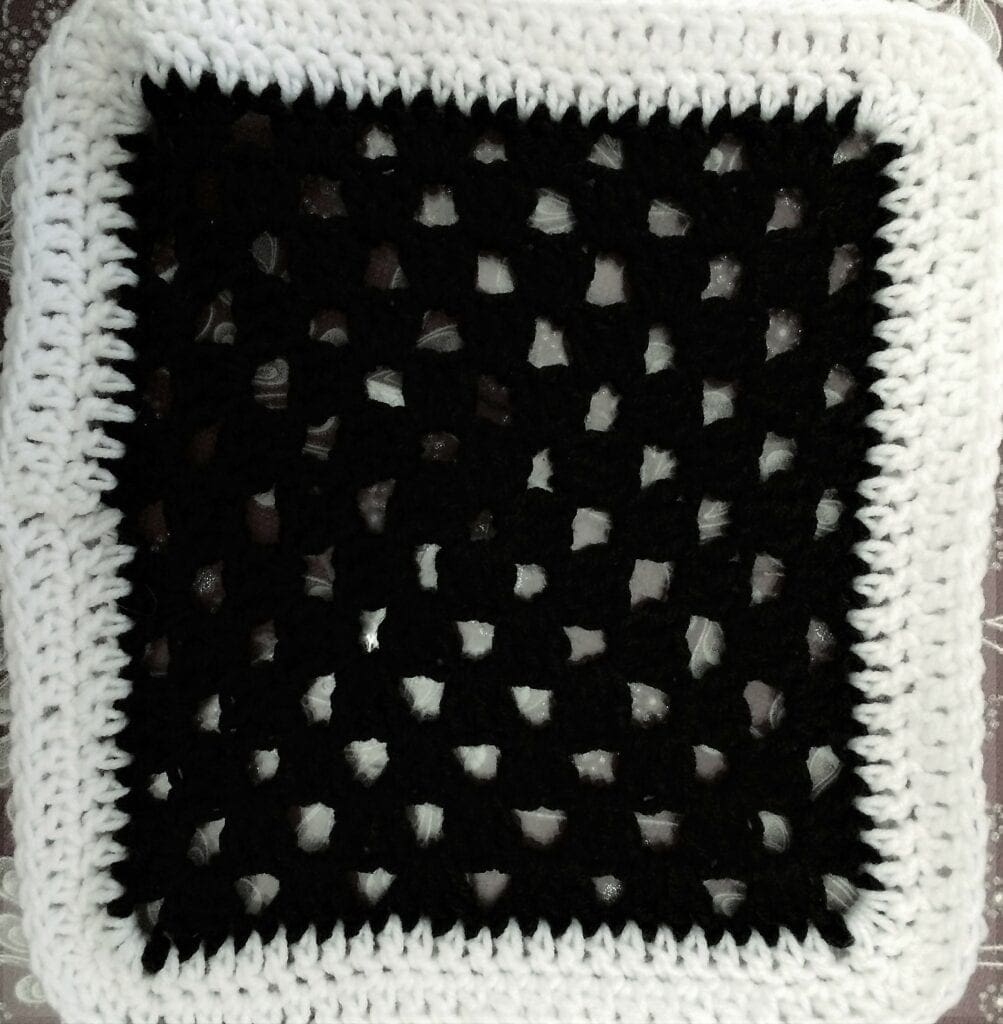
Square 1 is six rounds of the granny square pattern in white. Two rounds of double crochet using the white yarn.
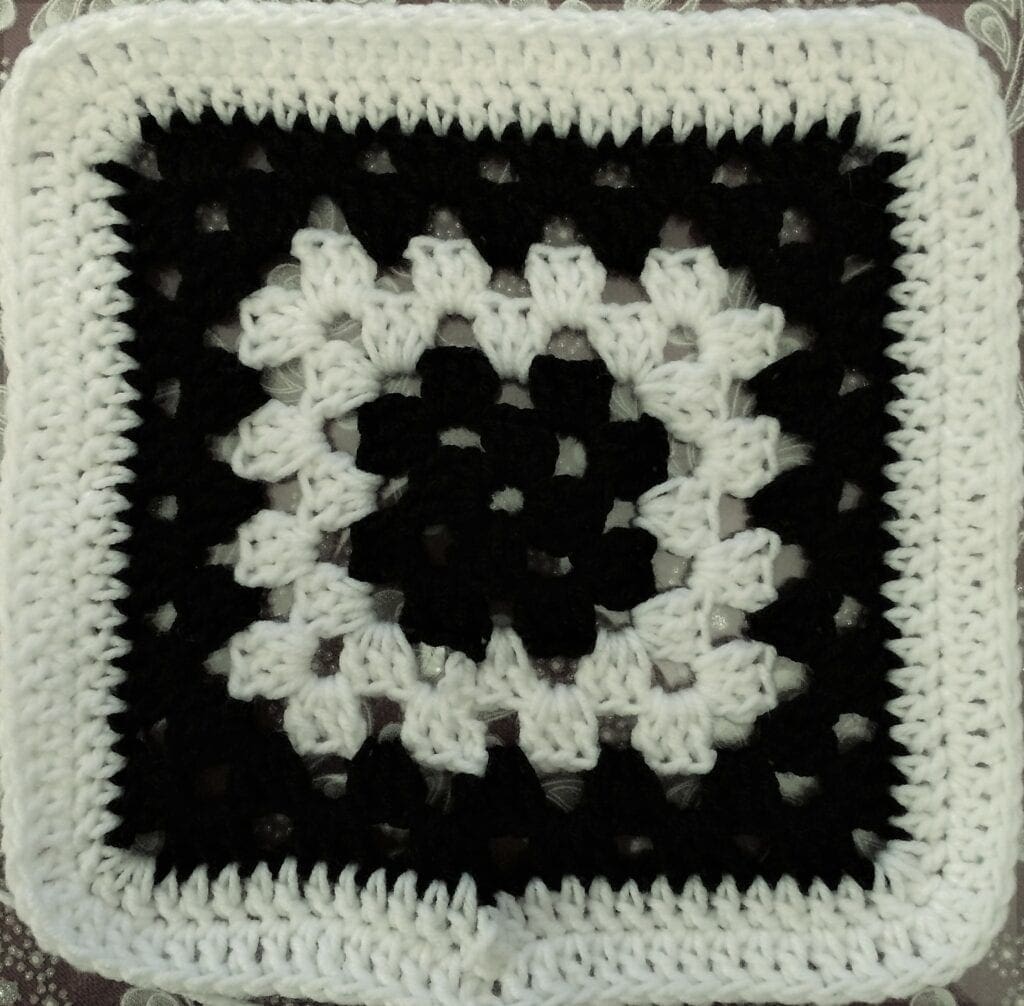
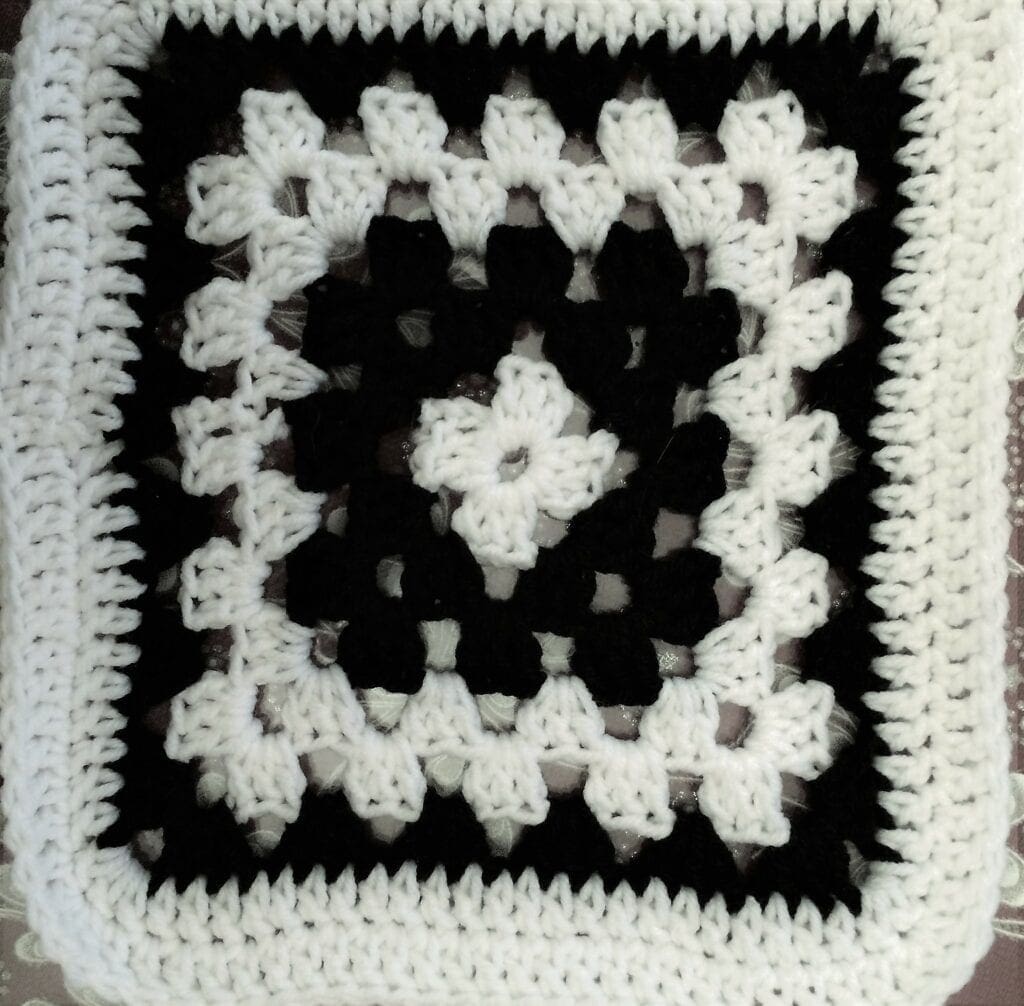
Square 2 uses two rounds of black, two rounds of white, and finishes with two rounds of black for the granny square. Two rounds of double crochet in white finishes this square.
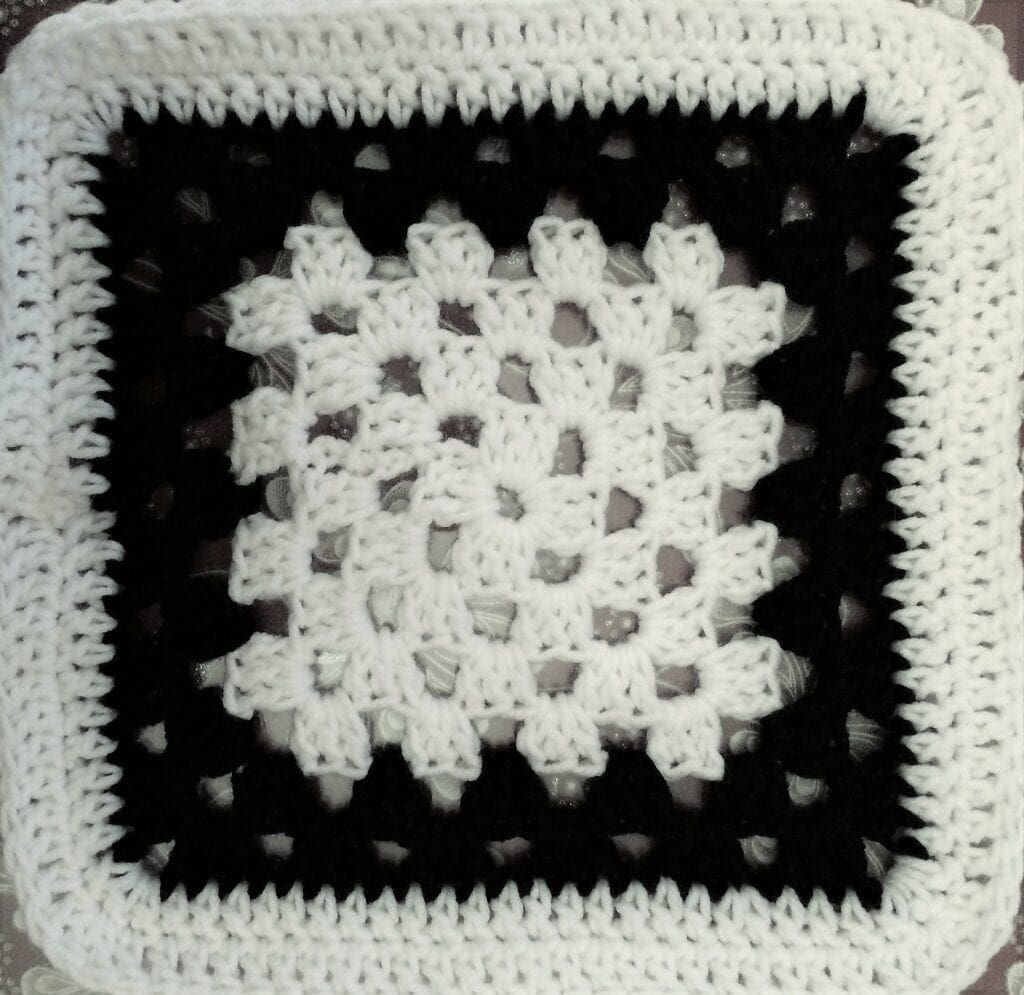
Square 3 consists of four rounds of white and two rounds of black for the granny square. The crochet edge for the square is two rounds of double crochet in white.
Square 4 consists of six rounds of black for the granny square and two rounds of double crochet in white for the border to the square.
Square 5 shows the one round of white, two rounds of black, two rounds of white, and one round of black for the granny square. Finished off with the two rounds of double crochet in white yarn.
Joining the Crochet Squares
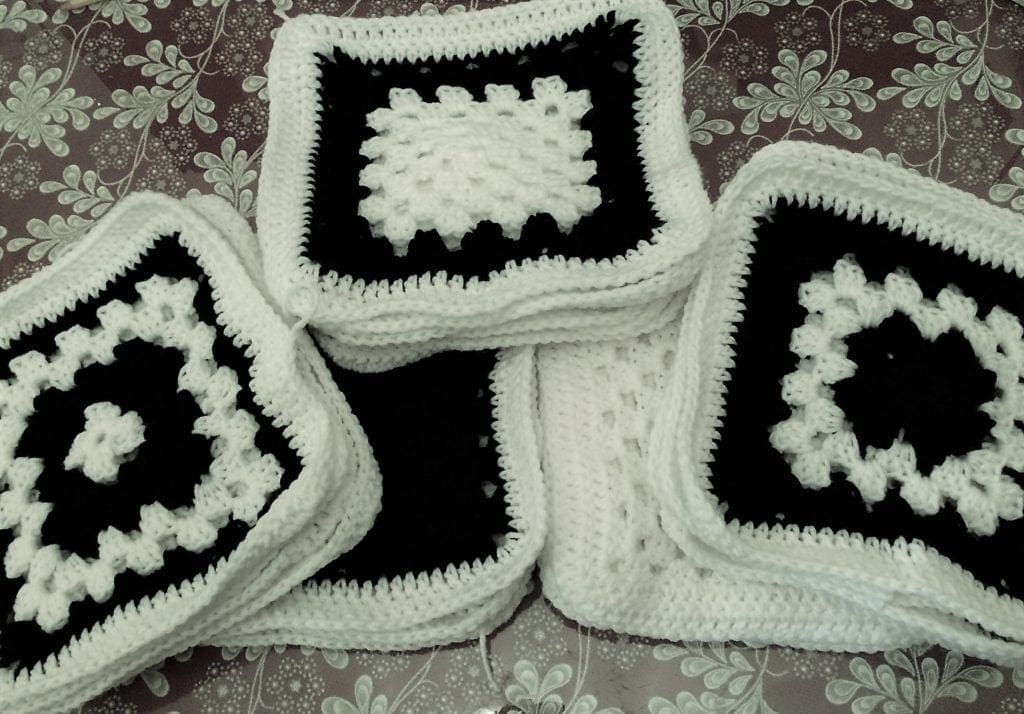
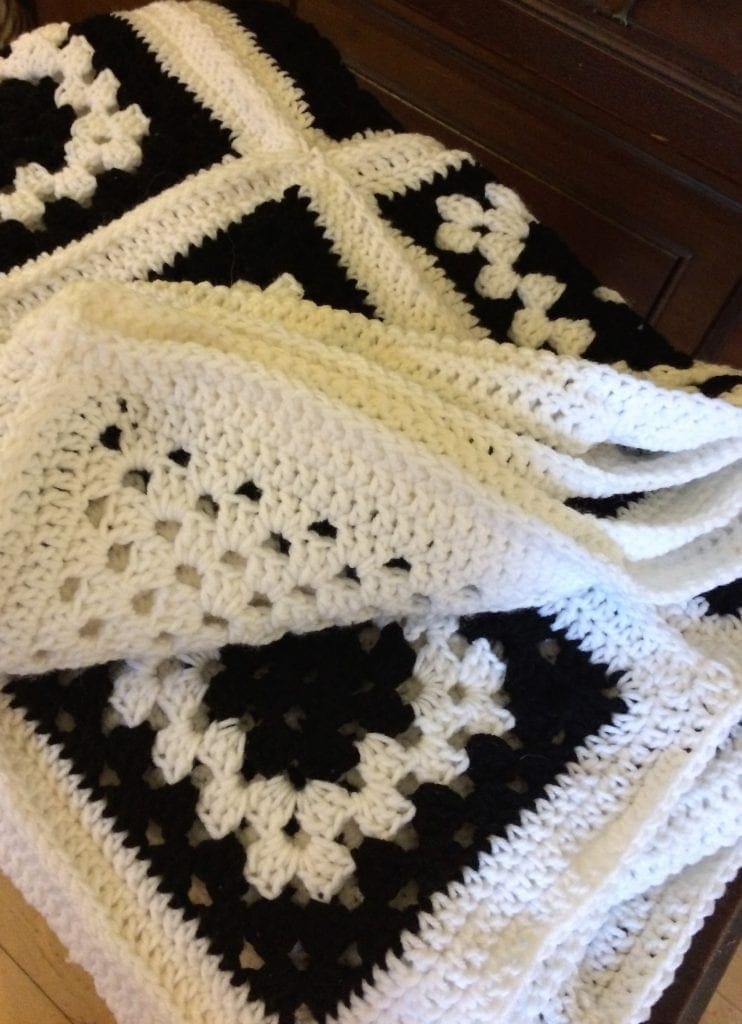
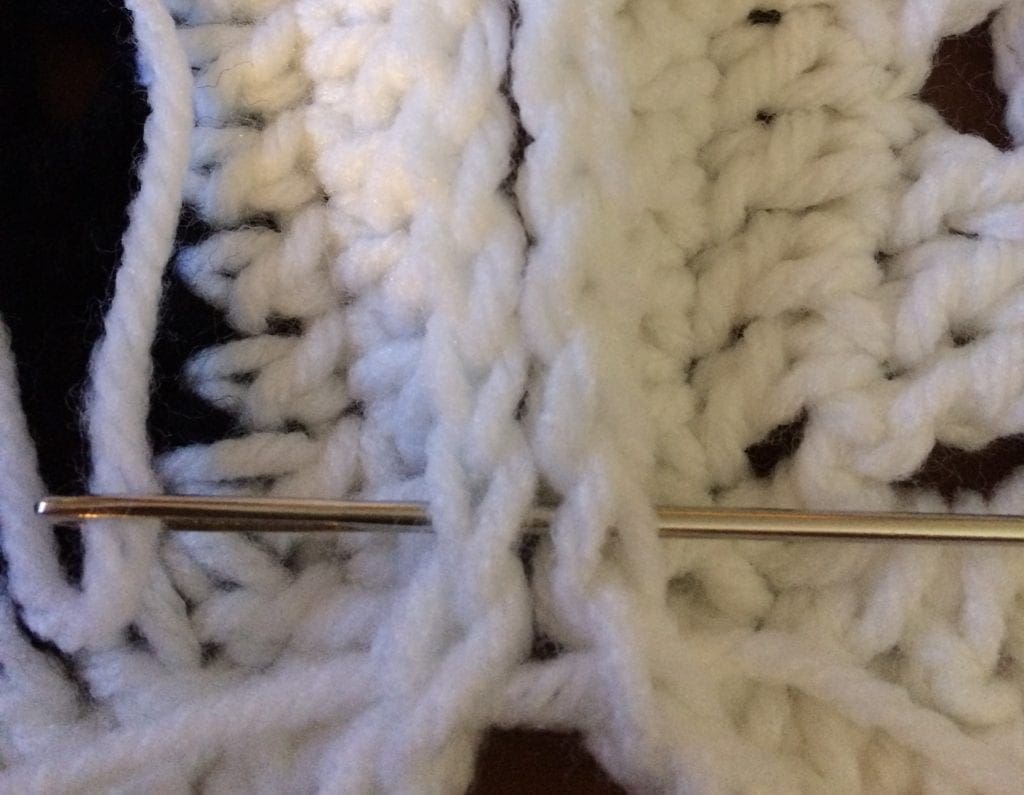
I chose to use a yarn needle and weave the yarn through both yarn loops. Here is a close-up photo showing how I joined the squares.
Align the Squares Evenly
Caution: be careful to align the squares evenly, otherwise, you will have to do what I had to do on one and start all over. However, it is easy to remove the yarn. It is not like having to remove stitches from sewing a garment.
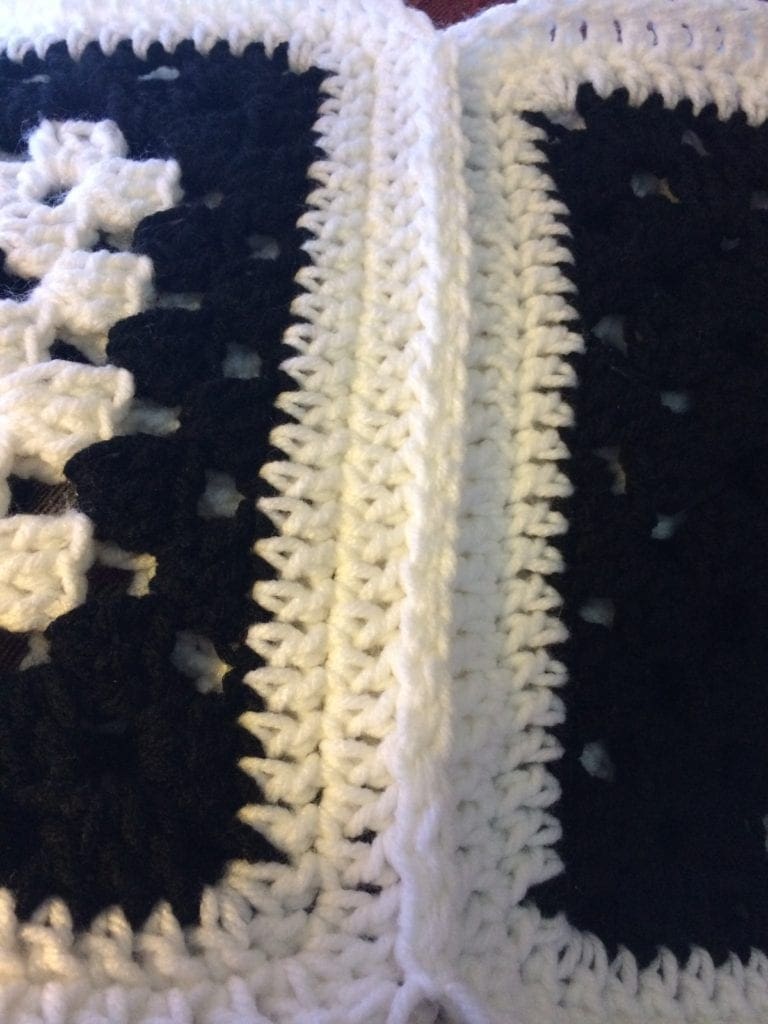
Here are two squares joined together.
Note: I am nervous that one yarn running through the join would not be enough for the wear and tear that this will get. I went from one edge to the other and back again with the same yarn. Then I tied it off and weaved in the strands. It just feels more secure to me.
After joining one end of each square together, I had six rows of squares, which I laid next to each other to join the rows.
Crochet Border for Black and White Granny Square Blanket
When you have your blanket the size you would like, finish off with two rows of DC around the whole thing.
Warm and Snuggly Beautiful Handmade Blanket
Warm evenings and cozy blankets go hand-in-hand, and a crocheted granny square blanket is the perfect way to achieve both. Ideal for snuggling up with your favorite book or watching movies with friends, mastering this classic pattern will give you an heirloom-worthy blanket that’s sure to inspire the nostalgist in you.
Video Tutorials on Granny Square Basics
Here is a video tutorial on making a granny square.
Here is video tutorial on changing colors when making a granny square
If you loved this post, please share on your fave social media links. It helps to show me that these types of posts are helpful – thank you!
Here are other free crochet patterns to spark your next crochet project.
“Happy with pattern and was easy to follow the directions.”
Jacquelin, a Verified Etsy Buyer
You can find Victoria crocheting, quilting, and creating recipes. She has cooked in restaurants for over 20 years, including many larger parties. She learned to crochet when she was just 11 years old and has been crocheting ever since; over 50 years now. Over 40 years ago, she loved her first class in sewing and continues to hone her skills in quilting. Many have enjoyed the handmade gifts over the years. In her professional career, she has worked in management in a wide variety of businesses including higher education as a dean of a division. All the while attending college part-time to achieve her doctorate in higher education with an emphasis in e-learning.


This pattern looks pretty, but I have one question: did you do a border on the outer edge of the blanket? I didn’t see one in the pattern and I always like to put borders on my blankets – I find that it helps with protecting the seams in granny square items.
Hi, I did put a border on the blanket. It is in the directions, but might be easily overlooked when first reading. Here is the excerpt from the pattern. Crochet Edge for the Blanket
Once all the squares were joined together. I did two rows of double crochet around the whole thing in the white yarn.
I think that often a border can add so much to the overall look and feel of the crochet pattern.
Vicky