Last updated on June 18th, 2026 at 12:12 pm
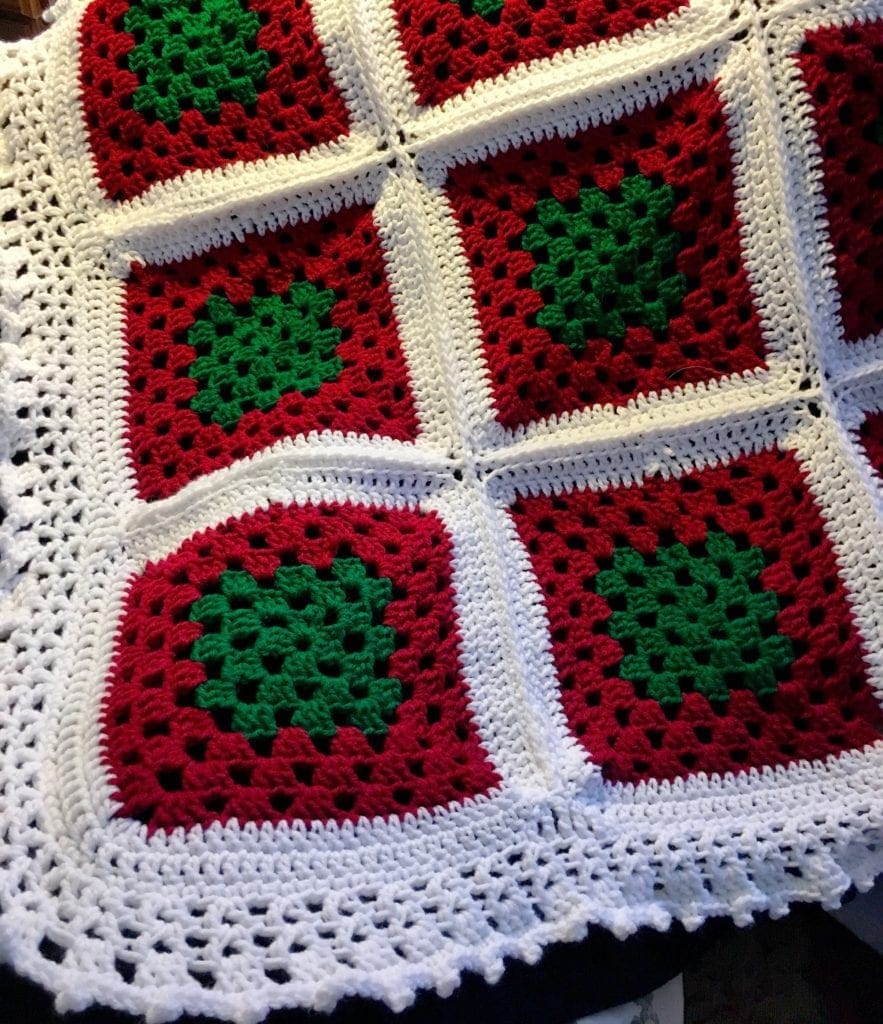
This pretty Winter Holiday Season Colors Granny Square Afghan. The lacy border really dressed up the beautiful Holiday colors. It was very easy to complete. The hardest part was figuring out what I wanted to do next.
There’s no better way to get into the winter holiday spirit than by crocheting an afghan in festive colors. In this tutorial, we’ll show you how to make a granny square afghan using red, green, and white yarn. This would be a perfect project to work on while watching your favorite Christmas movies. So let’s get started.
Winter Crochet Project
When I started making these granny squares, I had no idea on what the end result would be. This is one of those projects where you just start and see where the yarn takes you.
It is January as I write this post and we still have lots of snow on the ground. The temperature has not been above ten degrees for weeks now. I am hoping for an early spring. I love the seasons and watching nature come to life again in the spring. Since it is still winter, it is still a good time to display this beautiful afghan.
Crochet A Handmade Gift
It is my sister-in-law’s birthday in a few weeks and I decided about half way through this that I would make this for her. I know she likes the burgundy color and I think that she will like displaying and using this.

Developing and Writing the Crochet Pattern
It is fun to create a new pattern. However, remembering to write down what I did so others can enjoy creating one of their own can be the hardest part for me sometimes. Before I give this afghan to my sister-in-law, I need to get this pattern written up. Once it is gone, I will not be able to look back at what I did to get it down correctly.
Video Tutorial Near Bottom of Directions
Video tutorial on crocheting the granny square
The video shown further down in the post is for a different crochet pattern. It is helpful in understanding the traditional granny square pattern. I hope that if my written pattern directions are at all confusing, you take a moment to view the video.
Video tutorial on changing color when crocheting the granny square
There is also a video from another granny square pattern that shows how to change color without having it visible. It is a very simple method.
Directions: Winter Holiday Season Colors Granny Square Afghan
Gauge
Approximately 12 stitches per 4 inches
Size
Approximately 46 X 58 inches
Supplies:
- J Boye hook
- Burgundy Red Heart Super Saver Yarn Burgundy color (1 1/2 skeins)
- Paddy Green Red Heart Super Saver Yarn Paddy Green color (1 skeins)
- White Red Heart Super Saver Yarn White color (3 skeins)
- Scissors
- Tapestry Needle
Size:
Each granny square is approximately 11 inches X 11 inches. Then there is about a 1-inch white border around each square and about a 2 inch white border around the whole afghan.
Abbreviations:
- CH = Chain
- DC = Double Crochet
- SC = Single Crochet
- SK = Skip
- SL ST = Slip Stitch
- SP = Space
- ST = Stitch
- STs = Stitches
- TR = Treble Crochet
- YO = Yarn Over
- [ ] repeat between
Begin Crochet Pattern
Starting with the Red Heart Super Saver Yarn Paddy Green color
Begin by making a Magic Circle. Directions for the magic circle can be found here. This is a detailed step-by-step tutorial on making the magic circle.
Round 1:
For this round, you will be working inside the magic circle. chain 3 and count this chain 3 as your first DC of this round and throughout the entire pattern. Continuing working in the ring, work 2 DC. Then chain 3. 3 DC, CH 3, 3DC, CH3, 3DC, CH3 and join into the top of the beginning chain. This join completes the first shell of the first round. (note, you should have 4 clusters of 3 DC with 4 areas of CH 3 between)
Round 2:
CH 4 (This will count as your first DC plus a 1 CH). Then in the first CH 3 SP, [3 DC, 3 CH, 3 DC and CH 1]. Continue the stitch pattern between the [ ] until the last CH 3 SP. In the last CH 3 SP, work the 3 DC, 3 CH, then work only 2 DC and join with a SL into the 3rd chain of the beginning CH STs. This join will complete the round. (You should have 8 shells, 4 chain 3 spaces, and 4 CH 1 spaces).
Round 3:
CH 3 (Counts as a DC), Insert the hook into the CH 1 SP from the previous row, (Should be right where the previous row ended). YO and work a DC, Insert hook again, YO and DC. (This completes your first 3 DC in the round). CH 1. [In the corner CH 3 SP work (3 DC, 3 CH, 3 DC. and CH 1)]. In the next CH 1 SP work 3 DC and 1 CH]. Repeat between [ ] 3 more times until all 4 sides are complete. After the last DC in the CH 3 space CH 1 and SL ST into the top ST of the first DC of this round. (You should have 12 shells and 12 spaces after the completion of this round).
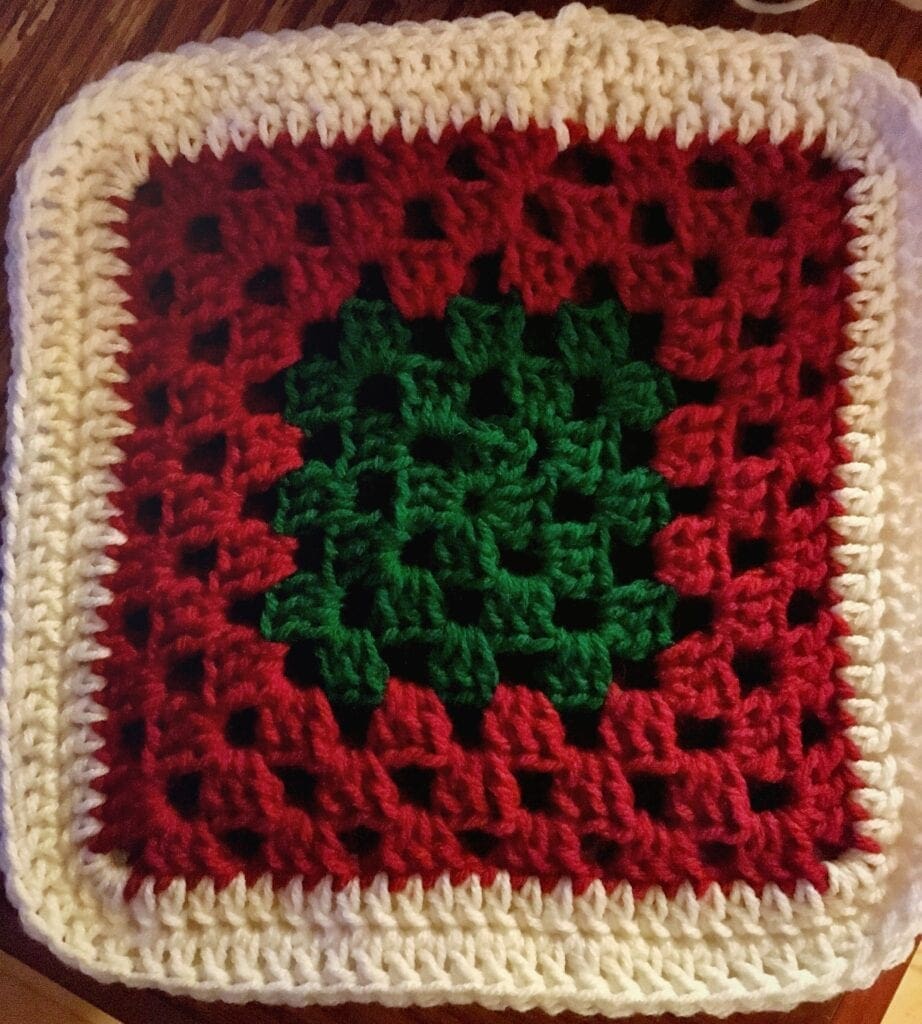
Additional Photo Detail for Crocheting the Granny Squares
If you want to see more pictures of making the granny squares. You can check out this earlierblog post for crocheting the granny squares.
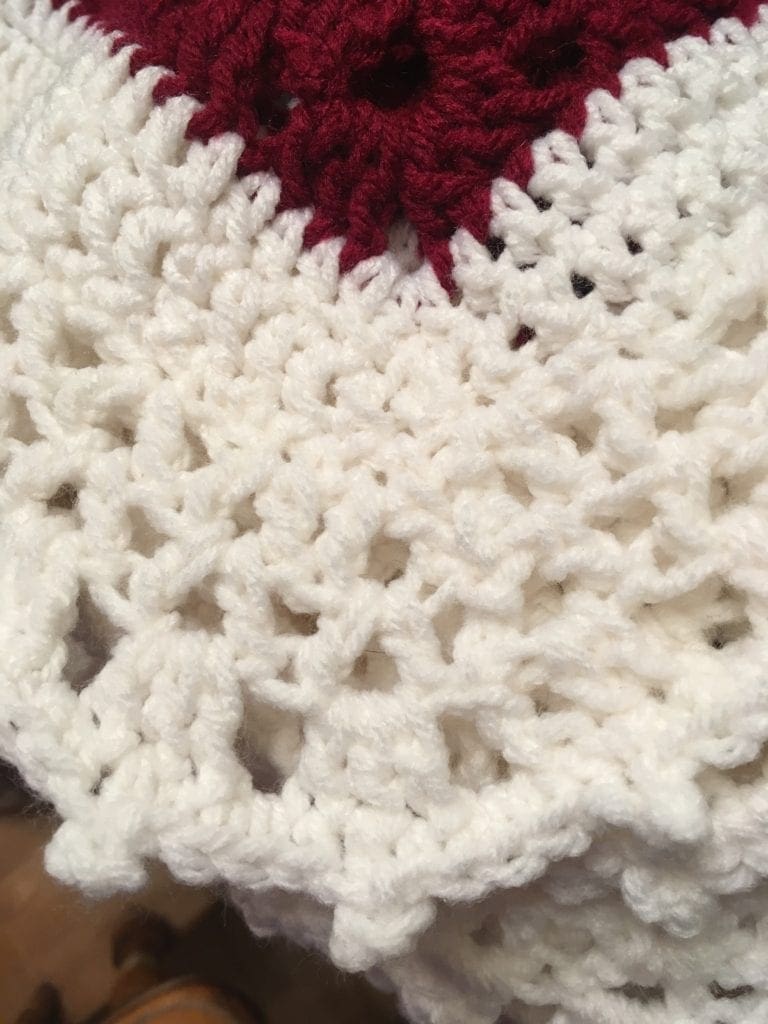
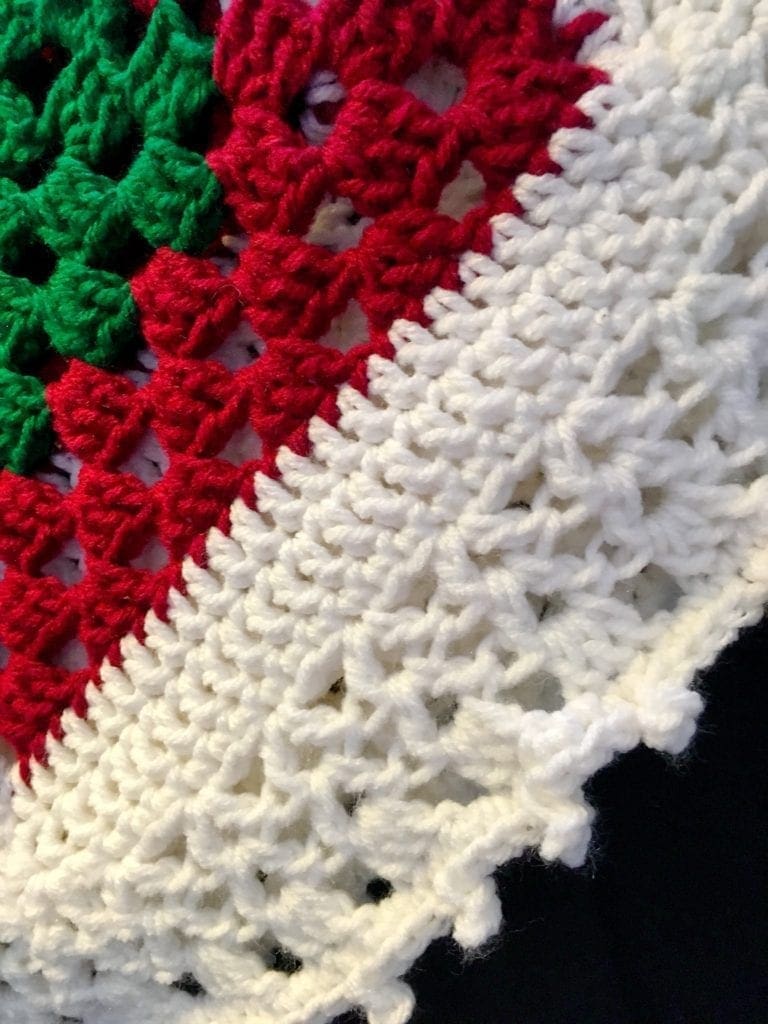
Here are photos of the lacy crochet border.
Round 4-6:
Change yarn to Red Heart Super Saver Yarn Burgundy color and repeat rounds 2 and 3.
I made 20 of these squares.
Weave in ends before adding on the border.
White Border for each Square:
Round 7:
Switch to the White Yarn color. Begin by CH 3, in the next ST DC. DC all the way around. SL ST to the top ST of the first CH 3.
Round 8:
CH 3 and DC all the way around. In the corners, add a CH 1 between the DC twice. This helps the corners lay flat. SL ST to the top ST of the first CH 3.
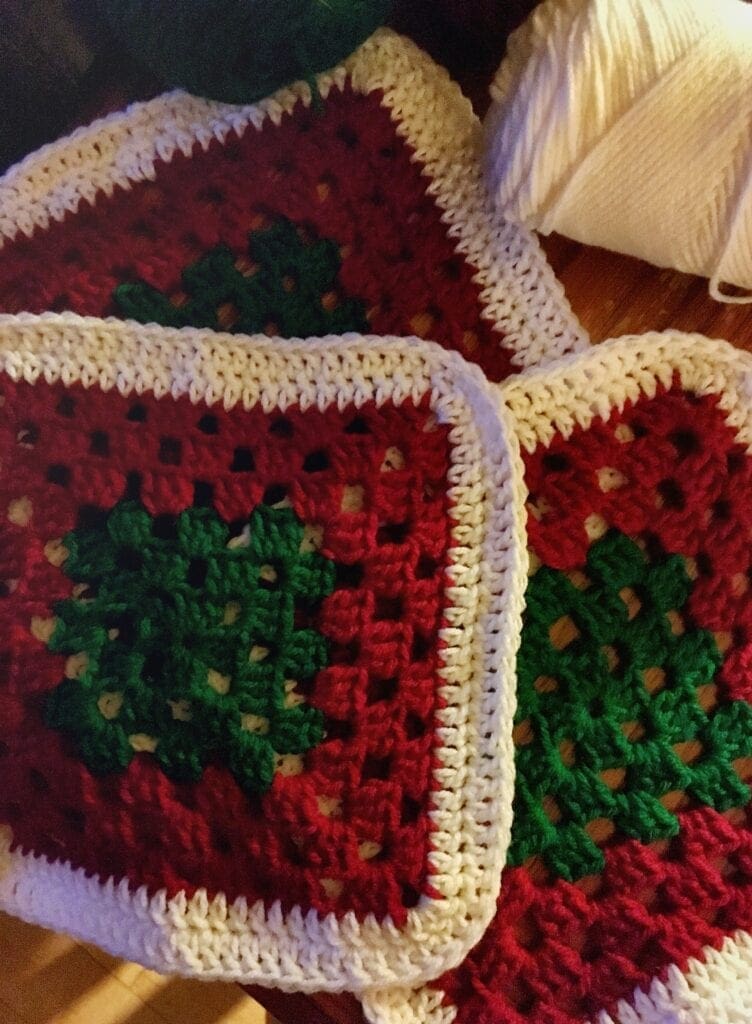
Joining the squares:
Using the White yarn color, I joined one row of squares at a time all one way first, then I did the rows across next so that the yarn was continuous in each row until I came to the end of each row. I weaved in the ends before I added the lacy border.
Joining Directions:
Lay the squares flat next to each other. (Hint: I make sure that there is at least a 6-inch tail on, so it can be weaved in). Starting in the middle DC in the corner of two squares, Put the crochet hook through the bottom loop of the ST on the right, then the bottom loop of the ST on the left. YO and pull through both loops on the hook.
Complete this process for the first square-continue on to the next two squares. Without cutting the yarn, lay out the next set of two squares and continue the process until you have joined a row of 10 squares. (5 on each side). Repeat this process two more times. You should have 4 rows of 5 squares on each side.
Now it is time to complete the joining process on the horizontal rows.
I did the same process as outlined above; however, when I came to the joining stitches in the corners where the vertical join runs through, I put my crochet hook under the vertical stitches did a YO and completed a SC. Then continued joining as usual. At the end of the horizontal row, cut off the yarn and weave in the ends.
Lacy Edging
This lacy crochet edging really helps make your crochet project pop. The addition of this simple and stunning crochet edge really gives the afghan an elegant look. Since this is a gift, I really wanted to make sure that this had that WOW factor. This border consists of five rows of crochet stitches.
Directions: Lacy Border
Lacy Border Round One:
With the White Yarn I did a DC all the way around the outside of the afghan. In order to make the corners of each square be the same height as the rest of the stitches, I completed 5 Treble crochet ST. After completing the last DC ST, SL ST to join to the top ST of the first CH 3.
- Outer corners In the corners in order to ease the yarn around the corner and have less puckering, I did a DC, CH 1, DC, CH 1, DC continuing on with my DC around.
Lacy Border Round Two
CH 4, Insert hook into the same ST and complete a DC (this is the first V-Stitch with a CH 1 in the middle). *SK 2 ST. DC, CH 1, DC in the next ST*. Continue this pattern until you reach your first corner. In the corner (and each corner after this too) only skip 1 ST between the V-Stitch pattern twice, then continue on with the *SK 2 ST. DC, CH 1, DC in the next ST* pattern. At the end of the round CH 1 and SL ST into the top CH 3 beginning ST.
Border Round Three
CH 4, Insert hook into the CH 1 SP of the previous row and complete a DC (this is the first V-Stitch with a CH 1 in the middle). *In the next CH 1 SP, DC, CH 1, DC *. Continue this pattern all the way around. At the end of the round CH 1 and SL ST into the top CH 3 beginning ST.
Border Round Four
CH 3 and 2 DC in the CH 1 SP in the previous row. CH 1. *3 DC in next CH 1 SP, CH 1*. Continue the pattern between * all the way around. At the end CH 1 and SL ST into the top CH 3 beginning ST.
Border Round Five
In this round, you will complete a Picot stitch in middle ST of the 3 DC in the previous row with SC in the other Stitches.
To begin, CH 1, in the next ST SC, in the next ST Picot ST, then SC until the middle DC in the next area where you will complete a Picot ST. Continue this pattern completing the round with a SL ST. Cut off the yarn and weave in the ends.
Crochet the Picot Stitch
- Here is how to complete the Picot ST: Most Picot stitches call for a CH 3, I wanted mine a bit taller, so I did a CH 4 and insert hook into the back bar of the first CH, YO, Pull through all loops on the hook. Continue on with the next SC.
Here is a good picture tutorial on how to complete the Picot Stitch.
How to Crochet A Granny Square Video Tutorial
How to Change Colors For A Granny Square Video Tutorial
I hope I have motivated you to make your own beautiful Winter Holiday Season Colors Granny Square Afghan and you display it with pride.
If you loved this post, share on your fave social media links. It helps to show me that these types of posts are helpful – thank you!
You may also enjoy these crochet patterns

You can find Victoria crocheting, quilting, and creating recipes. She has cooked in restaurants for over 20 years, including many larger parties. She learned to crochet when she was just 11 years old and has been crocheting ever since; over 50 years now. Over 40 years ago, she loved her first class in sewing and continues to hone her skills in quilting. Many have enjoyed the handmade gifts over the years. In her professional career, she has worked in management in a wide variety of businesses including higher education as a dean of a division. All the while attending college part-time to achieve her doctorate in higher education with an emphasis in e-learning.
Pingback: American Pride Granny Square Blanket - Pattern Princess
Pingback: 4 Beginner Crochet Earrings Patterns - Pattern Princess
In the white round it doesn’t say to put 3 in the corners. It would be nice if I knew that and btw I paid for the pattern. Otherwise it is a really si pile pattern and I like it
On this one, I put a DC in each stitch. Since there are 3 CH stitches in each corner of the square, I did a DC in each Ch ST. Does that help?
I love this pattern, I just don’t understand the magic circle. Also every time I’ve tried a granny square blanket the square’s are beautiful but I can never get them together evenly. …I might be to old to learn something new.
So sorry to hear. Here is a video on how to make the magic circle. Hope it helps. https://youtu.be/SGVyc7febv0
I’m sure your sister-in-law loved it. It is pretty.
Thank you so much. I hope she has many years of enjoying both displaying and using the afghan.