Last updated on March 27th, 2026 at 09:48 am
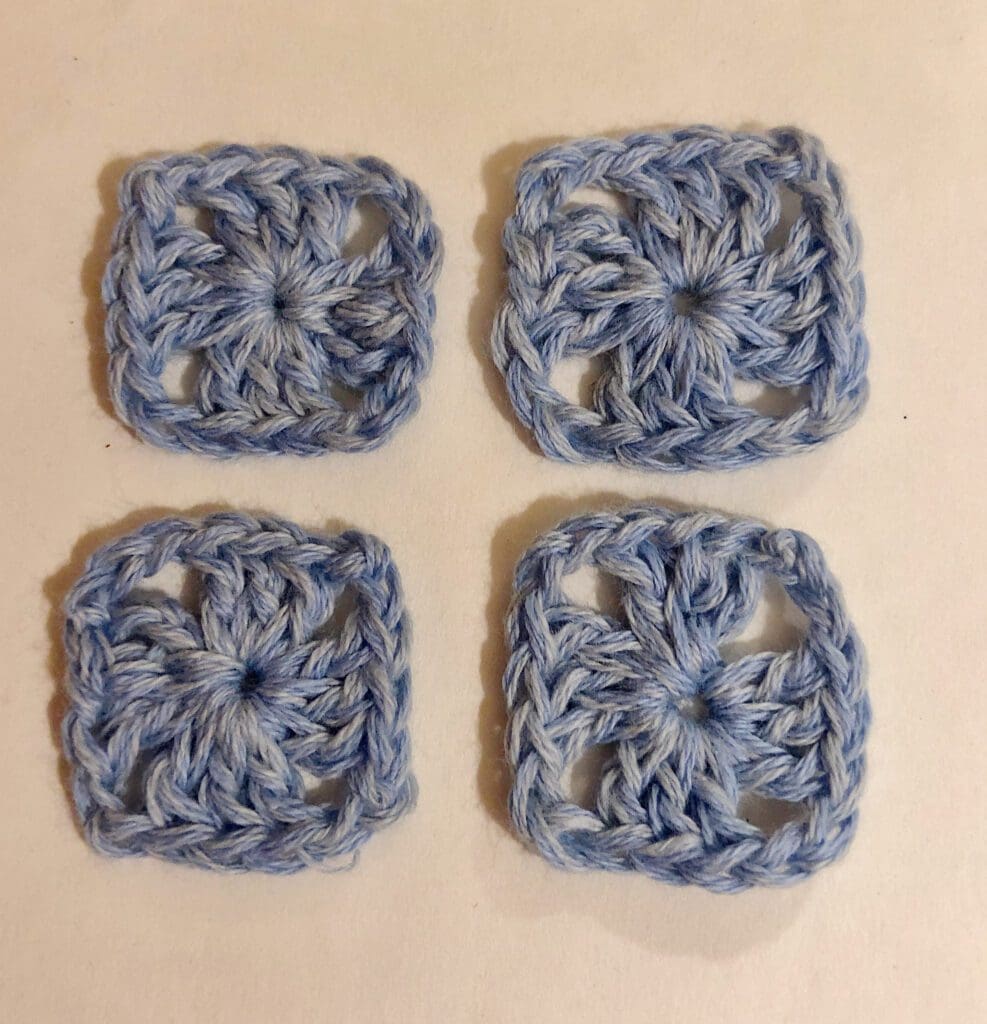
Make 4 Beginner Crochet Earrings patterns using the basic granny square. This miniature squares can be transformed into delicate and chic jewelry.
Post contains affiliate links, and we earn commissions if you shop through the links on this page. For more information, please read the disclosure section under the About Us page.
The nice thing about these earrings is that they are lightweight, which makes them comfortable to wear. Change up the yarn color to create a statement piece that you love.
Make Your Own Earrings
There is something about a DIY project that makes me feel so satisfied to know that I had the talent to create a stylish accent piece.

One of my favorite things about these earrings is that they can be made from just a few scant yards of fingering yarn, thread yearn, or even embroidery floss. The wide variety of colors available are plentiful. That way, you can find just the right one for your next crochet project.
If you are looking for a new pair of trendy earrings to freshen up your look, why not make your own earrings?
You can crochet these in very little time. Even if you are a beginner at crochet, you can master this easy crochet pattern.
Design Your Own Earrings Too
Using two patterns and thread yarn, you can design your own earrings by pairing the mini-squares with beads. Additionally, the square can be hung to show the lovely square shape or turned on its edge to create an entirely different look. One earring has a pretty gem below the square, whereas the other one has the gem near the top.
The handmade jewelry that can be made from just two sizes of crochet squares is just amazing. Make a few today and you will be designing your own earrings too.
Video and Photo Tutorial
I have included links to a video tutorial on how to crochet the basic granny square. If you are new to crochet, this will help you get started. Here is the written crochet pattern on how to crochet the basic granny square. Make sure to visit this free crochet pattern as it has a photo tutorial to help too.
Fingering Yarn for Earrings
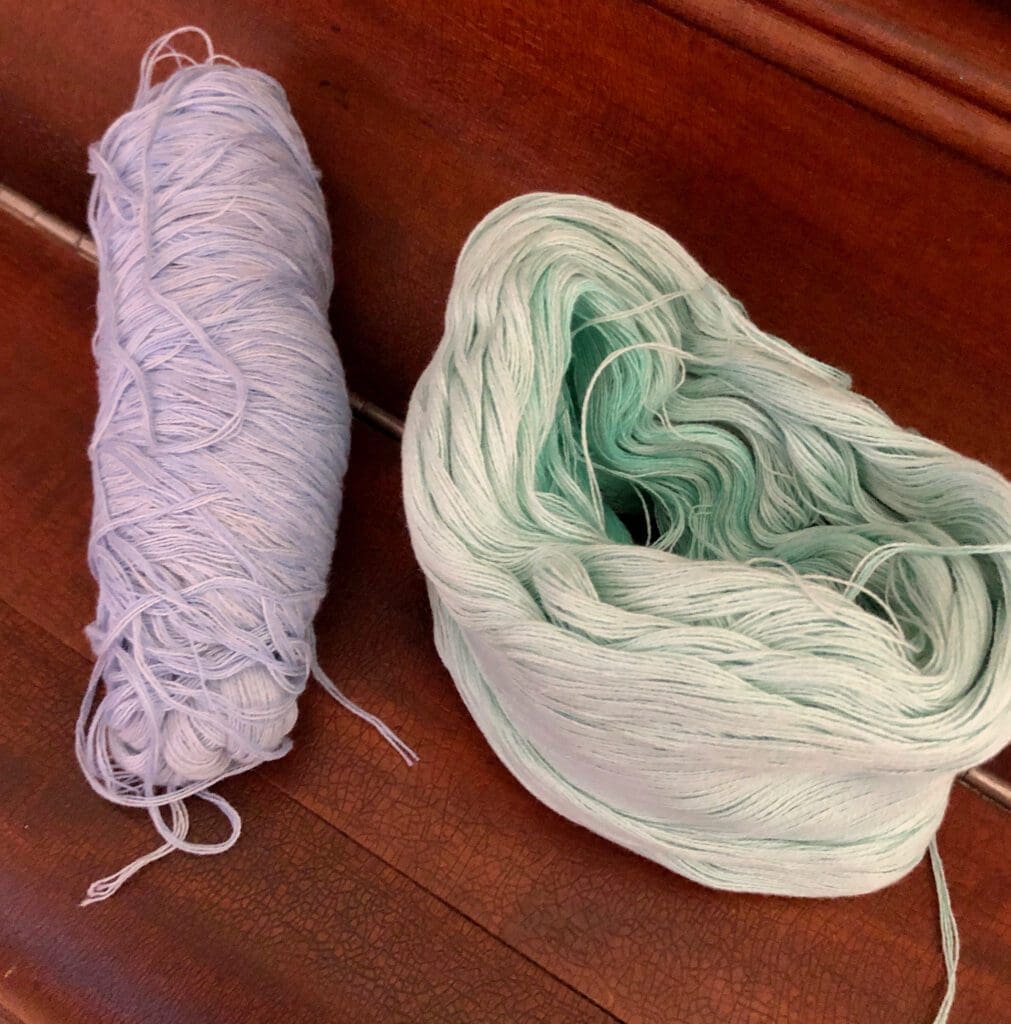
The yarn that I used for these earrings is leftover from a crochet market bag that I made in two colors. They were fingering yarn cakes and after I made a handful of earrings, there is still plenty leftover to make something else or more earrings.
Directions: Granny Square Earrings
Gauge
30 Stitches to 4 inches
Size
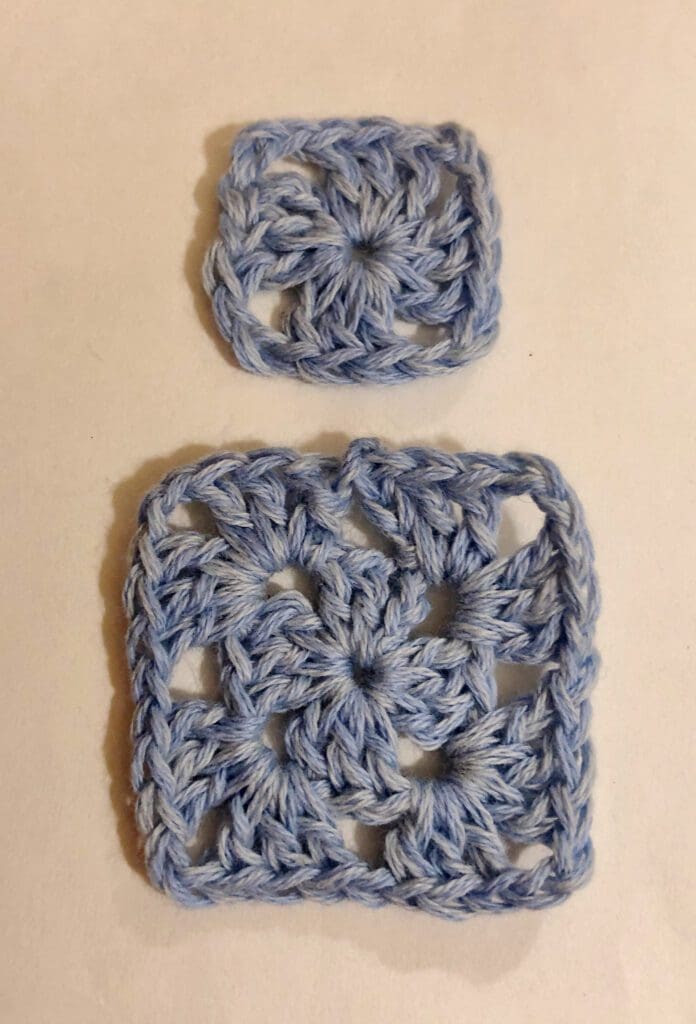
1-inch square for the small earrings.
1 ½ – inch square for the large earrings.
Materials to Crochet the Granny Squares
Cotton Kings Twirls Hobbi yarn. Approximately 5 yards.
Today, I used leftover yarn from two different skeins. Here are the color numbers. The mint color is from a variegated yarn cake color number 07. The light blue is from a variegated yarn cake color number 08.
Yarn needle
Scissors
Fabric Glue (optional)
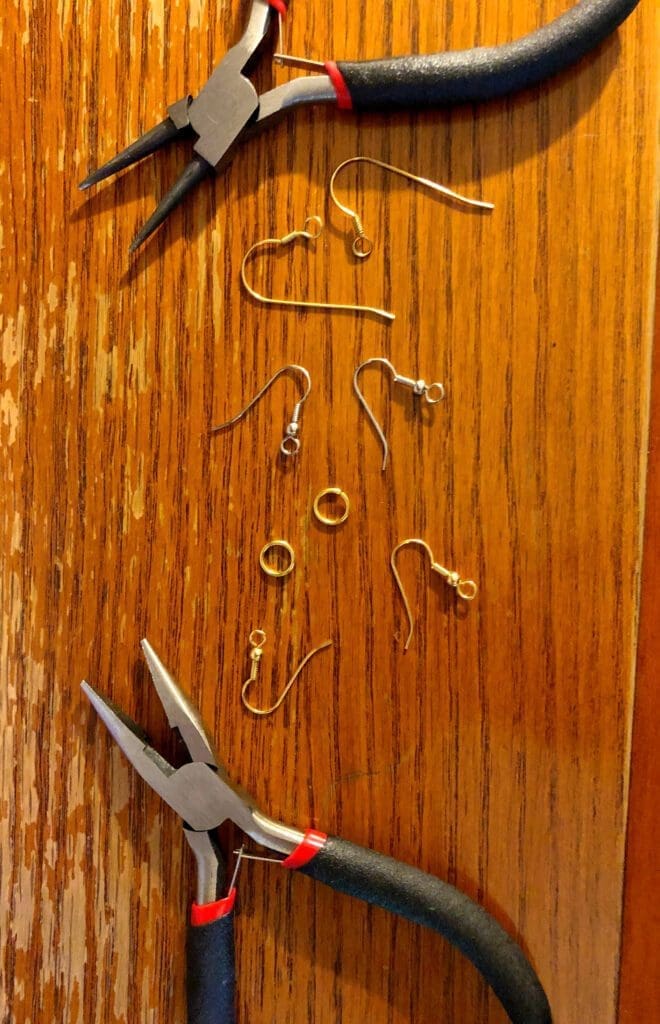
Supplies Needed to Make Your Own DIY Earrings
Jewelry Pliers
Jump rings
Earrings Wires
Beads and Gems
Abbreviations
CH = Chain
DC = Double Crochet
SC = Single Crochet
SL ST = Slip Stitch
SP = Space
ST = Stitch
STs = Stitches
YO = Yarn Over
[ ] repeat between
Crochet Pattern Notes
Only two chains for the corners. For the granny square earring pattern, I only worked a chain two in each corner rather than the usual chain three.
Small Granny Square Earrings. These earrings are completed with just 1 round of crochet stitches.
Larger Granny Square Earrings. 2 rounds of crochet stitches are uses for these square earrings.
Stiffen the yarn. If you prefer the earrings to be a bit stiffer, add a bit of fabric glue that dries clear to the back of the earrings. It is a good idea to rub most of the glue off as too much will be noticeable. If I apply the glue, I will rub the excess off on a plastic bag. This works nicely for getting the glue spread around and not making a mess.
Fingering Yarn or Embroidery Floss. Depending on the size you want your earrings to be, you can change up the type of yarn or thread used in this pattern. I have used embroidery floss, and cotton thread size 10.
Crochet Pattern Directions
Begin
This pattern uses the magic circle to begin. If you are not familiar with this, I have a crochet tutorial on How to Crochet the Magic Circle.
Round 1 in worked inside the magic circle.
Round 1
- Chain 3. (This counts as a DC.)
- In the foundation ring, work: 2 DC and CH 2.
- Continue working in the ring and work (3DC, CH 2) three times.
- Join with a SL ST into the 3rd CH of the beginning CH STs.
- This will complete the first round of the granny square. There should be 4 clusters of 3 DC with 4 areas of CH 2 between. (The CH 2 Spaces are the corners.)
Crocheting the squares for the small earrings are complete using the round 1 directions. Use the yarn needle to weave in the end a few times and cut off the excess yarn.
Continue to Round 2 for the larger earrings.
Round 2
- Chain 4. (This counts as 1 DC plus CH 1.)
- In the next CH 3 SP work (3 DC, CH 2, 3 DC, CH 1).
- In the next 2- CH 3 Spaces, work (3 DC, CH 2, 3 DC, CH 1). You should now have three sets of 3 DC, 3- CH 2 Spaces, and 3-CH 1 Spaces.
- In the last CH 3 SP, work (3 DC, CH 2, 2 DC).
- End the round by joining with a SL ST into the 3rd CH of the beginning CH STs. (You should have 8 shells, 4 chain 2 spaces, and 4 CH 1 spaces).
Crocheting the squares for the large earrings are complete. Use the yarn needle to weave in the end a few times and cut off the excess yarn.
Turn the Granny Squares into Earrings
Using the jewelry pliers attach the jump rings to the area you would like to attach the earring wires. Make sure the close the jump ring all the way so the earring wire is securely attached.
If you would like to add gems or beads, they can be added using the jump rings as desired.
The photo below shows the small granny square with a pretty gem at the bottom.
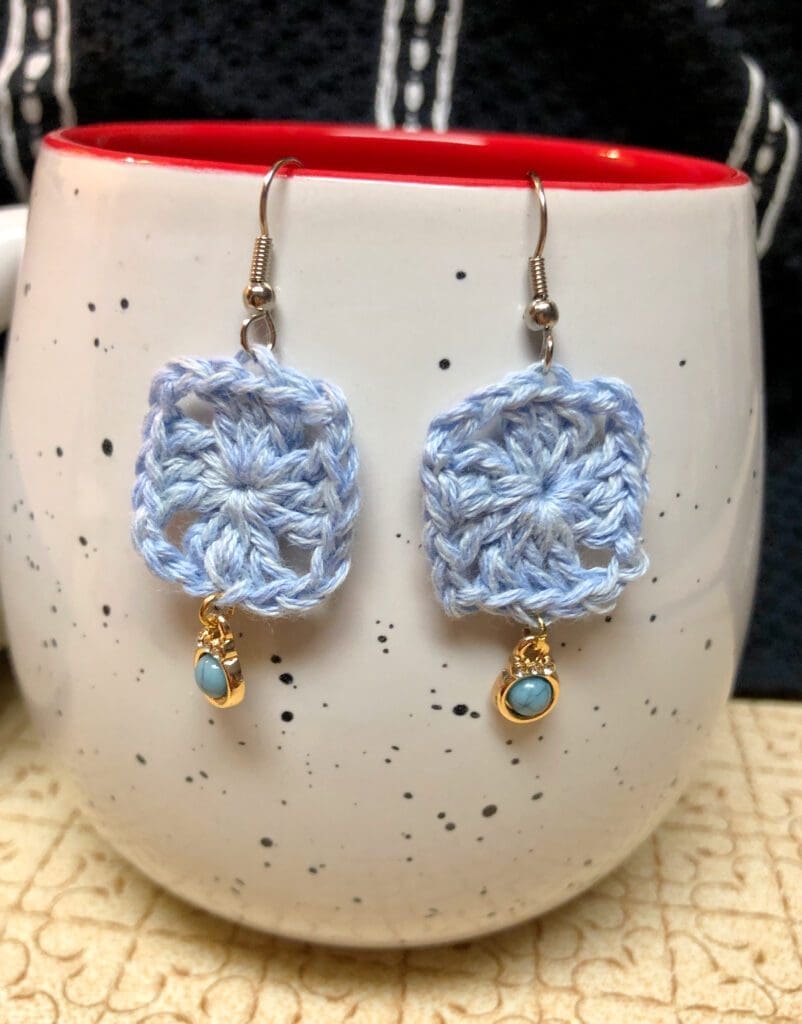
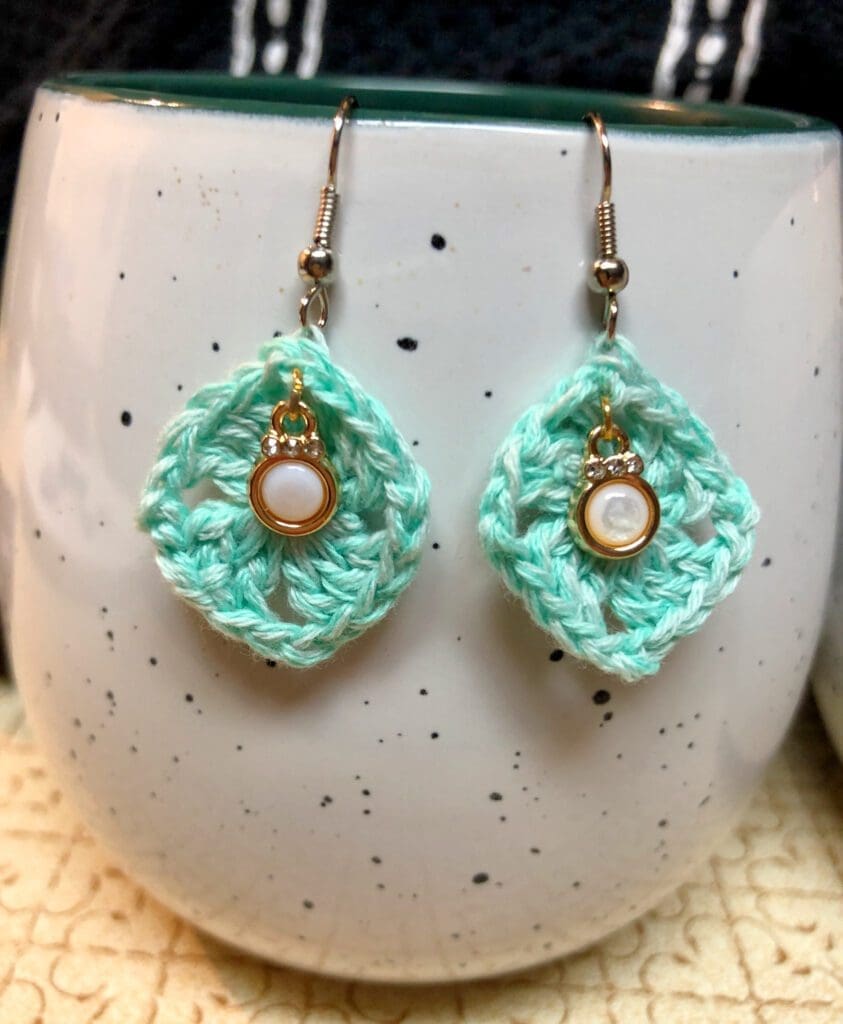
Turn the square on its side and add a gem at the top for a completely different look.
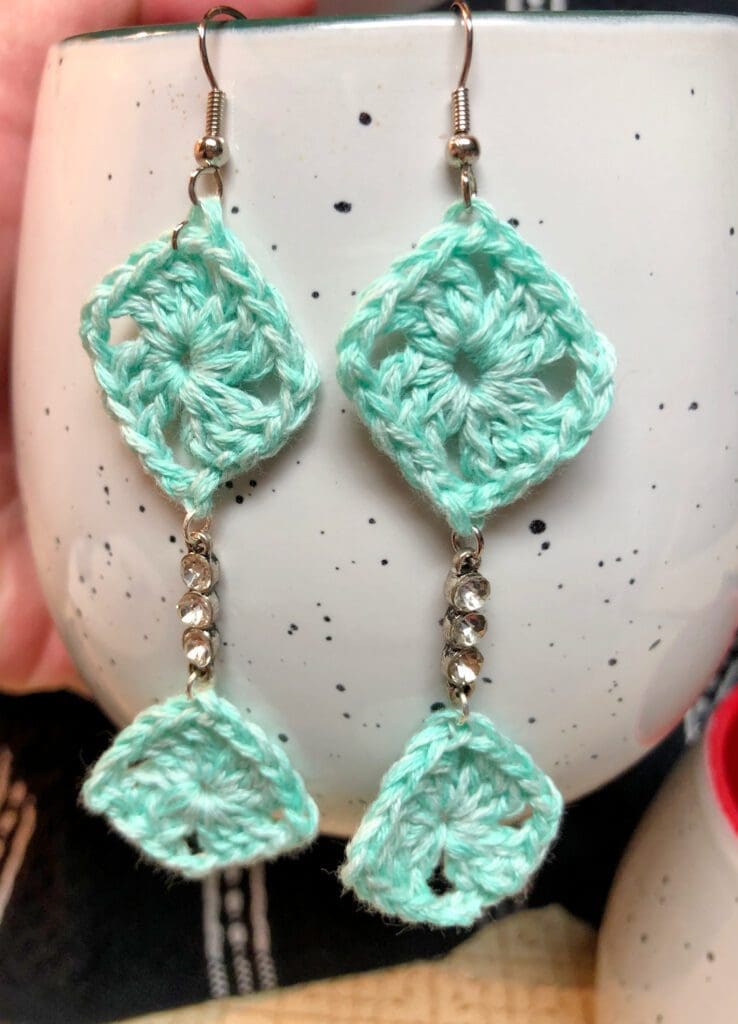
If you prefer a long dangly earring add a few gems in the middle.
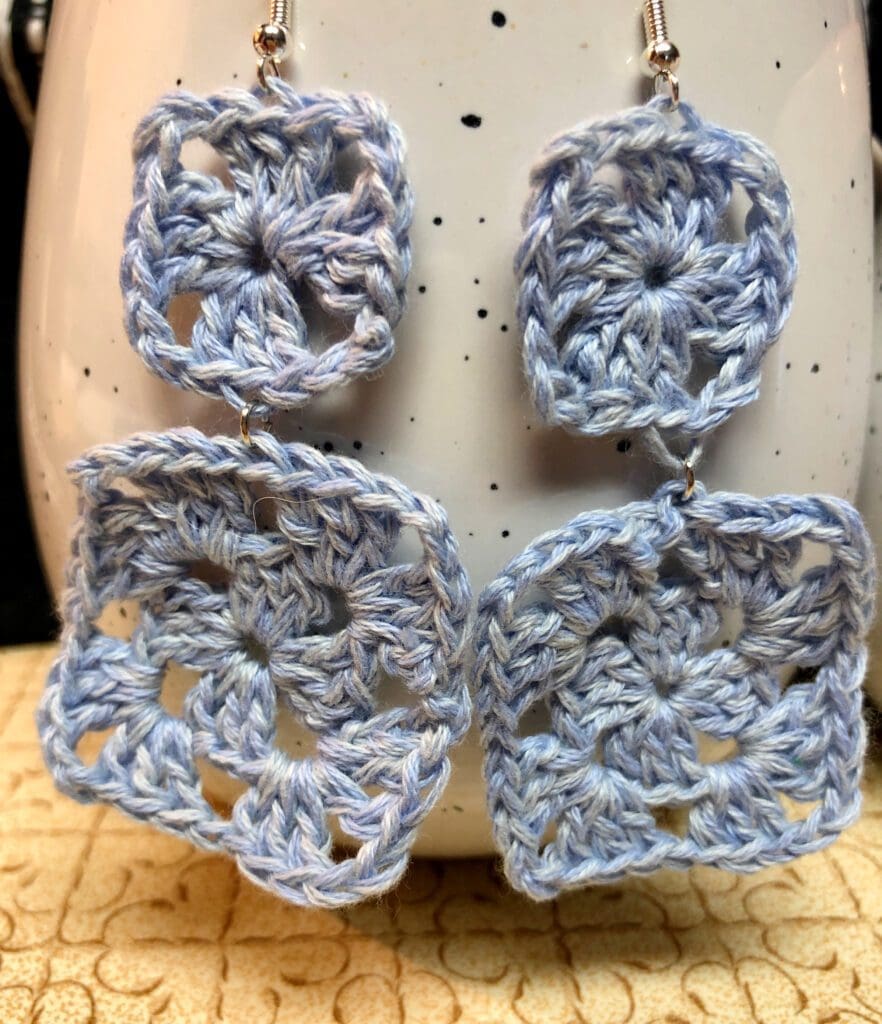
Lastly, here are the small and large granny square earrings put together in a cute ensemble.
We hope this inspires you create a pair of earrings or two. These are just 4 Beginner Crochet Earrings Patterns, but the possibilities are many. I know we will be making a few more of these. Such a fun and easy crochet project.
YouTube Crochet Basic Tutorials
4 Beginner Crochet Earrings Patterns ~ Reminders as you watch the granny square crochet tutorial video.
Only two chains for the corners. For the granny square earring pattern, I only worked a chain two in each corner rather than the usual chain three.
Small Granny Square Earrings. These earrings are completed with just 1 round of crochet stitches.
Larger Granny Square Earrings. 2 rounds of crochet stitches are uses for these square earrings.
Granny Square Crochet Tutorial
How to Make the Magic Circle

You can find Victoria crocheting, quilting, and creating recipes. She has cooked in restaurants for over 20 years, including many larger parties. She learned to crochet when she was just 11 years old and has been crocheting ever since; over 50 years now. Over 40 years ago, she loved her first class in sewing and continues to hone her skills in quilting. Many have enjoyed the handmade gifts over the years. In her professional career, she has worked in management in a wide variety of businesses including higher education as a dean of a division. All the while attending college part-time to achieve her doctorate in higher education with an emphasis in e-learning.