Last updated on March 3rd, 2026 at 09:33 am
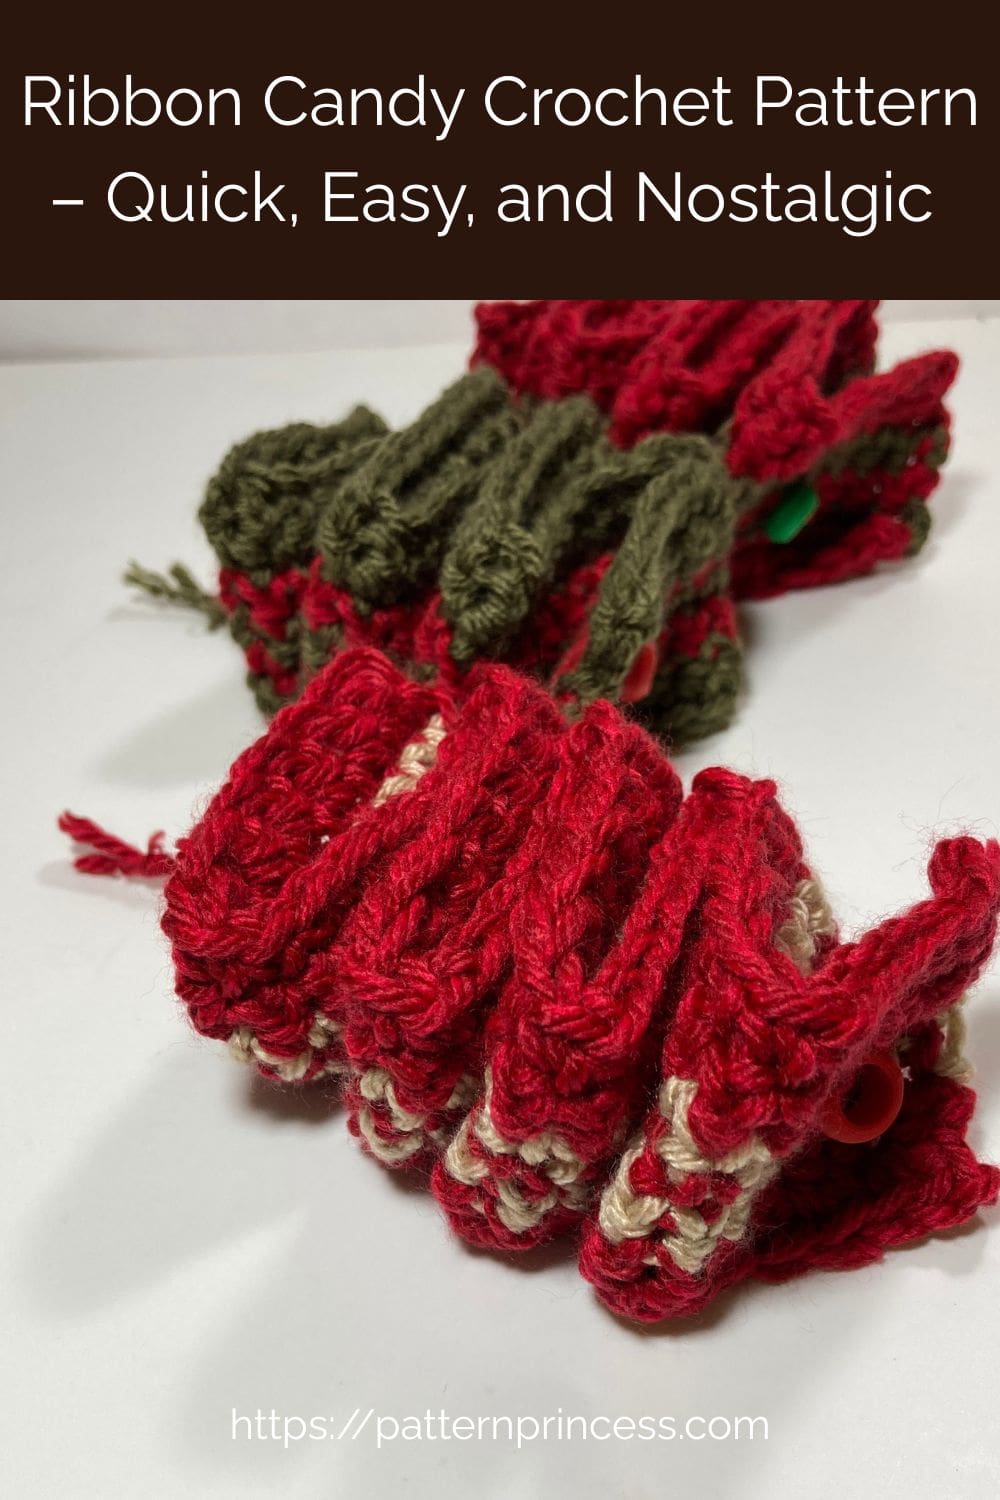
The Ribbon Candy Crochet Pattern is Quick, Easy, and Nostalgic. It brings a touch of old-fashioned holiday charm to your handmade décor. Inspired by the classic twisty candies that once filled every Christmas candy dish. This pattern is a sweet nod to vintage holiday traditions.
Simple enough for beginners yet delightful for experienced crocheters, these colorful ribbon candies add a timeless, homemade touch to your festive season.
Vintage Ribbon Candy
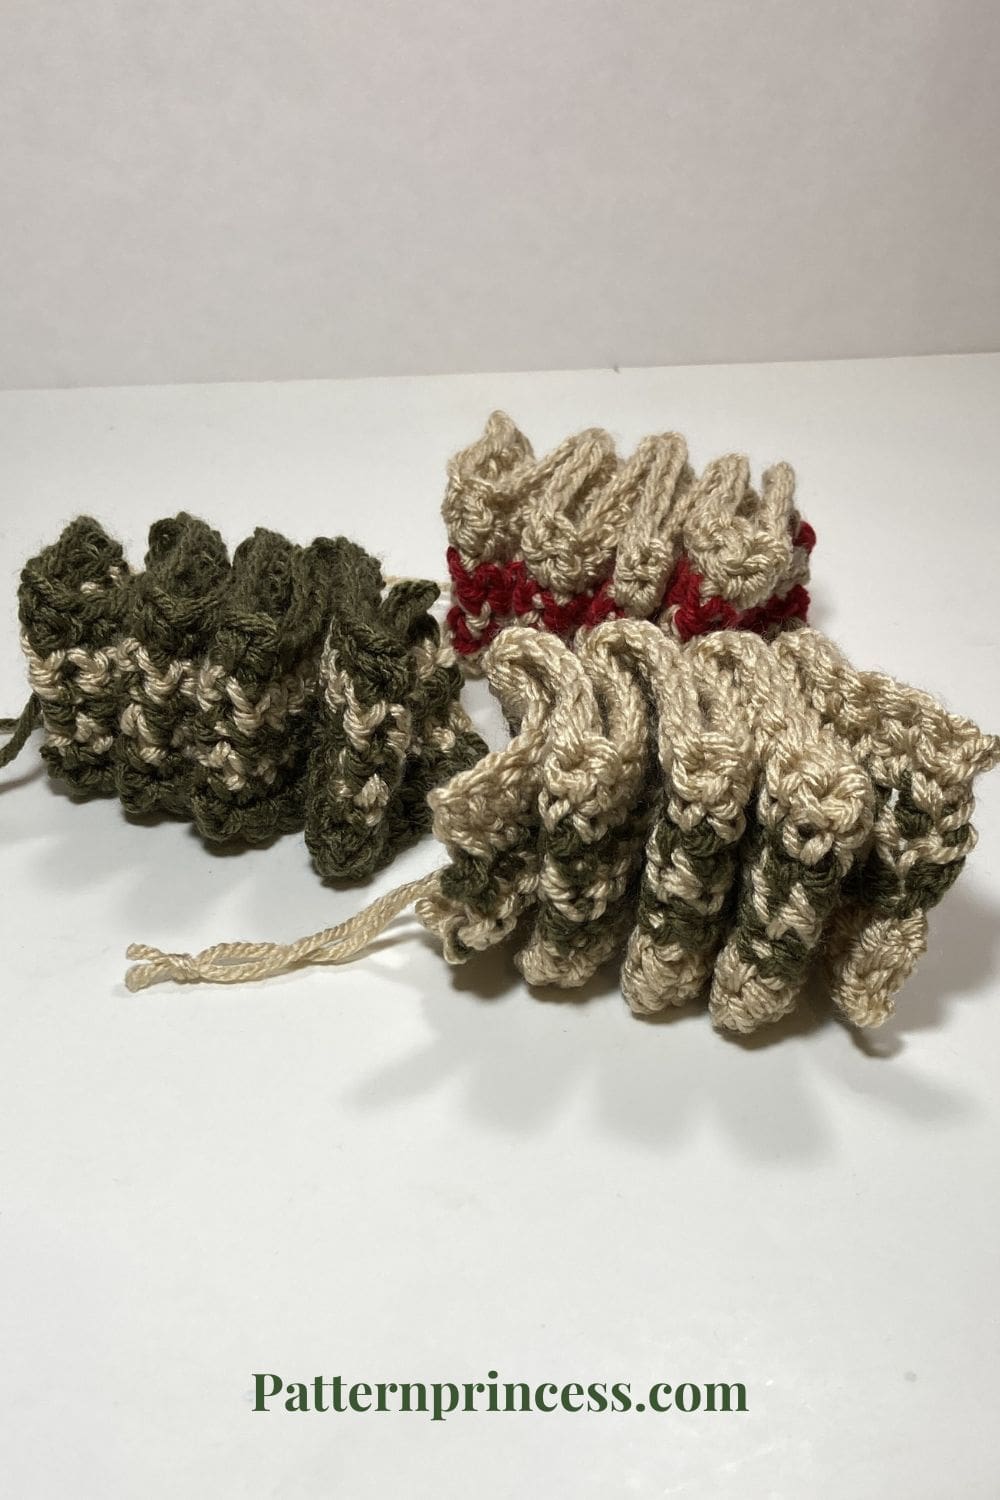
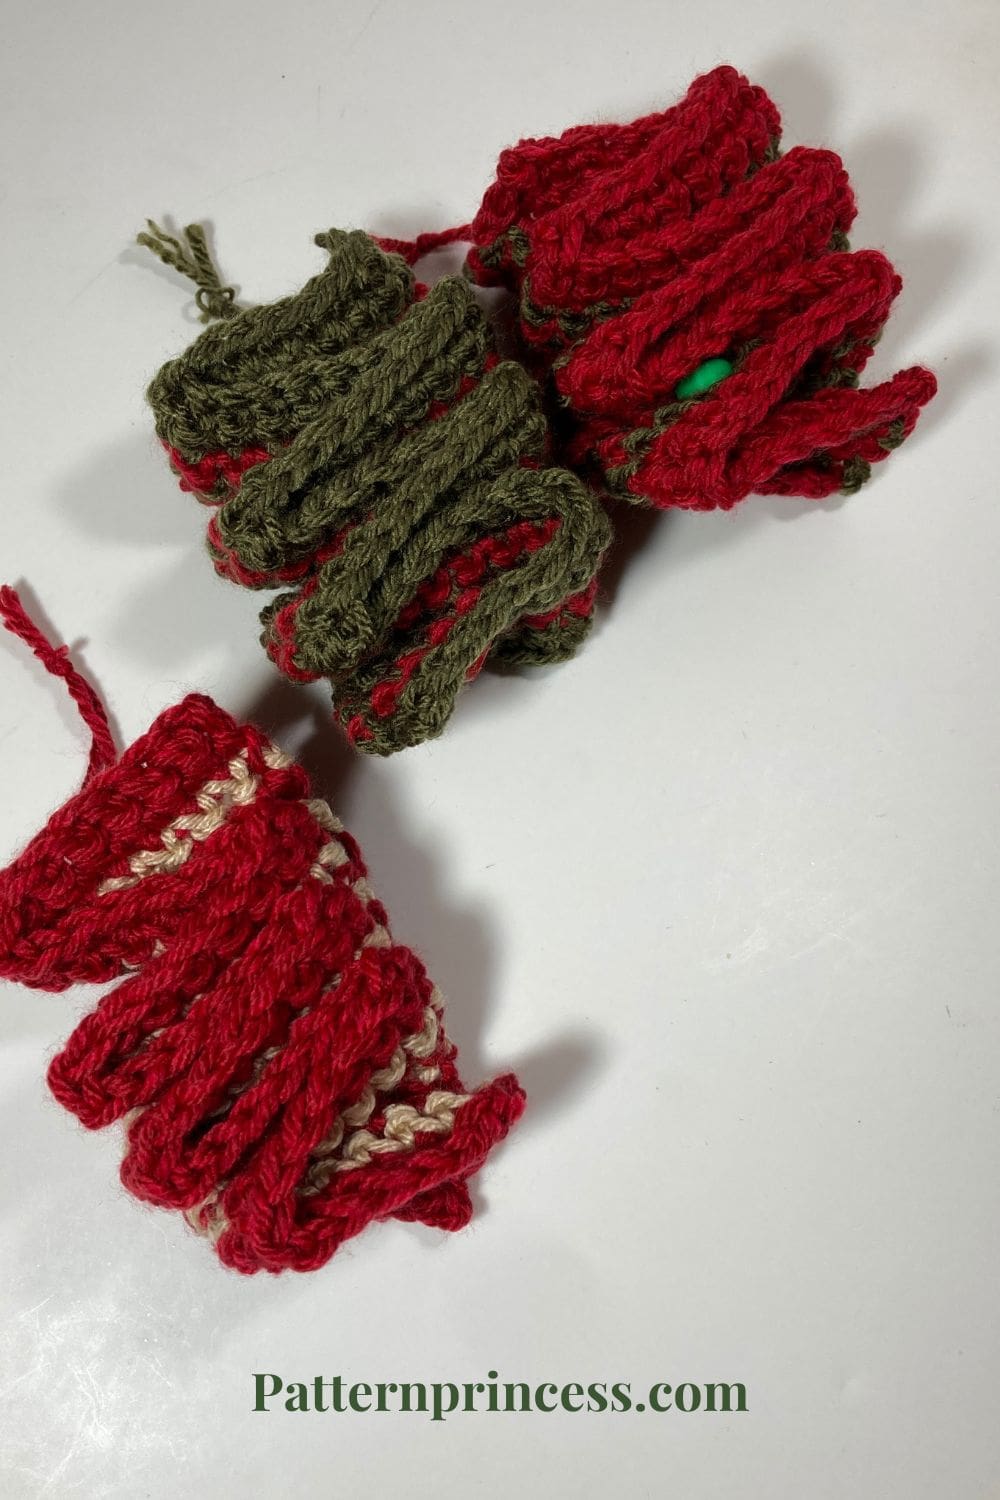
When I was growing up, ribbon candy was everywhere during the Holiday season. There’s something wonderfully nostalgic about the colorful twists of this classic candy. Those shiny, sugary curls that once filled every candy dish during the holidays.
This crochet version captures that same charm, adding a handmade touch to your festive décor. Whether you remember the real candy from childhood or just love a vintage-inspired project, these sweet little crochet ornaments bring a cozy, old-fashioned sparkle to your season.
Great Pattern for Stash Busting
This beginner-friendly crochet pattern works up quickly using any medium-weight yarn you have on hand. Each piece takes 50 yards or less, making it a perfect scrap-busting project for those extra bits of holiday-colored yarn.
The pattern is easy to follow, with full step-by-step instructions and video tutorials for both right- and left-handed crocheters.
Free Christmas Crochet Pattern
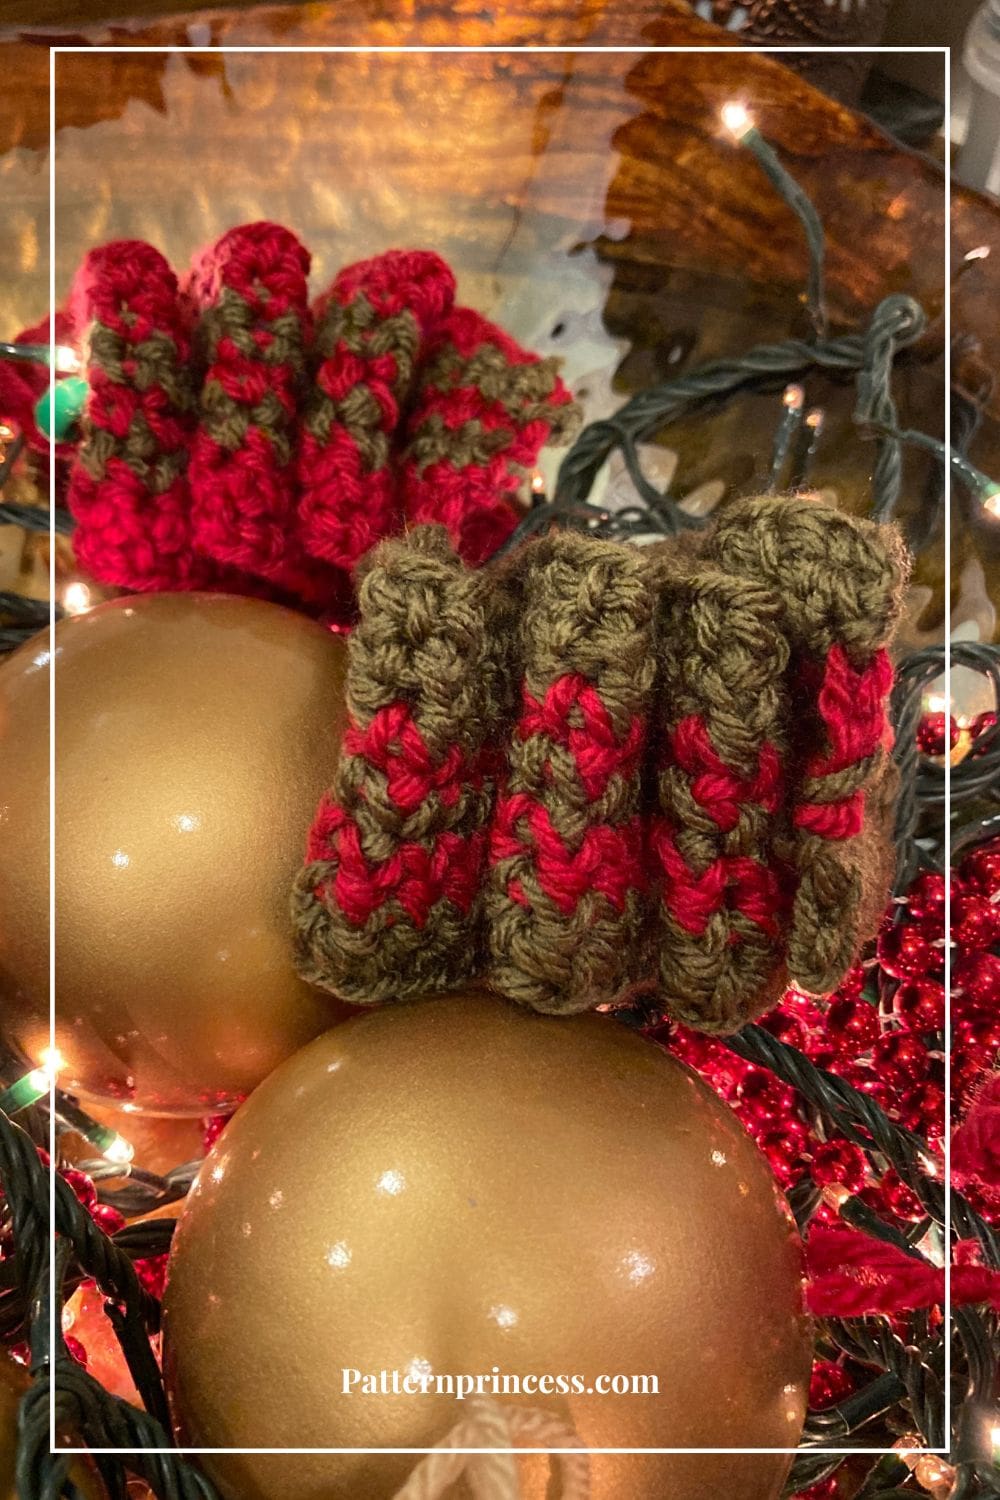
What makes these little ribbon candies so fun is how versatile they are. Hang them on your Christmas tree, tie them onto gifts as charming toppers, string them together for a festive garland, or simply display a few in a decorative bowl with fairy lights for a warm holiday glow.
They add a handmade touch anywhere you place them. And they’re quick enough to make a whole batch.
You’ll find the full free crochet pattern right here on the website, so grab your favorite holiday yarns and get ready to make something quick, easy, and delightfully nostalgic.
Get Your Ad Free Printable PDF in our Etsy Shop.
Directions: Ribbon Candy Crochet Pattern
Skill Level
Beginner Friendly – Easy
Gauge
Approximately 12 stitches and 14 rows every 4 inches.
For accurate size, check your gauge as your crochet stitches may be looser or tighter than mine.
Size
Strip is 2 inches wide x 19 inches long. Ribbon candy ornament is 2 inches wide and about 3 ½ inches tall.
Abbreviations
- CH = Chain Stitch
- SC = Single Crochet Stitch
- SK = Skip
- SC BLO = Single Crochet Back Loop
- ST = Stitch
- STs = Stitches
- [ ] = Repeat Between
Materials
Lion Brand Basic Stitch Anti-Pilling. #4 medium weight yarn. Partial skein about 30 yards total.
Colors Shown:
- Almond
- Red Heather
- Olive
Size I Crochet Hook 5.5 mm
Tapestry Needle
Scissors
Tape Measure
Optional ¼-inch beads with a center hole large enough for yarn to pass through
Crochet Stitches
Chain Stitch (CH ST)
Begin the chain stitch by making a slip knot on the crochet hook. Leave about a 5-inch tail on the yarn. This will be weaved in later.
Next snug up the yarn loop that is on the crochet hook; while it should be firm, it should also be loose enough to slide on the hook with ease.
Keeping the loop on the hook, wrap the yarn over the crochet hook from back to front. Draw the yarn through the loop. You’ve just made a chain stitch. Continue yarning over and drawing the yarn through the loop on the hook to make more chain stitches.
HOW TO CROCHET THE CHAIN STITCH video tutorial
Single Crochet (SC)
Insert the hook, pull up a loop. Yarn over and pull through the two loops on the hook.
HOW TO CROCHET THE SINGLE CROCHET STITCH video tutorial
Pattern Notes
Pattern is written in US crochet terminology.
Turn after each row.
Since this pattern is reversible, there isn’t a right side and wrong side.
I carried the yarn up the side. There are links to video tutorials for both right hand and left hand crocheters after the written pattern.
Crochet Pattern
Begin with the primary yarn color.
Start by making a slip knot and adding the loop on the hook.
Work 60 foundational chain stitches.
Row 1
SC in the back bump of the second ST from the Hook and in each back bump of the STs across. Turn (59)
Row 2
CH 1 (Does not count as a ST). SC in the first ST and in each ST across. Turn (59)
Row 3
Change yarn color.
Repeat row 2.
Row 4
Change back to the first yarn color.
Repeat row 2.
Row 5
Change yarn color
Repeat row 2.
Row 6
Change back to the first yarn color.
Repeat row 2.
Row 7
Continue using yarn color.
Repeat row 2.
Finishing
When done, weave in the yarn ends and cut off the excess yarn.
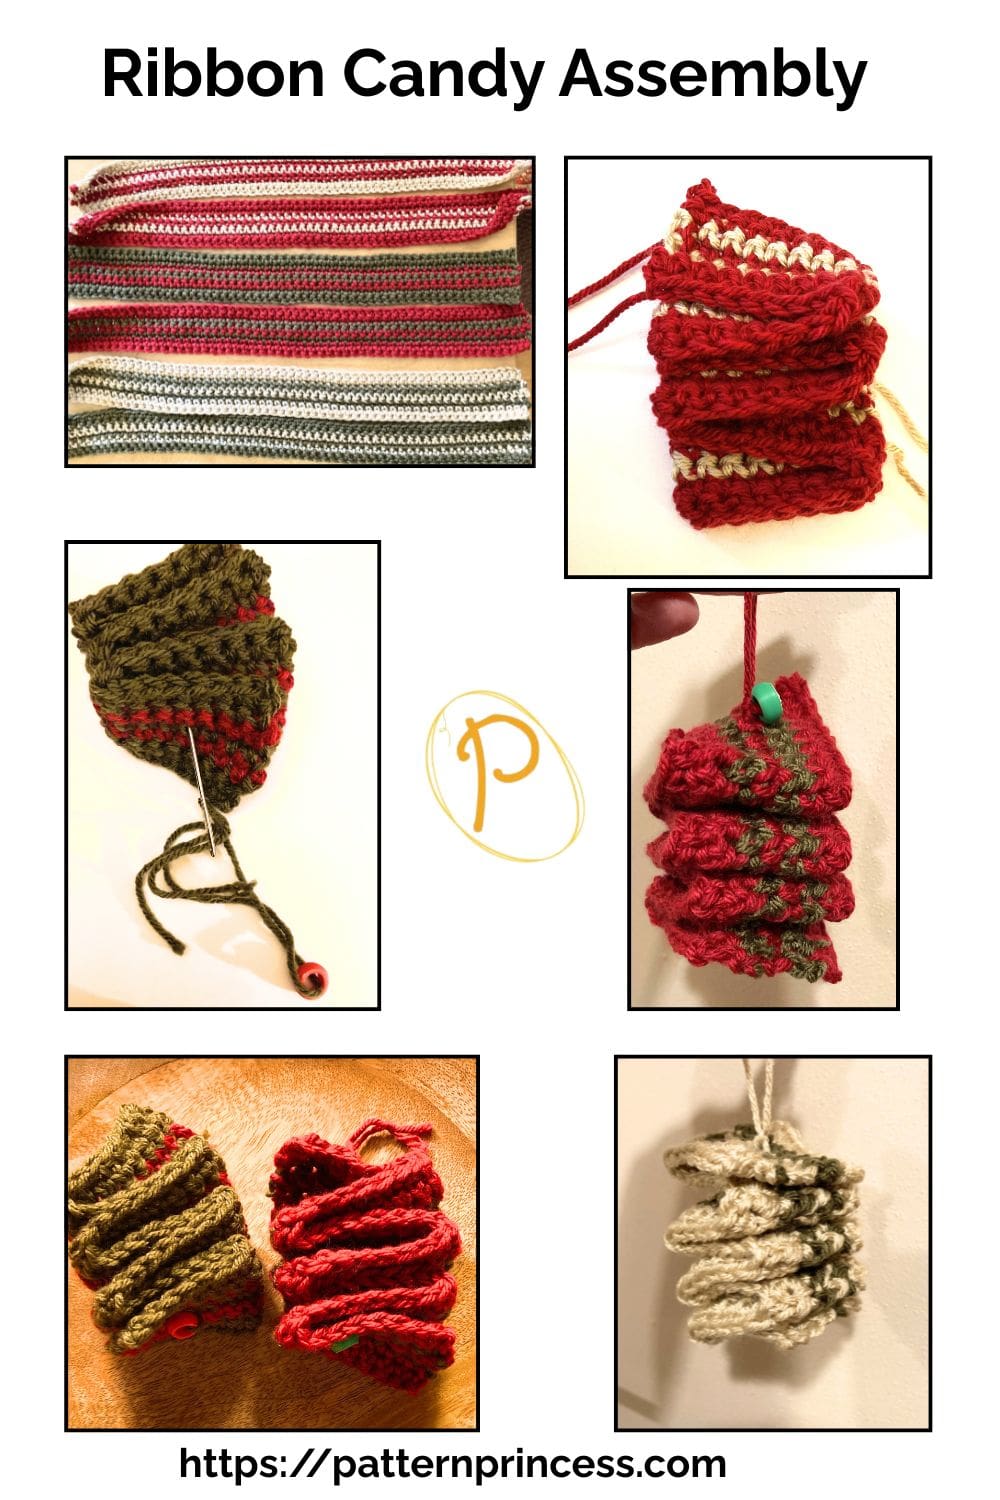
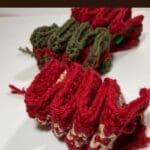
Assembling
There are two ways of assembling.
- Using a 16’inch yarn piece. Thread one end of the yarn through the yarn needle.
Make 3 folds the length of the strip about 2 ½ inches each fold.
Insert the yarn needle through the center and through all the layers of the folds out through the bottom. Make sure not to pull the yarn out of the top.
Next move the yarn needle over a stitch and run it back up through the folds. Remove the yarn needle.
Bring the ends of the yarn together and tie a knot to secure a loop near the top fold. Tip. Keep loose so the folds can relax a little, so they show better.
Lastly, create a loop for hanging by tying a knot on the top of the yarn ends. Snip off any excess.
2. Using a 16’inch yarn piece. Thread one end of the yarn through the yarn needle. Add a bead. Bring the other end of the yarn piece through the yarn needle leaving the bead to hang in the middle.
Make 3 folds the length of the strip about 2 ½ inches each fold.
Insert the yarn needle through the center and after the first fold, insert another bead onto the yarn needle. Continue to the next folds and add another bead. End with a bead on the top.
To secure the bead on the top, back through a few loops under the bead. Again, keep things a little so the folds can relax a little, so they show better.
Lastly, create a loop for hanging by tying a knot on the top of the yarn ends. Snip off any excess.
YouTube Video Tutorials
How to Crochet in the Back Bump, the Striped Strip, and Carry the Yarn up the Side.
We hope that you have enjoyed this lovely crochet pattern.
Ribbon Candy Crochet Pattern (Free Pattern + Video)
Equipment
- 1 Size I Crochet Hook 5.5 mm
- 1 Tapestry Needle
- 1 Scissors:
- 1 Tape Measure
- 3-4 per ornament Optional ¼-inch beads with a center hole large enough for yarn to pass through
Materials
- 30 yards Lion Brand Basic Stitch Anti-Pilling. #4 medium weight yarn.
- Colors Shown: Almond, Red Heather, Olive
Instructions
- Begin with the primary yarn color. Start by making a slip knot and adding the loop on the hook. Work 60 foundational chain stitches.30 yards Lion Brand Basic Stitch Anti-Pilling. #4 medium weight yarn. , Colors Shown: Almond, Red Heather, Olive
Row 1
- SC in the back bump of the second ST from the Hook and in each back bump of the STs across. Turn (59)
Row 2
- CH 1 (Does not count as a ST). SC in the first ST and in each ST across. Turn (59)
Row 3
- Change yarn color.
- Repeat row 2.
Row 4
- Change back to the first yarn color.
- Repeat row 2.
Row 5
- Change yarn color
- Repeat row 2.
Row 6
- Change back to the first yarn color.
- Repeat row 2.
Row 7
- Continue using yarn color.
- Repeat row 2.
- Finishing
- When done, weave in the yarn ends and cut off the excess yarn.
Assembly
- There are two ways of assembling.
- 1. Using a 16’inch yarn piece. Thread one end of the yarn through the yarn needle.
- Make 3 folds the length of the strip about 2 ½ inches each fold.
- Insert the yarn needle through the center and through all the layers of the folds out through the bottom. Make sure not to pull the yarn out of the top. Next move the yarn needle over a stitch and run it back up through the folds. Remove the yarn needle. Bring the ends of the yarn together and tie a knot to secure a loop near the top fold. Tip. Keep loose so the folds can relax a little, so they show better. Lastly, create a loop for hanging by tying a knot on the top of the yarn ends. Snip off any excess.
- 2. Using a 16’inch yarn piece. Thread one end of the yarn through the yarn needle. Add a bead. Bring the other end of the yarn piece through the yarn needle leaving the bead to hang in the middle.
- Make 3 folds the length of the strip about 2 ½ inches each fold.
- Insert the yarn needle through the center and after the first fold, insert another bead onto the yarn needle. Continue to the next folds and add another bead. End with a bead on the top. To secure the bead on the top, back through a few loops under the bead. Again, keep things a little so the folds can relax a little, so they show better.
- Lastly, create a loop for hanging by tying a knot on the top of the yarn ends. Snip off any excess.
Notes
YouTube Video Tutorials
How to Crochet in the Back Bump, the Striped Strip, and Carry the Yarn up the Side.left hand video: https://youtu.be/hpUPUTH18iA
right hand video: https://youtu.be/omnE7eDr0gc
Skill Level
Beginner Friendly – EasyGauge
Approximately 12 stitches and 14 rows every 4 inches.For accurate size, check your gauge as your crochet stitches may be looser or tighter than mine.
Size
Strip is 2 inches wide x 19 inches long. Ribbon candy ornament is 2 inches wide and about 3 ½ inches tall.Abbreviations
• CH = Chain Stitch• SC = Single Crochet Stitch
• SK = Skip
• SC BLO = Single Crochet Back Loop
• ST = Stitch
• STs = Stitches
• [ ] = Repeat Between

You can find Victoria crocheting, quilting, and creating recipes. She has cooked in restaurants for over 20 years, including many larger parties. She learned to crochet when she was just 11 years old and has been crocheting ever since; over 50 years now. Over 40 years ago, she loved her first class in sewing and continues to hone her skills in quilting. Many have enjoyed the handmade gifts over the years. In her professional career, she has worked in management in a wide variety of businesses including higher education as a dean of a division. All the while attending college part-time to achieve her doctorate in higher education with an emphasis in e-learning.
I still can’t find the free recipe card printable. Can you help me please and Thanks for all the patterns!
Hi Rose,
Just above where you commented, you should see the recipe card printable. There is a print button on there. You can just print on paper or print to PDF to safe a digital copy. Also, we have this one on our free PDFs page too. https://patternprincess.com/pattern-pdfs/
Vicky
I wish I had the candy to nibble on while doing your pattern 😉
Thank you
Right!?! Let the Holidays begin.
Vicky
Such a quick and easy crochet pattern for a Christmas Ornament.