Last updated on April 28th, 2026 at 09:35 am
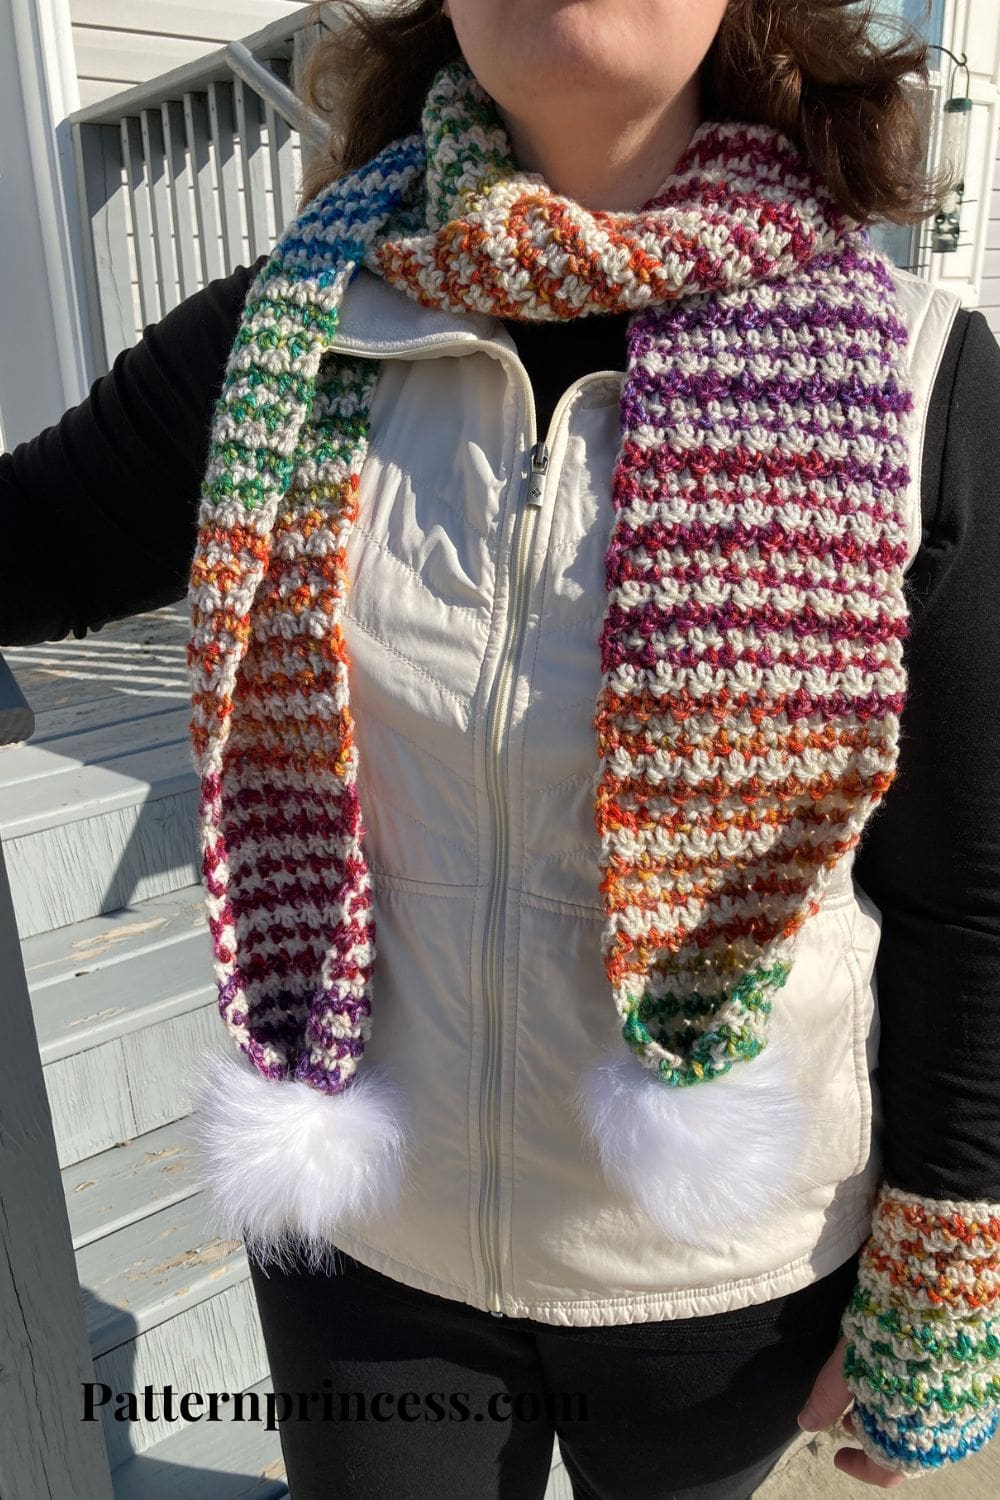
The Frost Blossom Pom Scarf brings just the right balance of both cozy and playfulness. With its soft texture and cheerful finishing touches, this piece adds warmth and personality to any winter outfit.
This scarf is part of our Frost Blossom Collection, a collaboration between my daughter Casey and me. After falling in love with the texture and color combination in our blanket and cowl, we knew we wanted to create a scarf that carried that same cozy feel—with just a bit of added charm.
The result is a beautifully textured scarf finished with pom accents that give it a fun, lighthearted touch while still keeping that calm, wintery feel we love throughout the collection.

Pattern Overview
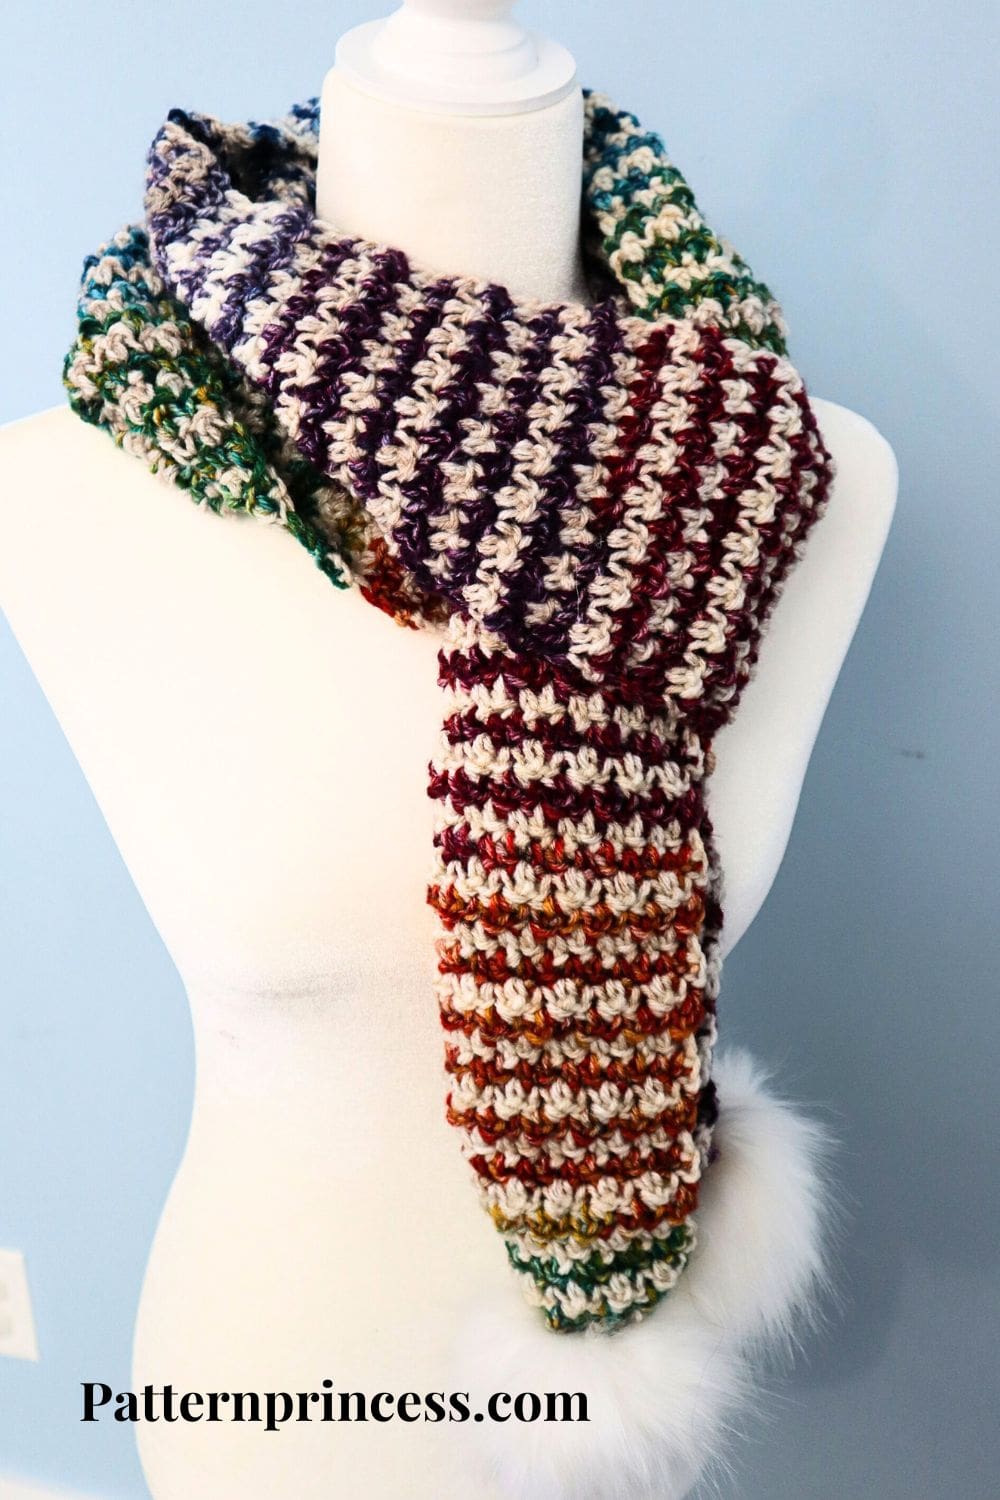
The Scarf is worked flat in short rows using the lemon peel stitch, creating a soft, flexible fabric with gentle texture throughout.
Once the scarf is complete, simple pom accents are added to the ends for a playful finish. This extra detail adds visual interest while keeping the project approachable and enjoyable to make.
Whether you’re dressing up a winter coat or adding a cozy layer for everyday wear, this scarf is designed to be both practical and fun.
Lemon Peel Stitch
At the center of the design is the simple but satisfying lemon peel stitch. If you’ve never worked it before, you’re in for a treat. It has a lovely rhythmic flow that makes this pattern relaxing and beginner friendly while still producing a rich, textured look.
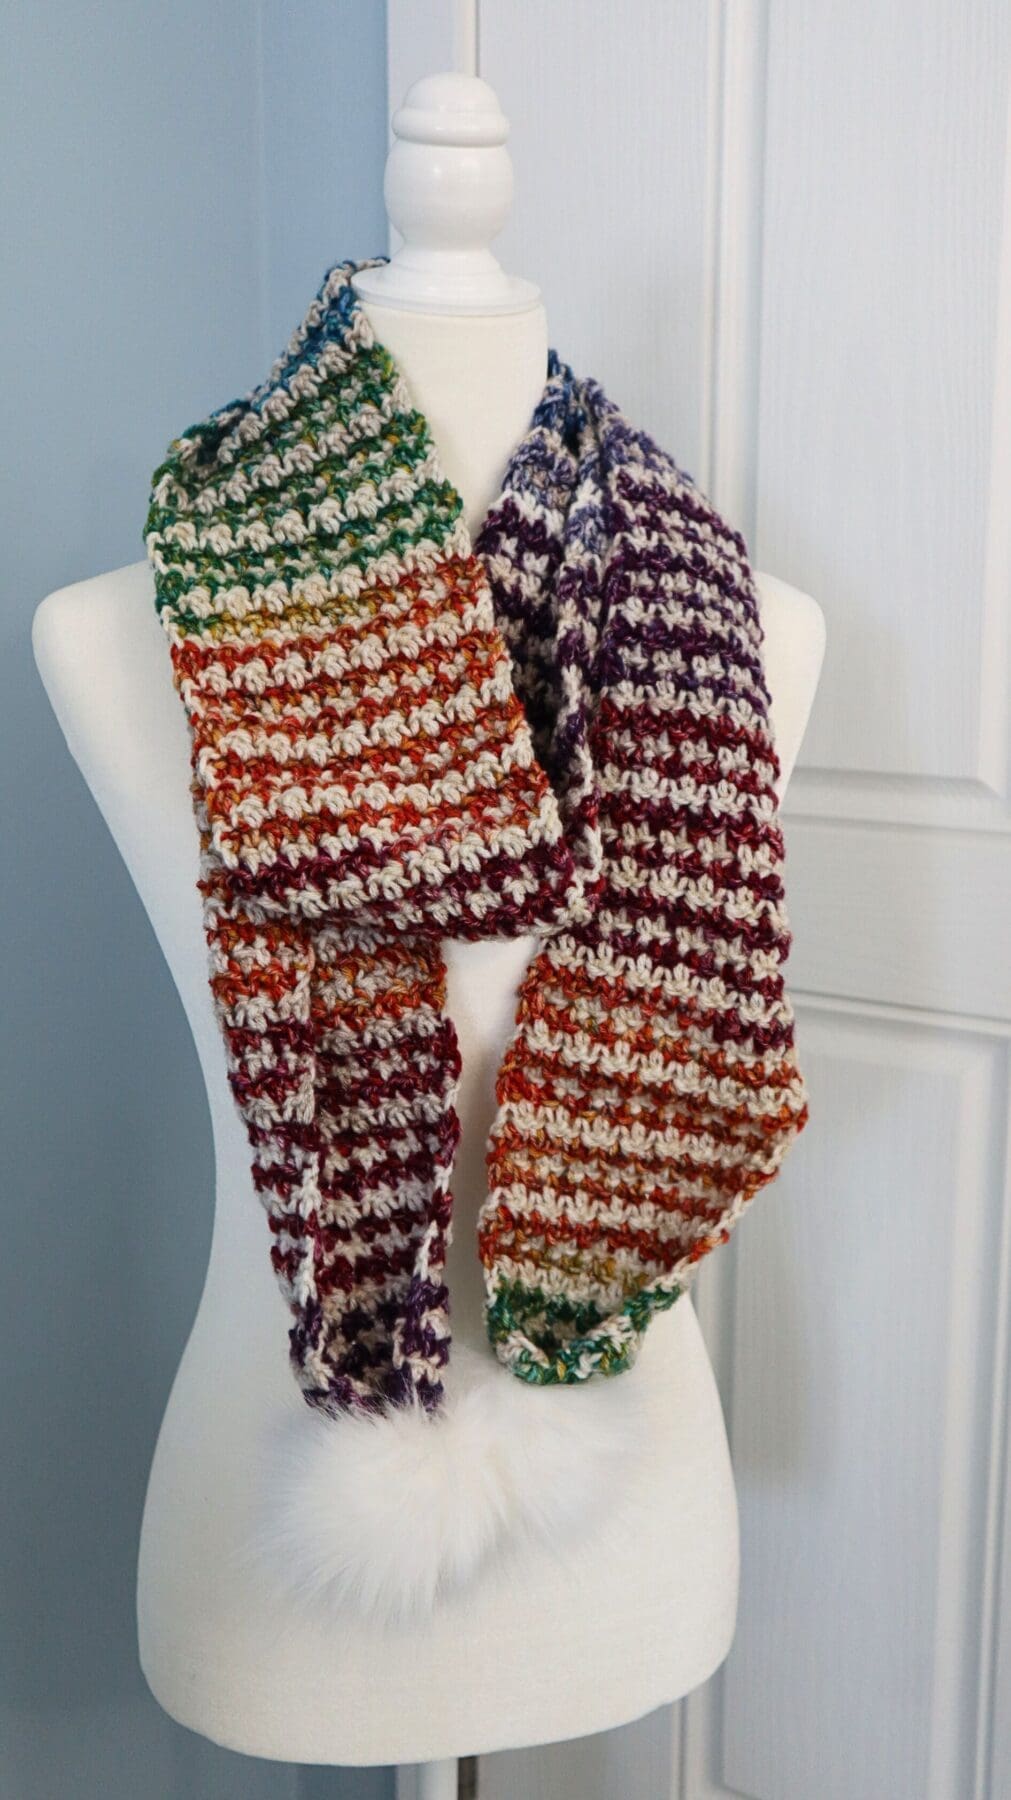
When worked in strict black and white, this stitch creates the classic houndstooth effect. But by using variegated yarns, it takes on a completely different personality. The colors softly blend and shift, creating that signature “frost meets bloom” look we love so much.
Yarn Choices
For this scarf, we used Red Heart Bitty Stripes in Crayon Box and Moonbeam. These two yarns work beautifully together, adding softness, depth, and gentle color variation throughout the piece.
The yarn is also washable and dryable, making this scarf an easy-care accessory you can wear again and again all season long.
Pattern Highlights
- Beginner-friendly lemon peel stitch texture
- Relaxing, repetitive stitch pattern
- Crocheted flat for simple construction
- Playful pom accents for a fun finish
- Part of the Frost Blossom Collection
- Step-by-step videos tutorial available
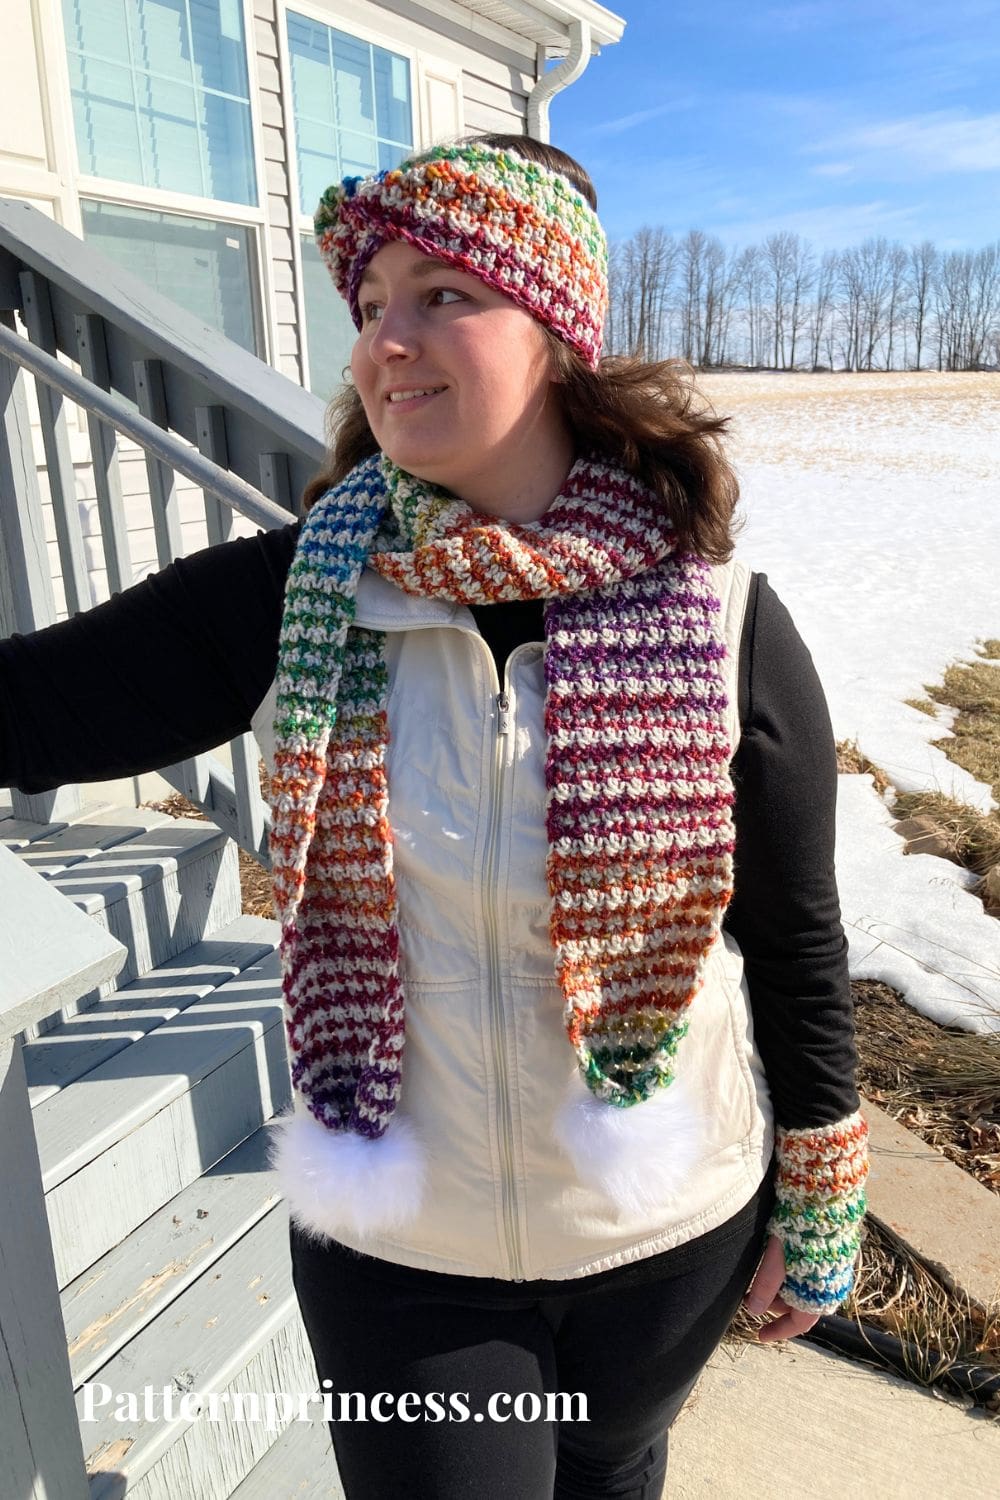
As part of the Frost Blossom Collection, this scarf coordinates perfectly with the matching cowl, hat, and other accessories. Making it easy to create a cozy, coordinated winter set.
This scarf makes a thoughtful handmade gift and is perfect for adding a pop of cozy texture to your winter wardrobe.
Get Your Ad Free Printable PDF in our Etsy Shop
Directions: Frost Blossom Pom Scarf
Skill Level
Beginner-Friendly
Gauge
Approximately 12 stitches and 10 rows = 4″ x 4″ in lemon peel stitch.
Size
Approximately 5 1/2 inches wide X 76 inches long.
To adjust the width, simply adjust your chains by any odd number of chains. To make the project longer or shorter, simply crochet more or fewer rows.
Abbreviations
- CH = Chain
- DC = Double Crochet
- SC = Single Crochet
- SK = Skip
- SP = Space
- ST = Stitch
- STs = Stitches
- YO = Yarn Over
- [ ] = Repeat Between
Materials
Yarn. Red Heart Super Saver Bitty Stripes from Yarnspirations. It is a #4 medium weight yarn, 515 yards each skein. 100% Acrylic.
This scarf uses approximately 400 yards. You will need one skein of each yarn color.
I used two yarn colors:
- Color A: Crayon Box
- Color B: Moonbeam
If you are not able to find the yarn locally, you can purchase it online. Savings Center – Pattern Princess
Size I 5.5mm Crochet Hook.
Scissors
Tapestry Needle
Tape Measure
Stitch Markers
Faux Fur Pompon. I used the snap kind. If you use one with a loop, then you’ll want a button for attaching the pom. If there is no loop, you can attach the pompon with yarn.
Pattern Notes
Written in US Terms.
This pattern uses the Lemon Peel Stitch.
How to Crochet the Lemon Peel Stitch for Beginners
Chain 1 at the beginning of the row is the turning chain and does not count as a stitch.
This pattern is written to carry the yarn up the side of the pattern.
Helpful Tips for Beginners
✔Alternating Stitches
You’ll always be alternating single crochet and double crochet stitches throughout this pattern.
Here’s the simple rule of thumb:
- If the stitch below is a double crochet, work a single crochet into it.
- If the stitch below is a single crochet, work a double crochet into it.
This alternating pattern gives you the signature lemon peel-like texture.
✔ Use a Stitch Marker
Because this stitch uses alternating heights, the last stitch can blend in. Place a stitch marker in the first stitch of the row. This prevents accidental increases or decreases that throw off your count.
✔ Counting Made Easy
If you start with an odd number of chains, you’ll end up with an even number of stitches, which ensures the alternating pattern lands correctly on the next row.
✔ Make sure to watch the video tutorials to see how to crochet the lemon peel stitch and how to change yarn color. They are located after the written directions.
Crochet Stitches Used
Chain Stitch (CH ST)
Begin the chain stitch by making a slip knot on the crochet hook. Leave about a 5-inch tail on the yarn. This will be weaved in later.
Next snug up the yarn loop that is on the crochet hook; while it should be firm, it should also be loose enough to slide on the hook with ease.
Keeping the loop on the hook, wrap the yarn over the crochet hook from back to front. Draw the yarn through the loop. (The first chain stitch is complete).
HOW TO CROCHET THE CHAIN STITCH video tutorial
Double Crochet (DC)
Yarn over, insert the hook in a stitch and pull up a loop. Next, yarn over and pull through two loops on the hook. Lastly, yarn over again and pull through the last two loops on the hook.
HOW TO CROCHET THE DOUBLE CROCHET STITCH video tutorial
Single Crochet (SC)
Insert the hook in a stitch and pull up a loop. Yarn over and pull through the two loops on the hook.
HOW TO CROCHET THE SINGLE CROCHET STITCH video tutorial
Begin Crochet Pattern
Chain any odd number of chain stitches.
Crochet a Foundation Row
Starting with yarn color A
Begin the chain stitch by making a slip knot on the crochet hook.
Chain 17
Row 1
SC in 2nd CH from the hook. DC in next CH. [SC in the next ST, DC in the next ST]. Repeat across between [ ]. End with a DC in the last St. Turn (You’ll have an even number of stitches.)
Do not cut your yarn. Add a stitch marker.
Row 2
Change to yarn color B. Pull the new yarn color through the loop on the hook and snug up yarn color A. Continue with the pattern using yarn color B.
CH 1 (Turning Chain Doesn’t Count as a Stitch). SC in the first DC ST, DC in the SC ST. [SC in the next ST, DC in the next ST]. Repeat across between [ ]. End with a DC in the last St.
Add a stitch marker.
Row 3
Change back to yarn color A
Now you’ll see the unused color strand (Color A) waiting at the other end.
To reuse it.
- Insert your hook into the first stitch.
- Gently pull up Color A and yarn over with it to start the row.
The unused yarn will be carried neatly up the side.
CH 1 (Doesn’t Count as a ST). DC in the first SC ST, SC in the DC ST. [DC in the next ST, SC in the next ST]. Repeat across between [ ]. End with a SC in the last St. Turn
Row 4
Change back to yarn color B
CH 1 (Doesn’t Count as a ST). DC in the first SC ST, SC in the DC ST. [DC in the next ST, SC in the next ST]. Repeat across between [ ]. End with a SC in the last St. No Turn
Row 5
Change back to yarn color A
CH 1 (Doesn’t Count as a ST). SC in the first DC ST, DC in the SC ST. [SC in the next ST, DC in the next ST]. Repeat across between [ ]. End with a DC in the last St. Turn
Row 6
Change back to yarn color B
CH 1 (Doesn’t Count as a ST). SC in the first DC ST, DC in the SC ST. [SC in the next ST, DC in the next ST]. Repeat across between [ ]. End with a DC in the last St. No Turn
Rows 7 through 212
Continue repeating rows 3-6 until desired length.
Once you reach your desired length, leave about a 20-inch-long yarn tail.
Adding the Pompon Embellishments: The Finishing Touch
I added a faux fur pompon that uses a snap to attach to the end of the crochet scarf. Switch to a yarn needle with an eye small enough to go through the holes of the snap.
Step 1. Using the yarn needle weave the yarn tail through the end of the scarf and pull up a bit to scrunch a bit smaller.
Step 2. Fold the end of the scarf and sew together. This creates an area to attach the Pompon.
You can use any method to join the ends. A slip stitch or a single crochet through both ends. You could use the yarn needle and work a whip stitch through both ends.
- Whipstitch. Insert the needle from back to front, wrapping the yarn around the edges in a spiral motion.
- Mattress Stitch. Work through the middle of the stitches on the edges of both pieces, creating an almost invisible seam.
Keep the Tension Even. As you sew, ensure the yarn is snug but not so tight that it puckers or distorts the fabric.
Step 3. Sew the snap to the top outside of the scarf end you just sewed. Weave in the yarn ends and trim off the excess yarn. Snap on the pom.
Step 4. Repeat this process for the other end of the scarf. Take care to fold the end of the scarf in the same direction as the first end.
Finishing
Weave in any remaining yarn tails with the yarn needle. Snip off the excess yarn.
Video Tutorials on our YouTube Channel
Welcome to our Lemon Peel Stitch crochet tutorial!
In this video, we’ll guide you step-by-step through creating this cozy, textured stitch in both a solid yarn color and alternating yarn colors. Learn how to carry the yarn up the side to save time and for minimal yarn ends to weave in.
- How to Crochet the Lemon Peel Stitch right hand
- How to Crochet the Lemon Peel Stitch left hand
- How to Attach Pompon to a Scarf
We hope that you have enjoyed this lovely crochet pattern.
XO
Vicky & Casey

You can find Victoria crocheting, quilting, and creating recipes. She has cooked in restaurants for over 20 years, including many larger parties. She learned to crochet when she was just 11 years old and has been crocheting ever since; over 50 years now. Over 40 years ago, she loved her first class in sewing and continues to hone her skills in quilting. Many have enjoyed the handmade gifts over the years. In her professional career, she has worked in management in a wide variety of businesses including higher education as a dean of a division. All the while attending college part-time to achieve her doctorate in higher education with an emphasis in e-learning.