Last updated on April 28th, 2026 at 09:23 am
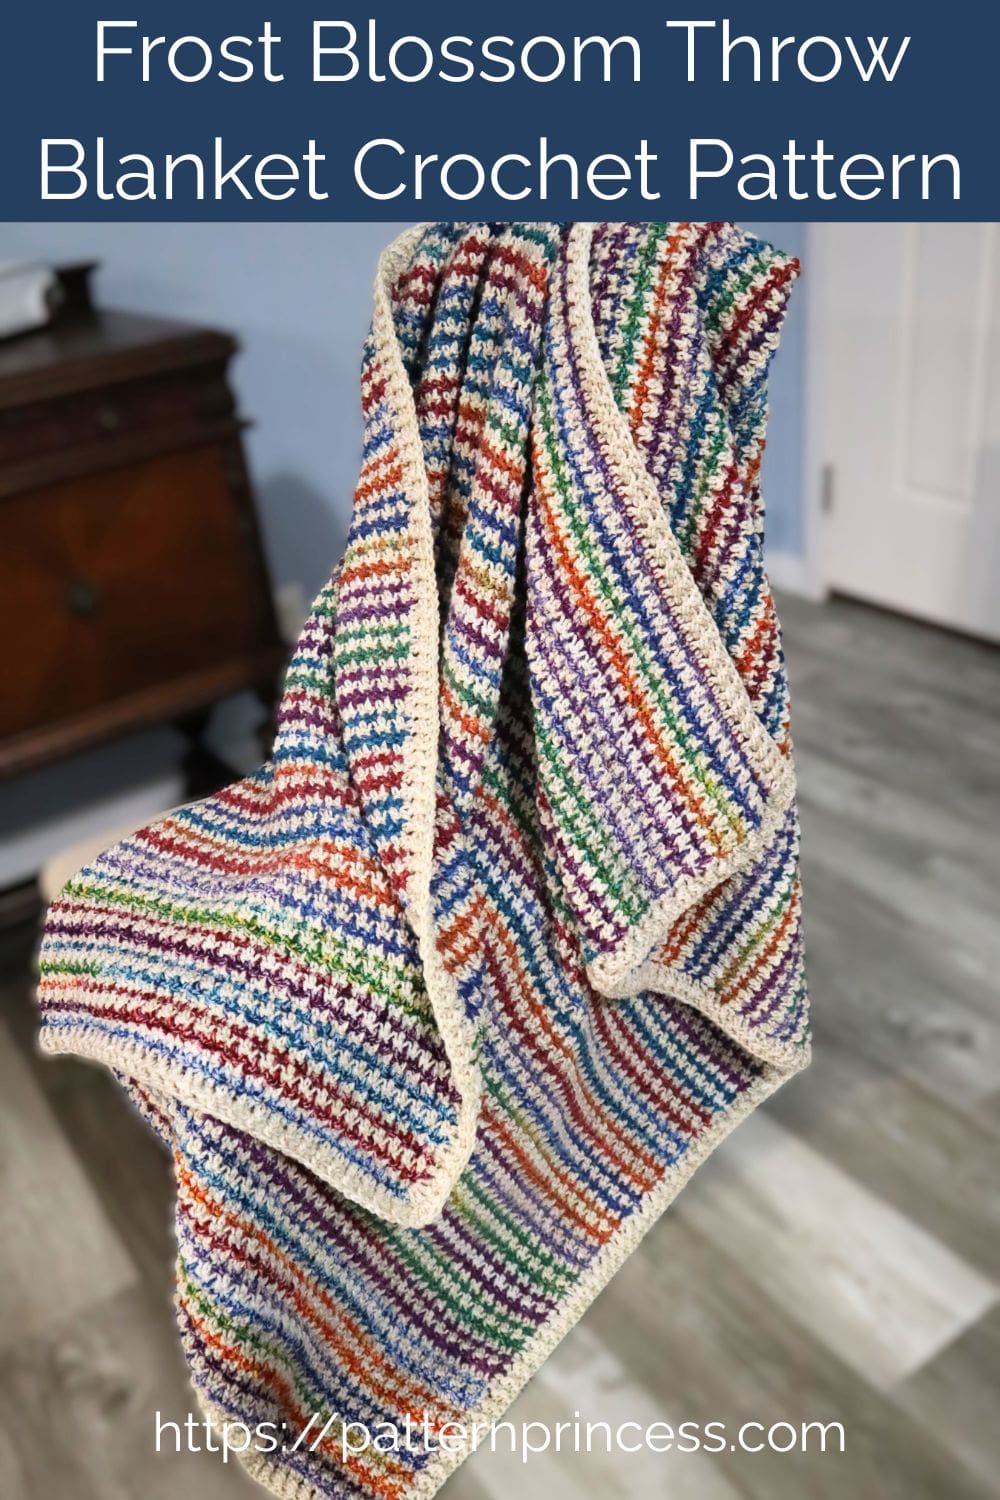
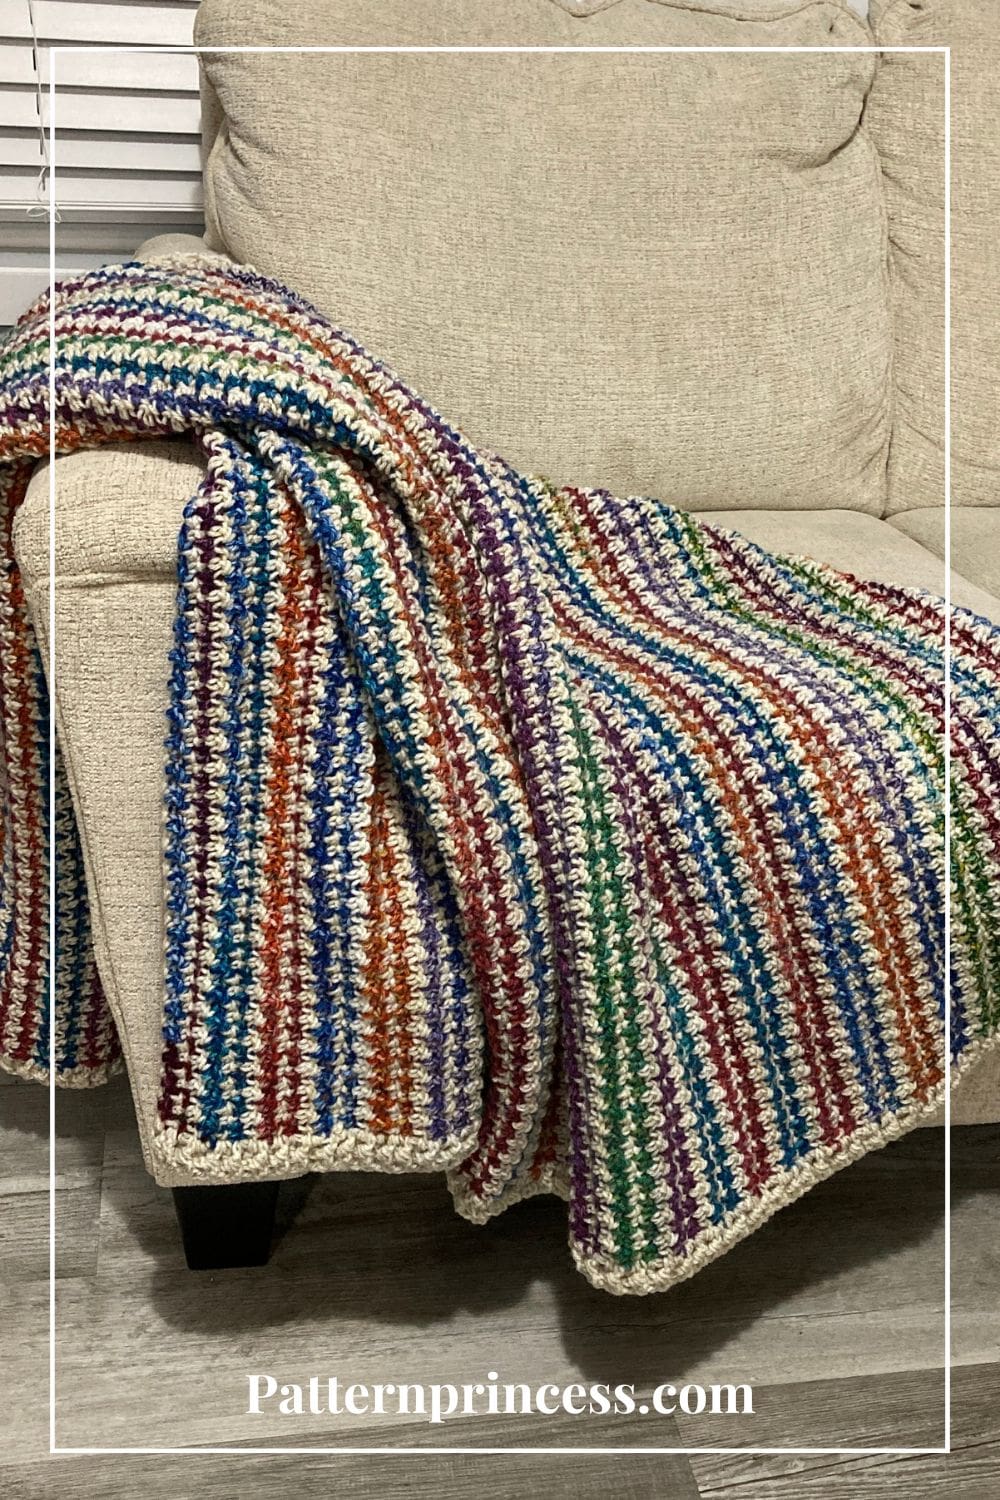
This Frost Blossom Throw Blanket was created as a special collaboration between my daughter and me. We wanted a blanket that felt calm and wintery at first glance, but with gentle blooms of color that keep it cheerful and fresh.
This gorgeous blanket is the heart of our Frost Blossom Collection and one of those projects that quickly becomes a favorite on your hook.
There is something extra comforting about a blanket that feels just right in your hands — soft, textured, and cozy without being complicated. We love this beautifully textured throw that looks much more intricate than it actually is.
Pattern Features
- Beginner-friendly crochet blanket pattern
- Carry the yarn up the side rather than weave in many yarn ends
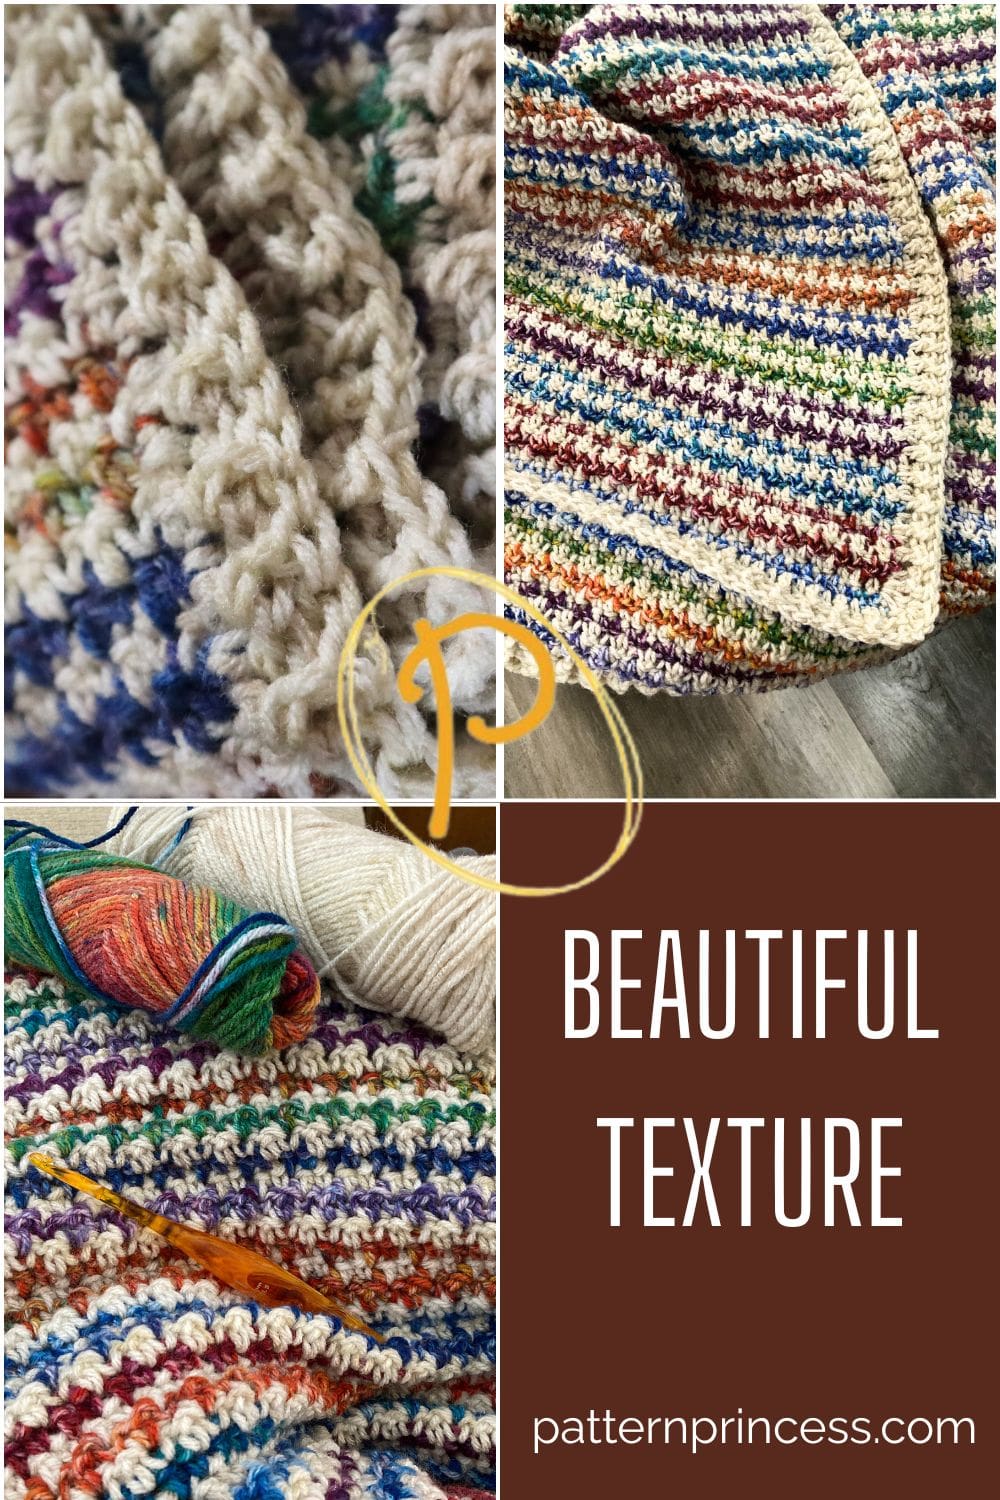
- Simple lemon peel stitch texture
- Multiple blanket sizes included (5 sizes)
- Part of the Frost Blossom Collection
- Full video tutorial support
Lemon Peel Stitch
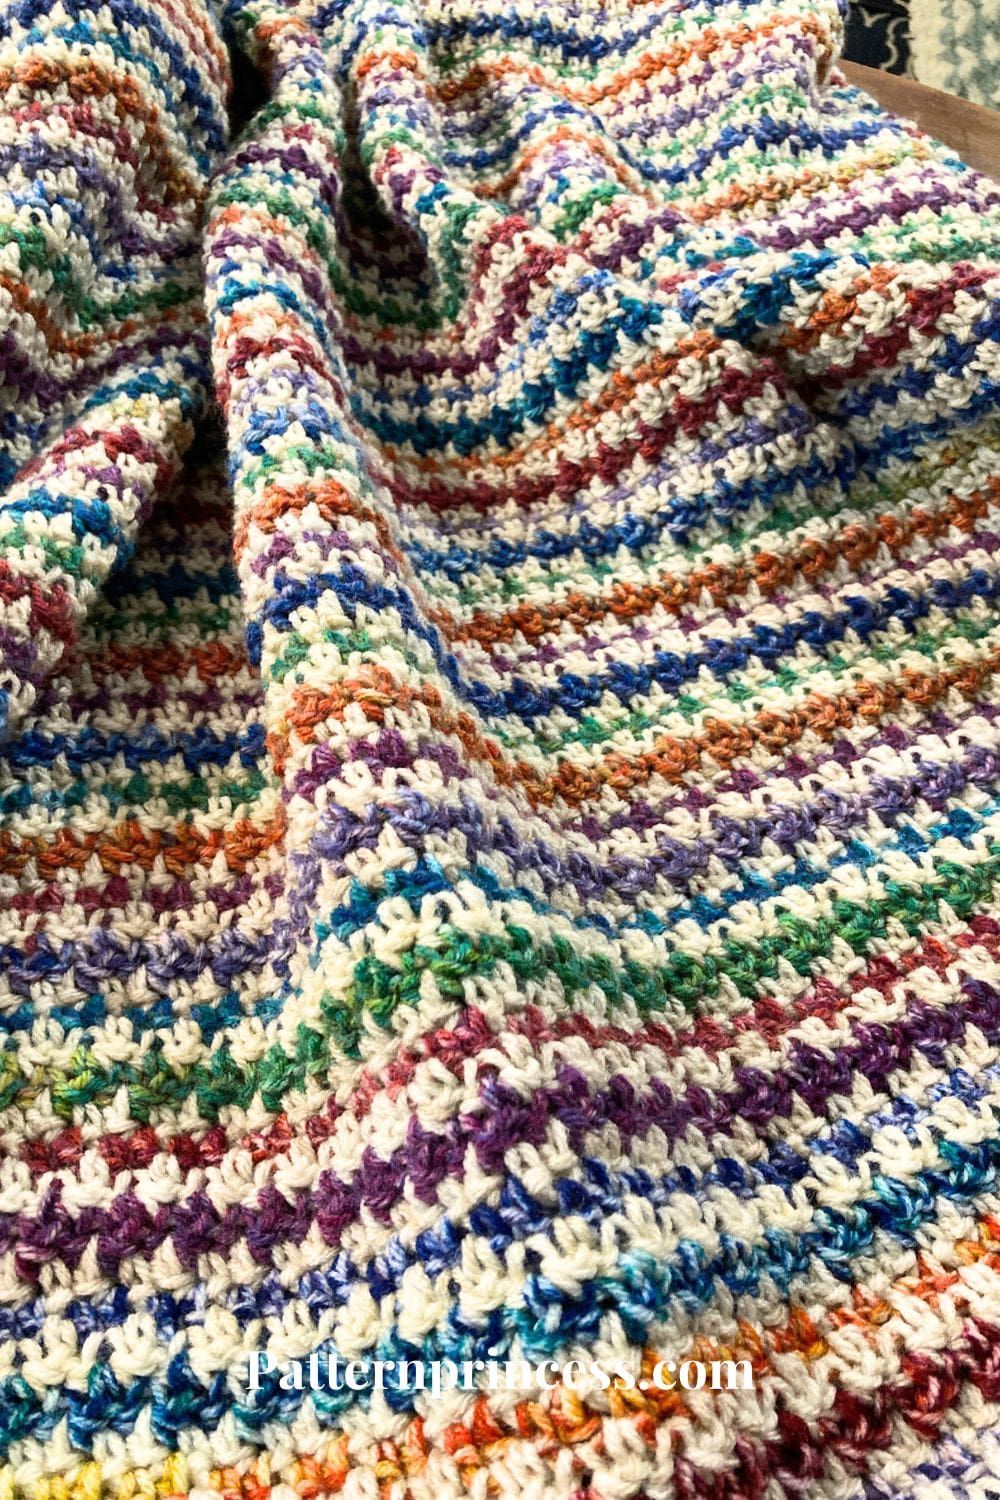
At the center of the design is the simple but satisfying lemon peel stitch. If you’ve never worked it before, you’re in for a treat — it has a lovely rhythmic flow that makes this pattern relaxing and beginner friendly while still producing a rich, woven look.
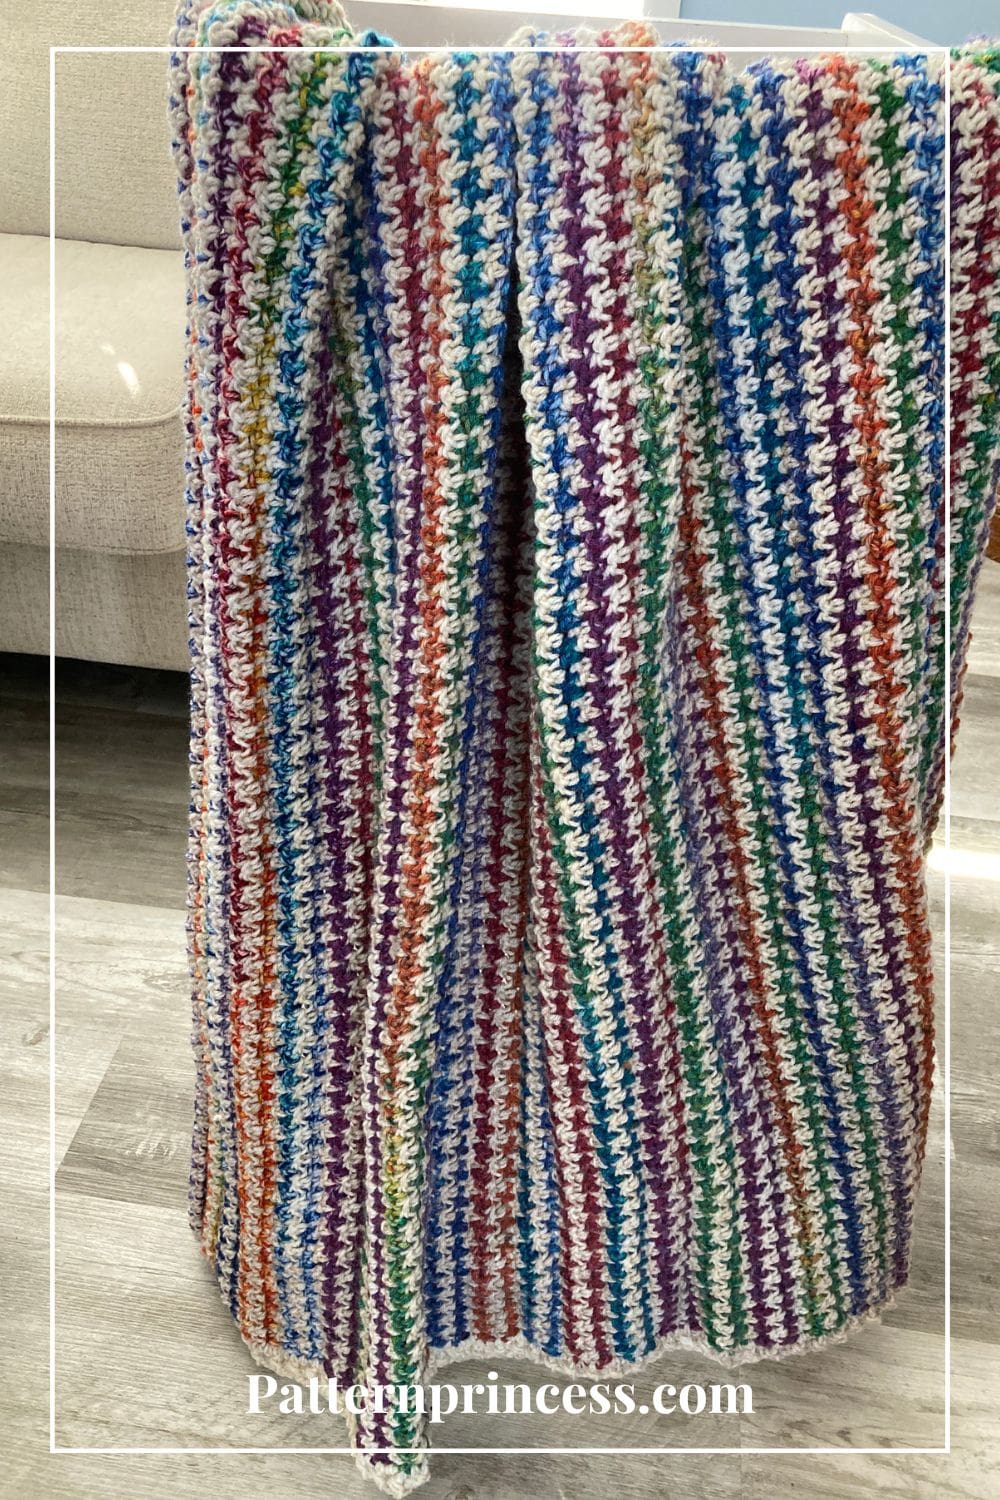
When worked in strict black and white, this stitch creates the classic houndstooth effect, but using variegated yarns gives it a completely different personality. The colors softly blend and shift, creating that signature “frost meets bloom” feel we love so much.
Yarn Choices
For this blanket, we used Red Heart Bitty Stripes in Crayon Box and Moonbeam. These two yarns play beautifully together, giving the blanket depth, softness, and just the right amount of color movement.
Whether you’re making this throw to keep, gift, or coordinate with the rest of the Frost Blossom pieces, we hope it becomes a relaxing project you’ll enjoy from the very first row.
Get Your Ad Free Printable PDF in our Etsy Shop.
Why You’ll Love the Frost Blossom Throw
The Frost Blossom Throw Blanket is crocheted using the beautifully textured lemon peel stitch, a simple combination of single crochet and double crochet stitches. This engaging stitch pattern creates rich texture while still being wonderfully relaxing to crochet.
The result is a wonderfully cozy baby blanket or a stunning throw for your home. In fact, we enjoyed crocheting this stitch so much that Casey and I designed eight additional patterns using the same technique for the Frost Blossom Collection.
Best of all, Red Heart Bitty Stripes yarn is both washable and dryable, making this blanket a practical and easy-care project for everyday use.
Directions: Frost Blossom Throw Blanket
Skill Level
Beginner-Friendly
Gauge
Approximately 11 stitches and 10 rows = 4″ x 4″ in lemon peel stitch.
Size
There are 5 suggested sizes for this throw blanket.
Note: The final size includes a 1 ½ inch border, which adds 3 inches to the final size.
- Baby Blanket: 37 X 37 inches without border. 40 X 40 inches with border.
- Small Throw Blanket: 47 X 47 inches without border. 50 X 50 inches with border.
- Medium Throw Blanket: 55 X 55 inches without border. 58 X 58 inches with border. (shown)
- Large Throw Blanket: 57 X 67 inches without border. 60 X 70 inches with border.
- X-Large Blanket: 67 X 67 inches without border. 70 X 70 inches with border.
To adjust the width, simply adjust your chains by any odd number of chains. To make the project longer or shorter, simply crochet more or fewer rows.
Abbreviations
- BPDC = Back Post Double Crochet
- CH = Chain
- FPDC = Front Post Double Crochet
- DC = Double Crochet
- SC = Single Crochet
- SK = Skip
- SP = Space
- ST = Stitch
- STs = Stitches
- YO = Yarn Over
- [ ] = Repeat Between
Materials
Yarn. Red Heart Super Saver Bitty Stripes from Yarnspirations. It is a #4 medium weight yarn, 515 yards each skein. 100% Acrylic.
I used two yarn colors: Crayon Box and Moonbeam.
Note: The border is worked using the Moonbeam yarn color. Therefore, the pattern requires more of this color.
- Baby Blanket: 1,725 yards or 2 skeins of Crayon Box and 3 skeins of Moonbeam.
- Small Throw Blanket: 2,690 yards or 3 skeins of Crayon Box and 4 skeins of Moonbeam.
- Medium Throw Blanket: 3,605 yards or 3 skeins of Crayon Box and 4 skeins of Moonbeam. (shown)
- Large Throw Blanket: 4,550 yards or 4 skeins of Crayon Box and 6 skeins of Moonbeam.
- X-Large Blanket: 5,300 yards or 5 skeins of Crayon Box and 7 skeins of Moonbeam.
If you are not able to find the yarn locally, you can purchase it online. Savings Center – Pattern Princess
Size I 5.5mm Crochet Hook
Scissors
Tapestry Needle
Tape Measure
Stitch Markers
Pattern Notes
Written in US Terms.
This pattern uses the Lemon Peel Stitch.
Chain 1 at the beginning of the row is the turning chain and does not count as a stitch.
This pattern is written to carry the yarn up the side of the blanket.
Crochet Border consists of alternating the front post double crochet and back post double crochet stitches. With three double crochet stitches worked in each corner.
Helpful Tips for Beginners
✔Alternating Stitches
You’ll always be alternating single crochet and double crochet stitches throughout this pattern.
Here’s the simple rule of thumb:
- If the stitch below is a double crochet, work a single crochet into it.
- If the stitch below is a single crochet, work a double crochet into it.
This alternating pattern gives you the signature lemon peel-like texture.
✔ Use a Stitch Marker
Because this stitch uses alternating heights, the last stitch can blend in. Place a stitch marker in the first stitch of the row. This prevents accidental increases or decreases that throw off your count.
✔ Counting Made Easy
If you start with an odd number of chains, you’ll end up with an even number of stitches, which ensures the alternating pattern lands correctly on the next row.
✔ Make sure to watch the video tutorials to see how to crochet the lemon peel stitch and how to change yarn color. They are located after the written directions.
Crochet Stitches Used
Chain Stitch (CH ST)
Begin the chain stitch by making a slip knot on the crochet hook. Leave about a 5-inch tail on the yarn. This will be weaved in later.
Next snug up the yarn loop that is on the crochet hook; while it should be firm, it should also be loose enough to slide on the hook with ease.
Keeping the loop on the hook, wrap the yarn over the crochet hook from back to front. Draw the yarn through the loop. (The first chain stitch is complete).
HOW TO CROCHET THE CHAIN STITCH video tutorial
Double Crochet (DC)
Yarn over, insert the hook through a stitch and pull up a loop. Next, yarn over and pull through two loops on the hook. Lastly, yarn over again and pull through the last two loops on the hook.
HOW TO CROCHET THE DOUBLE CROCHET STITCH video tutorial
Single Crochet (SC)
Insert the hook in a stitch, pull up a loop. Yarn over and pull through the two loops on the hook.
HOW TO CROCHET THE SINGLE CROCHET STITCH video tutorial
How to crochet the front post and back post double crochet alternating.
Front Post Double Crochet and Back Post Double Crochet
The crochet border uses the front post double crochet and back post double crochet stitches in an alternating pattern. Resulting in a soft and squishy feel with a ribbed look. If you like this finish for you crochet blankets, you can find all the details on how to work the alternating FPDC and BPDC stitches here and in the video tutorial.
Back Post Double Crochet (BPDC)
Back post stitches appear to recede on the side of the crocheted fabric that is facing you. Note: Because a post stitch is shorter than a normal stitch, you make the turning chain with one chain stitch less than the normal turning chain requires. Yarn over, insert the hook from back to front between the posts of the first and second double crochet of the row below. Then insert the hook from the front to the back front between the posts of the second and third stitches. (The hook should now be positioned horizontally in front of the double crochet that you are working around). Yarn over, pull the yarn over the post of the stitch. There should now be 3 loops on the hook. Yarn over, pull the yarn through 2 loops on the hook. Last, yarn over again and pull through the last two loops on the hook.
Front Post Double Crochet (FPDC)
Front post stitches are raised crochet stitches on the surface of the fabric facing you. Note: Because a post stitch is shorter than a normal stitch, you make the turning chain with one chain stitch less than the normal turning chain requires. Yarn over, insert the hook from front to back between the posts of the first and second double crochet of the row below. Then insert the hook from the back to the front between the posts of the second and third stitches. (The hook should now be positioned horizontally behind the double crochet that you are working around). Yarn over, pull the yarn around the post of the stitch. There should now be 3 loops on the hook. Yarn over, pull the yarn through 2 loops on the hook. Lastly, yarn over again and pull through the last two loops on the hook.
Begin Crochet Pattern
Crochet a Foundation Row
Begin the chain stitch by making a slip knot on the crochet hook.
Starting with yarn color A
Note: For my blanket, I started and ended with the Crayon Box yarn color.
Chain any odd number of chain stitches.
- Baby Blanket: chain 101 Stitches.
- Small Throw Blanket: chain 129 Stitches.
- Medium Throw Blanket: chain 151 Stitches. (shown)
- Large Throw Blanket: chain 157 Stitches.
- X-Large Blanket: chain 185 Stitches.
Row 1
SC in 2nd CH from the hook. DC in next CH. [SC in the next ST, DC in the next ST]. Repeat across between [ ]. End with a DC in the last St. Turn (You’ll have an even number of stitches.)
Do not cut your yarn. Add a stitch marker.
Row 2
Change to yarn color B. Pull the new yarn color through the loop on the hook and snug up yarn color A. Continue with the pattern using yarn color B.
CH 1 (Turning Chain Doesn’t Count as a Stitch). SC in the first DC ST, DC in the SC ST. [SC in the next ST, DC in the next ST]. Repeat across between [ ]. End with a DC in the last St.
Add a stitch marker.
Row 3
Change back to yarn color A
Now you’ll see the unused color strand (Color A) waiting at the other end.
To reuse it.
- Insert your hook into the first stitch.
- Gently pull up Color A and yarn over with it to start the row.
The unused yarn will be carried neatly up the side.
CH 1 (Doesn’t Count as a ST). DC in the first SC ST, SC in the DC ST. [DC in the next ST, SC in the next ST]. Repeat across between [ ]. End with a SC in the last St. Turn
Row 4
Change back to yarn color B
CH 1 (Doesn’t Count as a ST). DC in the first SC ST, SC in the DC ST. [DC in the next ST, SC in the next ST]. Repeat across between [ ]. End with a SC in the last St. No Turn
Row 5
Change back to yarn color A
CH 1 (Doesn’t Count as a ST). SC in the first DC ST, DC in the SC ST. [SC in the next ST, DC in the next ST]. Repeat across between [ ]. End with a DC in the last St. Turn
Row 6
Change back to yarn color B
CH 1 (Doesn’t Count as a ST). SC in the first DC ST, DC in the SC ST. [SC in the next ST, DC in the next ST]. Repeat across between [ ]. End with a DC in the last St. No Turn
Rows 7 and Beyond
Continue repeating rows 3-6 until desired length.
- Baby Blanket: 96 rows.
- Small Throw Blanket: 122 rows.
- Medium Throw Blanket: 143 rows. (shown)
- Large Throw Blanket: 148 rows.
- X-Large Blanket: 174 rows.
Finishing
After you work the last SC ST, cut off the yarn leaving about a 12-inch long tail. Pull the yarn tail through the last loop on the hook.
Thread the yarn needle with the yarn tails and weave them through the crochet stitches back and forth until the yarn feels secure. Snip off the excess yarn.
Crochet Border
Change to yarn color B
Round 1
Join yarn color B in any stitch along one side (not in a corner). Chain 3 (Counts as a DC). DC in each stitch around. (Work 1 DC in each stitch across the top and bottom edges and work 1 DC per row along the side edges. In the corners work 3 DC in the corner ST). End the round with a SL ST into the top CH of the first CH 3.
Round 2
CH 2 (Does NOT count as a stitch). (The stitches on this row are a bit shorter than the regular DC). Complete an alternating ST pattern between FPDC and BPDC. Corners: When you get to the corners, work 3 DC into the middle DC ST from the previous row. However, on the other two stitches from the previous row DCs in the corner – blend those into the alternating FPDC and BPDC stitch pattern. End the round with a SL ST into the top CH of the first CH 2.
Finishing
After completing the border, fasten off leaving a 12-inch long tail. Pull the yarn tail through the last loop on the hook.
Thread the yarn needle with the yarn tails and weave them through the crochet stitches back and forth until the yarn feels secure. Snip off the excess yarn.
Video Tutorials on our YouTube Channel
Welcome to our Lemon Peel Stitch crochet tutorial!
In this video, we’ll guide you step-by-step through creating this cozy, textured stitch in both a solid yarn color and alternating yarn colors. Learn how to carry the yarn up the side to save time and for minimal yarn ends to weave in.
How to Crochet the Lemon Peel Stitch right hand
How to Crochet the Lemon Peel Stitch left hand
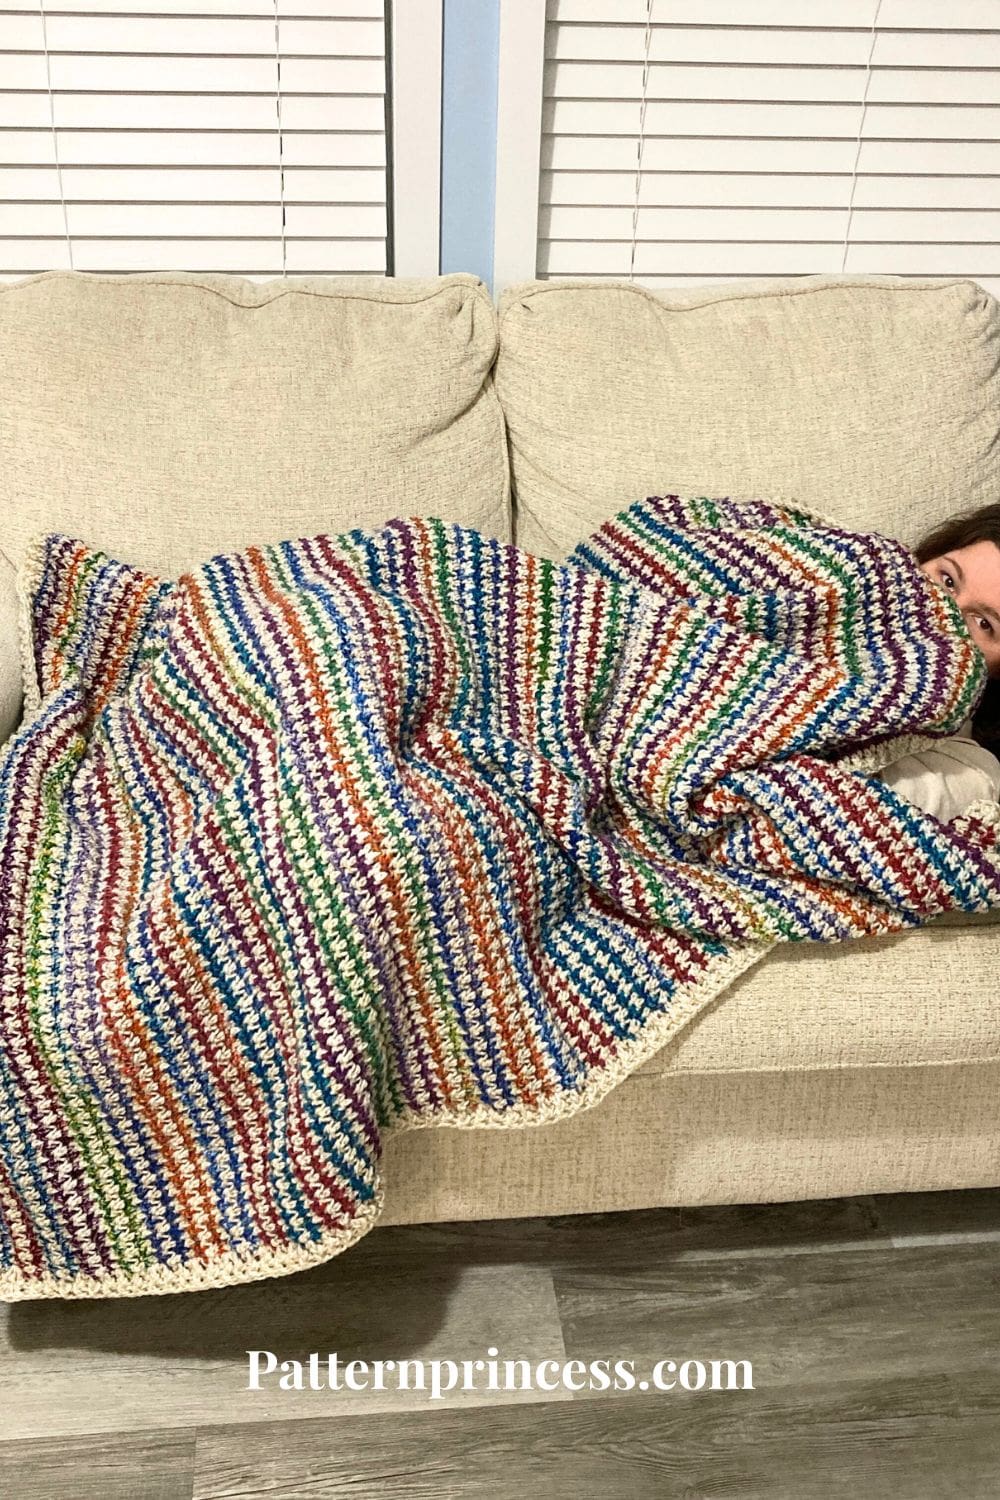
A Few Short Videos for the Frost Blossom Throw Blanket. This stunning blanket is perfect for snuggling up on those chilly nights.
Short Video Crocheting the Lemon Peel Stitch for this Blanket
Short Video Crocheting the Border
The lemon peel is a beautiful stitch with minimal counting and maximum charm. It offers endless possibilities and a soothing rhythm.
We hope that you have enjoyed this lovely crochet pattern.

You can find Victoria crocheting, quilting, and creating recipes. She has cooked in restaurants for over 20 years, including many larger parties. She learned to crochet when she was just 11 years old and has been crocheting ever since; over 50 years now. Over 40 years ago, she loved her first class in sewing and continues to hone her skills in quilting. Many have enjoyed the handmade gifts over the years. In her professional career, she has worked in management in a wide variety of businesses including higher education as a dean of a division. All the while attending college part-time to achieve her doctorate in higher education with an emphasis in e-learning.
I am getting ready to start row 3 with color A. It is at the opposite end of where I need to start. I can’t figure out how to pull up color A. Do you have a video?
Hi Jan,
I do have videos. They are located after the written pattern. I will put the links here for your convenience.
How to Crochet the Lemon Peel Stitch right hand https://youtu.be/aPsQq8JWgNo
How to Crochet the Lemon Peel Stitch left hand https://youtu.be/LVfo6wBpgtg
vicky
Hi, I noticed that Vicky has answered your question about the stitch, but I’m thinking you may have been confused like I was about how to start out after the 3rd row with the yarn at the other end, and I finally figured it out. You simply put a stitch marker in the yarn loop at the end of the row that you just finished and go back to the other end and just pick up your colored yarn at the other end and start your color row on the end where it’s sitting , and continue with the lemon peel stitch . When you finish that row, then both of your yarn colors will be at the same end, and then you’ll pick up your light colored yarn and go back across and you just keep repeating the same thing so you end up with your yarn at opposite ends, then back together the next row, but you always use a stitch marker for, the one you just finished with and return to the opposite end to pick up your yarn that you left behind, then crochet the full row until it reaches the other end. I hope that made sense.