Last updated on January 19th, 2026 at 09:55 pm
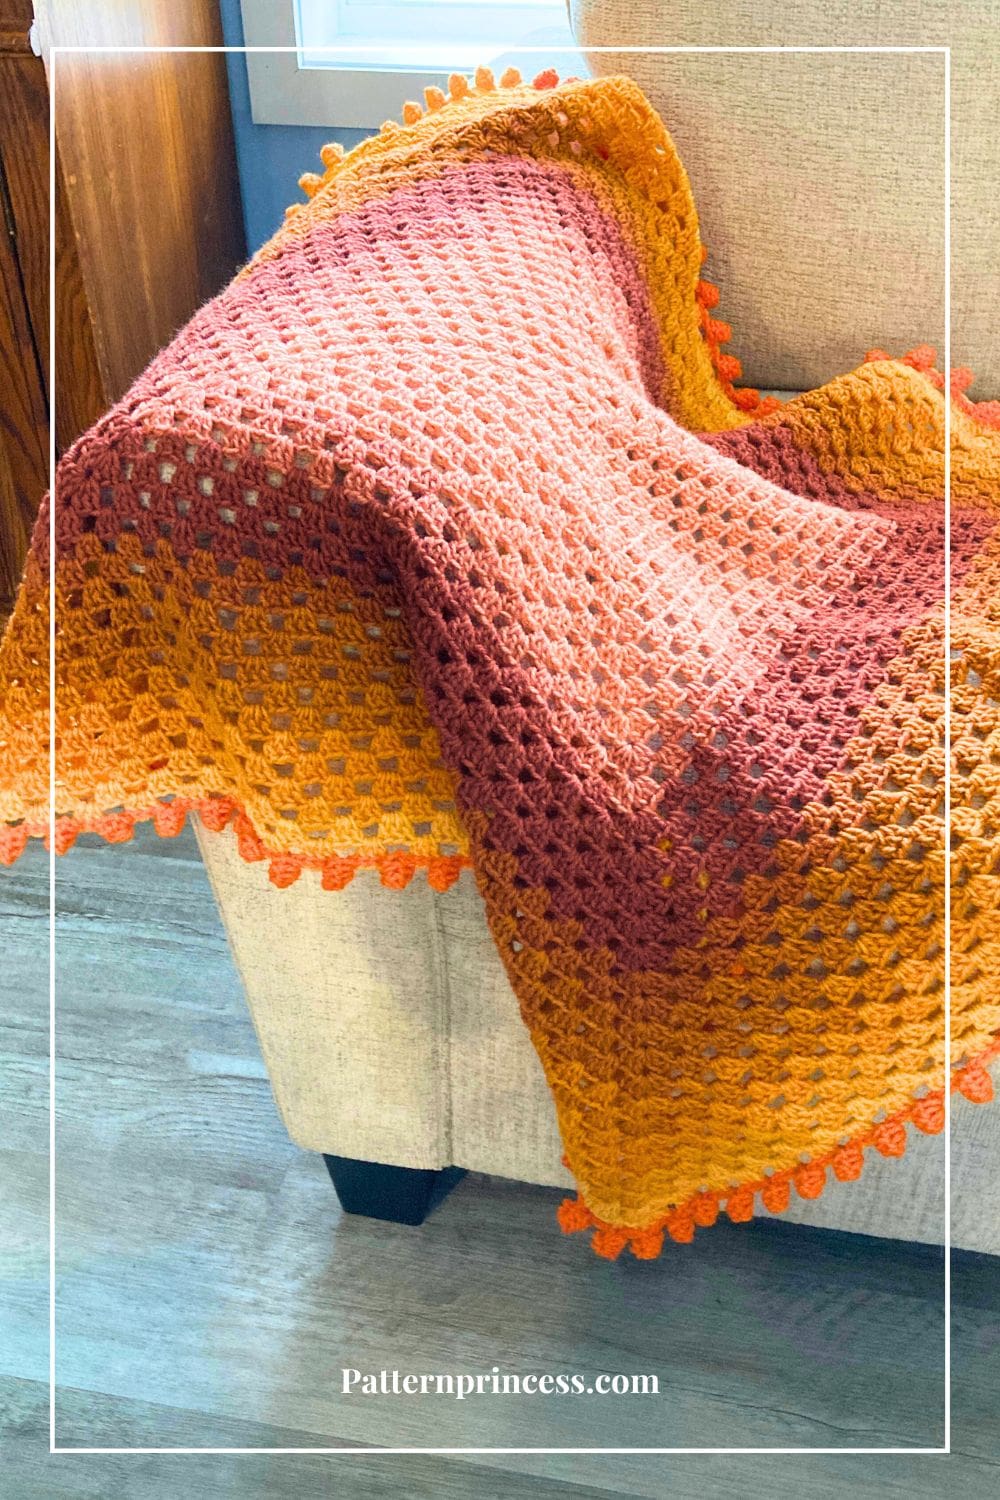
If you love the timeless charm of granny squares but want a modern twist, this Granny Square Crochet Blanket with Dot Border is perfect for your next project. Crafted as a continuous granny square, this blanket eliminates the need for piecing blocks together, making it as simple as it is stunning.
What sets it apart is the use of a single yarn cake that effortlessly transitions through vibrant colors. Creating a striking gradient effect without the hassle of changing skeins.
To top it all off, the whimsical dot border adds a touch of playful texture, with tiny crochet balls hanging along all four sides. A simple border that’s eye-catching in detail that turns a cozy throw into a statement piece. It really makes the border pop.
Whether you’re curling up on the couch or looking for a unique handmade gift, this project is as delightful to make as it is to admire.
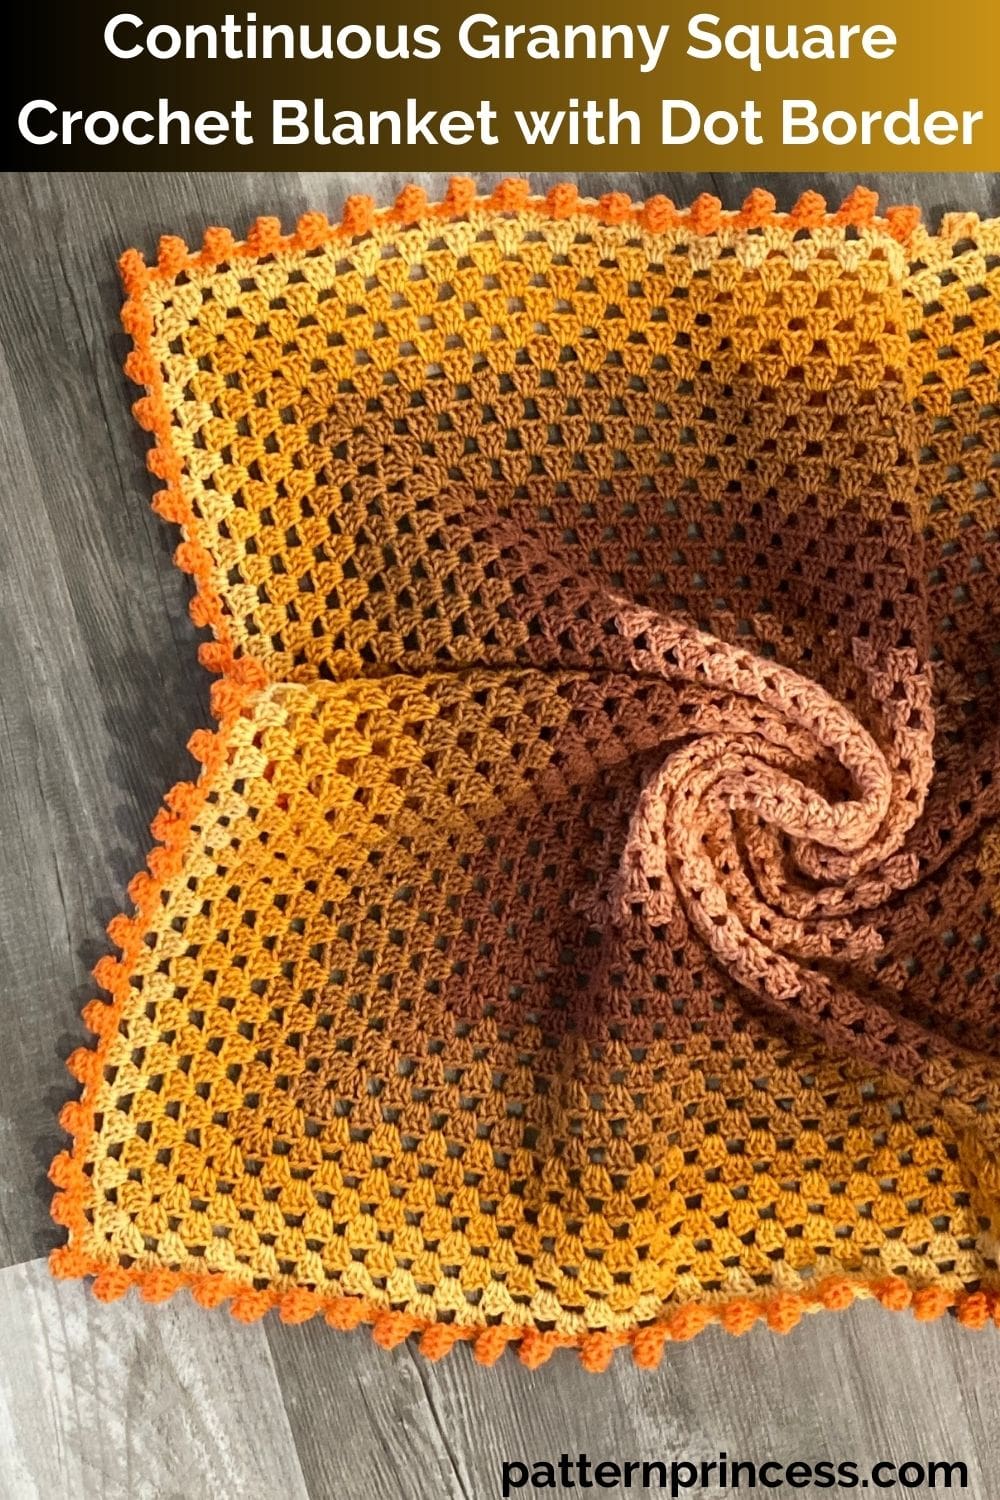
Using up My Yarn Stash
I had this gorgeous single yarn cake in my stash just waiting for the right project. It’s a great way to use up that one large yarn cake hanging around in your yarn stash.
Awesome patterns like this are made even better when the recipient loves it. I brought this over to my daughter’s house to take photos for writing up crochet pattern. My 2-year-old grandson grabbed it and ran with it squealing with glee. Then he rolled in it. Of course, he sleeps with it now.
Customize the Size of the Crochet Blanket
This blanket pattern includes yarn requirements for three different sizes.
- Small. 36 x 36 inches. (Shown). Perfect for a baby blanket.
- Medium. 50 x 50 inches. A nice throw blanket.
- Large. 60 x 60 inches. This one is a nicer size for snuggling under.
How to Crochet a Granny Square Blanket
Understanding the Continuous Granny Square
A continuous granny square is a clever crochet technique where a single piece of yarn is worked continuously to form a square. Eliminating the need for joining multiple smaller squares together. This method not only saves time but also creates a seamless, polished look with no visible joins or bulky seams. It’s a wonderful option for creating blankets, pillow covers, or even wearable items like ponchos or shawls.
The beauty of this technique lies in its simplicity and flexibility. You start with a small ring at the center. Then work a square around the ring. Next you continue to work outward in concentric rounds. Each round builds upon the previous one, with the iconic granny square clusters. Groups of three double crochets separated by spaces, forming a textured and airy design. The corners are strategically increased in every round, ensuring the square shape is maintained as it grows.
When using a color-changing yarn cake, like in this project, the continuous granny square shines. The natural transitions in the yarn create a stunning gradient effect that moves effortlessly from one shade to the next. Giving the blanket a dynamic, colorful appearance without the need to change yarns manually.
However, this blanket project also looks lovely using a single color.
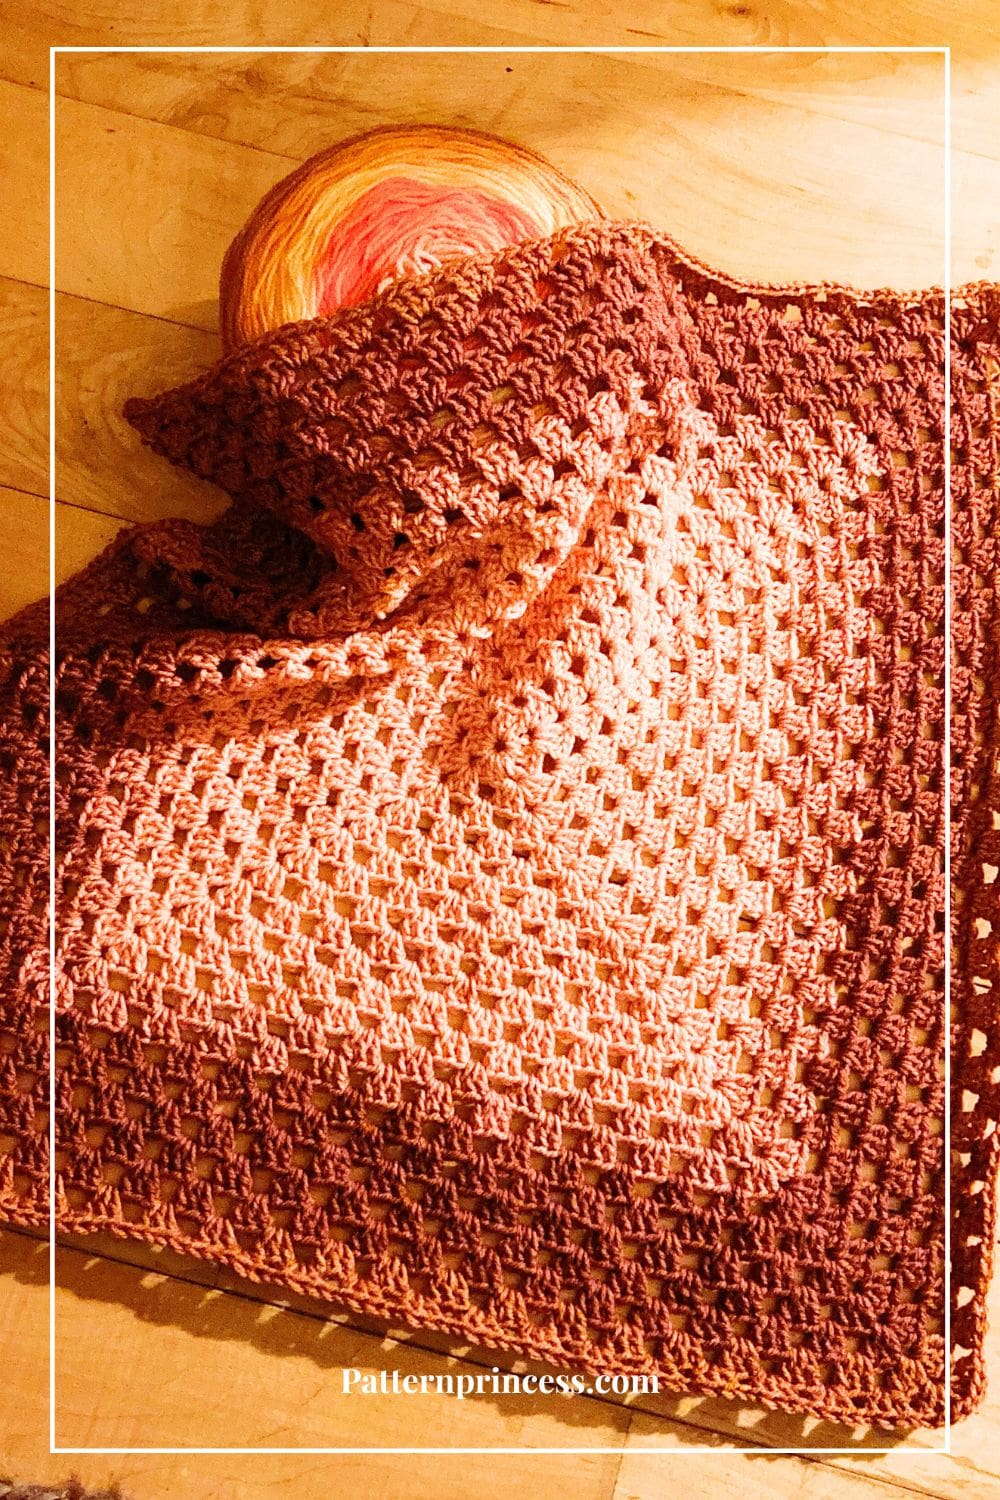
Continuous Granny Square is Great for Beginner Crocheters
This technique is ideal for beginners because it uses basic stitches and follows a simple, repetitive pattern. For seasoned crocheters, it’s a relaxing project that allows creativity to flourish, especially when paired with fun border designs like the dot border in this blanket.
Bobble Stitch Border
If you love the look of this dot border using the bobble stitch, we have another pattern for you. A while back, we made a rectangular shawl using this bobble stitch on the ends.
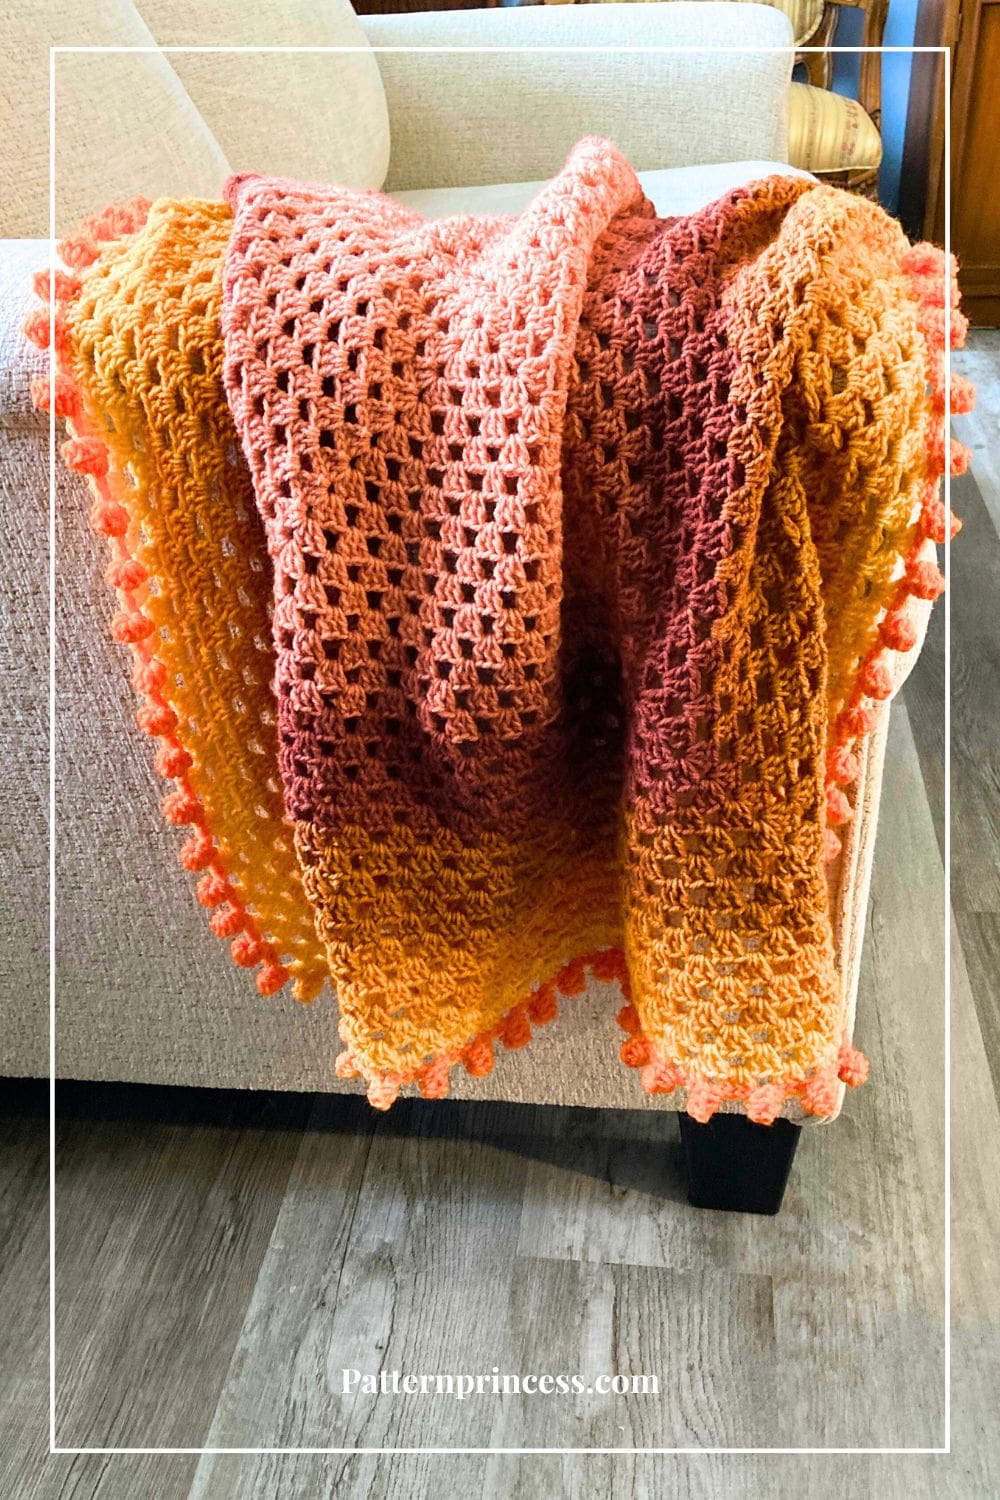
Get Your Ad Free Printable PDF in our Etsy Shop.
Directions: Continuous Granny Square Crochet Blanket with Dot Border
Skill Level
Confident Beginner. The continuous granny square itself is great for a beginner to work. However, the dot border is better suited for a confident beginner.
Gauge
22 double crochet stitches and 8 rows every 4 inches.
Size
36 X 36 inches square.
You can change the size of the blanket by adding or decreasing rounds. Three size suggestions are noted in the materials section.
Materials
Yarn. Lion Brand Mandala in Elektro Color. 1 Yarn Cake, 1,181 yards.
You can get this yarn right from Lion Brand. Find links on our Savings Page.
Make this in three sizes.
36 x 36 inches. 1,150 yards (shown). Great size for baby blankets.
50 x 50 inches. Approximately 2,300 yards.
60 x 60 inches. Approximately 3,450 yards.
Crochet Hook Size H, 5.0 mm hook
Scissors
Tapestry Needle
Tape Measure
Abbreviations
- CH = Chain
- DC = Double Crochet
- DC BO = Double Crochet Bobble
- GR CL = Granny Cluster
- SC = Single Crochet
- SK = Skip
- SL ST = Slip Stitch
- SP = Space
- ST = Stitch
- STs = Stitches
- YO = Yarn Over
- [ ] = Repeat Between
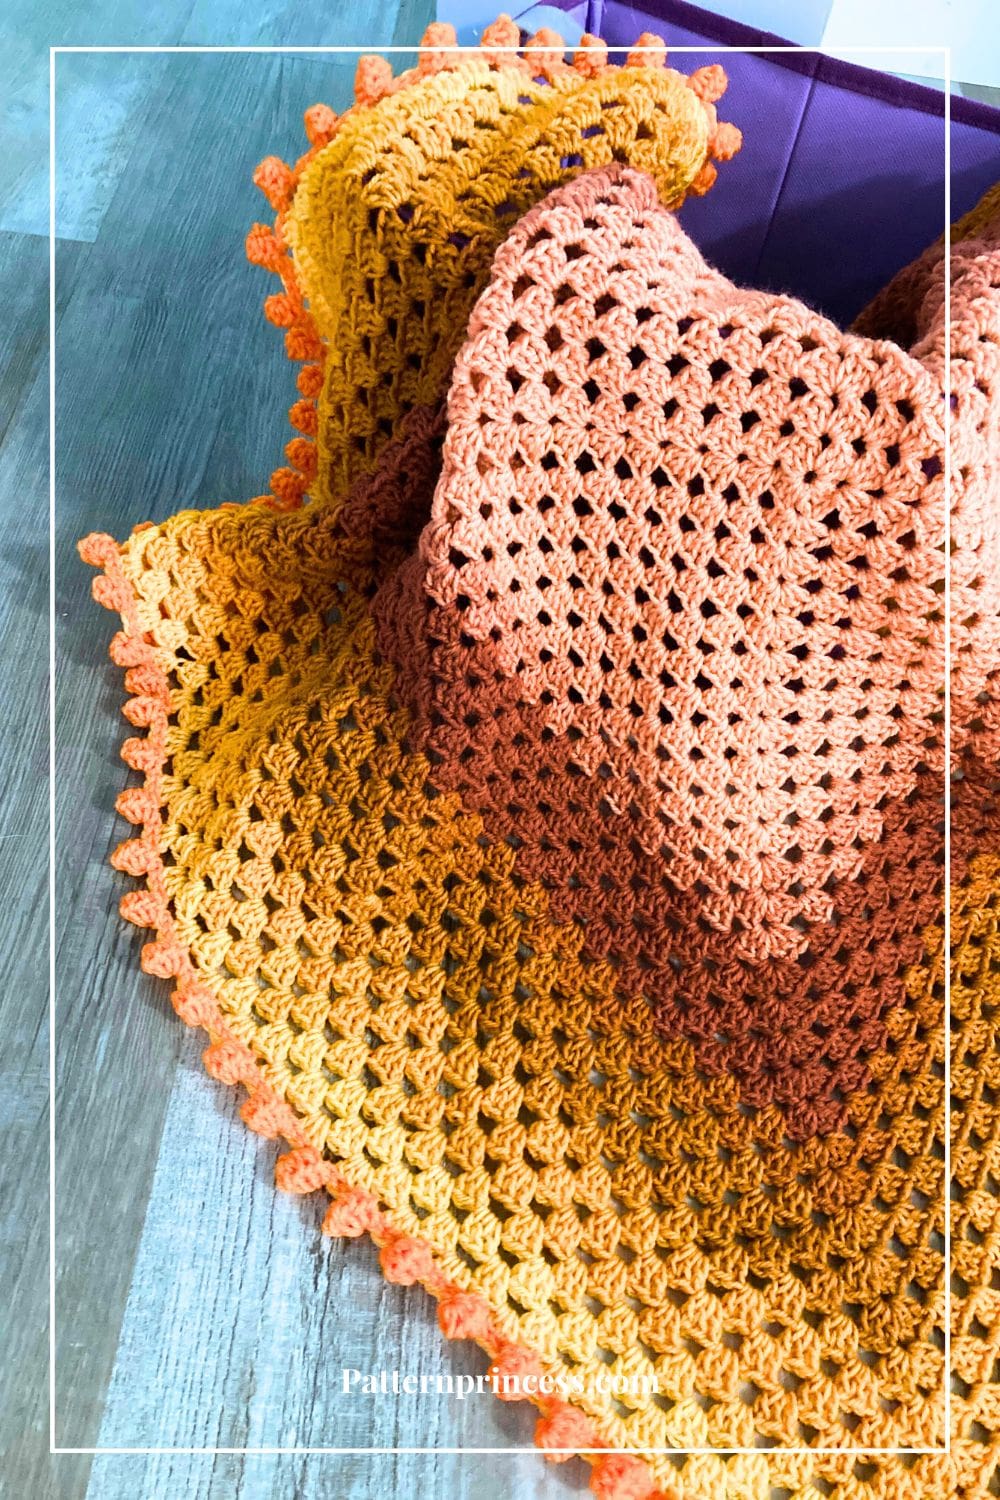
Pattern Notes
Written in US Crochet Terminology.
This pattern is worked in the round.
Chain 3 counts as a double crochet stitch.
The corner space of a granny square normally has a ch-2 space or a ch-3 space between the two granny stitch clusters. This blanket uses just a ch-1 space between. I was looking for a smaller corner hole.
This blanket uses yarn that changes to different colors on its own. If you want to change colors each round, I recommend doing that in the corners where you start each round. Join yarn before working the first CH 3 in the corner ST.
To eliminate the seam that is often visible in granny squares, you will be working slip stitches to the corner to begin each round. This creates a lovely granny square with a finished look and no seam.
I did not turn each round. However, if you find that your square starts to get wonkey and look askew, turning your work after each round fixes that.
I started on the outside of the yarn cake as I wanted the brighter orange color for the bobble stitch dot border on the blanket.
Crochet Stitches
Double Crochet (DC)
Yarn over, insert hook through both loops and pull up a loop. Next, yarn over and pull through two loops on the hook. Lastly, yarn over again and pull through the last two loops on the hook.
Double Crochet Bobble (DC BO)
A double crochet bobble is created by joining 5 incomplete double crochet stitches. They are joined at the top. Sort ort of like a double crochet 5 together. However, these stitches are worked into a chain stitch.
Here are the steps.
Step 1. Chain 3, yarn over and insert the hook into the 3rd chain from the hook. Pull up a loop. There should be 3 loops on the hook.
Step 2. Yarn over and pull through 2 loops. There should be 2 loops left on the hook.
Step 3. Yarn over and insert the hook back into the same chain. Pull up a loop. Yarn over and pull through 2 loops. There should now be 3 loops left on the hook.
Step 4. Repeat step 3, 3 more times. Until you have 6 loops left on the hook.
Step 5. Yarn over and pull through all 6 loops on the hook.
Step 6. Slip stitch back into the initial stitch where you started. For this pattern it will be the chain 1 space.
Granny Cluster, or shell
A granny cluster is a term for a special crochet stitch that consists of a set of 3 double crochet stitches, all worked into one stitch or space. The clusters are then separated from one another with chain stitches. You can find a photo tutorial on how to crochet the granny square, which will be helpful if you are a beginner at crochet.
Single Crochet (SC)
Insert the hook, pull up a loop. Yarn over and pull through the two loops on the hook.
HOW TO CROCHET THE SINGLE CROCHET STITCH video tutorial
You can find video tutorials of this pattern below the written pattern.
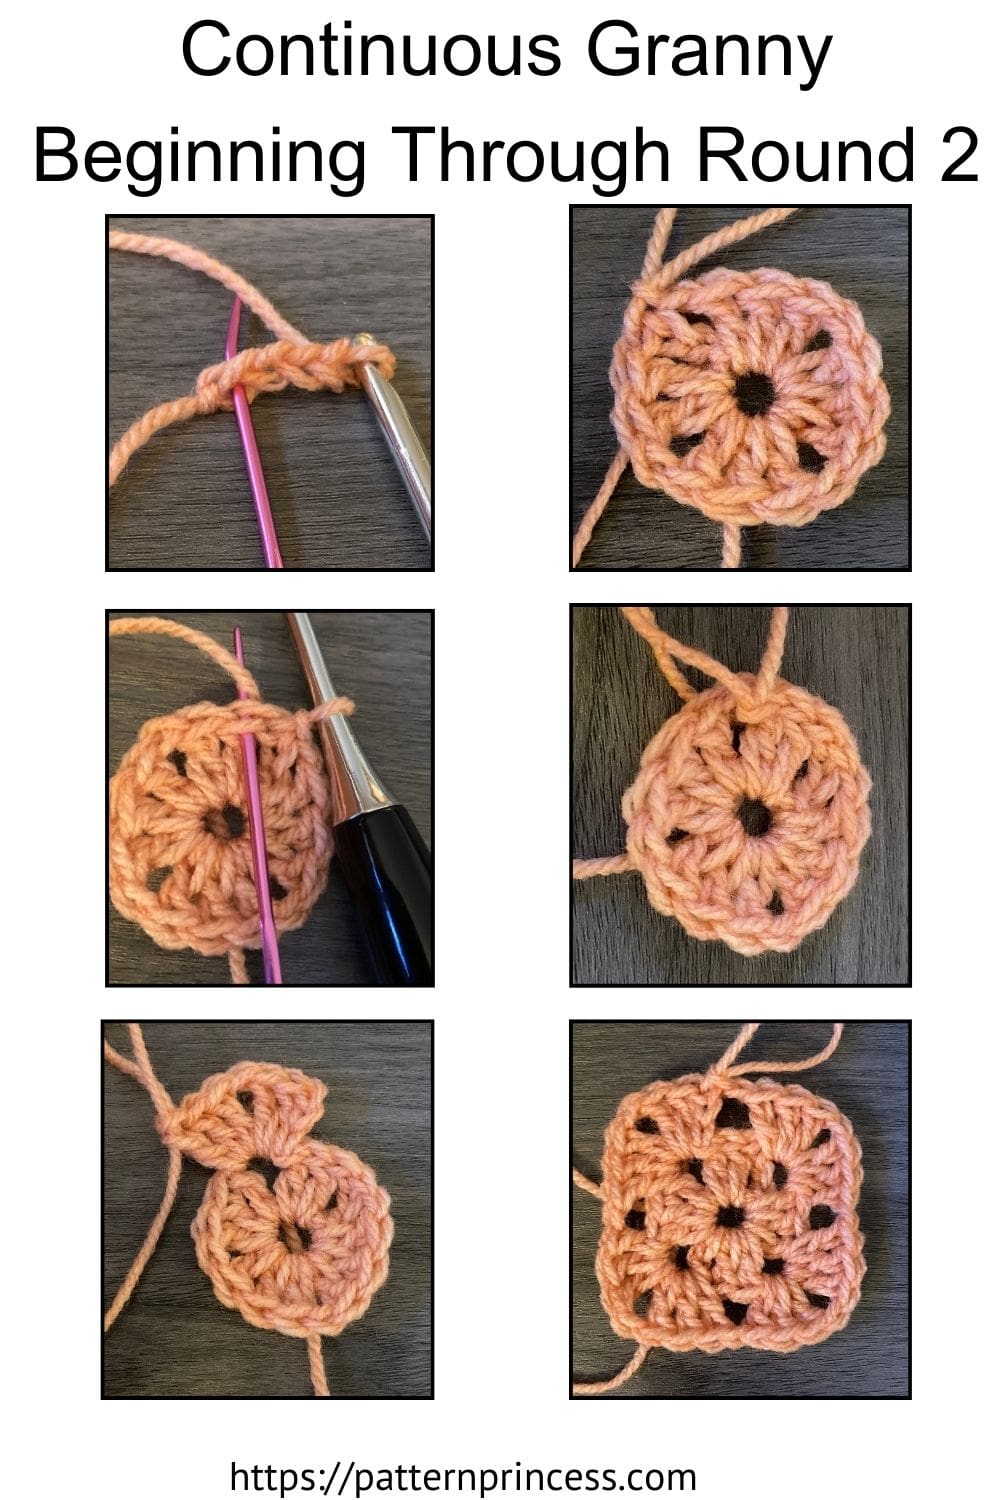
Begin
You can start with a magic circle or a chain 4. Since this is a blanket that will get a lot of use, I started with the chains as it will provide extra stability.
CH 4, SL ST into the first CH ST to form a ring.
Round 1
For this round, you will be working inside the ring. CH 3, 2 DC, CH 1 [3DC, CH 1] 3 times. SL ST into the top CH of the beginning CH 3 to close the round. You should have (4 DC granny clusters and 4 CH STs).
Round 2
SL ST into the next 2 STs and SL ST into the CH 1 SP. Work (CH 3, 2DC, CH 1, 3 DC) into the same CH 1 SP. (This creates the first corner of this round). [CH 1, in the next CH 1 SP work (3 DC, CH 1, 3 DC)]. Repeat 2 times. Join with a SL ST into the top CH 3. You should have (8 DC granny clusters, and 8 CH 1 SP).
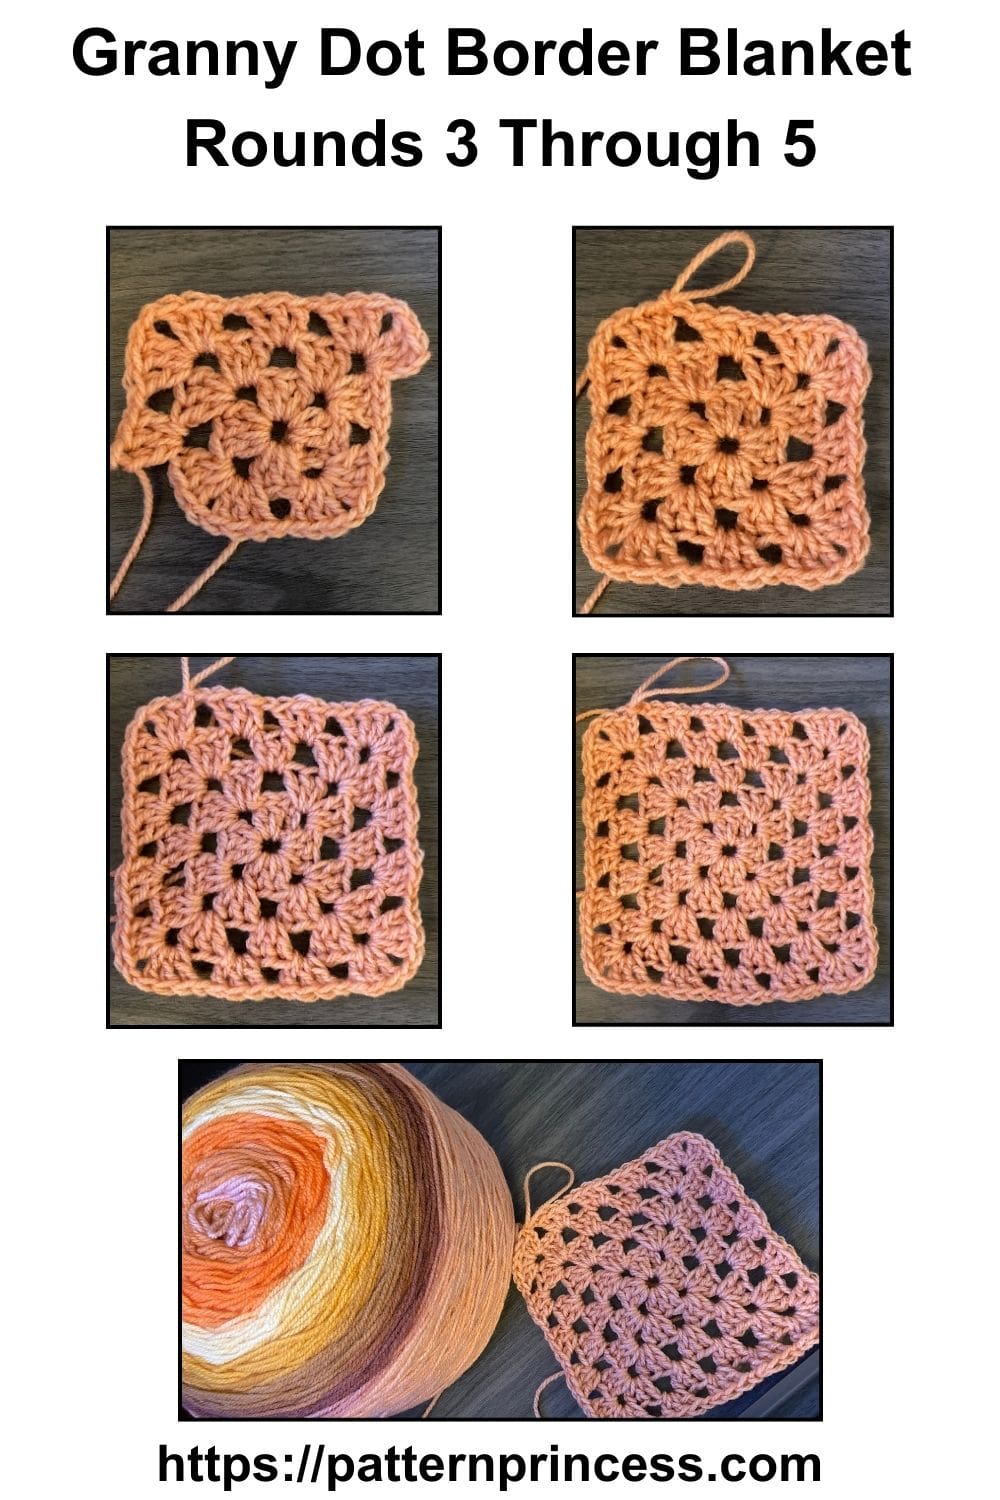
Round 3
SL ST into the next 2 STs and SL ST into the CH 1 SP. Work (CH 3, 2DC, CH 1, 3 DC) into the same CH 1 SP. [CH 1, in the next CH 1 SP work (3 DC, CH 1). In the corner CH 1 SP work (3 DC, CH 1, 3 DC)]. Repeat 2 times. On the last side work (3 DC, CH 1) in the CH 1 SP. Join with a SL ST into the top CH 3. You should have (12 DC granny clusters, and 12 CH 1 SP).
Round 4
SL ST into the next 2 STs and SL ST into the CH 1 SP. Work (CH 3, 2DC, CH 1, 3 DC) into the same CH 1 SP. CH 1, in the next CH 1 SP work [(3 DC, CH 1)]. Repeat between [ ] to the corner. In the corner CH 1 SP work (3 DC, CH 1, 3 DC). Continue to repeat the side pattern and the corner patterns around joining with a SL ST into the top CH 3 to close each round. In this round you should have (16 DC granny clusters, and 16 CH 1 SP).
Rounds 5 through 32
Continue working Round 4 adding granny clusters and a chain stitch on each side to grow the size of the continuous granny blanket.
This makes the small 36 x 36 inch blanket pattern. (Shown).
For the Medium,50 x 50 inch, and large, 60 x 60 inch just continue adding rounds before working the border. Use a tape measure to determine the size.
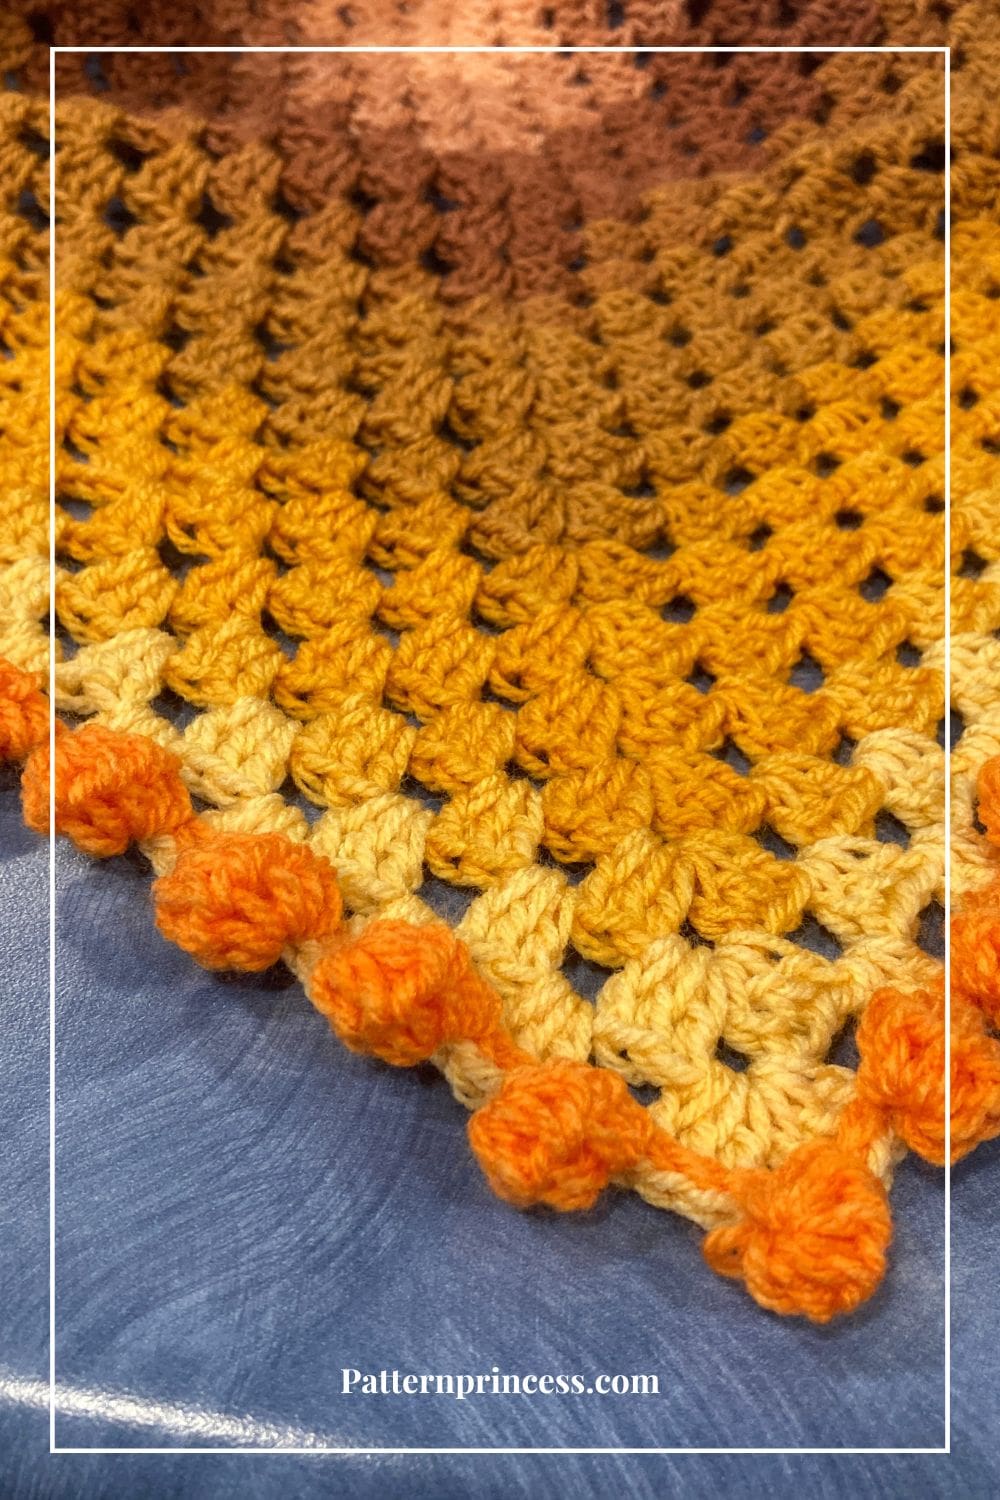
Crochet Border Pattern
Since this yarn cake changed to a different color on its own, I just kept using the same yarn. The bright orange contrasting color dots really make a huge difference in the fun appearance.
Round 33
This is the final round and it Creates the Border of crochet bobbles.
SL ST into the next 2 STs and SL ST into the CH 1 SP. Work the double crochet bobble. The DC BO is worked on the side of your blanket and in each corner.
Step 1. Chain 3, yarn over and insert the hook into the 3rd chain from the hook. Pull up a loop. There should be 3 loops on the hook.
Step 2. Yarn over and pull through 2 loops. There should be 2 loops left on the hook.
Step 3. Yarn over and insert the hook back into the same chain. Pull up a loop. Yarn over and pull through 2 loops. There should now be 3 loops left on the hook.
Step 4. Repeat step 3, 3 more times. Until you have 6 loops left on the hook.
Step 5. Yarn over and pull through all 6 loops on the hook.
Step 6. Slip stitch back into the initial stitch where you started. For this pattern it will be the chain 1 space.
[SL ST into the next CH 1 SP, work the DC BO]. Repeat around between [ ]. End with a SL ST into the first SL ST of this round.
Finishing
Use the tapestry needle to weave in the yarn tails on the back side of the work. I like to weave back and forth 3 to 5 times. Cut off the excess yarn.
Video Tutorials of this continuous granny square crochet blanket with the dot border.
Advantages of Using Yarn Cakes for a Continuous Granny Square
Using a yarn cake for a continuous granny square is a game-changer for several reasons.
Effortless Color Changes
Yarn cakes often come in beautiful gradient or self-striping patterns, allowing you to achieve a stunning color transition without manually switching yarns. This not only saves time but also eliminates extra ends to weave in.
The continuous granny square works especially well with yarn cakes, as the square naturally grows outward, showcasing the color changes in a visually appealing, spiral-like effect.
Fewer Interruptions
With just one yarn cake, you can crochet uninterrupted for a long time, making the project more enjoyable and efficient. This is especially helpful for maintaining focus and rhythm in your work.
Compact and Organized
Yarn cakes are tightly wound, so they don’t roll around as you crochet. They’re easy to store and keep neat, reducing tangling and frustration during your project.
Avoiding Common Pitfalls
To make your continuous granny square a success, consider these tips.
Maintain Consistent Tension
Pay attention to your tension as the square grows. Uneven tension can cause the square to ripple or pucker. Adjust your grip or hook size if you notice inconsistencies.
Mark Your Corners
If you are a beginner at crocheting, you may want to use stitch markers to mark the corners as you go. Especially in the early rounds. This ensures you’re increasing correctly in each corner and maintaining a true square shape.
Keep an Eye on the Yarn Cake
If your yarn cake includes abrupt or unexpected color changes (sometimes seen with certain gradients or self-striping yarns), be prepared to adjust. You might want to cut and rejoin the yarn for smoother transitions in some cases.
Plan for Yarn Management
Monitor your yarn usage as the square grows. Larger rounds use significantly more yarn, so keep an extra cake or coordinating skein on hand if you want to add more rounds or need extra for the border.
What are some tips for washing and caring for a granny square blanket?
Here are some helpful tips for washing a crochet blanket, especially one with a delicate design.
Check the Yarn Label
- Before washing, refer to the care instructions on the yarn label. Different fibers (acrylic, cotton, wool, or blends) have specific requirements for washing and drying.
- If you no longer have the label, proceed with a gentle approach to avoid damage.
Spot Clean First
- For small stains, try spot cleaning with a damp cloth, mild detergent, and gentle blotting. Avoid scrubbing, as it can distort the stitches.
Hand Wash for Safety
- Fill a large sink or basin with cool to lukewarm water and add a gentle detergent. Submerge the blanket and swirl it gently to clean. Avoid wringing or twisting to prevent stretching.
Use a Gentle Machine Cycle
- If the yarn is machine washable, place the blanket in a mesh laundry bag to protect the dots and stitches. Use a delicate cycle with cold water and mild detergent.
Avoid Fabric Softeners
- Fabric softeners can leave residue, reducing the blanket’s softness and affecting the yarn texture. Opt for a vinegar rinse instead for natural softness.
Reshape While Wet
- After washing, gently squeeze out excess water without wringing. Lay the blanket flat on a clean, dry towel and reshape it to its original dimensions. Avoid hanging, as it can cause stretching.
Dry Properly
- Air drying is the safest method. Place the blanket on a flat surface, such as a drying rack or a large towel, and let it dry completely. Flip occasionally for even drying.
- Avoid direct sunlight, which can fade colors, and keep it away from high heat, which can damage fibers.
Store Carefully
- Once clean and dry, it’s a good idea to fold the blanket neatly and store it in a cool, dry place. If you’re worried about dust or moths, keep it in a breathable cotton storage bag. Adding cedar wood helps repel the pests too.
We hope you have enjoyed this beautiful granny blanket. Here are a few crochet blankets and other crochet projects to inspire you.

You can find Victoria crocheting, quilting, and creating recipes. She has cooked in restaurants for over 20 years, including many larger parties. She learned to crochet when she was just 11 years old and has been crocheting ever since; over 50 years now. Over 40 years ago, she loved her first class in sewing and continues to hone her skills in quilting. Many have enjoyed the handmade gifts over the years. In her professional career, she has worked in management in a wide variety of businesses including higher education as a dean of a division. All the while attending college part-time to achieve her doctorate in higher education with an emphasis in e-learning.
