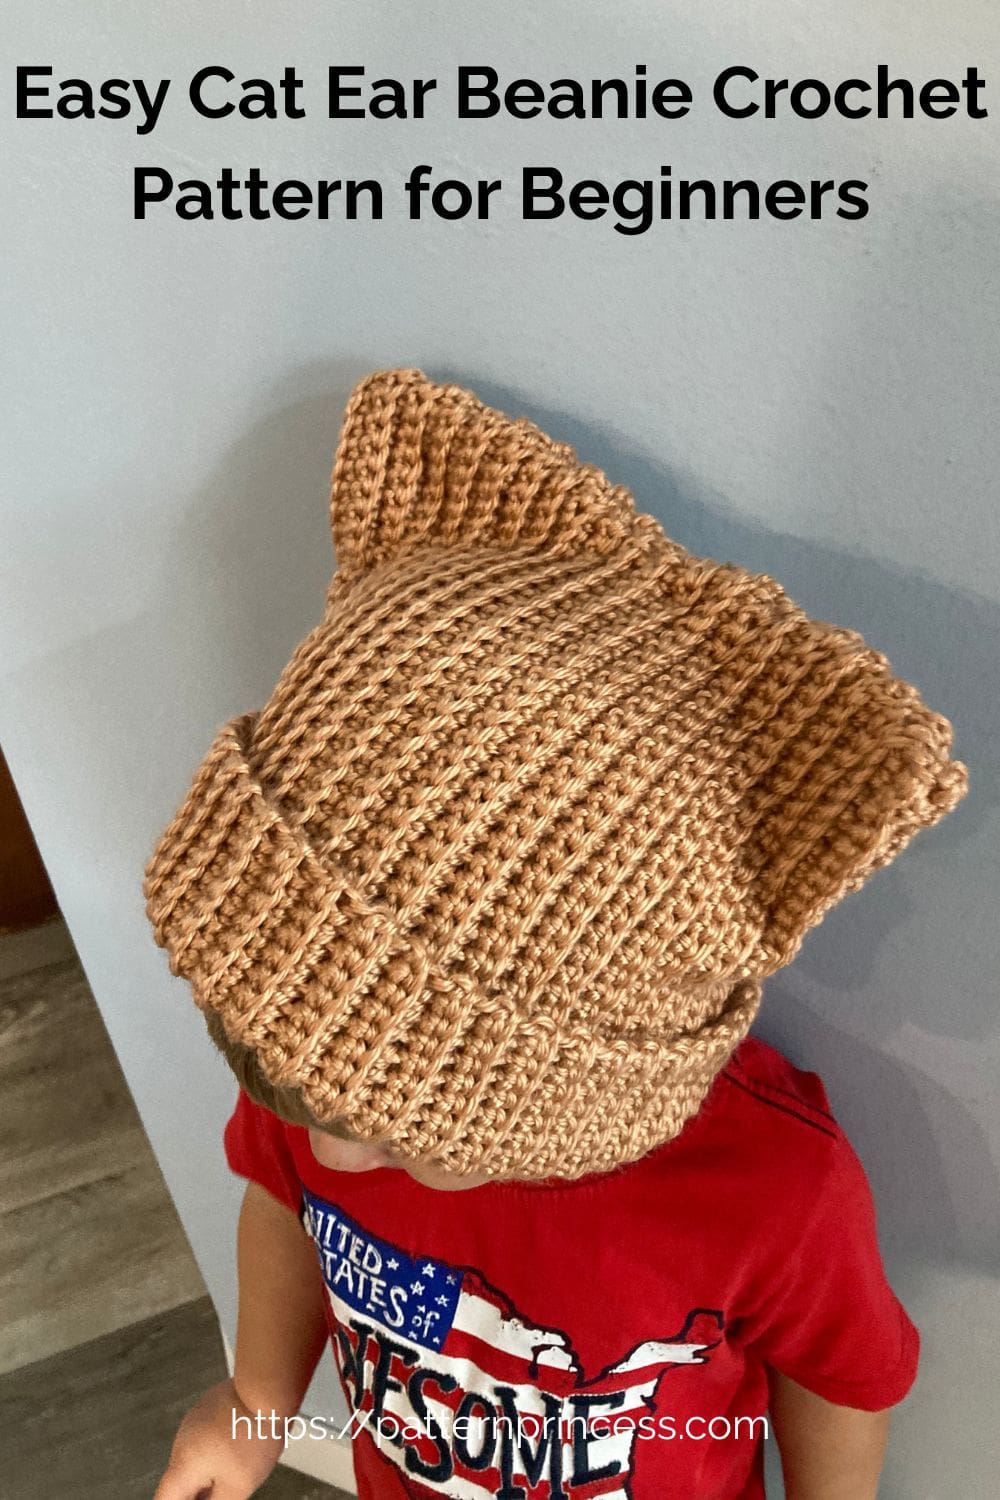
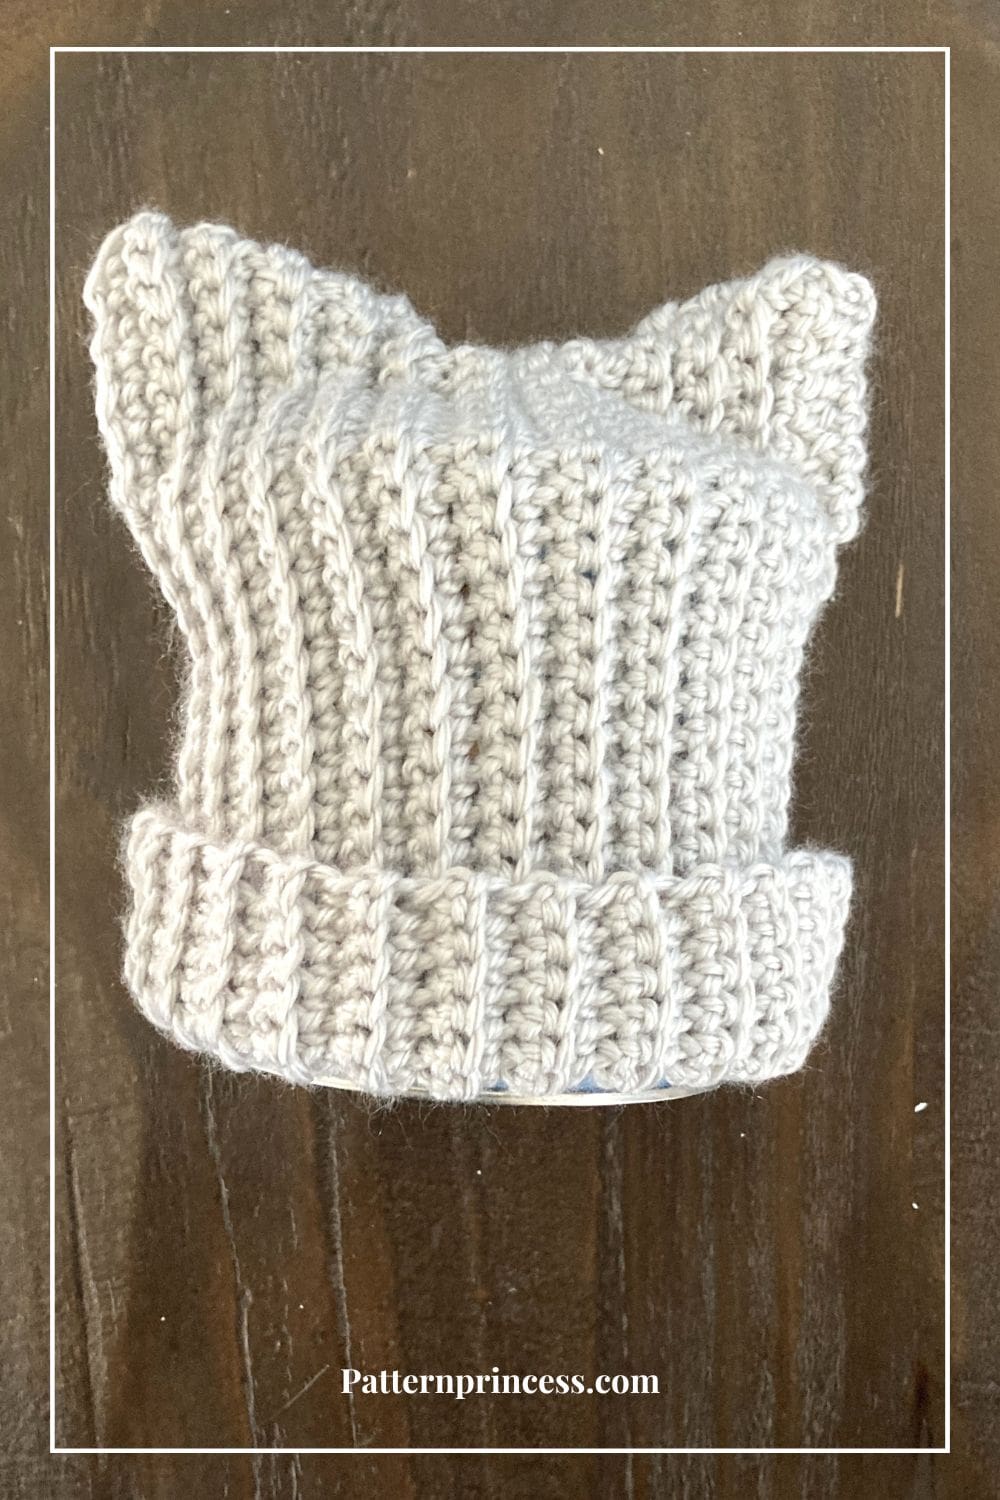
This Easy Cat Ear Beanie free crochet pattern keeps things uncomplicated: single crochet ribbing, medium-weight yarn, and a neat rectangle that turns into a hat with cute cat ears. The “ears” appear automatically when the top corners are sewn—no shaping or special stitches needed. Simple construction, satisfying finish.
This beanie is great for everyday cold-weather wear, with just enough whimsy to stand out without being a costume. It’s also a fast, reliable project for gifts or market prep.
It’s a beginner-friendly pattern with a quiet charm, perfect when you want a relaxing project that still feels fun to wear.
Medium Weight Yarn
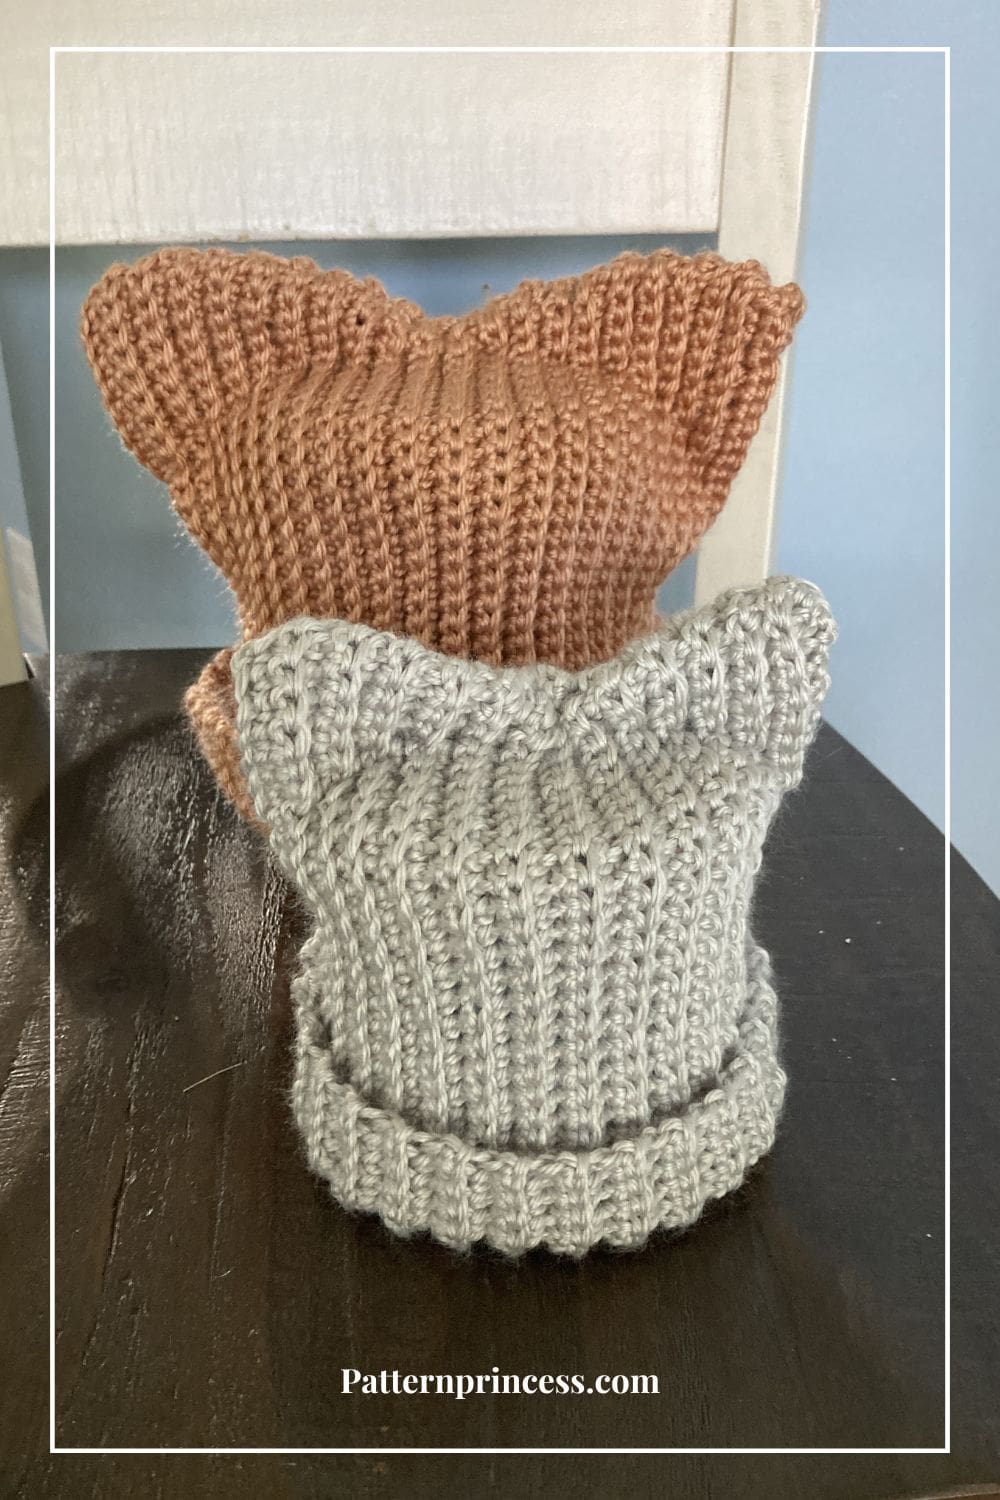
This beanie looks great in simple neutrals. I made one in a soft grey (Moonbean) and another in a warm tan (Breathe), and both give the hat a clean, classic look. But if you want something a little more playful, variegated yarns and self-striping patterns work beautifully with the single crochet ribbing.
If you’ve been waiting to use a pretty multicolor skein in your stash, this is a great project for it.
The stitch texture breaks up color changes in a really nice way, giving the beanie subtle movement without overwhelming the cat-ear shape. Whether you prefer calm solids or fun color shifts, this pattern adapts easily to whatever yarn you love.
How the Beanie Comes Together
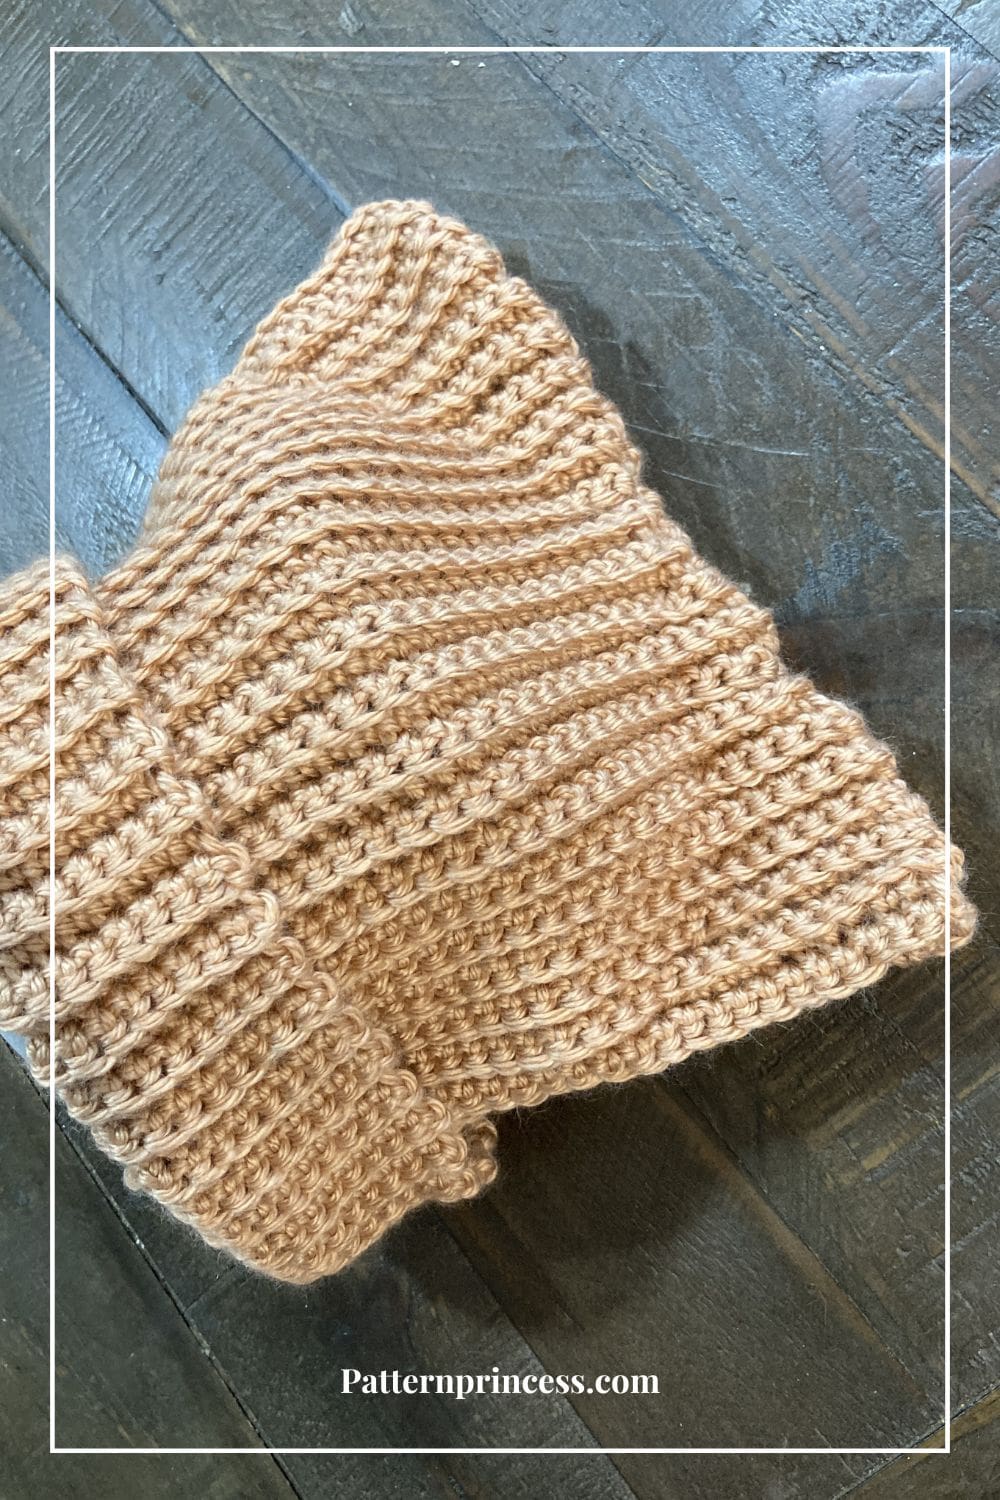
This beanie is as simple as it is clever. You start by crocheting one long rectangle in single crochet ribbing. Once your rectangle is complete, you seam the short ends to form a tube. Then, the top is stitched closed. Finally, sew a diagonal line through both layers on each corner—this is what forms the little cat-ear points.
By breaking it down this way, you can see exactly how each step contributes to the finished hat. Even if you’re new to crocheting or seaming, the process is straightforward. And the result is a playful, wearable project you’ll be proud of.
Crochet Pattern Variations
While the basic Easy Cat Ear Beanie is simple and sweet, there are plenty of ways to make it your own. The fold-up brim (included in this pattern) is cozy and versatile, but you could also experiment with a taller crown for a slouchier fit. For a matching set, try crocheting a coordinating scarf or fingerless gloves. If you want to branch out from the cat-ear look entirely, adding a pom-pom to the top is a playful alternative. These small tweaks let you personalize your project and keep the creativity flowing.
Easy Beanie with Minimal Shaping
This crochet beanie pattern is designed with beginners in mind, so don’t worry if you’re still getting comfortable with crochet. The single crochet ribbing is straightforward.
Seaming the top and corners to form the cat ears is simple. Just sew two lines through both layers and the ears are done. If you are a beginner, take it slow, enjoy the process, and remember even small imperfections give handmade items their charm!
Available in Three Sizes
This Easy Cat Ear Beanie comes in three sizes to fit a wide range of heads: Child, Teen/Small Adult, and Adult. The simple rectangle construction also makes it easy to adjust the height or width if you want a slightly slouchier style or a snugger fit.
Get Your Ad Free Printable PDF in our Etsy Shop.
Directions: Easy Cat Ear Beanie
Skill Level
Beginner. This is a crochet technique that is perfect for a beginner.
Gauge
Approximately 14 stitches and 19 rows every 4 inches.
Size
This pattern is available in three sizes
- Child = 8 X 10 inches
- Teen/Small Adult = 9 X 11 inches
- Adult = 11 X 18 inches
To change the height from the forehead to the top of the head, chain any number of stitches. To change the circumference around the head, crochet any number of rows.
Measure as You Go or Make a Gauge Swatch.
When determining how long to make your rectangle, measure from the tip of the nose to the crown of the head. Add three inches so there is enough for the brim to fold up.
Add a few more inches to the length if you want a slouchy hat.
Determine the circumference by measuring around your head.
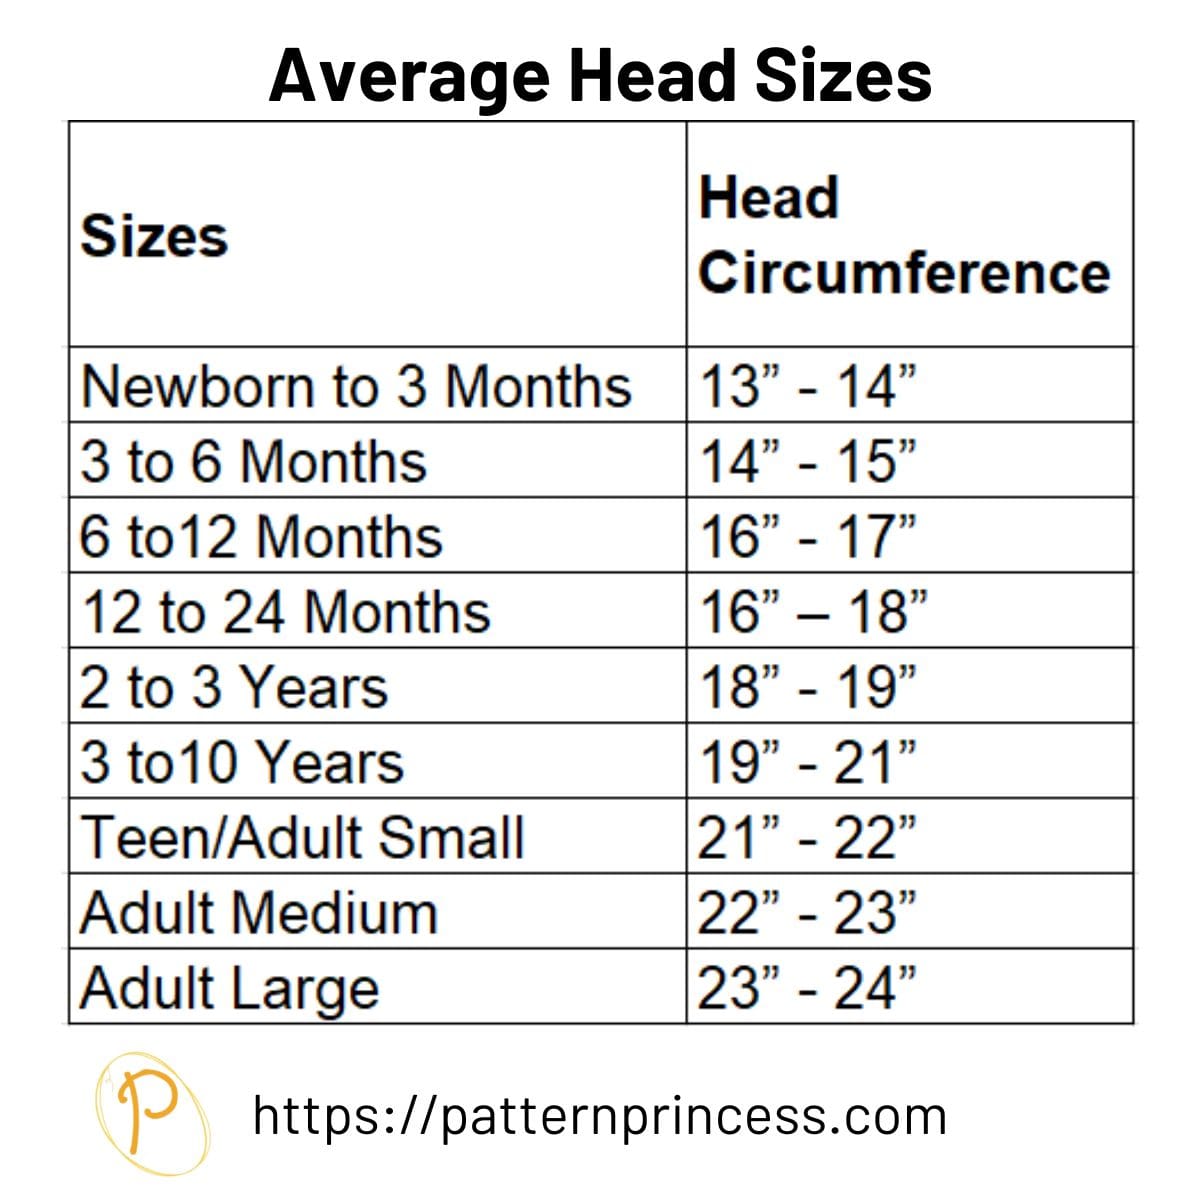
Head Sizing Guide
If you are not sure what size to make it. I have some suggested sizes to get you started.
Make this with a different yarn rather than a medium weight. Just make sure you measure your beginning chain stitches to get the length and measure the width of the rows for the length.
This crochet stitch is stretchy, and the width will stretch 2-3 inches, so make sure to make the width 2-3 inches smaller than the final circumference you are looking for.
Abbreviations
- CH = Chain
- SC BLO =Single Crochet Back Loop Only
- SL ST BLO = Slip Stitch Back Loop Only
- ST = Stitch
- STs = Stitches
Materials
Yarn. Furls Fiber Arts Wander Acrylic Yarn, #4 medium weight, 120 yards each skein.
I used the colors Moonbean and Breathe.
- Child = 8 X 10 inches, plan on approximately 120 yards.
- Teen/Small Adult = 9 X 11 inches, plan on approximately 150 yards.
- Adult = 11 X 18 inches, plan on approximately 200 yards.
If you are not able to find this yarn locally, you can purchase it online. Savings Center – Pattern Princess
Crochet Hook Size H 5.0mm
Scissors
Tapestry Needle
Tape Measure
Pattern Notes
Pattern is written in US Terms.
Keep your slip stitches and your turning chain stitch loose. If they are too tight it is hard to get the crochet hook into the loop.
While this was made with a medium worsted weight yarn, you can make this with a different yarn weight. Just use a tape measure to check your length and width as you crochet your rectangle.
Beginner Crochet Beanie Crochet Stitches
Chain Stitch (CH ST)
Begin the chain stitch by making a slip knot on the crochet hook. Leave about a 5-inch tail on the yarn. This will be weaved in later.
Next snug up the yarn loop that is on the crochet hook; while it should be firm, it should also be loose enough to slide on the hook with ease.
Keeping the loop on the hook, wrap the yarn over the crochet hook from back to front. Draw the yarn through the loop. You’ve just made a chain stitch. Continue yarning over and drawing the yarn through the loop on the hook to make more chain stitches.
HOW TO CROCHET THE CHAIN STITCH video tutorial
Single Crochet (SC)
Insert the hook, pull up a loop. Yarn over and pull through the two loops on the hook.
HOW TO CROCHET THE SINGLE CROCHET STITCH video tutorial
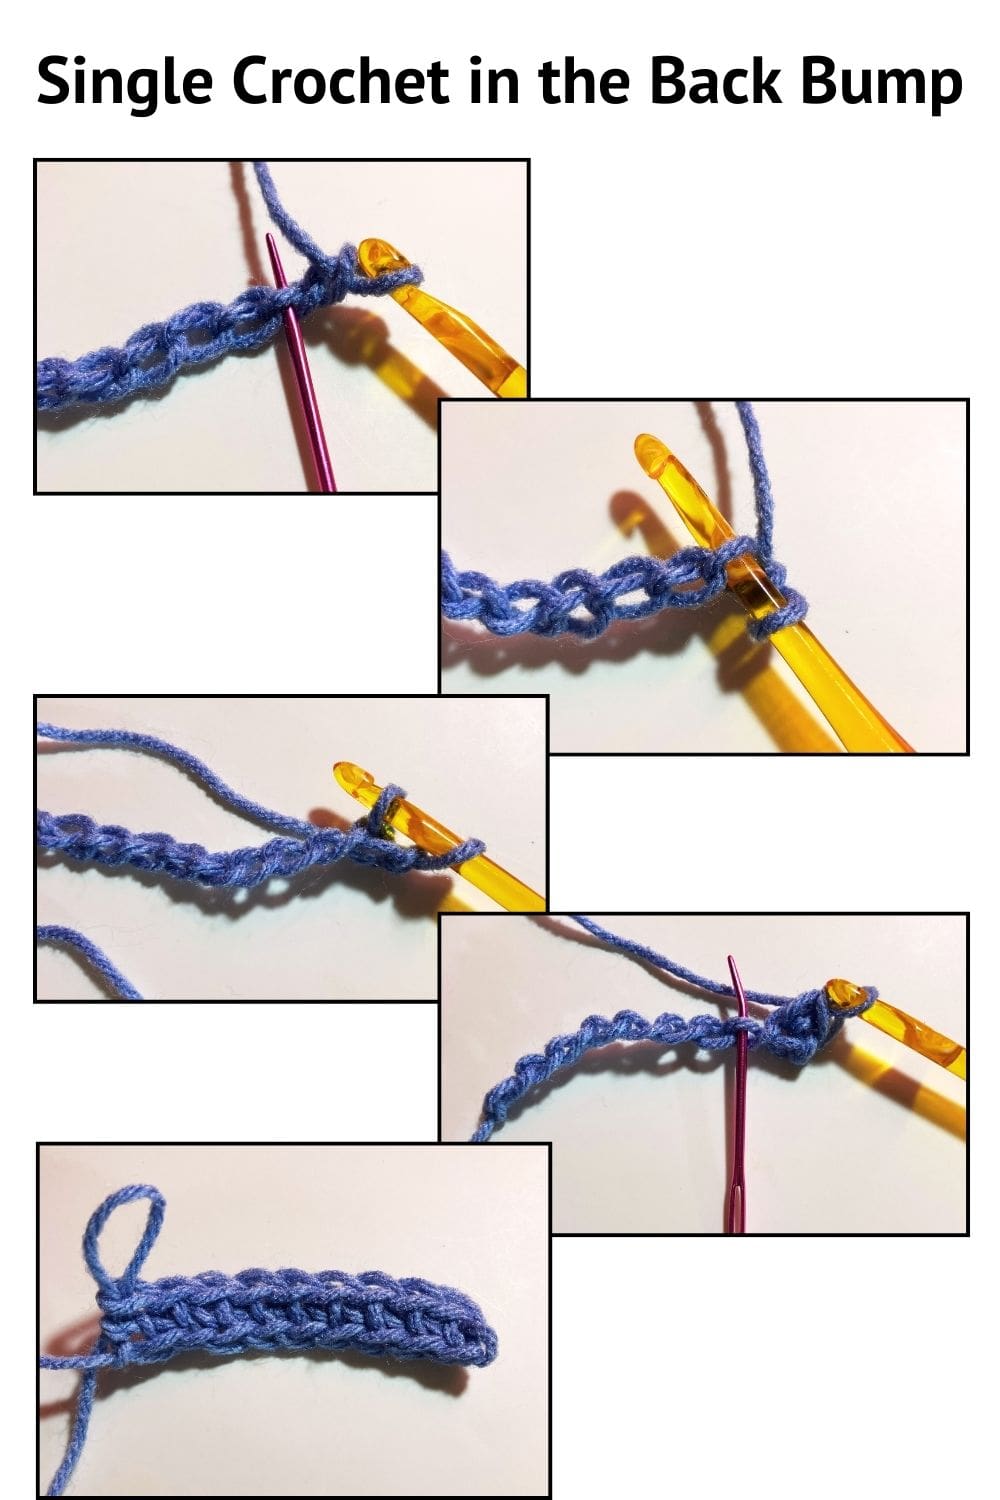
Single Crochet in the Back Bump of the Chain Stitch
Insert the hook in the back bump of the chain stitch, pull up a loop. Yarn over and pull through the two loops on the hook.
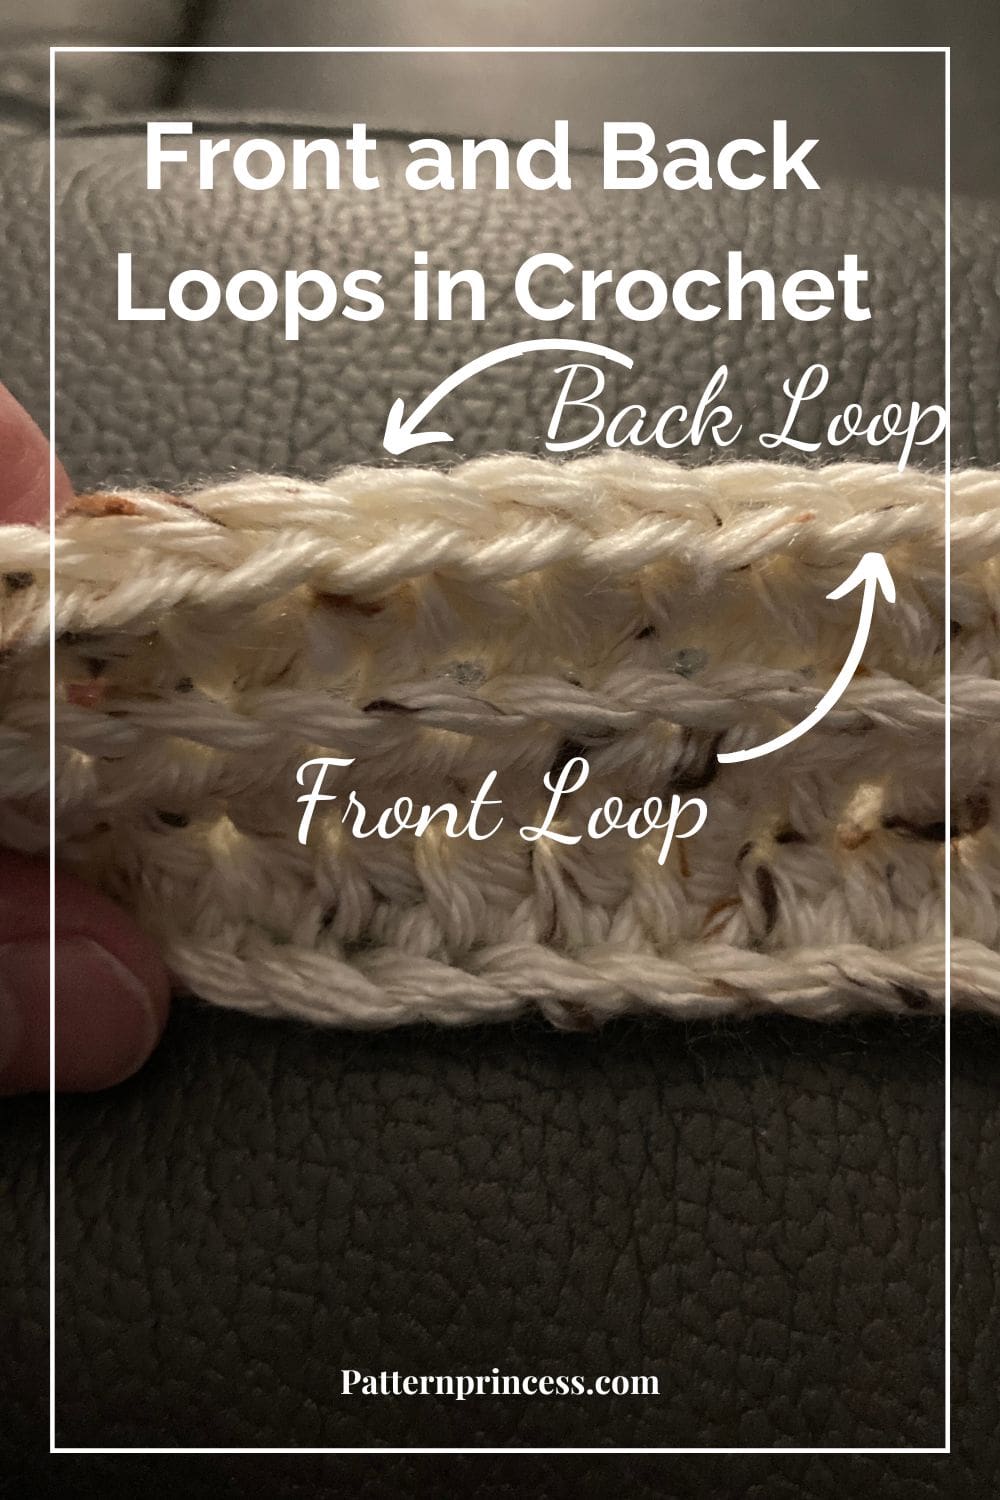
Single Crochet Back Loop Only (SC BLO)
Insert the hook in the back loop, pull up a loop. Yarn over and pull through the two loops on the hook.
Photo and Video Tutorial of Crochet Stitches
Sometimes, a closer look makes all the difference.
Video Tutorials for Left Hand and Right Hand Crocheters
Begin the Crochet Pattern
Start by making a slip knot and adding the loop on the hook.
Make a chain to the length of the hat height that you need.
Note: To change the height, work any number of chain stitches desired.
Here are some suggested beginning chains for a medium weight yarn.
- Child: Beginning chain 28 for 8 inches.
- Teen/Small Adult: Beginning chain 32 for 9 inches.
- Adult: Beginning chain 38 for 11 inches.
Row 1
Beginning in the second chain from the hook, work 1 SC in the back bump of each CH ST across. Turn
Row 2
CH 1 (Does not count as a ST). Work 1 SC in the back loop of the first ST and each ST across. Turn
Rows 3 and Beyond
Repeat row 2 until desired length.
Here are some suggested row counts for various head sizes. Make sure to use a tape measure rather than just stiches and rows for accuracy.
- Child: Work 46 rows for 10 inches.
- Teen/Small Adult: Work 54 rows for 11 inches.
- Adult: Work 84 rows for 18 inches.
When done, leave a long yarn tail.
Cat Ear Beanie Assembly
Make your last row, tie off with a long tail for sewing the sides and top of the hat together. I like to leave a long tail, about 40-50 inches.
Sewing the Side and Top Together
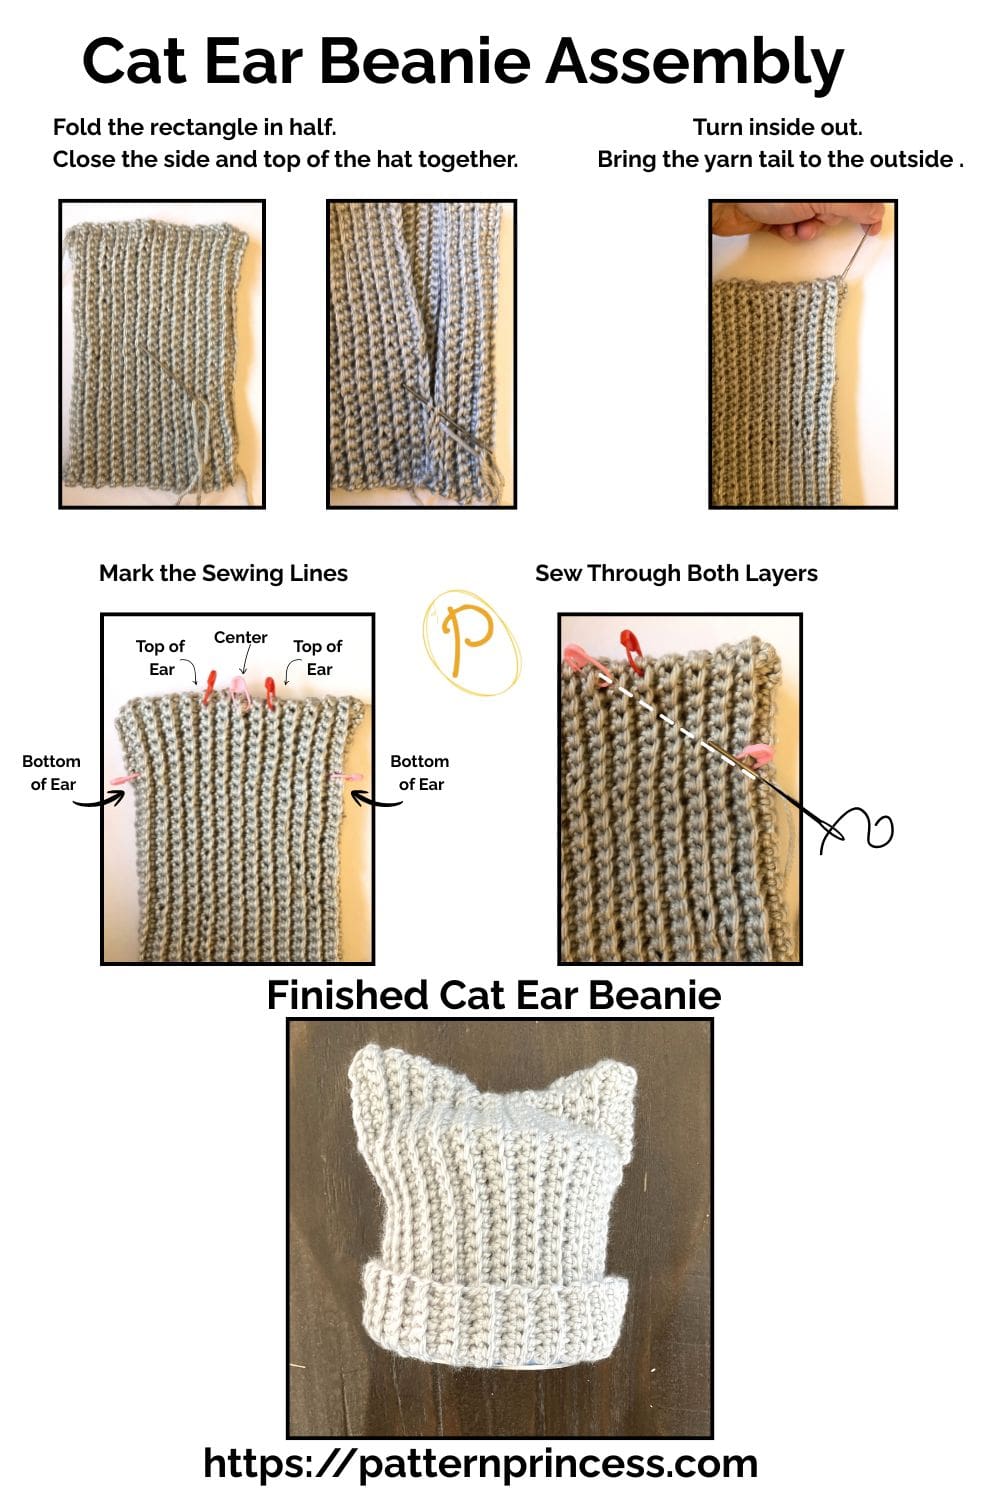
Fold the rectangle in half.
Close the side and top of the hat together.
Use the yarn needle to sew the sides of the hat together, catching both loops of the bottom of the starting chain, and the back loop of the single crochet. Continuing to weave back and forth catching the back loop on each stitch.
For the top, I used the whip stitch to close sewing through both layers.
Alternatively, you can slip stitch the two sides together and the top together.
When done, turn inside out. Bring the yarn tail to the outside of the hat in the top corner where you just ended joining.
Mark the Sewing Lines
Use a tape measure and stitch marker to mark the top center of the beanie.
Next, use stitch markers and the tape measure to mark the sewing line to make the cat ears.
Measure from the top to the bottom of the ear and mark with a stitch marker.
Child: Top of ear measure ½ inch on either side of the center line. Bottom of the ear measure 1 ½ inches from the top corner. Repeat for the other side.
Teen/Small Adult: Top of ear measure 1 inch on either side of the center line. Bottom of the ear measure 2 inches from the top corner. Repeat for the other side.
Adult: Top of ear measure 1 inch on either side of the center line. Bottom of the ear measure 3 inches from the top corner. Repeat for the other side.
Form the Cat Ear
Slip stitch down to the bottom of the ear where your yarn is. Then sew through both layers from where you marked the bottom of the ear to the top of the ear.
Slip stitch over to the top of the other ear stitch marker and sew through both layers to the bottom of the ear.
Weave in the yarn ends and snip off the excess yarn.
You’ve just finished this cute crochet beanie. Enjoy wearing or gifting your cat ear beanie.
Here are some other free crochet patterns to inspire your next project.

You can find Victoria crocheting, quilting, and creating recipes. She has cooked in restaurants for over 20 years, including many larger parties. She learned to crochet when she was just 11 years old and has been crocheting ever since; over 50 years now. Over 40 years ago, she loved her first class in sewing and continues to hone her skills in quilting. Many have enjoyed the handmade gifts over the years. In her professional career, she has worked in management in a wide variety of businesses including higher education as a dean of a division. All the while attending college part-time to achieve her doctorate in higher education with an emphasis in e-learning.