Last updated on February 24th, 2026 at 07:30 pm
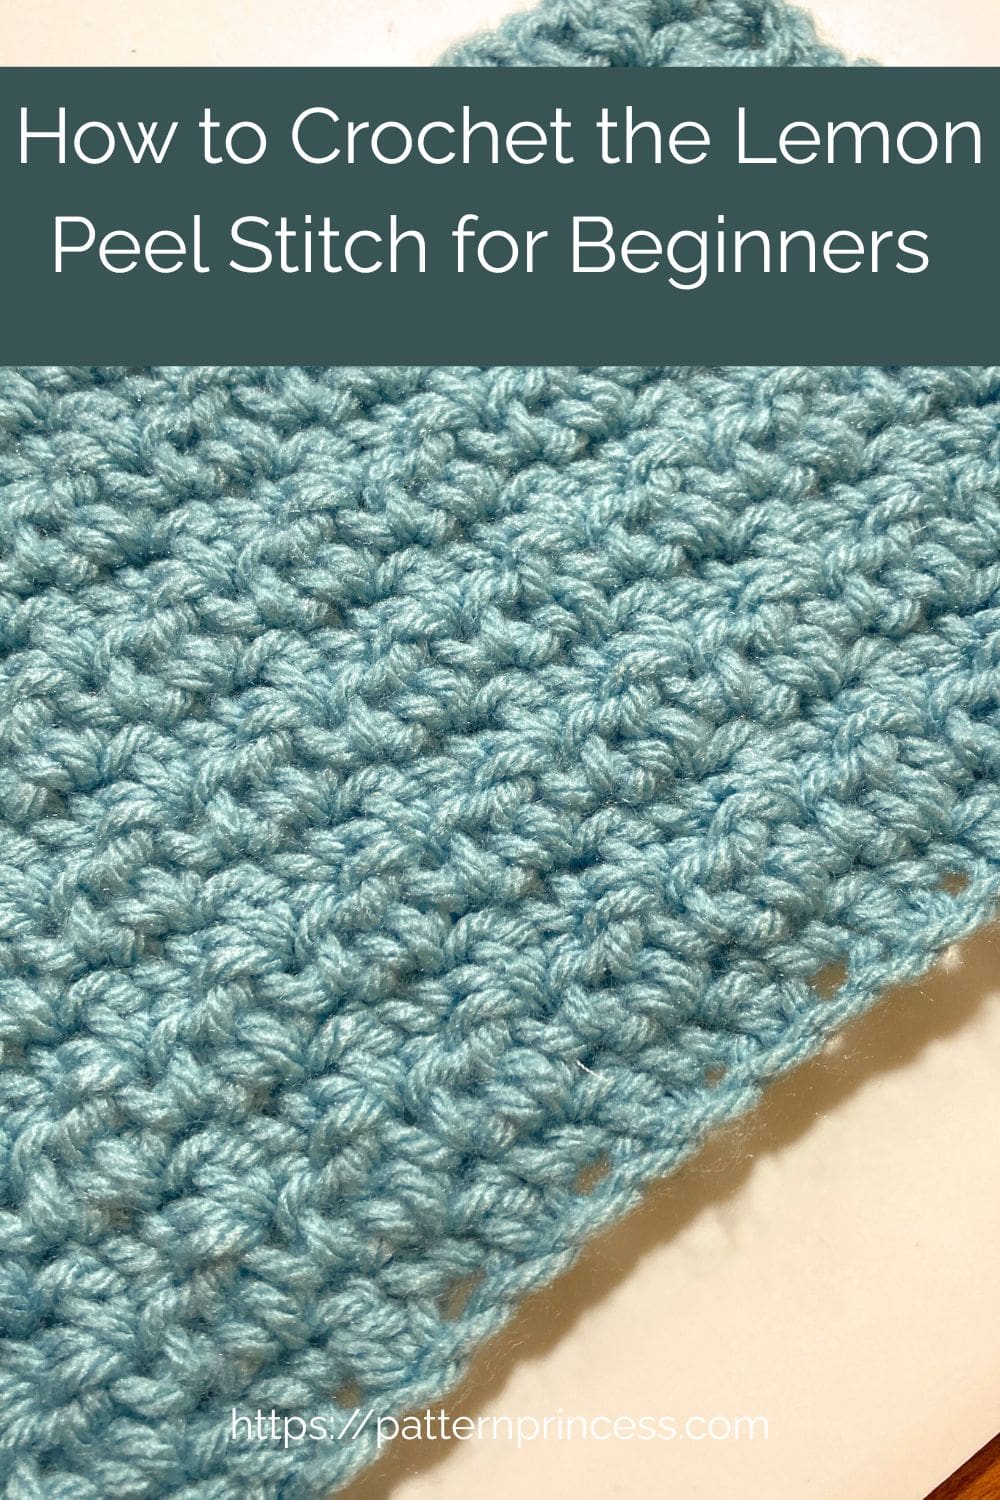
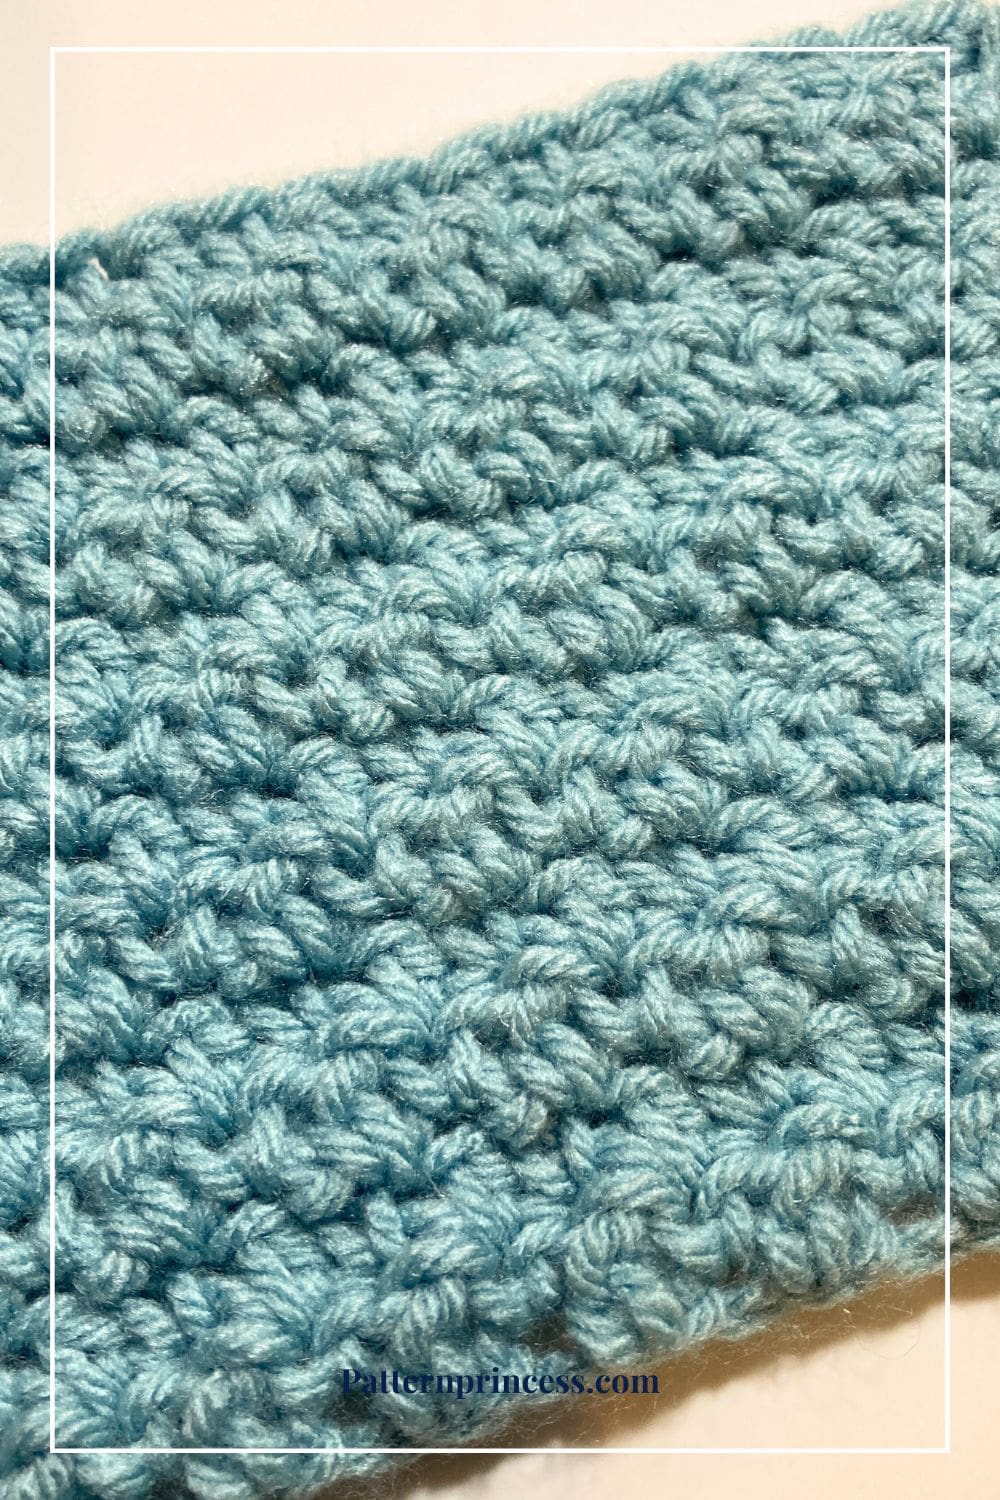
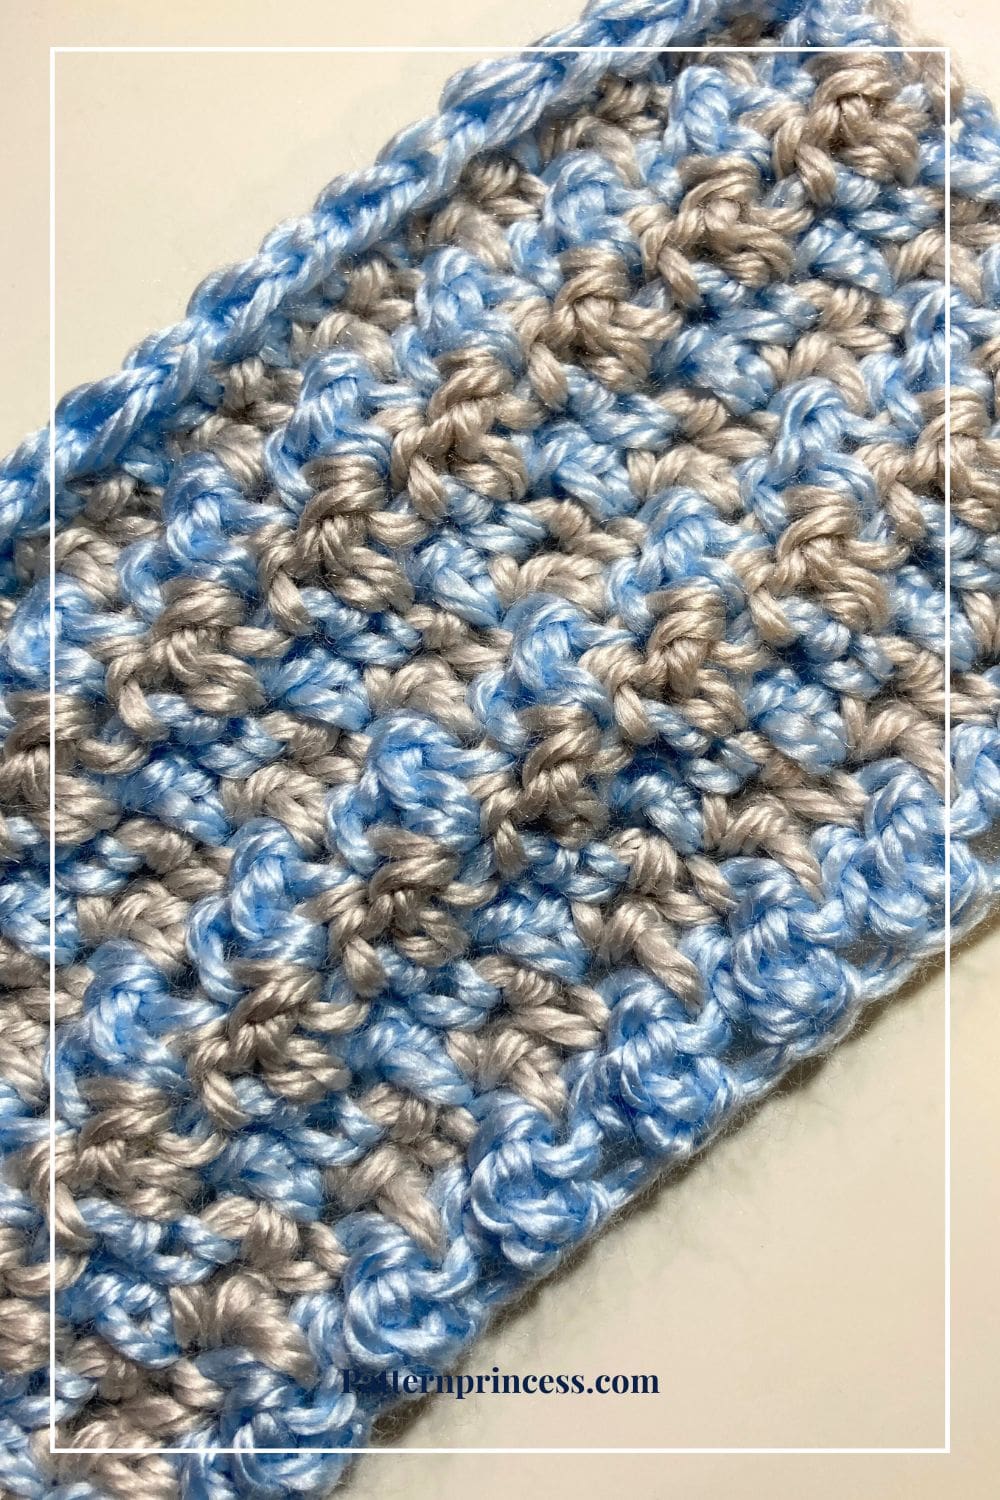
The Lemon Peel Stitch is a combination of two of the most basic crochet stitches: the single crochet and the double crochet. We simply alternate the stitches across each row; single, double, single, double, etc. It really is that easy. This stitch creates a beautiful effect, similar to a lemon rind, hence the name.
This might just become your new favorite stitch. The result is a beautiful stitch that’s beginner-friendly. It creates a wonderful texture, and works for a variety of different projects.
This easy crochet stitch is simple enough for beginners yet satisfying for seasoned makers. It’s one of those favorite crochet stitches you’ll turn to again and again.
As a lifelong crocheter with a soft spot for cozy textures and farmhouse-style projects, the lemon peel crochet stitch instantly won me over. It has that softly bumpy texture. Almost like the peel of a lemon. Which gives your fabric a natural, handcrafted charm. Perfect for baby blankets, wash cloths, hats, scarves and other crochet projects.
What Is the Lemon Peel Stitch?
The lemon peel stitch is a two-stitch repeat that alternates single crochet stitches and double crochet stitches across each row. Because these different heights of stitches are worked side-by-side, they create a subtle, lemon peel-like texture with a soft, slightly nubby surface.
Why You’ll Love This Stitch
- Beginner-friendly. If you can work single crochet and double crochet stitches, you’ve already mastered the hard part.
- Works up quickly. A great choice for blankets, dishcloths, and other fast crochet projects.
- Dense fabric. Perfect for cotton yarn when making farmhouse-style wash cloths, trivets, or spa sets.
- Beautiful texture. The alternating height creates a naturally beautiful texture without complicated shaping or counting.
Solid, Variegated, or Striped Yarn
One of the best things about the lemon peel stitch is that it looks beautiful with almost any yarn style. But depending on what you choose—solid, variegated, or multiple colors—you’ll get a slightly different effect in your finished crochet projects.
Solid Color Yarn
If you want the beautiful texture of the lemon peel stitch to be the main focus, solid colors are your bestchoice.
Solid yarns make the slightly bumpy texture stand out because there are no color changes distracting the eye from the alternating single crochet stitches and double crochet stitches.
Variegated Yarn
Variegated yarns work surprisingly well with the lemon peel stitch, because the soft texture pairs nicely with gradual or bold color changes. However, the effect depends on the type of variegation.
Long color changes (ombre / self-striping)
- Create natural stripes
- Show off both the color and the texture
Short color changes (speckled / confetti / quick shifts)
- Add fun visual interest
- Slightly disguise the texture
If your variegated yarn has extremely quick color changes, the texture may be a bit less pronounced—but still lovely.
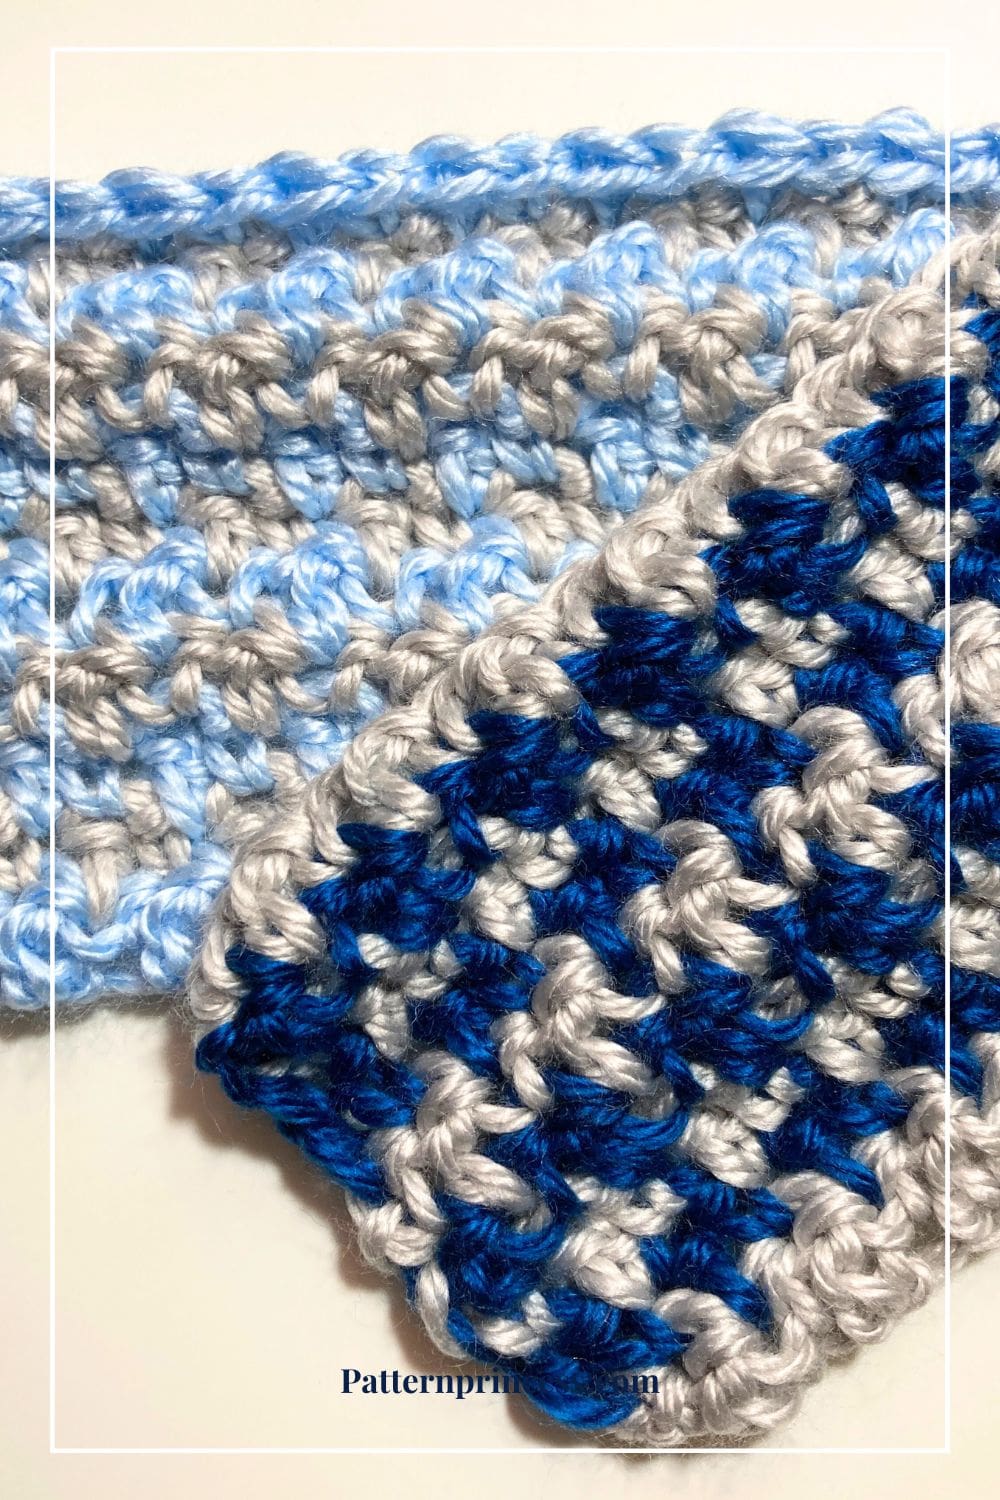
Using Two or More Colors
If you want a truly standout project, switching colors is a great way to highlight the row repeat of the lemon peel stitch.
Here are a few color strategies that work especially well.
Stripe Every Row
Change colors at the beginning of each row to create a tight stripe pattern. This works beautifully because the alternating stitch pattern stays consistent, and you’ll get clean, uniform rows.
Wide Color Blocks
Switch colors every 4–6 rows. This keeps the texture consistent while giving your project modern, bold sections of color.
The lemon peel stitch is very forgiving the alternating stitches make almost any yarn look intentional and well-designed.
What Can You Make with the Lemon Peel Stitch?
This great way to practice basic stitches works beautifully for:
- Baby blankets
- Wash cloths and spa sets
- Table runners
- Scarves
- Hot pads
- Dish towels
- Placemats
- Bags
- Rustic home décor
The wonderful texture and simplicity make it a natural fit for farmhouse-style makes.
For beginners and most projects, worsted weight cotton yarn or worsted weight acrylic yarn are the top choices. But this easy stitch pattern works well with any yarn from lightweight to chunky yarn.
Get your ad free printable PDF in our Etsy shop.
Directions: How to Crochet the Lemon Peel Stitch for Beginners
Skill Level
Beginner Friendly
Gauge
The gauge will depend on the yarn weight and crochet hook used.
Size
This sample pattern is approximately 4 inches wide.
To adjust the width, simply adjust your chains by any odd number of chains. To make the project longer or shorter, simply crochet more or fewer rows.
Abbreviations
- CH = Chain
- DC = Double Crochet
- SC = Single Crochet
- SK = Skip
- SP = Space
- ST = Stitch
- STs = Stitches
- YO = Yarn Over
- [ ] = Repeat Between
Materials
Yarn. I used a number 4 medium weight yarn for my sample. It works well with this pattern.
Crochet Hook. Choose a hook size that matches your yarn weight.
I used a size I 5.5mm crochet hook along with a medium weight yarn for my sample.
Note: You can use any weight yarn and the recommended hook size that can be found on the yarn band packaging.
Scissors
Tapestry Needle
Tape Measure
Stitch Markers
Pattern Notes
Written in US Terms.
Chain 1 at the beginning of the row is the turning chain and does not count as a stitch.
Helpful Tips for Beginners
✔Alternating Stitches
You’ll always be alternating single crochet and double crochet stitches throughout this pattern.
Here’s the simple rule of thumb:
- If the stitch below is a double crochet, work a single crochet into it.
- If the stitch below is a single crochet, work a double crochet into it.
This alternating pattern gives you the signature lemon peel-like texture.
✔ Use a Stitch Marker
Because this stitch uses alternating heights, the last stitch can blend in. Place a stitch marker in the first stitch of the row. This prevents accidental increases or decreases that throw off your count.
✔ Counting Made Easy
If you start with an odd number of chains, you’ll end up with an even number of stitches, which ensure the alternating pattern lands correctly on the next row.
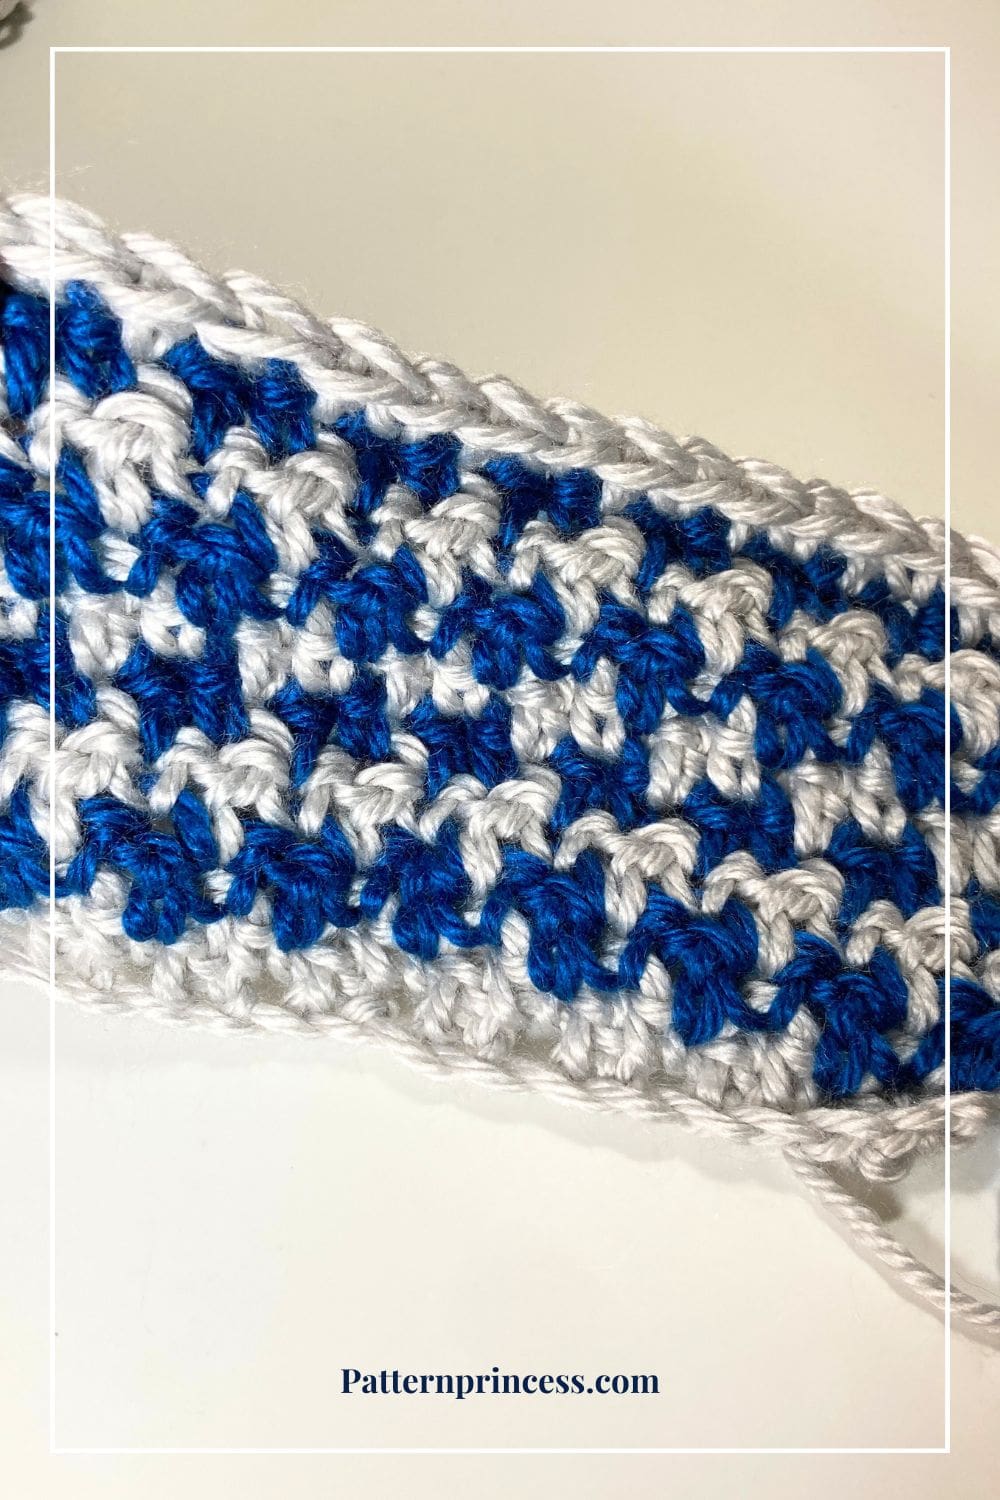
Changing Yarn Color Ideas
The crochet pattern can be worked using a solid color yarn. However, you can create a gorgeous stripe pattern using different colors.
Changing Yarn Color Every Other Row. You can change yarn colors every other row. There are two ways to do this.
- Carrying the yarn through the row. Continue repeating row 2 and carry the unused yarn color through your work. Give it a tug every few stitches to make sure it does pucker. Don’t pull too tight.
- Carry the yarn up the side. Repeat rows 3-6 alternating the yarn color and not carrying it through your work. This is my preferred method.
Make sure to watch the video tutorials to see how to crochet the lemon peel stitch and how to change yarn color.
Wide Color Blocks
Switch colors every 4–6 rows.
This keeps the texture consistent while giving your project modern, bold sections of color.
Crochet Stitches Used
Chain Stitch (CH ST)
Begin the chain stitch by making a slip knot on the crochet hook. Leave about a 5-inch tail on the yarn. This will be weaved in later.
Next snug up the yarn loop that is on the crochet hook; while it should be firm, it should also be loose enough to slide on the hook with ease.
Keeping the loop on the hook, insert the hook in the stitch, wrap the yarn over the crochet hook from back to front. Draw the yarn through the loop. (The first chain stitch is complete).
HOW TO CROCHET THE CHAIN STITCH video tutorial
Double Crochet (DC)
Yarn over, insert the hook through both loops and pull up a loop. Next, yarn over and pull through two loops on the hook. Lastly, yarn over again and pull through the last two loops on the hook.
HOW TO CROCHET THE DOUBLE CROCHET STITCH video tutorial
Single Crochet (SC)
Insert the hook, pull up a loop. Yarn over and pull through the two loops on the hook.
HOW TO CROCHET THE SINGLE CROCHET STITCH video tutorial
Crochet the Lemon Peel Stitch
Method 1
- This method works when using a solid color.
- This method works for changing the yarn color and carrying the yarn through the rows work.
Begin Pattern
Crochet a Foundation Row
Begin the chain stitch by making a slip knot on the crochet hook.
Chain any odd number of chain stitches.
For the sample I chained 21.
Row 1
SC in 2nd CH from the hook. DC in next CH. [SC in the next ST, DC in the next ST]. Repeat across between [ ]. End with a DC in the last St. Turn (You’ll have an even number of stitches.)
Row 2
CH 1 (Turning Chain Doesn’t Count as a Stitch). SC in the first DC ST, DC in the SC ST. [SC in the next ST, DC in the next ST]. Repeat across between [ ]. End with a DC in the last St. Turn
Rows 3 and Beyond
Repeat Row 2 until your swatch reaches your desired height.
Finishing
After you work the last SC ST, cut off the yarn leaving about a 12-inch long tail. Pull the yarn tail through the last loop on the hook.
Thread the yarn needle with the yarn tails and weave them through the crochet stitches back and forth until the yarn feels secure. Snip off the excess yarn.
That’s it. If you want to carry the yarn up the side, continue reading.
Method 2
- Changing Yarn Color Every Other Row
- Carrying the Yarn Up the Side
Crocheting two-color alternating rows with the lemon peel stitch looks beautiful and modern, and the best part is. You don’t have to cut the yarn at the end of each row. Instead, you can carry the yarn up the side of your work rather than through it. This keeps everything neat and saves a ton of time.
Here’s exactly how to do it:
Crochet a Foundation Row
Begin the chain stitch by making a slip knot on the crochet hook.
Starting with yarn color A
Chain any odd number of chain stitches.
For the sample I chained 21.
Row 1
SC in 2nd CH from the hook. DC in next CH. [SC in the next ST, DC in the next ST]. Repeat across between [ ]. End with a DC in the last St. Turn (You’ll have an even number of stitches.)
Do not cut your yarn. Add a stitch marker.
Row 2
Change to yarn color B. Pull the new yarn color through the loop on the hook and snug up yarn color A. Continue with the pattern using yarn color B.
CH 1 (Turning Chain Doesn’t Count as a Stitch). SC in the first DC ST, DC in the SC ST. [SC in the next ST, DC in the next ST]. Repeat across between [ ]. End with a DC in the last St.
Add a stitch marker.
Row 3
Change back to yarn color A
Now you’ll see the unused color strand (Color A) waiting at the other end.
To reuse it.
- Insert your hook into the first stitch.
- Gently pull up Color A and yarn over with it to start the row.
The unused yarn will be carried neatly up the side.
CH 1 (Doesn’t Count as a ST). DC in the first SC ST, SC in the DC ST. [DC in the next ST, SC in the next ST]. Repeat across between [ ]. End with a SC in the last St. Turn
Row 4
Change back to yarn color B
CH 1 (Doesn’t Count as a ST). DC in the first SC ST, SC in the DC ST. [DC in the next ST, SC in the next ST]. Repeat across between [ ]. End with a SC in the last St.
Row 5
Change back to yarn color A
CH 1 (Doesn’t Count as a ST). SC in the first DC ST, DC in the SC ST. [SC in the next ST, DC in the next ST]. Repeat across between [ ]. End with a DC in the last St. Turn
Row 6
Change back to yarn color B
CH 1 (Doesn’t Count as a ST). SC in the first DC ST, DC in the SC ST. [SC in the next ST, DC in the next ST]. Repeat across between [ ]. End with a DC in the last St.
Rows 7 and Beyond
Continue repeating rows 3-6 until desired length.
Finishing
After you work the last SC ST, cut off the yarn leaving about a 12-inch long tail. Pull the yarn tail through the last loop on the hook.
Thread the yarn needle with the yarn tails and weave them through the crochet stitches back and forth until the yarn feels secure. Snip off the excess yarn.
Video Tutorials on our You Tube Channel
How to Crochet the Lemon Peel Stitch right hand
How to Crochet the Lemon Peel Stitch left hand
Will the Carried Yarn Show?
Not usually. The lemon peel stitch creates a dense fabric, so the carried yarn hides well.
If you’re using very contrasting colors (like black and white), you may see a tiny bit of color along the edge. This is easy to hide later with a simple crochet border.
The lemon peel is a beautiful stitch with minimal counting and maximum charm. It offers endless possibilities and a soothing rhythm.

You can find Victoria crocheting, quilting, and creating recipes. She has cooked in restaurants for over 20 years, including many larger parties. She learned to crochet when she was just 11 years old and has been crocheting ever since; over 50 years now. Over 40 years ago, she loved her first class in sewing and continues to hone her skills in quilting. Many have enjoyed the handmade gifts over the years. In her professional career, she has worked in management in a wide variety of businesses including higher education as a dean of a division. All the while attending college part-time to achieve her doctorate in higher education with an emphasis in e-learning.