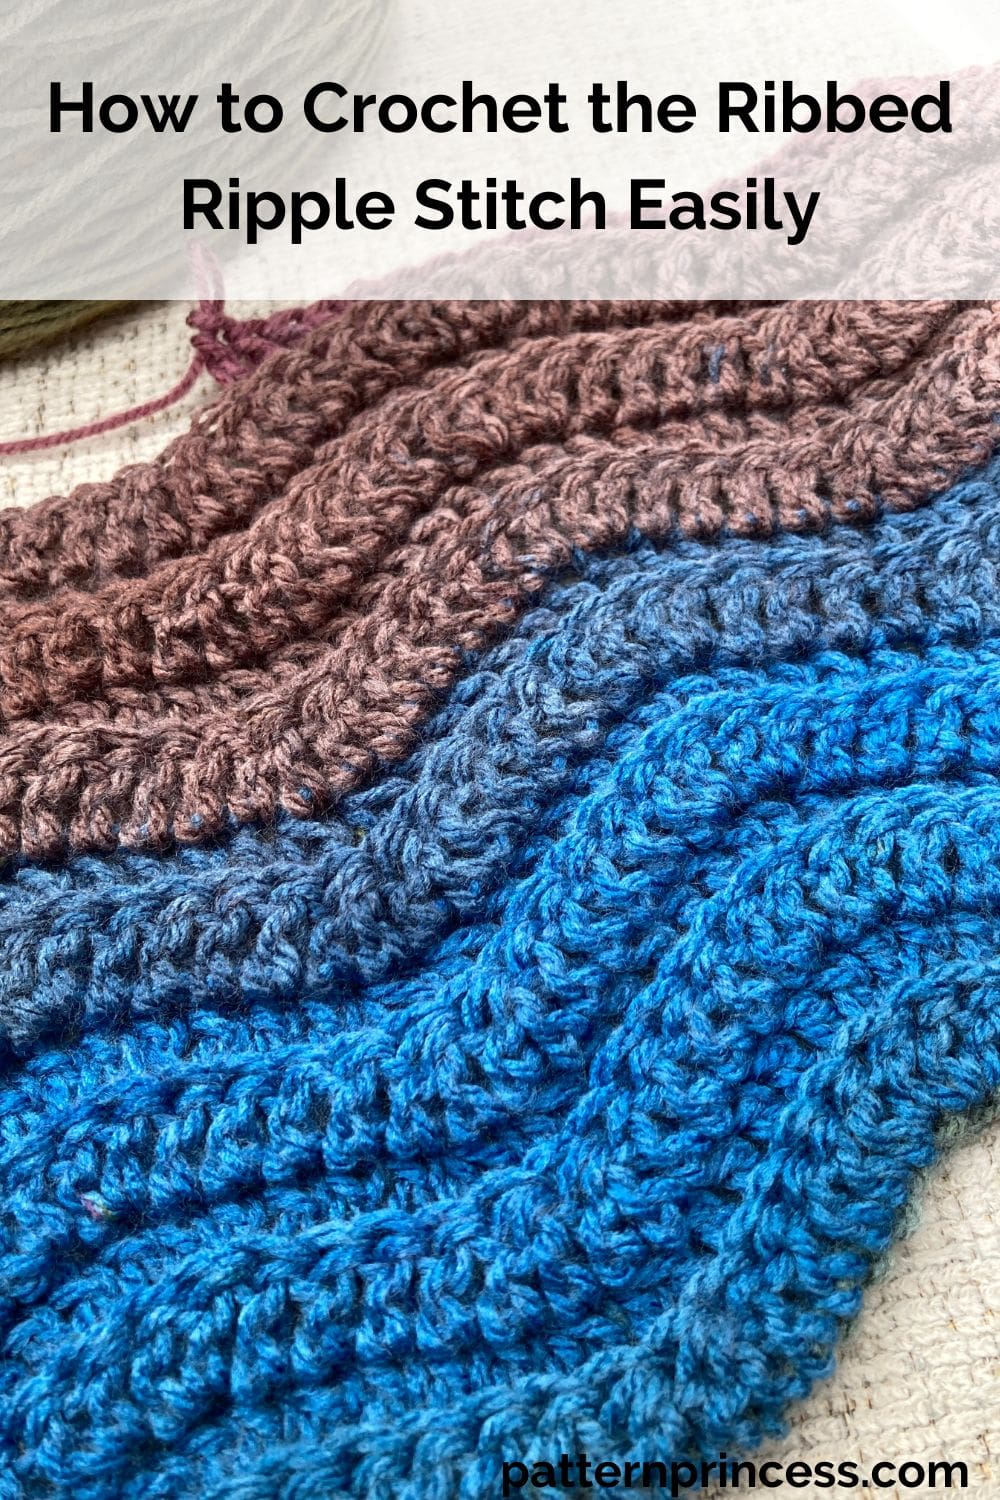
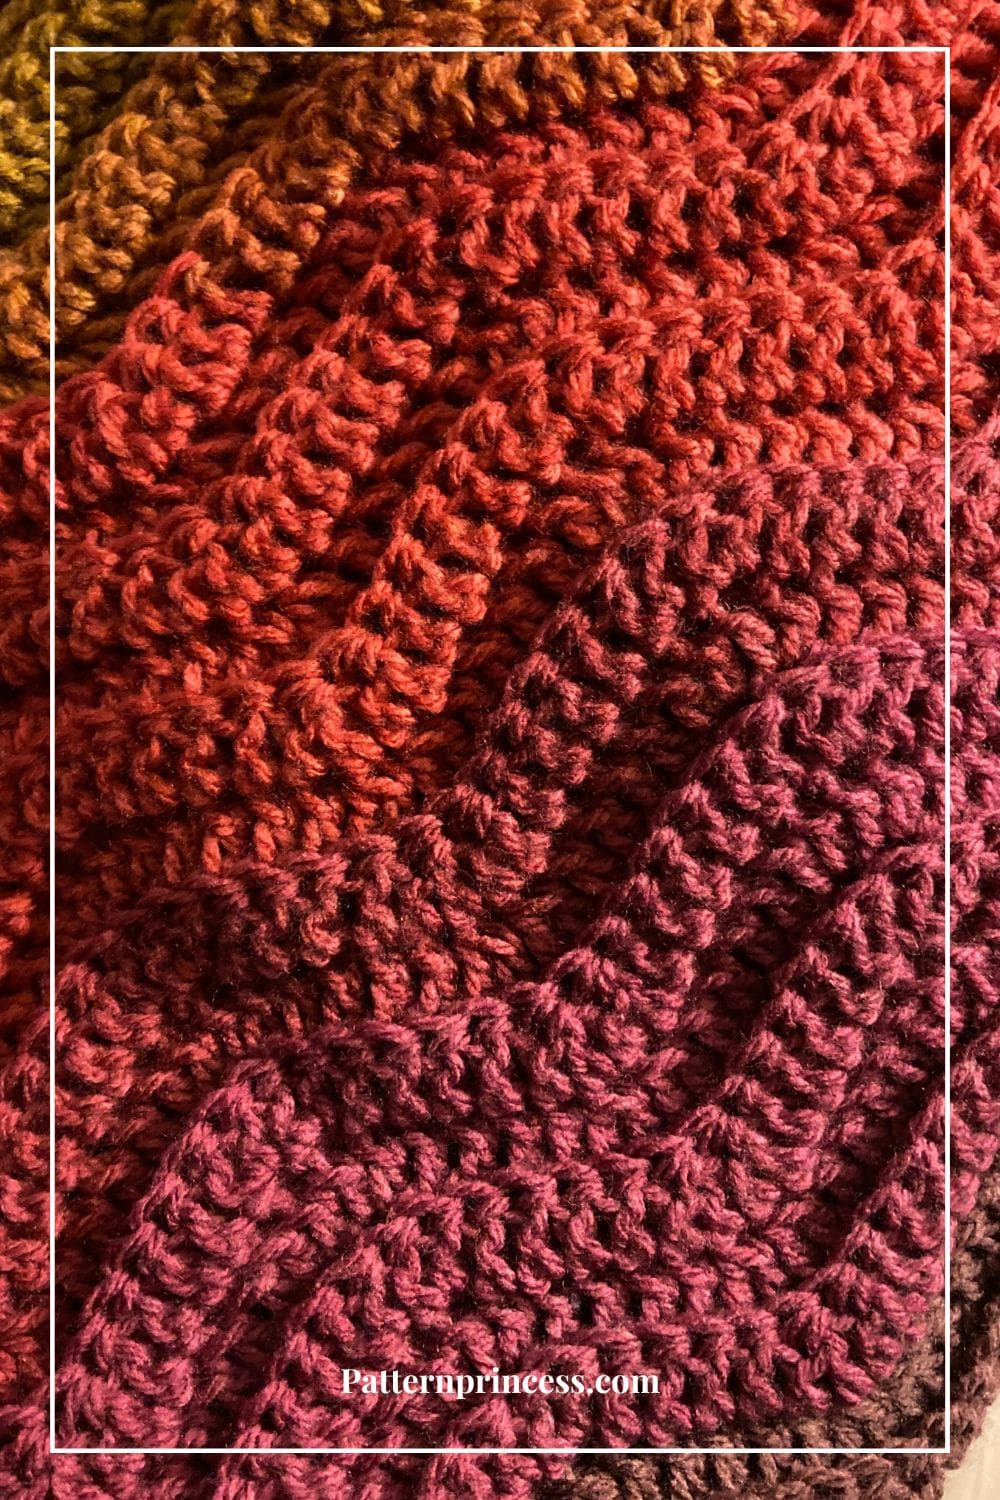
The Ribbed Ripple Stitch combines beautiful texture with an eye-catching wave pattern. This pattern creates a soft, raised effect, adding depth and dimension to blankets, scarves, and more. Even though it looks intricate, it’s surprisingly simple to crochet once you get the hang of it.
What makes this unique is the use of the Back Loop Only (BLO) technique, which enhances the classic ripple stitch with added depth and texture. This subtle yet eye-catching detail gives the wave a beautifully defined look that appears intricate but is surprisingly easy to create.
As you work through the pattern, the gentle ripples take shape, creating a rhythmic flow that makes this project both satisfying and soothing to crochet. Whether you’re making a cozy blanket, a stylish scarf, or even a textured afghan, this stitch adds a attractive touch without being overly complicated.
Other Names for the Ribbed Ripple Stitch.
The Ribbed Ripple Stitch is known by several other names, depending on the crochet community and variations of the pattern. Here are some other names you may have heard of.
- Classic Ripple Stitch. A common term for any ripple-style pattern.
- Chevron Stitch. Refers to the chevron-like peaks and valleys.
- Back Loop Ripple Stitch. Highlights the use of back loop only (BLO) technique.
- Textured Ripple Stitch. Emphasizes the raised texture from working in the BLO.
- Ridged Ripple Stitch. Another name referencing the ribbed texture.
- Wave Stitch. Sometimes used for ripple patterns that have a softer, wavy look.
- Zigzag Stitch. A broad term for ripple patterns with a sharp, angular appearance.
- Wavy Ribbing Stitch. A textured crochet stitch that creates a fabric with gentle waves and raised ridges.
Easy One Row Repeat
At first glance, the Ribbed Ripple Stitch might look intricate, but don’t worry, it’s really quite easy. With a simple combination of basic crochet stitches and a rhythmic pattern of increases and decreases, you’ll be able to create gorgeous rippling textures with ease. Even if you’re a confident beginner. If you can work the double crochet stitch, you can master this pattern. I’ll guide you through each step so you can learn this stitch in no time.
I’ll walk you through everything you need to know: the materials, stitch abbreviations, and step-by-step instructions.
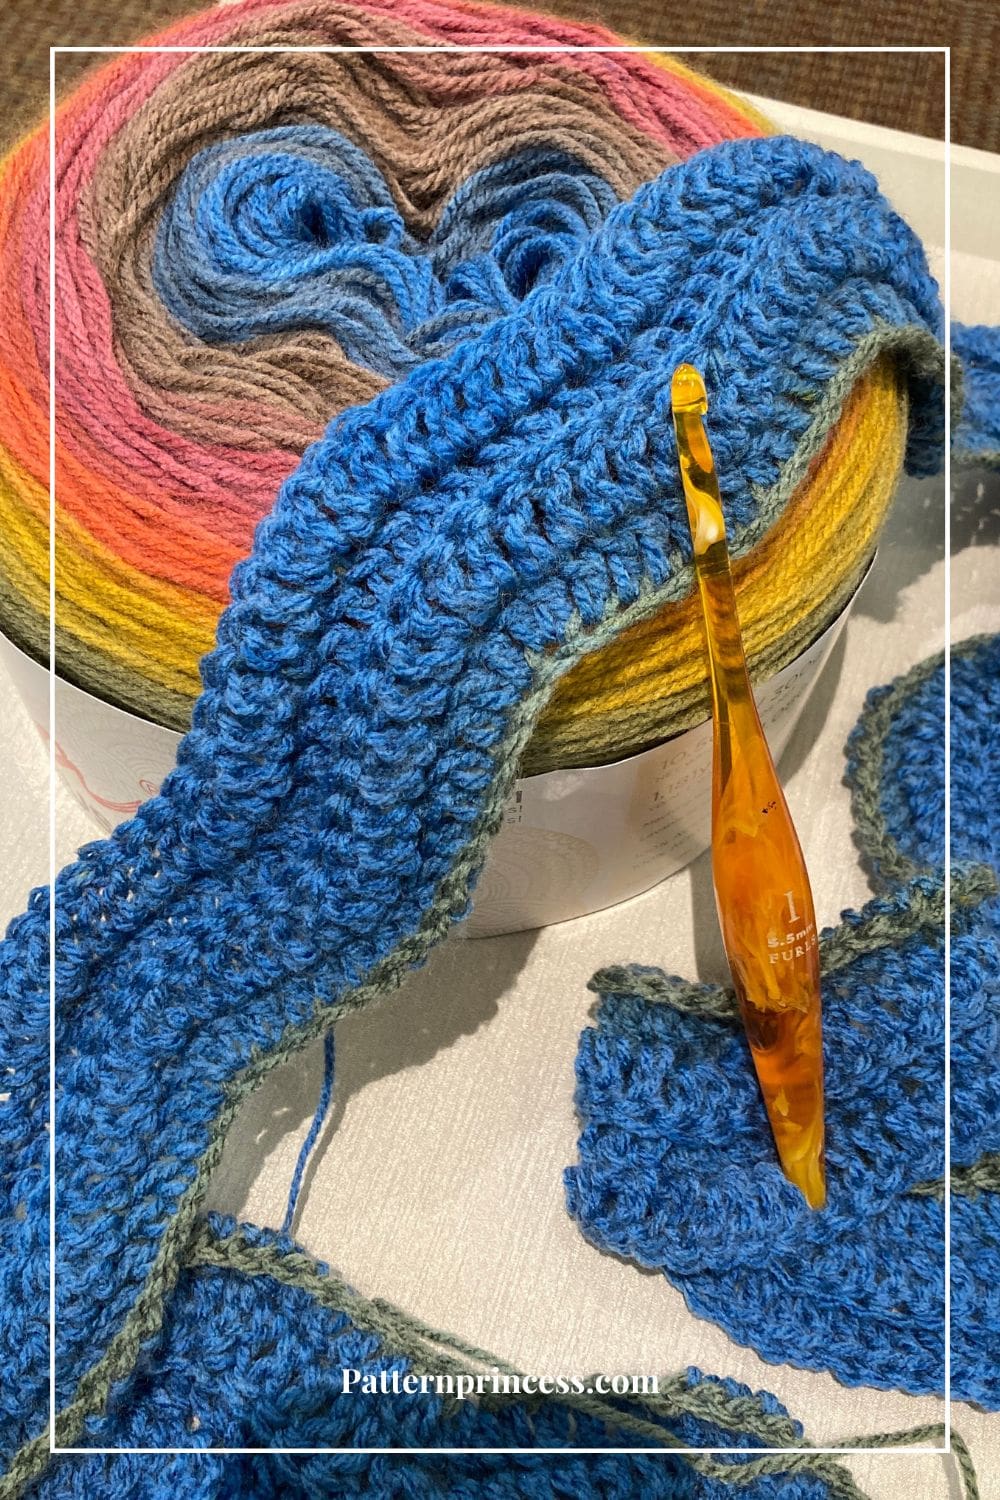
Yarn Options for This Pattern
For this crochet pattern you’ll want a yarn that provides good stitch definition to highlight the ribbing. Here are some excellent choices.
This wavy pattern looks fantastic with a variety of yarn weights and different colors. It works beautifully with a worsted weight yarn, creating a cozy and textured fabric that’s perfect for blankets and afghans.
If you’re looking for something more delicate, a lighter-weight cotton yarn gives a breathable, airy feel. Great for summer throws or baby blankets. On the other hand, using a chunkier yarn results in a warm, plush ripple pattern with bold definition.
This stitch pattern also shines in a solid color, highlighting the ribbed texture. But it looks just as stunning in striped yarn or self-striping cake yarns, which add effortless color changes without the need to weave in extra ends. Whether you go for classic hues or a vibrant gradient effect, this stitch adapts beautifully to any style.
Easy Crochet Stitch Pattern
The Ribbed Ripple Stitch is a fun and rewarding technique that works well for various crochet patterns. Whether you’re making a baby blanket, a crochet ripple blanket, or a cotton afghan. This is a great pattern for adding texture and elegance to any project.
You can find another ripple stitch tutorial that has just 3 double crochet stitches between the peaks and valleys. Additionally, the stitches are worked through both loops rather than the back loop. The Double Crochet Ripple Stitch Pattern.
Directions: How to Crochet the Ribbed Ripple Stitch Easily
Skill Level
Confident Beginner. It is an easy pattern if you can work the Double Crochet stitch.
Size
The size of your project can easily be adjusted using multiples of 14 plus 3. That means your initial chain should be divisible by 14. Then add three more chain stitches.
Gauge
The gauge will depend on what yarn and crochet hook you use for this pattern.
Materials
Yarn. For the sample, I used a number 4, medium weight yarn. However, this stitch would work nicely with any yarn weight as noted above.
Crochet Hook sized for the yarn
Tapestry Needle
Scissors
Abbreviations
- BLO – Back Loop Only
- CH = Chain
- DC = Double Crochet
- DC2TOG = Double Crochet Two Together
- SK = Skip
- SP = Space
- ST = Stitch
- STs = Stitches
- [ ] = Repeat Between
Crochet Pattern Notes
Turn at the end of each row.
The chain three at the beginning of each row counts as a double crochet.
Repeat row 2 throughout the pattern.
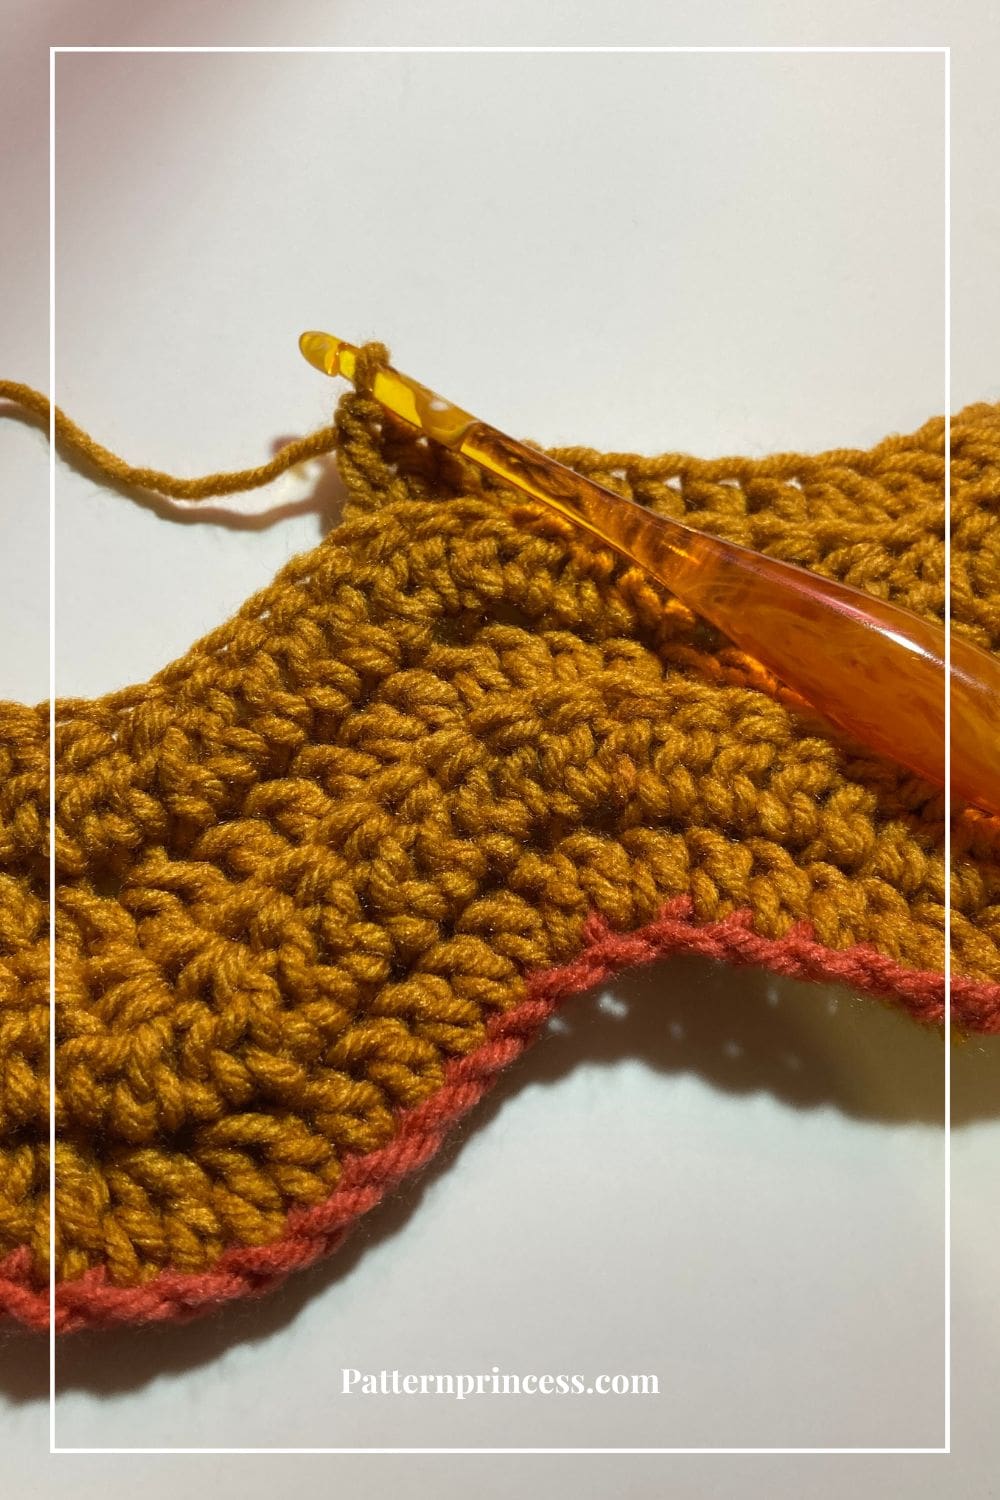
After the first row, all the stitches are worked in the back loop.
It is quite easy to keep track of where you left off with the repeating pattern. When working the double crochet two together stitches, they create the valleys. Working two double crochet stitches in one stitch creates the soft peaks. These are the two key elements in working the simple ripple stitch.
Keep your stitches loose. Make sure to place your last stitch in the top stitch of the previous row turning chain. This helps make the sides very straight.
The length of your starting chain will shorten by a few inches due to the peaks and valleys.
This pattern is written in U S Crochet Terms.
There are links for video tutorials below the written pattern.
Basic Crochet Stitches Used
Double Crochet (DC). Yarn over, insert the hook through both loops and pull up a loop. Next, yarn over and pull through two loops on the hook. Lastly, yarn over again and pull through the last two loops on the hook.
Double Crochet 2 Together (DC2TOG). This decreases the stitches by one double crochet stitch each time this is worked.
First. Yarn over, insert hook into next stitch and pull up a loop. There will be three loops on the crochet hook. Yarn over, pull through two loops on the hook. There should now be just two loops left on the hook.
Second. Yarn over and insert the hook into the next stitch and pull up a loop. There will be four loops on the hook. Yarn over, pull through two loops. There should now be just three loops on the hook.
Lastly, yarn over and pull through the remaining three loops.
Begin Crochet Pattern
Start by making a slip knot and adding the loop on the hook.
Chain your desired number of chains.
For the sample in the video tutorial, I make a small swatch using a chain of 31 stitches. Which is 14 X 2 = 28 plus 3 = 31. Use multiples of 14 plus 3 to make a different size.
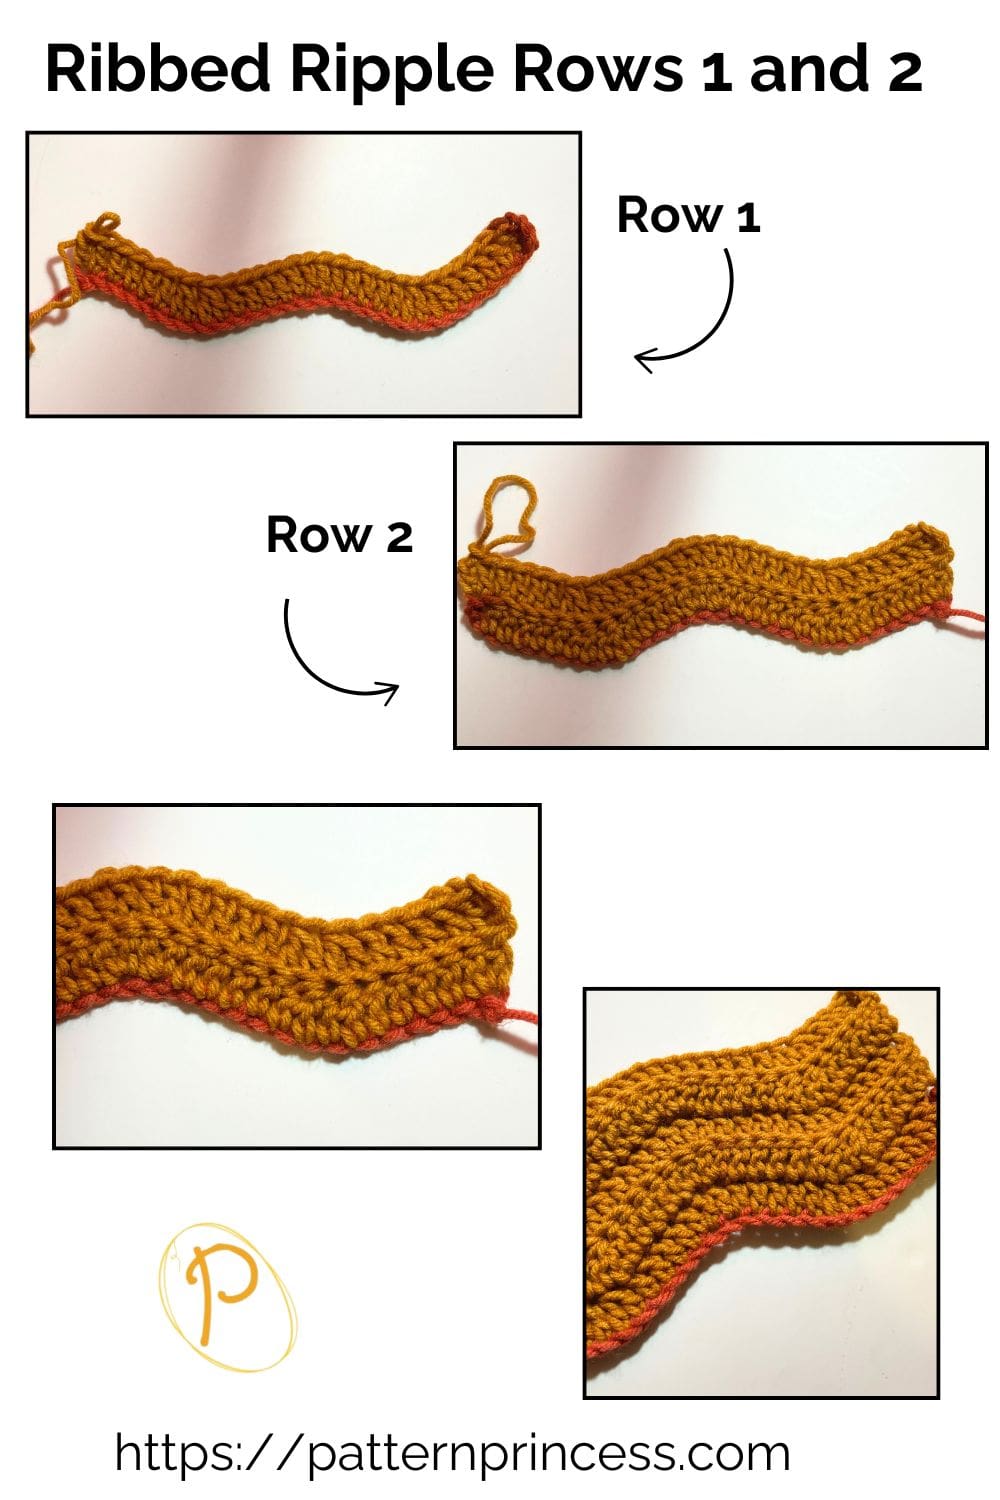
Row 1
DC in 4th chain from hook. (First 3 CH STs skipped count as a DC). [1 DC in each of the next 4 CH STs. Work a DC2TOG, and one more DC2TOG. Then work 1 DC in each of the next 4 CH STs. Work 2 DC in the next CH ST, and 2 DC in the next CH ST.] Repeat across between [ ]. End with 2 DC in the last CH ST. Turn
Row 2
All stitches in this row and beyond work in the back loop only. (BLO)
CH 3 (Counts as a DC). DC in the same ST in the BLO. (Another way to say this, if you count STs, it will be the 4th CH from the hook). [1 BLO DC in each of the next 4 STs. 2DCTOG twice in the BLO. Work 1 BLO DC in each of the next 4 STs. 2 BLO DC in the next ST, and 2 BLO DC in the next ST.] Repeat across between [ ]. End with 2 BLO DC into the top of the CH 3 turning chain from the previous row. Turn
Rows 3 and Beyond
Repeat row 2
Finishing
After you work the last ST, cut off the yarn leaving about a 12-inch long tail. Pull the yarn tail through the last loop on the hook.
Thread the yarn needle with the yarn tails and weave them through the crochet stitches back and forth until the yarn feels secure. Snip off the excess yarn.
If you are a beginner crocheter, you can find more detail on finishing your crochet project on the website.
Crochet Video Tutorials
We have other free crochet patterns to inspire your next project.
Ripple Stitch Blankets

How to Crochet the Ribbed Ripple Stitch Easily
Equipment
- Crochet Hook sized for the yarn
- Tapestry Needle
- Scissors:
Materials
- Yarn. For the sample I used a number 4, medium weight yarn. However, this stitch would work nicely with any yarn weight as noted above.
Instructions
Begin Crochet Pattern
- Start by making a slip knot and adding the loop on the hook.
- Chain your desired number of chains.
- For the sample in the video tutorial, I make a small swatch using a chain of 31 stitches. Which is 14 X 2 = 28 plus 3 = 31. Use multiples of 14 plus 3 to make a different size.
Row 1
- DC in 4th chain from hook. (First 3 CH STs skipped count as a DC). [1 DC in each of the next 4 CH STs. Work a DC2TOG, and one more DC2TOG. Work 1 DC in each of the next 4 CH STs. Work 2 DC in the next CH ST, and 2 DC in the next CH ST.] Repeat across between [ ]. End with 2 DC in the last CH ST. Turn
Row 2
- All stitches in this row and beyond work in the back loop only. (BLO)
- CH 3 (Counts as a DC). DC in the same ST in the BLO. (Another way to say this, if you count STs, it will be the 4th CH from the hook). [1 BLO DC in each of the next 4 STs. 2DCTOG twice in the BLO. Work 1 BLO DC in each of the next 4 STs. 2 BLO DC in the next ST, and 2 BLO DC in the next ST.] Repeat across between [ ]. End with 2 BLO DC into the top of the CH 3 turning chain from the previous row. Turn
Rows 3 and Beyond
- Repeat row 2
Finishing
- After you work the last ST, cut off the yarn leaving about a 12-inch long tail. Pull the yarn tail through the last loop on the hook.
- Thread the yarn needle with the yarn tails and weave them through the crochet stitches back and forth until the yarn feels secure. Snip off the excess yarn.
Notes
Skill Level
Confident Beginner. It is an easy pattern if you can work the Double Crochet stitch.Size
The size of your project can easily be adjusted using multiples of 14 plus 3. That means your initial chain should be divisible by 14. Then add three more chain stitches.Gauge
The gauge will depend on what yarn and crochet hook you use for this pattern.Abbreviations
- BLO – Back Loop Only
- CH = Chain
- DC = Double Crochet
- DC2TOG = Double Crochet Two Together
- SK = Skip
- SP = Space
- ST = Stitch
- STs = Stitches
- [ ] = Repeat Between
Crochet Pattern Notes
Turn at the end of each row.The chain three at the beginning of each row counts as a double crochet.
Repeat row 2 throughout the pattern.
After the first row, all the stitches are worked in the back loop.
It is quite easy to keep track of where you left off with the repeating pattern. When working the double crochet two together stitches, they create the valleys. Working two double crochet stitches in one stitch creates the soft peaks. These are the two key elements in working the simple ripple stitch.
Keep your stitches loose. Make sure to place your last stitch in the top stitch of the previous row turning chain. This helps make the sides very straight.
The length of your starting chain will shorten by a few inches due to the peaks and valleys.
This pattern is written in U S Crochet Terms.

You can find Victoria crocheting, quilting, and creating recipes. She has cooked in restaurants for over 20 years, including many larger parties. She learned to crochet when she was just 11 years old and has been crocheting ever since; over 50 years now. Over 40 years ago, she loved her first class in sewing and continues to hone her skills in quilting. Many have enjoyed the handmade gifts over the years. In her professional career, she has worked in management in a wide variety of businesses including higher education as a dean of a division. All the while attending college part-time to achieve her doctorate in higher education with an emphasis in e-learning.
this is a fun pattern for so many projects