Last updated on March 27th, 2026 at 09:51 am
These Quick and Easy Crochet Headbands are small, which means that they use up very little yarn, plus they work up quickly. This very simple pattern is a great crochet project for a beginner.
*Post contains affiliate links* for more information please read the disclaimer on the About Us page.

DIY Hair Accessory
The headband and bow or flowers are crocheted separately; then sewn together at the end. What a fun way to add a feminine touch to any style.
Headbands from Yarn Scraps
You know when you have just a little extra yarn left over from a project and you just hate to throw it away? I know, me too.
Well, here is a cute and quick pattern that will use up some of those scraps of yarn and be a beautiful gift for someone or to wear yourself.
Video Tutorial of this Hair Accessory
If you are new to crochet, or prefer learning this pattern with a video tutorial, the link is provided closer to the bottom of this post.
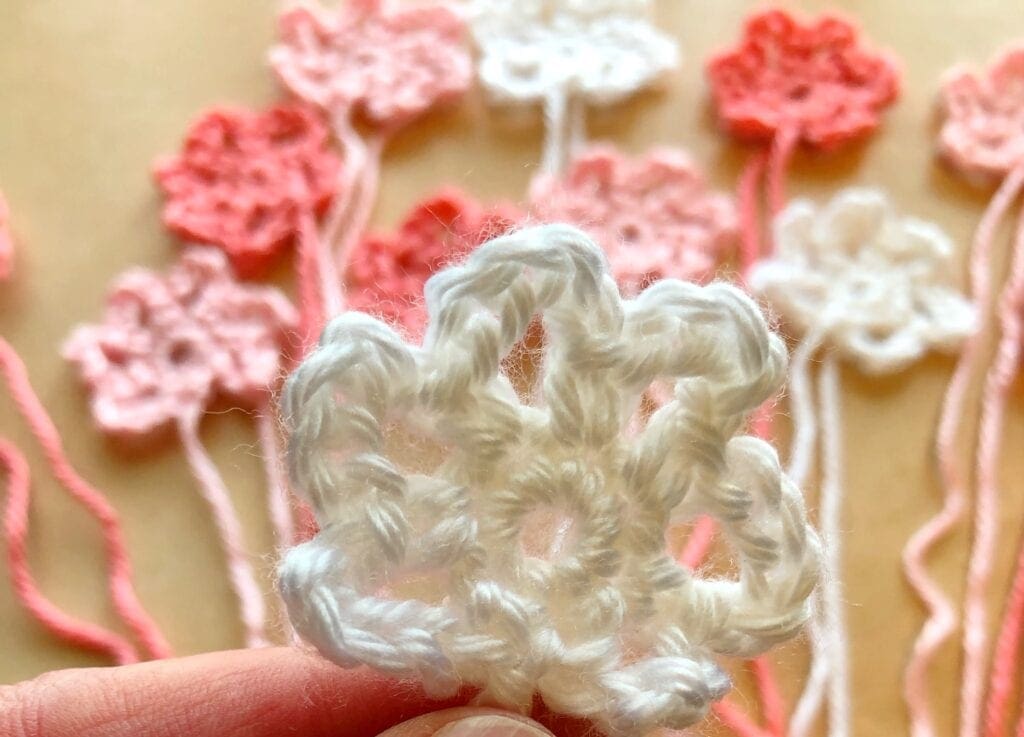
Crochet Flower Embellishments
The headbands also have cute little flower embellishments. You can find that pattern too. I used two different styles of dainty flowers today. Here are the patterns. The Open Petal Flower and The Cute Little Flower.
A Word About Head Size Guidelines
As I was determining what size to make this headband, I did a little research on head size guidelines. According to Wikipedia, one study in the United States shows, the average adult circumference head size to be approximately 21 3/4 inches or 55 centimeters for females and 22 1/2 inches or 57 centimeters for males.
However, the Craft Yarn Council has the average head sizes broken down a bit more with specific recommendations for head size from infant to adult head sizes. What did I do? I made these all 19 inches in circumference. My daughter’s head is 21 1/2 inches around. The headband fit nicely.
Remember, the crochet headband will have some stretch and give; therefore, I made the circumference a bit smaller so it does not get too loose and slip.
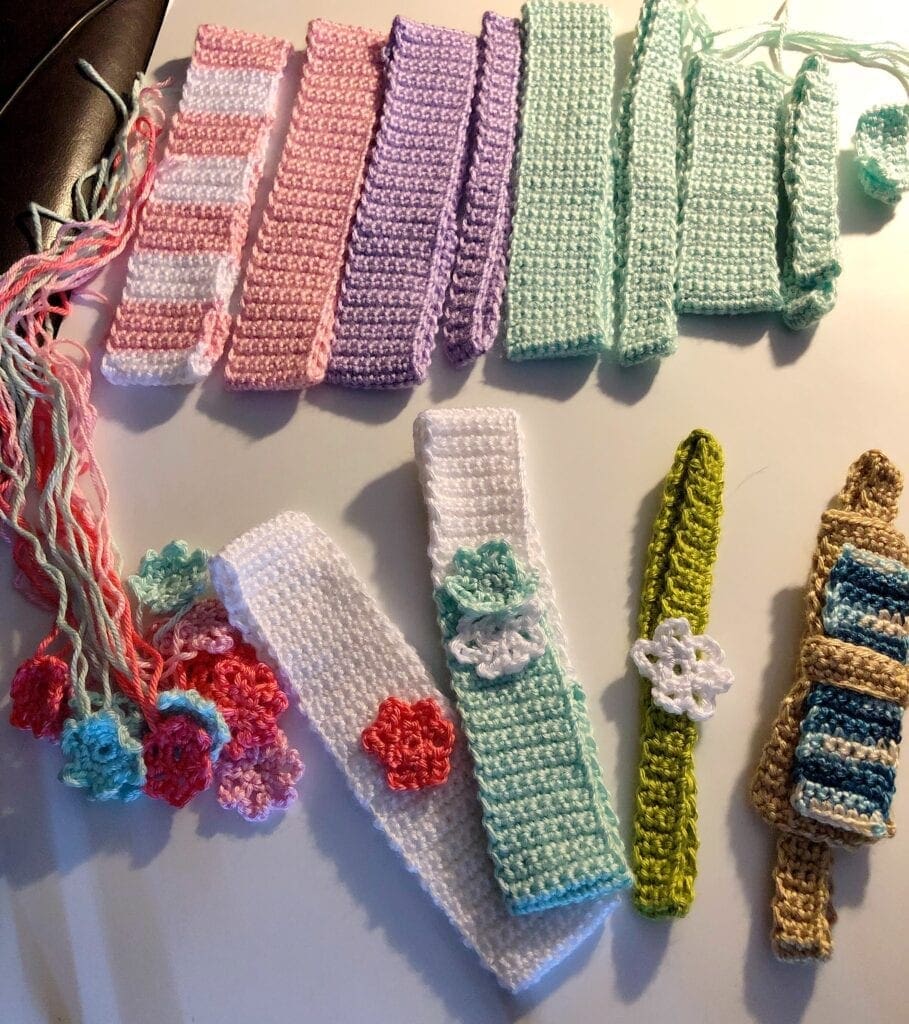
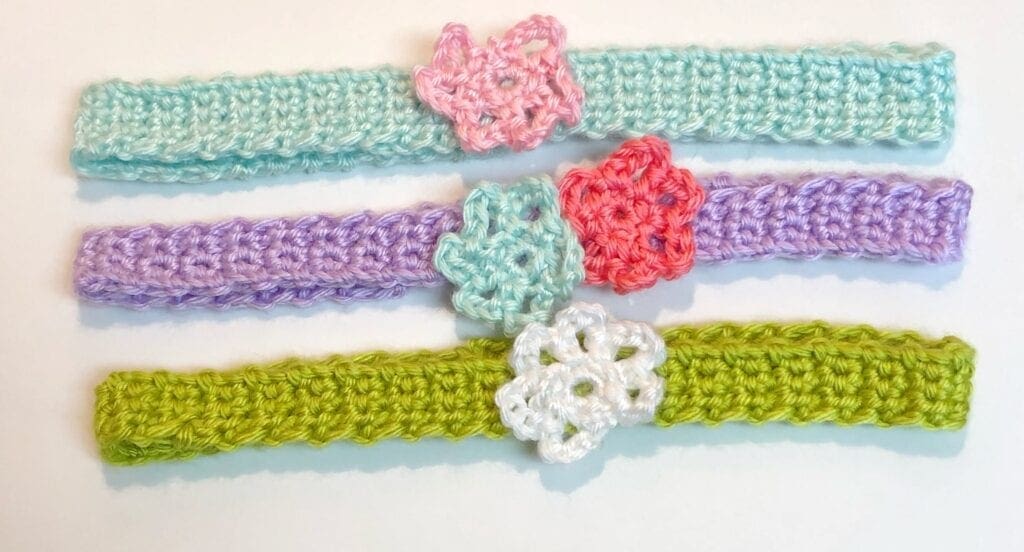
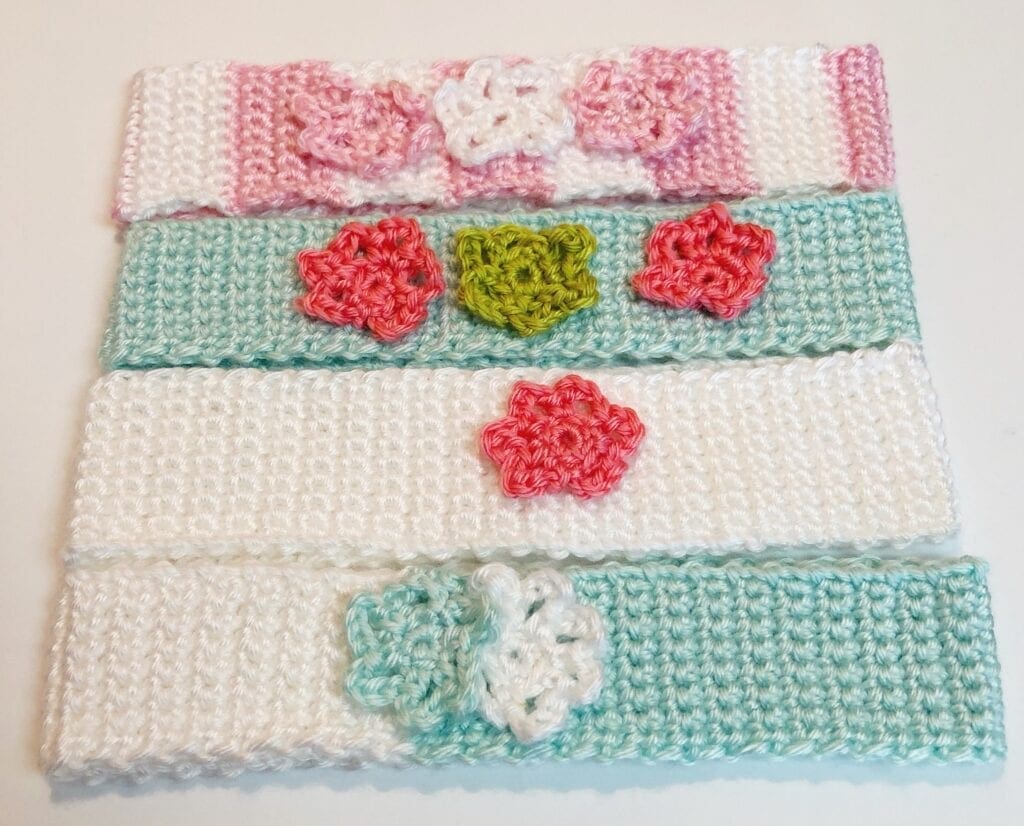
Headbands Waiting to be Embellished
When I started making these headbands and appliques, I did not have the end result in mind. I was just having fun creating. It was just as fun figuring out what applique to pair with which headband.
Get an Ad Free PDF of the Pattern Here.
Changing Size of Headband
This headband is made using the single crochet stitch. Therefore, it is easy to change both the length and width by increasing or decreasing by 1 stitch. I continued crocheting rows until I reached 19 inches.
Note: the crochet will stretch a bit, I worked this pattern in rows back and forth rather than lengthwise in order to minimize the stretch.
Directions: Quick and Easy Crochet Headband
Materials:
The yarn that I used was all scrap yarn from my recent crochet projects. Caron Simply Soft is used for all of the items shown in various colors.
Size F Crochet Hook
Yarn Needle
Scissors
Abbreviations:
CH = Chain
SC = Single Crochet
SL ST = Slip Stitch
Directions to the Wide Headband Shown Below:
The directions to the bow embellishments will be shown further down.
Begin with CH 10
Row 1: SC in 2nd CH from the hook and in each CH across. 9 stitches to the end of this row.
Row 2: CH 1, SC in each ST across.
Rows 3 and beyond: Repeat row 2. Continue the rows until the piece measures about 19 inches in long. I crocheted 93 rows or 19 inches long.
Finishing: Fasten off leaving a long tail.
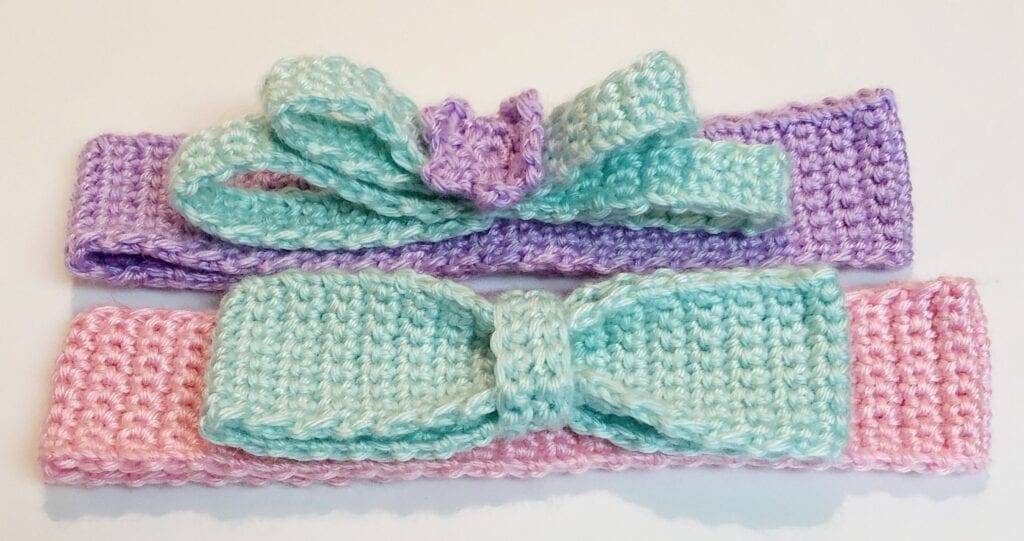
Two-Toned Headband
Changing colors creates a unique look. So pretty and feminine.
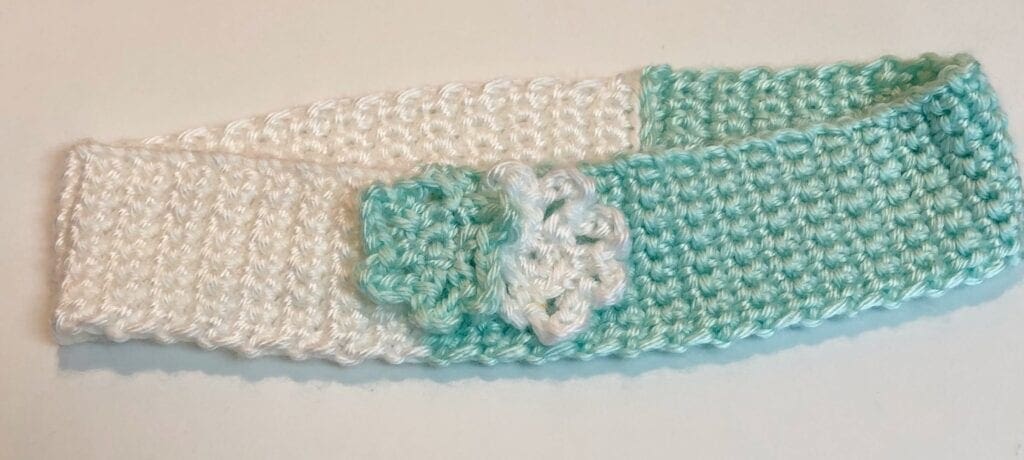
In the headband shown in the photo above, I changed yarn color half way through. The width is a CH 10 just like the two with the bows in the photo above.
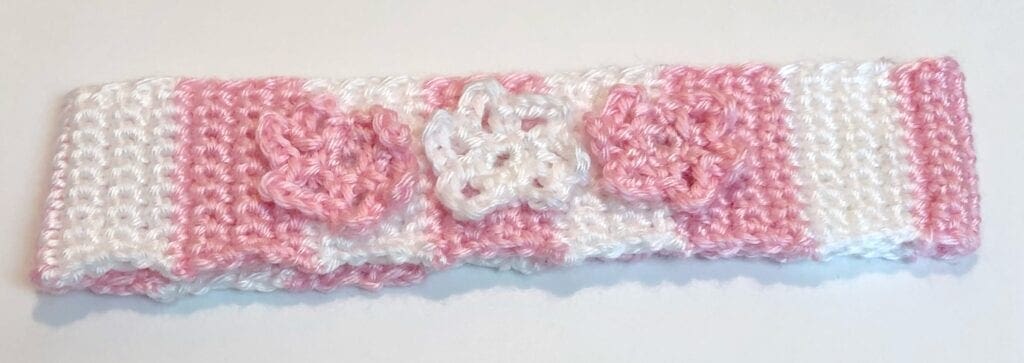
The headband shown in the photo is also made using the CH 10; however, the pink and white colored yarn is changed every 5 rows.
Directions to the Narrow Headband Shown Below:
Begin with CH 5
Row 1: SC in 2nd CH from the hook and in each CH across. 4 stitches to the end of this row.
Row 2: CH 1, SC in each ST across.
Rows 3 and beyond: Repeat row 2. Continue the rows until the piece measures about 19 inches in long.
Finishing: Fasten off leaving a long tail.
Directions to the Bow
Begin with CH 10 or CH 5 depending on the desired width.
Row 1: SC in 2nd CH from the hook and in each CH across.
Row 2: CH 1, SC in each ST across.
Rows 3 and beyond: Repeat row 2. continue to the rows until the piece measures 13 inches long.
Note: if you desire a bow on top of a bow, as I have done on one of the headbands, the second bow is 9 inches long.
Finishing: Fasten off leaving a long tail.
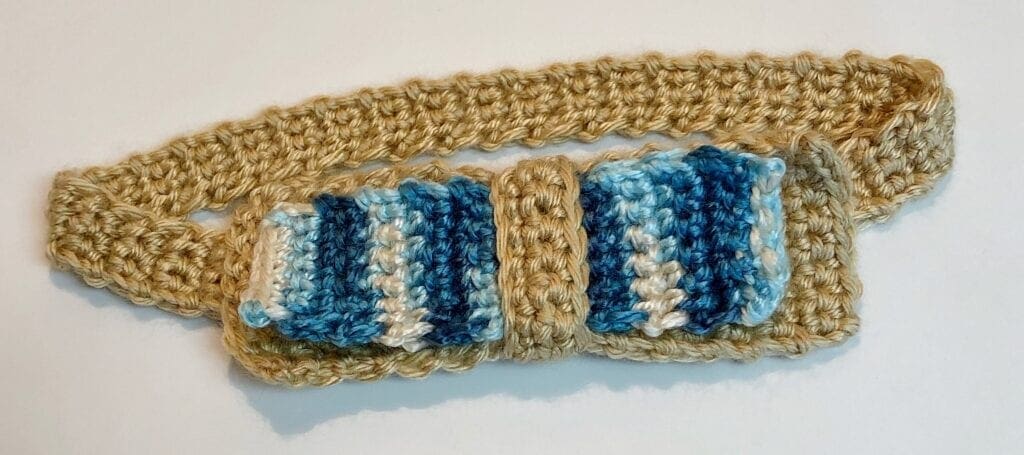
Directions to the Flat Bow and Bow Tie
In the bow below, there are two sizes of bow and two colors. They are attached and covered with a Bow Tie in the middle. The headband itself is made using the CH 5 pattern.
The tan bow directions:
Begin with CH 10
Row 1: SC in 2nd CH from the hook and in each CH across. 9 stitches to the end of this row.
Row 2: CH 1, SC in each ST across
Rows 3 and beyond: Repeat row 2. continue to the rows until the piece measures 6 inches long.
Finishing: Fasten off leaving a long tail.
Note: This bow lays flat and does not need to be folded and joined.
The blue striped yarn directions:
Begin with CH 8
Row 1: SC in 2nd CH from the hook and in each CH across. 7 stitches to the end of this row.
Row 2: CH 1, SC in each ST across
Rows 3 and beyond: Repeat row 2. continue to the rows until the piece measures 4 1/2 inches long.
Finishing: Fasten off leaving a long tail.
Note: The yarn is a variegated yarn. This created a nice stripe effect without having to change the yarn. Additionally, this bow lays flat and does not need to be folded and joined.
Directions to Bow Tie
Begin CH 12
Row 1: SC in 2nd CH from the hook and in each CH across. 12 stitches to the end of this row.
Rows 2 and 3: CH 1, SC in each ST across.
Finishing: Fasten off leaving a long tail.
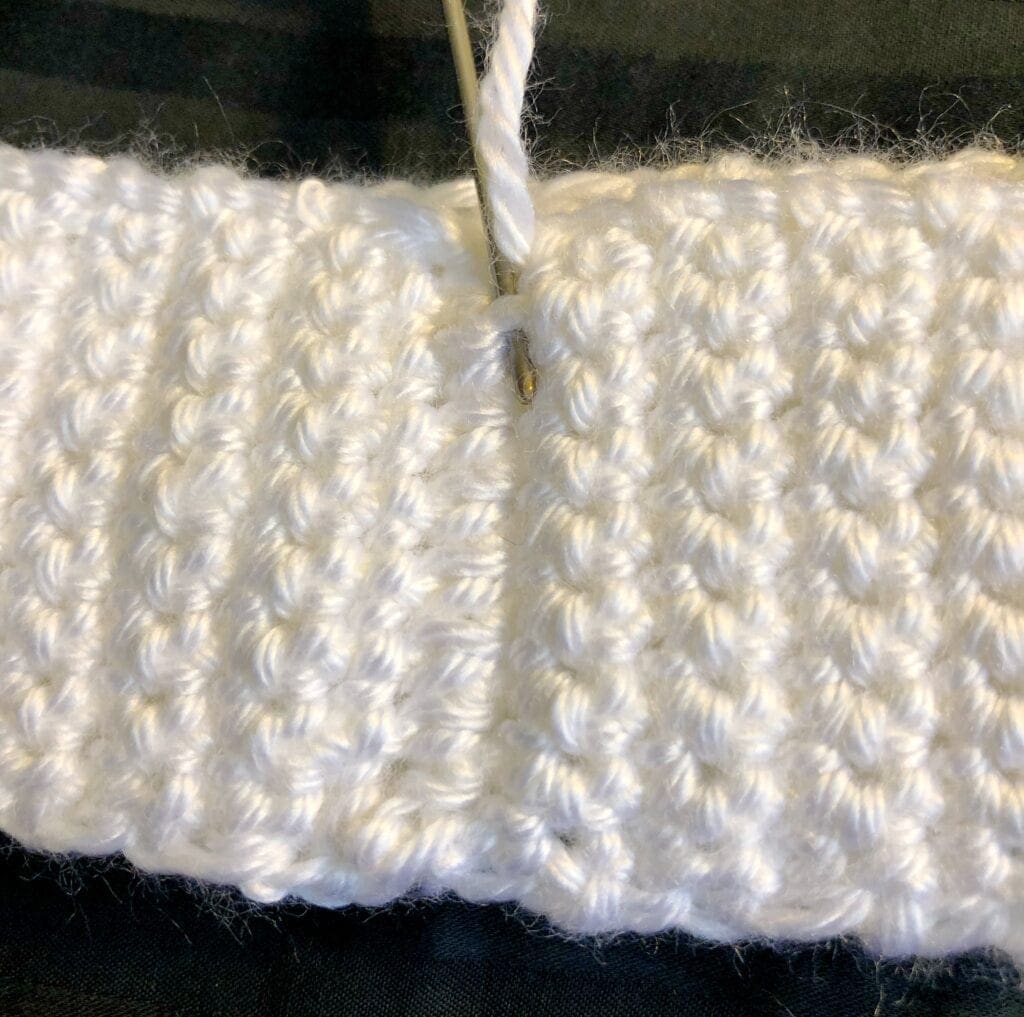
Headband Assembly
Sew the ends of the headband together. Lay them flat and use the yarn tails to stitch them together.
Note: This is also done for the bows that are 13 inches long and 9 inches long too.
This invisible join method works nicely especially if you are joining different colors. There is less chance of the joining yarn colors showing through. Not sure how to do this? I have a video on how to join granny squares using the invisible join – that is the same method used for this.
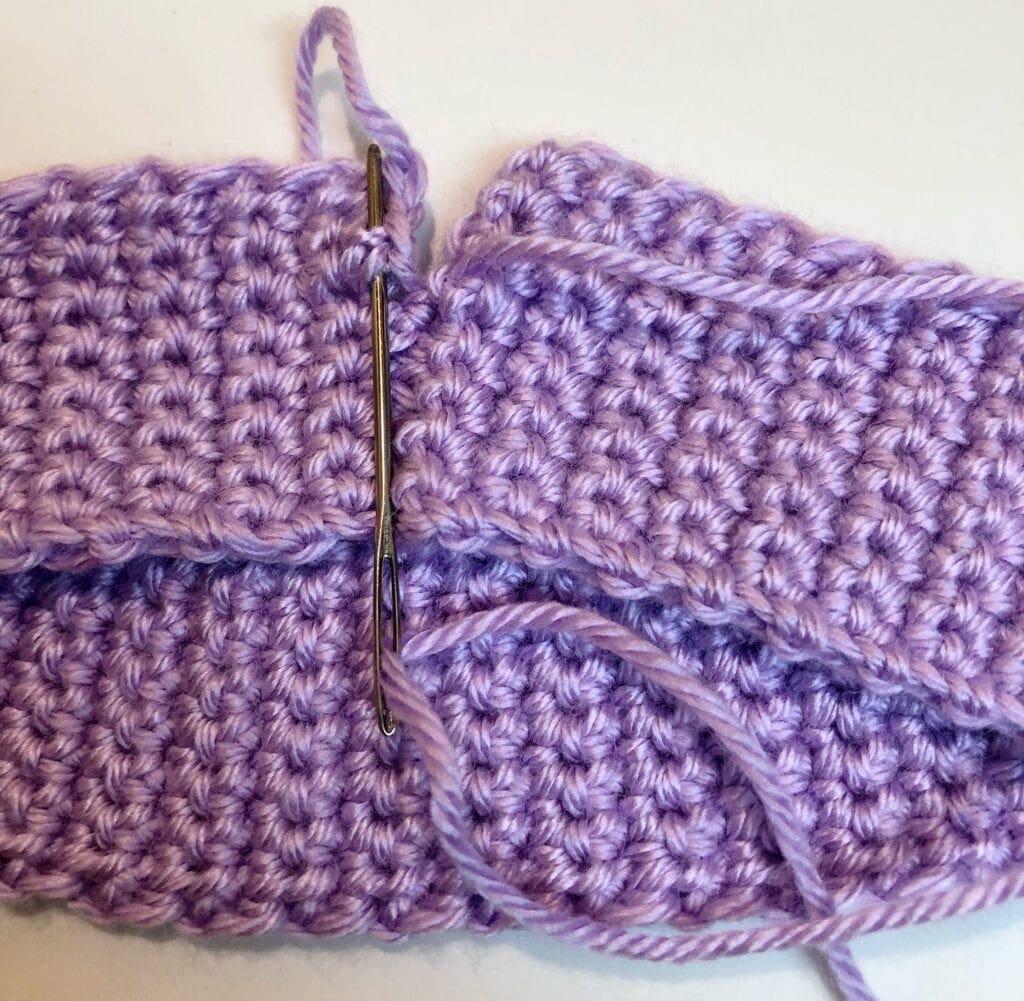
This photo shows another method of sewing the pieces together. I just sewed back and forth picking up a loop and going to the other side.
After the headband pieces are sewn together, it is time to start adding the embellishments.
Wrap the Bow Tie Around the Bow Before Sewing on the Headband
If you add the bow tie, wrap this around the center of the bow, then sew the sides of the tie together with the yarn tail. Then sew the bow to the headband.
Use the long tails of yarn on the appliques to attach them. When you have completed weaving in the ends, cut off the excess yarn.
Crochet Project to use up Yarn Scraps
Video Tutorial on Quick and Easy Crochet Headband
If you loved this post, please share. It helps to show me that these types of posts are helpful – thank you!
I hope that you liked this pattern. If you are looking for more ideas for crocheted projects, here are a few others you may enjoy.

You can find Victoria crocheting, quilting, and creating recipes. She has cooked in restaurants for over 20 years, including many larger parties. She learned to crochet when she was just 11 years old and has been crocheting ever since; over 50 years now. Over 40 years ago, she loved her first class in sewing and continues to hone her skills in quilting. Many have enjoyed the handmade gifts over the years. In her professional career, she has worked in management in a wide variety of businesses including higher education as a dean of a division. All the while attending college part-time to achieve her doctorate in higher education with an emphasis in e-learning.