Last updated on July 4th, 2024 at 11:44 pm
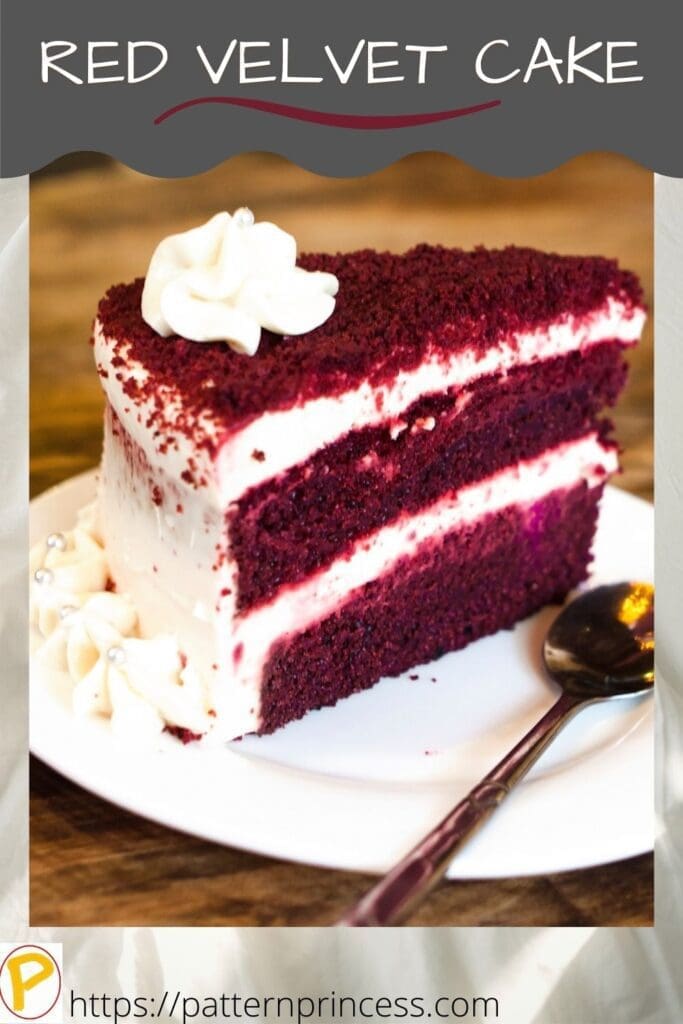
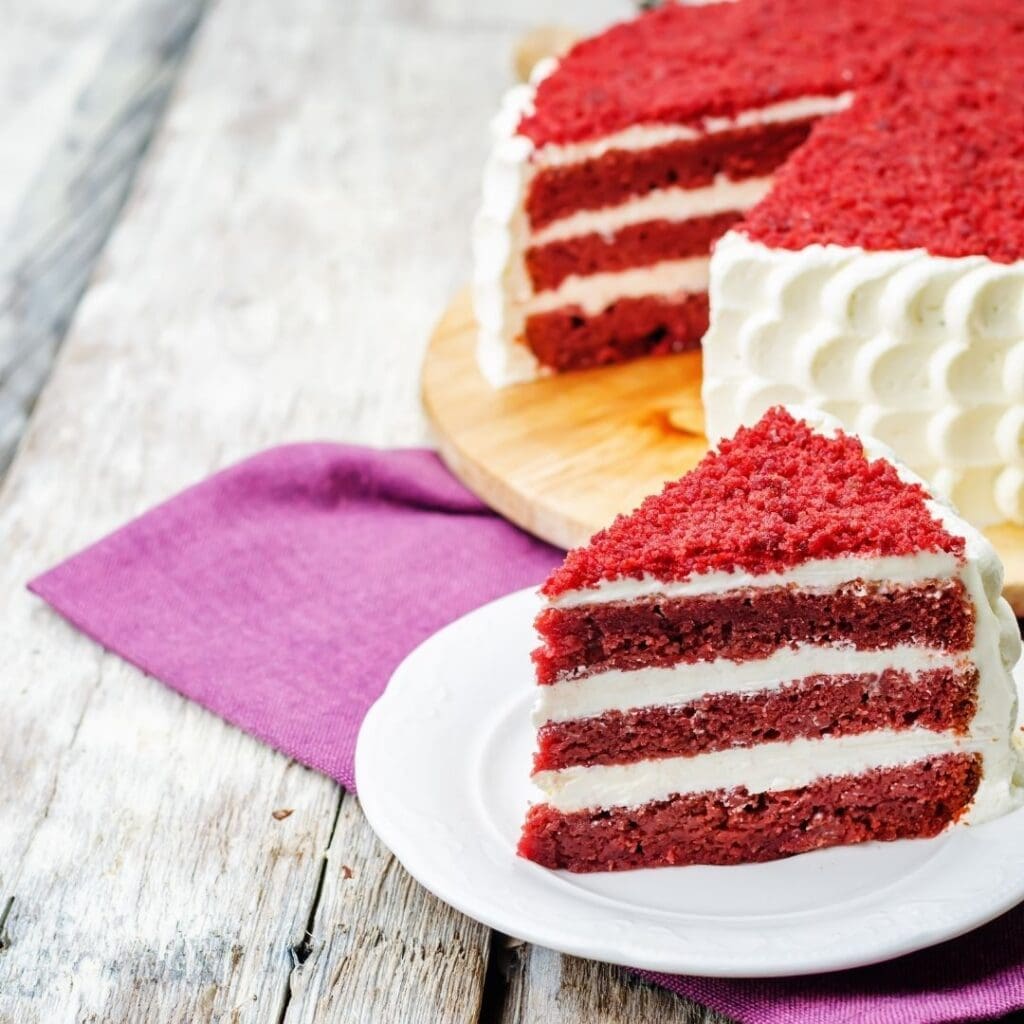
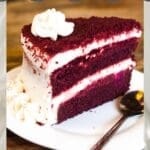
This red velvet cake is a soft, buttery, and flavorful cake that is just as beautiful as it is delicious. The recipe I am sharing with you today has been handed down in our family through the ages.
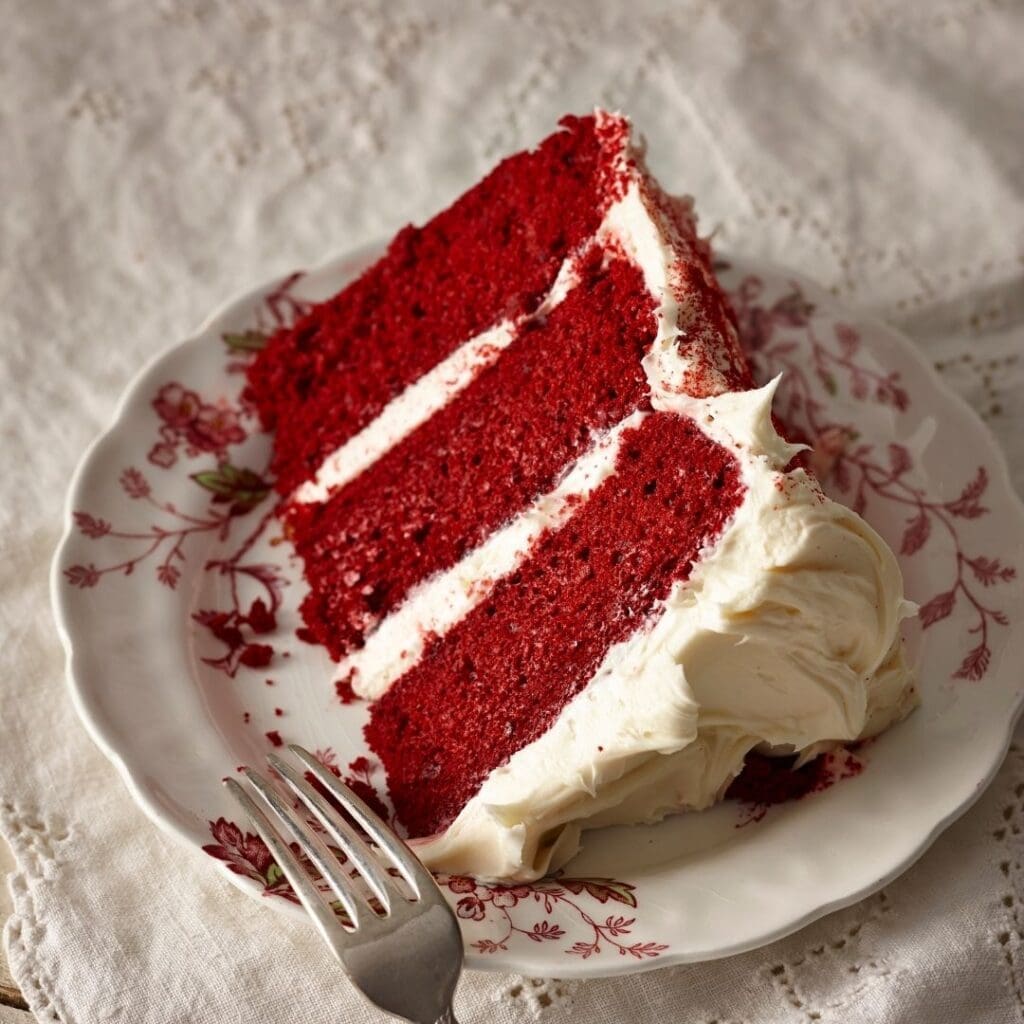
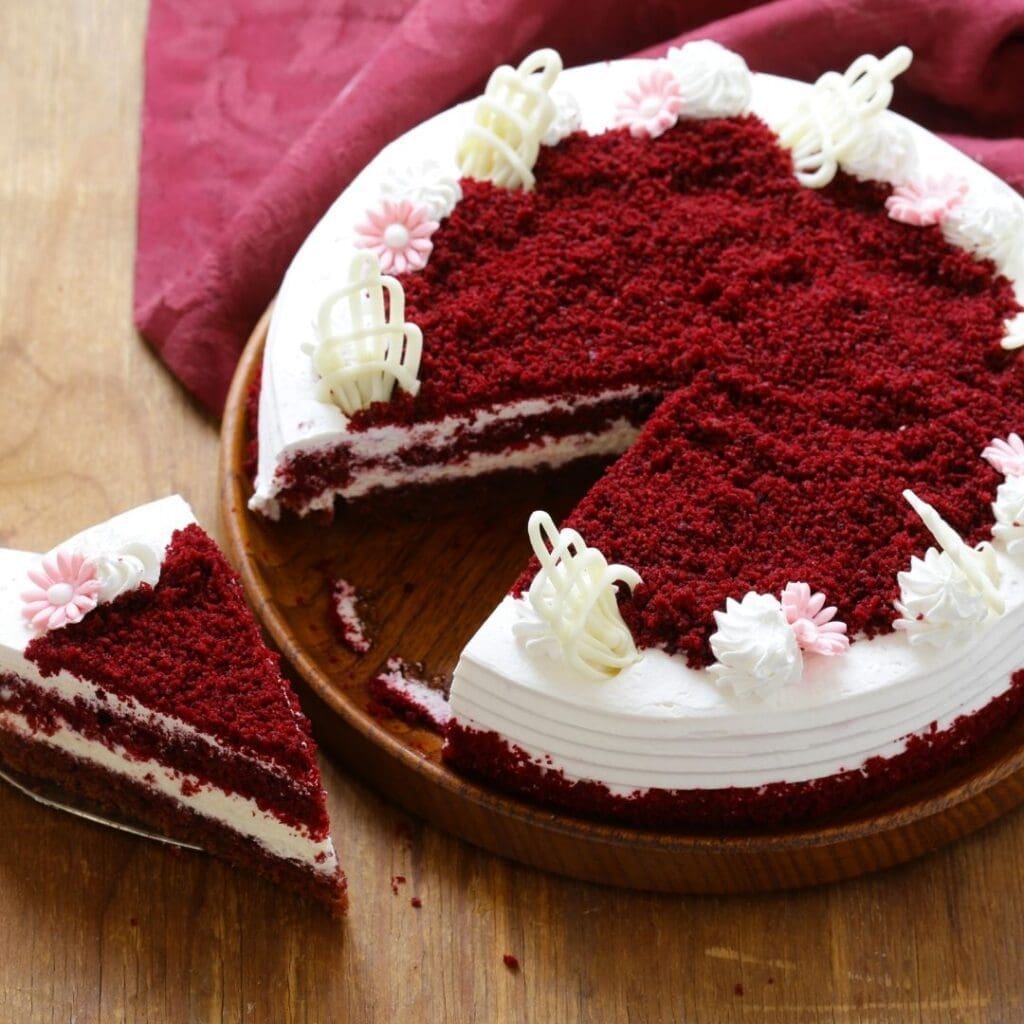
This iconic cake can be made from scratch with a few simple steps. Top the cake with a whipped cream cheese frosting and your dessert will look like it came out of a bakery.
I have always thought there is something elegant about this particular cake. I am not sure if it is the red color of the cake contrasted by the fluffy white frosting or the delectable flavor of the cake. Either way, it is a cake that still feels fancy every time we enjoy a piece.
Post contains affiliate links, and we earn commissions if you shop through the links on this page. For more information, please read the disclosure section under the About Us page.
Why is Red Velvet Cake So Popular?
My grandmother enjoyed this cake when it was first popular in the early 1930s. On special occasions, she would make this gorgeous cake for us.
The only problem was that she had three newspaper clippings with the red velvet cake recipe, and they were all slightly different. The newspaper clippings were back from the early 1930s. Recipes for red devil’s food cake were showing up in newspaper food columns as a beautiful Christmas cake. Therefore, the popularity began to grow.
According to the Washington Post, red velvet cake is the “color of joy”. Well established business and local bakery shops began to serve the delicious red confection.
Since then, red velvet cake has become as popular and is a standard in the baking world right alongside the carrot cake or a pineapple upside-down cake.
While she served this cake for those special occasions, as a child, I was happy to enjoy anything sweet anytime! I still have fond memories.
I think this would be a real show stopper for Valentine’s Day too.
What is the Flavor of Red Velvet Cake?
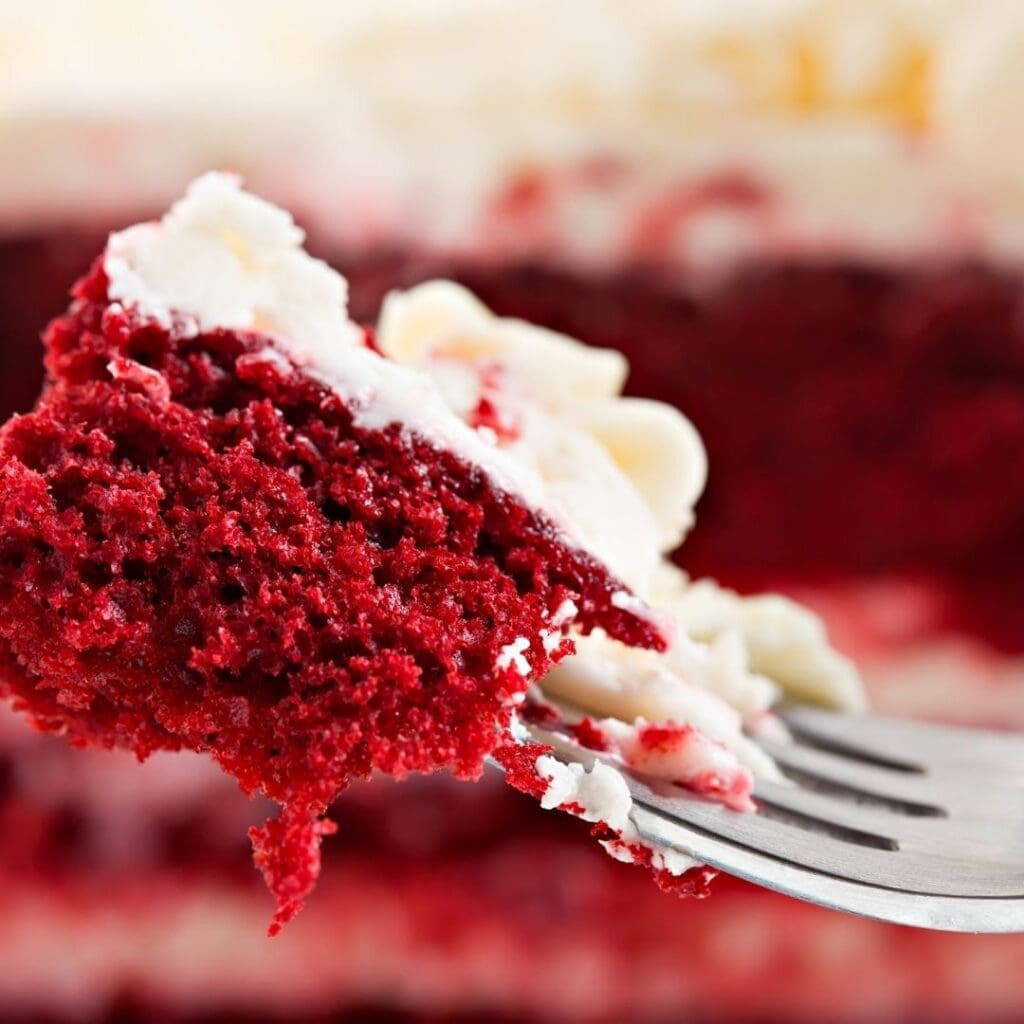
Red velvet cake has a mild chocolate flavor that has the slightest hint of tang. The cake itself is fluffy, buttery, and moist with the addition of the cream cheese frosting, which has a distinct slight tang to the icing. The combination leaves a wonderful mouthfeel. This unique trace of a tangy taste is a sign that you are eating a tur red velvet cake.
This cake also pairs well with Ermine frosting or my quick and easy buttercream frosting.
Ingredients in This Easy Red Velvet Cake Recipe
Dry Ingredients
Cake Flour. If you really want to soft and silky texture of the velvet cake, then cake flour is a must. However, you if you are not able to find it, you could make your own. Sometimes, I find myself wanting to bake something just to find out I lack the exact ingredients. It is nice to know simple tricks that will help make your recipes a success. This is one of them!
If you prefer not to use cake flour for some reason, all-purpose flour will work, the cake will be a little less tender. The good thing is that it should still taste delicious though.
Cocoa Powder (Unsweetened). This recipe calls for unsweetened cocoa powder and you might be wondering, what does unsweetened cocoa powder do. It adds a deep chocolate flavor to baked goods and this concentrated flavor makes this well suited for the velvet cake.
Baking Soda. Baking soda is a leavening agent used in baked goods like cakes, muffins, and cookies. It becomes activated when it’s combined with both an acidic ingredient and a liquid.
Salt. Because you are using unsalted butter, this recipe calls for butter. Often bakeries will do this because they can control the amount of salt in a recipe better.
Wet Ingredients
Unsalted Butter. Make sure that the butter is unsalted and at room temperature as it will combine with the other ingredients better. The butter is used in the cake and the frosting.
Superfine White Sugar. The caster sugar blends easier and better. However, you can use granulated sugar in this recipe, just make sure that is combined well.
Eggs. Eggs add structure and help the cake rise. Just like the butter, the eggs should be at room temperature and two large eggs are enough for this recipe.
Vegetable Oil. This helps keep the cake moist. You might be wondering why cakes use vegetable oil in the recipe. Since vegetable oil remains a liquid and butter solidify, cakes made with the vegetable oil are moister than their butter-based counterparts.
White Vinegar. Why use vinegar when baking a cake? The vinegar is an acid that will react with the baking soda to give the cake batter a lift as it bakes.
Vanilla Extract. It is important to use a good vanilla extract in this recipe. You might be wondering why use pure vanilla extract versus imitation vanilla? When vanilla extract is pure, that meads that it is made of natural ingredients like vanilla beans, water, and alcohol. Whereas imitation vanilla can be made of artificial ingredients and fillers. What’s more is that the imitation vanilla flavoring is often weak. This is used in the cake and the frosting.
Buttermilk. In this recipe, it is important to use real buttermilk. In other recipes I often will make my own buttermilk substitute by combining milk and lemon juice. When left sit for 5 minutes, it will curdle and have the same effect in recipes as using buttermilk will. However, not in this recipe, it is the pure buttermilk tangy taste and culture that give this cake such a unique flavor. So, don’t substitute on this ingredient.
Red Food Coloring. While the cake will have a slightly red hue without the food coloring, in my book, it needs to be a bit brighter red for a show-stopping cake. However, many recipes often call for an entire tube of food coloring and this can taste bad and throw off the entire taste of the cake. Therefore, use a food coloring that does not have taste and use just a little for great results. Ameri Color Super Red is a good food coloring choice.
Cream Cheese Frosting Ingredients
Philadelphia Cream Cheese Block. Slightly softened so it will mix well. This is used in the frosting. Use the block of cheese not the whipped or pre-flavored. Some people prefer the Philadelphia Cream Cheese brand to any other for this frosting. I have a few other brands in my area that work well too, but the Philadelphia is probably the most widely known.
Powdered Sugar. This is sometimes called confectioner’s sugar. It is used to make frosting because it creates a smooth consistency that is perfect for frosting and filling desserts.
How to Make an Easy Red Velvet Layer Cake with Cream Cheese Frosting
This really is a simple cake recipe. You don’t have to wait for a special occasion. The hardest part is making sure that you measure all the ingredients properly. When baking, it is important not to guess.
This really is not much more than making an everyday cake. However, it is striking and once you have had a chance to experience this great tasting, I promise you will end up making it again.
Let’s dig into how to make this stunning cake.
Preheat oven to 350 degrees Fahrenheit and prepare two 8″ cake pans or three 6″ cake pans with shortening and a light dusting of flour or cocoa powder.
Have the ingredients at room temperature before starting this recipe.
Sift together the dry ingredients in a large bowl and set aside, cake flour, unsweetened cocoa powder, salt, and baking soda.
Using an electric mixer, beat the butter and sugar together until the sugar is well dissolved. Approximately 4 minutes.
Continue mixing and add the eggs one at a time, mixing between to blend.
Then add the vegetable oil, vinegar, vanilla, buttermilk, and red food coloring. Continue mixing 1-2 more minutes until smooth.
Finally add the dry ingredients and mix until just combined. You might see a few small lumps yet, that is okay. It is best not to over mix the batter.
Divide the cake batter between the prepared cake pans. Bake for 25 to 30 minutes. Check with a toothpick inserted into the middle at 25 minutes. If it comes out clean, remove the cakes. If not, let them continue baking rechecking them every 5 minutes. It is important not to overbake as the cake will be too dry.
Let cakes rest in the pans for 10 minutes before turning out onto a cooling rack. Then slide a knife or offset spatula around the inside of the pans to loosen the cake from the pan and place the cakes on a wire rack.
Easy Cream Cheese Frosting
In a mixing bowl, beat together the cream cheese, butter, and vanilla for 2-3 minutes.
Mix in the powdered sugar and vanilla extract and continue mixing until fully combined, about 2 minutes, scraping down the sides of the bowl as needed. The frosting should be light and smooth.
Cake Assembly
After the cakes are completely cool, trim off the domes of your cakes to make them flat. Save the cake domes that you cut off to use as decorating crumbs.
Place your first layer on a cake board or large flat plate. Add a large scoop of the cream cheese frosting and spread it onto your cake layer using an offset spatula. I make my frosting about 1/4″ thick between the cake layers. Then place another layer of cake on top.
Spread a thin layer of frosting all over the cake, this will seal in the crumbs. Freeze cake for 20 minutes to harden the crumb coat.
Add the final layer of frosting to the chilled cake.
Add the cake filling crumble to the sides or top of the cake as a decoration.
If you are feeling fancy, add additional frosting decorations such as a few dollops of frosting to the top with a piping bag.
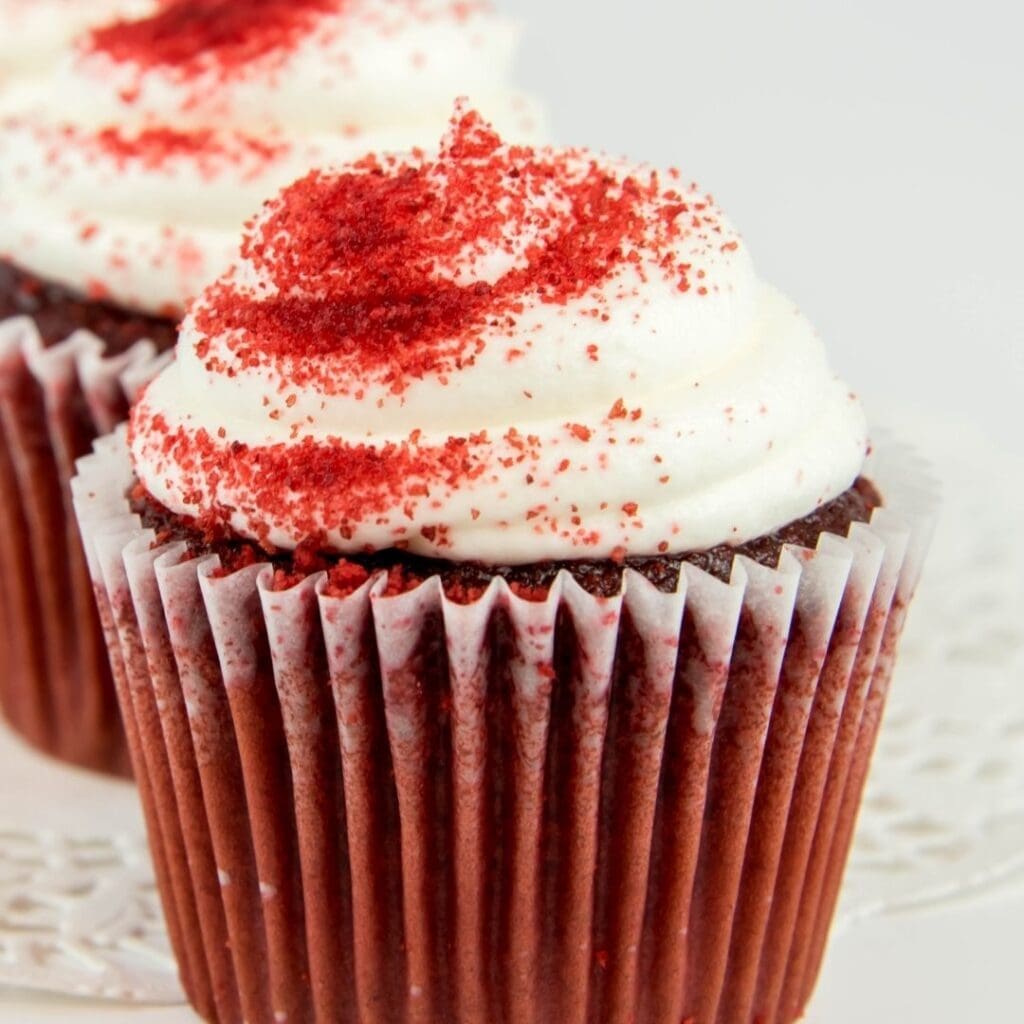
Make This Cake Batter into Red Velvet Cupcakes
Just fill the cupcake liners 2/3 full. Do not overfill as the batter will overflow all over the cupcake tin. Bake for 10-15 minutes at 350 degrees Fahrenheit. Since each oven temperature can fluctuate a bit, make sure to test with a toothpick for doneness. If it comes out clean, they are ready, if there is moist cake batter on the toothpick after 15 minutes, bake a bit longer and recheck. Maybe after another 5 minutes.
Recipe Pro Tips
It is best to have all the ingredients at room temperature before starting the recipe.
Sift dry ingredients together to remove any lumps. It also helps create a soft and fluffy cake.
Prepare the cake pans with shortening and a light dusting of flour or cocoa powder. This helps ensure that the cake will come out of the cake tins. The last thing you want is to go through all the work and have the cake stick in the pan. Another great option is to cut a round of parchment paper and place that in the bottom of the cake tin. This too will help reduce the chance of sticking.
Cream the butter and sugar approximately 4 minutes. The sugar will get completely dissolved and the creaming method will incorporate air into the cake batter. This is another way to ensure that the cake has a fine crumb and is light and airy.
Cake Tin Options
This is an easy recipe to divide into 2 8-inch cake tins. However, you can divide between 3 6-inch bake tins for more height to your final presentation. If you do not own cake tins, no worries, you can bake this in a sheet pan. You will just have something more like cake bars. I have even cut the sheet pan cake into rectangles and stacked those on top of each other with frosting between the layers and that makes a beautiful presentation too.
I cut the cake tops flat before stacking and decorating. Save the cake you cut off to crumble and decorate the tops or sides of the cake. This is purely options though.
Frosting Tips
When mixing the frosting, if it seems a bit too runny, you can always add a bit more powdered sugar. If it is too stiff, add a bit of water ½ teaspoon at a time.
When frosting the cake, spread a thin layer of frosting all over the cake. This is called the crumb coat and it seals in all the crumbs, so they don’t get into your final coat of frosting. It is easier to add the final frosting layer if you freeze cake for 20 minutes to harden the crumb coat.
It is easiest to add the last coat of frosting using a turntable and an off-set spatula or bench scraper.
Storage and Freezing Cake
It is safe to store leftover cake in an airtight container in the refrigerator for up to 3 days.
This cake will also freeze well in an airtight container up to 4 months. When ready to serve, just thaw before serving if already frosted. If frozen unfrosted, just partially that before frosting the cake.
Here is a recipe for my White Velvet Cake that is made in a sheet pan.
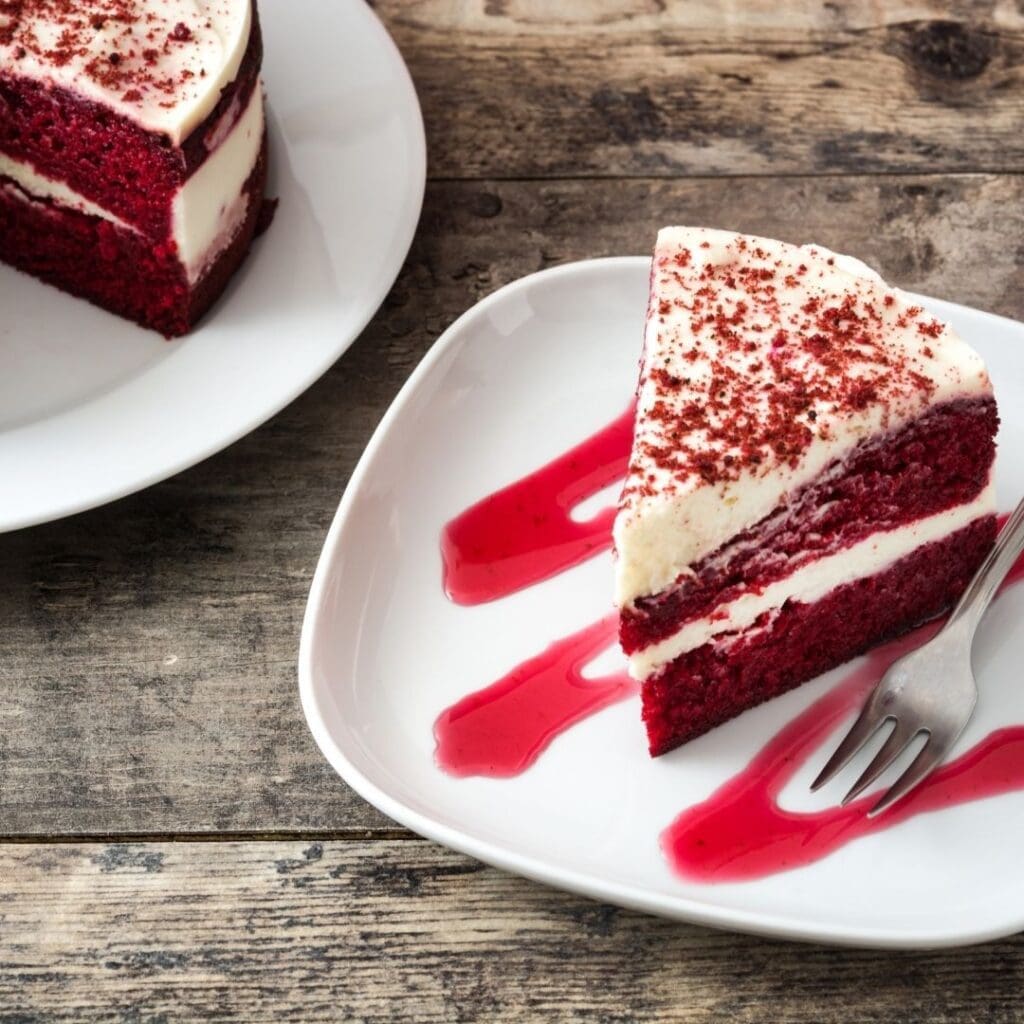
What goes with red velvet cake?
Red velvet cake is a versatile and delicious dessert that pairs well with a variety of accompaniments. Here are some popular options to serve alongside or with red velvet cake:
- Cream Cheese Frosting: This classic pairing is practically a must. Cream cheese frosting complements the subtle chocolate and tangy flavors of red velvet cake perfectly.
- Fresh Berries: Fresh strawberries, raspberries, or blueberries can add a burst of color, freshness, and a slightly tart contrast to the sweetness of the cake.
- Whipped Cream: A dollop of freshly whipped cream or a generous swirl of whipped topping can provide a light and airy texture that balances the cake’s richness.
- Chocolate Ganache: If you’re a chocolate lover, drizzling a rich chocolate ganache over your red velvet cake can create a delightful contrast in both flavor and texture.
- Ice Cream: Vanilla ice cream or a cream cheese-flavored ice cream can be a delightful accompaniment, especially when serving the cake warm.
- Nuts: Chopped nuts, such as pecans or walnuts, can add a crunchy texture and a nutty flavor that pairs nicely with the cake.
- Coffee or Tea: A cup of coffee or a nice cup of tea, like Earl Grey or chai, can be a great beverage to enjoy alongside a slice of red velvet cake.
- Fruit Sauce or Compote: You can serve a fruity sauce or compote made from berries or cherries as a topping to add a fruity twist to your cake.
- Candied or Dried Fruits: Candied ginger or dried fruits like cranberries can offer a sweet and slightly tangy contrast.
- Lemon or Citrus Zest: A sprinkle of lemon or citrus zest on top of the cake can provide a refreshing and aromatic touch.
- Milk: A glass of cold milk can be a classic and simple accompaniment to balance the sweetness of the cake.
Ultimately, the choice of accompaniment will depend on your personal preferences and the occasion. Red velvet cake is a versatile treat that can be enjoyed in many ways, so feel free to get creative with your pairings.
Red Velvet Cake
As an Amazon Associate I earn from qualifying purchases.
Kitchen Essentials


Ingredients
Dry Ingredients
- 2 2/3 Cups Cake Flour
- 2 Tablespoons Unsweetened Cocoa Powder
- 1 Teaspoon Baking Soda
- Pinch Salt
Wet Ingredients
- 1/2 Cup Unsalted Butter 1 US stick, Softened
- 1 ½ Cups Superfine White Sugar
- 2 Large Eggs Room Temperature
- 1 Cup Vegetable Oil
- 1 Teaspoon White Vinegar
- 2 Teaspoons Vanilla Extract
- 1 Cup Buttermilk Room Temperature
- 2 1/2 Teaspoons Red Food Coloring
Cream Cheese Frosting
- 14 Ounces Cream Cheese Philadelphia Cream Cheese Block at Room Temperature
- 1/2 Cup Unsalted Butter Room Temperature
- 1 1/2 Teaspoon Vanilla Extract
- 4 Cups Powdered Sugar
text ingredients
Instructions
- Preheat oven to 350 degrees Fahrenheit and prepare two 8″ cake pans or three 6″ cake pans with shortening and a light dusting of flour or cocoa powder.
- Have the ingredients at room temperature before starting this recipe.
- Sift together the dry ingredients in a large bowl and set aside, cake flour, unsweetened cocoa powder, salt, and baking soda.2 2/3 Cups Cake Flour, 2 Tablespoons Unsweetened Cocoa Powder, 1 Teaspoon Baking Soda, Pinch Salt
- Using an electric mixer, beat the butter and sugar together until the sugar is well dissolved. Approximately 4 minutes.1/2 Cup Unsalted Butter , 1 ½ Cups Superfine White Sugar
- Continue mixing and add the eggs one at a time, mixing between to blend.2 Large Eggs
- Then add the vegetable oil, vinegar, vanilla, buttermilk, and red food coloring. Continue mixing 1-2 more minutes until smooth.1 Cup Vegetable Oil, 1 Teaspoon White Vinegar, 2 Teaspoons Vanilla Extract, 1 Cup Buttermilk , 2 1/2 Teaspoons Red Food Coloring
- Finally add the dry ingredients and mix until just combined. You might see a few small lumps yet, that is okay. It is best not to over mix the batter.
- Divide the cake batter between the prepared cake pans. Bake for 25 to 30 minutes. Check with a toothpick inserted into the middle at 25 minutes. If it comes out clean, remove the cakes. If not, let them continue baking rechecking them every 5 minutes. It is important not to overbake as the cake will be too dry.
- Let cakes rest in the pans for 10 minutes before turning out onto a cooling rack. Then slide a knife or offset spatula around the inside of the pans to loosen the cake from the pan and place the cakes on a wire rack.
Easy Cream Cheese Frosting
- In a mixing bowl, beat together the cream cheese and butter for 2-3 minutes.14 Ounces Cream Cheese , 1/2 Cup Unsalted Butter
- Mix in the powdered sugar and vanilla extract and continue mixing until fully combined, about 2 minutes, scraping down the sides of the bowl as needed. The frosting should be light and smooth.1 1/2 Teaspoon Vanilla Extract, 4 Cups Powdered Sugar
Cake Assembly
- After the cakes are completely cool, trim off the domes of your cakes to make them flat. Save the cake domes that you cut off to use as decorating crumbs.
- Place your first layer on a cake board or large flat plate. Add a large scoop of the cream cheese frosting and spread it onto your cake layer using an offset spatula. I make my frosting about 1/4″ thick between the cake layers. Then place another layer of cake on top.
- Spread a thin layer of frosting all over the cake, this will seal in the crumbs. Freeze cake for 20 minutes to harden the crumb coat.
- Add the final layer of frosting to the chilled cake.
- Add the cake filling crumble to the sides or top of the cake as a decoration.
- If you are feeling fancy, add additional frosting decorations such as a few dollops of frosting to the top with a piping bag.
Your Own Private Notes
Notes
Recipe Pro Tips
I cut the cake tops flat before stacking and decorating. Save the cake you cut off to crumble and decorate the tops or sides of the cake. This is purely options though.This is an easy recipe to divide into 2 8-inch cake tins. However, you can divide between 3 6-inch bake tins for more height to your final presentation. If you do not own cake tins, no worries, you can bake this in a sheet pan. You will just have something more like cake bars. I have even cut the sheet pan cake into rectangles and stacked those on top of each other with frosting between the layers and that makes a beautiful presentation too. Prepare the cake pans with shortening and a light dusting of flour or cocoa powder. This helps ensure that the cake will come out of the cake tins. The last thing you want is to go through all the work and have the cake stick in the pan. Another great option is to cut a round of parchment paper and place that in the bottom of the cake tin. This too will help reduce the chance of sticking. It is best to have all the ingredients at room temperature before starting the recipe. Sift dry ingredients together to remove any lumps. It also helps create a soft and fluffy cake. Cream the butter and sugar approximately 4 minutes. The sugar will get completely dissolved and the creaming method will incorporate air into the cake batter. This is another way to ensure that the cake has a fine crumb and is light and airy. When mixing the frosting, if it seems a bit too runny, you can always add a bit more powdered sugar. If it is too stiff, add a bit of water ½ teaspoon at a time. When frosting the cake, spread a thin layer of frosting all over the cake. This is called the crumb coat and it seals in all the crumbs, so they don’t get into your final coat of frosting. It is easier to add the final frosting layer if you freeze cake for 20 minutes to harden the crumb coat. It is easiest to add the last coat of frosting using a turntable and an off-set spatula or bench scraper.
Storage and Freezing Cake
It is safe to store leftover cake in an airtight container in the refrigerator for up to 3 days. This cake will also freeze well in an airtight container up to 4 months. When ready to serve, just thaw before serving if already frosted. If frozen unfrosted, just partially that before frosting the cake.Nutrition
A few of my favorite things
The Power of Positivity

You can find Victoria crocheting, quilting, and creating recipes. She has cooked in restaurants for over 20 years, including many larger parties. She learned to crochet when she was just 11 years old and has been crocheting ever since; over 50 years now. Over 40 years ago, she loved her first class in sewing and continues to hone her skills in quilting. Many have enjoyed the handmade gifts over the years. In her professional career, she has worked in management in a wide variety of businesses including higher education as a dean of a division. All the while attending college part-time to achieve her doctorate in higher education with an emphasis in e-learning.