Last updated on January 19th, 2026 at 09:54 pm
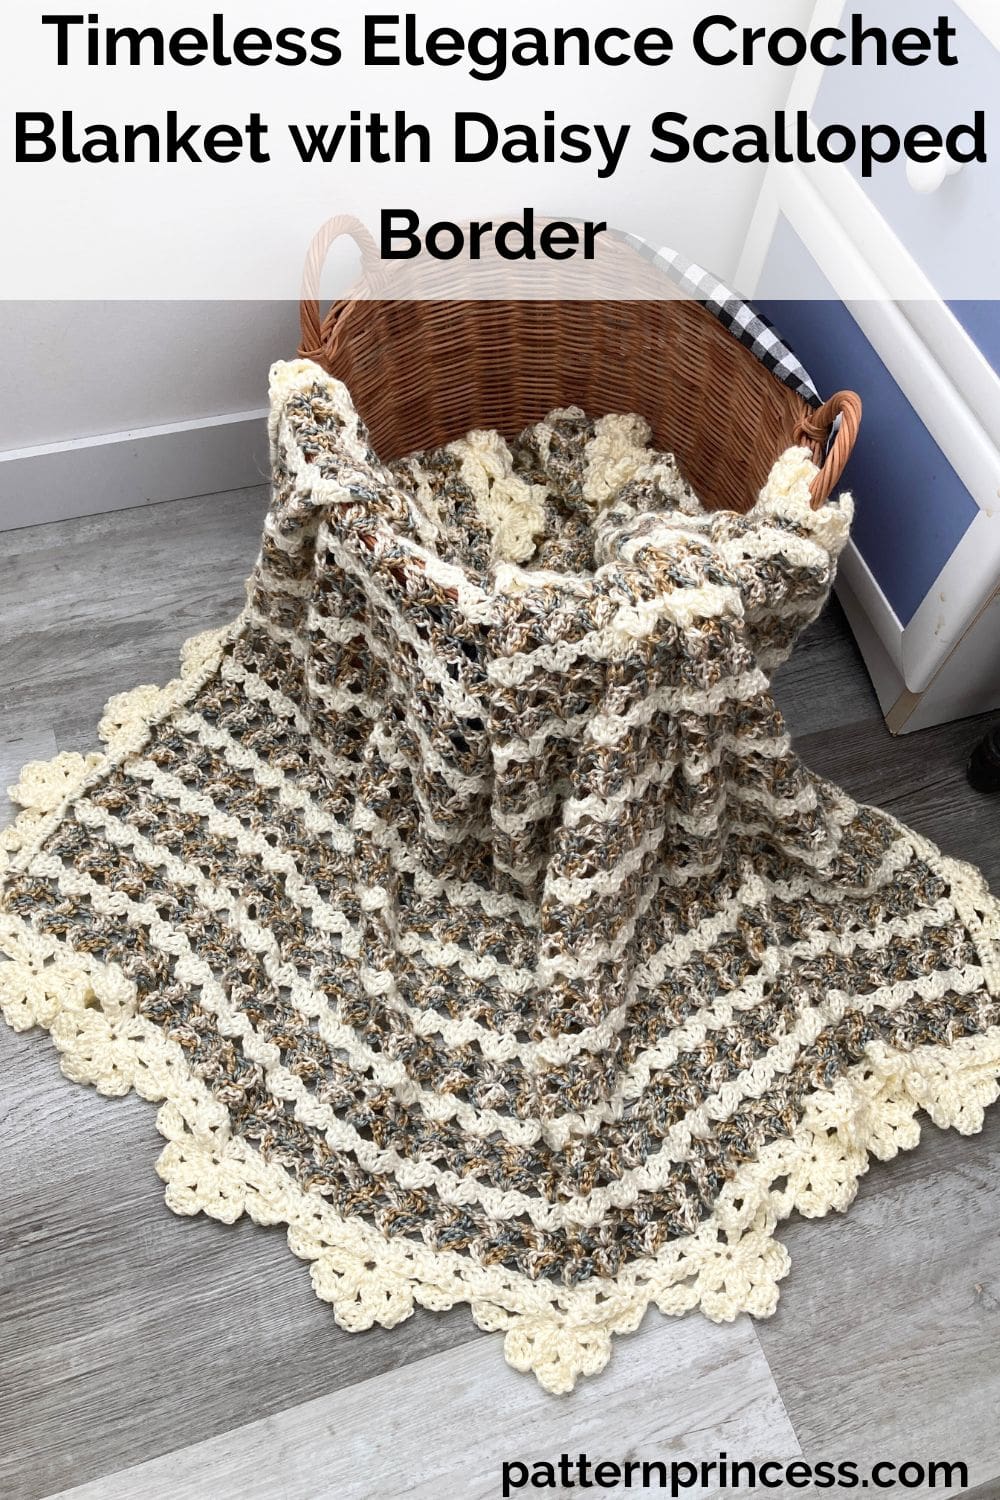
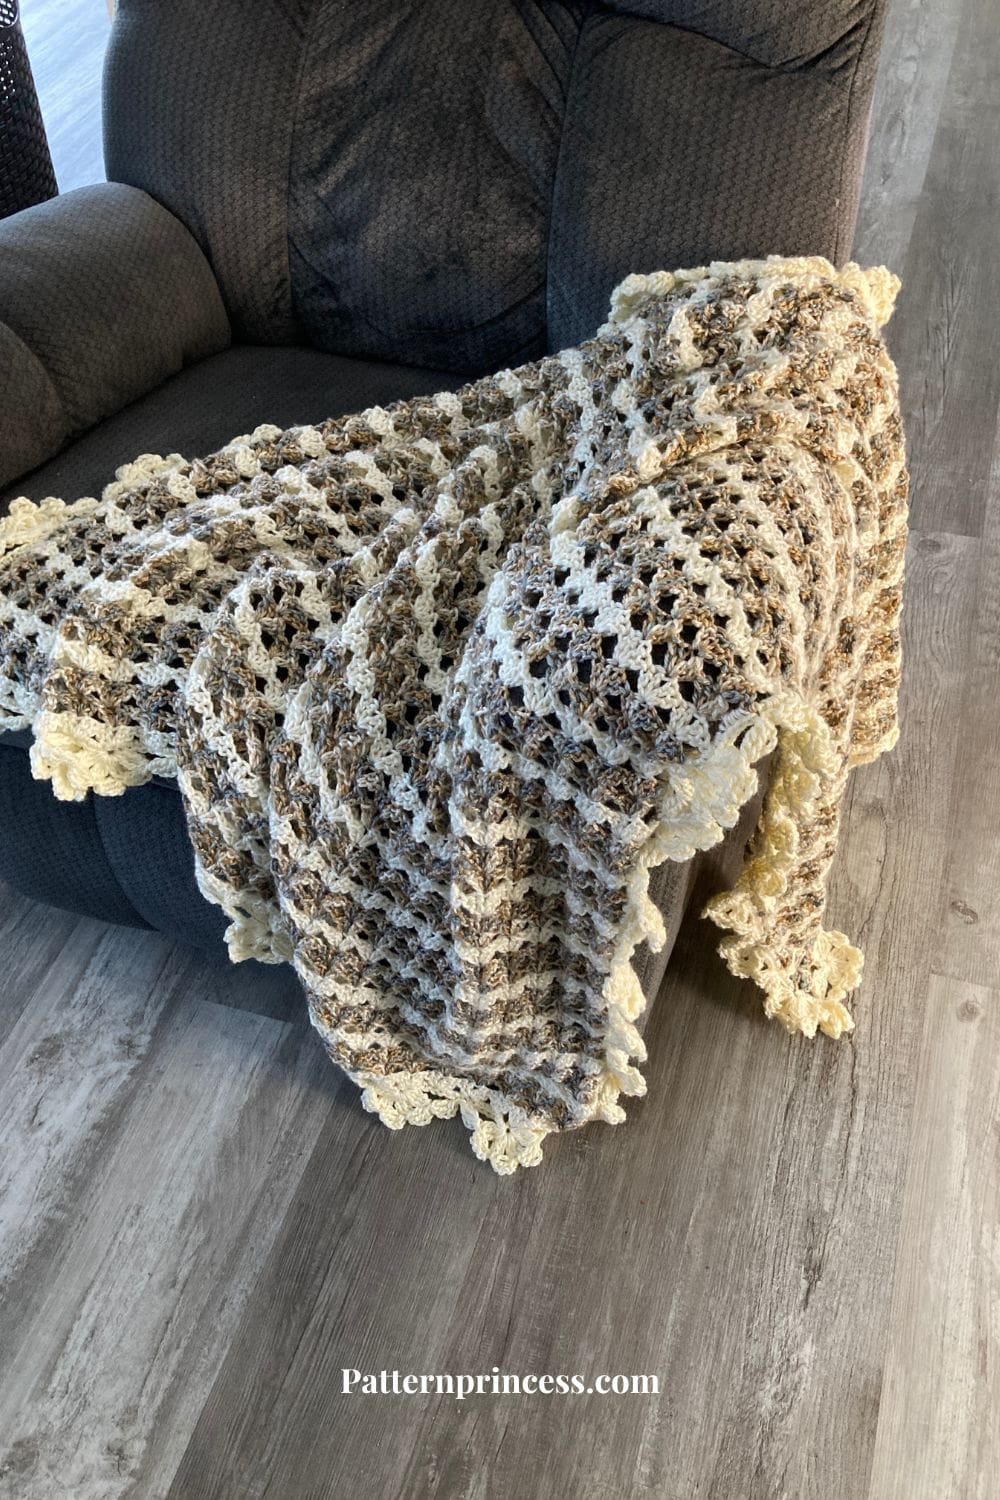
The Timeless Elegance Crochet Blanket brings together the delicate texture of the Iris Stitch with the soft charm of a daisy-inspired edge. There’s something magical about a crochet blanket that feels like a piece of art and a comforting embrace all at once.
An approachable design that showcases a beautiful stitch that is framed with a border reminiscent of delicate daisy petals. And a blanket that’s perfect for adding warmth and sophistication to any space.
Timeless Elegance Crochet Blanket
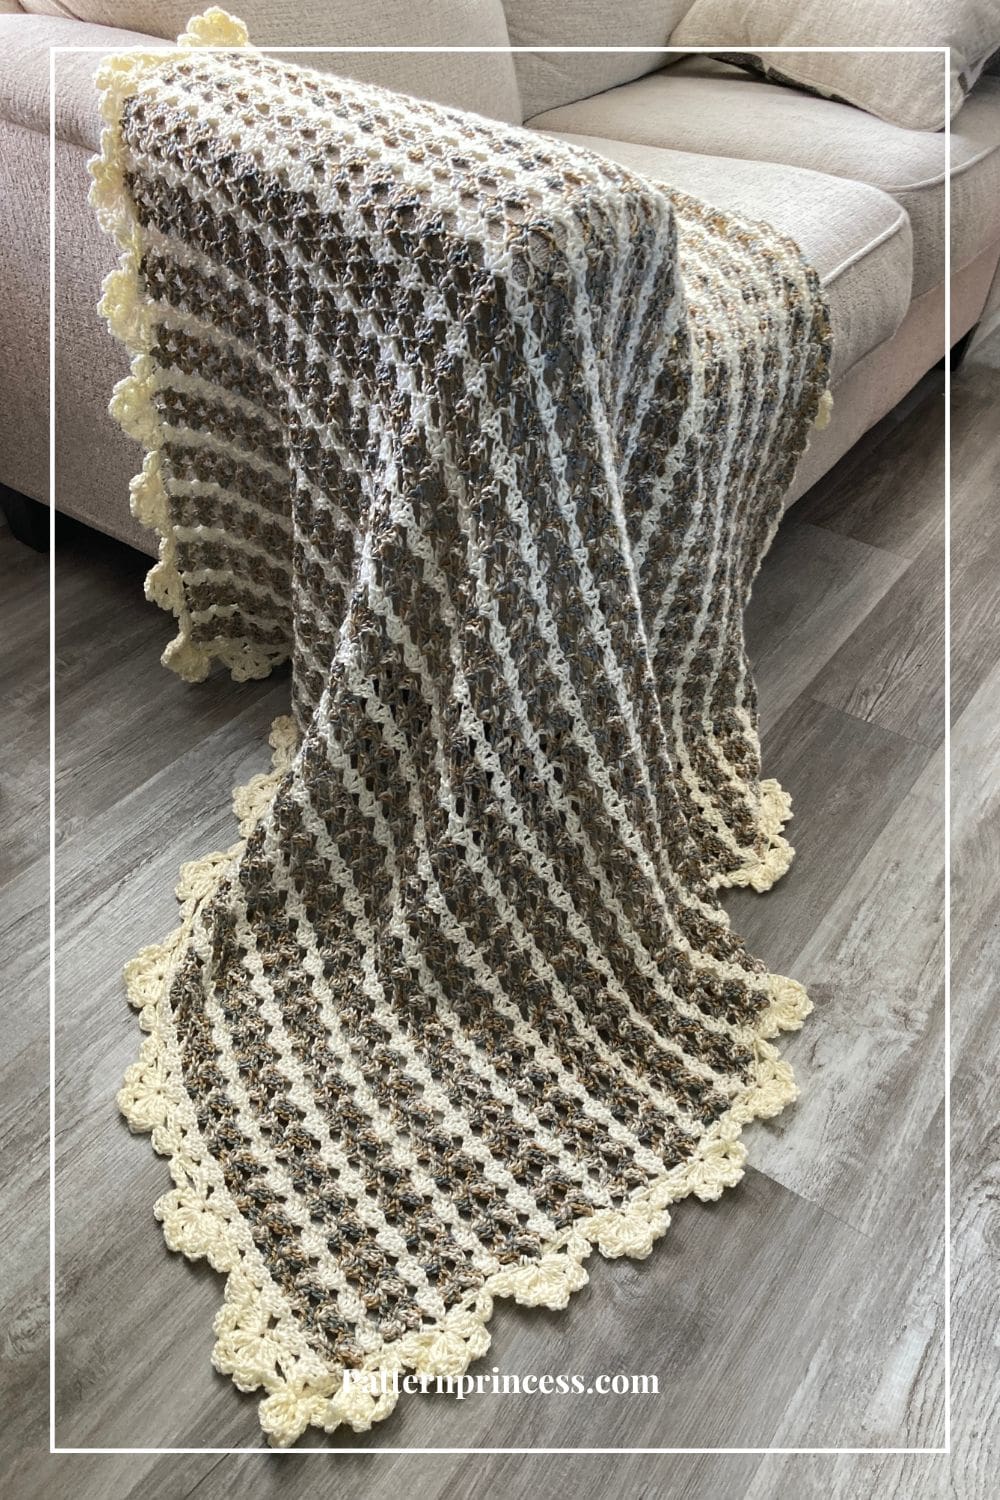
Whether you’re making it for your home or as a thoughtful handmade gift, this blanket is both simple and rewarding to create.
It’s a beautiful statement piece for your home. or a heartfelt gift for a loved one, this pattern offers endless opportunities to infuse your creativity into a truly timeless project.
Easy Repeating Crochet Pattern
It’s an easy stitch to learn and it is super speedy to crochet. Yet, it doesn’t use up too much yarn. The pattern has an easy repeat so it can be memorized and worked up quickly. Once you get the first few figured out, it becomes an easy crochet border to do as it is a repeating pattern. The gorgeous daisy border may look hard, but it is only two rows of stitches to achieve this floral border. Making it awesome for a fun project you can finish fast.

Directions: Timeless Elegance Crochet Blanket with Daisy Scalloped Border
Skill Level
This blanket is perfect for a confident beginner. However, the daisy border is more suited to an Intermediate Crocheter.
Gauge
13 SC and 14 rows with a 5 mm (U.S. H/8) crochet hook.
Approximately 4 inches per daisy scallop cluster.
Size
51 X 55 Inches
Change the size of the blanket using any stitch combination using multiples of 4 plus 3.
Border. Change the size by using multiples of 15.
Materials
Caron Simply Soft in yarn color Off White. Each skein has 315 yards. We used 2 ½ skeins or 790 yards.
Loops and Threads Soft and Shiny in yarn color Shimmer. Each skein has 207 yards. We used 3 ½ skeins or 750 yards.
Total yardage 1,540.
Crochet Hook 5 mm (U.S. H/8) crochet hook
Scissors
Tapestry Needle
Measuring Tape
Abbreviations
- CH = Chain
- DC = Double Crochet
- SK = Skip
- SL ST = Slip Stitch
- SP = Space
- ST = Stitch
- STs = Stitches
- TC = Treble Crochet
- 2 TC-CL = 2 Treble Crochet Cluster
- 3 TC-CL = 3 Treble Crochet Cluster
- [ ] = Repeat Between
Pattern Notes
Written in US Crochet Terms.
Turn at the end of each row.
Change colors as desired at the end of rows. In the video, I do show how to carry the yarn up the side.
The last stitch at the end of the row can be worked into the top chain of the first chain three or you can just work into the space. They both have a great look for the border.
For the border, work the stitches on the right side of your project. There is no need to turn your work for the border.
Important Tip. For the border, you’ll need a multiple of 15 to work this pattern. Therefore, when working the single crochet round adjust your stitches on the sides, top, and bottom so they are divisible by 15 (not counting the corner stitches).
Special Stitches Used
Chain Stitch
Insert the hook in the stitch, wrap the yarn over the crochet hook from back to front. Draw the yarn through the loop. (The first chain stitch is complete).
HOW TO CROCHET THE CHAIN STITCH video tutorial
Double Crochet
Yarn over, insert the hook through both loops and pull up a loop. Next, yarn over and pull through two loops on the hook. Lastly, yarn over again and pull through the last two loops on the hook.
HOW TO CROCHET THE DOUBLE CROCHET STITCH video tutorial
Treble Crochet (TC)
YO twice, insert your hook, YO and pull up a loop, YO and pull through two loops, YO and pull through two loops again, YO and pull through remaining two loops.
2 Treble Crochet Cluster (2TC-CL)
- YO twice, insert your hook, YO and pull up a loop, YO and pull through two loops, YO and pull through two loops again. There should be two loops on the hook.
- YO twice, insert your hook, YO and pull up a loop, YO and pull through two loops, YO and pull through two loops again. There should be three loops on the hook.
- YO and pull through the remaining three loops.
3 Treble Crochet Cluster (3TC-CL)
- YO twice, insert your hook, YO and pull up a loop, YO and pull through two loops, YO and pull through two loops again. There should be two loops on the hook.
- YO twice, insert your hook, YO and pull up a loop, YO and pull through two loops, YO and pull through two loops again. There should be three loops on the hook.
- YO twice, insert your hook, YO and pull up a loop, YO and pull through two loops, YO and pull through two loops again. There should be four loops on the hook.
- YO and pull through the remaining four loops.
Two Double Crochet V-Stitch. This means you work two double crochet stitches, chain 1, and two double crochet stitches all in one stitch. Today, this becomes the Iris Stitch Cluster.
Yarn Color Pattern
Begin with off white yarn for row 1. Then work two rows of shimmer.
Continue repeating one row of off white and two rows of shimmer throughout the blanket. End with a row of off white for a symmetrical look.
Begin
Make a slip knot and put the loop on the crochet hook.
Make a foundation chain 139 CH STs.
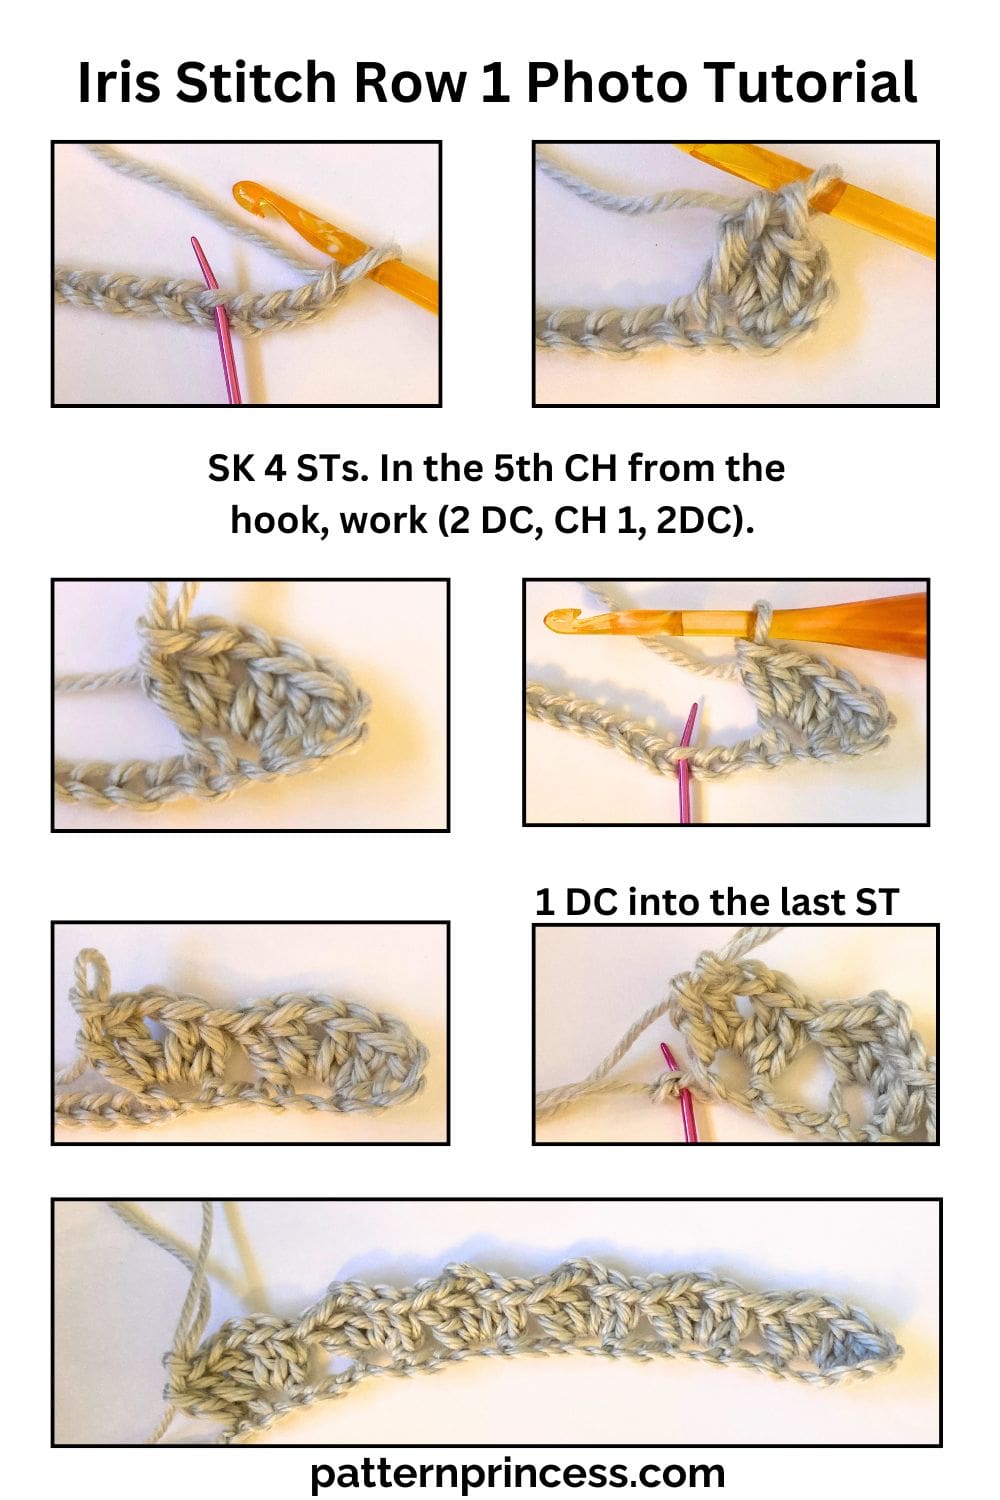
Row 1
SK 4 STs. In the 5th CH from the hook, work (2 DC, CH 1, 2DC). [SK 3 STS, in the 4th CH ST work (2DC, CH 1, 2DC)]. Repeat across between [ ] to the last 2 CH STs. Then SK 1 ST and work 1 DC into the last ST. Turn
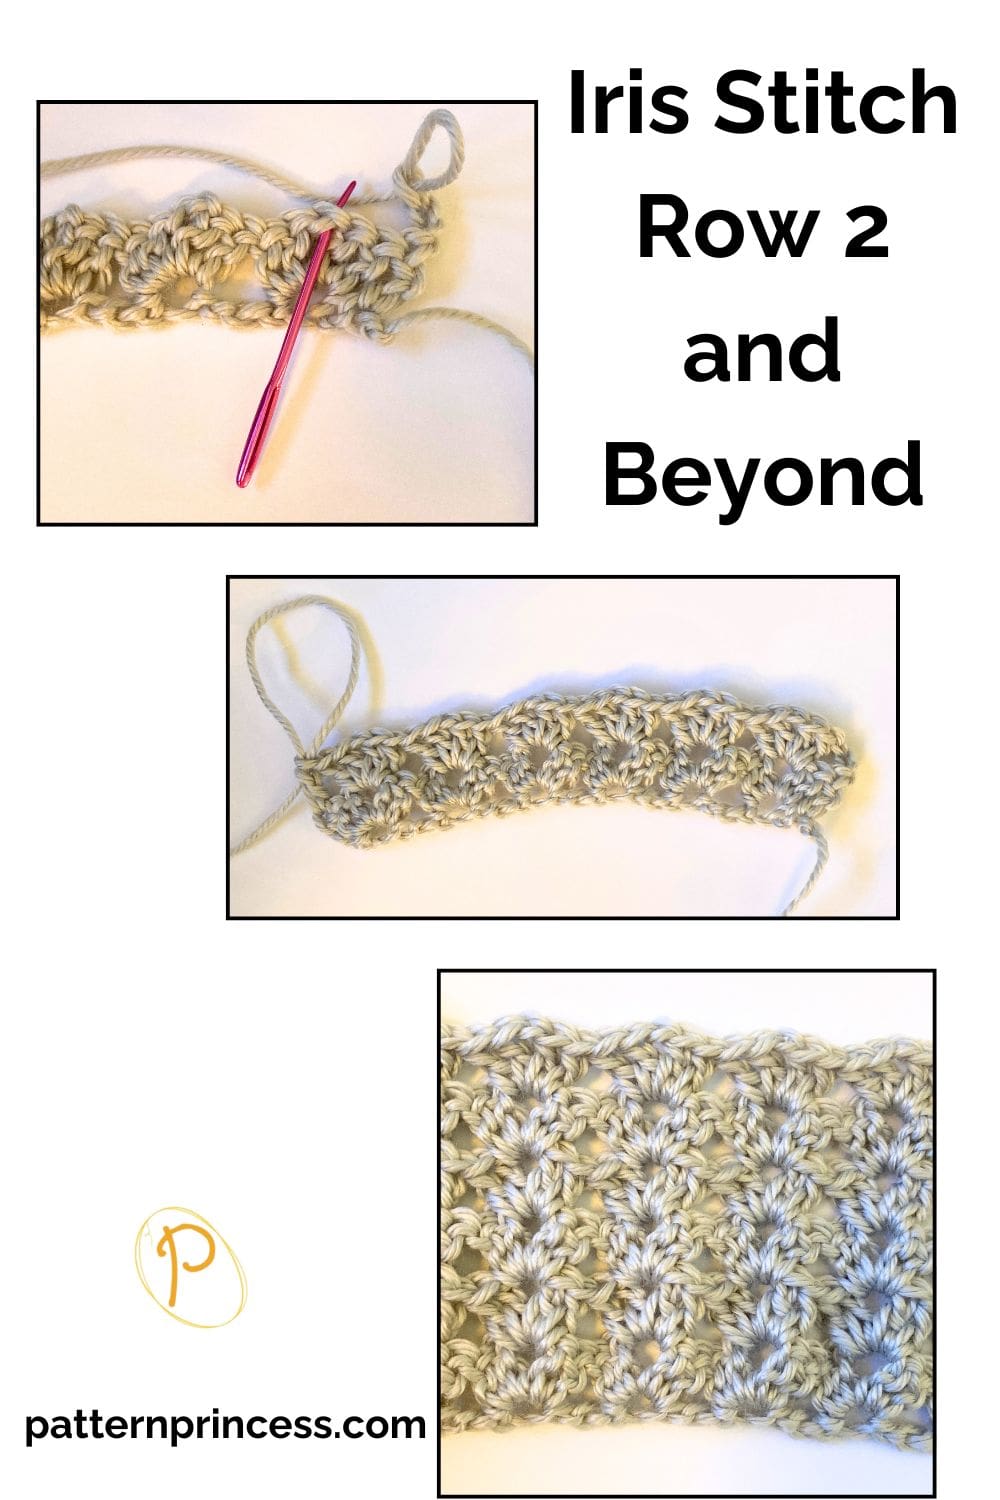
Row 2
CH 3. SK 2 DC. In the CH SP of the row below, work (2DC, CH 1, 2DC). [SK to the next CH SP and work (2DC, CH 1, 2DC)]. Repeat across between [ ]. End with 1 DC in the top of the turning chain. Turn
Rows 3 through 67
Continue to repeat row 2.
Finishing
Before starting the border weave in yarn ends.
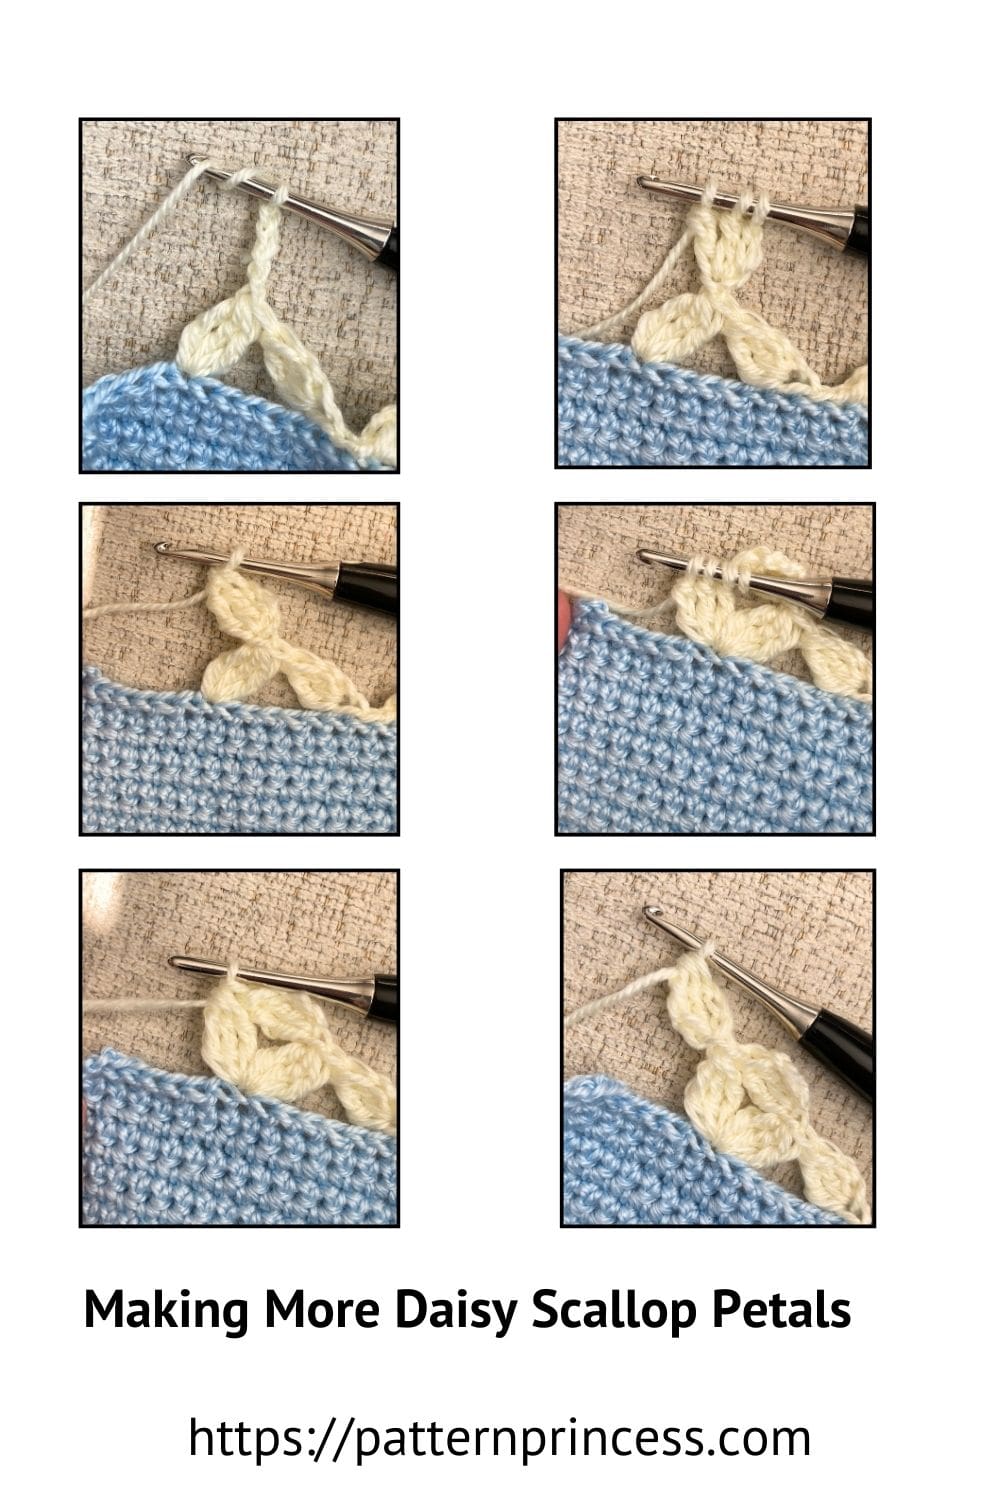
Crochet Daisy Scalloped Border
The border is worked using the Off-White Yarn.
The photos showing this border do not show the round of single crochet. We found that we like to do a round of single crochet stitches around before adding this border.
Round 1
Start with a slip knot and a loop on the crochet hook. Join the yarn to your project in a corner.
Border Math
You’ll need a multiple of 15 to work this pattern. Therefore, when working the single crochet round adjust your stitches on the sides, top, and bottom so they are divisible by 15 (not counting the corner stitches).
Work 3 SC in each corner ST.
For the top and bottom. Skip all centers of Iris Stitches and place 2 SC on each side. There will be 1 extra stitch so only work 1 SC on one side of an Iris Stitch somewhere. There will be 135 SC total, which is 4 in each Iris Stitch, less 1 ST. There will be 9 groups of 15.
For the rows. There will be 14 groups of 15 or 210 single crochet stitches. Ease the stitches along the sides working 3 or 4 stitches for each row.
I worked 3 in each row on the long sides and added 9 stitches along the way for a total of 210 stitches.
When you have completed the round, join with a slip stitch to the beginning SC.
Round 2
If you’re not there already, SL ST to a stitch just after the 3 corner stitches. At the end of the row, you’ll end up doing 1 slip stitch to the middle corner stitch and 1 slip stitch after the corner stitch.
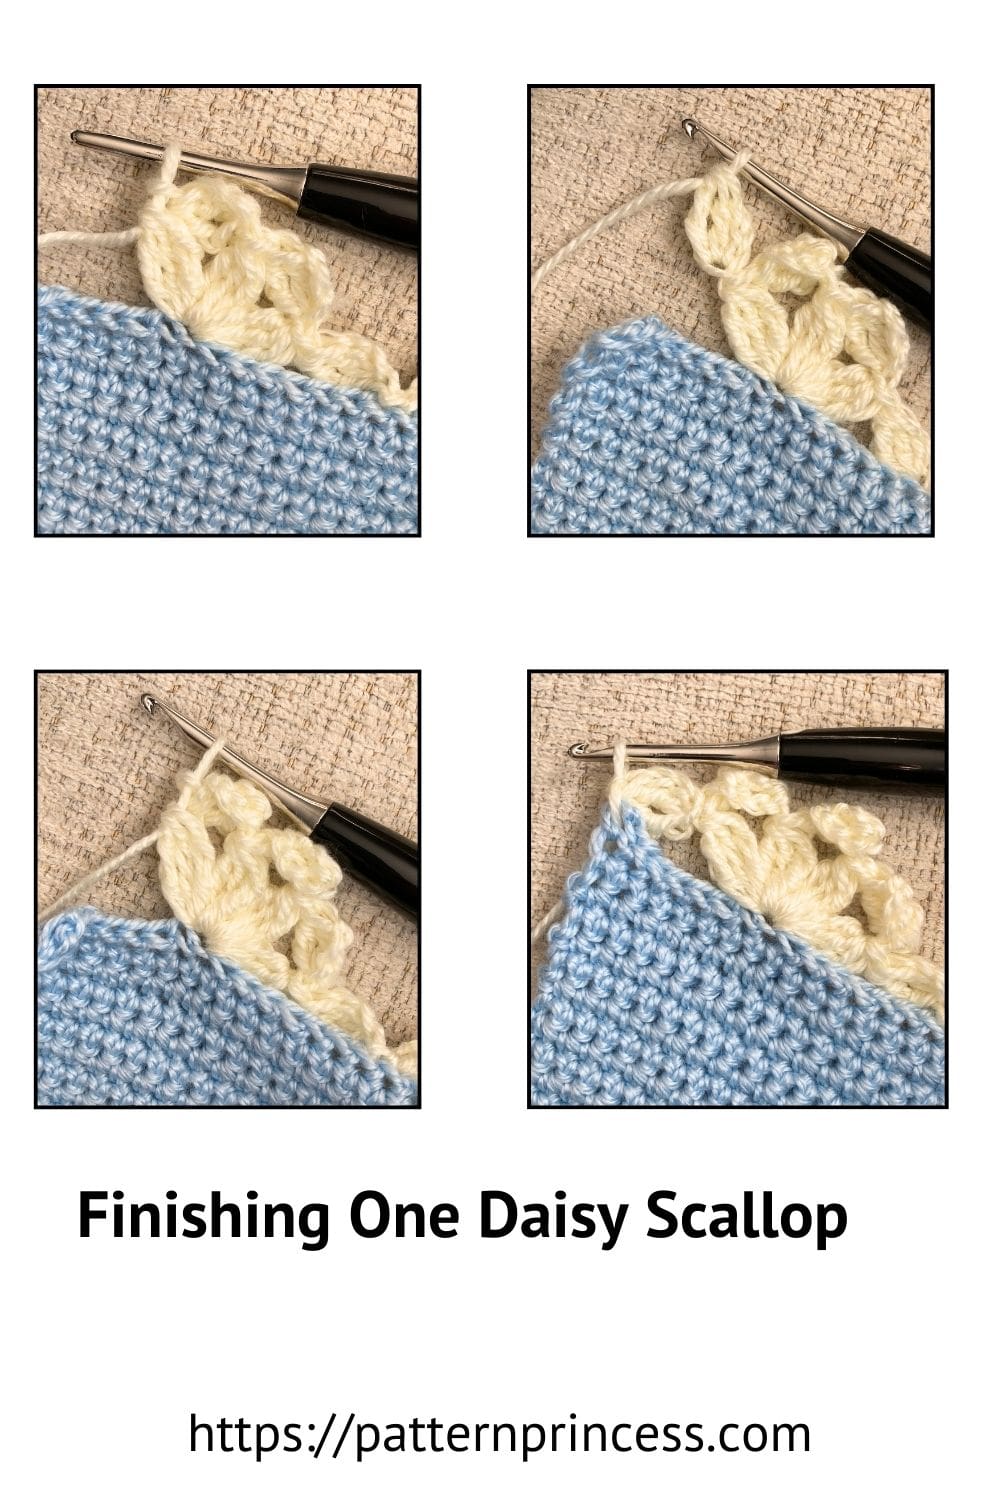
1 Daisy Stitch Section. CH 4 (Counts as TC). Work a 2 TC-CL in the first ST of the CH 4. SK the next 6 STs. In the 7th CH work a 3 TC-CL. [CH 4 (Counts as TC). Work a 2 TC-CL in the first ST of the CH 4. 3 TC-CL in the same ST as before]. Repeat between [ ] 2 times. CH 4 (Counts as TC). Work a 2 TC-CL in the first ST of the CH 4. SK the next 6 STs. In the 7th CH work a SL ST.
SL ST to the next ST.
Repeat the Pattern for the daisy stitch on the sides, top, and bottom.
When you get to the corners, work the following stitches.
Corner Stitches
SL ST to the corner ST. (Work CH 4, 2 TC-CL in the first ST of the CH 4. CH 6. Work 2 TC-CL in the 4th CH from the hook. SL ST back into the corner ST). Repeat (Work CH 4, 2 TC-CL in the first ST of the CH 4. CH 6. Work 2 TC-CL in the 4th CH from the hook. SL ST back into the corner ST). SL ST back into the corner ST. SL ST into the first ST on the side of STs you are working on to continue working around with the daisy scallop pattern.
Finishing
Cut the yarn leaving a 10-12 inch yarn tail. Pull the yarn tail through the last stitch. Using the tapestry needle, weave all yarn ends in and trim off any excess yarn.
Video Tutorial of the Iris Crochet Stitch
How to Crochet Iris Stitch Pattern with Video
Right hand video
We also have the daisy scallop floral border free pattern for more details.
You Tube Tutorials for the Crochet Daisy Scallop Floral Border
We used version 3.

You can find Victoria crocheting, quilting, and creating recipes. She has cooked in restaurants for over 20 years, including many larger parties. She learned to crochet when she was just 11 years old and has been crocheting ever since; over 50 years now. Over 40 years ago, she loved her first class in sewing and continues to hone her skills in quilting. Many have enjoyed the handmade gifts over the years. In her professional career, she has worked in management in a wide variety of businesses including higher education as a dean of a division. All the while attending college part-time to achieve her doctorate in higher education with an emphasis in e-learning.