Last updated on January 19th, 2026 at 09:35 pm
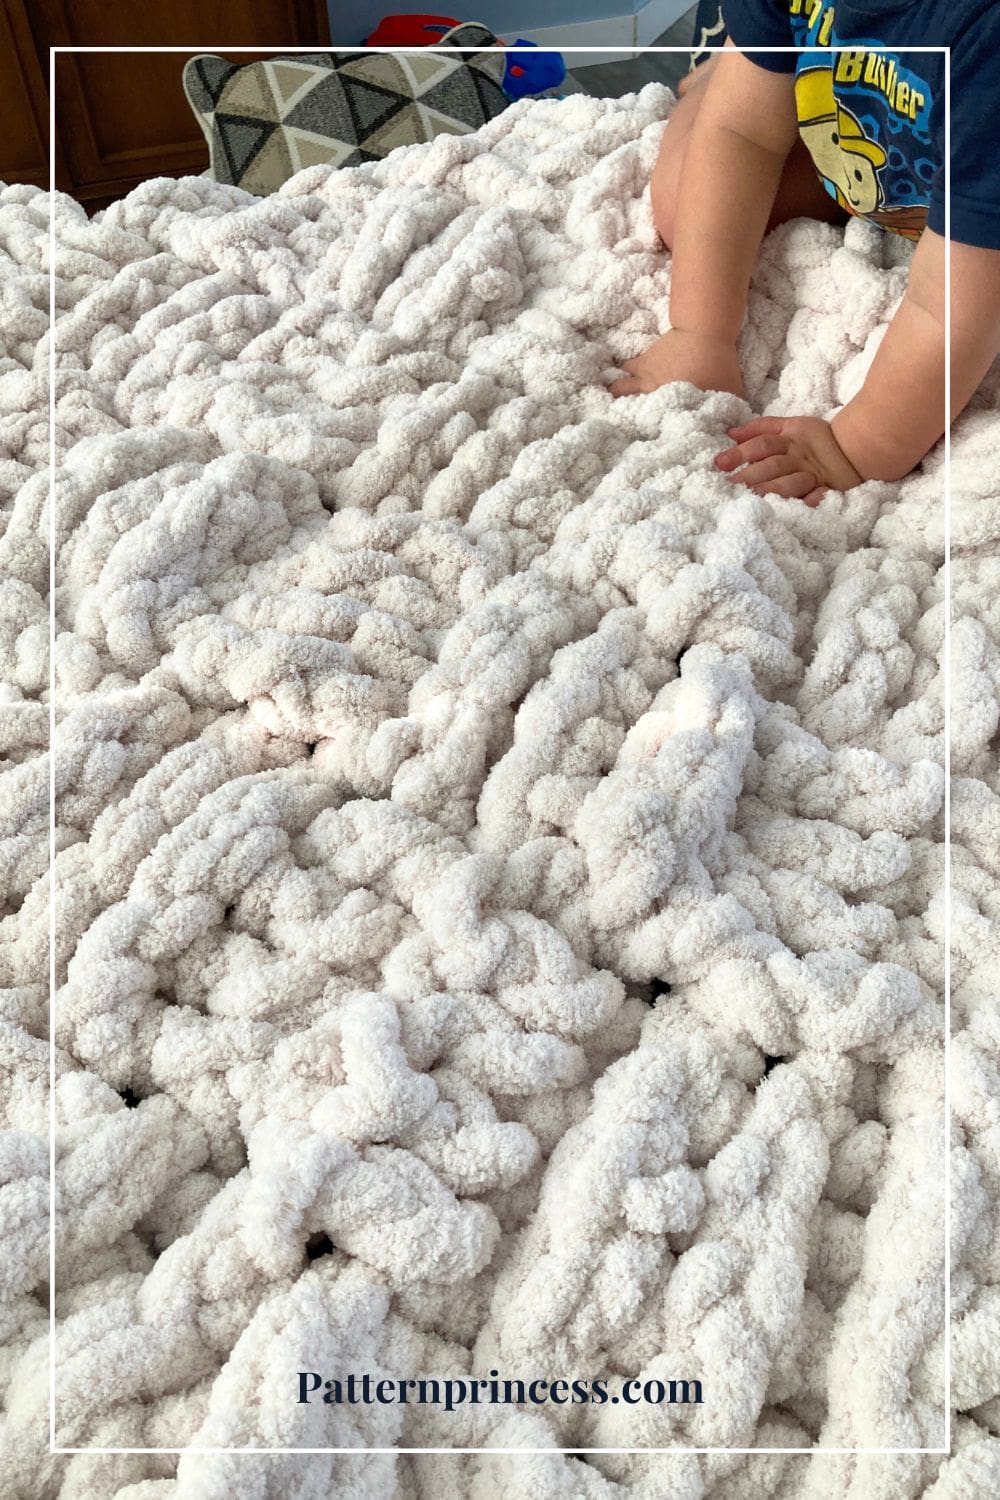
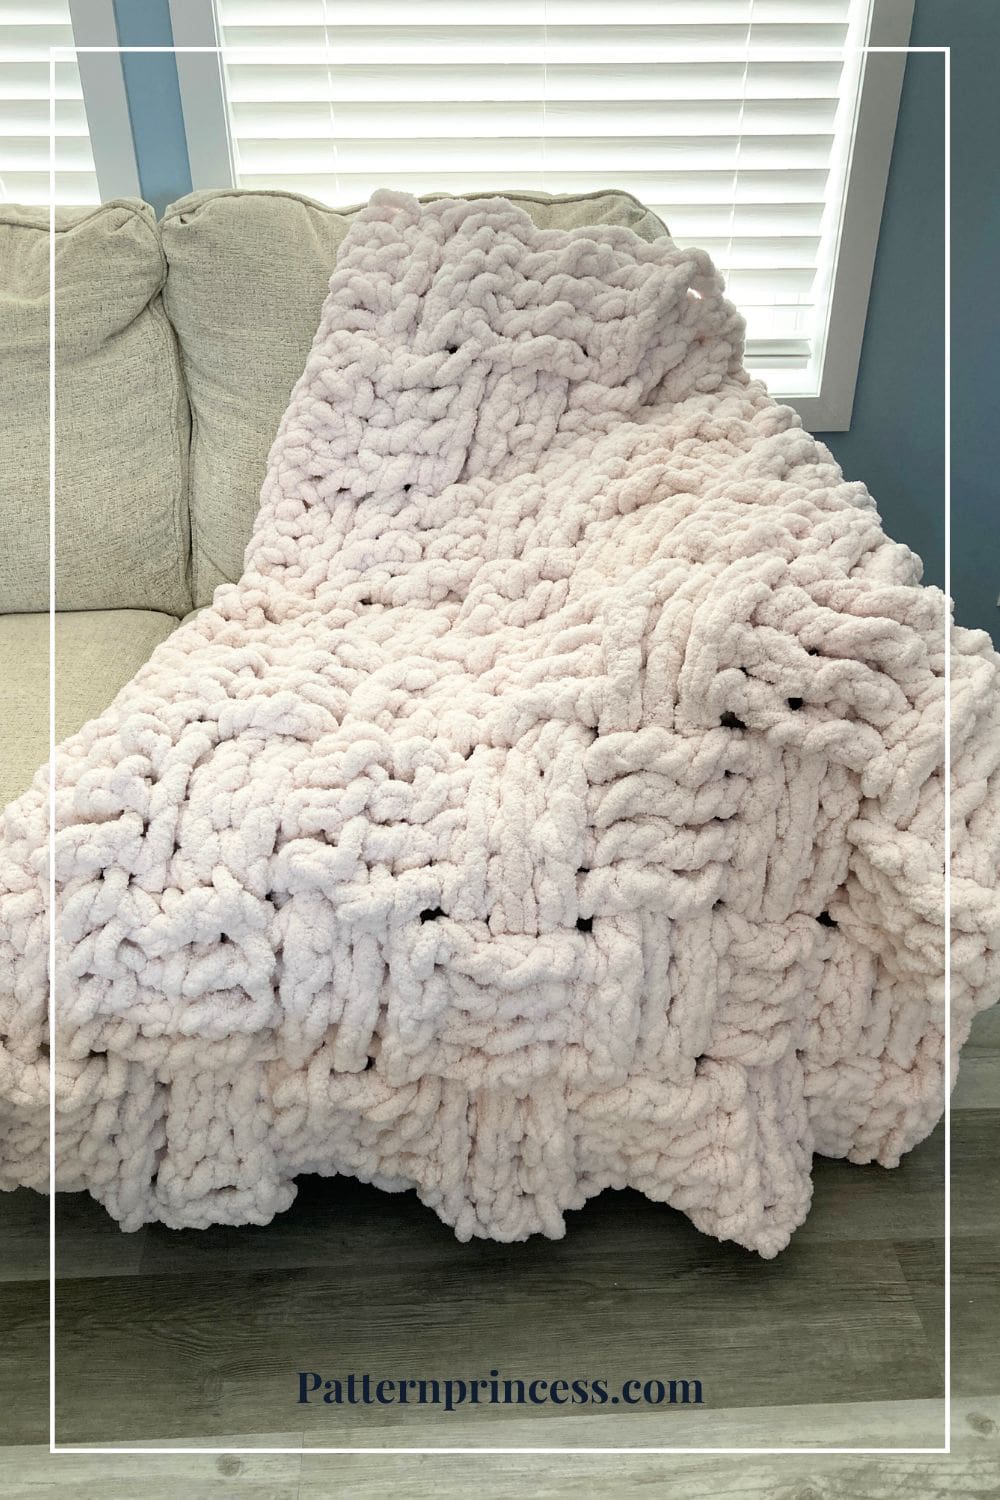
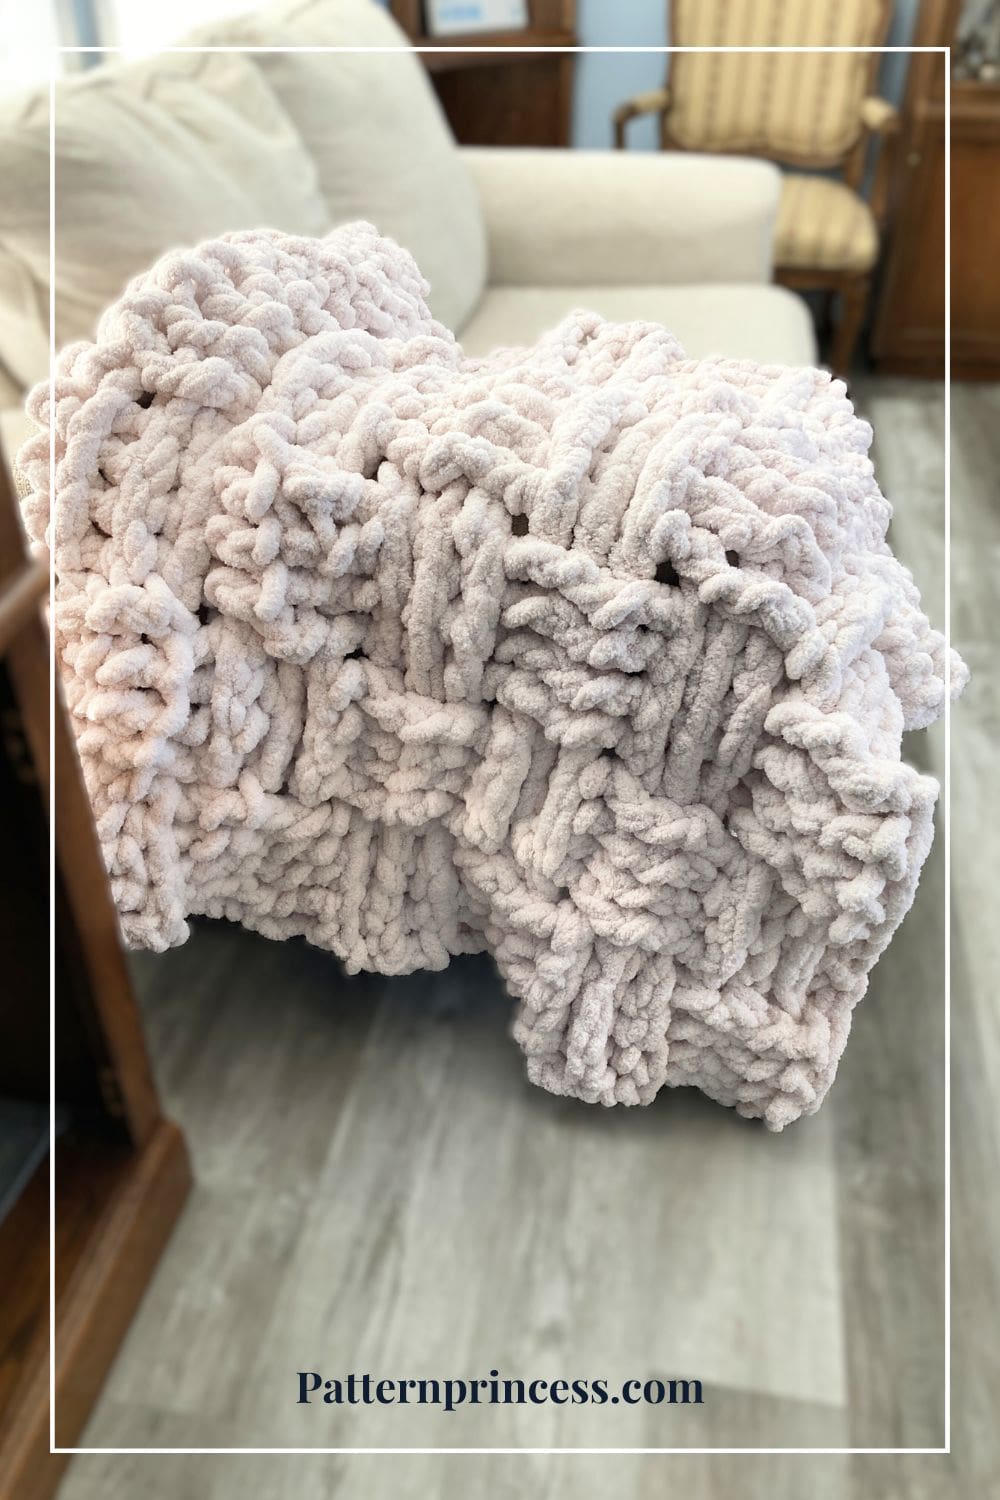
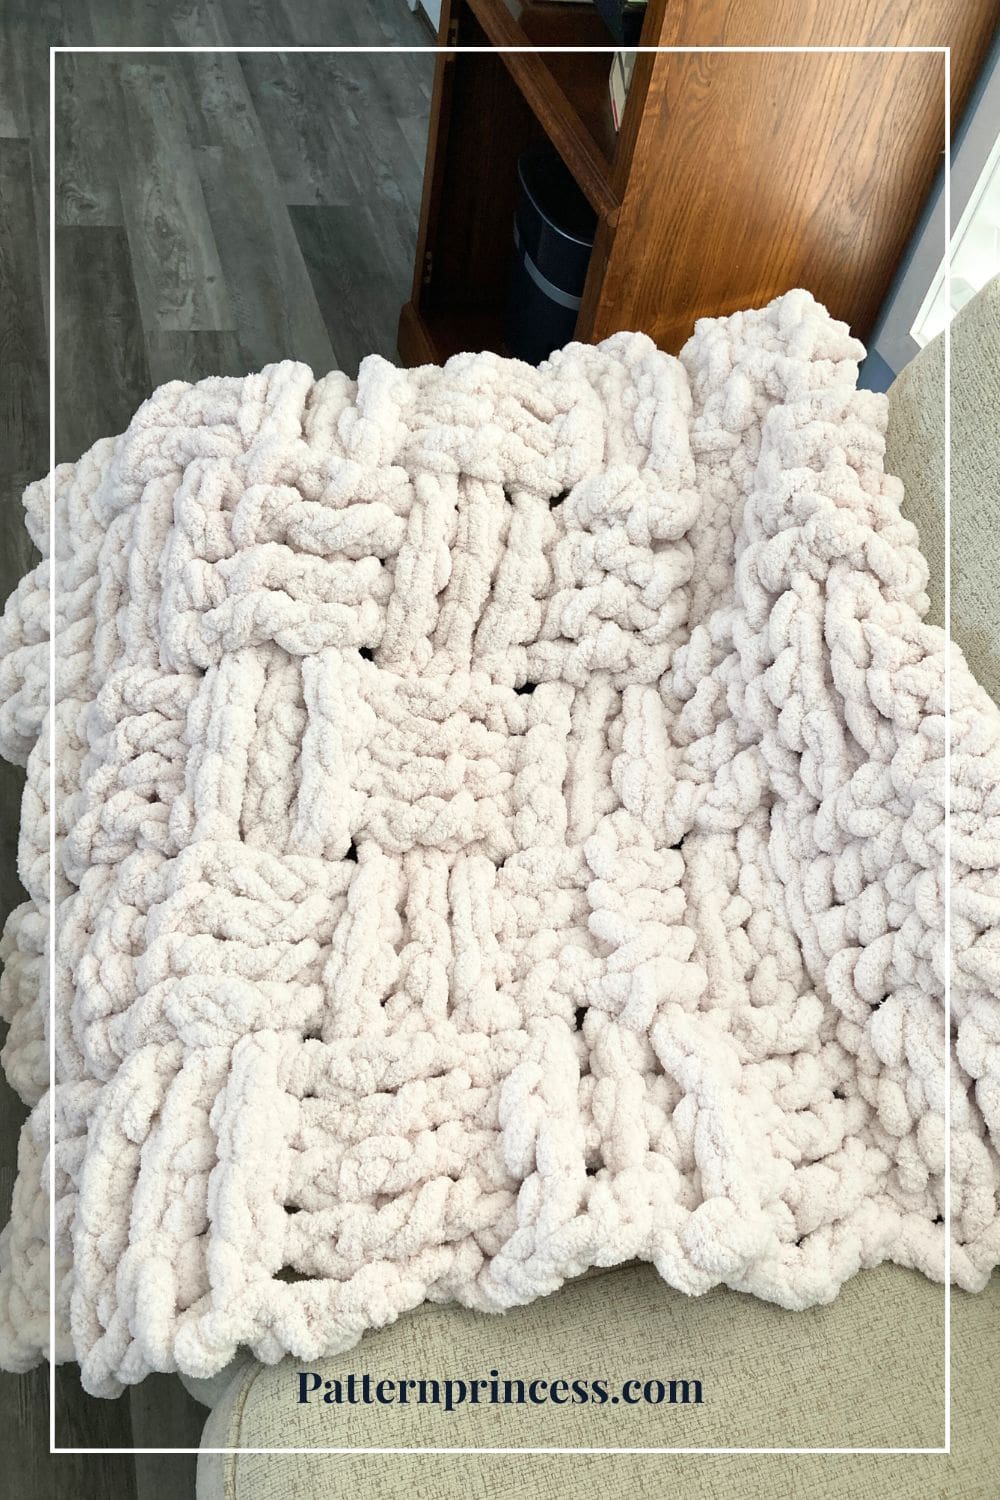
This 2-Day Chunky Throw Blanket Pattern quickly became one of my favorites. Not only because it works up fast, but because the basket weave stitch adds such beautiful texture without any complicated techniques. The free crochet pattern comes in four sizes with video tutorials. It’s made with plush Bernat Blanket Big yarn. This throw is thick, squishy, and wonderfully soft. Perfect for curling up on the couch when the weather cools and you want a project that feels as warm as it looks.
If you love quick wins, pairing chunky yarn with a timeless texture is one you’re going to enjoy. I loved working on every stitch of this beauty. Lovely for gifting to a loved one or adding a handcrafted touch to your home.

Chunky yarn Project
The oversized yarn creates bold, defined texture and a luxurious weight while keeping the pattern quite simple and approachable.
The result is a warm, modern, and wonderfully chunky blanket you’ll reach for again, and again. There’s something so comforting about working up a big, cozy blanket you can finish in just a weekend. Especially when the weather cools and you want a project that feels as warm as it looks.
Whether you’re looking to make a fast weekend project, build up your handmade gift stash, or create a cozy throw for your living room, this blanket is designed to be both beautiful and practical.
Why You’ll Love This Pattern
- It’s truly a weekend project. With extra-chunky Bernat Blanket Big yarn, this throw works up fast – Just 2 Days! Perfect when you want the satisfaction of finishing a cozy blanket quickly.
- Stunning texture with simple stitches. The classic basket weave stitch adds a rich, woven look without complicated techniques, making it approachable for confident beginners.
- Warm, squishy, and unbelievably soft. This yarn creates a thick, plush fabric that’s perfect for snuggling, gifting, or adding a handmade touch to your space.
- Easy to customize. Adjust the width or length to create a couch throw, oversized bed blanket, or even a quick gift for someone special.
- A timeless handmade piece. The basket weave design brings a classic, heirloom-style texture to a modern chunky blanket. Something you’ll love using year after year.
Get Your Ad Free Printable PDF in our Etsy Shop.
Directions: 2-Day Chunky Throw Blanket
Skill Level
This stitch is perfect for an advanced beginner to intermediate crocheter.
If you can crochet a double crochet stitch around posts, you can crochet this pattern.
Size
- Small Throw Blanket: 45 X 45 inches
- Medium Throw Blanket: 56 X 58 inches (shown)
- Large Throw Blanket: 65 X 65 inches
- X-Large Thow Blanket: 70 X 80 inches
Note. To change the size, use multiples of 8, then add 4 extra chain stitches.
Gauge
2.7 stitches every 4 inches. 1.7 rows of the pattern every 4 inches.
Materials
Bernat Blanket Big #7 Jumbo yarn. 100% polyester. Skein Weight: 10.5 oz. / 300 g. Yardage for each skein: 32 yd. / 29 m.
Yarn Color: Sandy Cream
- Small Throw Blanket: 320 yards or 10 skeins.
- Medium Throw Blanket: 400 yards or 13 skeins.
- Large Throw Blanket: 650 yards or 21 skeins.
- X-Large Thow Blanket: 828 yards or 27 skeins.
Crochet hook 30.0mm
Scissors
Tapestry needle
Tape Measure
Abbreviations
- CH = Chain
- BPDC = Back Post Double Crochet
- DC = Double Crochet
- FPDC = Front Post Double Crochet
- SK = Skip
- SL ST = Slip Stitch
- SP = Space
- ST = Stitch
- STs = Stitches
- [ ] = Repeat Between
Crochet Stitches
Chain Stitch (CH ST)
Begin the chain stitch by making a slip knot on the crochet hook. Leave about a 5-inch tail on the yarn. This will be weaved in later.
Next snug up the yarn loop that is on the crochet hook; while it should be firm, it should also be loose enough to slide on the hook with ease.
Keeping the loop on the hook, insert the hook in the stitch, wrap the yarn over the crochet hook from back to front. Draw the yarn through the loop. (The first chain stitch is complete).
HOW TO CROCHET THE CHAIN STITCH video tutorial
Double Crochet (DC)
To work a regular double crochet, yarn over, insert the hook through both loops and pull up a loop. Next, yarn over and pull through two loops on the hook. Lastly, yarn over again and pull through the last two loops on the hook.
HOW TO CROCHET THE DOUBLE CROCHET STITCH video tutorial
How to Work a Front Post or Back Post Double Crochet Stitch
If you are unfamiliar with crocheting the front post and back post double crochet stitches, we have a whole blog post dedicated to showing you the details.
How to Work a Front Post or Back Post Double Crochet Stitch – Pattern Princess
Back Post Double Crochet (BPDC)
The back post stitches appear to recede on the side of the crocheted fabric that is facing you.
- Yarn over, insert the hook from back to front between the posts of the first and second double crochet of the row below.
- Then insert the hook from the front to the back front between the posts of the second and third stitches. (The hook should now be positioned horizontally in front of the double crochet that you are working around).
- Yarn over, pull the yarn over the post of the stitch.
- There should now be 3 loops on the hook. Yarn over, pull the yarn through 2 loops on the hook.
- Last, yarn over again and pull through the last two loops on the hook.
HOW TO CROCHET THE BACK POST DOUBLE CROCHET video tutorial
Front Post Double Crochet (FPDC)
Front post stitches are raised crochet stitches on the surface of the fabric facing you.
When you work front post stitches, you will insert your hook from the front of your work to the back. Insert your hook the front to the back, so that the post you want to crochet around is in front of your hook.
- Yarn over, insert the hook from front to back between the posts of the first and second double crochet of the row below.
- Then insert the hook from the back to the front between the posts of the second and third stitches. (The hook should now be positioned horizontally in back of the post that you are working around).
- Yarn over, pull the yarn around the post of the stitch. There should now be 3 loops on the hook.
- Yarn over, pull the yarn through 2 loops on the hook.
- Lastly, yarn over again and pull through the last two loops on the hook.
HOW TO CROCHET THE FRONT POST DOUBLE CROCHET video tutorial
Pattern Notes
Written instructions in US terms.
This pattern looks the same on both sides.
Photos of the rows are shown within the written directions. You can find a step-by-step video tutorialfor both a left and right hand crocheter after the written pattern.
You’ll be repeating the pattern until you feel that a square is made. Then continue alternating the rows between the sets of blocks to create the woven look.
In each row, you’ll always end with a double crochet on the top of the chain 3.
Tension that’s too tight can make it hard to get your crochet hook into the stitches. A relaxed, even tension gives the best woven effect.
Turn at the end of each row.
Add a stitch marker at the end of every 3rd row.
Melting Ends (for synthetic yarn)
For synthetic yarns, such as acrylic or nylon, melting the ends can be an effective way to create a seamless join. This technique involves carefully melting the yarn ends with a flame, such as a lighter, to fuse them together.
I use this for super bulky yarn. I’ve found when trying to tie a knot or weave in super bulky yarn, the ends always pop out.
Melting the ends is a great way create a seamless join. This technique involves carefully melting the yarn ends with a flame, such as a lighter, to fuse them together.
- Hold the yarn ends in one hand with both ends pointing out. It is easier to light the yarn on fire this way.
- In the other hand use a lighter or a candle to light the ends of the yarn on fire.
- Put the lit ends of the yarn together and the flame will go out.
- Roll the joined yarn together between the palms of your hands a few times.
That’s it. You can keep crocheting with your chunky yarn.
Here is a quick video showing how I joined this yarn by melting the ends.
Begin Crochet Pattern
Begin Chain Stitches
Start with a Slip Knot. Place a slip knot on your crochet hook.
Work a starting chain using a Stitch multiple of 8 + 4.
- Small Throw Blanket: 28 stitches.
- Medium Throw Blanket: 36 stitches.
- Large Throw Blanket: 44 stitches.
- X-Large Thow Blanket: 52 stitches.
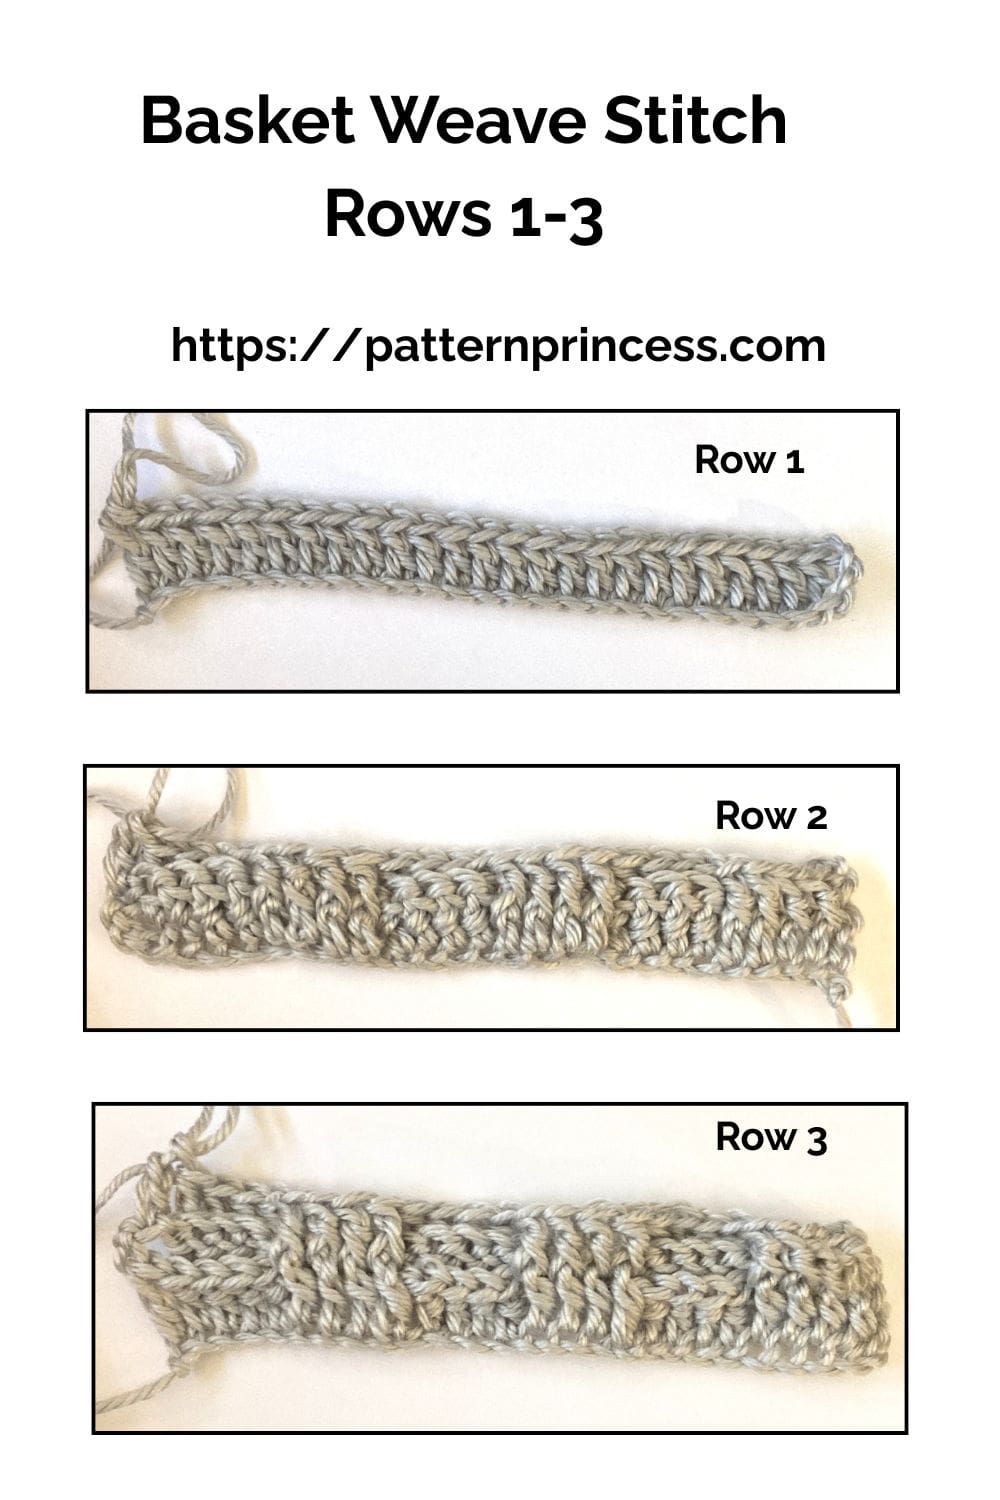
Row 1
In the 4th CH from the hook make a DC and each ST across. Turn
Row 2
CH 3 (Counts as a DC). [Work a FPDC around the next 4 DC STs. Work a BPDC around the next 4 STs]. Repeat the alternating stitches between [ ] across. End with a DC (not around the post) on the top CH of the first 3 skipped chain stitches. Turn
Row 3
CH 3 (Counts as a DC). [Work a FPDC around the next 4 FPDC STs. Work a BPDC around the next 4 BPDC STs]. Repeat the alternating stitches between [ ] across. End with a DC (not around the post) on the top CH of the previous row 3 chain stitches. Turn
Repeat row 3 until you feel that a square is made. For me, 3 rows of this alternating pattern made a square.
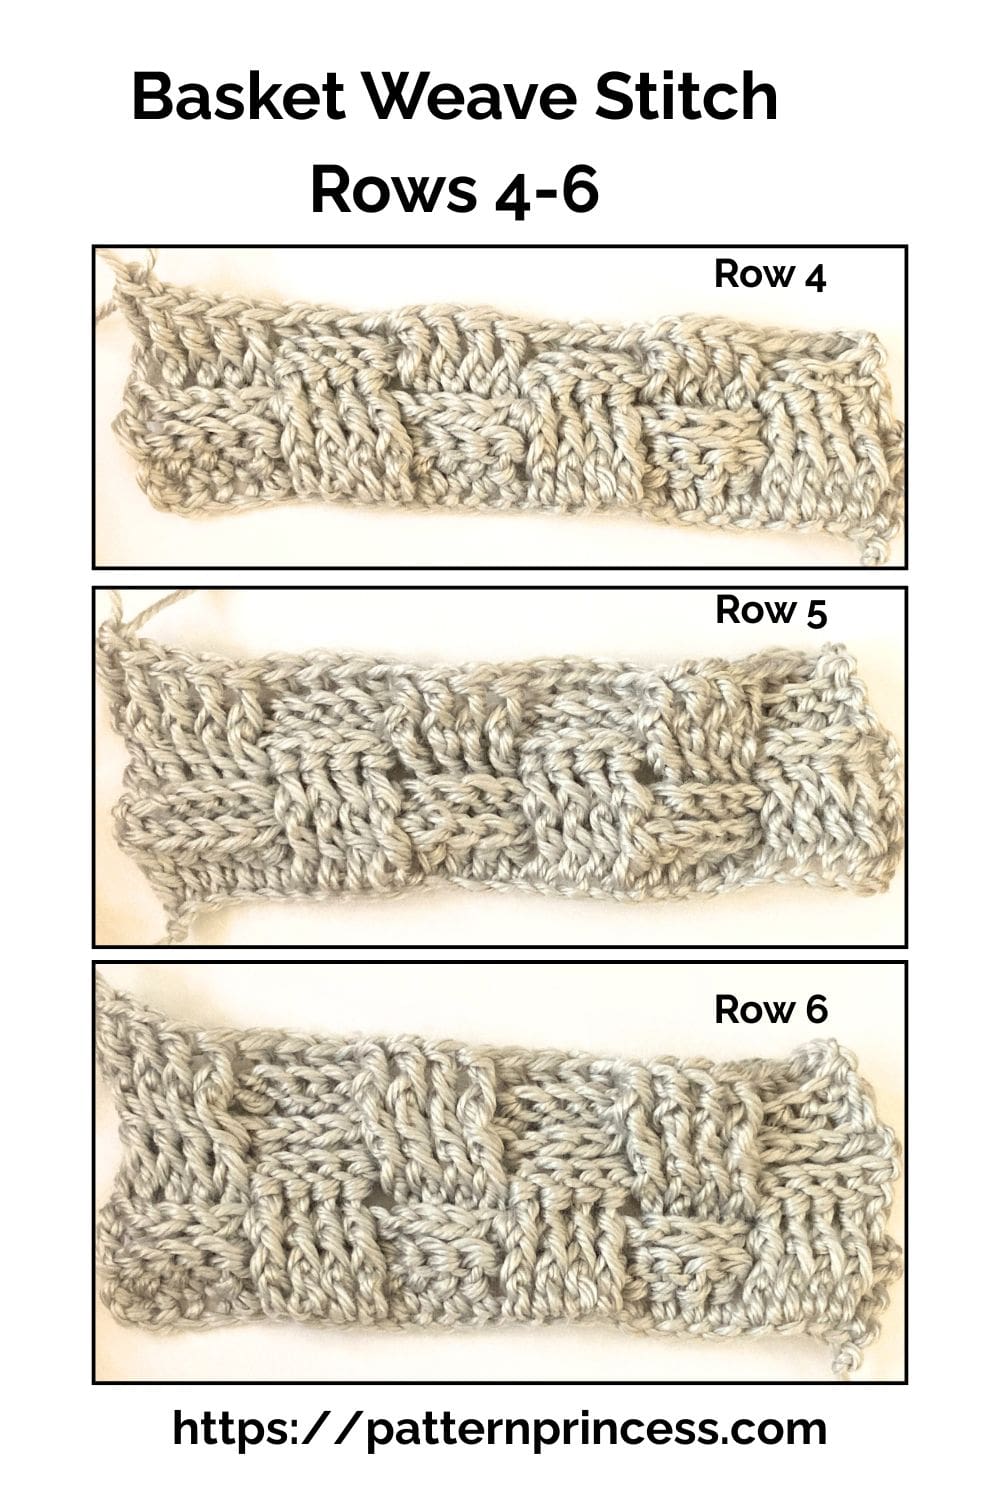
Row 4
For this row, you will be altering the direction of the stitches from the previous round. Tip. I placed a stitch marker at the end of row 3 to see where I was in the crochet pattern.
CH 3 (Counts as a DC). [Work a BPDC around the next 4 FPDC STs. Work a FPDC around the next 4 BPDC STs]. Repeat the alternating stitches between [ ] across. End with a DC (not around the post) on the top CH of the previous row 3 chain stitches. Turn
Row 5
CH 3 (Counts as a DC). [Work a BPDC around the next 4 BPDC STs. Work a FPDC around the next 4 FPDC STs]. Repeat the alternating stitches between [ ] across. End with a DC (not around the post) on the top CH of the previous row 3 chain stitches. Turn
Row 6
CH 3 (Counts as a DC). [Work a BPDC around the next 4 BPDC STs. Work a FPDC around the next 4 FPDC STs]. Repeat the alternating stitches between [ ] across. End with a DC (not around the post) on the top CH of the previous row 3 chain stitches. Turn
Add a stitch marker.
Row 7
Change the direction of the stitches with this row.
CH 3 (Counts as a DC). [Work a FPDC around the next 4 BPDC STs. Work a BPDC around the next 4 FPDC STs]. Repeat the alternating stitches between [ ] across. End with a DC (not around the post) on the top CH of the previous row 3 chain stitches. Turn
Row 8
CH 3 (Counts as a DC). [Work a FPDC around the next 4 FPDC STs. Work a BPDC around the next 4 BPDC STs]. Repeat the alternating stitches between [ ] across. End with a DC (not around the post) on the top CH of the previous row 3 chain stitches. Turn
Row 9
CH 3 (Counts as a DC). [Work a FPDC around the next 4 FPDC STs. Work a BPDC around the next 4 BPDC STs]. Repeat the alternating stitches between [ ] across. End with a DC (not around the post) on the top CH of the previous row 3 chain stitches. Turn
Add a stitch marker.
Row 10
Change the direction of the stitches with this row.
CH 3 (Counts as a DC). [Work a BPDC around the next 4 FPDC STs. Work a FPDC around the next 4 BPDC STs]. Repeat the alternating stitches between [ ] across. End with a DC (not around the post) on the top CH of the previous row 3 chain stitches. Turn
Row 11
CH 3 (Counts as a DC). [Work a BPDC around the next 4 BPDC STs. Work a FPDC around the next 4 FPDC STs]. Repeat the alternating stitches between [ ] across. End with a DC (not around the post) on the top CH of the previous row 3 chain stitches. Turn
Row 12
CH 3 (Counts as a DC). [Work a BPDC around the next 4 BPDC STs. Work a FPDC around the next 4 FPDC STs]. Repeat the alternating stitches between [ ] across. End with a DC (not around the post) on the top CH of the previous row 3 chain stitches. Turn
Rows 13 and Beyond
Continue to repeat rows 7-12 alternating the direction of the stitches.
- Small Throw Blanket: work 19 rows.
- Medium Throw Blanket: work 21 rows.
- Large Throw Blanket: work 27 rows.
- X-Large Thow Blanket: work 36 rows.
Finishing
Use the tapestry needle to weave in any loose ends on the back side of the work. I like to weave back and forth 3 to 5 times. Cut off the excess yarn.
Free Video Instructions on our YouTube channel of the Crochet Basket Weave Stitch
The video tutorials are using medium weight yarn to help see how to work the pattern better.
Right hand basket weave tutorial
Left hand basket weave tutorial
Crocheting the blanket using the Jumbo yarn.
We hope you have enjoyed this crochet stitch tutorial. Here are some other free crochet patterns to inspire your next project.

You can find Victoria crocheting, quilting, and creating recipes. She has cooked in restaurants for over 20 years, including many larger parties. She learned to crochet when she was just 11 years old and has been crocheting ever since; over 50 years now. Over 40 years ago, she loved her first class in sewing and continues to hone her skills in quilting. Many have enjoyed the handmade gifts over the years. In her professional career, she has worked in management in a wide variety of businesses including higher education as a dean of a division. All the while attending college part-time to achieve her doctorate in higher education with an emphasis in e-learning.