Last updated on January 19th, 2026 at 09:53 pm
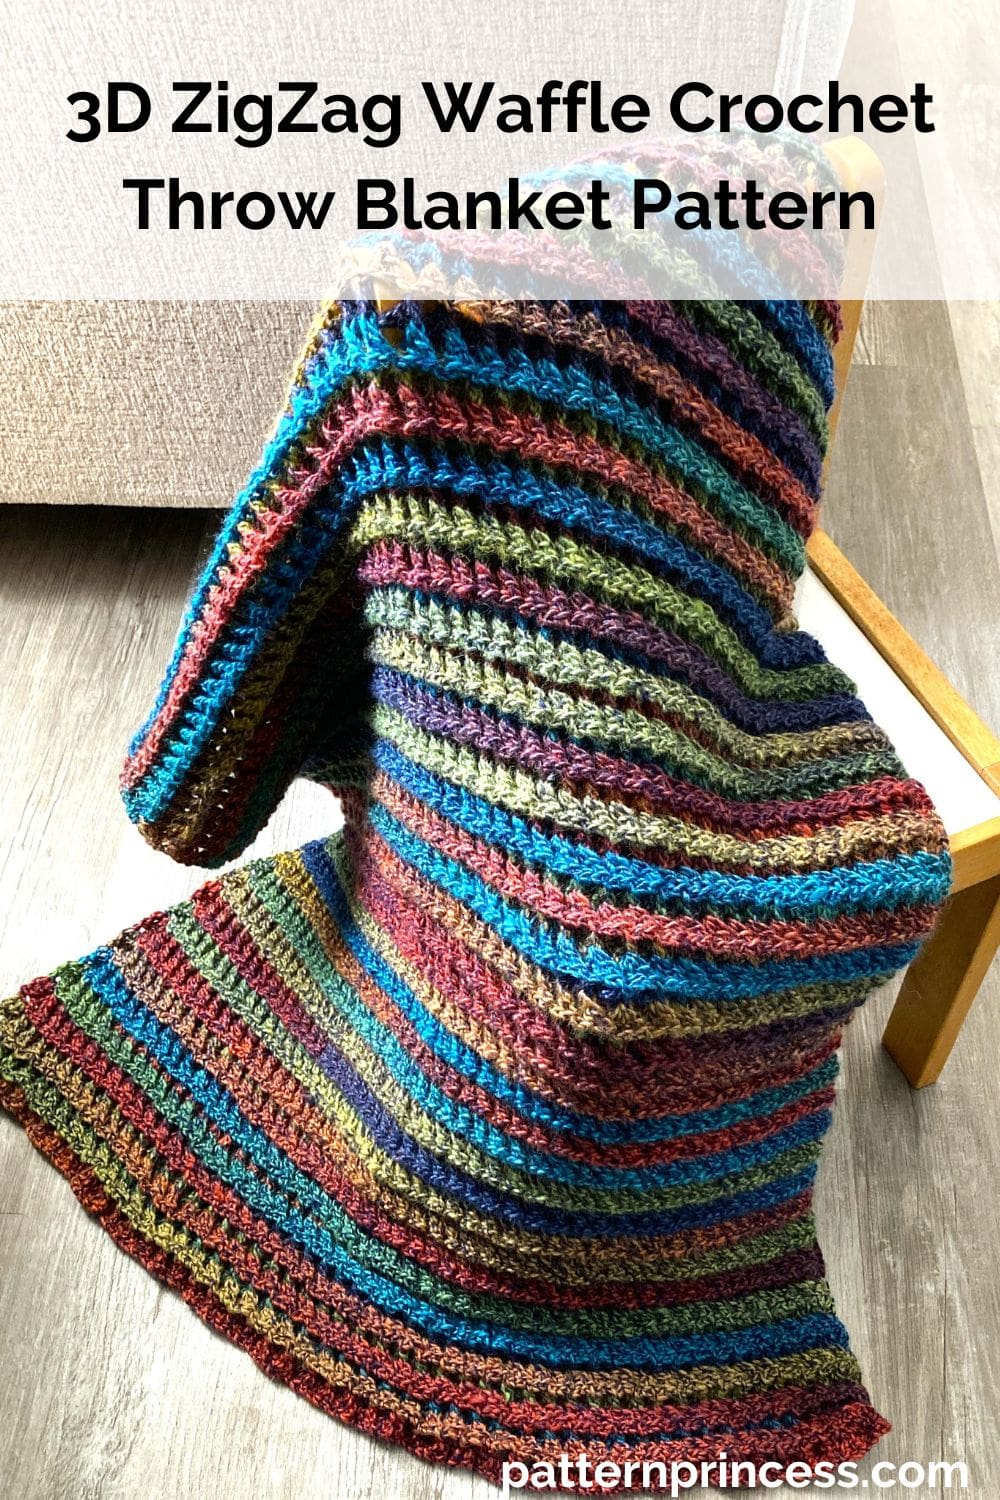
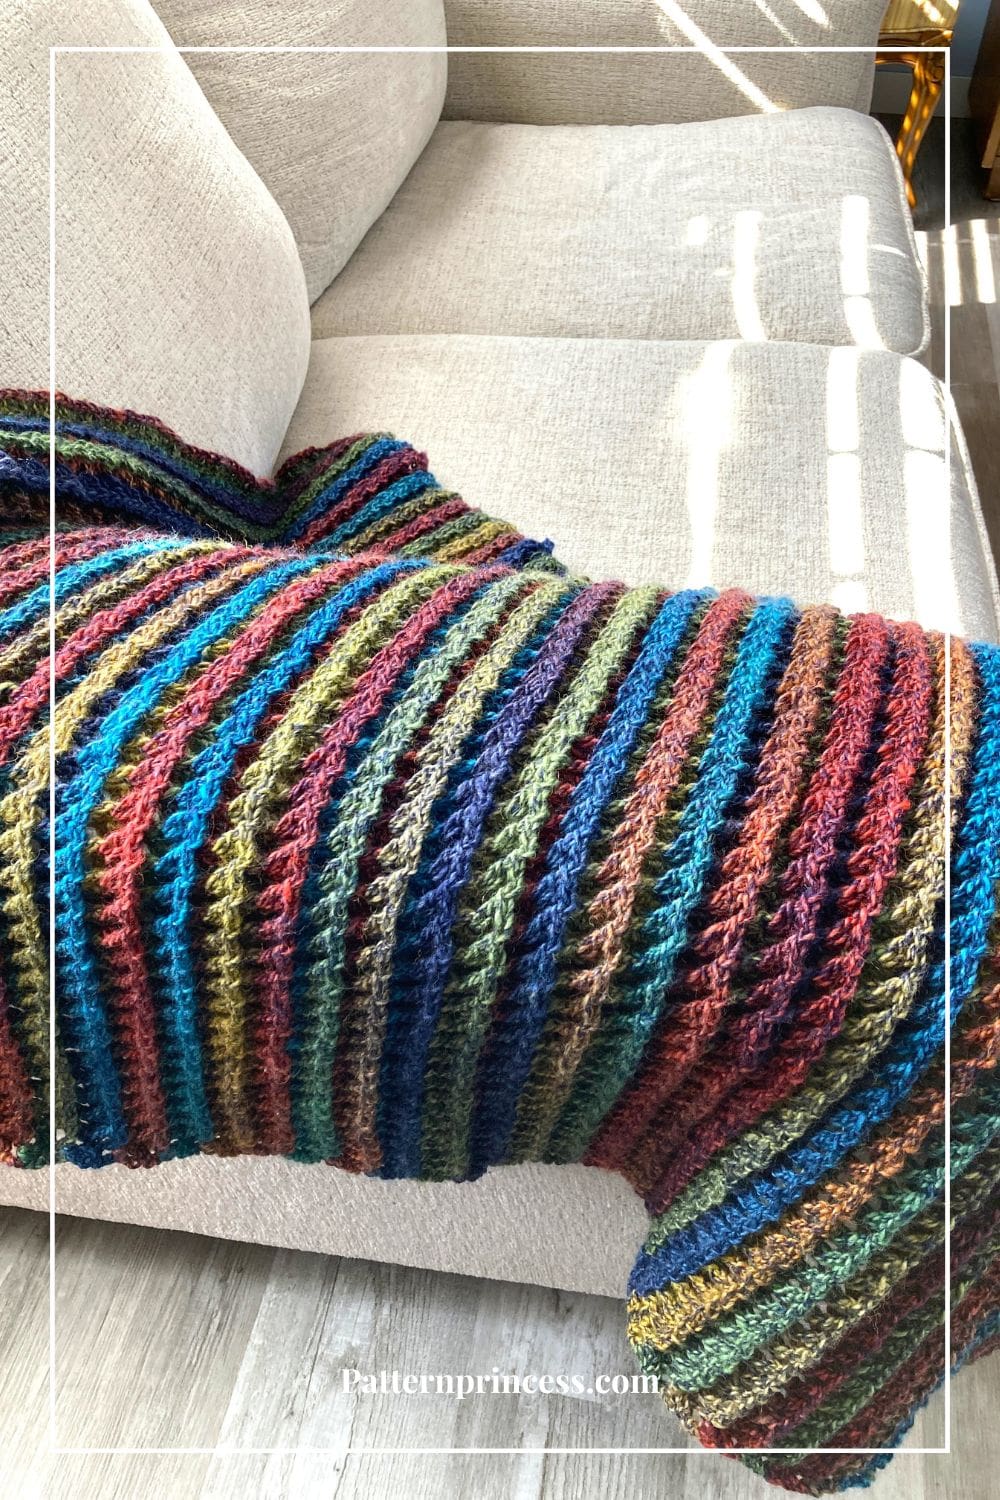
If you love texture-rich designs, this 3D ZigZag Waffle Crochet Throw Blanket Pattern is a great choice for you. This pattern has an easy, 1-row repeat. This stitch creates a gorgeous, plush, and reversible texture that is the same on both sides.
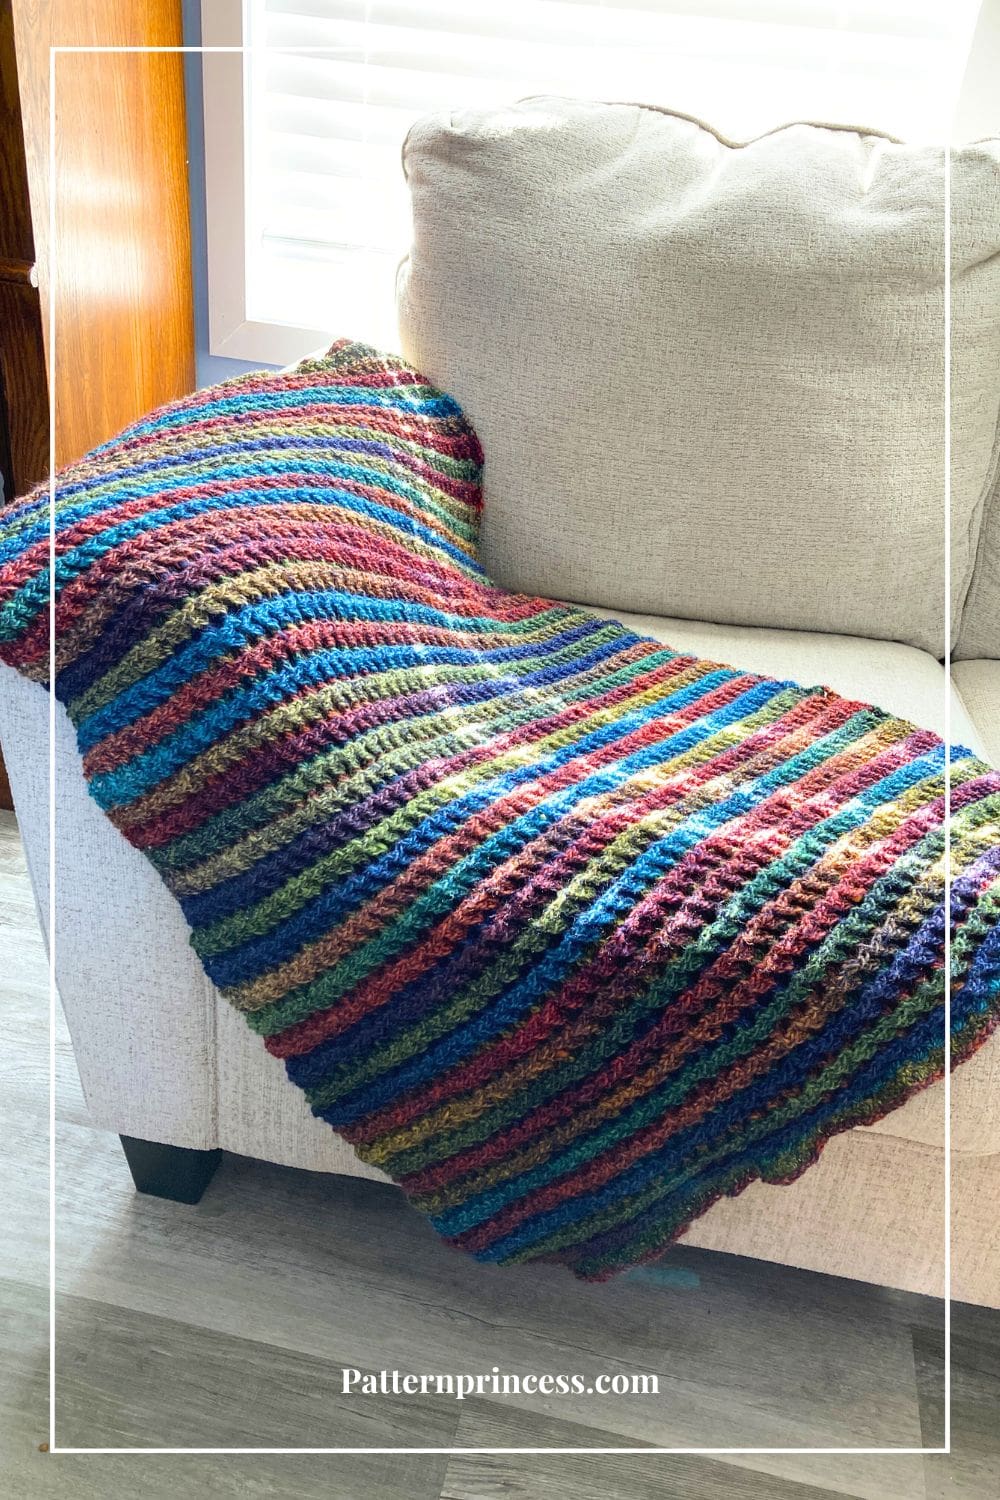
There’s something so satisfying about a crochet project that looks intricate but is surprisingly simple to make. This cozy throw combines the deep, squishy texture with a striking zigzag pattern, creating a visually stunning blanket that looks like it jumps right off the surface.
Whether you’re looking to make a chunky, warm throw for chilly nights or a decorative accent for your home, this pattern offers both beauty and functionality.
3D Textured Crochet Stitch
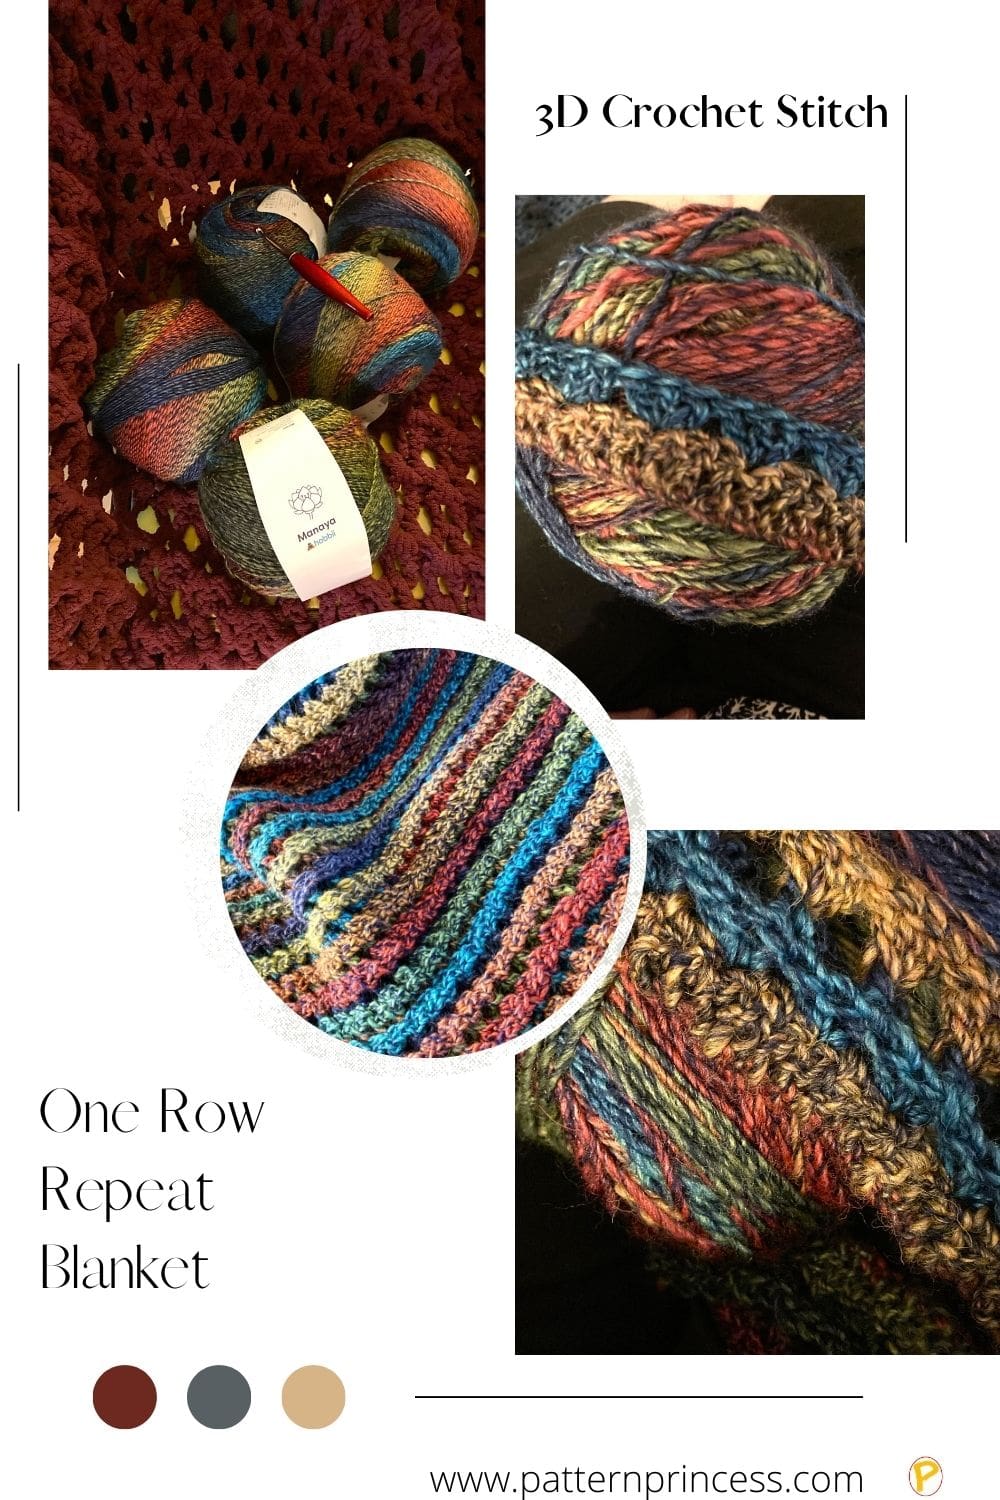
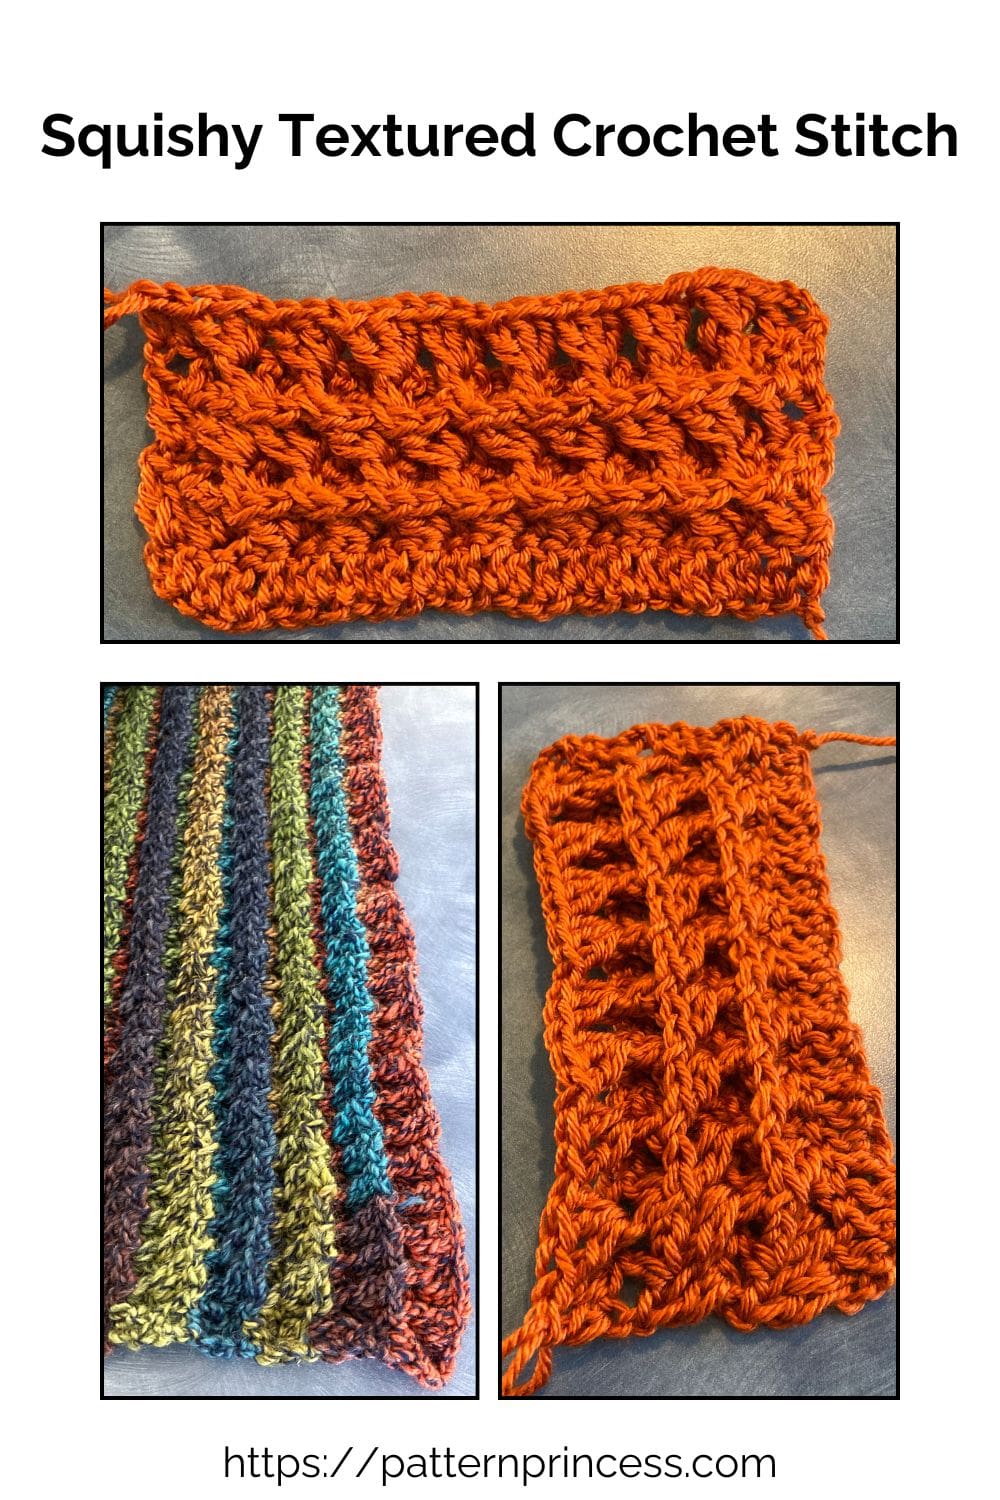
I love textured crochet patterns using simple stitches. They add a nice dimensional look to your work. Most 3D stitches utilize front post or sometimes back post crochet stitches. This particular pattern uses 3 front post double crochet stitches to create its look.
You should be able to work a basic chain and double crochet stitch around a post. Then this crochet design should be pretty easy for you.
Using a raised, three-dimensional stitch is a great way to add lots of bouncy stretch. Use this for your next blanket, scarf, bag, and more.
It’s an ideal gift for loved ones or a stylish addition to your living space. The raised 3D zigzag waffle stitch is a textured and stretchy crochet stitch.
Yarn for ZigZag Waffle Crochet Throw
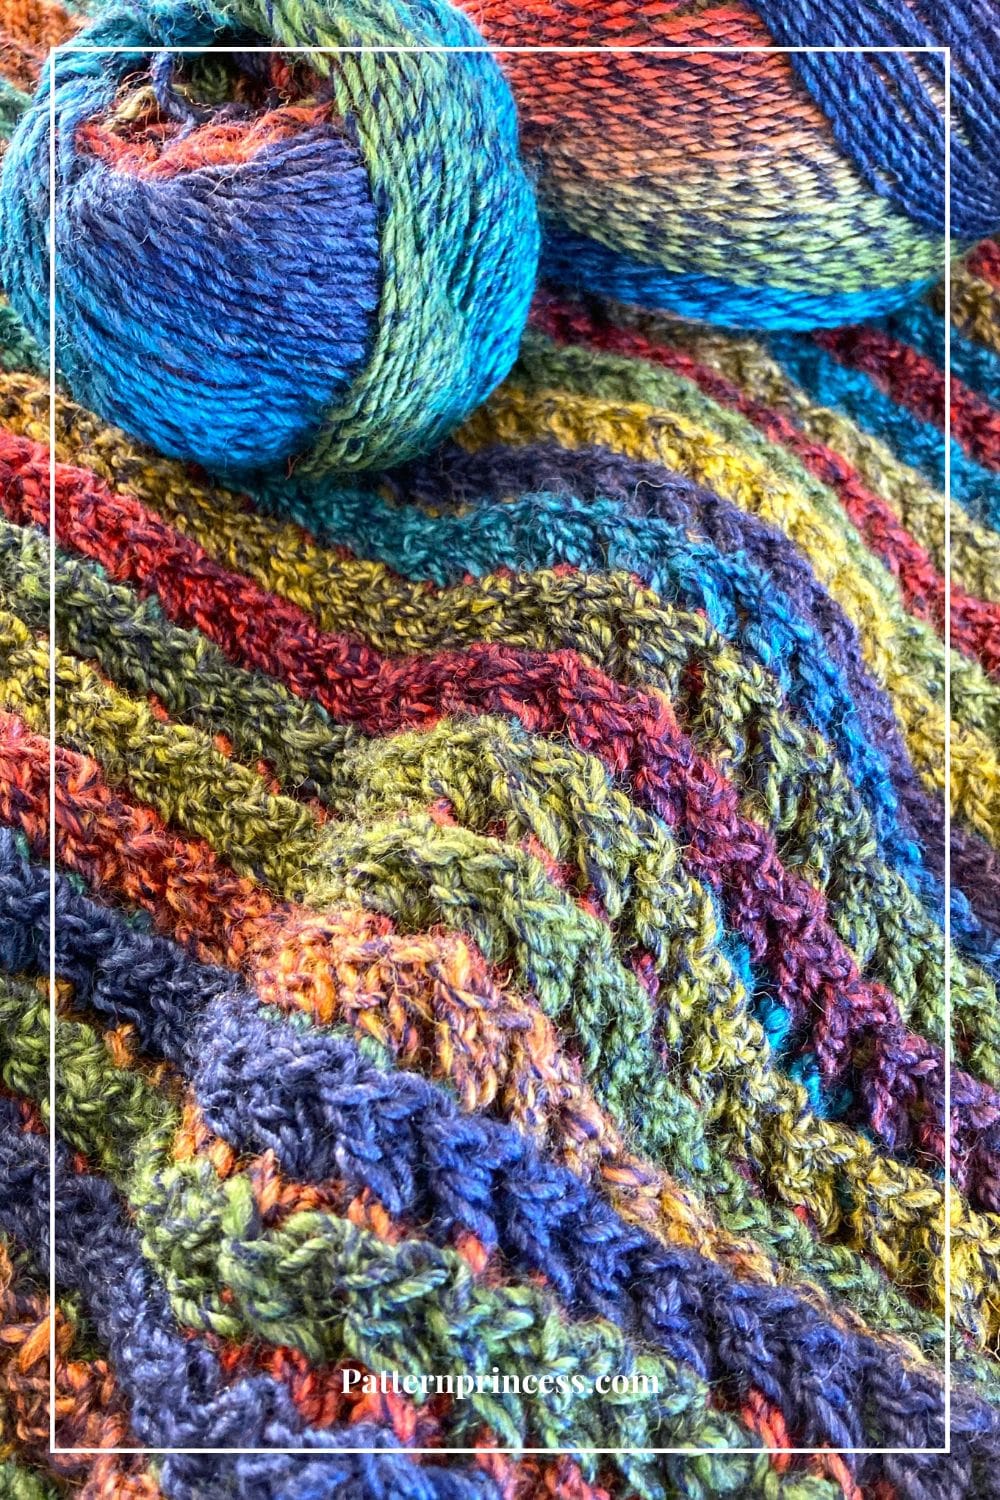
The easy stitch repeat with loads of texture is relaxing to work up. This can be worked in a solid color, 3 colors, 6 colors, or variegated yarn as I have here with this pattern. The yarn I used today is a medium worsted weight yarn, which looks lovely with this crochet stitch.
Four Blanket Sizes
It’s easy to make a different size of this throw blanket. If you are looking for ideas on different sizes to make your blanket, this Crochet Guidelines for Standard Bed and Blanket Sizes may help.
However, I have included four suggested sizes to get you going.
- Square Baby Blanket. 30 X 30 inches square.
- Baby or Toddler Blanket. 30 X 38 inches. (shown)
- Throw Blanket. 40 X 40 inches.
- Larger Throw Blanket. 50 X 60 inches.
Crochet Video Tutorials Along with Photo Tutorials
You can find a photo tutorial to help with the stitches in this pattern. After the written pattern, you will find YouTube video tutorials for right hand crocheters and left hand crocheters.
Get Your Ad Free Printable PDF in our Etsy Shop.
Directions: 3D ZigZag Waffle Crochet Throw Blanket Pattern
Skill Level
Advanced Beginner – Intermediate
You should be able to work the double crochet stitch and work it around the posts of the stitches below. Once you have mastered this method, you are ready for this pattern.
Finished Size
30 inches Wide X 38 Inches Long. Note, when measuring this blanket, I had it flat, not pulled or stretched. Due to the crochet stitch, it has quite a bit of stretch to the blanket; therefore, if you stretch it, you will have a slightly different size.
You may make this blanket to any dimensions. When changing the width of this blanket pattern, use multiples of 12 plus 4 for the beginning chain. Change the length by adding or decreasing rows.
Gauge
19 double crochet stitches across every 4 inches. 9 rows of double crochet every 4 inches.
Materials
Hobbii Manaya yarn in color 02. It is a number 4 medium weight yarn. Each skein has 200g/558 yards. I used 3 skeins for a total of 1,674 yards of yarn. It is a wool/acrylic blend in a variegated color yarn.
- Square Baby Blanket. 30 X 30 inches square. Plan for 2 ½ skeins or 1,400 yards.
- Baby or Toddler Blanket. 30 X 38 inches. Plan for 3 skeins or 1,674 yards. (shown)
- Throw Blanket. 40 X 40 inches. Plan for 4 ½ skeins or 2,511 yards of yarn.
- Larger Throw Blanket. 50 X 60 inches. Plan for 9 skeins or 4,464 yards.
Crochet Hook Size J, 6.0 mm hook
Yarn Needle
Scissors
I used a Furls crochet hook and yarn from Hobbii. If you are not able to find the yarn locally, make sure to stop by our savings center for links to get the hooks and yarn online.
Abbreviations
- CH = Chain
- DC = Double Crochet
- FPDC = Front Post Double Crochet
- SK = Skip
- SP = Space
- ST = Stitch
- STs = Stitches
- [ ] = Repeat Between, also the information for different sizes
Pattern Notes
Written in US Terms
The beginning chain is worked using a stitch count in multiples of 12 plus 4.
The first row is double crochet stitches. I worked them in the back bump of the chain stitch; however, you can work in the top loop of the chain stitches if you prefer.
Turn at the end of each row.
The chain 3 at the beginning of each row counts as a double crochet.
When working the FPDC in each row, they will be worked in the last double crochet stitch of the previous 3 double crochet cluster.
If crocheting in the back bump is new to you. We have a tutorial. Crocheting in the Back Bump
Special Stitches Used
Double Crochet (DC)
Yarn over, insert the hook through both loops and pull up a loop. Next, yarn over and pull through two loops on the hook. Lastly, yarn over again and pull through the last two loops on the hook.
HOW TO CROCHET THE DOUBLE CROCHET STITCH video tutorial
Front Post Double Crochet (FPDC)
Front post stitches are raised crochet stitches on the surface of the fabric facing you. Note: Because a post stitch is shorter than a normal stitch, you make the turning chain with one chain stitch less than the normal turning chain requires.
Yarn over, insert the hook from front to back between the posts of the first and second double crochet of the row below. Then insert the hook from the back to the front between the posts of the second and third stitches. (The hook should now be positioned horizontally behind the double crochet that you are working around).
Yarn over, pull the yarn around the post of the stitch. There should now be 3 loops on the hook.
Now you’ll be working on the loops on the hook. Yarn over, pull the yarn through 2 loops on the hook. Lastly, yarn over again and pull through the last two loops on the hook.
HOW TO CROCHET THE FRONT POST DOUBLE CROCHET video tutorial
Begin Crochet Pattern
Start by making a slip knot and adding the loop on the hook.
Chain 148 chain stitches for the blanket shown. Suggested chains for all the blanket sizes [148, 148, 196, 244].
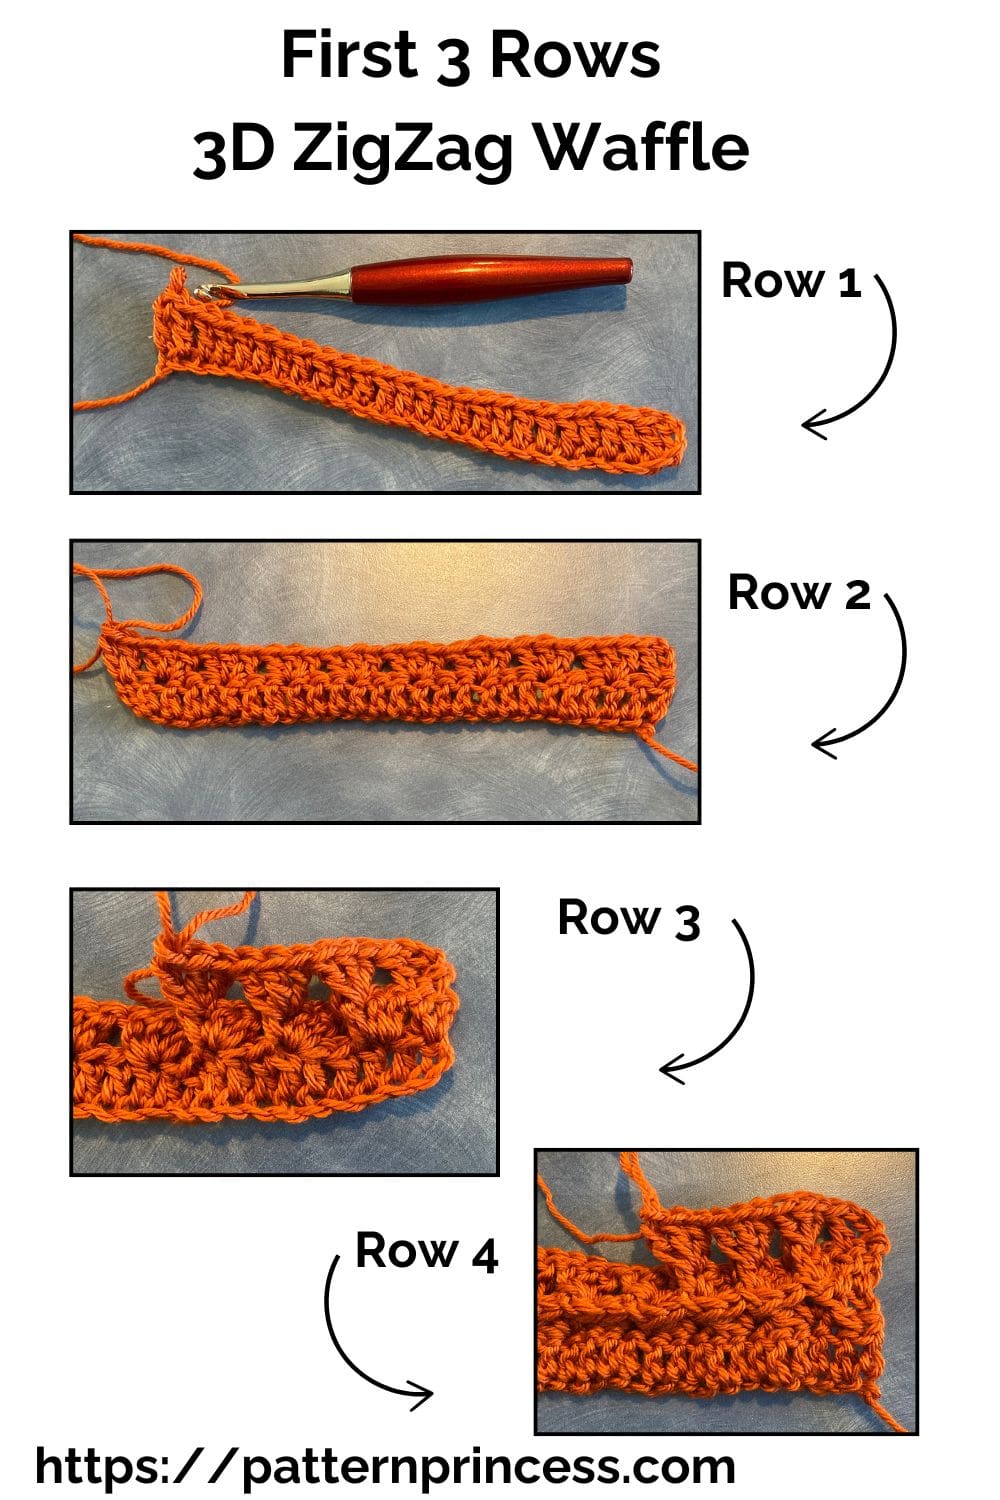
Row 1
Skip 3 STs (Counts as a DC). In the 4th ST from the hook, work a DC in the back bump and each ST across. Turn.
Row 2
CH 3 (Counts as DC). DC in the same ST. SK 1 ST work 3 DC in the next ST. [SK 2 STS, work 3 DC in the next ST]. Repeat across. When there are two stitches left, SK 1 ST, work 2 DC in the last ST. Turn
Row 3
CH 3 (Counts as DC). Work 1 DC in the DC ST. [SK to the last ST of the previous row 3 DC cluster. Work 3 FPDC]. Repeat between [ ] across. End with 1 DC in the last 2 DC STs. Turn
Rows 4 and Beyond
Repeat row 3.
Rows for all the blanket sizes [71, 90, 94, 140].
Finishing
After you work the last SC ST, cut off the yarn leaving about a 12-inch long tail. Pull the yarn tail through the last loop on the hook.
Thread the yarn needle with the yarn tails and weave them through the crochet stitches back and forth until the yarn feels secure. Snip off the excess yarn.
If you are a beginner crocheter, you can find more detail on finishing your crochet project on the website.
Crochet Video Tutorials of the 3D ZigZag Waffle Crochet Throw Blanket
We hope you enjoyed this project; it is just one of the best stitches to mimic a bulky weight yarn with loads of squish and texture.
If you love the 3D look of this blanket, here are some other free crochet blankets that use an easy textured crochet stitch.
- Blushing Lady Hygge Crochet Blanket Pattern
- Puffy and Dreamy Chunky Crochet Throw Blanket Pattern
- Hudson Soft and Bulky Baby Blanket Crochet Pattern
- Simple Squishy Crochet Bulky Throw Blanket Pattern

You can find Victoria crocheting, quilting, and creating recipes. She has cooked in restaurants for over 20 years, including many larger parties. She learned to crochet when she was just 11 years old and has been crocheting ever since; over 50 years now. Over 40 years ago, she loved her first class in sewing and continues to hone her skills in quilting. Many have enjoyed the handmade gifts over the years. In her professional career, she has worked in management in a wide variety of businesses including higher education as a dean of a division. All the while attending college part-time to achieve her doctorate in higher education with an emphasis in e-learning.