Last updated on March 27th, 2026 at 09:49 am
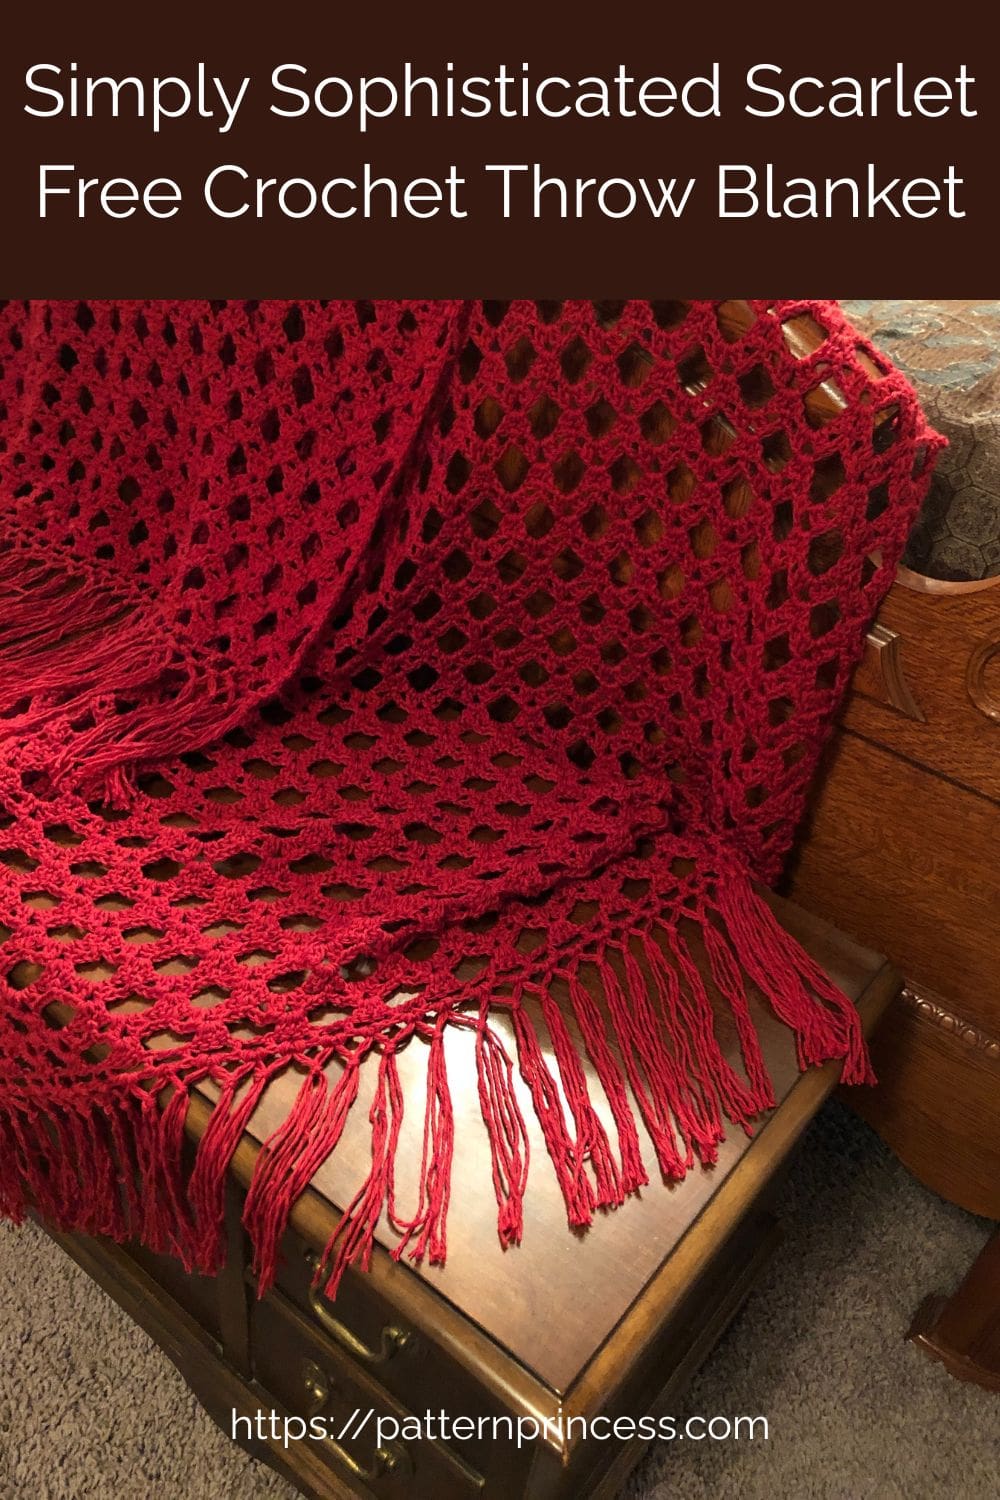
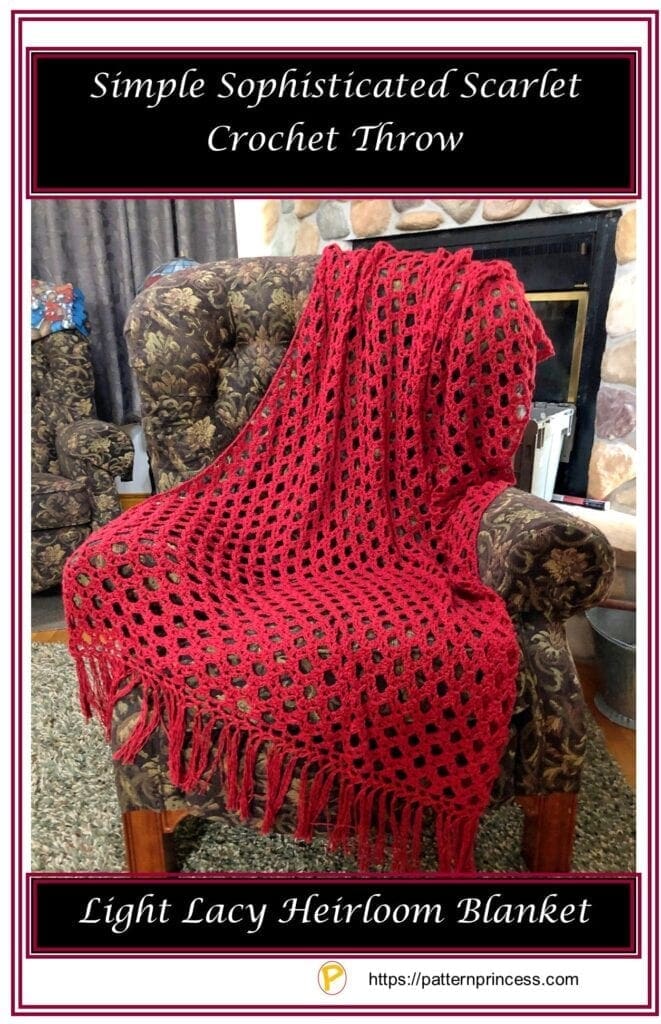
This simply sophisticated scarlet crochet throw uses the double, single, and chain stitches to complete. Crochet this beautiful heirloom blanket for yourself or to give as a treasured gift.
Pretty and Delicate Blanket or Crochet Wrap
This blanket works up to look complicated; however, it is not as hard as you may think. The crochet stitches create a light and lacy and work up so intricately with such care. Even a light covering like this one will keep you warm. As I was crocheting this beauty, I was amazed at how well it took the chill off.
Lace Blankets seem to instantly add a breath of fresh air to any room.
Developing This Crochet Blanket Pattern
While browsing through various crochet photos on the internet, I found a partial crochet stitch diagram that looked just lovely. It was so nice that I saved the photo to my phone.
A few weeks ago, I spent hours trying to find out the name of the stitch pattern, no luck. Then I searched crochet videos to try and find at least a video of this stitch. Again, this pattern eluded me. Therefore, I started to try and figure out the partial stitch diagram.
After many hours of trial and error, I finally had the crochet pattern figured out. (Now watch, someone that has been crocheting for many years will know exactly what this is called). Oh well, it is always a good learning experience to figure things out for myself. I am amazed at how this pushes me to be a better crochet pattern reader and writer.
With this pattern, I had to draw things out by hand just to make sure that the count was correct and that the stitches used would give the effect I was looking for. It is so satisfying when things come together, and the end results are this lovely crochet throw.
Crochet Shell Stitch with Open Windowpane Look
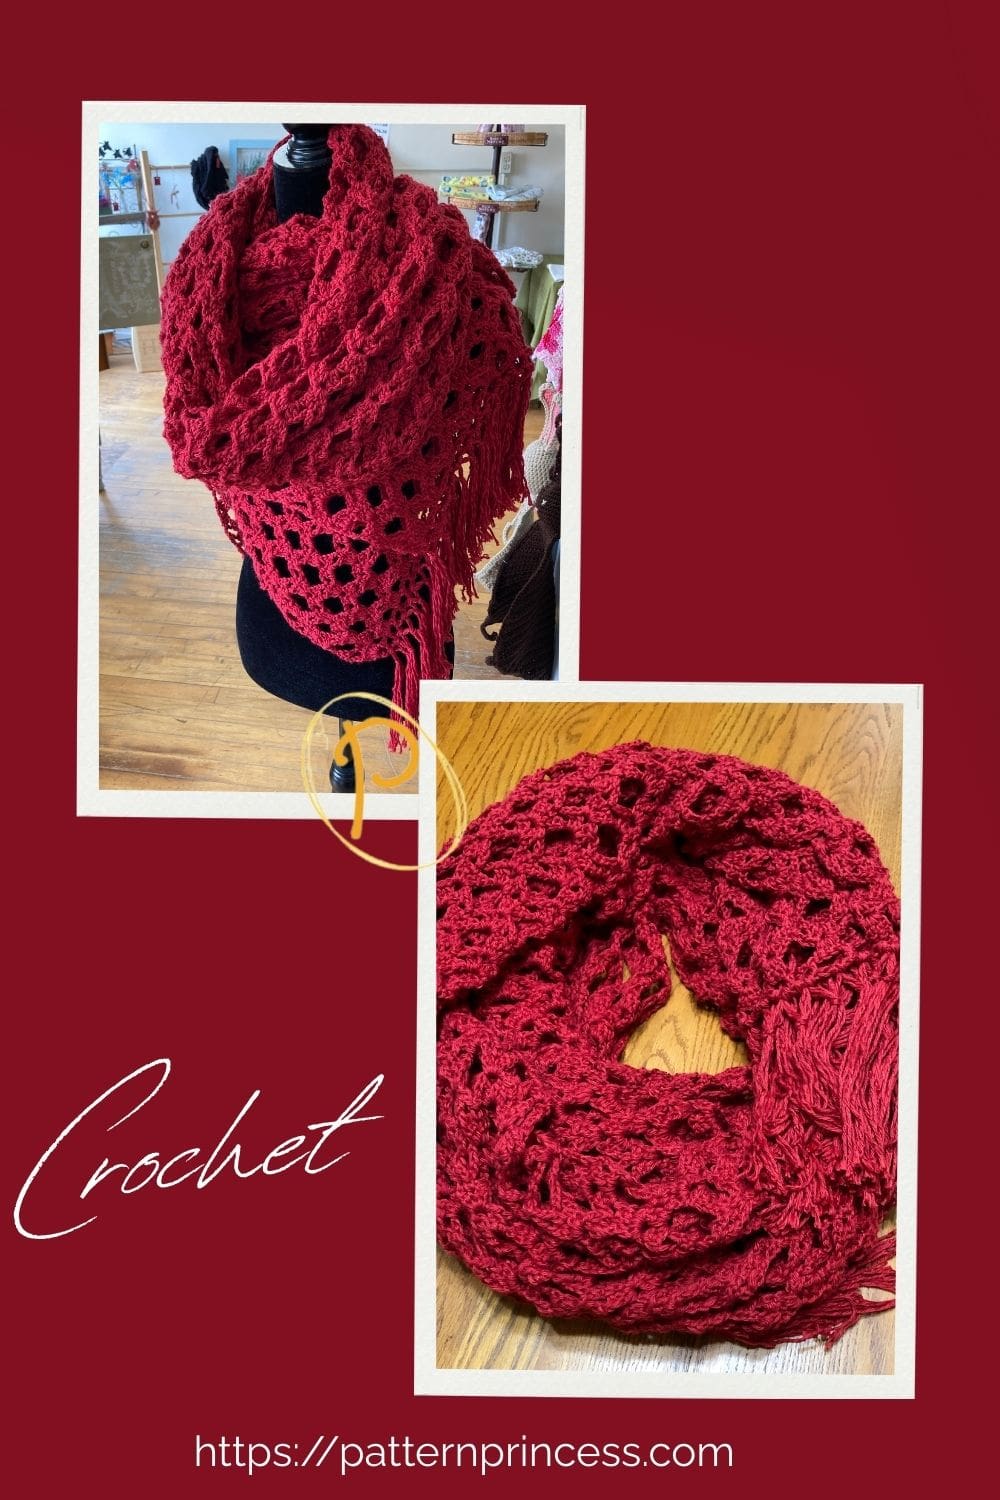
This crochet pattern combines the look of crochet shell stitches with the open look of a windowpane. While this was used for this Simply Sophisticated Scarlet Crochet Throw today, I think a bit of resizing would make this a lovely lacy crochet shawl. Actually, the cotton yarn makes this throw even lighter and when paired with the lace crochet stitches, it is light enough to wind up into a lovely circle.
I think this could really be worn as a lacy shawl or wrap too.
Crochet Lacy Bed Scarf
As I was taking photos to help you see the beauty of this throw, I realized how wonderful this would look like when used as a bed scarf. A bed scarf is a blanket that is placed at the foot of a bed to protect a comforter or duvet from damage and dirt. Bed scarves are often used in hotels.
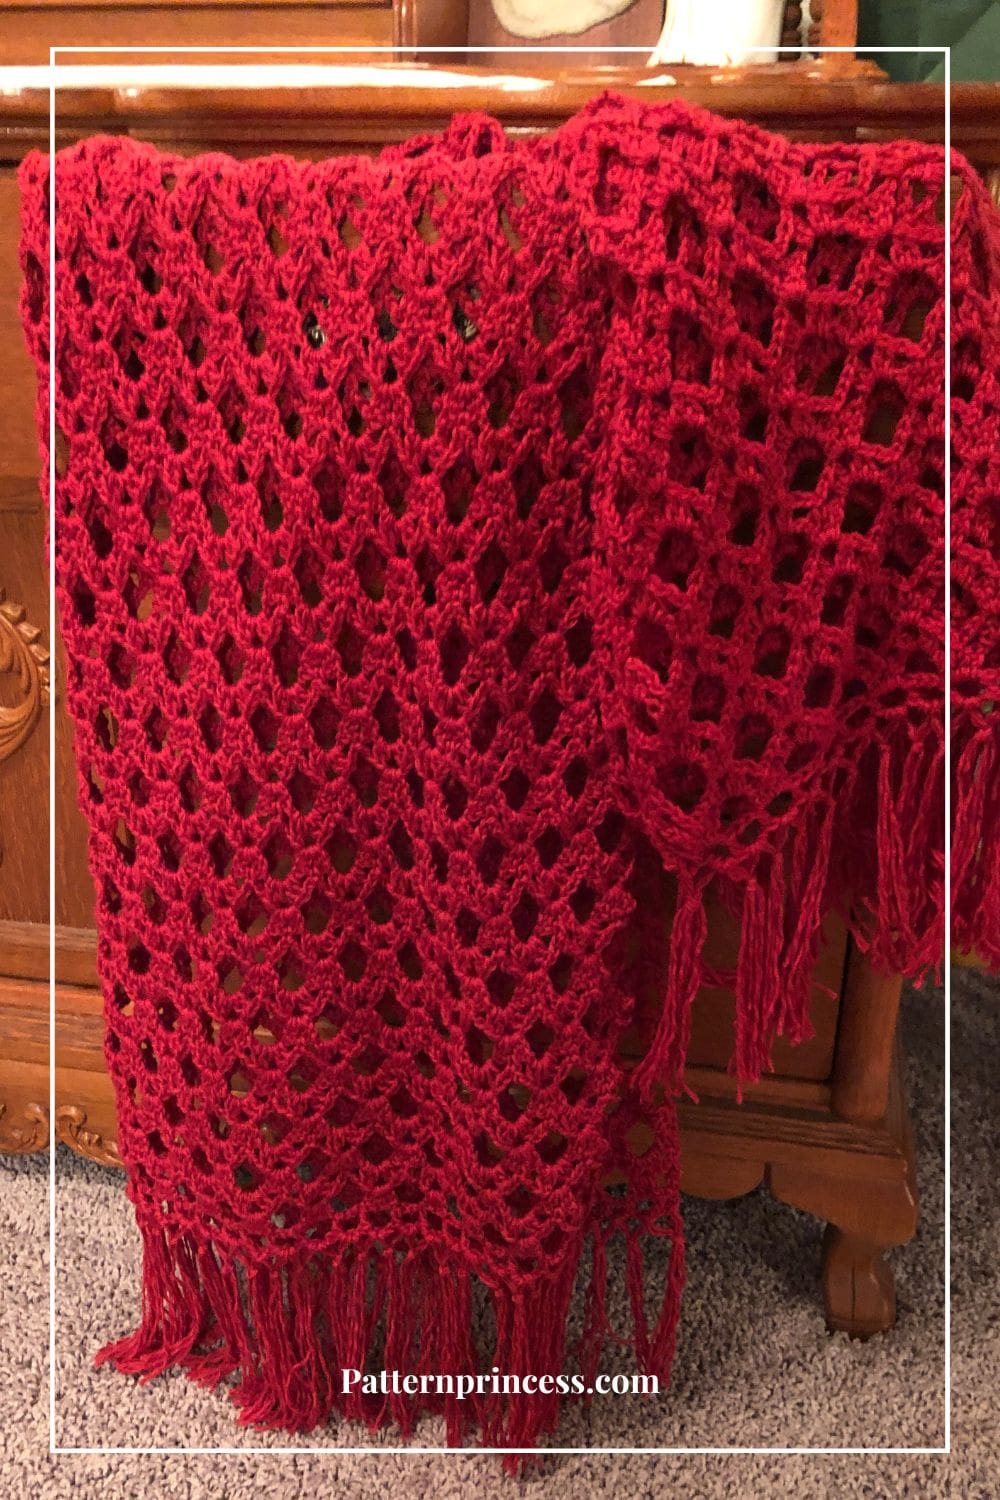
Fringed Crochet Blanket
This crochet blanket just seemed like it would not be complete without the added fringe. When adding the fringe, I completed a second knot to help hold the fringe in place. Sometimes, I feel like it is too easy for the fringe knots to loosen.
While I just did one extra knot, this would be perfect for a fancy fringe knot pattern. If you are good at this and have the patience, it would really look lovely. However, if you have not added fringe to any of your crochet blankets before, I have included this tutorial in the video link for the crochet pattern.
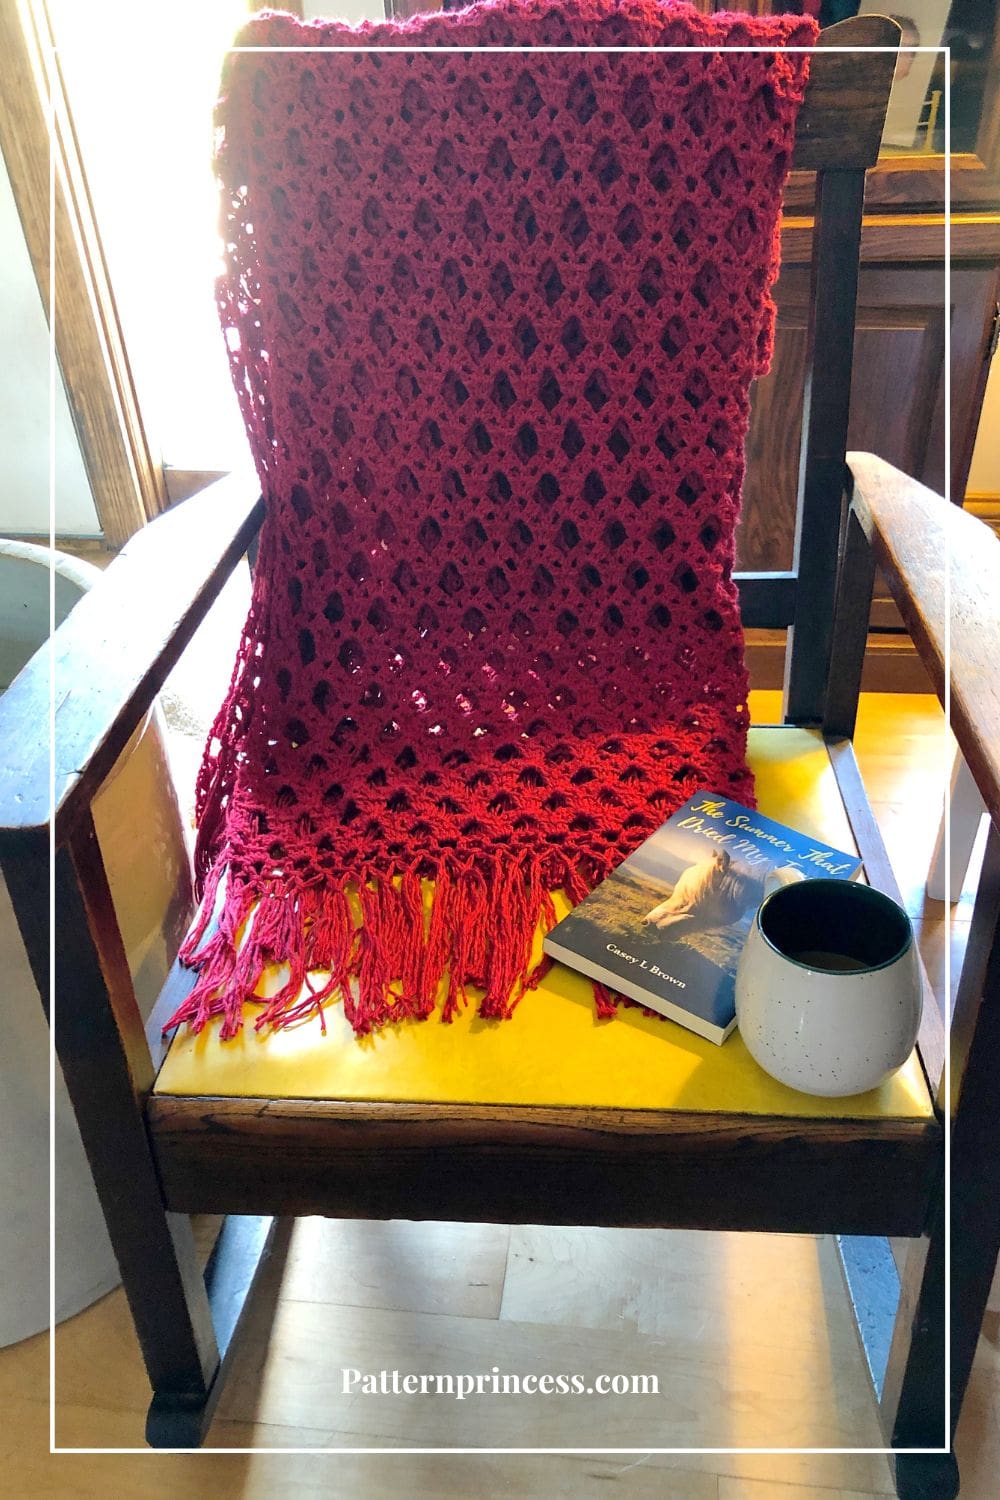
Relaxing with a Good Book Cuddled in this Light Blanket
This scene has sentimental history for me. The rocking chair is very old from my husbands grandfather. On the back of the chair, is the crochet blanket I made.
On the chair near front is my coffee and a copy of my daughter’s first book. So proud of all the work she did and her perseverance. If you would like a copy of her book, it is on Amazon, here is the link for her book The Summer That Dried My Tears.
Get Your Ad Free Printable PDF in our Etsy Shop.
Directions: Simply Sophisticated Scarlet Crochet Throw
Skill Level
Advanced beginner to intermediate level crocheter.
Size
The blanket is 42 X 81 inches without the fringe and 42 X 94 inches with the fringe.
Gauge
13 stitches per 4 inches. The crochet pattern is worked in multiples of 12 plus 9. If you are not familiar with this it means. The beginning chain of 141 stitches consists of 12 X 11= 132 + 9 = 141.
Materials
Lion Brand Comfy Cotton Blend, 3 Light / DK, 392 yards each skein. I used 5 skeins. Approximately 1,960 yards. Yarn color Poppy.
Size I Crochet Hook 5.5mm
Yarn Needle
Scissors
Abbreviations
- CH = Chain
- DC = Double Crochet
- SC = Single Crochet
- SL ST = Slip Stitch
- SK = Skip
- SP = Space
- ST = Stitch
- STs = Stiches
- TC = Treble Crochet
- [ ] = Repeat Between
Pattern Notes
Written in English US Terms.
I used four full skeins of the yarn for the blanket itself. When working the fringe, I used a new skein and used about half of the yarn.
Rather than weave in the ends each time I changed skeins, I tied them together and just kept crocheting. Since the color is the same, I was able to just keep crocheting until I ran out of one skein, tie in a new one and continue. There is a special knot that I used, as this knot will not pull apart.
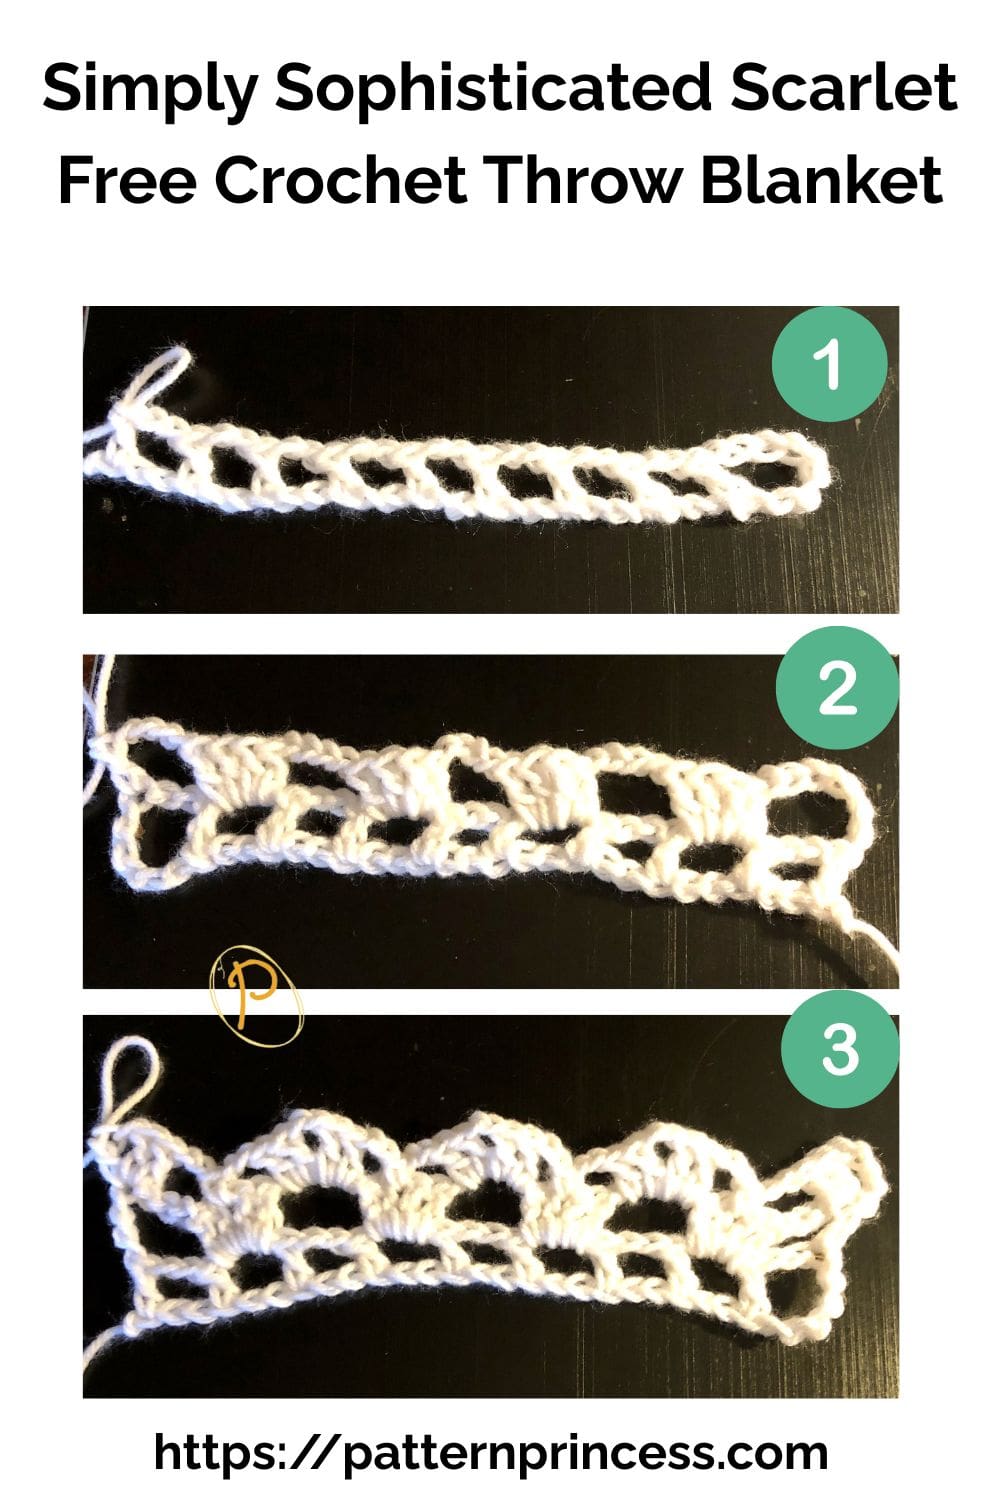
There are video links near after the written pattern showing how to work this crochet pattern through row 6.
The pattern is a repeat of rows 3-6.
Crochet Stitches
Double Crochet (DC)
Yarn over, insert the hook and pull up a loop. Yarn over and pull through two loops on the hook. finally, yarn over again and pull through the last two loops on the hook.
Single Crochet
Insert the hook, pull up a loop. Yarn over and pull through the two loops on the hook.
Treble Crochet
Yarn over twice, insert the hook and pull up a loop. Yarn over and pull through two loops on the hook. Next, yarn over again and pull through the next two loops on the hook. Lastly, yarn over again and pull through the last two loops on the hook.
Directions
CH 141
Row 1
DC in the 9th CH ST from the hook. (counts as CH 2, DC, CH 2). [CH 2, SK 2 CH, DC in the next ST] Repeat across between [ ]. Turn
Row 2
CH 7 (counts as DC and CH 4). SK previous row CH 2 and DC. [work 4 DC in next CH 2 SP. CH 4, SK (DC, CH 2, DC). Work 4 DC in next CH 2 SP]. Repeat across between [ ]. End with CH 4, SK (DC, CH 2). DC in 3rd ST from the top of the previous row initial CH STs. Turn
Row 3
CH 4 (counts as DC and CH 1). 2 DC in the same ST, CH 2 (SK 4 CH STs and 2 DC). Complete SC in center of previous row 4 DC STs. CH 2 [work (2 DC, CH 2, 2 DC) in previous row CH 4 SP. CH 2, SC in center of the previous row 4 DC STs, CH 2]. Repeat between [ ] across. After last (CH 2, SC, CH 2), SK 4 STs and end with 2 DC, CH 1, DC in the 3rd ST of the previous row CH 7. Turn
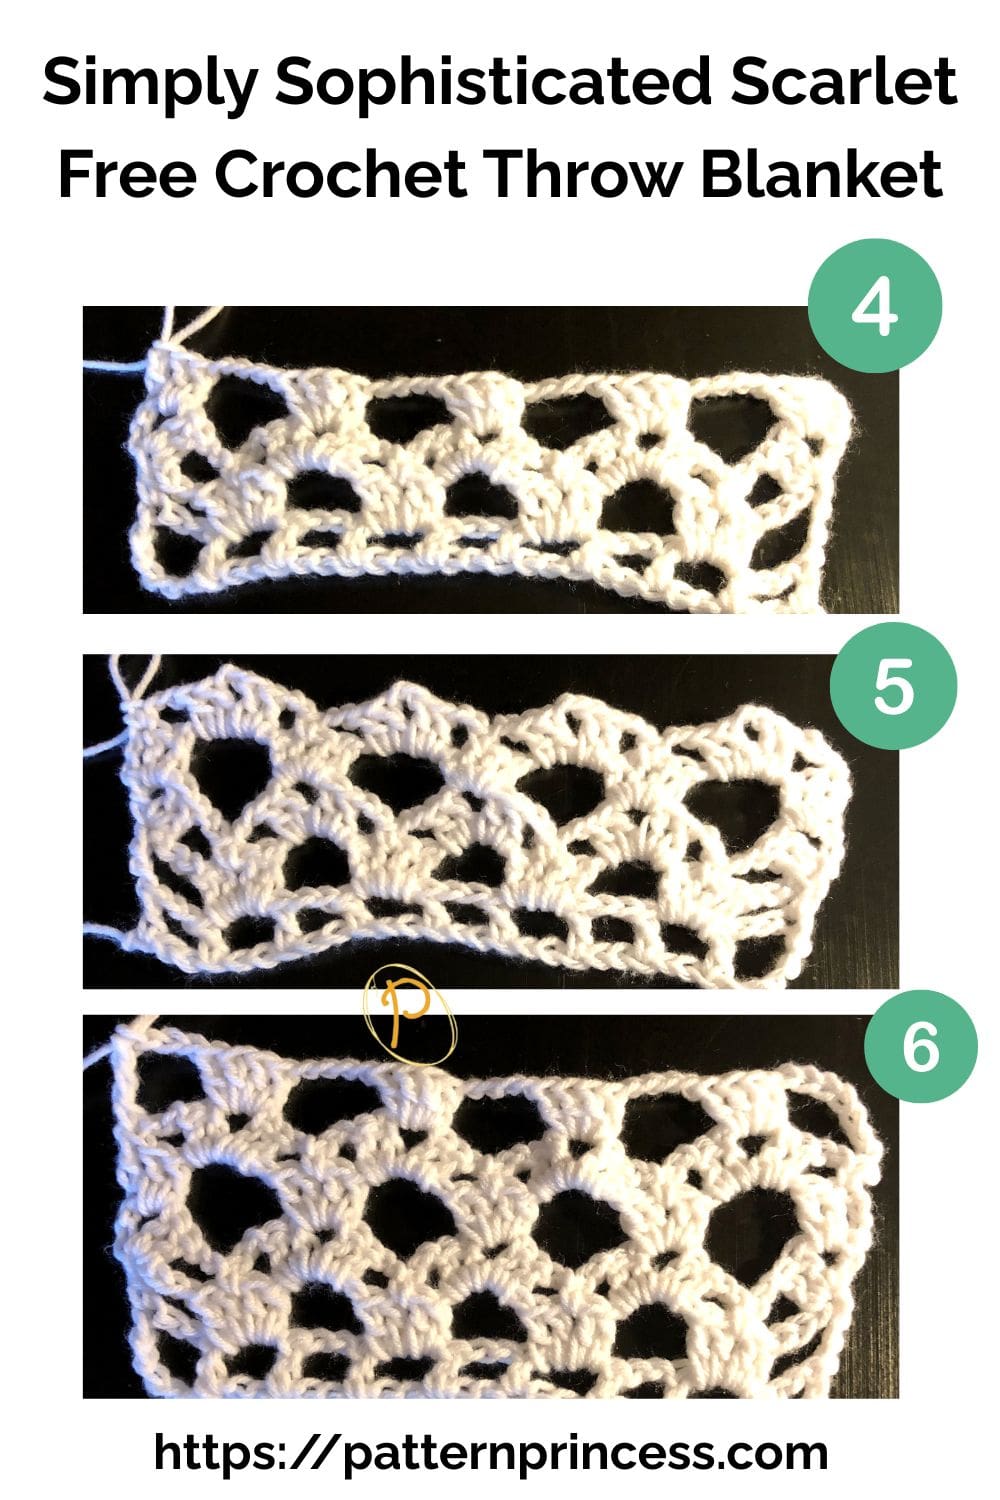
Row 4
CH 3 (counts as DC), 2 DC in the previous row CH 1 SP. [CH 4 (SK 2 DC, CH 2, SC, CH 2, 2 DC). Complete 4 DC in previous row CH 2 SP.] Repeat between [ ] across. End with CH 4, 2 DC in the previous row CH 2 SP and 1 DC on the top of the 3rd CH ST of the previous starting CH 3 STs. Turn
Row 5
CH 3 (counts as SC and CH 2). [in previous row CH 4 SP, complete (2 DC, CH 2, 2 DC) CH 2, SC in the center of the previous row 4 DC area. CH 2]. Repeat between [ ] across. End with CH 2, SC in the top ST of the previous for CH 3 ST. Turn
Row 6
CH 7 (counts as CH 3 and TC). SK previous row CH 2 and DC. [4 DC in the center of the previous row CH 2 SP, CH 4, SK (2 DC, CH 2, SC, CH 2, 2 DC]. Repeat between [ ] across. End with 4 DC in the last CH 2 SP, CH 3 and TC in the last ST. Turn
Rows 7 – 103
Repeat rows 3-6 (row 103 should end on a row 6 pattern).
Row 104
CH 6 (counts as DC, CH 3). SK 3 STs, in the 4th CH from the hook, DC. [CH 3, SK 4 DC, DC in the next ST, CH 2, SK 2 CH, DC in the next ST]. Repeat between [ ] across. End with CH 3, SK 3 CH STs, DC in the 3rd CH of the previous row CH 7.
Finishing
Weave in the yarn ends and remove the excess.
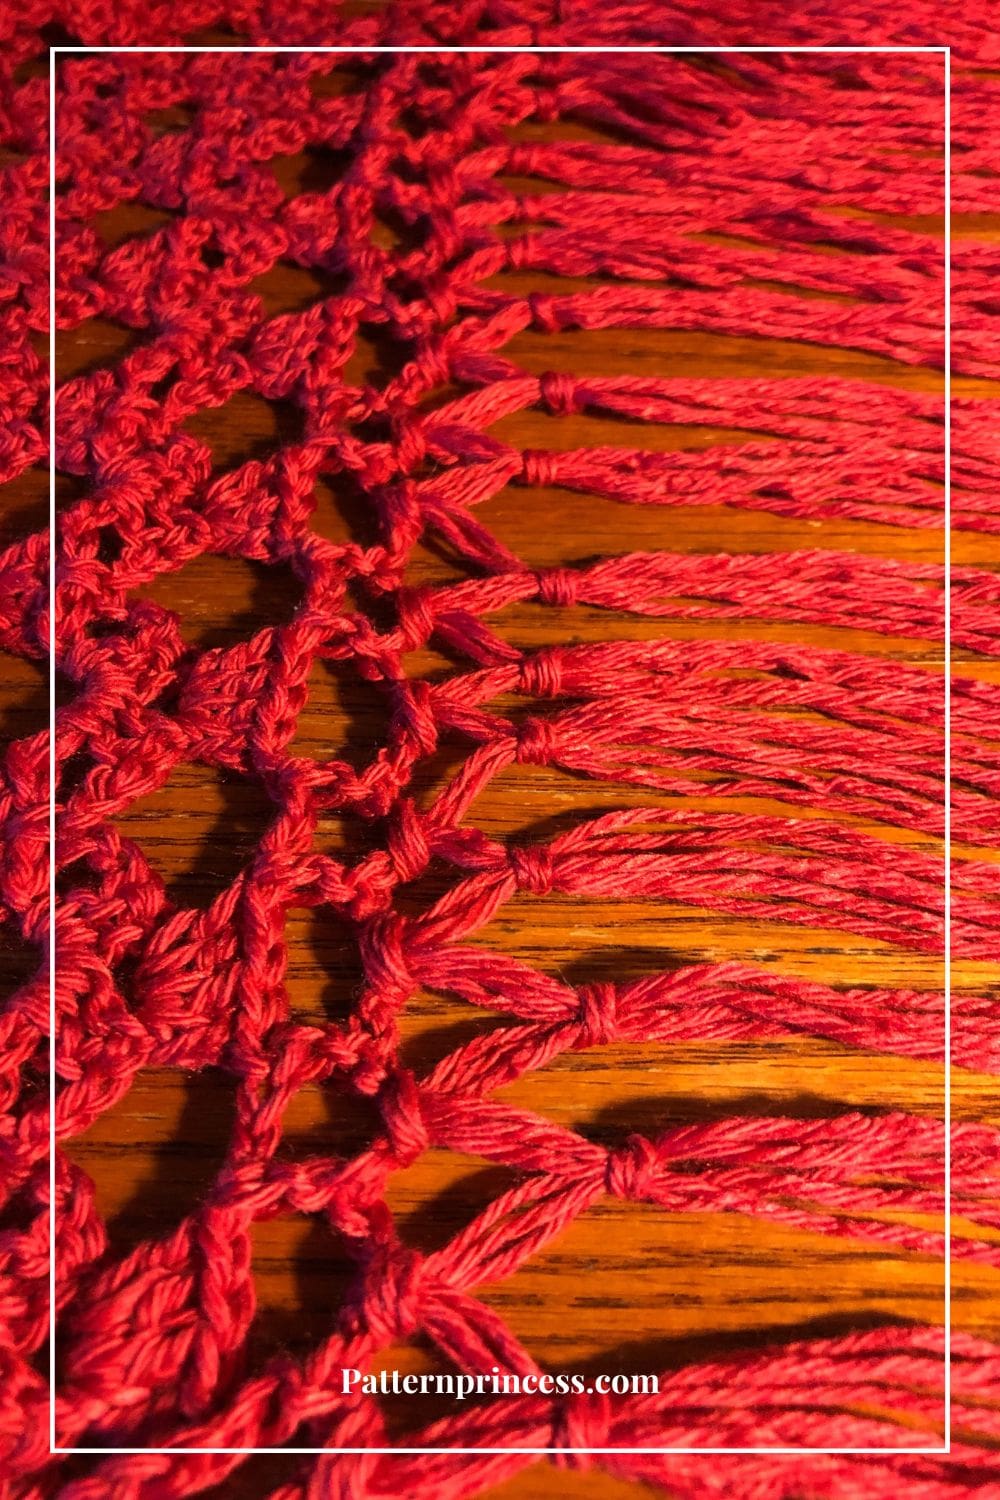
Adding Fringe to the Throw
To create the fringe, cut 18 or 20-inch pieces of yarn. You will need 3 pieces of yarn for each fringe. Add one fringe on each corner stitch and every other stitch between.
To attach the fringe, use your hook to push through the foundation chain two loops.
Fold the yarn in half and loop the middle onto the hook and pull through. Bring the strands of yarn through the loop and pull snug.
Second Knot
Now it is time to add the second knot for the fringe pieces.
Starting with the second fringe knot, separate the 6 strands into 3 strands on the left and 3 strands on the right. Tie the 3 strands on the right with the first fringe cluster. I tie the knot about an inch down from the initial fringe knot.
Then take the 3 strands on the left and the that with 3 yarn strands from the third fringe cluster in. Continue tying 3 strands from each fringe cluster with 3 yarn strands from the cluster next to it across.
Once you reach the end of the row, tie the second to the last fringe cluster 3 strands to the entire end fringe cluster.
Trimming the Fringe
Once the fringe is added, trim the yarn to approximately 6 1/2 inches.
Crochet Video Tutorial of First Six Rows
If you loved this post, please share. It helps to show me that these types of posts are helpful – thank you!
I hope that you liked this pattern. If you are looking for more ideas for crocheted projects, here are a few others you may enjoy.

You can find Victoria crocheting, quilting, and creating recipes. She has cooked in restaurants for over 20 years, including many larger parties. She learned to crochet when she was just 11 years old and has been crocheting ever since; over 50 years now. Over 40 years ago, she loved her first class in sewing and continues to hone her skills in quilting. Many have enjoyed the handmade gifts over the years. In her professional career, she has worked in management in a wide variety of businesses including higher education as a dean of a division. All the while attending college part-time to achieve her doctorate in higher education with an emphasis in e-learning.
I really want to try the lacy crochet pattern but it really intimidates me.. I am going to try to make a shawl. The pattern is beautiful.
Thank you. Hopefully, the video will help you too. This really would be so pretty as a shawl or wrap too. Would love to see yours when you finish.
I love your pattern can it also be made with Bernat blanket yarn?
Hi, I actually did a swatch with thicker yarn before using this cotton yarn. I think the drape is much better with the cotton yarn, but it does work with a regular 4-ply yarn as well. Hope this helps. Enjoy the pattern. Would love to see how yours turns out.
Vicky