Last updated on March 27th, 2026 at 09:41 am
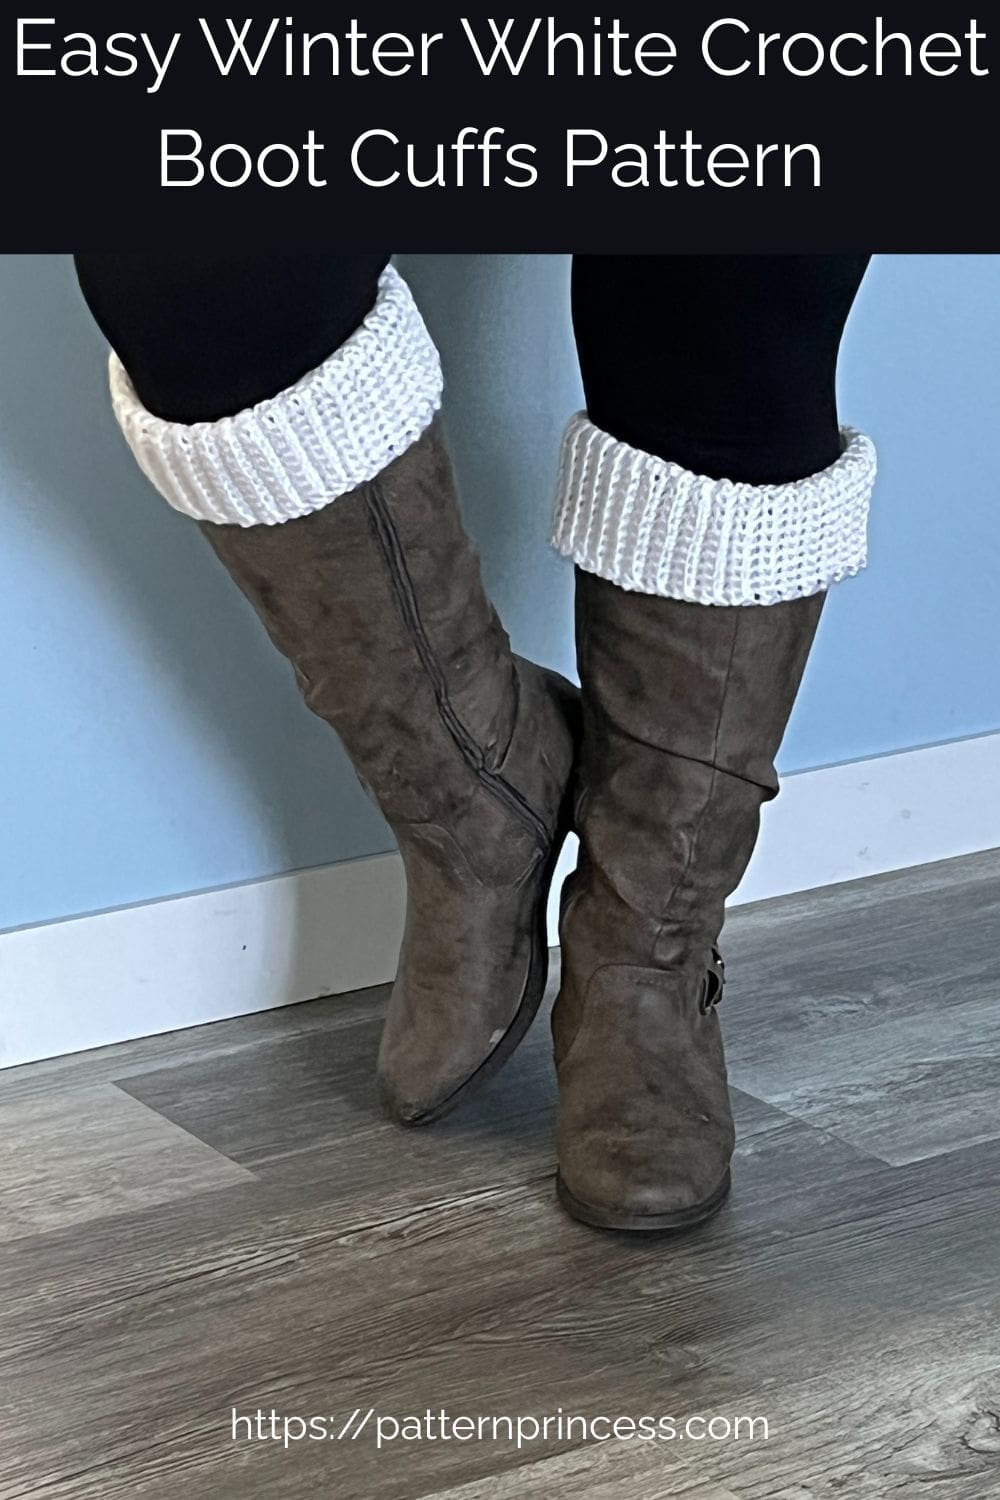
These Easy Winter White Crochet Boot Cuffs are such a simple way to add warmth and charm to any winter outfit without the bulk of full leg warmers. When the temperatures drop, I love pulling on my favorite pair of boots. The cuffs add that little extra touch of coziness and style.
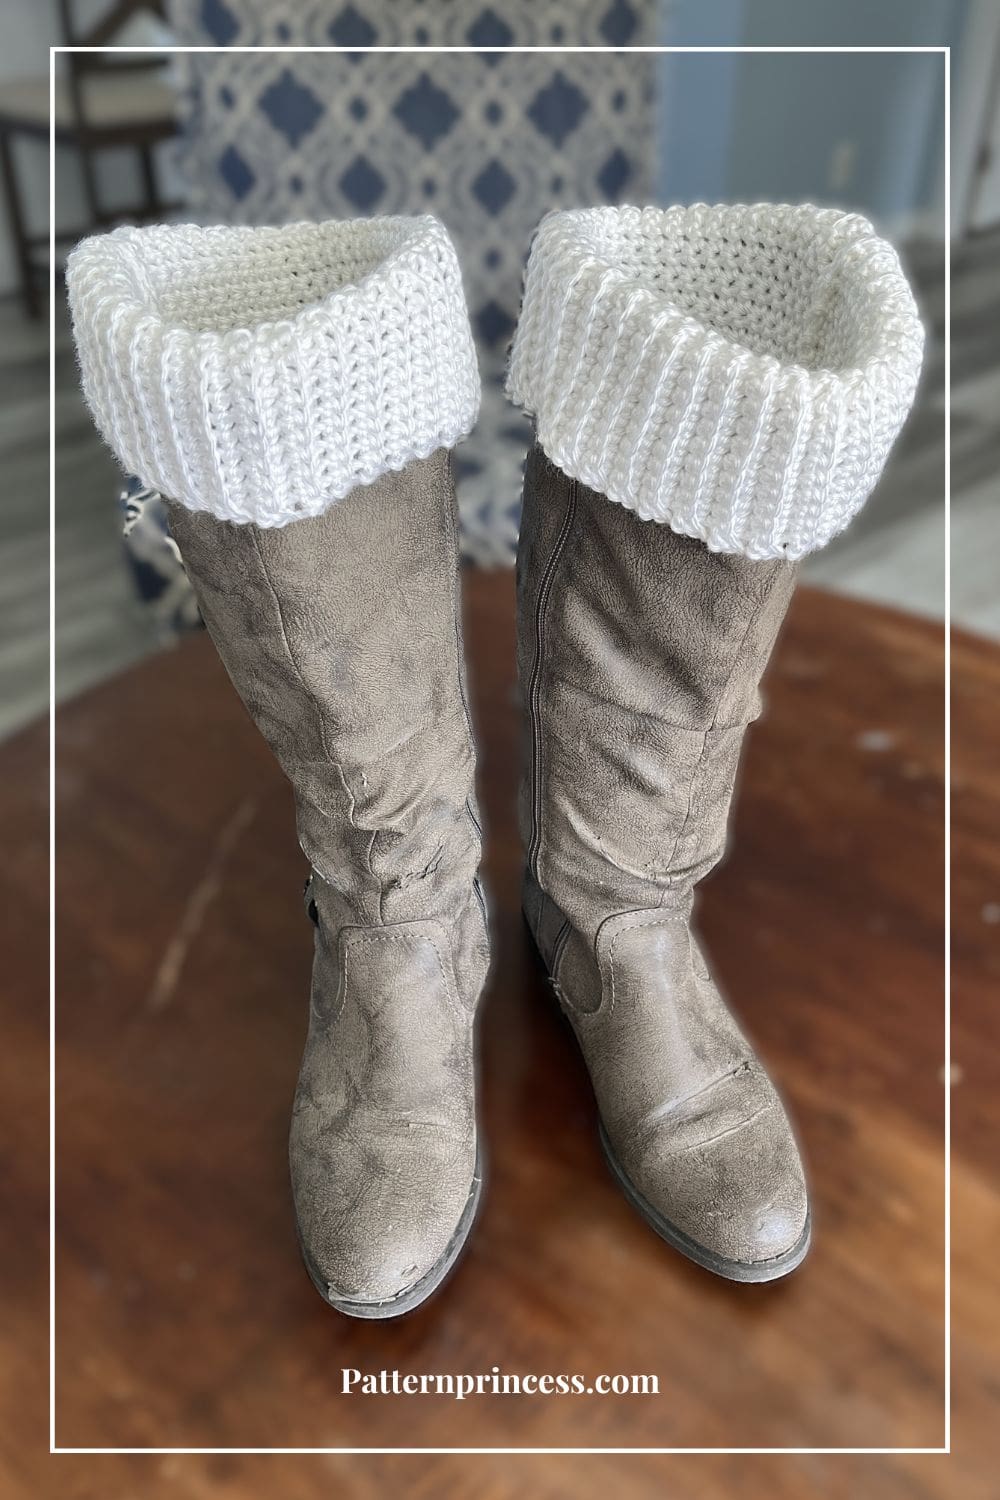
One of my favorite things about boot cuffs is how versatile they are. You can wear them peeking out of tall boots and shorter boots for a layered effect. Or even fold them over the top for a different look.
Easy Crochet Project
This free pattern is easy to crochet. They work up quickly, making them a fun project for a comfy weekend at home. Since they’re small and portable, they also make a great project to take on the go.
The ribbed texture gives them a classic look that pairs perfectly with everything from jeans to leggings. I used a soft white medium-weight yarn to keep things neutral, but of course, you could make them in any color to match your winter wardrobe.
Handmade Gifts
And let’s not forget about gift-giving! Handmade boot cuffs are a thoughtful, practical, and stylish present.
With the holidays or a friend’s birthday in mind, you can whip up a pair in no time and have something special to share. Whether you’re making them for yourself or someone you love, this free pattern is a cozy little project that’s sure to bring joy all winter long.

How to Crochet Boot Cuffs
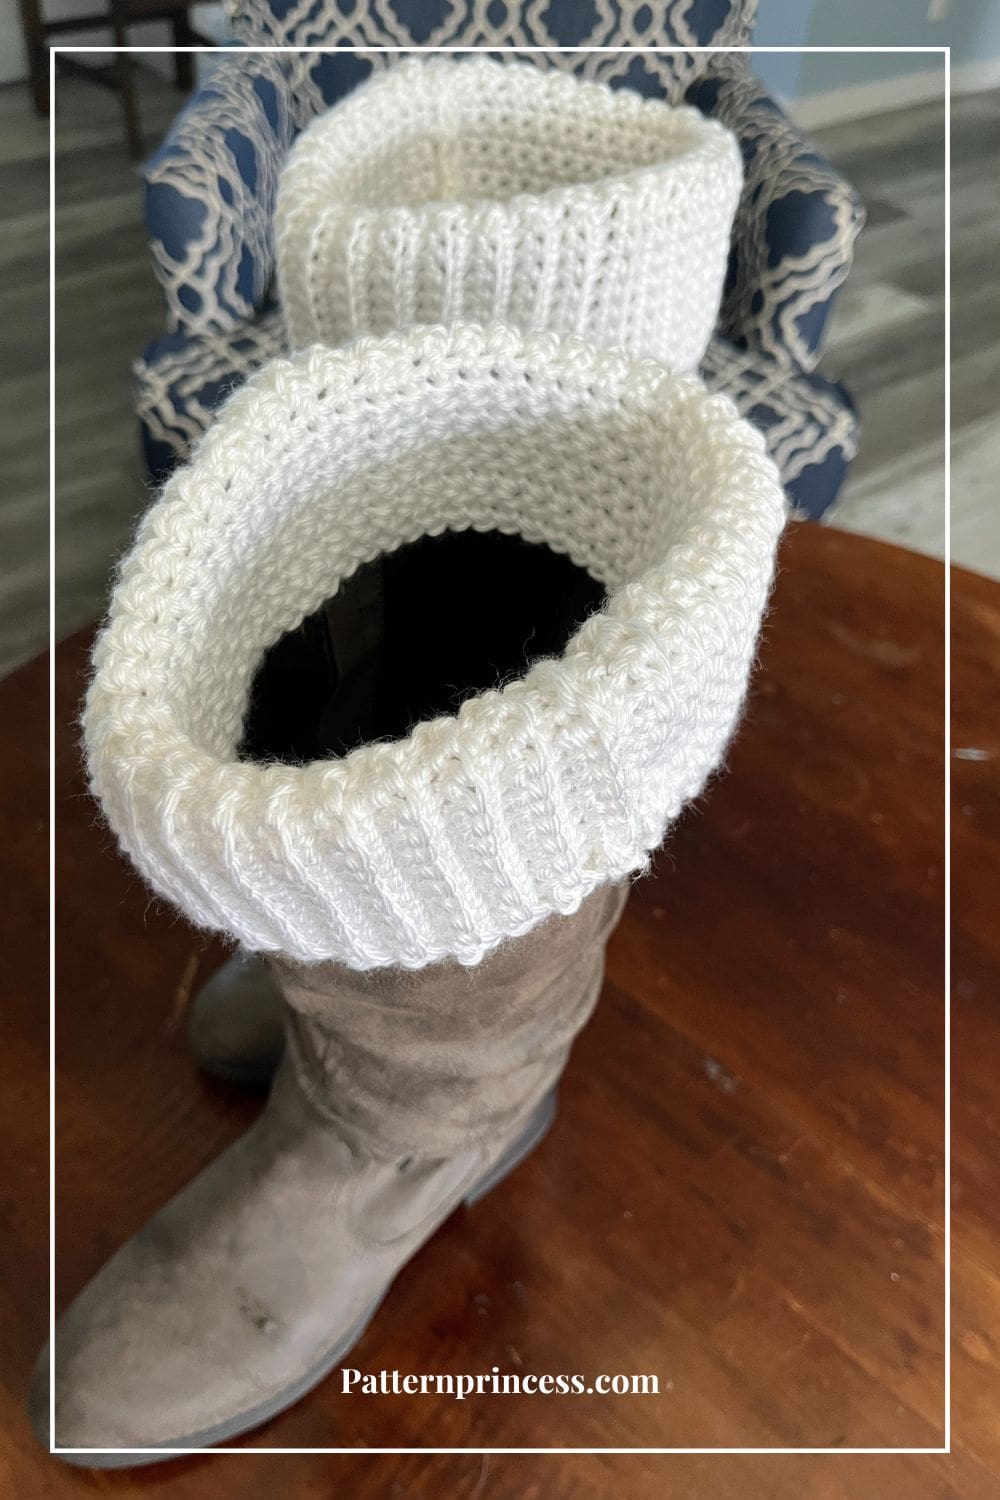
Here’s a quick overview of how these boot cuffs come together before we dive into the pattern. The entire cuff is worked flat and joined at the end.
You’ll start with the band that sits inside the boot and fits snugly around your leg (this part won’t be visible once you’re wearing them). The band is worked in rows of single crochet, which helps it keep its shape even after being worn and stretched.
Once the band is done, it’s time to create the ribbed cuff. This is done by working single crochet stitches in the back loop only, which gives that beautiful, ribbed texture.
Finally, the short ends are joined together to form a tube, completing the boot cuff.
Get your ad free printable PDF in our Etsy Shop.
Directions: Easy Winter White Crochet Boot Cuffs
Skill Level
Easy – Confident Beginner
Gauge
Approximately 12 stitches and 13 rows every 4 inches.
For accurate size, check your gauge as your crochet stitches may be looser or tighter than mine.
Size
5 inches wide x 15 inches long.
Changing the size
While this pattern comes in just one size, it is easy to change the size to fit your leg. Measure your leg where you want to boot cuff to sit. Crochet the initial band (chain stitches) to this size, then continue on with the pattern.
Abbreviations
- CH = Chain Stitch
- SC = Single Crochet Stitch
- SK = Skip
- SC BLO = Single Crochet Back Loop
- ST = Stitch
- STs = Stitches
- [ ] = Repeat Between
Materials
Caron Simply Soft #4 medium weight yarn. Partial skein about 120 yards total.
Color Shown: White
Size I Crochet Hook 5.5 mm
Tapestry Needle
Scissors
Tape Measure
Crochet Stitches
Chain Stitch (CH ST)
Begin the chain stitch by making a slip knot on the crochet hook. Leave about a 5-inch tail on the yarn. This will be weaved in later.
Next snug up the yarn loop that is on the crochet hook; while it should be firm, it should also be loose enough to slide on the hook with ease.
Keeping the loop on the hook, wrap the yarn over the crochet hook from back to front. Draw the yarn through the loop. You’ve just made a chain stitch. Continue yarning over and drawing the yarn through the loop on the hook to make more chain stitches.
HOW TO CROCHET THE CHAIN STITCH video tutorial
Single Crochet (SC)
Insert the hook, pull up a loop. Yarn over and pull through the two loops on the hook.
HOW TO CROCHET THE SINGLE CROCHET STITCH video tutorial
Single Crochet Back Loop Crochet (SC BLO)
Insert the hook in the back loop, pull up a loop. Yarn over and pull through the two loops on the hook.
Video Stitch Help for the Ribbing
Right hand video: https://youtu.be/sGSZ66c9CMY
Reft hand video: https://youtu.be/_7q4ikTa3lk
Pattern Notes
Pattern is written in US crochet terminology.
Turn after each row.
Since this pattern is reversible, there isn’t a right side and wrong side.
For this pattern, you’ll be working the boot cuff flat and joined at the end.
Crochet Pattern
Begin with the Band. The part that is inside the boot.
Start by making a slip knot and adding the loop on the hook.
Work enough chains to make your desired length.
For this pattern I worked a chain of 47 stitches.
Row 1
SK 1 ST, work a SC in the next ST and each ST across. Turn (46 STs)
Rows 2-10
CH 1 (Does not count as a ST). SC in the first ST and each ST across. Turn (46 STs)
Work the Ribbing. The part that is outside of the boot.
For this part, you will be working short rows on the long part of the band.
A few notes before we get started.
Forward Rows and Return Rows. The forward rows are the rows worked while moving away from the band. Return rows are those worked moving back toward the band.
Slip Stitches. Work 2 or 3 slip stitches at the end of the return rows. One is to anchor the return row and the next one or two are to set up for the next forward row.
Begin Ribbed Border
Join the yarn to a corner on one of the sides of your crochet project. Attach your yarn for the ribbing with the front side facing you.
Work 11 CH STs.
Now we’ll work back down the chain toward the edge of the blanket or crochet project.
Row 1
Work a SC into the second chain and in each ST across. Next, work a SL ST back into the SP where we joined our yarn. Work 1 SL ST into the next 2 STs. (10 STs)
Row 2
Turn your work. SK the 3 SL STS. Work a SC BLO into each the first SC ST and each ST across. (Forward pass completed). Begin the return pass. CH 1, SC BLO into the first ST and each ST across. Work a SL ST back into the base of the row in the body of the project. And work a SL ST into the next 2 STs. (10 STs)
*For my boot cuff ribbing there should be 10 SC BLO and 3 SL STs.
Rows 3 and beyond
Continue to repeat row 2.
Sewing the Ends Together
When you’re done, leave a long tail. About 15-20 inches. You will be using this to sew the ends together. This will create a “tube” shape.
Seaming Instructions
Fold the boot cuff in half matching the ends together.
Use the long yarn tail and yarn needle to sew the ends together. Starting on one end, insert the hook through the loops on the end of each side. Move the needle over a little, insert it back through the layers and out the other end. Continue working back and forth weaving the yarn through the layers.
When done, weave in the yarn ends and cut off the excess yarn.
Enjoy your beautiful boot cuffs.
We hope that you have enjoyed this lovely crochet pattern.

Easy Winter White Crochet Boot Cuffs Free Pattern
Equipment
- 1 Crochet Hook Size I 5.5mm
- 1 Scissors:
- 1 Tapestry Needle
- 1 Tape Measure
Materials
- 120 Yards Caron Simply Soft in the color white or any medium weight yarn
Instructions
- Begin with the Band. The part that is inside the boot.
- Start by making a slip knot and adding the loop on the hook.120 Yards Caron Simply Soft in the color white
- Work enough chains to make your desired length.
- For this pattern I worked a chain of 47 stitches.
- Row 1
- SK 1 ST, work a SC in the next ST and each ST across. Turn (46 STs)
- Rows 2-10
- CH 1 (Does not count as a ST). SC in the first ST and each ST across. Turn (46 STs)
- Work the Ribbing. The part that is outside of the boot.
- For this part, you will be working short rows on the long part of the band.
- A few notes before we get started.
- Forward Rows and Return Rows. The forward rows are the rows worked while moving away from the band. Return rows are those worked moving back toward the band.
- Slip Stitches. Work 2 or 3 slip stitches at the end of the return rows. One is to anchor the return row and the next one or two are to set up for the next forward row.
- Begin Ribbed Border
- Join the yarn to a corner on one of the sides of your crochet project. Attach your yarn for the ribbing with the front side facing you.
- Work 11 CH STs.
- Now we’ll work back down the chain toward the edge of the blanket or crochet project.
- Row 1
- Work a SC into the second chain and in each ST across. Next, work a SL ST back into the SP where we joined our yarn. Work 1 SL ST into the next 2 STs. (10 STs)
- Row 2
- Turn your work. SK the 3 SL STS. Work a SC BLO into each the first SC ST and each ST across. (Forward pass completed). Begin the return pass. CH 1, SC BLO into the first ST and each ST across. Work a SL ST back into the base of the row in the body of the project. And work a SL ST into the next 2 STs. (10 STs)
- *For my boot cuff ribbing there should be 10 SC BLO and 3 SL STs.
- Rows 3 and beyond
- Continue to repeat row 2.
- Sewing the Ends Together
- When you’re done, leave a long tail. About 15-20 inches. You will be using this to sew the ends together. This will create a “tube” shape.
- Seaming Instructions
- Fold the boot cuff in half matching the ends together.
- Use the long yarn tail and yarn needle to sew the ends together. Starting on one end, insert the hook through the loops on the end of each side. Move the needle over a little, insert it back through the layers and out the other end. Continue working back and forth weaving the yarn through the layers.
- When done, weave in the yarn ends and cut off the excess yarn.
Notes
- CH = Chain Stitch
- SC = Single Crochet Stitch
- SK = Skip
- SC BLO = Single Crochet Back Loop
- ST = Stitch
- STs = Stitches
- [ ] = Repeat Between

You can find Victoria crocheting, quilting, and creating recipes. She has cooked in restaurants for over 20 years, including many larger parties. She learned to crochet when she was just 11 years old and has been crocheting ever since; over 50 years now. Over 40 years ago, she loved her first class in sewing and continues to hone her skills in quilting. Many have enjoyed the handmade gifts over the years. In her professional career, she has worked in management in a wide variety of businesses including higher education as a dean of a division. All the while attending college part-time to achieve her doctorate in higher education with an emphasis in e-learning.
This crochet pattern works up quickly and looks great.