Last updated on July 5th, 2024 at 12:32 am
Easily create this Modern Baroque Design Throw. Pair the intricate yarn colors with a textured crochet stitch for a beautiful ornate looking throw.
*Post contains affiliate links* for more information please read the disclaimer on the About Us page.
Modern Baroque Design Throw
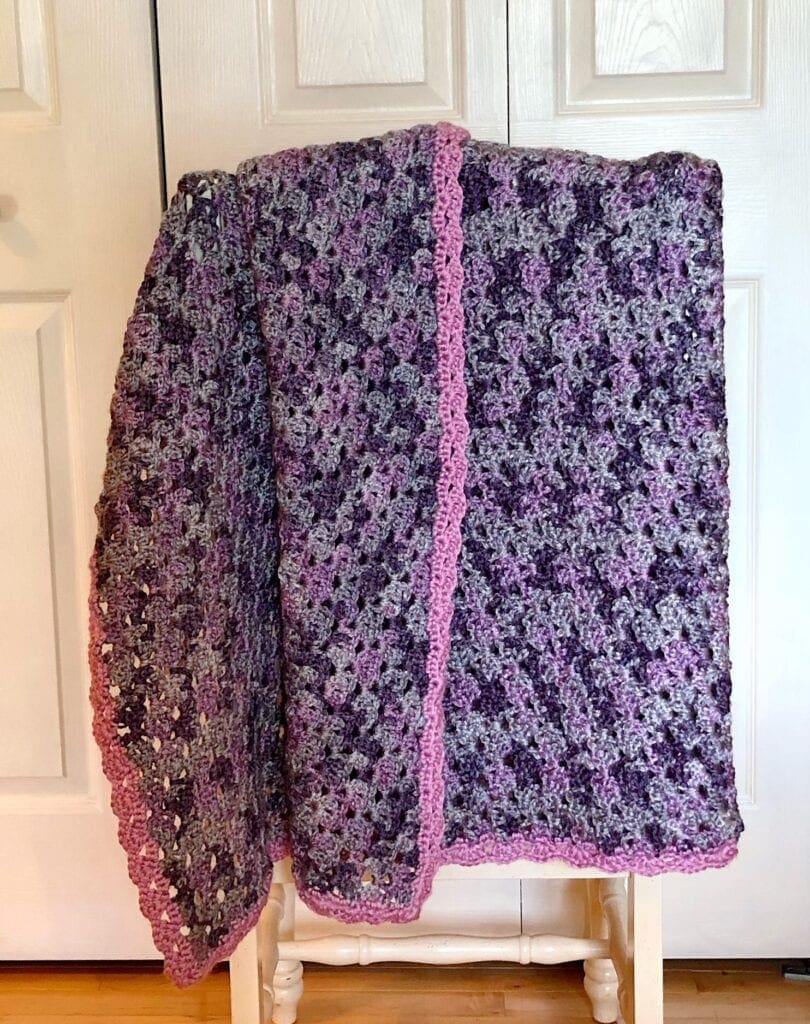
- Modern Baroque Design Throw
- What is Baroque Interior Designs?
- Crochet Pattern Notes
- Special Stitches Used
- Crochet Skill Level
- Crochet Blanket Size
- Changing the Blanket Size
- Materials
- Abbreviations
- Directions: Crochet Modern Baroque Design Throw
- Finishing Border
- Begin with Single Crochet
- Second Row of Crochet
- First Edging Option
- Second Edging Option
- This photo shows the second crochet edge option using all blackberry yarn.
- This photo shows the second crochet edge option using blackberry for the first two rows and baroque yarn for the final row.
- Finishing Crochet Blanket
What is Baroque Interior Designs?
According to Design Threads, Baroque Interior designs feature extravagant ornamental features; such as, swags, intricate scroll work, and intense color palettes. Home decor details are made to be in a grand scale, to showcase sophisticated and elegant detail.
Additionally, to achieve the extraordinary aura of a baroque interior, the color palette must be intense and almost sensual. While gold is the quintessential color within any Baroque interior, supplementing it with a rich range of shades is a must. Colors such as cobalt, crimson, emerald and plum all play beautifully into a baroque interior’s aesthetics.
Handmade Baroque Style
If you love modern baroque interior designs and style, this blanket will fit in your home decor nicely. This crochet blanket pattern will be a treasured heirloom for years to come. Use two versions of the v stitch to achieve a beautiful look and feel. This pattern is a four-row repeat to create the luxurious crochet pattern.
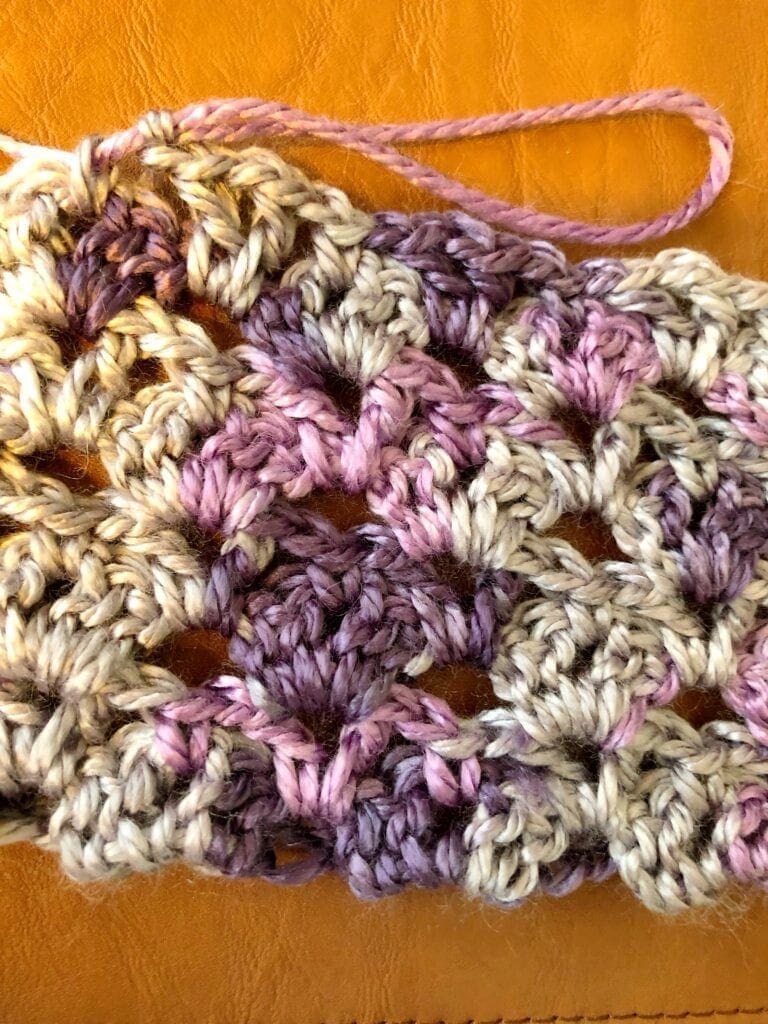
Here are is a close up to help see the stitches a bit better.
Crochet Pattern Notes
There are a few things that I want to make sure I point out for successful completion of the crochet pattern.
Each row is starts with a Chainless starting stitch. For instance, use the Chainless Double Crochet rather than a Chain 3. Use the Chainless Single Crochet rather than a Chain 1.
Use Stitch Markers after each four-row repeat. This will help be able to tell what row pattern you are on when you pick your work back up.
Special Stitches Used
V Stitch: (DC, CH 1, DC) into the same stitch
2 DC – V Stitch: (2 DC, CH 1, 2 DC) into the same stitch
Crochet Skill Level
Intermediate
This pattern is a bit more difficult; however, once the initial nine rows are completed, the pattern has a four-row repeat. Therefore, I would place this as an intermediate level.
Crochet Blanket Size
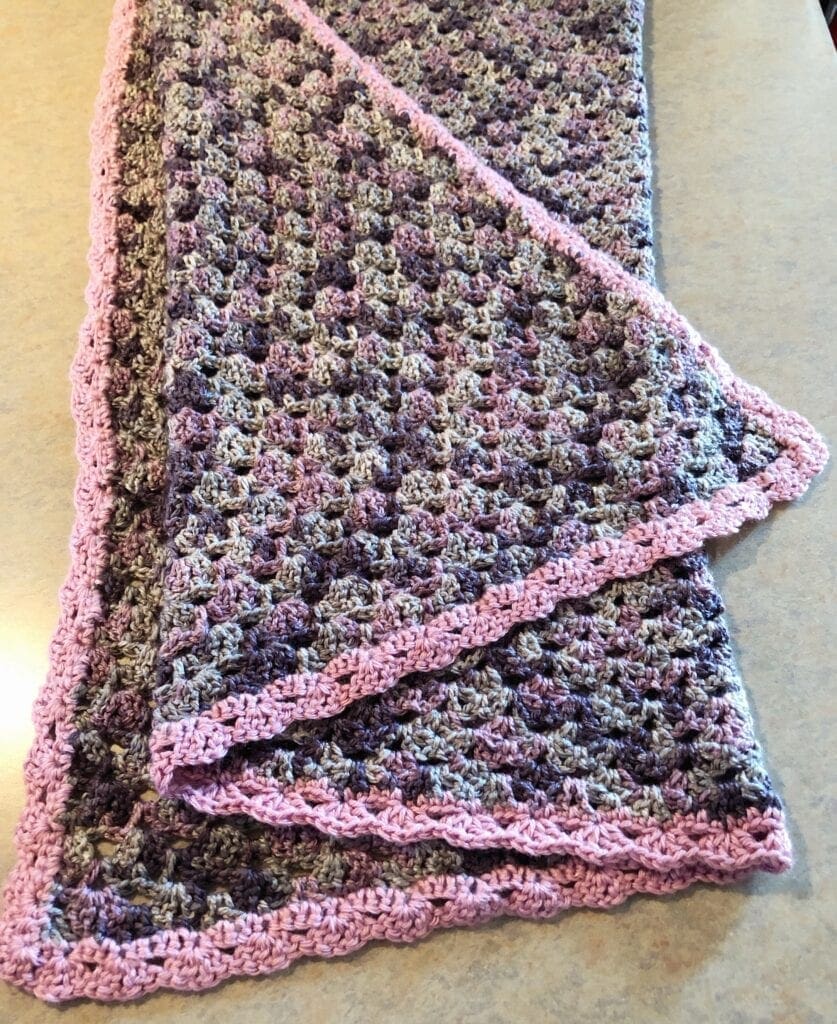
The overall size of the blanket is 37.5 inches wide X 45 inches long.
One skein of yarn yielded a section 37.5 inches wide X 9 inches long.
Changing the Blanket Size
The blanket is worked in multiples of 5 + 7. Therefore, if you would like the blanket wider or narrower, make sure that the foundational row of stitches is divisible by 5. Then add 7. For instance, this blanket is 145 + 7 stitches, which equals 152 stitches. Adjust the length by just stopping on after any one of the four row repeats.
Materials
Baroque Loops and Threads Yarn Total of 7 skeins or 1,449 yards. If you are not able to find the yarn locally, you can purchase the yarn here.
Blackberry Caron Simply Soft Yarn Total of 1/2 skein or approximately 160 yards. If you are not able to find this yarn locally, you can purchase the yarn here.
Crochet Hook Size H
Yarn Needle
Scissors
Abbreviations
CH = Chain
DC = Double Crochet
SC = Single Crochet
SK = Skip
Top of Form
SK ST = Skip Stitch
ST = Stitch
STs = More than one Stitch
SL ST = Slip Stitch
Directions: Crochet Modern Baroque Design Throw
Begin: Chain 152 Stitches
Row 2:
Chainless DC into the first ST, Skip 2 STs, 2 DC – V Stitch into the next ST, [skip 4 STs, 2 DC – V Stitch into the next ST]. Repeat between [ ] until 3 Stitches left. Then SK 2 STs and DC in last ST, turn.
Row 3:
2 DC into first ST, CH 1, SK 2 STs, SC into the next CH 1 SP, CH 1. [SK 2 Sts, V Stitch into the next CH 1 SP of the V Stitch of the previous row, CH 1, SK 2 STs, Sc into the next CH 1 SP, CH 1]. Repeat between [ ] until 3 STs left. Then SK 2 STs and 2 DC into last ST, turn.
Row 4:
(DC, CH 1, 2 DC) into first ST, [SK next (DC, CH 1 SP, SC, CH 1 SP), 2 DC – V Stitch into the next CH 1 SP of the V Stitch of the previous row]. Repeat between [ ] until the last CH 1 SP of the V Stitch, then SK (CH 1 SP, SC, CH 1 SP, DC). end with (2 DC, CH 1, DC) into the last DC ST, turn.
Row 5:
SC into first ST, CH 1, SK next Ch 1 SP. [SK 2 STs, V Stitch into the CH 1 SP space between 2 DC – V Stitch of the previous row, CH 1, SK 2 STs, SC into the next CH 1 SP, CH 1]. Repeat between [ ] until last 2 DC – V Stitches of previous row. CH 1, SK 2 STs, SK next CH 1 SP, SC into last DC ST, turn.
Row 6:
Dc into the first ST, SK next CH 1 SP. [2 DC – V Stitch into next CH 1 SP of the V Stitch of the previous row, SK next (CH 1 SP, SC, CH 1 SP)] Repeat between [ ] until the last CH 1 SP of the V Stitch of previous row. SK next CH 1 SP, DC into last SC ST, turn.
Row 7:
2 DC into the first ST, CH 1, SK 2 STs, SC into next CH 1 SP, CH 1 [SK 2 STs, V Stitch into the CH 1 space between the 2 DC – V Stitches of the previous row, CH 1 SK 2 STs, SC into the next CH 1 SP, CH 1]. Repeat to the last 2 STS. Skip to STs, DC into the last DC ST, turn.
Row 8:
(DC, CH 1, 2 DC) into first ST, [SK next (DC, CH 1 SP, SC, CH 1 SP), 2 DC – V Stitch into the next CH 1 SP of the V Stitch of the previous row]. Repeat between [ ] until the last CH 1 SP of the V Stitch, then SK (CH 1 SP, SC, CH 1 SP, DC). end with (2 DC, CH 1, DC) into the last DC ST, turn.
Row 9:
SC into first ST, CH 1, SK next Ch 1 SP. [SK 2 STs, V Stitch into the CH 1 SP space between 2 DC – V Stitch of the previous row, CH 1, SK 2 STs, SC into the next CH 1 SP, CH 1]. Repeat between [ ] until last 2 DC – V Stitches of previous row. CH 1, SK 2 STs, SK next CH 1 SP, SC into last DC ST, turn.
Repeat Crochet Rows
Continue on with the pattern making it as long as you wish by repeating rows 6 – 9. After the initial 9 row set up, I repeated rows 6 – 9 33 times or until the crochet blanket was 64 inches long.
Finishing Border
I tried two different crochet edges on this throw.
Begin with Single Crochet
Starting with the Blackberry Caron Simply Soft Yarn.
Both of the options include a Single Crochet in each Stitch all the way around the blanket. Make sure to Crochet 3 Single Crochet Stitches in each corner. This helps ease the stitches around the corners and they will lay flat.
Second Row of Crochet
Both of the edge options also have the 2 double crochet v stitch. Start in one of the corners with 2 DC. Skip 2, in the next ST, complete 2 DC, CH 1, 2 DC. [SK 4, in next ST, complete 2 DC, CH 1, 2 DC]. Repeat between [ ] until the next corner.
NOTE: Depending on how many stitches were completed along the edge, you my be a stitch short. Go ahead and adjust the last stitch count so that there is a 2 DC V Stitch 2 stitches away from the corner SC ST.
Continuing On: Once the last 2 DC V Stitch is completed, SK 2 Stitches, complete a 2 DC V Stitch in the corner ST, SK 2 Stitches, complete 2 DC V Stitch. Then carry on with the repeating pattern [SK 4, in next ST, complete 2 DC, CH 1, 2 DC]. Repeat between [ ] until the next corner.
Complete the next two corners. End with 2 DC, CH 1, and a SL ST into the first DC.
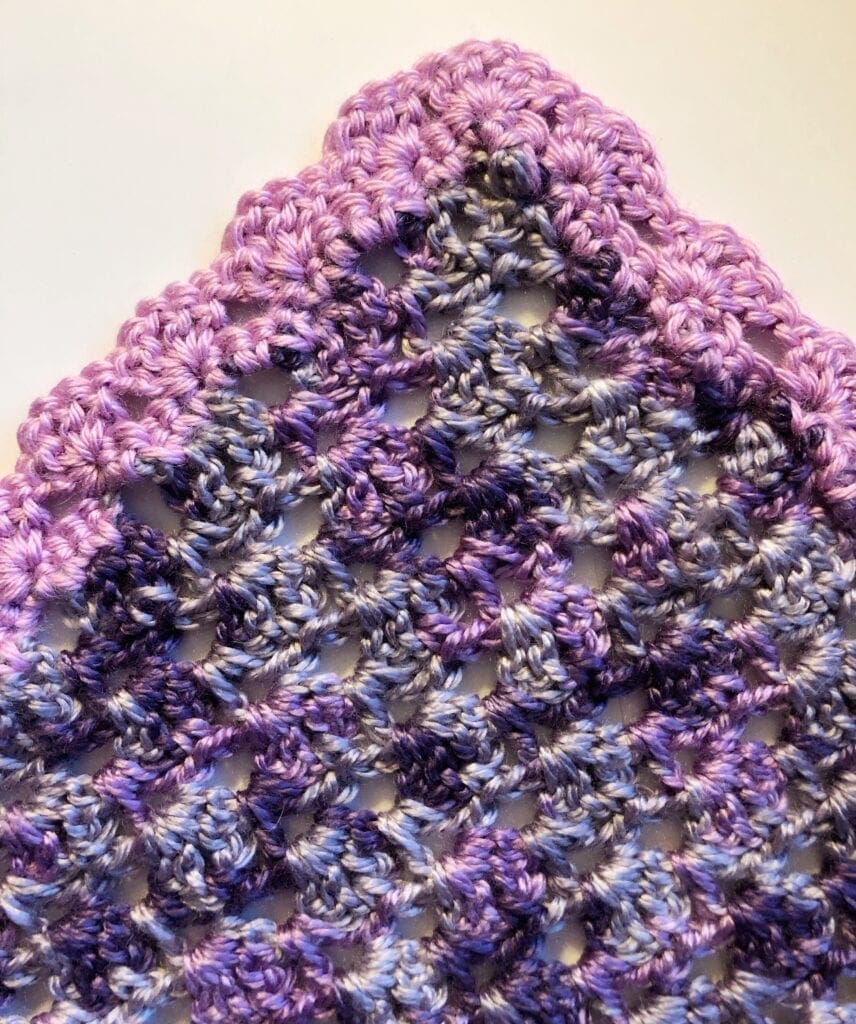
First Edging Option
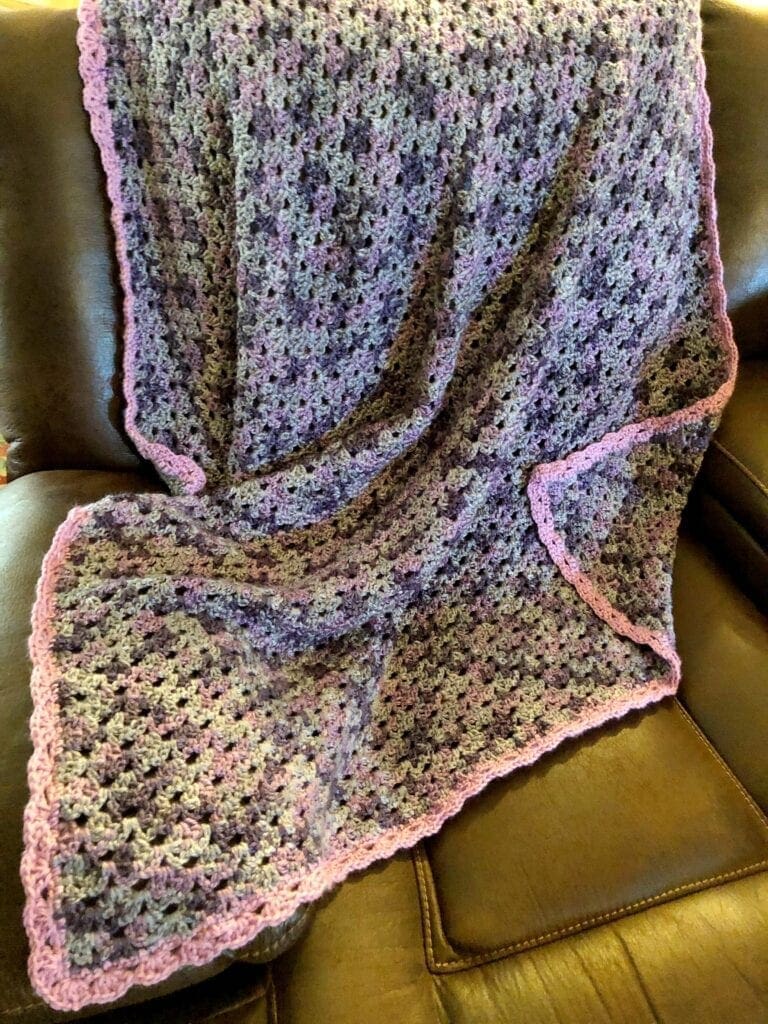
The directions written to this point complete the crochet blanket edging that is shown in the following photo.
Second Edging Option
Complete the directions for the first edging option. There will be one more row added. There is also two options for this last row. One option is to use the Blackberry yarn and the other is to use the Baroque yarn. I have included photos to help you choose your favorite finishing border.
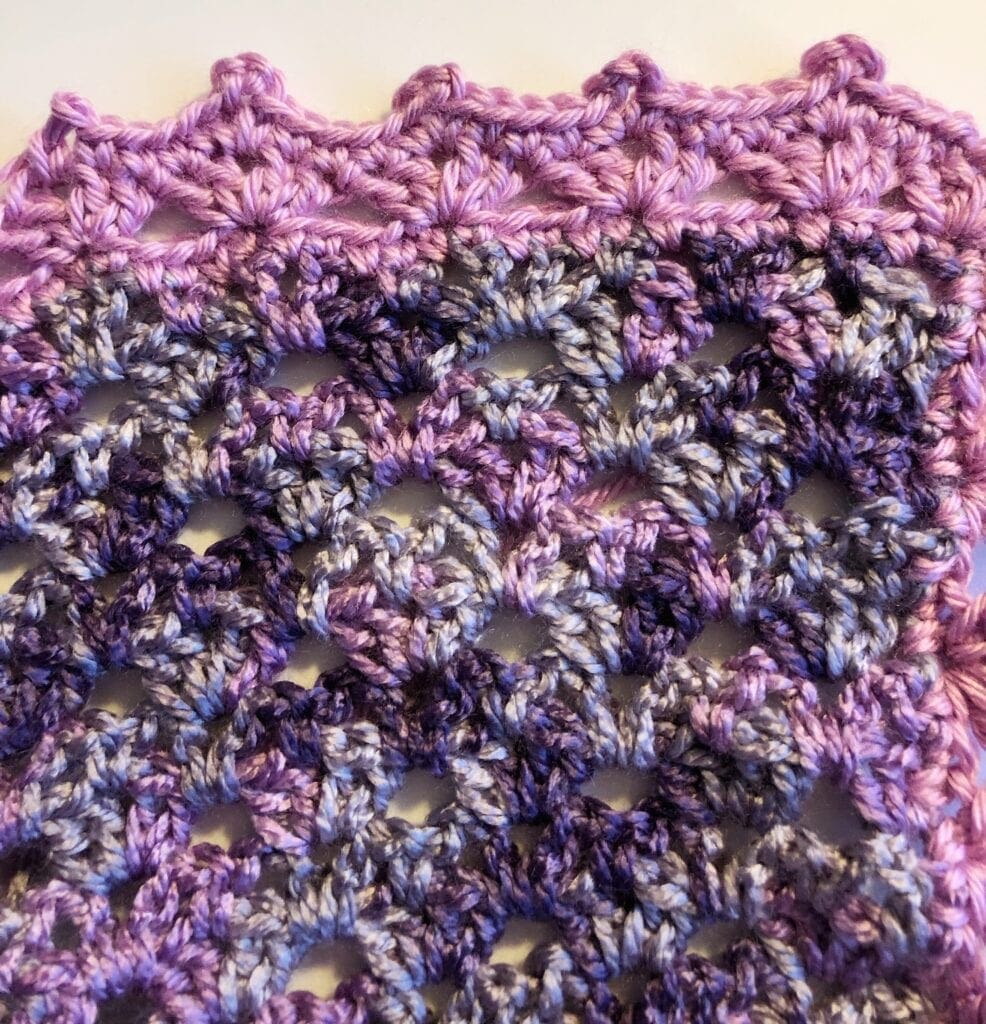
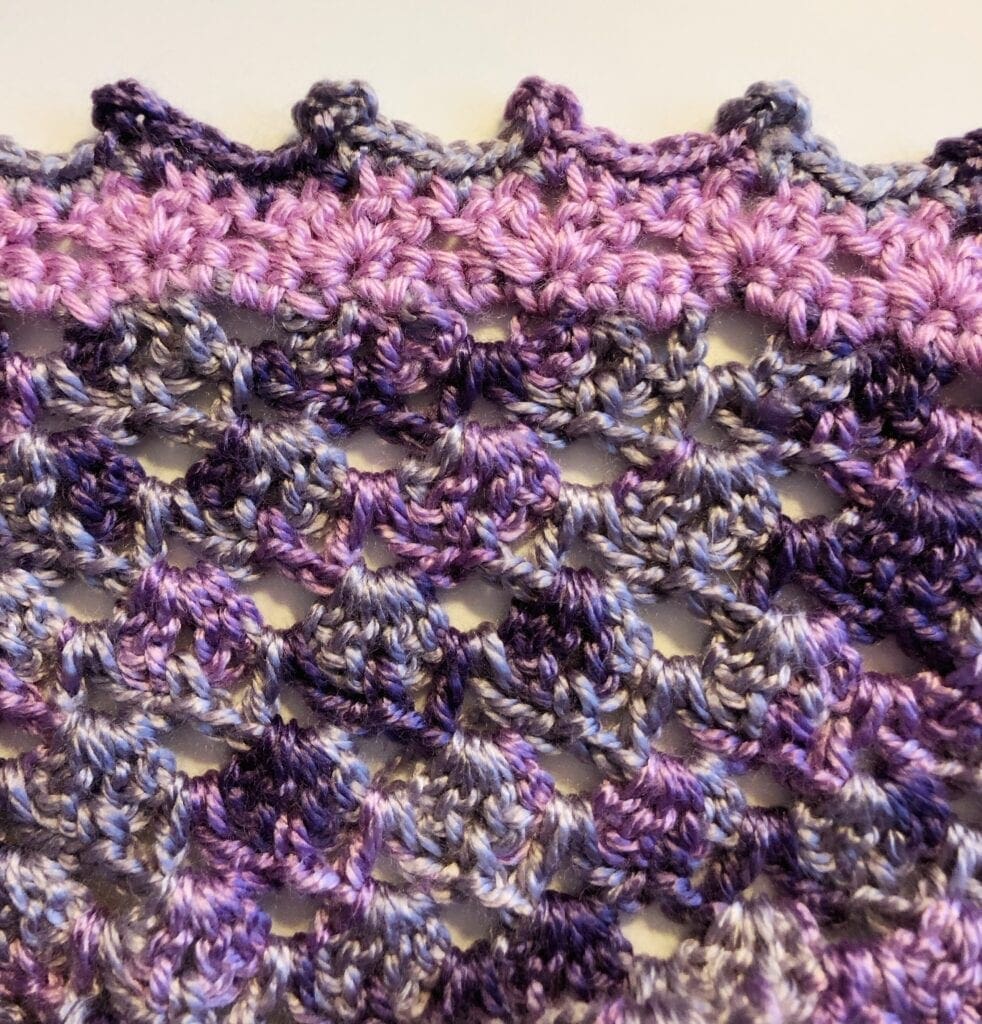
DIRECTIONS: Complete a SC in each stitch. When you come to the CH 1 spaces between the 2 DC stitches, complete SC, CH 3, SC. Repeat this all the way around the blanket. SL ST into first ST. (you are creating a crochet picot stitch).
This photo shows the second crochet edge option using all blackberry yarn.
This photo shows the second crochet edge option using blackberry for the first two rows and baroque yarn for the final row.
Finishing Crochet Blanket
Weave in all ends. Cut off excess yarn.
Enjoy showing off your beautiful work.
Video of Crochet Pattern
Here is the video of the first 9 rows being crocheted. NOTE: the pattern shown shows the beginning row as the no chain double crochet. This one starts with a chain of stitches. The rest except the size of the blanket and the borders are the same.
Right Hand Tutorial of First Nine Rows
Left Hand Tutorial of First Nine Rows
If you would like the written pattern for the Springtime Soft Shells Crochet Blanket Pattern, that can be found here.
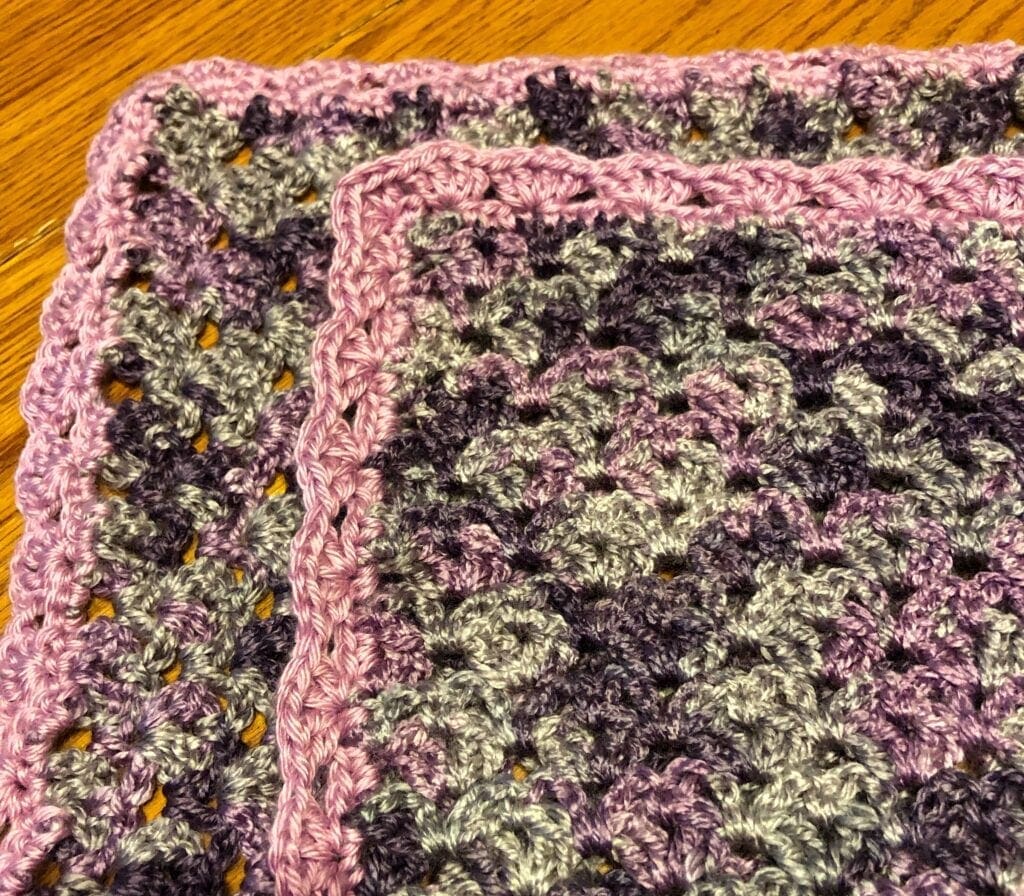
My sister and daughter both agreed on this crochet edge.
If you loved this post, please share. It helps to show me that these types of posts are helpful – thank you!
I hope that you liked this pattern. If you are looking for more ideas for crocheted projects, here are a few others you may enjoy.

You can find Victoria crocheting, quilting, and creating recipes. She has cooked in restaurants for over 20 years, including many larger parties. She learned to crochet when she was just 11 years old and has been crocheting ever since; over 50 years now. Over 40 years ago, she loved her first class in sewing and continues to hone her skills in quilting. Many have enjoyed the handmade gifts over the years. In her professional career, she has worked in management in a wide variety of businesses including higher education as a dean of a division. All the while attending college part-time to achieve her doctorate in higher education with an emphasis in e-learning.


Hello. I also got to row five in the written instructions and cannot figure it out. It is very confusing and the stitches do not match up with the previous row. The video is for soft shells afghan, not for the baroque.
While the video is for the soft shells afghan, it is the same pattern. Give it a watch to see if it helps you.
What’s a sc chainless at or a DC chainless at?
Hello, I did a video on the no chain double crochet. Here is the link. Hope it helps you. https://youtu.be/KTkqjrgh1sU
Vicky
I really would like to make this blanket, but am having difficulties interpreting the pattern. Can you help? For example:
Row 3: does the V-st Go in the space between the 2dc-v sts? There isn’t a Ch-1 space there.
Row 5: should I ch-1 at the beginning? It doesn’t square off if you don’t. Again, there’s no ch-1 space between 2dc-v sts.
The next 4 rows have these same issues. What am I missing? I found a beautiful variegated yarn that would be great with this.
Please help me!!!
Laura
Thanks for asking. I want to help make sure you can make this. The video tutorial may help you too. However, since using the two strands of yarn at once, it is very bulky; therefore, I chose not to do the CH 1 between the two double crochet stitches that are normally done with a V-Stitch. For row 5 and beyond, you repeat row 3. Each row starts with a CH 3. Does this help?