Last updated on March 27th, 2026 at 09:12 pm
Here is your guide for how to block crochet using three methods. If you’ve ever wondered how to take your crochet projects from good to great, then you’re in the right place.
Today, we’re delving into the transformative technique of blocking your crochet pieces. Mastering blocking can elevate the quality and presentation of your granny squares and other creations to a whole new level.
Blocking crochet fabric involves manipulating your finished project into a specific shape while it dries. This is achieved by applying moisture. Using one of three methods, whether through soaking, misting, or steaming the crochet piece. Then secure it in place using pins. It’s a great way to make sure you end up with a well-defined look with sharp straight edges and clean lines.
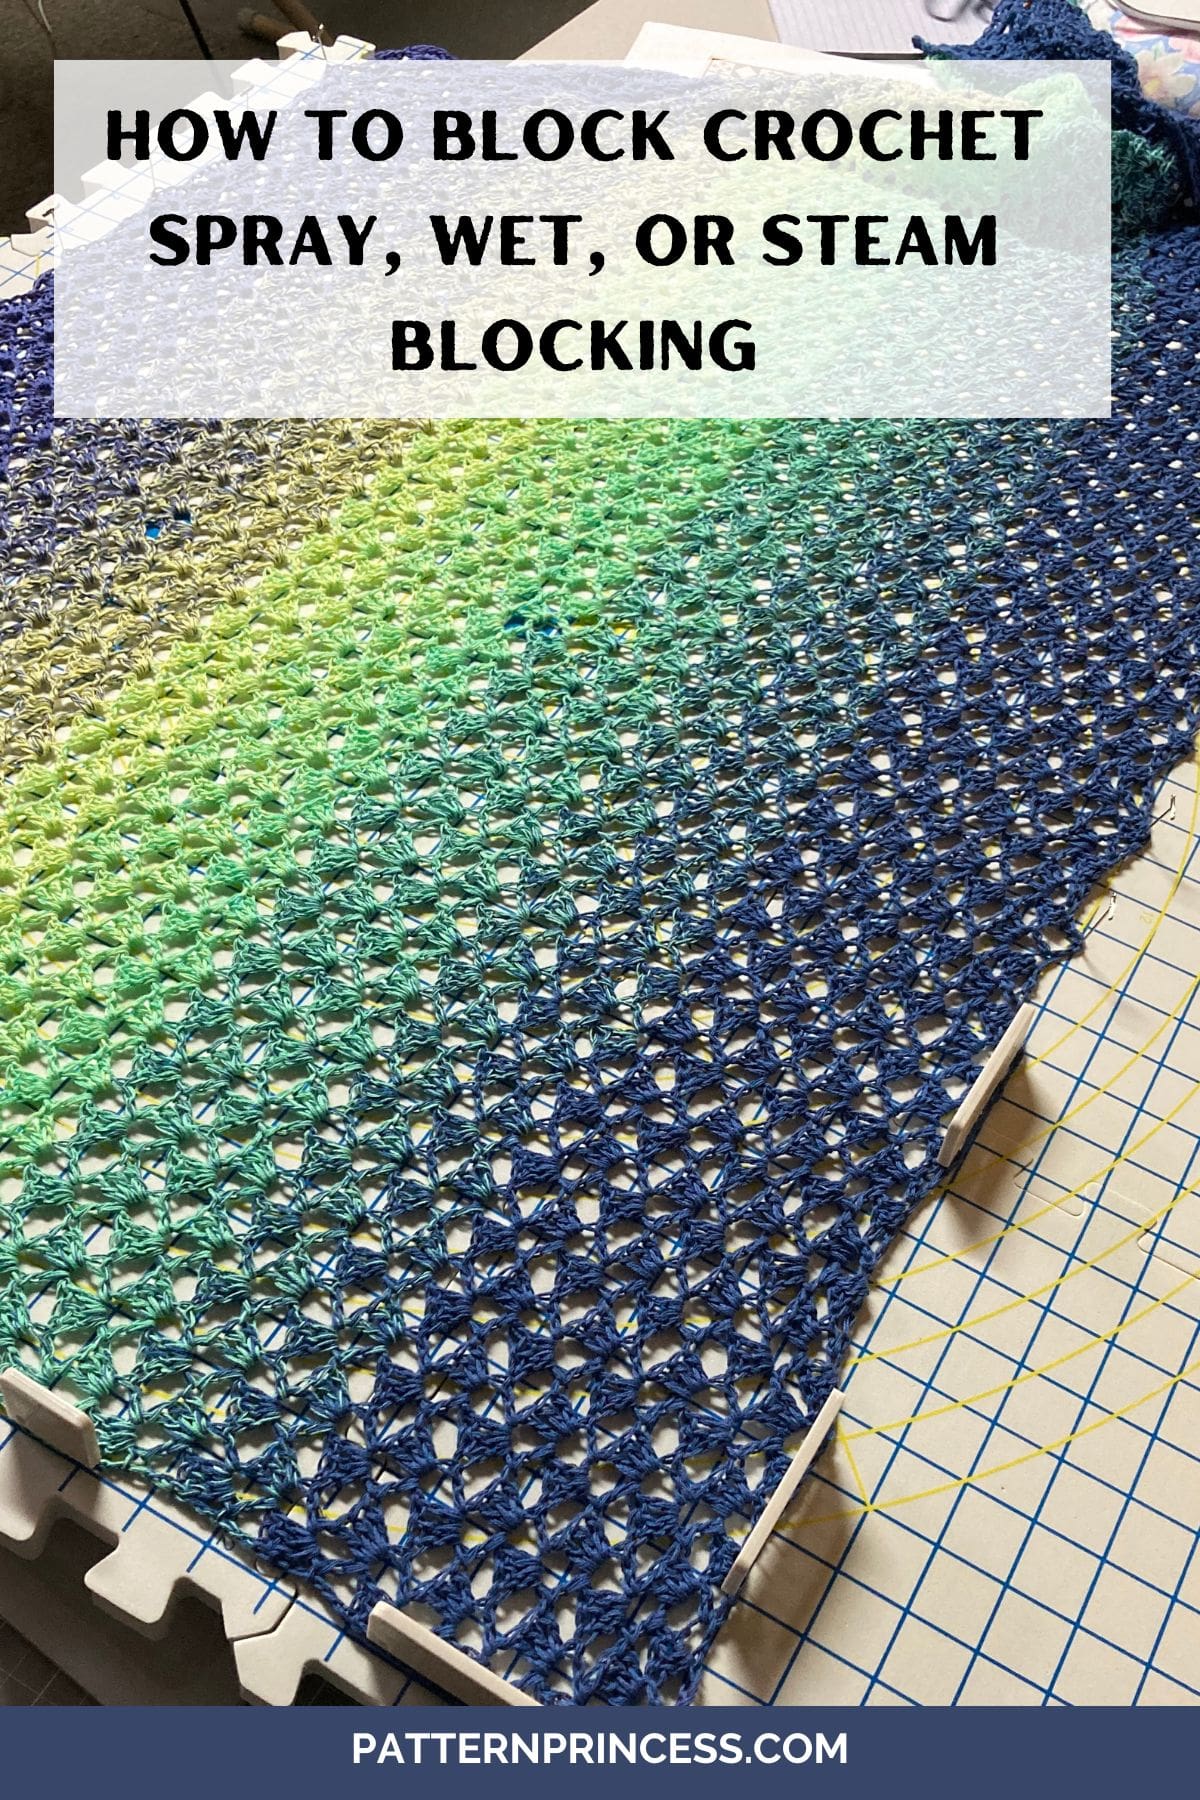
Table of contents
What is Blocking?
First things first, let’s demystify the concept of blocking. In simple terms, blocking is the process of shaping and setting your crochet piece to achieve a desired size, shape, and drape. It involves wetting or steaming the fabric and then gently manipulating it into the desired form before allowing it to dry completely.
Why Block Crochet?
You might be wondering, “Why bother blocking my crochet projects?” Well, blocking offers several key benefits.
Firstly, it helps to even out stitches and create a more polished appearance. Secondly, it can correct any misshapen or uneven areas in your work.
Additionally, blocking allows you to control the final dimensions of your project, ensuring a perfect fit for garments or consistent sizing for multiple pieces. Lastly, it enhances the overall drape and texture of the fabric, giving your finished piece a professional finish.
Types of Blocking
There are three different methods of blocking a crochet item: wet blocking and steam blocking are popular. There is a third method spray or mist blocking.
Wet Blocking. This method involves soaking your crochet piece in lukewarm water, gently squeezing out the excess moisture, and then shaping it to size before allowing it to air dry.
Steam Blocking. Alternatively, steam blocking utilizes steam from an iron or steamer to reshape the fabric. You hover the steam iron or steamer above the fabric, allowing the steam to penetrate and relax the fibers, and then shape the piece as desired.
Spray Blocking/Mist Blocking. Spray blocking involves lightly misting the crochet piece with water using a spray bottle instead of fully submerging it or using steam. This method is particularly suitable for delicate or easily distorted fibers that may be damaged by soaking or direct heat.
Which Method is Best?
The “best” blocking method often depends on several factors, including the fiber content of your yarn, the desired outcome for your project, and personal preference. Each blocking method has its own advantages and considerations.
Wet Blocking
Best for natural fibers such as wool, cotton, and linen.
Advantages. Fully saturates the fabric, allowing for thorough relaxation of the fibers and shaping. Can be effective for correcting uneven tension and setting the final dimensions of the piece.
Considerations. Requires more time for drying, and certain fibers may be prone to stretching or felting when wet.
Steam Blocking
Best for synthetic fibers, delicate yarns, and projects that require minimal moisture.
Advantages. Provides controlled shaping and setting of the fabric without fully saturating it. Quick drying time and less risk of overstretching or damaging delicate fibers.
Considerations. Requires caution to avoid direct contact with the hot iron or steamer, and some fibers may be sensitive to heat.
Spray Blocking/Mist Blocking
Best for delicate fibers, acrylic yarn, and projects that require minimal moisture.
Advantages. Offers gentle shaping and setting of the fabric with minimal moisture, reducing the risk of stretching or distortion. Can be effective for projects that cannot withstand soaking or direct heat.
Considerations. May require more time and effort to achieve even coverage with the spray bottle, and results may vary depending on the fineness of the mist and the absorbency of the fabric.
It’s often helpful to experiment with different blocking techniques to determine which method yields the best results for your specific projects.
Step-by-Step Guide to Blocking Crochet
Now, let’s walk through the basic steps of blocking crochet:
Prepare Your Workspace. Find a flat, clean surface where you can comfortably lay out your crochet piece.
Choose Your Blocking Method. Decide whether you’ll be wet blocking, steam blocking, or mist blocking based on the fiber content of your yarn and your personal preference.
Prepare Your Crochet Piece. If wet blocking, gently soak your crochet piece in lukewarm water with a mild detergent. For steam blocking, set up your iron or steamer according to the manufacturer’s instructions. For mist blocking, fill your spray bottle with water.
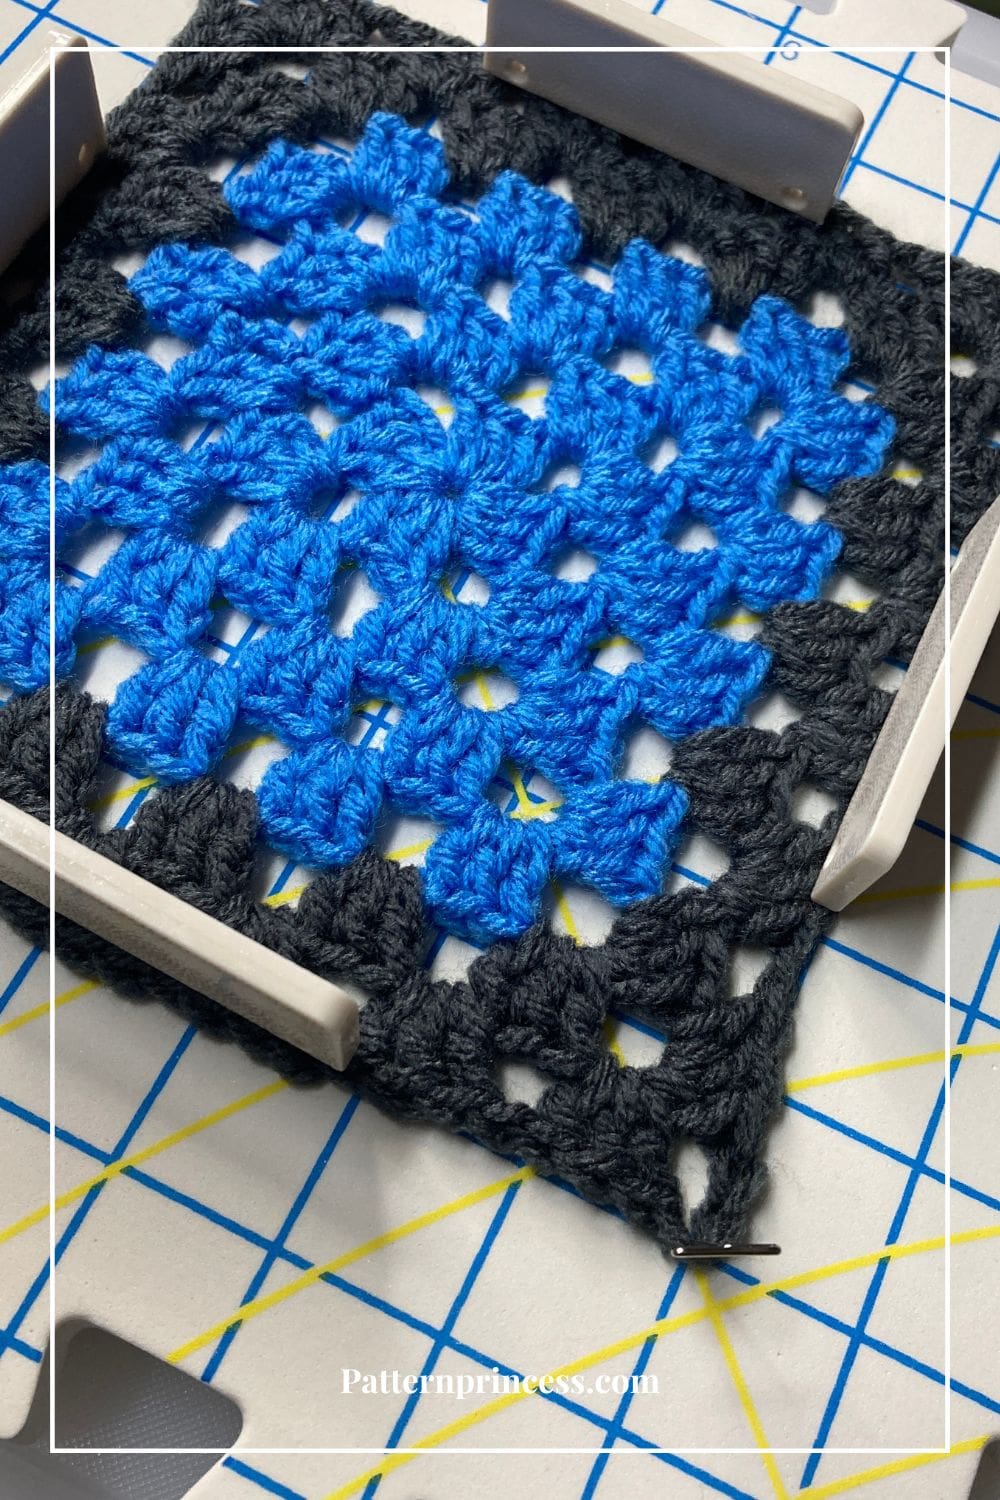
Shape Your Piece. Carefully manipulate your crochet piece into the desired shape and dimensions. Use rust-proof pins to secure the edges and maintain the shape while drying.
Allow it to Dry. If wet blocking, lay your piece flat on a towel and allow it to air dry completely. For steam blocking, hover the iron or steamer over the fabric, avoiding direct contact, until the piece is dry and set.
Finish and Enjoy. Once dry, remove the pins and admire your beautifully blocked crochet creation!
Tips for Success
- Always read the care instructions for your yarn before blocking to ensure compatibility with your chosen method.
- Use rustproof pins to prevent staining your crochet piece.
- Take your time and be patient, as rushing the blocking process can result in a less-than-perfect outcome.
- Experiment with different blocking techniques and methods to find what works best for your projects.
How to Steam Block Crochet
Let’s delve deeper into the process of steam blocking crochet:
Steam blocking is a convenient and effective method for shaping and setting your crochet projects. Follow these steps to steam block your crochet piece with precision and care:
- Gather Your Materials
- Iron or handheld garment steamer
- Clean towel or blocking mat
- Crochet piece to be blocked
- Access to a flat, heat-resistant surface
- Prep Your Iron or Steamer
- Fill the iron or steamer with water according to the manufacturer’s instructions. I use distilled water.
- Set the iron or steamer to the appropriate temperature and steam setting for the fiber content of your yarn. Refer to the yarn label or manufacturer’s recommendations for guidance.
2. Prepare Your Crochet Piece
- Lay out your crochet piece on a clean towel, foam mat, or other blocking mats on a flat surface.
- Smooth out any wrinkles or folds in the fabric, ensuring it is positioned evenly.
3. Apply Steam
- Hold the iron or steamer approximately 1-2 inches above the surface of the crochet piece, ensuring it does not make direct contact with the fabric.
- Press the steam button or trigger to release a steady stream of steam over the entire surface of the fabric.
- Move the iron or steamer in a slow, sweeping motion across the fabric, allowing the steam to penetrate the fibers evenly.
4. Shape Your Piece
- As you apply steam, use your hands to gently manipulate the fabric into the desired shape and dimensions.
- Pay special attention to any areas that require shaping or stretching, such as edges, corners, or lace motifs.
- Use rustproof pins to secure the edges and maintain the shape of the fabric while it dries, if necessary.
5. Allow to Dry
- Once you have shaped the fabric to your satisfaction, allow it to air dry completely.
- Avoid disturbing the fabric while it dries to ensure the shape is preserved.
- Once dry, remove the pins and admire your beautifully steam-blocked crochet creation!
- Your crochet piece should now have a professional finish with enhanced stitch definition and drape.
Tips for Steam Blocking Success
- Always test the steam setting of your iron or steamer on a small, inconspicuous area of the fabric before proceeding to ensure it does not damage or shrink the yarn.
- Keep the iron or steamer moving at all times to prevent overheating or scorching the fabric.
- Use caution when handling the hot iron or steamer to avoid burns or injury.
- For stubborn wrinkles or areas that require additional shaping, apply steam directly to the problem areas and gently stretch or manipulate the fabric as needed.
How to Wet Block Crochet
Let’s explore the wet blocking process in more detail:
Wet blocking is a traditional method for shaping and setting your crochet projects. Follow these steps to wet block your crochet piece effectively:
- Gather Your Materials
- Clean towels or blocking mats
- Large basin or sink
- Mild detergent or wool wash (if needed)
- Rustproof pins
- Crochet piece to be blocked
2. Prepare Your Crochet Piece
- Fill a basin or sink with lukewarm water. If desired, add a small amount of mild detergent or wool wash to gently cleanse the fabric. Be sure to follow the manufacturer’s recommendations for the detergent-to-water ratio.
- Submerge your crochet piece in the water, ensuring it is fully saturated. Allow it to soak for 15-30 minutes to relax the fibers and remove any excess dye or sizing.
3. Remove Excess Water
- After soaking, carefully remove the crochet piece from the water and gently squeeze out the excess moisture. Avoid wringing or twisting the fabric, as this can distort the stitches and shape.
4. Shape Your Piece
- Lay out clean towels or blocking mats on a flat surface to absorb excess moisture and protect your work surface.
- Carefully shape your crochet piece to the desired dimensions and form. Use your hands to smooth out any wrinkles or uneven areas, paying special attention to edges, corners, and lace motifs.
- If needed, use rustproof pins to secure the edges and maintain the shape of the fabric while it dries. Pin along the edges, spacing the pins evenly to distribute tension and prevent puckering.
5. Allow to Air Dry
- Once you have shaped the fabric to your satisfaction, allow it to air dry completely. Place the blocked piece in a well-ventilated area away from direct sunlight or heat sources.
- Avoid disturbing the fabric while it dries to ensure the shape is preserved. Depending on the fiber content and thickness of the yarn, drying times may vary from a few hours to overnight.
- Once dry, carefully remove the pins and admire your beautifully wet-blocked crochet creation.
Tips for Wet Blocking Success
- Always read the care instructions for your yarn before wet blocking to ensure compatibility with water and any additional treatments.
- Use lukewarm water to avoid shocking the fibers and causing them to shrink or felt.
- Handle the wet fabric with care to prevent stretching or distorting the stitches.
- If you’re blocking multiple pieces that need to match in size, block them at the same time to ensure consistency.
Spray Blocking/Mist Blocking
Here’s a basic outline of how spray blocking works:
- Prepare Your Crochet Piece. Lay out your crochet piece on a clean towel or blocking mats on a flat surface.
- Mist with Water. Fill a clean spray bottle with lukewarm water and lightly mist the crochet piece until it is damp but not soaking wet.
- Shape Your Piece. Gently manipulate the fabric into the desired shape and dimensions using your hands. Smooth out any wrinkles or uneven areas.
- Pin if Necessary. If needed, use rustproof pins to secure the edges and maintain the shape of the fabric while it dries. Pin along the edges, spacing the pins evenly to distribute tension.
- Allow to Air Dry. Once you have shaped the fabric to your satisfaction, allow it to air dry completely in a well-ventilated area away from direct sunlight or heat sources.
Tips for Spray Blocking Success
- Adjust the spray bottle nozzle to control the intensity of the mist. Aim for a fine mist to ensure even coverage without saturating the fabric.
- Test the spray bottle on a small, inconspicuous area of the fabric before misting the entire piece to ensure it does not cause any water spotting or damage.
- Use caution when spraying delicate or easily distorted fibers to prevent stretching or misshaping the fabric.
While spray blocking may not be as widely discussed as wet blocking and steam blocking, it can be a useful technique for certain projects and yarns, particularly those that require gentle handling or minimal moisture.
How to Block a Large Project?
Blocking larger projects like shawls follows a similar process to blocking smaller items, but there are a few additional considerations due to the size and shape of the project. Here’s a guide specifically for blocking larger crochet projects like shawls:
Choose Your Blocking Surface. Select a flat, clean surface large enough to accommodate the entire shawl when laid out flat. Blocking mats or clean towels placed on a flat floor or yoga mats work well for larger projects. You can also purchase good blocking kits with foam pieces that interlock together to create a larger surface.
Prepare Your Shawl. After completing your shawl, weave in any loose ends and gently wash it according to the care instructions for the yarn. If the yarn is delicate or requires special care, consider using a no-rinse wool wash or gentle detergent.
Soak, Steam, or Spray. Depending on your preferred blocking method, either soak the shawl in lukewarm water with a mild detergent. Steam it with an iron or handheld steamer. Spray with a fine mist using a spray bottle and water. Make sure the entire shawl is wet enough to relax the fibers.
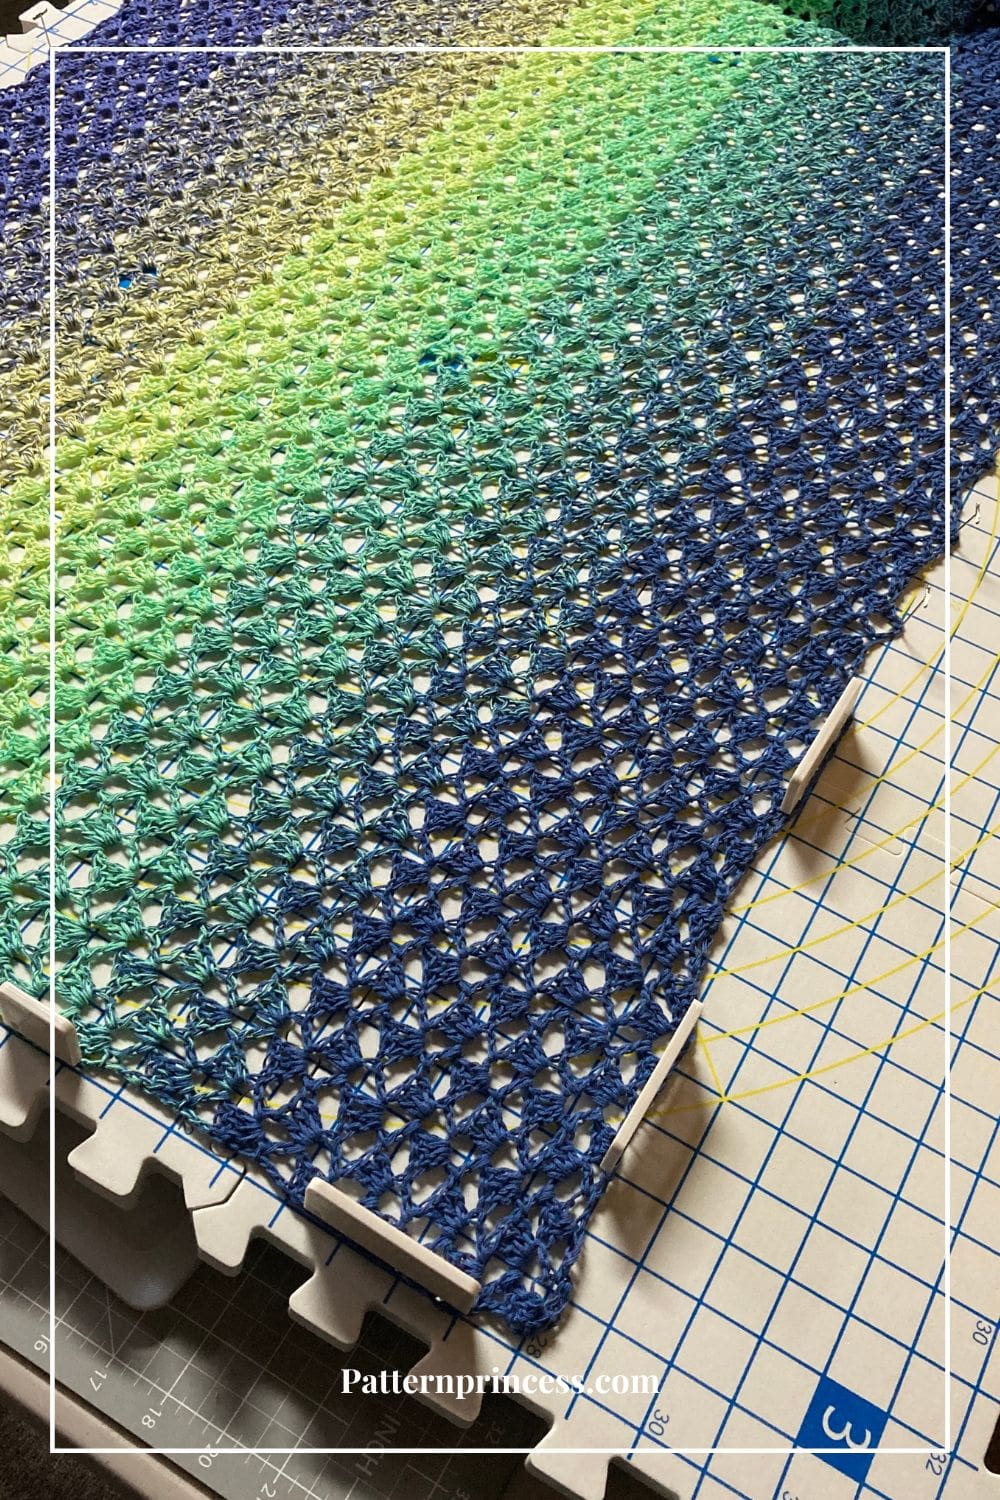
Shape Your Shawl.
Lay out the damp or steamed shawl on your blocking surface, smoothing it out to distribute any wrinkles or folds. Pay special attention to the edges and any lace or textured motifs that need to be defined.
Pin in Place. Use rustproof T-pins or blocking wires to pin the edges of the shawl to the blocking surface, ensuring it maintains its desired shape and dimensions. Start by pinning the center of the top edge and work your way outwards, pinning along the sides and bottom edge.
Adjust as Needed. Take the time to adjust the shawl to your desired shape and size, gently stretching or reshaping it as necessary. Make sure the edges are straight and the corners are square, if applicable.
Allow it to Dry. Leave the shawl to air dry completely in a well-ventilated area away from direct sunlight or heat sources. Depending on the fiber content and thickness of the yarn, drying times may vary from a few hours to overnight.
Your shawl should now have a professional finish with enhanced stitch definition and drape.
When blocking larger projects like shawls, it’s essential to ensure that the entire piece is evenly blocked and that the edges are straight and well-defined.
Do you have to block crochet even if the crochet pattern calls for it?
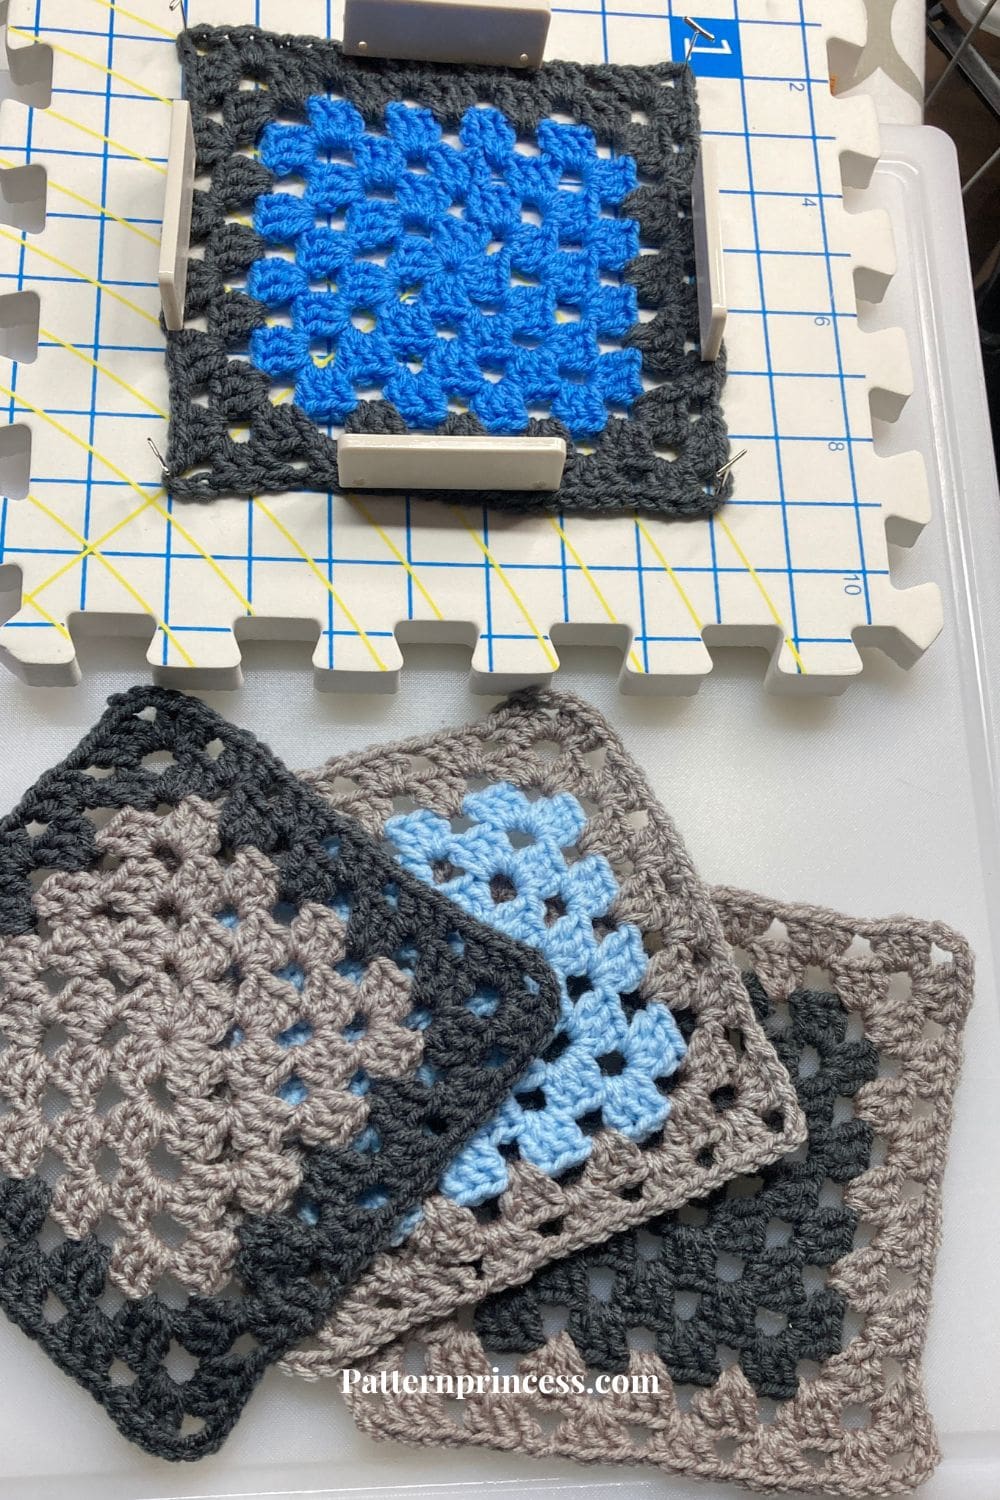
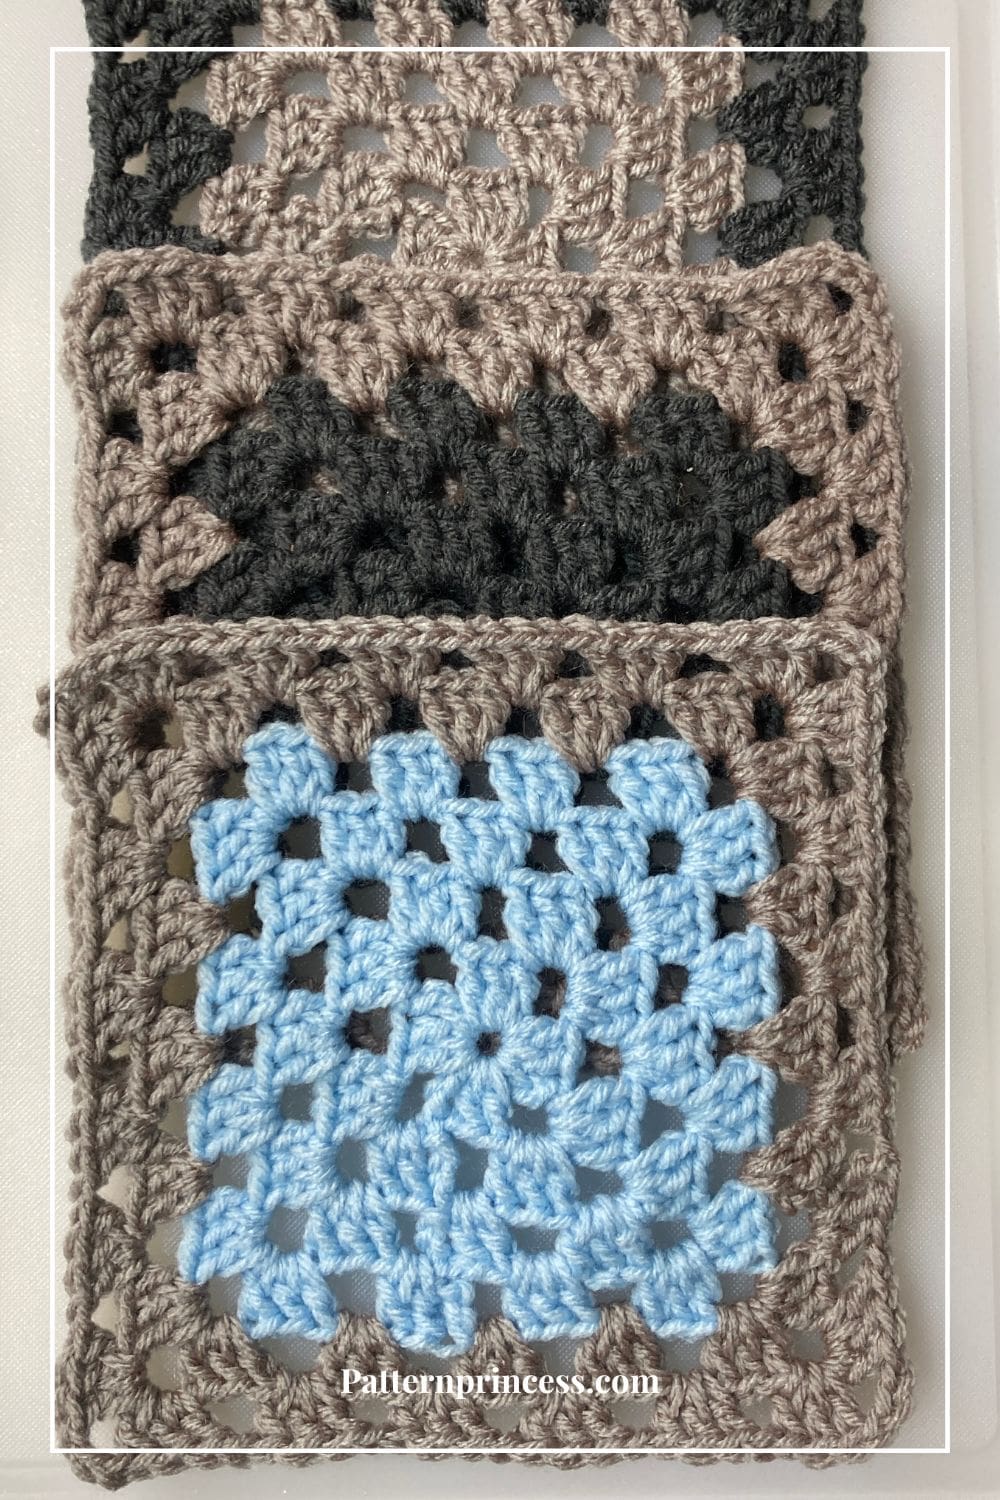
No. I rarely block my crochet. Occasionally, I find a project where the stitches would show up better if blocked. Usually when I’m using a cotton thread yarn. Then I will often block. When making granny squares, it is nice to block them before sewing together as it aligns things so much nicer.
- Aurora Borealis Easy Rectangular Crochet Shawl Pattern
- Abigail Crochet Sideways Shawl Feather and Fan Stitch
- How to Crochet a Rectangle Granny Free Pattern
- How to Crochet the Classic Granny Square For Beginners

You can find Victoria crocheting, quilting, and creating recipes. She has cooked in restaurants for over 20 years, including many larger parties. She learned to crochet when she was just 11 years old and has been crocheting ever since; over 50 years now. Over 40 years ago, she loved her first class in sewing and continues to hone her skills in quilting. Many have enjoyed the handmade gifts over the years. In her professional career, she has worked in management in a wide variety of businesses including higher education as a dean of a division. All the while attending college part-time to achieve her doctorate in higher education with an emphasis in e-learning.