Learning how to read a crochet pattern can feel a little like learning a new language at first. All those abbreviations, symbols, and rows of instructions might look overwhelming—but once you understand the basics, everything starts to click.
If you’ve ever picked up a pattern, felt confused, and set it back down… you’re not alone. The good news? Crochet patterns follow a predictable structure. Once you learn how to break them down, you’ll be able to tackle everything from your first project to more advanced crochet projects with confidence.
This guide walks you through exactly how to read a crochet pattern step by step—so you can spend less time guessing and more time creating.
Quick Start: How to Read a Crochet Pattern
- Read the pattern once
- Check materials and gauge
- Review abbreviations
- Start with Row 1 only
- Count stitches as you go
Tip: Don’t worry if everything doesn’t make sense right away—crochet patterns are meant to be followed one step at a time.
What Is a Crochet Pattern?
A crochet pattern is simply a set of written instructions that shows you how to create a specific project using yarn and a crochet hook.
Think of it as your guide from start to finish. Whether you’re making a cozy blanket, a simple dishcloth, or your very first scarf, the pattern walks you through each step so you know exactly what to do next.
Most crochet patterns will explain:
- What materials you need
- Which stitches to use
- How many stitches to make
- When to repeat steps
- How to shape and finish your project
If you’ve ever felt unsure picking up a pattern, you’re not alone. At first glance, they can look a little overwhelming—but once you understand how they’re organized, they become much easier to follow.
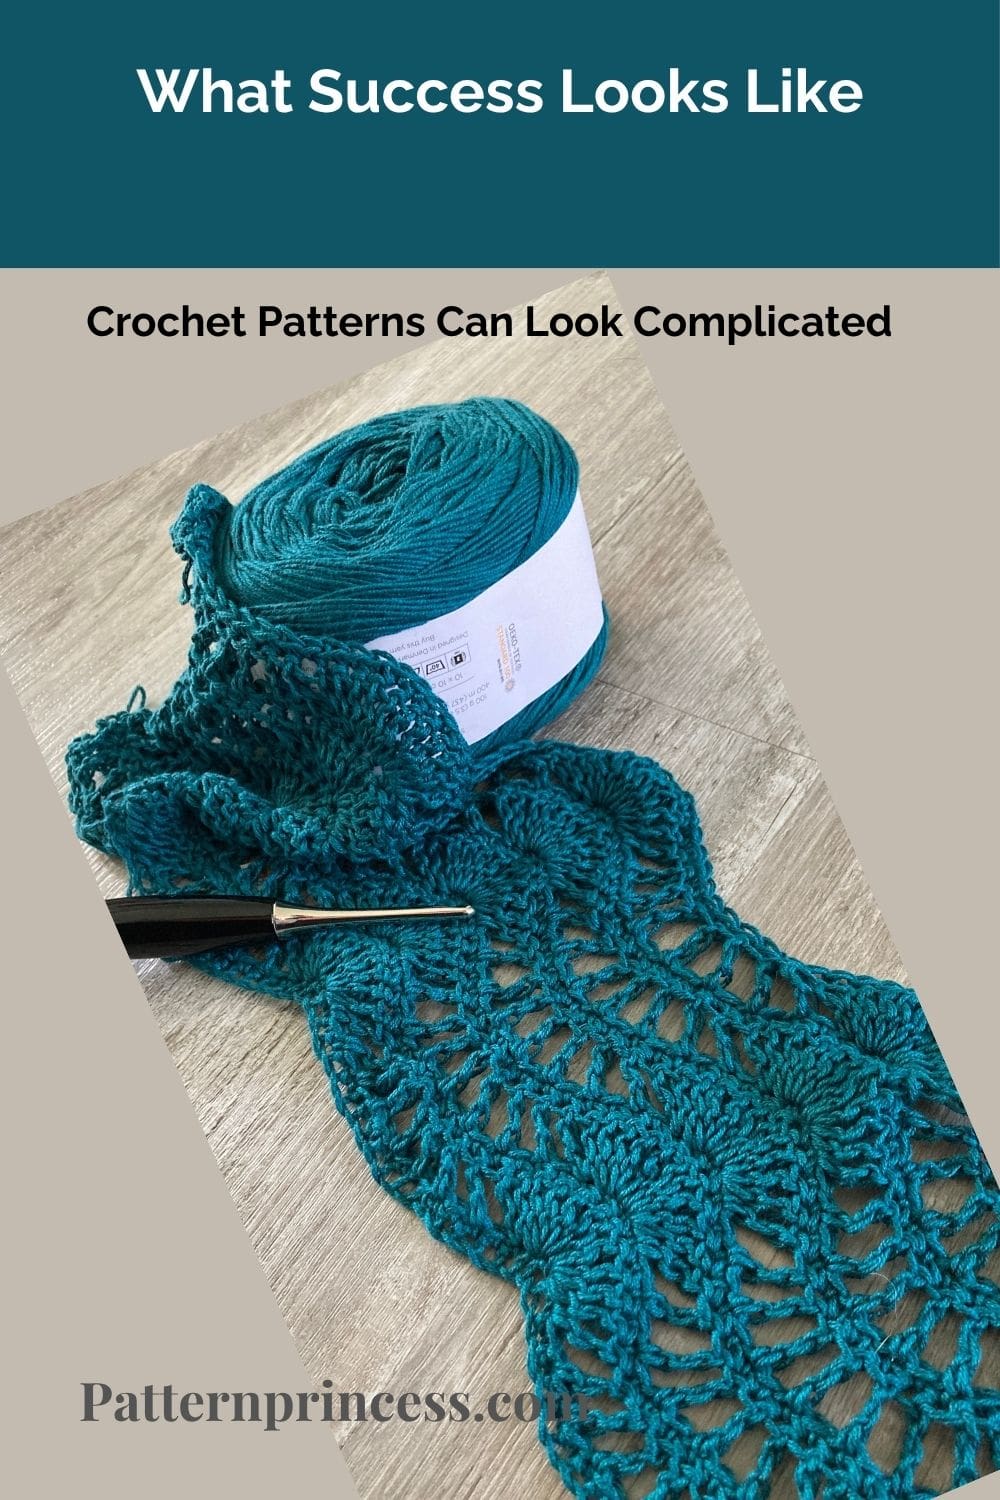
Why Crochet Patterns Can Look Complicated
Crochet patterns often look more complicated than they really are because they use a type of shorthand language.
Instead of writing everything out in long sentences, designers use abbreviations and symbols to keep things simple and repeatable.
This shorthand helps:
- Keep patterns shorter and easier to read
- Make repeating steps more efficient
- Clearly explain even more detailed stitch patterns
It might feel confusing at first—all those letters, numbers, and parentheses—but don’t let that scare you off. Once you learn what those abbreviations mean and how patterns are structured, it starts to feel second nature.
And before long, you’ll be reading a crochet pattern just as easily as following a favorite recipe.
Why Learning to Read a Crochet Pattern Matters
When you understand how to read a crochet pattern, you unlock a whole new world of creativity. You’re no longer limited to video tutorials or guessing your way through stitches.
You’ll be able to:
- Follow written instructions with ease
- Understand different yarn weights and hook sizes
- Adjust patterns to fit your needs
- Confidently try new crochet projects
It’s one of the most important skills every crocheter can learn.
Understanding Pattern Anatomy
Every crochet pattern starts with the essentials, and skipping this section is why so many projects turn out the wrong size or texture.
The top of any pattern lists the materials you need, the hook size, the type of yarn, gauge requirements, and sometimes skill level. This section might seem simple, but it plays a big role in how your project turns out.
The hook size determines how tight or loose your stitches form. The type of yarn affects drape, warmth, and structure. And your gauge swatch tells you if your tension matches the designer’s, which is the difference between a scarf that fits and one that’s three inches too wide.
What to Look for at the Top of a Pattern
- Hook size like “H/8 (5mm)” tells you which tool creates the stitch tension the designer used
- Yarn weight and yardage so you buy enough of the right thickness
- Gauge measurement like “16 sc and 18 rows = 4 inches” which you must match or your finished size will be off
- Stitch abbreviations list that decodes what “sc,” “dc,” and “ch” actually mean in that specific pattern
- Finished measurements so you know what size the final piece should be
Common Parts of a Crochet Pattern
Most crochet patterns are organized in a similar way. Once you know what to expect, they become much easier to follow.
You’ll usually see:
- Pattern overview
- A materials list, including yarn and hook size
- Abbreviations used in the pattern
- Gauge information, when relevant
- Step-by-step pattern instructions including any notes that explain essential details
Let’s cover this in a bit more detail.
Pattern Overview
This section gives you a quick snapshot of the project.
It usually includes:
- Skill level (beginner, intermediate, advanced)
- Finished size
- Style notes or construction details
Take a moment to read this—it helps you decide if the pattern is the right fit for your skill level.
Materials List
This tells you exactly what you’ll need before you start.
Look for:
- Type of yarn (like acrylic yarn, cotton yarn, or wool yarn)
- Yarn weight (worsted weight yarn is very beginner-friendly)
- Hook size
- Extras like scissors, stitch markers, or tapestry needles
Always check the yarn label if you’re substituting yarn. Matching the right yarn weight makes a big difference in your final result.
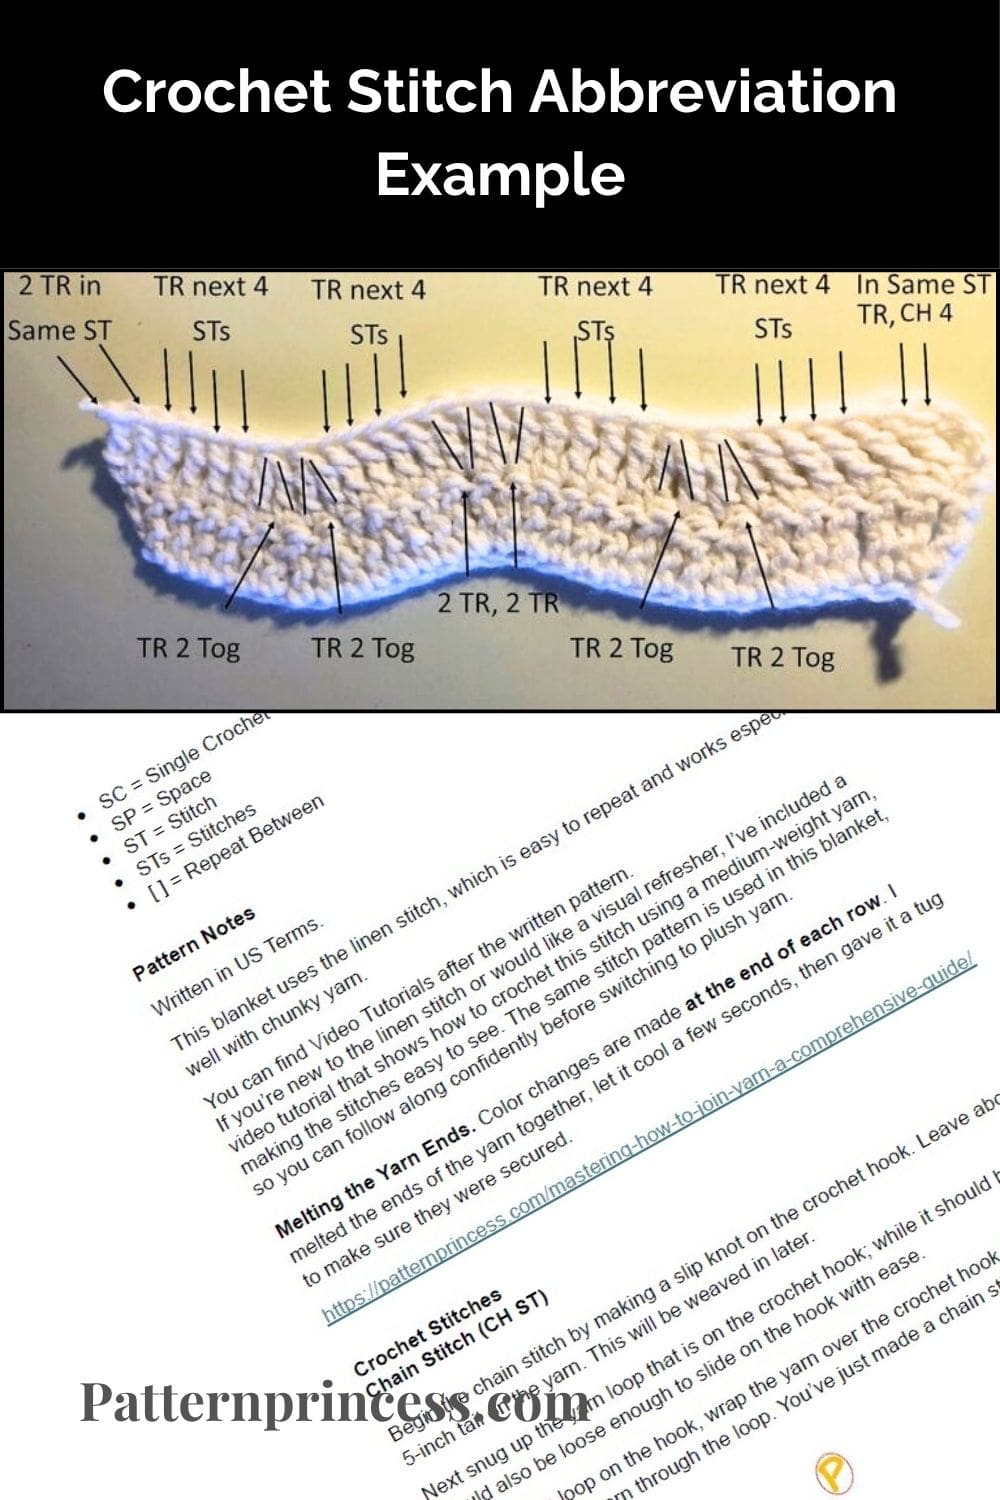
Crochet Abbreviations
Abbreviations make patterns compact, but they’re the number one reason beginners freeze up.
Most crochet instructions use a standard set of abbreviations recognized across patterns. Once you memorize the core list, you can read 90% of patterns without constantly referencing a key. The remaining 10% use designer-specific shorthand, which is why every pattern includes its own abbreviation guide.
Patterns use abbreviations to keep instructions short and consistent.
Here are a few common ones:
- ch = chain – The foundation of almost every project
- sc = single crochet – The shortest, tightest basic stitch
- dc = double crochet – Taller and looser than single crochet
- sl st = slip stitch – Used to join rounds or move across stitches invisibly
- yo = yarn over – Wrapping yarn around your hook to create height
- st(s) = stitch(es) – Refers to any completed stitch
- sp = space – The gap between stitches, often from chain stitches
- rep = repeat – Tells you to do a section multiple times
- sk = skip – Pass over a stitch without working into it
- inc = increase – Work multiple stitches into one stitch
- dec = decrease – Combine two stitches into one
You’ll also see front loop (FL) and back loop (BL), which tell you to insert your hook into only one side of the stitch instead of both loops. This creates texture and ridge effects. When a pattern says “working in BL only,” it’s changing the fabric structure intentionally.
Parentheses and asterisks control repetition. When you see “(sc, dc) in next st,” you do both stitches in the same spot. When you see “* sc in next 3 sts, 2 sc in next st, repeat from * around,” you repeat everything after the asterisk until the instruction changes. Double asterisks mean a larger repeat section, often spanning multiple rows.
Most patterns include a key or abbreviation list—don’t skip it.
Gauge (Why It Matters)
Gauge tells you how many stitches and rows should fit into a specific measurement (usually 4 inches).
Example:
- 16 stitches x 12 rows = 4” square
If your gauge doesn’t match:
- Your project may turn out too big or too small
For your first project, don’t stress too much—but as you grow, this becomes more important.
Pattern Instructions (The Heart of It All)
This is where the actual crocheting happens. Crochet patterns are written in a step-by-step order that follows exactly how your project comes together.
You might see patterns worked:
- In rows
- In rounds
- From the bottom up or the top down
Each line is there to guide you along the way. You don’t have to understand the whole pattern at once—just focus on the step you’re on, and let it lead you forward.
Example:
- Row 1: Ch 20, sc in 2nd ch from hook and across (19 sts)
- Row 2: Ch 1, turn, sc across
Key things to watch:
- Parentheses ( ) = repeat instructions
- Asterisks (*) = repeat a section
- Stitch counts at the end of rows
Take it one line at a time—don’t try to read too far ahead.
Typical Row Breakdown:
“Row 1: Ch 20, sc in 2nd ch from hook, sc in each ch across, turn. (19 sc)”
Let’s decode that. You chain 20 stitches. Then you insert your hook into the second chain from your hook, which is not the chain on your hook but the next one down. You single crochet there, then single crochet into every remaining chain. The number in parentheses at the end is your stitch count, which confirms you should have 19 single crochet stitches when the row is done. If your count doesn’t match, you missed a stitch or added one by accident.
The word “turn” means you flip your work so you’re crocheting back in the opposite direction. Flat projects turn at the end of each row. Projects worked in the round say “join” or “do not turn” instead, which means you keep spiraling in the same direction.
When you see instructions like “sc in next stitch,” that’s singular. You make one single crochet. When it says “2 sc in next stitch,” you’re increasing by making two single crochets in the same stitch. “Sc in next 5 sts” means you do one single crochet in each of the next five stitches, moving one stitch at a time.
Chain spaces get their own callout. If a row says “ch 2, sk 2 sts, sc in next st,” you’re creating a gap. Later rows might say “sc in ch-2 sp,” which means you work into that gap, not into the individual chain stitches.
Stitch counts in parentheses are your safety net. Count your stitches at the end of every row. If you’re off by even one, backtrack immediately. Errors compound fast, and fixing row 3 is easier than ripping out row 15.
Reading Crochet Charts and Diagrams
Charts are visual maps of your stitches, and once you learn the symbols, they’re faster to read than written instructions.
Crochet diagrams use standardized symbols to represent each stitch type. A small oval is a chain. An X or + is a single crochet. A T shape is a double crochet. Instead of reading sentences, you see exactly where each stitch sits in relation to the others, which makes lace patterns and complex stitch combinations way easier to visualize.
How to Navigate a Crochet Chart:
- Start at the bottom for flat projects worked in rows, reading right to left on odd rows and left to right on even rows
- Start at the center for projects worked in the round, spiraling outward counterclockwise
- Each symbol shows stitch type and height so you know if it’s a chain, single crochet, or double crochet at a glance
- Arrows or numbers mark the starting point and direction
- Symbol keys appear next to or below the chart, matching each icon to its stitch name
Charts show you stitch placement in ways that words can’t. If a double crochet symbol sits between two stitches instead of on top of one, you know you’re working into the chain space below. If three double crochet symbols fan out from the same base, you’re making a shell stitch. The visual layout removes the guesswork.
Some patterns include both written instructions and charts for the same project. Use whichever format your brain processes faster. Visual learners often prefer charts. Step-by-step followers stick with written rows. Neither is better, just different processing styles.
How to Break Down a Crochet Pattern Step-by-Step
When you’re starting a new pattern, follow this simple process:
Step 1: Read the Pattern All the Way Through
Even if it doesn’t make complete sense yet, this helps you see the big picture.
Step 2: Highlight Important Sections
Mark:
- Stitch repeats
- Color changes
- Special stitches
Step 3: Check Your Materials
Make sure you have the right yarn, hook, and tools ready.
Step 4: Start Small
Begin with just the first row or round. Focus only on what’s directly in front of you.
Step 5: Count Your Stitches
This is the number one habit that prevents mistakes.
Beginner Tips for Reading Crochet Patterns
- Go slow. There’s no rush—accuracy matters more than speed.
- Use a highlighter or pencil. Mark off rows as you complete them.
- Look up unfamiliar stitches. Many patterns include helpful notes or links.
- Stick with simple patterns first. Dishcloths, scarves, and blankets are great starting points.
Common Mistakes (And How to Avoid Them)
Even experienced crocheters run into the same common issues when reading patterns, and most are easy to fix with one small habit change.
Skipping the pattern notes
Always read the notes section—it often explains important details.
Using the wrong yarn weight
This can completely change the size and feel of your project.
Ignoring Stitch Counts
The numbers in parentheses at the end of each row exist for a reason. If you skip counting and keep going, you’ll be six stitches short by row 10 and have no idea where you went wrong. Count every single row, especially in the first 20 rows of a new pattern.
Not Marking the First Stitch
When you work in the round, stitches spiral and your start point shifts. Without a stitch marker in your first stitch, you’ll lose track of where each round begins and end up with wonky shaping. Use a locking marker or a scrap piece of contrasting yarn.
Misreading Repeat Instructions
Asterisks and parentheses control what repeats and how many times. If you repeat the wrong section or stop too early, the pattern falls apart. When you see an asterisk, highlight or underline the exact stitches that repeat so you don’t accidentally include or exclude the wrong part.
Working Into the Wrong Loop
Unless the pattern specifies front loop or back loop, you default to working under both loops of the stitch. Accidentally working in only one loop changes the fabric texture and makes your stitch count impossible to track. Watch where your hook goes, especially on textured stitches.
What Success Looks Like
You’ll know you’re reading patterns correctly when your stitch counts match, your gauge is dead-on, and your fabric looks like the photos.
The first few rows always feel slow because you’re translating abbreviations and double-checking every instruction. By row 10, the rhythm kicks in and you stop thinking about what “sc in next st” means because your hands already know. By the time you finish your first full pattern, you’ve built a mental library of abbreviations, repeat structures, and stitch combinations that transfer to every future project.
Your confidence shift happens when:
- You can glance at a row and know what it’ll look like before you crochet it
- Stitch counts match on the first try instead of needing three recounts
- You catch your own mistakes within a few stitches instead of five rows later
- New abbreviations don’t stop you because you know how to reference the key and keep moving
- You start choosing patterns based on the stitches you want to learn, not the ones you already know
Different sizes, stitch types, and pattern formats won’t intimidate you anymore. You’ll recognize the same building blocks rearranged in new ways. A granny square, a lace shawl, and an amigurumi animal all use chain stitches, basic stitches, and increase/decrease logic. Once you crack the reading system, every pattern becomes accessible.
Your First Crochet Pattern Project Ideas
If you’re just learning to read patterns, start with something simple:
- Beginner crochet dishcloth
- Easy scarf using worsted weight yarn
- Basic granny square
- Simple baby blanket
These projects help you practice reading patterns without feeling overwhelmed.
If you’re ready to practice, try this Beginner Easy Ribbed Knit Look Crochet Scarf Pattern to get started. https://patternprincess.com/beginner-easy-ribbed-knit-look-crochet-scarf-pattern/
What to Do If You Get Stuck
Even experienced crocheters get stuck sometimes.
Try this:
- Re-read the row slowly
- Break it into smaller steps
- Check your stitch count
- Look for pattern notes or tutorials
And remember—mistakes are part of the learning process.
Key Takeaways
- A crochet pattern is a set of written instructions that guides you through creating a project with yarn and a crochet hook.
- Patterns may look complicated at first because of shorthand, but that shorthand keeps instructions clear and easy to follow once you learn it.
- Most patterns include helpful sections like materials, yarn weight, gauge, abbreviations, and step-by-step instructions.
- Following a pattern helps ensure your project turns out the right size and shape.
- Reading crochet patterns is a skill that gets easier with practice—each project builds your confidence.
Learning how to read a crochet pattern might feel tricky at first, but it’s one of the most valuable skills you can build. Each project helps everything click a little more.
Before long, you’ll glance at a pattern and understand exactly what to do. The abbreviations become familiar, the stitch counts make sense, and the process starts to feel natural.
And that’s when crochet truly becomes relaxing—just the way it’s meant to be.

You can find Victoria crocheting, quilting, and creating recipes. She has cooked in restaurants for over 20 years, including many larger parties. She learned to crochet when she was just 11 years old and has been crocheting ever since; over 50 years now. Over 40 years ago, she loved her first class in sewing and continues to hone her skills in quilting. Many have enjoyed the handmade gifts over the years. In her professional career, she has worked in management in a wide variety of businesses including higher education as a dean of a division. All the while attending college part-time to achieve her doctorate in higher education with an emphasis in e-learning.