Last updated on July 4th, 2024 at 11:27 pm
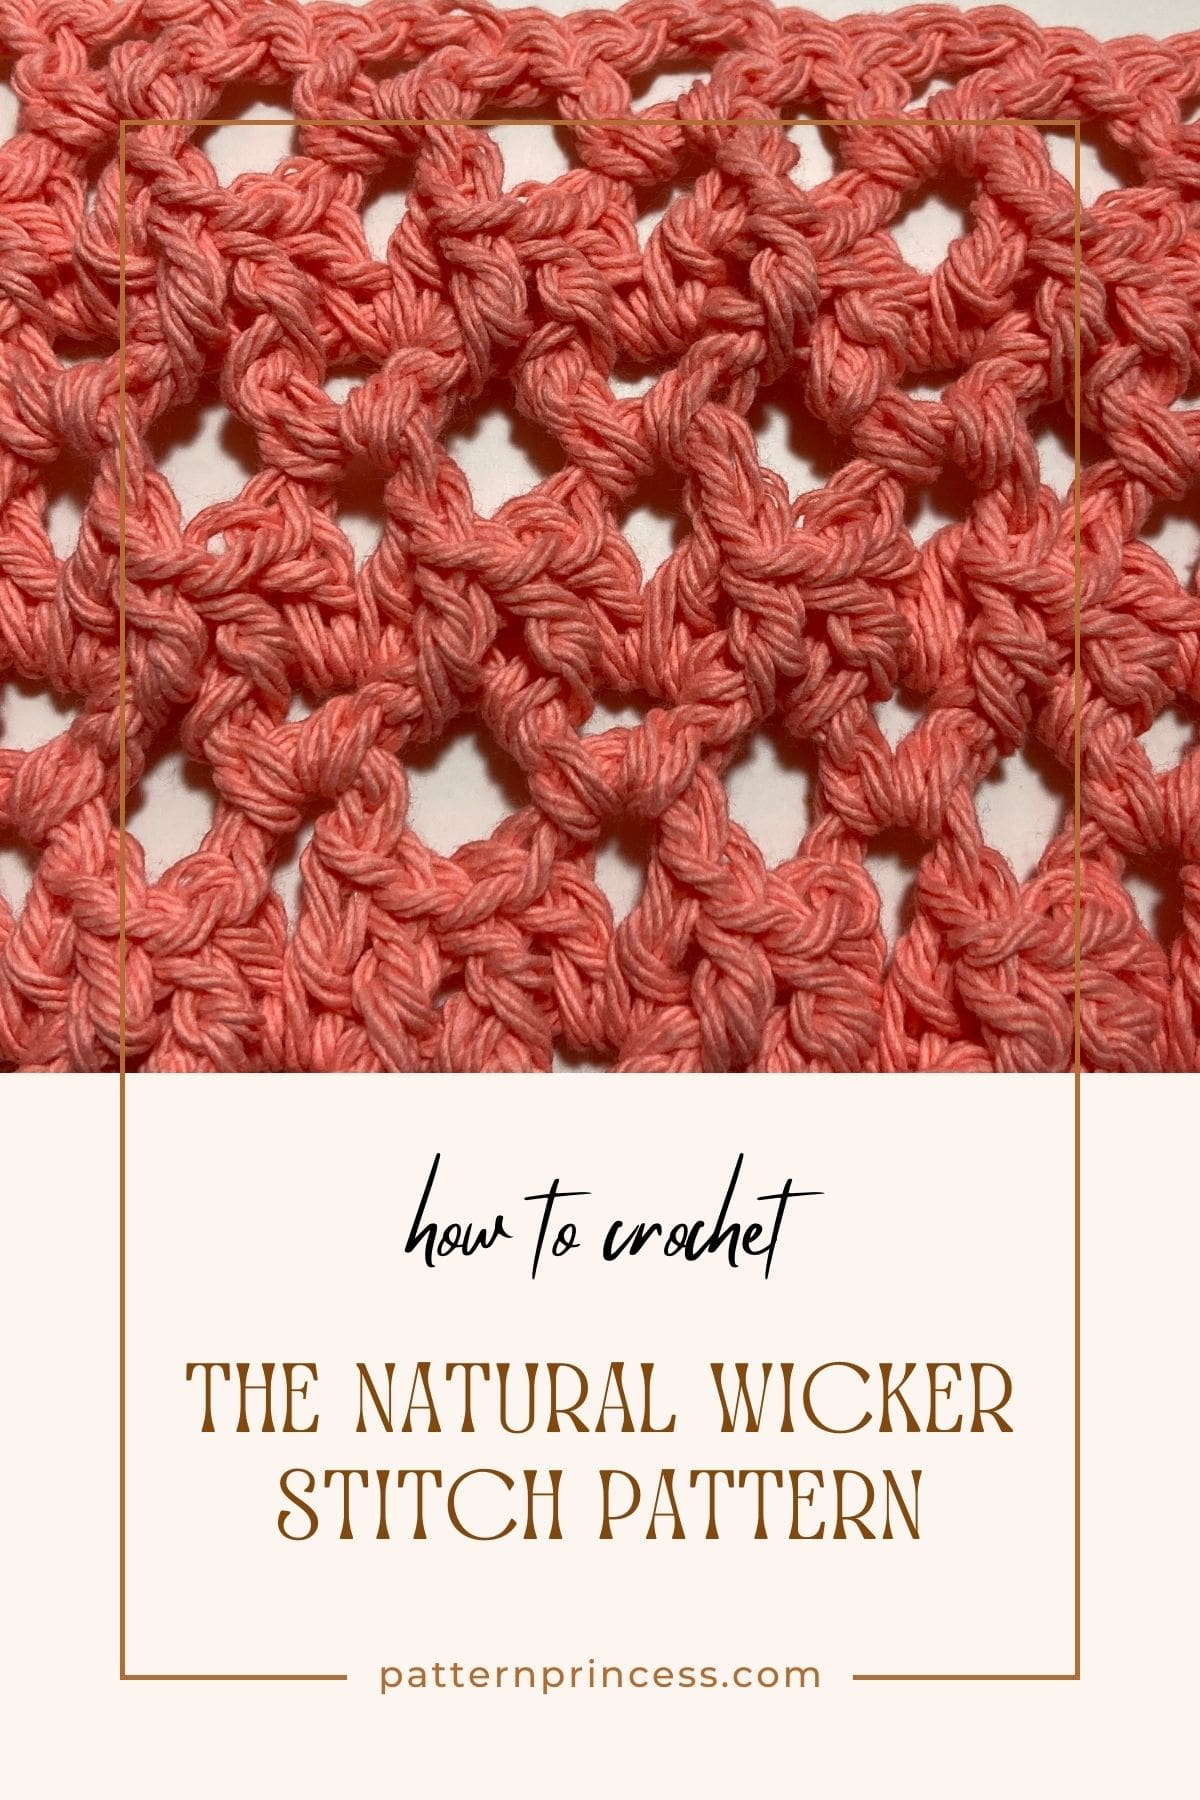
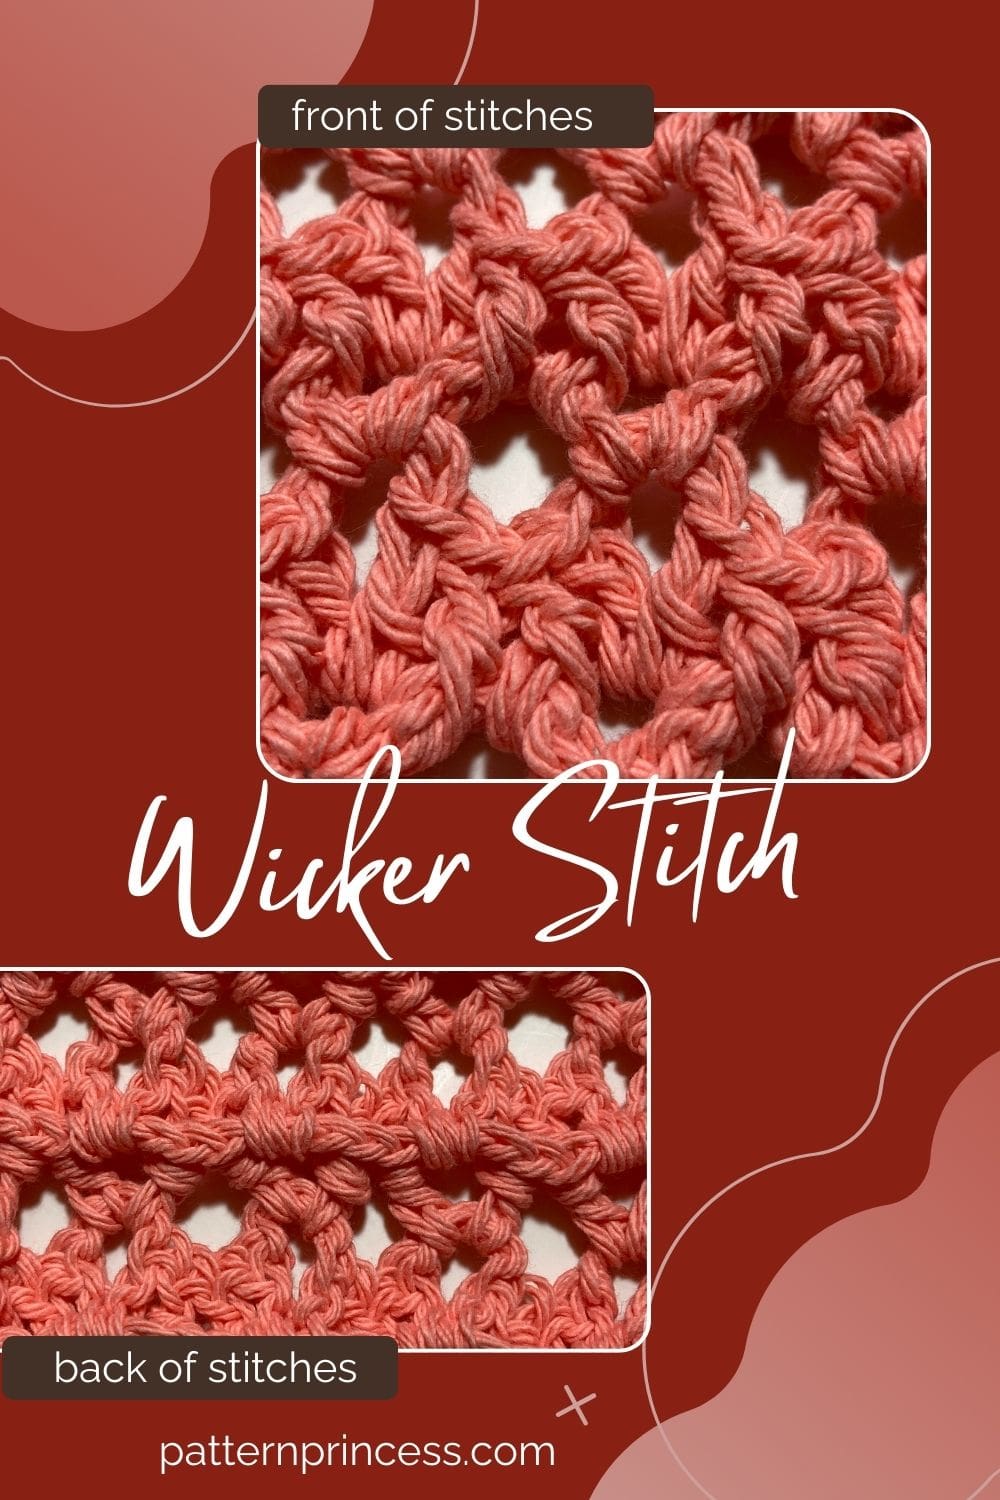
Enter the natural wicker stitch. A delightful combination of v stitches and front post double crochet. Despite its airy appearance, the natural wicker stitch offers a bit more substance, making it perfect for a wide variety of projects.
This crochet technique creates lacy structure with beautiful openwork with lots of texture. It’s suitable for lightweight accessories and decorative crochet blankets. It works up fast, but it would be considered a bit of a yarn eater. Not too much though.
A charming stitch pattern to elevate your warm-weather crochet projects or summer essentials. This versatile stitch is a beautifully textured stitch and it’s fun to make.
I first saw this stitch pattern on a YouTube tutorial from Rich Textures Crochet and fell in love with it.
Two-Row Repeat Crochet Pattern
A two-row repeat stitch pattern that you can easily memorize. This dramatic pattern would make a pretty throw, baby blanket, shawl, or a scarf. It has an open look with lots of texture, it’s not your average v-stitch pattern.
This pattern combines basic stitches and chains worked into the same stitch to make a unique texture.
You can find the video tutorial after the written free pattern.
Yarn
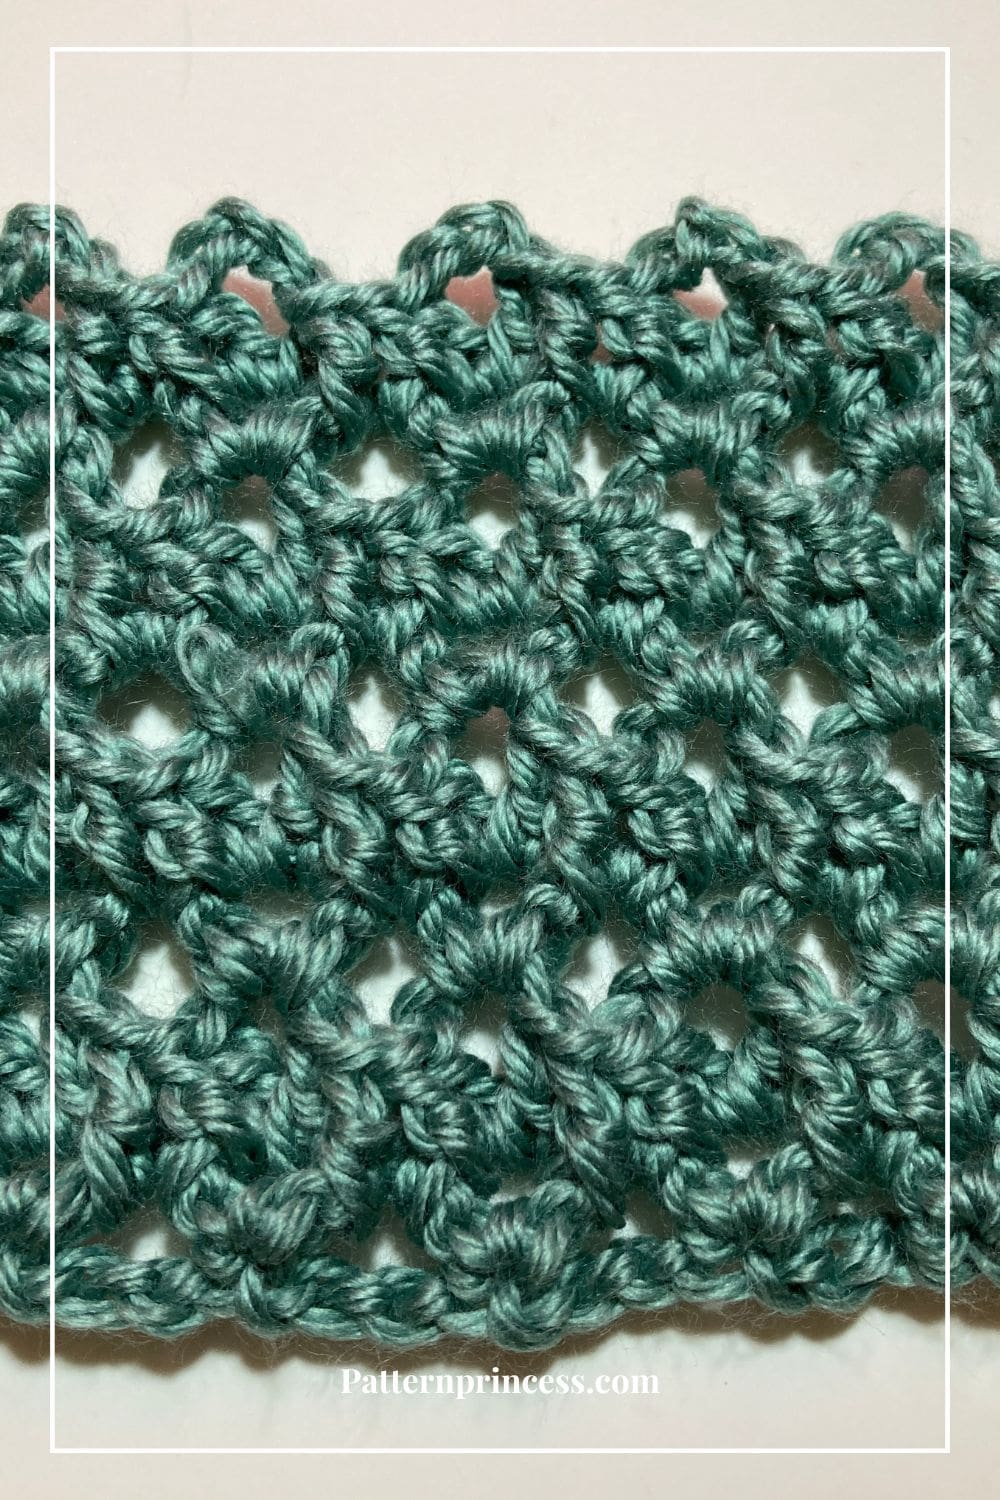
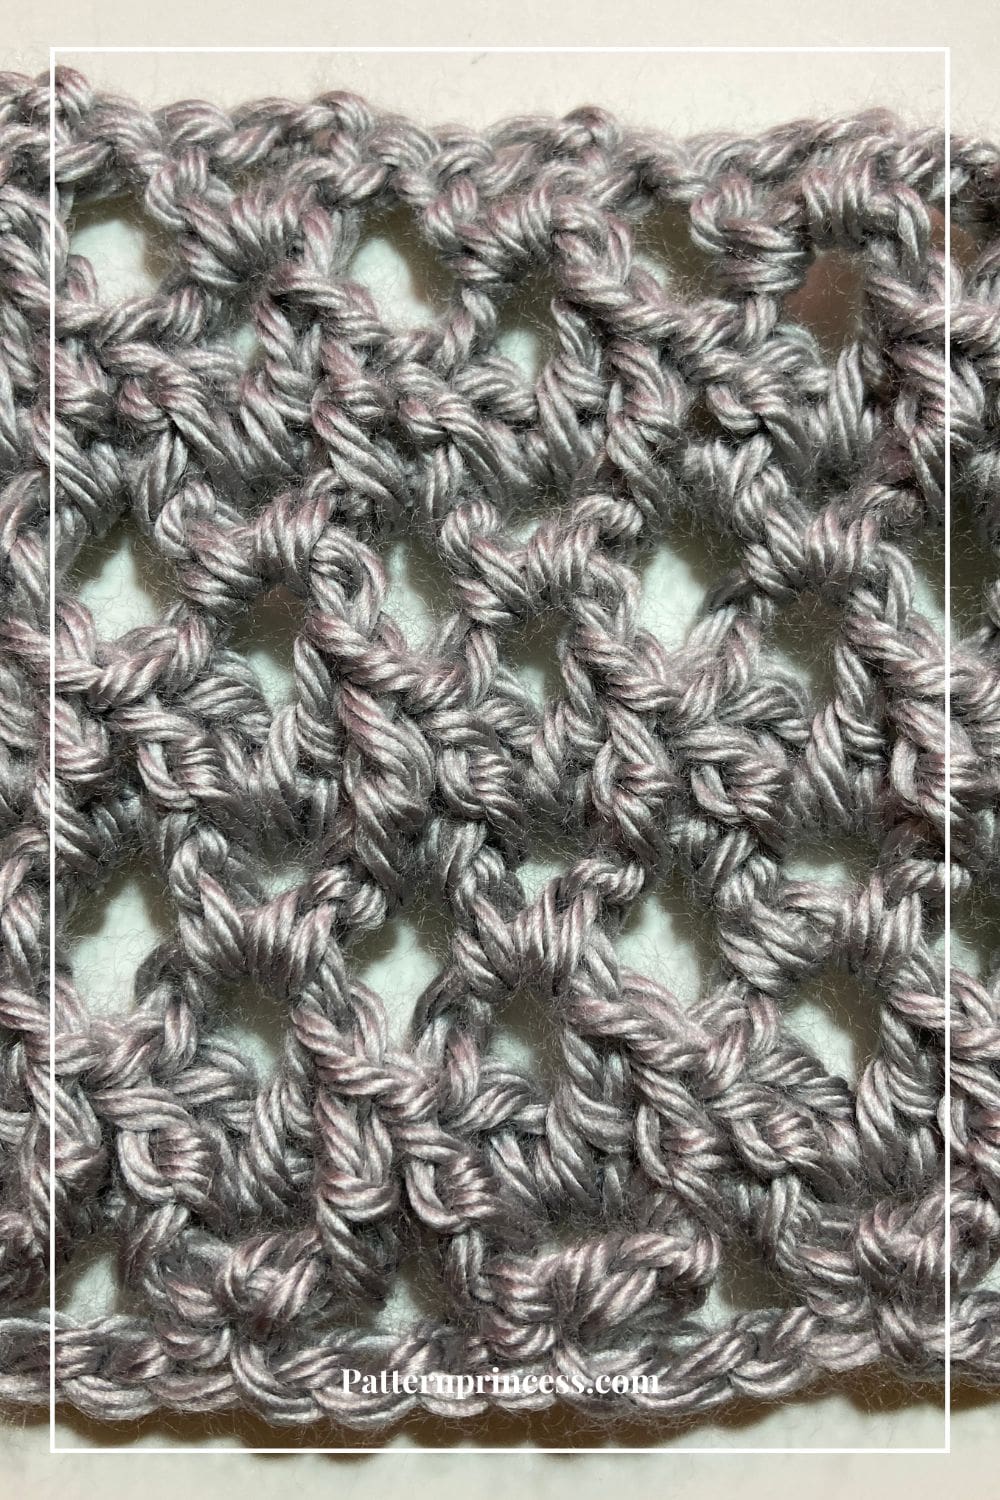
It’s a great stitch for you to use your favorite yarn. You can use any yarn and matching hook for this stitch pattern. I’ve done this stitch in a few different yarns so you can see how it looks using a medium weight yarn. I think this would look lovely in a bulky yarn too.
It looks really pretty in solid yarn colors. However, different colors like a self-striping variegated yarn would work well with this natural wicker stitch. You can also change yarn colors every few rows.
Directions: How to Crochet the Natural Wicker Stitch
Skill Level
Intermediate
You should be able to work the double crochet stitch and work it around the posts of the stitches below. Once you have mastered this method, you are ready for this pattern.
Finished Size
The size will depend on the project you work on. However, you can adjust the width by adjusting the beginning foundational chain stitches by 4. Change the length by adjusting the rows.
Gauge
The gauge for your project will depend on the yarn and crochet hook used.
Materials
This pattern works nicely with a medium-weight yarn.
Use a crochet hook size for the yarn used.
Yarn Needle, Tapestry Needle
Scissors
Abbreviations
CH = Chain
DC = Double Crochet
FPDC = Front Post Double Crochet
SK = Skip
SP = Space
ST = Stitch
STs = Stitches
[ ] = Repeat Between
Special Stitch Abbreviations
CH 2 V-Stitch = Chain Two V-Stitch
CH 3 V-Stitch = Chain Three V-Stitch
Special Stitches
Chain Two V-Stitch (CH 2 V-Stitch). Work [1 DC, CH 2, 1 DC] into same ST.
Chain Three V-Stitch (CH 3 V-Stitch). Work [1 DC, CH 3, 1 DC] into same ST.
Front Post Double Crochet (FPDC)
Front post stitches are raised crochet stitches on the surface of the fabric facing you. Note: Because a post stitch is shorter than a normal stitch, you make the turning chain with one chain stitch less than the normal turning chain requires. Yarn over, insert the hook from front to back between the posts of the first and second double crochet of the row below. Then insert the hook from the back to the front between the posts of the second and third stitches. (The hook should now be positioned horizontally behind the double crochet that you are working around). Yarn over, pull the yarn around the post of the stitch. There should now be 3 loops on the hook. Yarn over, pull the yarn through 2 loops on the hook. Lastly, yarn over again and pull through the last two loops on the hook.
HOW TO CROCHET THE FRONT POST DOUBLE CROCHET video tutorial
Crochet Pattern Notes
Chain two and turn at the end of the row.
This pattern is a one row repeat throughout.
This pattern is written in U S Crochet Terms.
Find the links for the video tutorials below the written pattern.
Begin
To begin, make a slip knot and then chain your desired length using foundational chain stitches.
For this stitch pattern you will need to chain a multiple of four stitches for your chains.
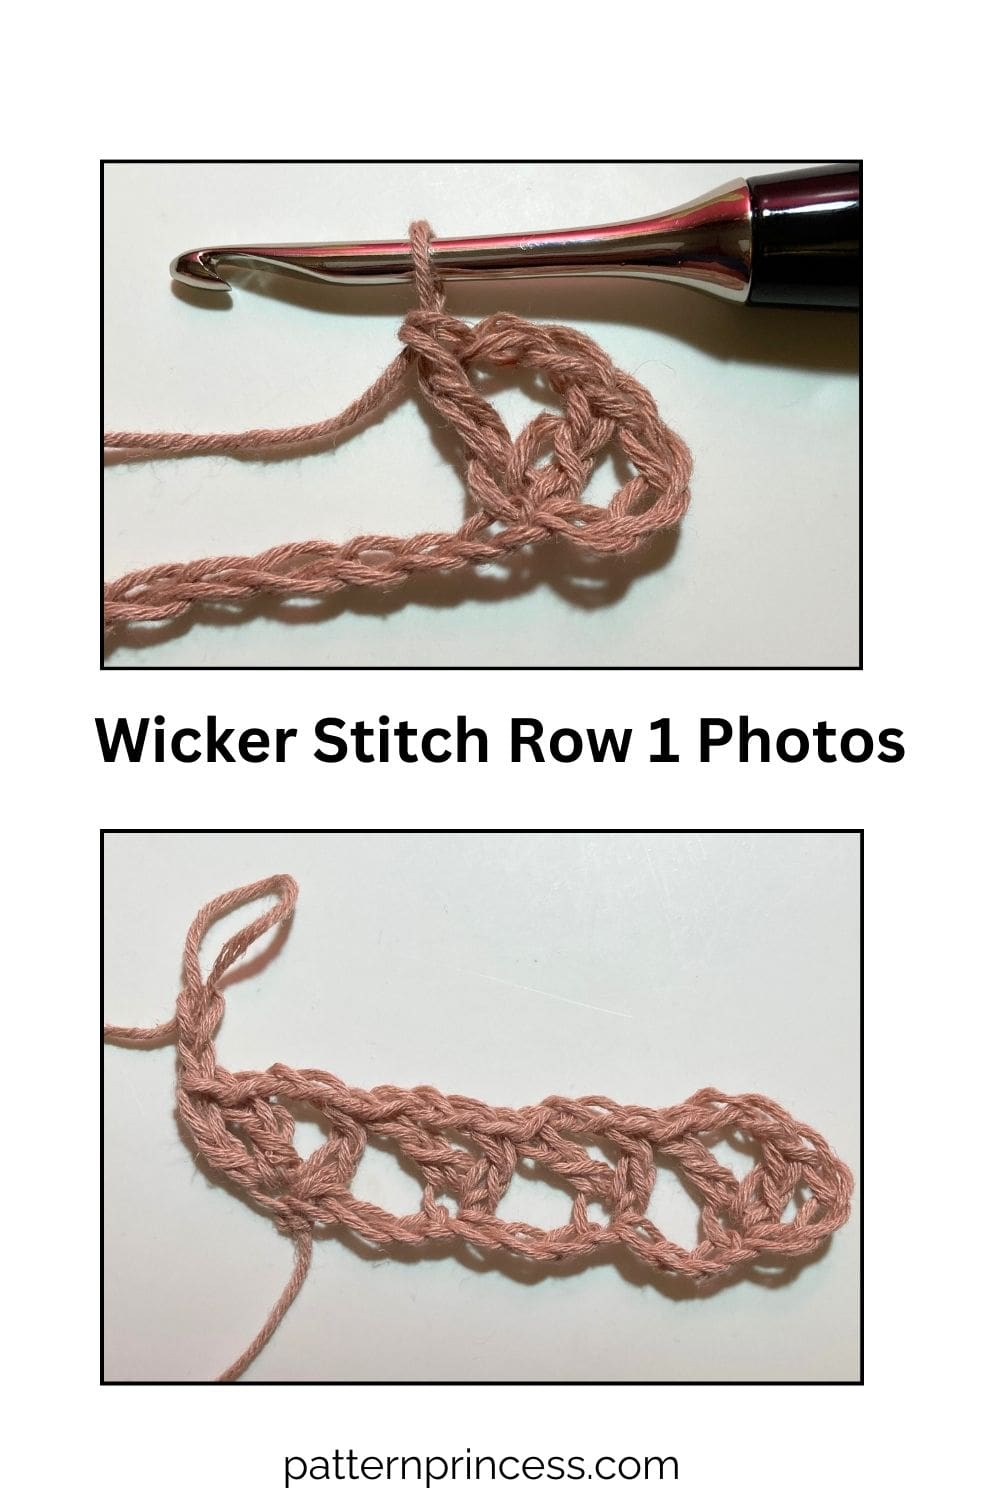
Row 1
In the fourth chain from your hook, work one CH 2 V-Stitch. *Refer to the special stitches above*. [Skip the next three stitches, work a CH 2 V-Stitch in the next stitch]. Repeat between [ ] across. In the final ST work a CH 2 V-Stitch and a DC. Chain 2 and turn your work.
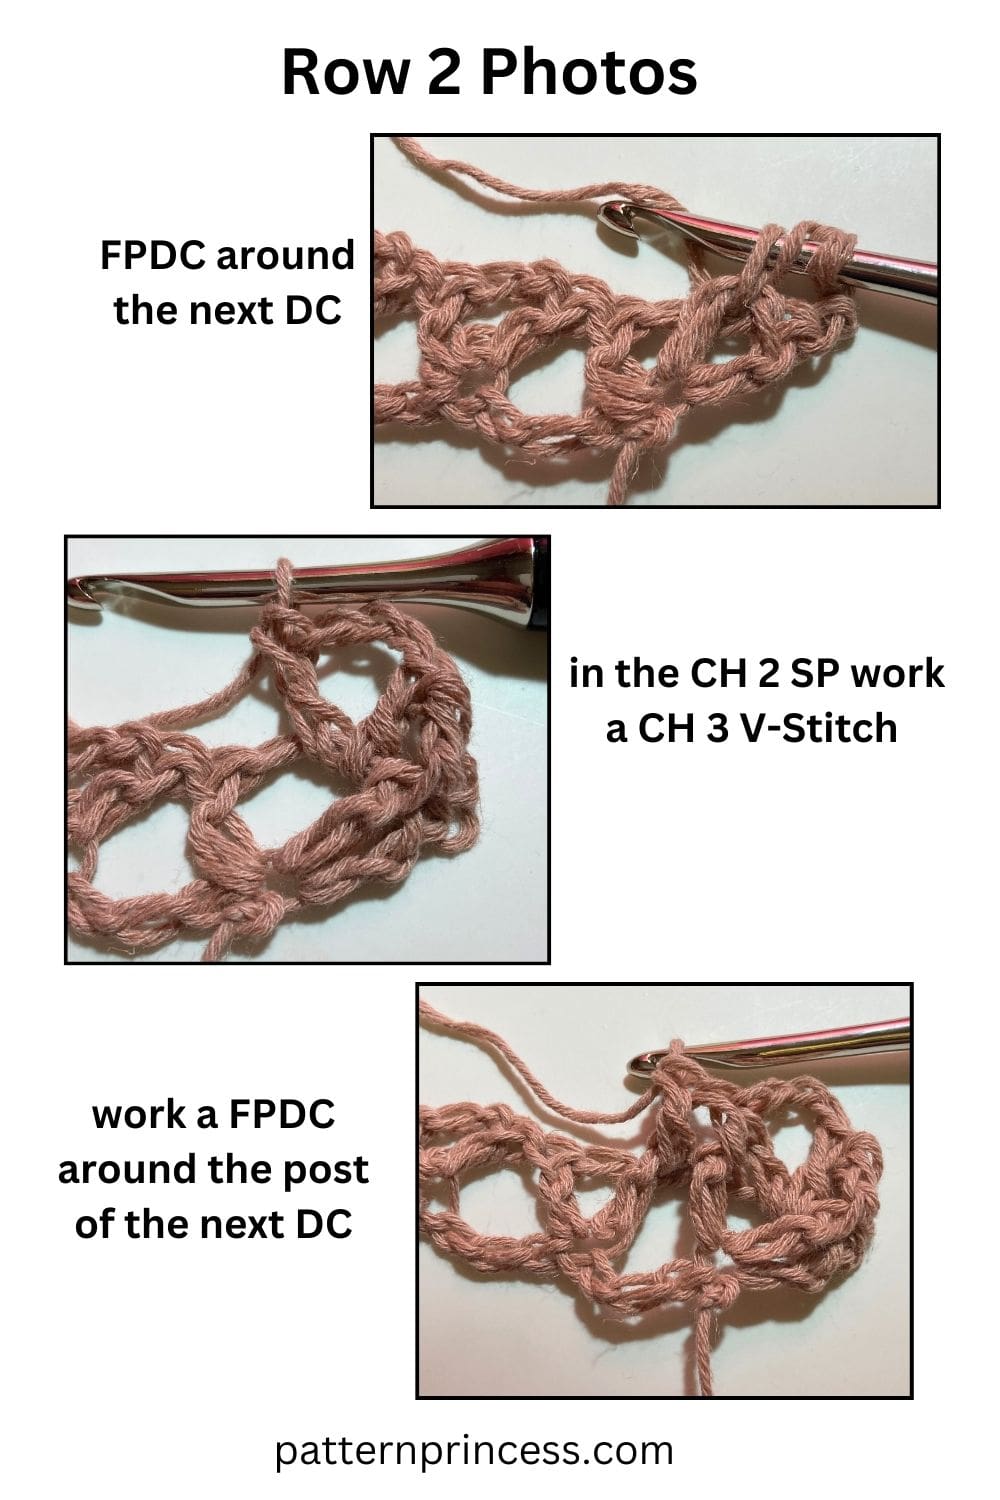
Row 2
SK the first stitch. In the next ST work a [FPDC around the next DC, in the CH 2 SP work a CH 3 V-Stitch, work a FPDC around the post of the next DC]. Repeat between [ ] across. End with a DC in the last starting chain two space in the previous row. CH 2 and turn.
Row 3
*You will be working in CH 3 spaces across for this row.*
Start by skipping over to the first CH 3 SP from the hook and work a CH 2 V-Stitch. [SK to the next CH 3 SP and work a CH 2 V-Stitch]. Repeat across between [ ] to the end. DC in the final starting CH 2 SP in the previous row. CH 2 and turn.

Rows 4 and Beyond
Continue repeating rows 2 and 3.
Finishing
Cut off a long yarn tail about 10-12 inches. Pull through the last loop. Use the yarn needle to weave in the yarn ends and snip off any excess yarn.
Video Tutorial on YouTube
We hope you have a chance to make natural wicker stitch. Take some time to explore our other free crochet patterns.
- How to Crochet the Modern Granny Stitch
- How to Crochet the Granny Spike Stitch
- Solid Granny Square Crochet Pattern for Beginners
- How to Crochet the Blanket Stitch

You can find Victoria crocheting, quilting, and creating recipes. She has cooked in restaurants for over 20 years, including many larger parties. She learned to crochet when she was just 11 years old and has been crocheting ever since; over 50 years now. Over 40 years ago, she loved her first class in sewing and continues to hone her skills in quilting. Many have enjoyed the handmade gifts over the years. In her professional career, she has worked in management in a wide variety of businesses including higher education as a dean of a division. All the while attending college part-time to achieve her doctorate in higher education with an emphasis in e-learning.