Last updated on July 3rd, 2026 at 03:31 pm
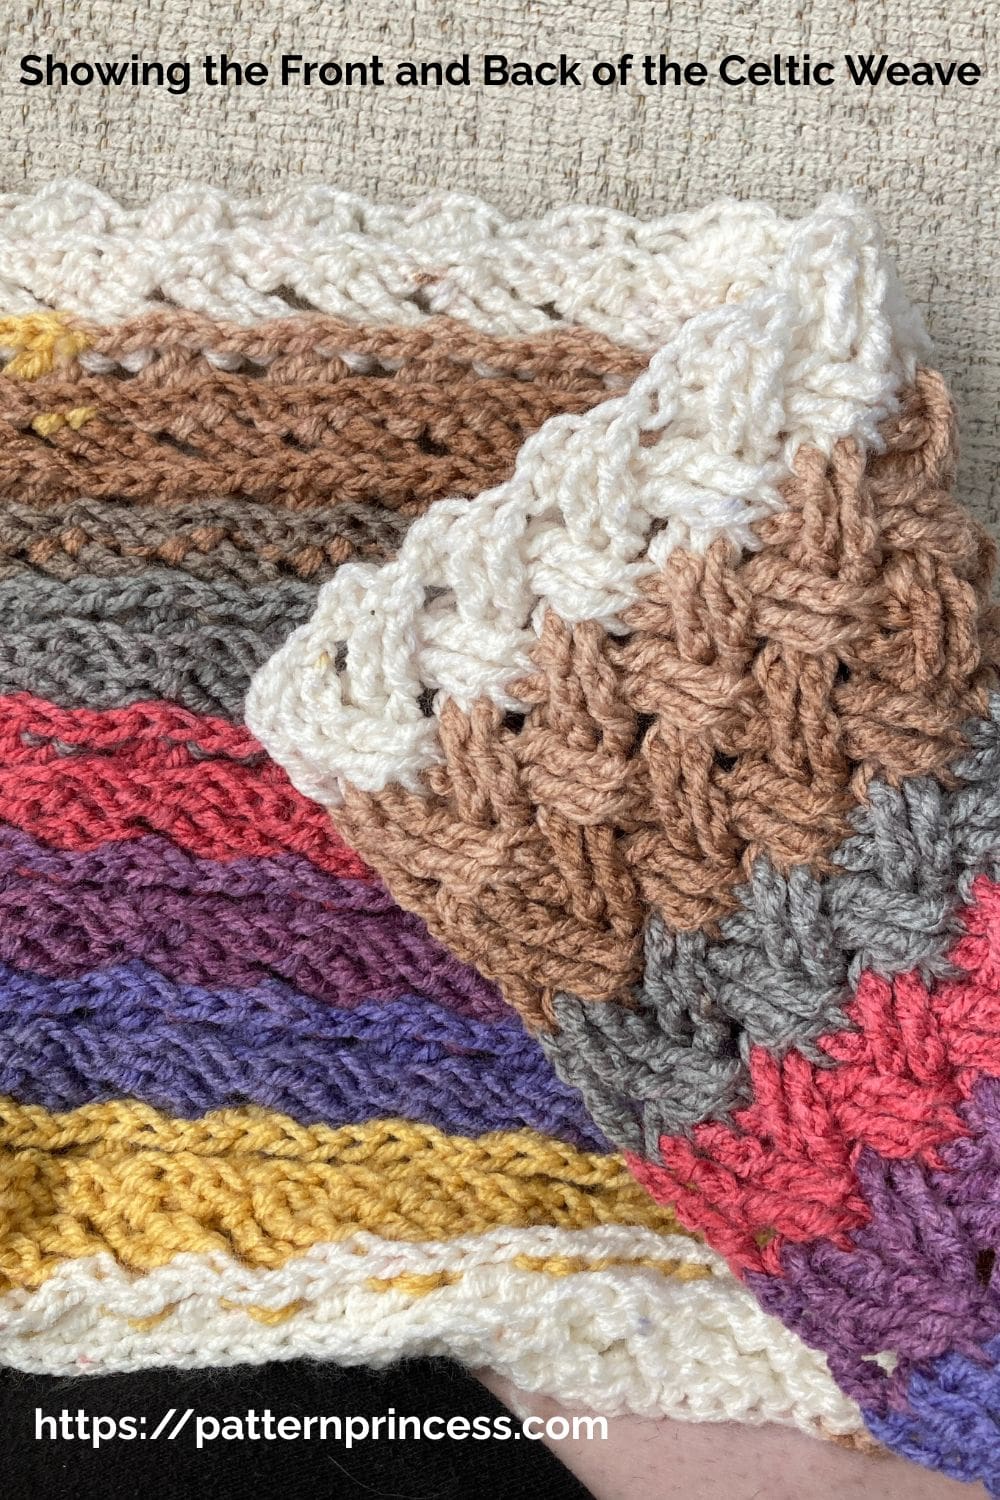
If you’re ready to explore a truly beautiful crochet stitch that creates a bold, woven effect, the Celtic Weave Crochet Stitch might just become one of your favorite stitches.
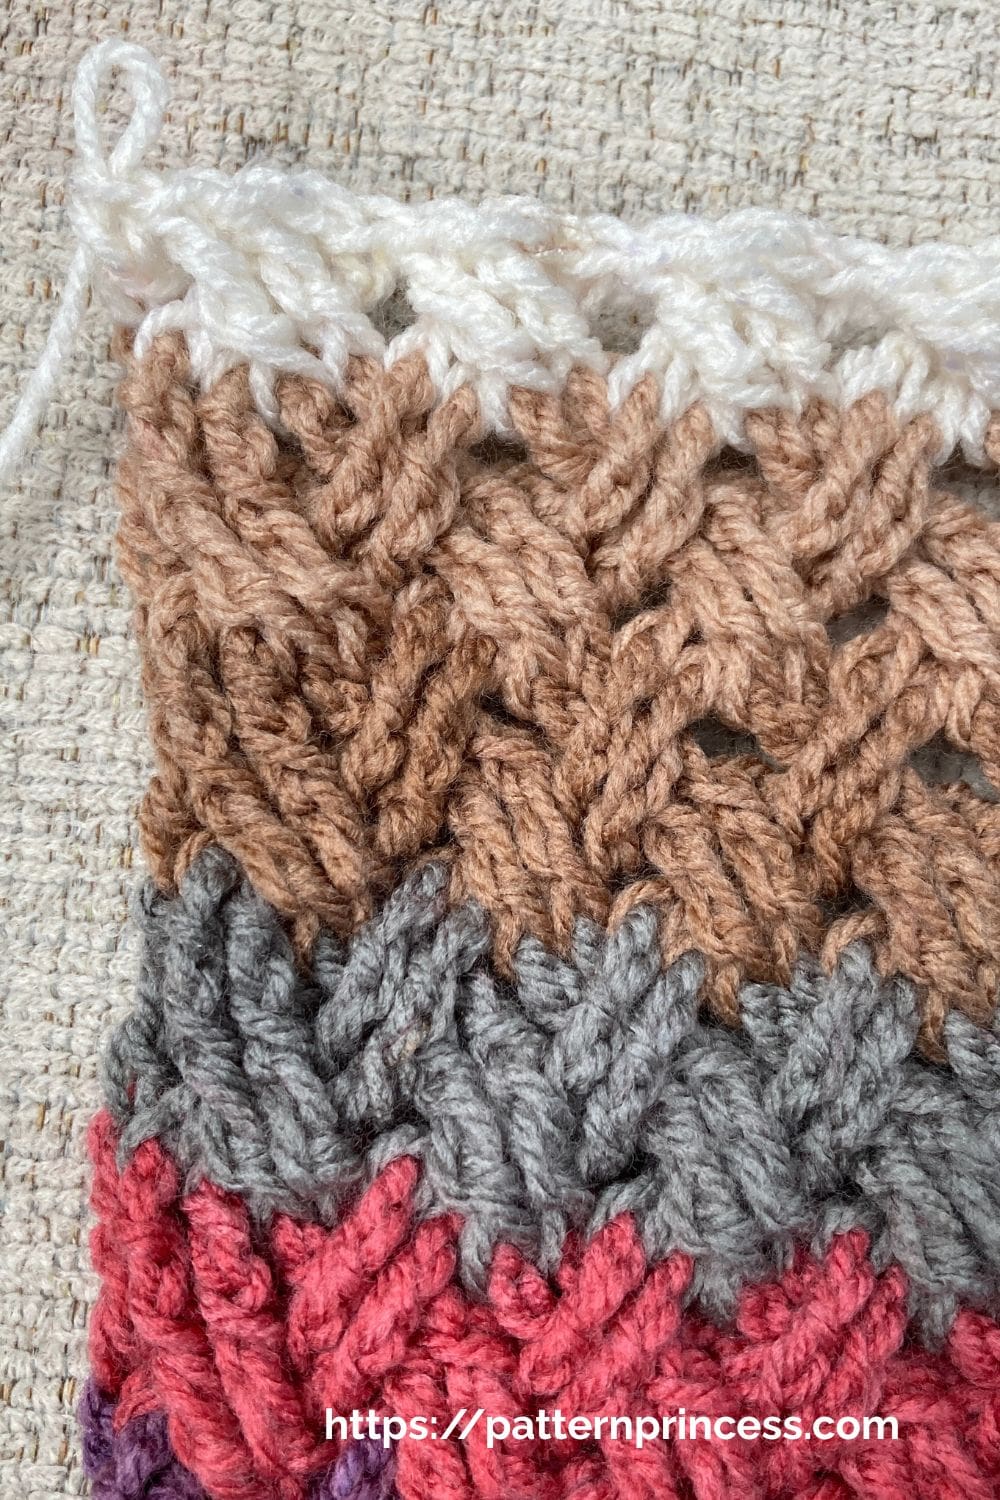
This technique uses front post and back post treble crochet stitches, worked in a unique out-of-order sequence. They form the striking texture that gives the Celtic weave stitch its signature braided look.
Though it may seem a bit tricky at first glance, this two-row repeat crochet pattern becomes quite rhythmic once you get the hang of it.

We’ll walk through the pattern together step-by-step on how to learn this stitch. With this free tutorial, which includes a photo tutorial and free video tutorials on our YouTube Channel to support a variety of learning styles.
This stitch adds richness and depth to any project. You can create this textured stitch using a variety of yarns—anything from soft worsted weight to cotton blends—depending on your crochet projects.
Creative Ways to Use the Celtic Weave Stitch
- Scarves and Cowls. The dense texture of this stitch makes it perfect for projects where warmth is key. It also adds eye-catching detail that turns simple accessories into standout pieces.
- Hats and Beanies. Whether you feature the stitch throughout or just around the brim, it brings bold texture and structure to winter headwear.
- Mittens and Fingerless Gloves. Add a touch of elegance and coziness to your cold-weather accessories by working the Celtic weave across the back of the hand.
- Sweaters and Cardigans. Incorporate the stitch into accent areas like cuffs, pocket panels, or even a statement back panel to elevate your garments with a richly textured finish.
- Blankets and Throws. The thick, interlocking look of the Celtic weave is perfect for cozy baby blankets, memory blankets, or full-sized throws that are as beautiful as they are warm.
- Pillow Covers. Add a modern, sophisticated touch to your home décor by using this stitch for textured pillow fronts in neutral or bold tones.
- Tote Bags and Pouches. The tight structure provides durability and an upscale woven look for stylish handmade bags or zippered accessories.
- Headbands and Ear Warmers. A small project that’s perfect for showcasing this striking stitch—great for gifts or quick makes.
- Table Runners, Placemats, or Pot Holders. For those who love mixing crochet with home decor, the Celtic weave brings elegant texture to your dining space.
Get Your Ad Free Printable PDF in our Etsy Shop
Directions: Crochet Celtic Weave Stitch
Skill Level
Intermediate
Gauge
18 double crochet stitches and 6 rows every 4” X 4”.
Size
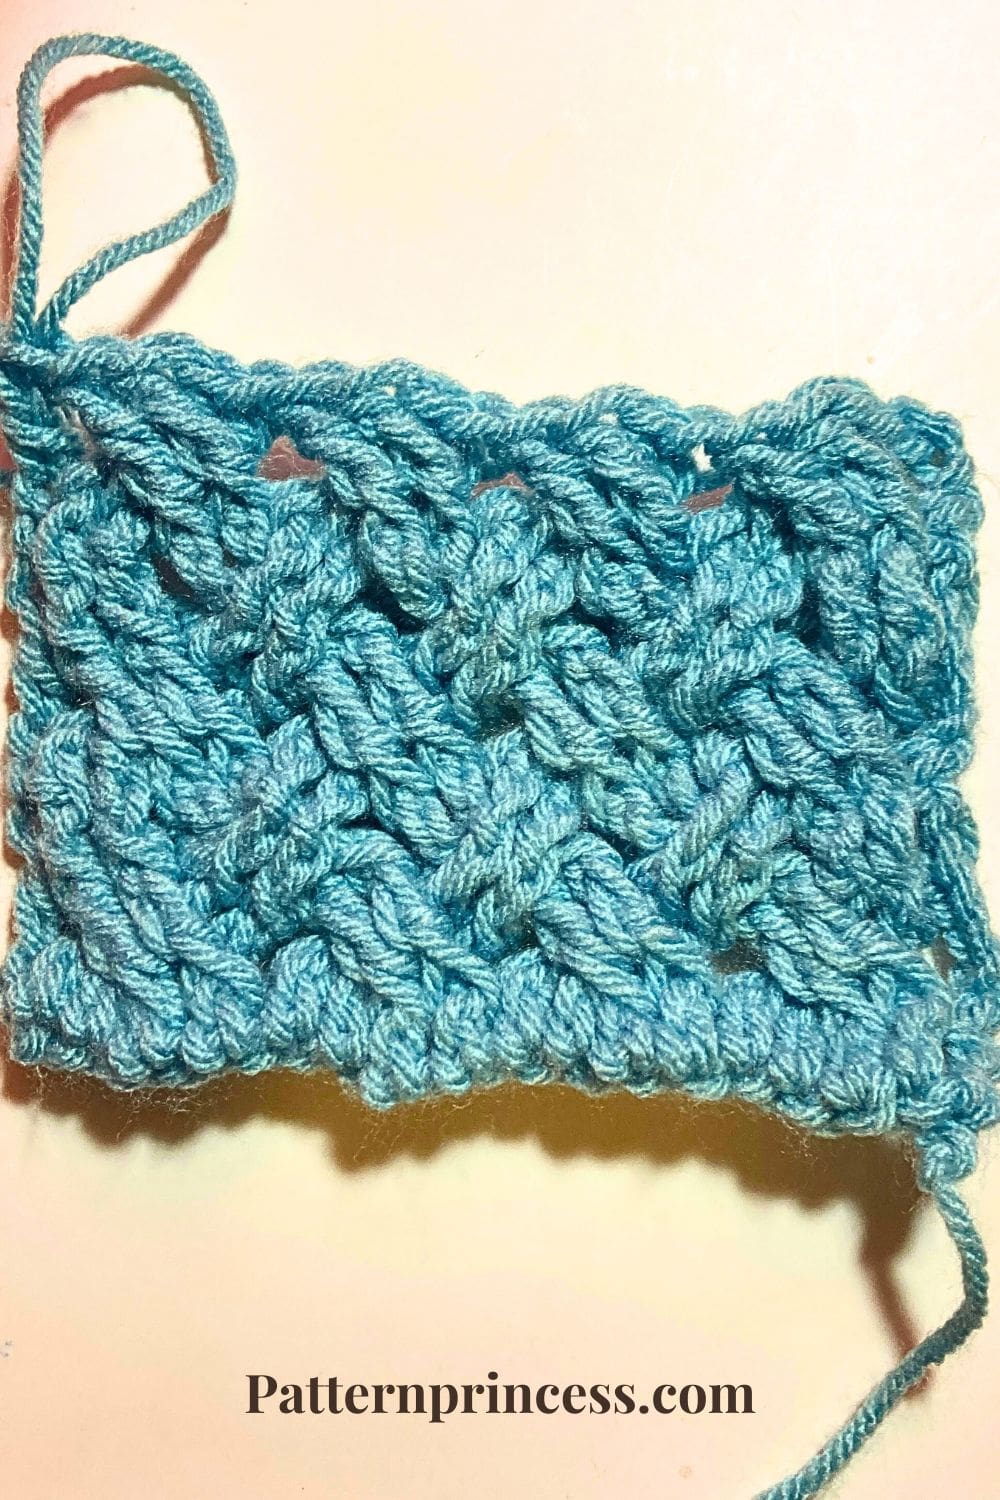
This sample pattern is approximately 4 inches wide.
To adjust the width of the blanket, simply start with a chain in a multiples of 4. To make the blanket longer or shorter, simply crochet for more or fewer rows.
Abbreviations
- BPTR = Back Post Treble Crochet
- CH = Chain
- DC = Double Crochet
- FPTR = Front Post Treble Crochet
- SK = Skip
- SP = Space
- ST = Stitch
- STs = Stitches
- YO = Yarn Over
- [ ] = Repeat Between
Materials
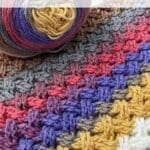
Yarn. I used a number 4 medium weight yarn for my sample. It works well with this pattern.
Crochet Hook. Choose a hook size that matches your yarn weight.
I used a size I 5.5mm crochet hook along with Caron One Pound Yarn for my sample.
Note: You can use any weight yarn and the recommended hook size that can be found on the yarn band packaging.
Scissors
Tapestry Needle
Pattern Notes
Written in US Terms.
The pattern is a two row repeat.
Turn at the end of each row.
Chain 3 at the beginning of rows counts as a double crochet.
Even numbered rows are the right side or front of your work. The odd numbered rows are the wrong side or back of your work.
If you change color, it is nice to change it every two rows. This way, you can carry the yarn up the edge of the project if adding a border.
You may choose to practice the pattern on a small swatch before beginning a larger project.
There are photo tutorials throughout the pattern and video tutorials after the written pattern.
Crochet Stitches Used
Chain Stitch (CH ST)
Begin the chain stitch by making a slip knot on the crochet hook. Leave about a 5-inch tail on the yarn. This will be weaved in later.
Next snug up the yarn loop that is on the crochet hook; while it should be firm, it should also be loose enough to slide on the hook with ease.
Keeping the loop on the hook, wrap the yarn over the crochet hook from back to front. Draw the yarn through the loop. (The first chain stitch is complete).
Double Crochet (DC)
Yarn over, insert the hook through both loops and pull up a loop. Next, yarn over and pull through two loops on the hook. Lastly, yarn over again and pull through the last two loops on the hook.
Front Post Treble Crochet Stitch (FPTR)
Yarn over hook twice, insert hook around the post of stitch from front to back to front. Yarn over and pull up a loop, you will have four loops on the hook. Next yarn over and pull through two loops. There will be three loops on the hook. Yarn over, pull through two loops and yarn over for the last time and pull through the remaining two loops.
Back Post Treble Crochet Stitch (BPTR)
Yarn over hook twice, insert hook around the post of stitch from back to front to back. Yarn over and pull up a loop, you will have four loops on the hook. Next yarn over and pull through two loops. There will be three loops on the hook. Yarn over, pull through two loops and yarn over for the last time and pull through the remaining two loops.
Begin
Begin the chain stitch by making a slip knot on the crochet hook.
Crochet a Foundation Row
Begin your Celtic weave crochet with a multiple of 4 stitches.
Sample Size Chain 20

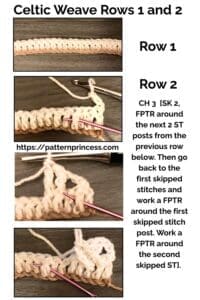
Row 1
DC in the 4th CH from the hook. DC in each ST across. Turn
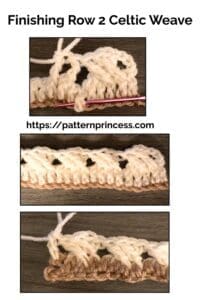
Row 2
CH 3 (Counts as DC). [SK 2, FPTR around the next 2 ST posts from the previous row below. Then go back to the first skipped stitches and work a FPTR around the first skipped stitch post. Work a FPTR around the second skipped ST]. Repeat between [ ] across until 1 ST remains. DC in the last ST. Turn

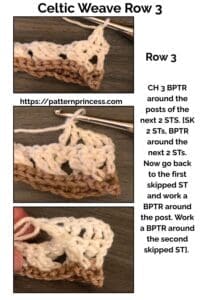
Row 3
CH 3 (Counts as a DC). BPTR around the posts of the next 2 STS. [SK 2 STs, BPTR around the next 2 STs. Now go back to the first skipped ST and work a BPTR around the post. Work a BPTR around the second skipped ST]. Repeat between [ ] until there are 3 STs left. BPTR around the posts of the next 2 STs and DC in the last ST. Turn

Row 4
Repeat row 2
Row 5
Repeat row 3.
Row 6 and Beyond
Continue to repeat rows 2 and 3 until your desired length.
Finishing
After you work the last ST, cut off the yarn leaving about a 12-inch long tail. Pull the yarn tail through the last loop on the hook.
Thread the yarn needle with the yarn tails and weave them through the crochet stitches back and forth until the yarn feels secure. Snip off the excess yarn.
Crochet Video Tutorials of the Crochet Celtic Weave Stitch Pattern
We hope you have enjoyed this Celtic Stitch Pattern. Here are other free patterns to inspire your next project.
Learn How to Crochet Celtic Weave Stitch: Free Pattern
Equipment
- 1 Crochet Hook: Choose a hook size that matches your yarn weight.
- 1 Scissors:
- 1 Tapestry Needle
Materials
- Yarn I used a number 4 medium weight yarn for my sample. It works well with this pattern.
Instructions
Begin
- Begin the chain stitch by making a slip knot on the crochet hook.
- Crochet a Foundation Row, Sample Size Chain 20
- Begin your Celtic weave crochet with a multiple of 4 stitches.
Row 1
- DC in the 4th CH from the hook. DC in each ST across. Turn

Row 2
- CH 3 (Counts as DC). [SK 2, FPTR around the next 2 ST posts from the previous row below. Then go back to the first skipped stitches and work a FPTR around the first skipped stitch post. Work a FPTR around the second skipped ST]. Repeat between [ ] across until 1 ST remains. DC in the last ST. Turn
Row 3
- CH 3 (Counts as a DC). BPTR around the posts of the next 2 STS. [SK 2 STs, BPTR around the next 2 STs. Now go back to the first skipped ST and work a BPTR around the post. Work a BPTR around the second skipped ST]. Repeat between [ ] until there are 3 STs left. BPTR around the posts of the next 2 STs and DC in the last ST. Turn
Row 4 and Beyond
- Continue to repeat rows 2 and 3 until your desired length.
Finishing
- After you work the last SC ST, cut off the yarn leaving about a 12-inch long tail. Pull the yarn tail through the last loop on the hook.
- Thread the yarn needle with the yarn tails and weave them through the crochet stitches back and forth until the yarn feels secure. Snip off the excess yarn.
Notes
Abbreviations
- BPTR = Back Post Treble Crochet
- CH = Chain
- DC = Double Crochet
- FPTR = Front Post Treble Crochet
- SK = Skip
- SP = Space
- ST = Stitch
- STs = Stitches
- YO = Yarn Over
- [ ] = Repeat Between

You can find Victoria crocheting, quilting, and creating recipes. She has cooked in restaurants for over 20 years, including many larger parties. She learned to crochet when she was just 11 years old and has been crocheting ever since; over 50 years now. Over 40 years ago, she loved her first class in sewing and continues to hone her skills in quilting. Many have enjoyed the handmade gifts over the years. In her professional career, she has worked in management in a wide variety of businesses including higher education as a dean of a division. All the while attending college part-time to achieve her doctorate in higher education with an emphasis in e-learning.
A wonderful crochet stitch with loads of texture.