Last updated on June 5th, 2026 at 01:33 pm
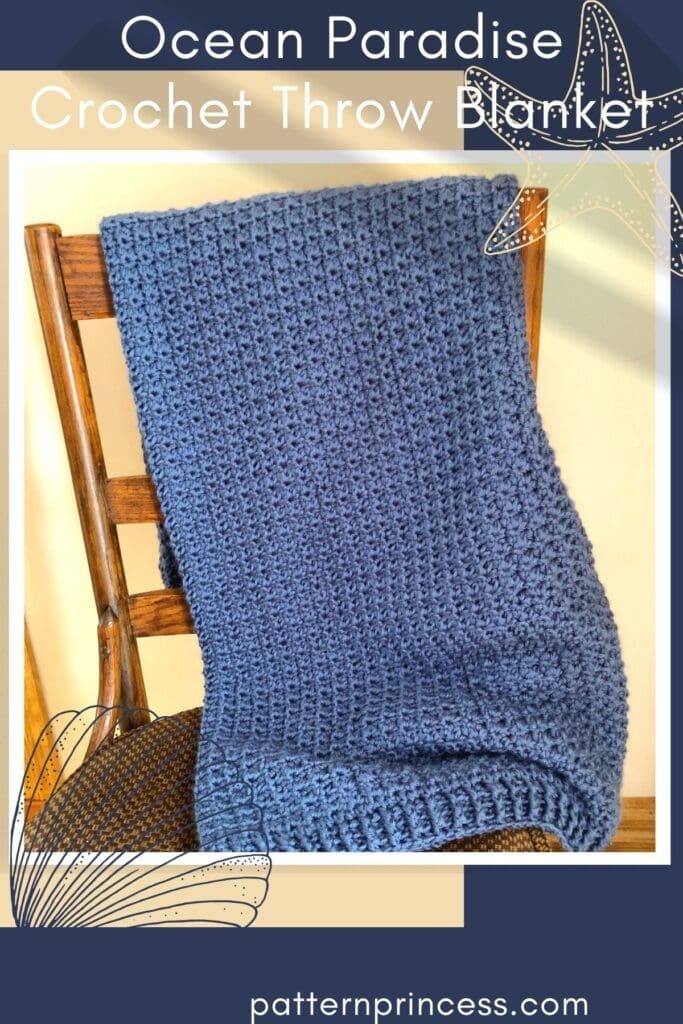
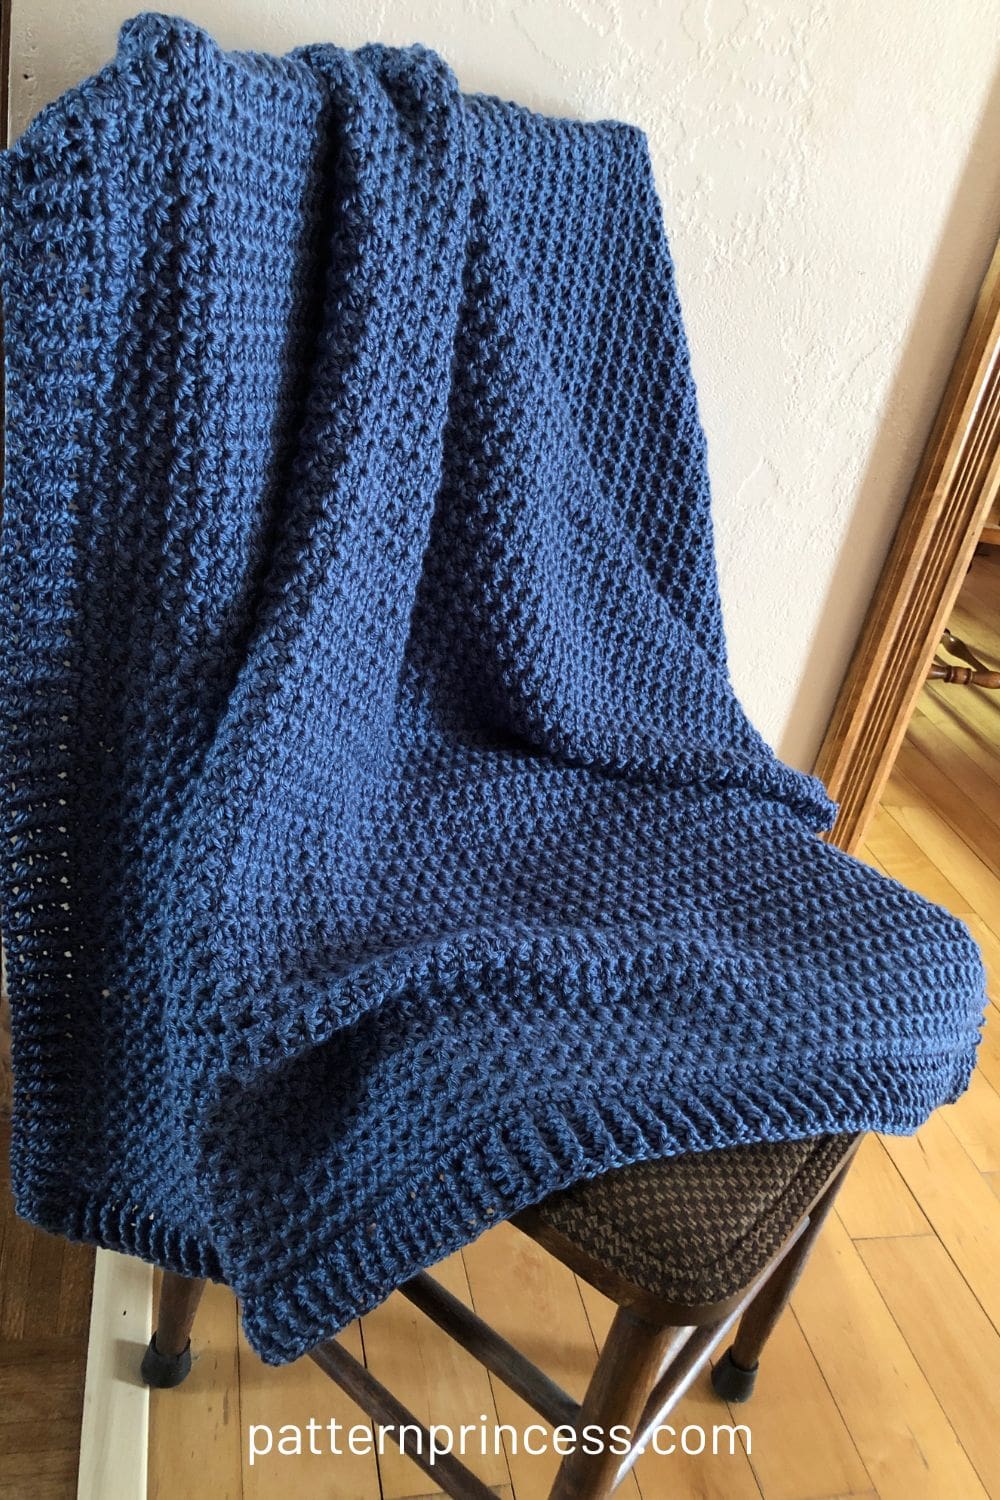
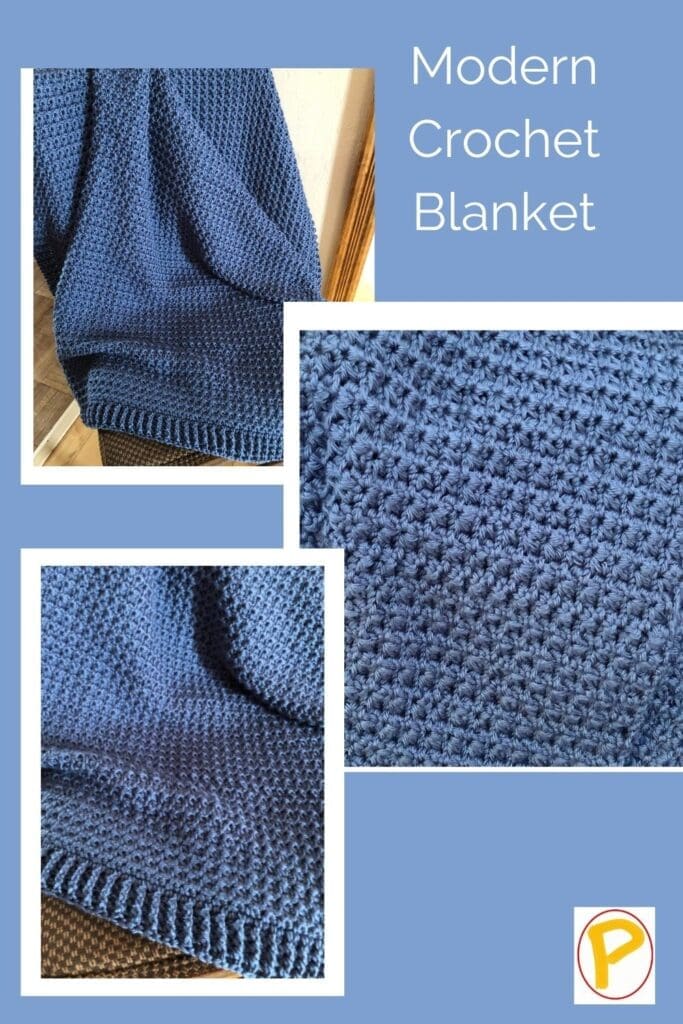
The Ocean Paradise Crochet Throw Blanket combines rich texture, beautiful ocean-inspired color, and simple repeating stitches to create a cozy blanket you’ll be proud to display in your home. The Trinity Stitch creates gentle ridges that resemble waves rolling across the water, while the ribbed border adds a polished, professional finish.
One of my favorite things about this blanket is that once you complete the first few rows, the pattern settles into an easy repeat. The stitch pattern may look intricate at first glance, but it quickly becomes relaxing and rhythmic. Whether you’re making this blanket for your own home or as a thoughtful handmade gift, the repetitive design makes it an enjoyable project from start to finish.
Seven Blanket Sizes Included in This Free Pattern
This pattern now includes seven blanket sizes, from baby blankets to larger bed-sized options, making it easy to create the perfect blanket for any space or occasion. Detailed yardage estimates and starting chain counts are included for each size to help you plan your project with confidence.
Pair this deep blue color with the delightful stitch pattern and you have a winner. My son-in-law named this blanket as he said that it reminds him of the deep color of the ocean with waves rippling across the water.
To make the pattern even easier to follow, I’ve also included step-by-step photos throughout the tutorial. These close-up images walk you through the Trinity Stitch and border construction so you can crochet with confidence, even if you’re trying this stitch for the first time.
Pattern Update: This pattern has been expanded to include seven blanket sizes, updated yarn requirements, and step-by-step photos to make the project even easier to follow.
Available Sizes
- Baby
- Crib
- Lapghan (shown)
- Medium Throw
- Large Throw
- Twin
- Queen/King
Why You’ll Love This Pattern
- Easy 2-row repeat after setup
- Step-by-step photo tutorial
- Beautiful Trinity Stitch texture
- Cozy throw blanket size
- Beginner-friendly intermediate project
- Great for gifts and home décor
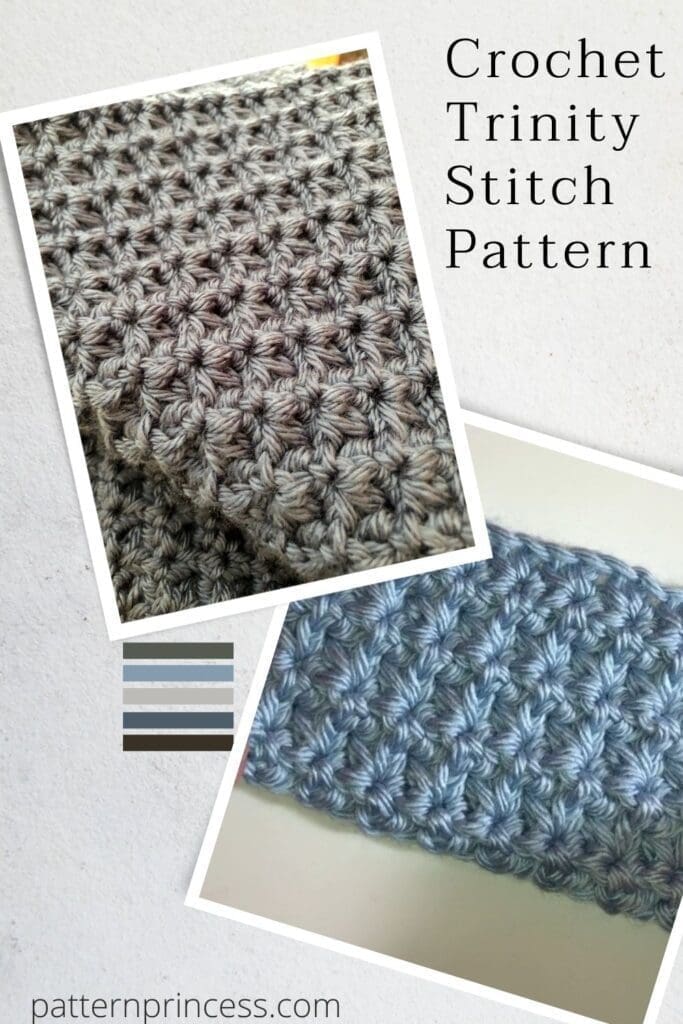
Use this detailed crochet tutorial if the Trinity Crochet Stitch is a new stitch for you. Even if you have done this one before, sometimes, it is good to have a review before you start a project.
Yarn Substitutions and Stash-Busting Ideas
This blanket was designed using Caron Simply Soft yarn, which creates a soft, lightweight throw with beautiful drape and excellent stitch definition. The Trinity Stitch texture really shines with this yarn’s smooth finish.
If you’d like to shop your stash before purchasing new yarn, many other #4 medium-weight yarns can work well in this pattern. Keep in mind that some worsted-weight yarns are slightly thicker than Caron Simply Soft, which may result in a blanket that is a bit larger or denser than the original.
Great stash-friendly alternatives include:
- Red Heart Soft
- Premier Everyday Worsted
- Lion Brand Basic Stitch Anti-Pilling
- Hobby Lobby I Love This Yarn
- Big Twist Value
- Caron One Pound
- Caron Jumbo
For a blanket with even more texture definition, choose a smooth yarn rather than a fuzzy or heavily textured yarn. Solid colors, gentle ombrés, and self-striping yarns all work beautifully with the Trinity Stitch pattern.
If you are not able to find the yarn locally, you can purchase it online. Savings Center – Pattern Princess
Using leftover yarn from your stash? This pattern is a great candidate for color changes. Try alternating colors every few rows, creating wide stripes, or working sections in coordinating shades inspired by the ocean theme.
As always, make a small gauge swatch before beginning. Different yarn brands can vary slightly in thickness, and a quick swatch can help you determine whether you need to adjust your hook size to achieve the desired finished measurements.
Get Your Ad Free Printable PDF in our Etsy shop.
Directions: Ocean Paradise Crochet Throw Blanket
Skill Level
Advanced Beginner or Intermediate Crocheter
Gauge
Approximately 13 stitches and 11 rows every 4-inches
Size
41-inches wide X 51- inches long
To change the width, adjust the beginning number of chains by any even number. Adjust the length by increasing or decreasing the rows.
- Baby = 30 X 36 inches
- Crib = 36 X 48 inches
- Lapghan = 41 X 51 inches (shown)
- Medium Throw = 50 X 60 inches
- Large Throw = 60 X 70 inches
- Twin = 66 X 90 inches
- Queen/King = 90 X 100 inches
Materials
Country Blue Caron Simply Soft 315 yards each skein.
- Baby = 30 X 36 inches. 4 Skeins or 994 yards.
- Crib = 36 X 48 inches. 6 Skeins or 1,590 yards.
- Lapghan = 41 X 51 inches (shown). 6 Skeins or 1,890 yards.
- Medium Throw = 50 X 60 inches. 9 Skeins or 2,760 yards.
- Large Throw = 60 X 70 inches. 13 Skeins or 3,864 yards.
- Twin = 66 X 90 inches. 18 Skeins or 5,465 yards.
- Queen/King = 90 X 100 inches. 27 Skeins or 8,280 yards.
Crochet Hook Size J 6.0mm
Yarn Needle
Scissors
Tape Measure
Abbreviations
- BPDC = Back Post Double Crochet
- CH = Chain
- DC = Double Crochet
- DCs = Double Crochet Stitches
- FPDC = Front Post Double Crochet
- SC = Single Crochet
- SL ST = Slip Stitch
- SP = Space
- ST = Stitch
- STs = Stitches
- YO = Yarn Over
- [ ] = Repeat
Crochet Pattern Notes
Pattern is written in US Terms.
This pattern is a repeat of row 2 until you reach your desired size.
Try and keep your stitches a bit loose. This will help you be able to get your hook into the stitches in the previous row.
Turn at the end of each row.
Crochet Border consists of alternating the front post double crochet and back post double crochet stitches. With three double crochet stitches worked in each corner.
Crochet Stitches
Chain Stitch (CH)
Begin the chain stitch by making a slip knot on the crochet hook. Leave about a 5-inch tail on the yarn. This will be woven in later.
Next snug up the yarn loop that is on the crochet hook; while it should be firm, it should also be loose enough to slide on the hook with ease.
Keeping the loop on the hook, wrap the yarn over the crochet hook from back to front. Draw the yarn through the loop. You’ve just made a chain stitch. Yarn over again and draw the yarn through the loop on the hook. Continue yarning over and drawing the yarn through the loop on the hook to make more chain stitches.
HOW TO CROCHET THE CHAIN STITCH video tutorial
Double Crochet (DC)
Yarn over, insert the hook in a stitch and pull up a loop. Next, yarn over and pull through two loops on the hook. Lastly, yarn over again and pull through the last two loops on the hook.
HOW TO CROCHET THE DOUBLE CROCHET STITCH video tutorial
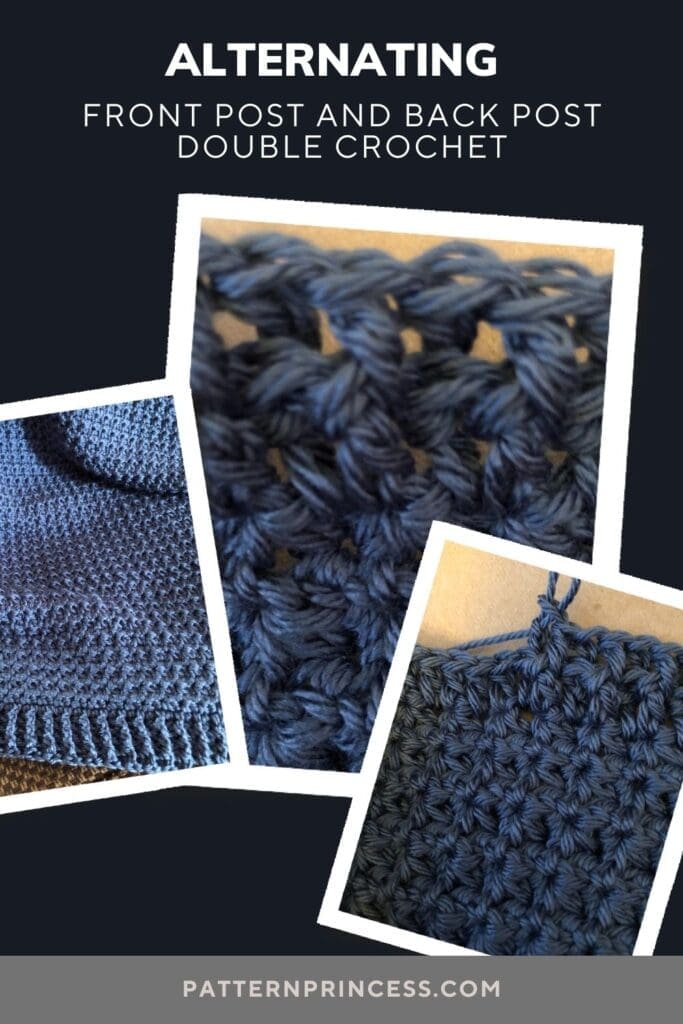
Front Post Double Crochet and Back Post Double Crochet
The crochet border uses the front post double crochet and back post double crochet stitches in an alternating pattern. Resulting in a soft and squishy feel with a ribbed look. If you like this finish for you crochet blankets, you can find all the details on how to work the alternating FPDC and BPDC stitches here and in the video tutorial.
How to crochet the front post and back post double crochet alternating.
Back Loop Double Crochet (BLDC)
Yarn over, insert the hook through the back loop only of a stitch and pull up a loop. Next, yarn over and pull through two loops on the hook. Lastly, yarn over again and pull through the last two loops on the hook.
HOW TO CROCHET THE BACK LOOP DOUBLE CROCHET STITCH video tutorial
Front Loop Double Crochet (FLDC)
Yarn over, insert the hook through the front loop only of a stitch and pull up a loop. Next, yarn over and pull through two loops on the hook. Lastly, yarn over again and pull through the last two loops on the hook.
HOW TO CROCHET THE FRONT LOOP DOUBLE CROCHET STITCH video tutorial
Single Crochet (SC)
Insert the hook in a stitch and pull up a loop. Yarn over and pull through the two loops on the hook.
HOW TO CROCHET THE SINGLE CROCHET STITCH video tutorial
Crochet Pattern
Begin
The foundation chain stitch is worked in even stitches, multiples of 2.
Begin the chain stitch by making a slip knot on the crochet hook. Leave about a 5-inch tail on the yarn. This will be woven in later.
Next snug up the yarn loop that is on the crochet hook; while it should be firm, it should also be loose enough to slide on the hook with ease.
Starting Chain
- Baby = 104 chain stitches.
- Crib = 124 chain stitches.
- Lapghan = 146 chain stitches. (shown)
- Medium Throw = 170 chain stitches.
- Large Throw = 204 chain stitches.
- Twin = 226 chain stitches.
- Queen/King = 307 chain stitches.
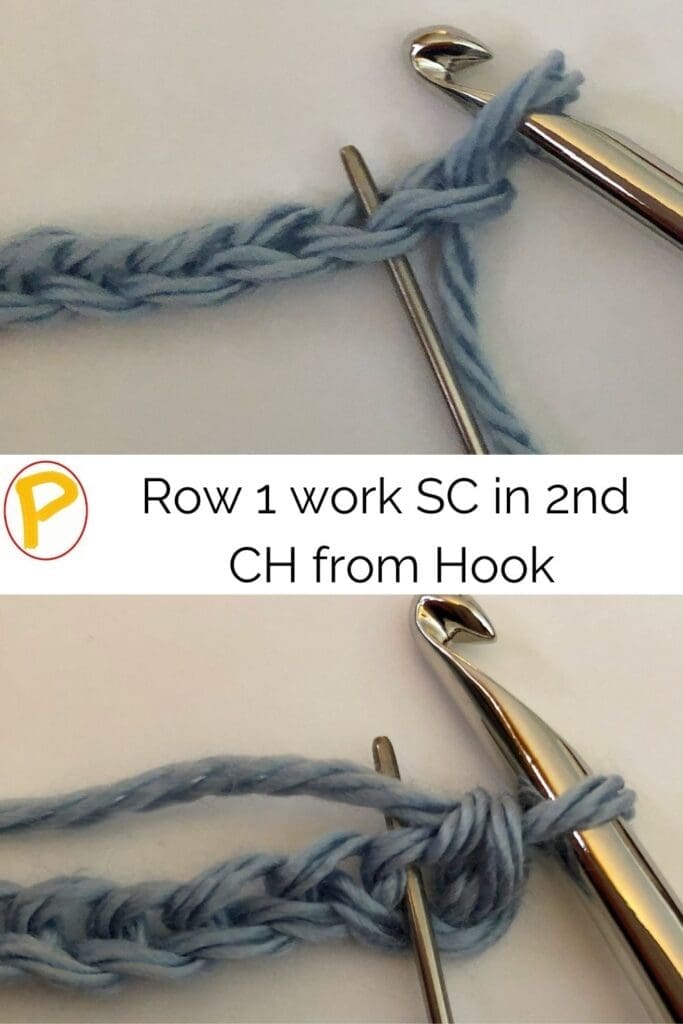
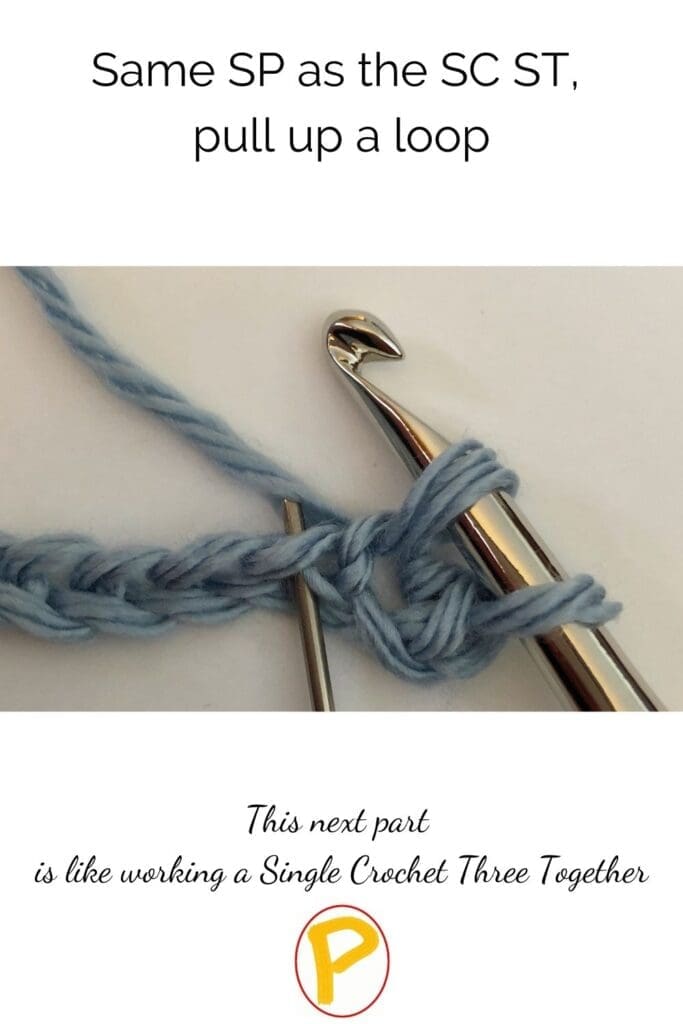
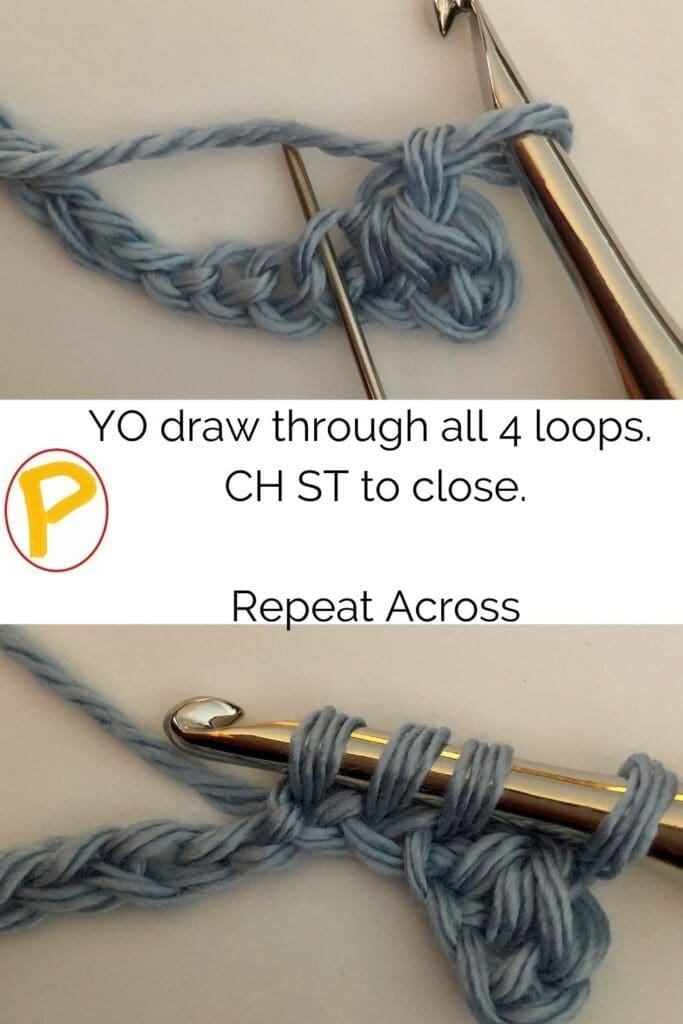
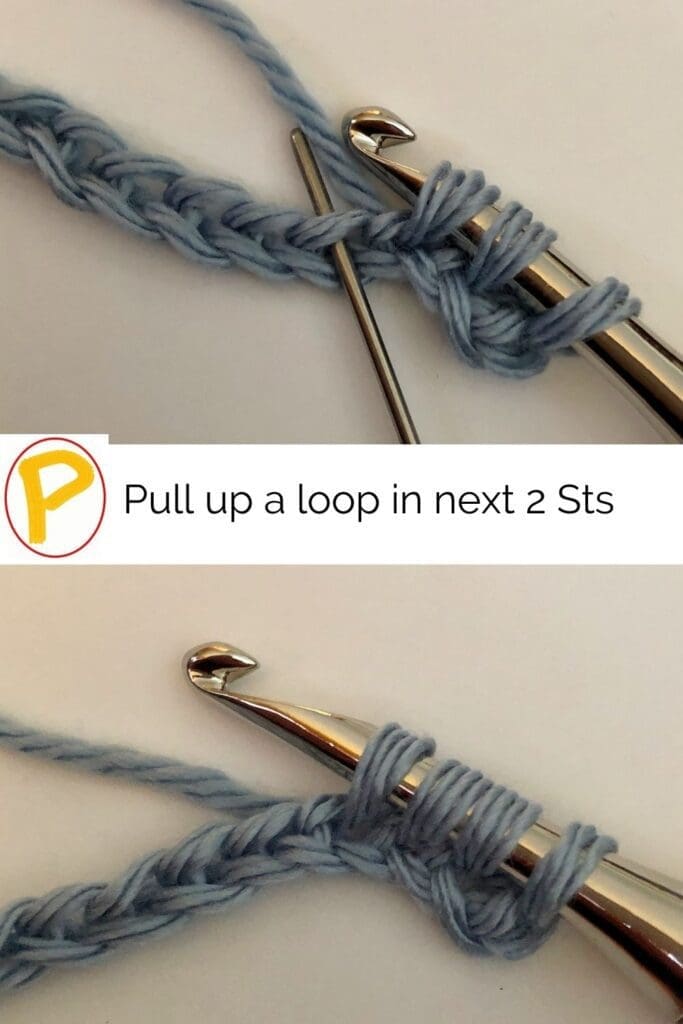
Row 1
SC in the 2nd CH from the hook. Insert hook into the same SP as the SC ST and pull up a loop. Pull up a loop in the next 2 STs. There should be 4 loops on your hook at this point. YO and pull through all 4 loops on your hook. CH 1 to close this stitch. [Insert the hook into the same SP and pull up a loop, pull up a loop in the next 2 STs, YO and pull through all 4 loops on the hook, CH 1 to close]. Repeat between [ ] across. End of the row. In the last ST, do not close with the Ch 1, rather work a SC in the last ST. Turn
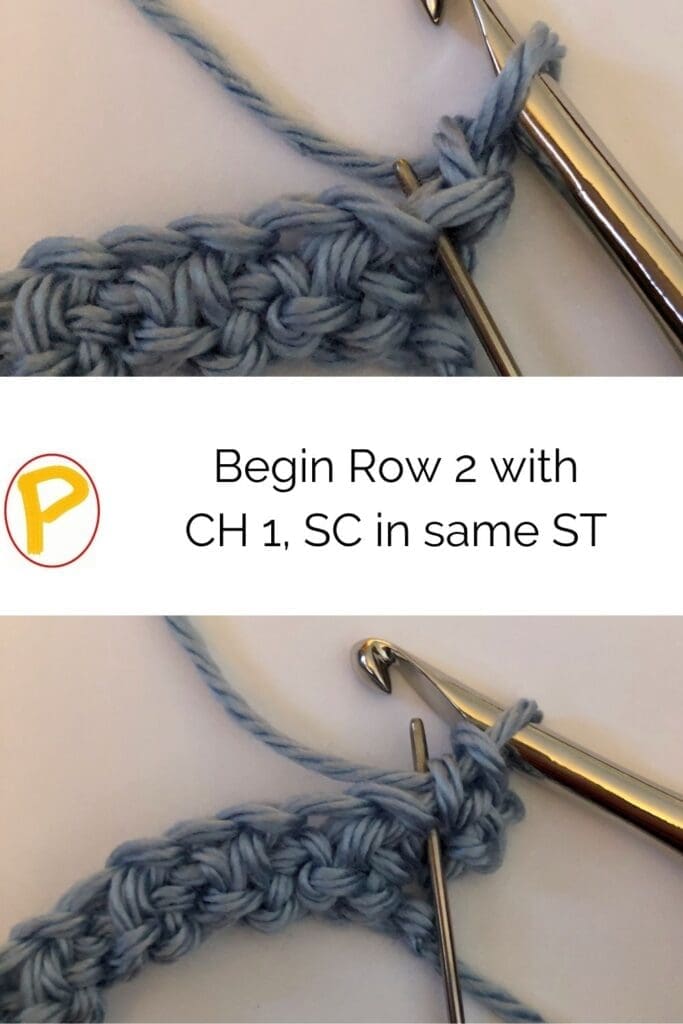
Row 2
CH 1, SC in the same ST as you worked the CH 1 (The first ST). Insert the hook into the same SP as the SC ST and pull up a loop. Pull up a loop in the next 2 STs. There should be 4 loops on your hook at this point. YO and pull through all 4 loops on your hook. CH 1 to close this stitch. [Insert the hook into the same SP and pull up a loop, pull up a loop in the next 2 STs, YO and pull through all 4 loops on the hook, CH 1 to close]. Repeat between [ ] across. In the last ST, do not close with the Ch 1, rather work a SC in the last ST. Turn
Rows 3 and Beyond
Repeat row 2.
- Baby = 104 rows.
- Crib = 138 rows.
- Lapghan = 146 rows. (shown)
- Medium Throw = 172 rows.
- Large Throw = 200 rows.
- Twin = 258 rows.
- Queen/King = 286 rows.
Finishing
Work a chain stitch, cut the yarn off leaving about a 12-inch tail. Draw the yarn through the chain stitch and pull snug. Use the yarn needle to weave in the yarn tail and snip off excess yarn.
Crochet Border Directions for Ocean Paradise Crochet Throw Blanket
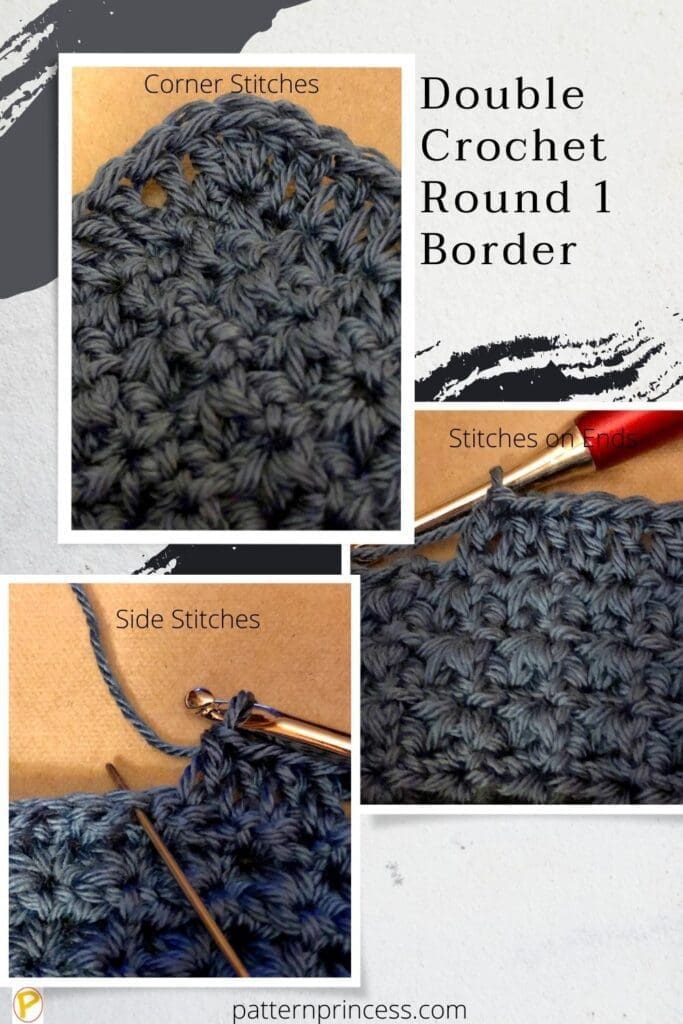
Round 1
Pull up a loop in any stitch to the left side of a corner stitch. Chain 3 (Counts as a DC). DC in each stitch around. (On the ends work a DC in each ST, work 1 DC for each row for the sides. In the corners work 3 DC in the corner ST). End the round with a SL ST into the top CH of the first CH 3.
Round 2
CH 2 (Counts as a DC). (The stitches on this row are a bit shorter than the regular DC, therefore, I used a chain of 2 for matching height). Complete an alternating ST pattern between FPDC and BPDC. Corners: When you get to the corners, continue to work 3 DC into the middle DC ST from the previous row. However, on the other two stitches from the previous row DCs in the corner – blend those into the alternating FPDC and BPDC stitch pattern. End the round with a SL ST into the top CH of the first CH 2.
Rounds 3 and 4
Repeat round 2. However, make sure to complete the FPDC and BPDC where the previous row FPDC and BPDC have been completed. This elongates that stitch and creates the beautiful, ribbed look.
Finishing
Work a chain stitch, cut the yarn off leaving about a 12-inch tail. Draw the yarn through the chain stitch and pull snug. Use the yarn needle to weave in the yarn tail and snip off excess yarn.
You Tube Video Tutorials of the Trinity Stitch
Left Hand Crochet Trinity Stitch Tutorial
Right Hand Crochet Trinity Stitch Tutorial
Here is a short video on crocheting the trinity stitch.
We hope that you have enjoyed this lovely crochet pattern.
XO
Vicky & Casey
Review on This Crochet Blanket from Etsy Customer, “I have been crocheting for over 60+ years. I have made hundreds of afghans and have hundreds of afghan patterns. This is the best pattern I have ever crocheted. The instructions were very detailed and expertly written. The Trinity Star stitch is beautiful and I loved the border. Well done.”
Karen

You can find Victoria crocheting, quilting, and creating recipes. She has cooked in restaurants for over 20 years, including many larger parties. She learned to crochet when she was just 11 years old and has been crocheting ever since; over 50 years now. Over 40 years ago, she loved her first class in sewing and continues to hone her skills in quilting. Many have enjoyed the handmade gifts over the years. In her professional career, she has worked in management in a wide variety of businesses including higher education as a dean of a division. All the while attending college part-time to achieve her doctorate in higher education with an emphasis in e-learning.