Last updated on March 27th, 2026 at 09:43 am
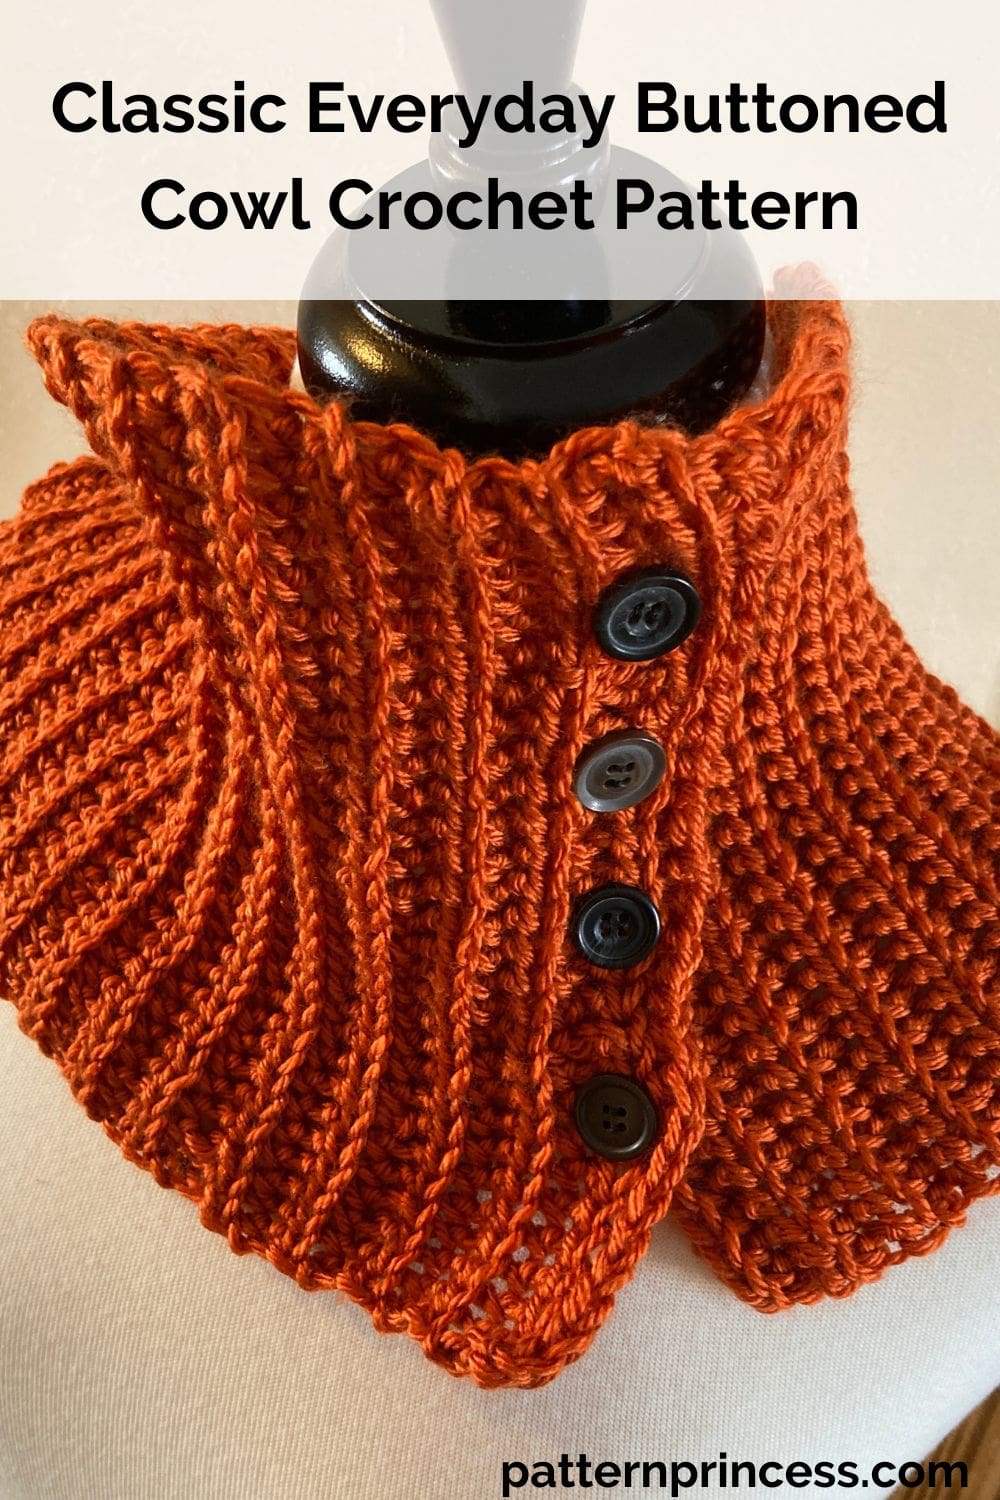
There’s something timeless about a handmade accessory that’s both functional and stylish, and the Classic Everyday Buttoned Cowl fits the bill for men who value understated class.
This free pattern uses basic stitches such as the half double crochet slip stitch. It creates a rugged texture and the practical addition of four buttons turn this into a stylish cowl.
This cowl is designed to adapt to your needs. Whether you’re bundling up for an early hike or heading to a casual meet-up. It’s not just about staying warm; it’s about doing it with confidence and classic style. A four-button closure gives it a polished look and lets you wear it exactly how you like, whether layered snugly under a jacket or styled as a statement piece.
Just the right amount of warmth and style for brisk mornings or cold days.
Buttoned Cowl Has Unisex Appeal
We created this new pattern with a beginner in mind. The simple stitch pattern is beginner-friendly and it makes a cozy cowl as a unisex accessory. Its timeless design and adjustable fit make it a practical and stylish option for both men and women.
Make this super quick project in different colors. Whether crocheted in neutral color tones or vibrant colors, this cowl is a heartfelt way to show someone you care while keeping them warm.
Whether paired with a tailored coat for a professional look or layered over a casual sweater for a relaxed vibe, it’s the ultimate go-to for style and comfort.
Styling Options
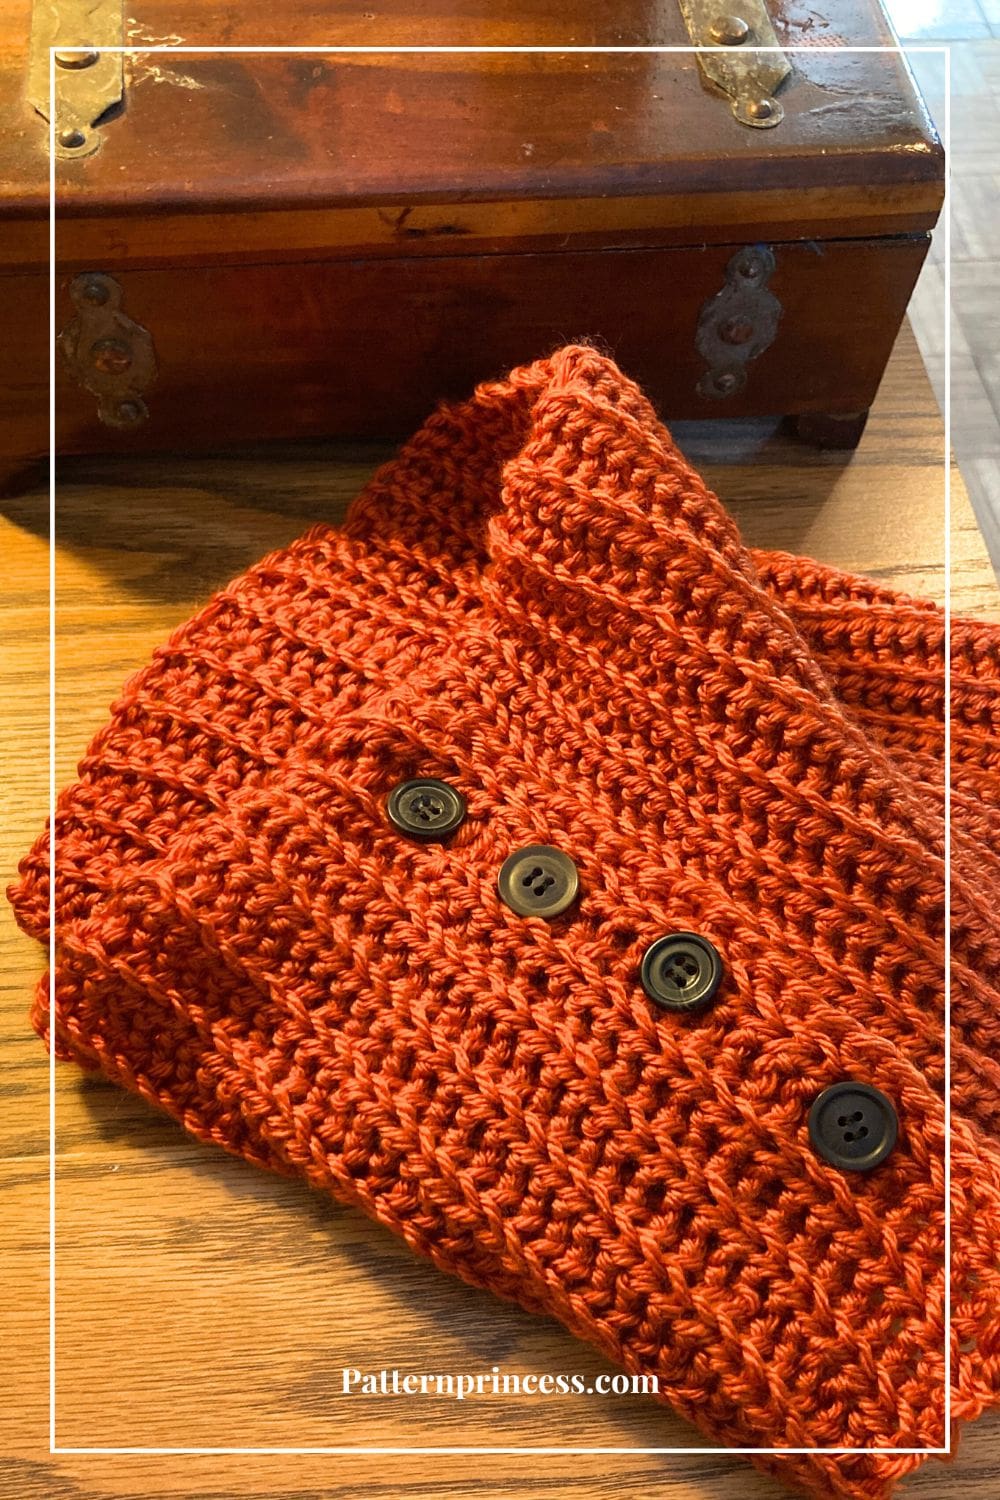
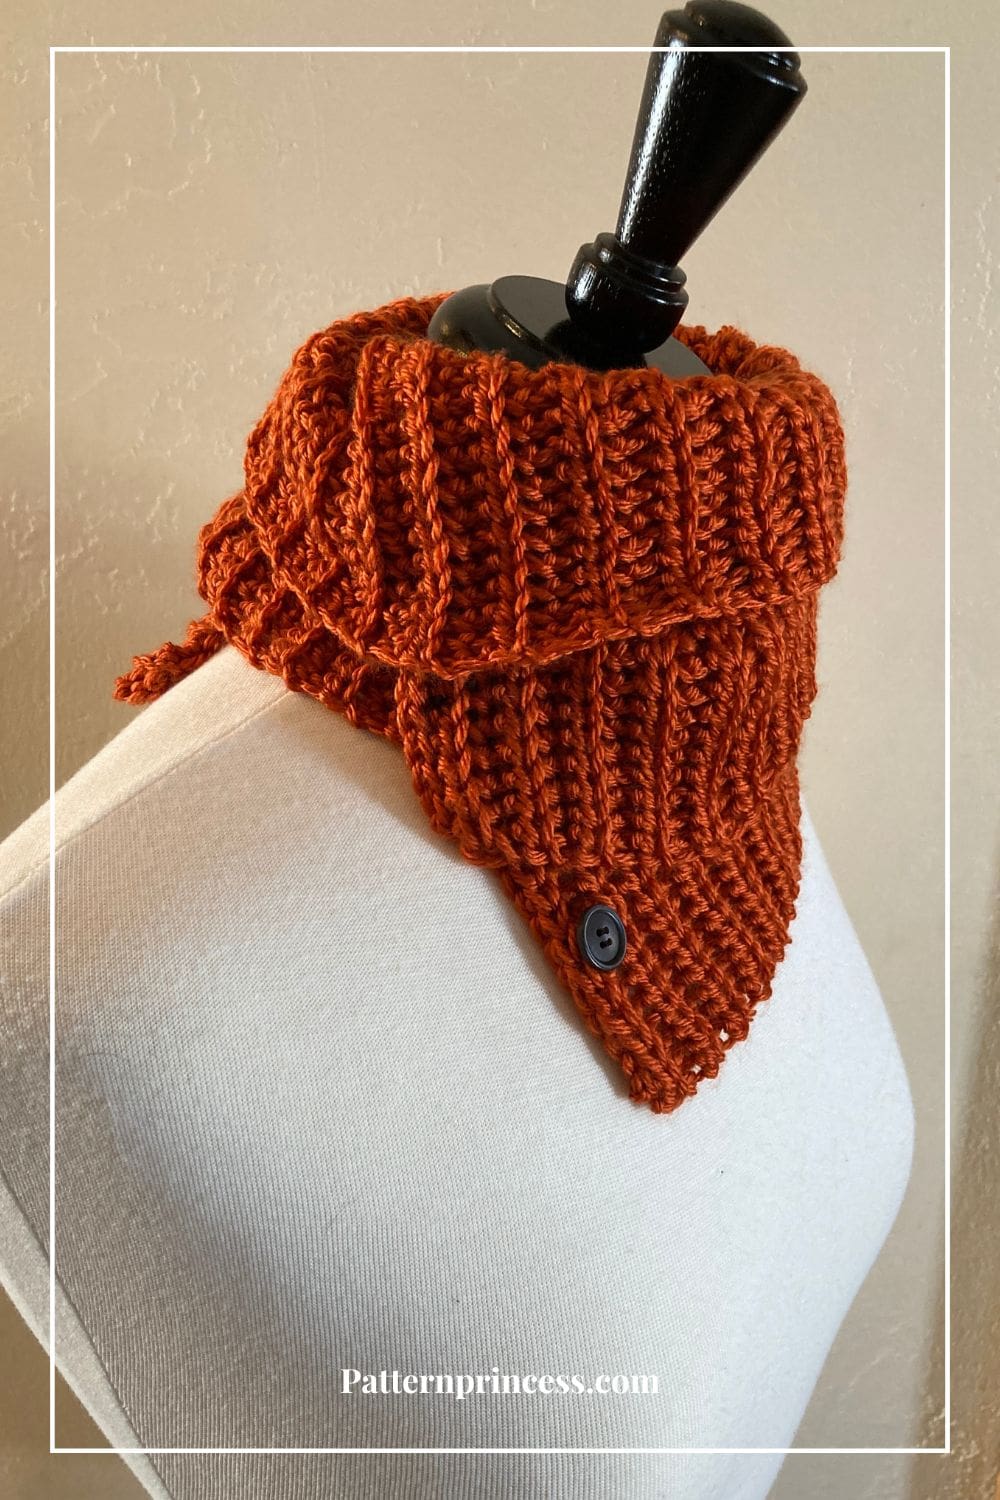
This thoughtfully designed cowl goes beyond just keeping you warm. It lets you switch up your look effortlessly. With 3/4-inch buttons that fit neatly into the crochet stitches, you can style it to suit your mood or outfit. Create a snug, circular cowl for maximum warmth, or button it along the edge for a chic, scarf-like appearance. Whether dressed up or down, this accessory adapts to your style with ease.
Yarn Flexibility Focus
The beautiful cowl is designed to work beautifully with medium-weight yarn, creating a perfect balance of warmth and texture. However, if you’re looking for something even cozier, bulky yarn is an excellent alternative.
Customizing the size is easy. Just use a tape measure to adjust the starting chain and rows to fit perfectly, no matter the yarn weight you choose. This versatility allows you to choose the yarn that best fits your style and comfort preferences, making it a truly adaptable project.
Get Your Ad Free Printable PDF in our Etsy shop
Directions: Classic Everyday Buttoned Cowl Crochet Pattern
Skill Level
Easy, beginner friendly
Gauge
16 stitches and 11 rows every 4 inches.
Size
17 ½ inches wide X 32 inches long.
The width of the cowl can be changed using any number of stitches. Change the length by adding or decreasing rows.
Abbreviations
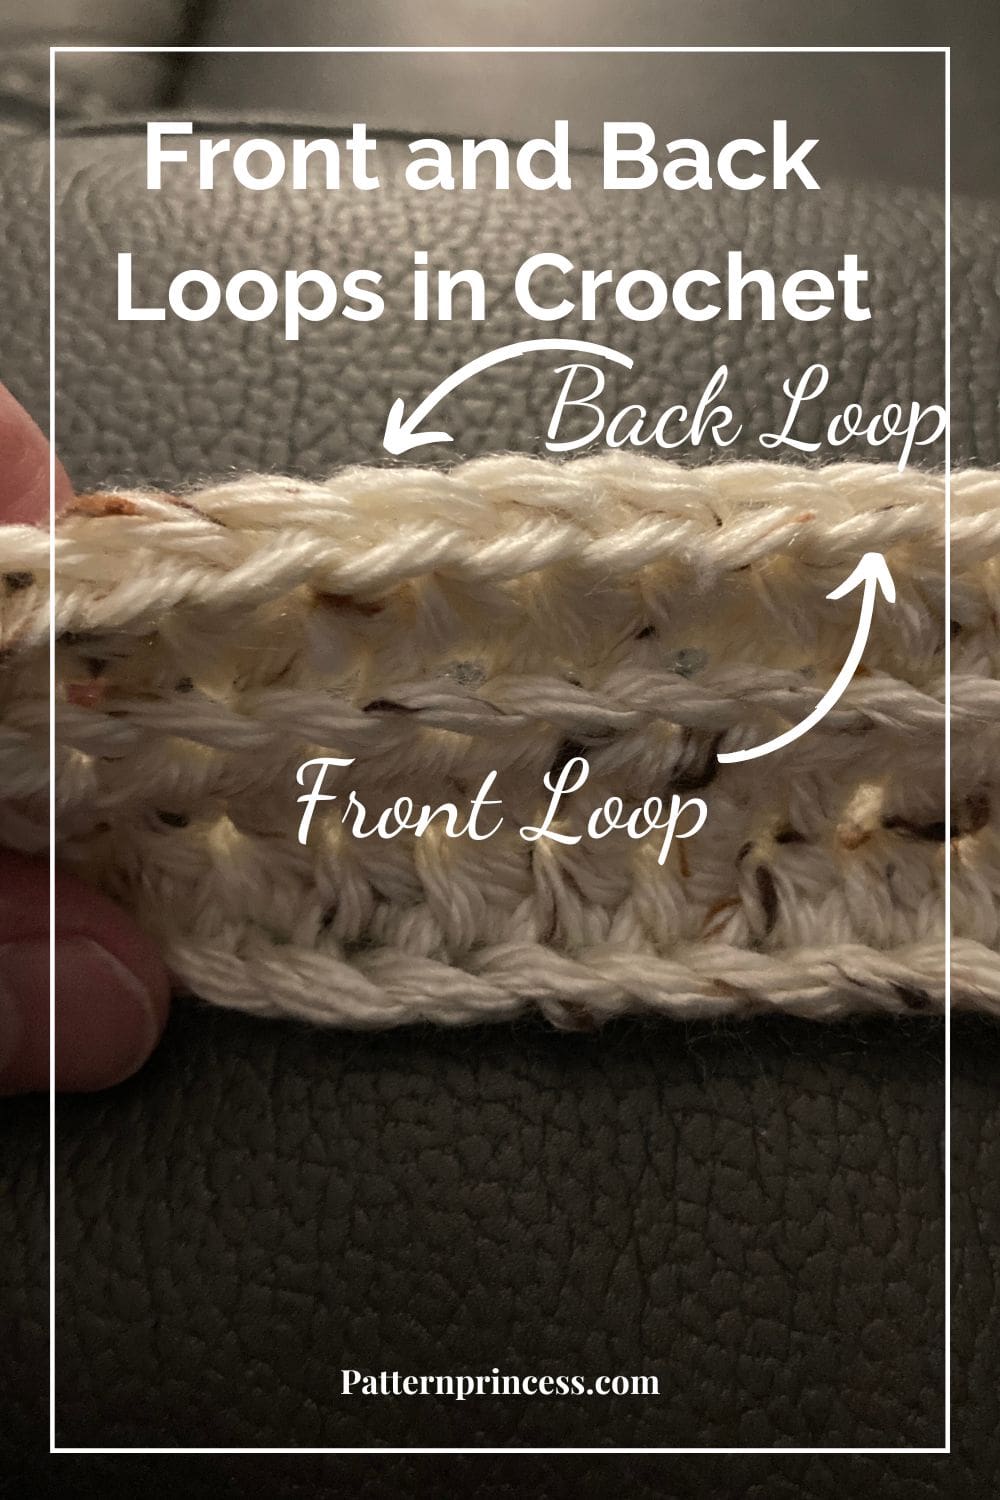
- BLO = Back Loop Only
- CH = Chain
- HDC SL ST = Half Double Crochet Slip Stitch
- SL ST = Slip Stitch
- ST = Stitch
- STs = Stitches
- [ ] = Repeat Between

Materials
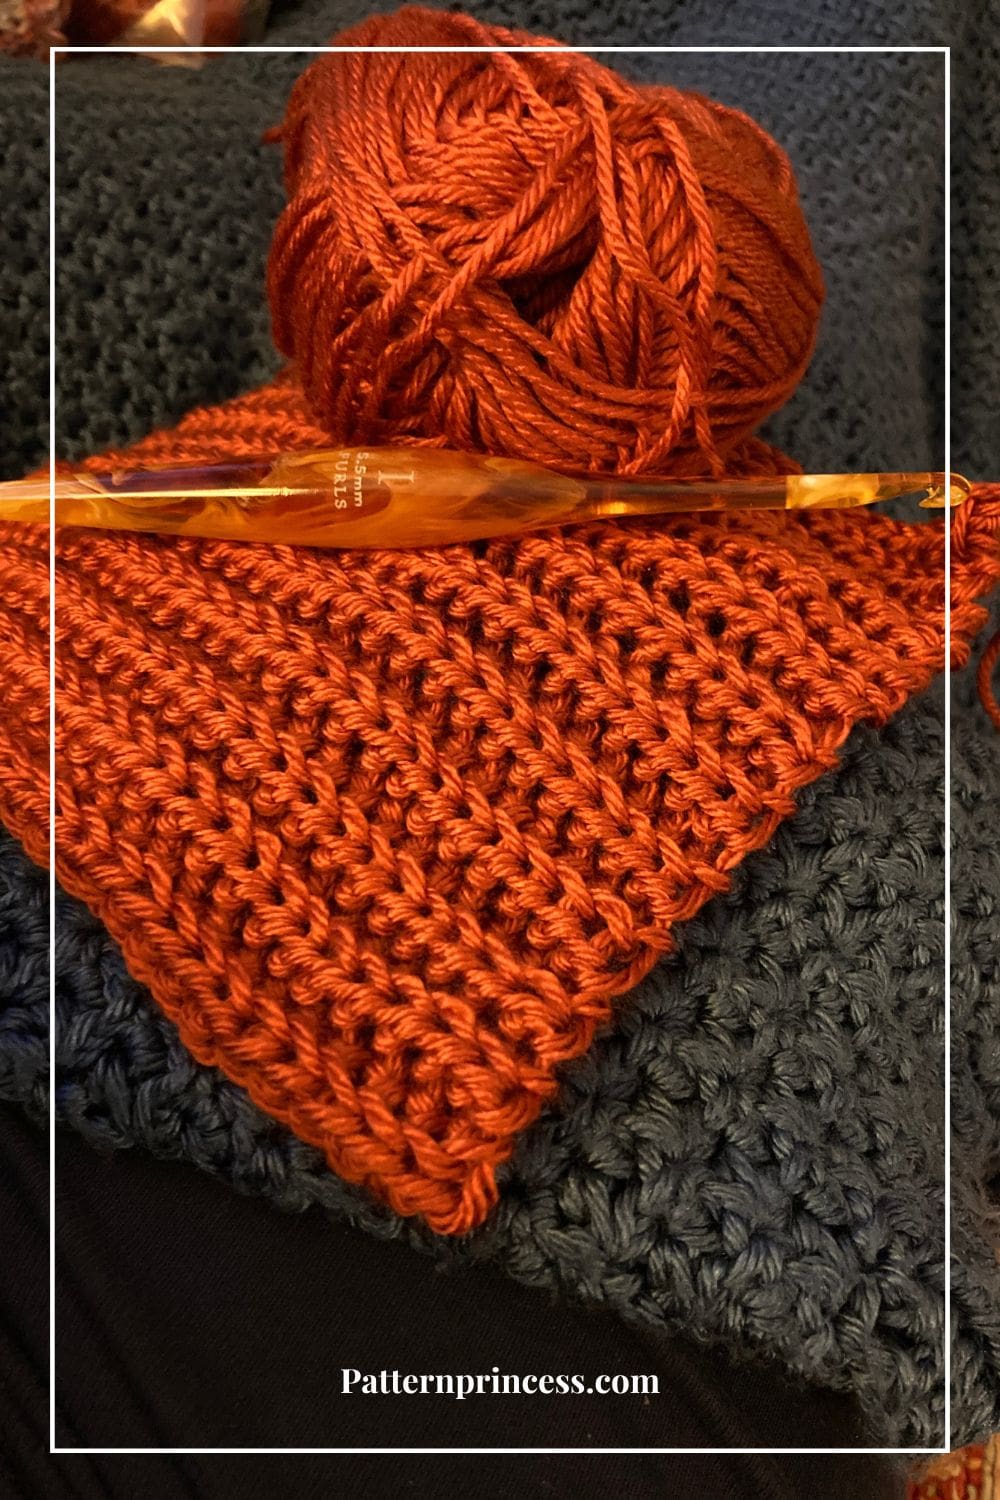
Lion Brand Basic Stitch Anti-Pilling. In the color Pumpkin. Each skein is 185 yards. I used 1 skein for a total of 185 yards.
Crochet Hook Size I 5.5mm
Tapestry Needle
Scissors
Tape Measure
Clip or Stitch Marker to help mark the spots for the buttons
¾-inch Buttons (4)
Thread
Sewing Needle
If you are not able to find the yarn locally, you can find it online. Check out our savings center for links to our favorite yarns and supplies.
Pattern Notes
Written in US Crochet Terms.
The turning chain does not count as a stitch.
Turn at the end of each row.
Tension Matters. Keep your tension even to achieve consistent stitches and a polished look.
You will be making a rectangle. It is worked back and forth in rows for the length.
Video tutorials are located after the written pattern.
Special Stitches
Half Double Crochet Slip Stitch (HDC SL ST)
To create this stitch, you yarn over, insert your hook into the designated stitch, yarn over again to pull up a loop (resulting in three loops on your hook), and then yarn over once more to pull through all three loops. This produces a solid, slightly raised texture that works well for building height in crochet fabric.
Begin Crochet Pattern
Begin by making a slip knot and adding a loop on your hook.
Chain 30.
Row 1
HDC SL ST in the back bump of the second chain from hook and in each remaining chain. Turn
Row 2
Chain 1 and turn work. HDC SL ST BLO in each stitch across. Turn
Row 3 through 93
Repeat row 2.
Finishing
After the last stitch, leave about a 10-12 inch yarn tail. Pull the tail through the last stitch. Using the tapestry needle, weave in the yarn ends. Cut off the excess yarn.

Sewing on the Buttons
Decide where you want the buttons. For a balanced look, evenly space the 4 buttons along the edge of the rectangle. A good guideline is to space the buttons 2-inches apart. The last button near the bottom edge, will be just 1 ½-inches from the edge.
Use clips or stitch markers to mark the button positions.
Use matching or contrasting thread, depending on whether you want the stitches to blend or stand out.
The sewing needle should fit through the buttonholes and thread that complements your project.
Threading the Needle
I use the double-thread method. Cut a length of thread or yarn, about 18–24 inches long, and thread it through the sewing needle. Bring the thread ends together and tie a knot at the end to secure it.
Attach the Buttons. Position the first button over its marked spot.
From the back of the rectangle, insert the needle through the crochet fabric and one hole of the button, pulling it until the knot is close to the crochet fabric.
Insert the needle through the opposite hole (if it’s a two-hole button) or an adjacent hole (if it’s a four-hole button), then back through the collar.
Tip. Then pull the needle and thread through the thread from the first pass before the knot. Then pull everything snug. This is a great way to keep the thread from pulling out of the crochet fabric.
Continue working from back to the front and front to the back with the needle and thread to secure the button. (About 3 or 4 times).
Secure the Button. When the button feels securely attached, tie a small knot on the underside of the collar to secure the thread.
How to Tie Off the Thread When Sewing Buttons
Finish Your Last Stitch. After sewing the button securely in place, bring the needle and thread to the back side of the collar.
Create the Knot. Hold the thread taut near the base where it exits the fabric. Wrap the thread around the needle three times.
While holding the wraps in place with your fingers, carefully pull the needle and thread all the way through the wraps and through the fabric near the underside of the button.
As you pull, the wraps will slide down to the base of the needle and tighten into a secure knot against the fabric.
Trim the Excess Thread. Use scissors to cut the thread close to the knot, leaving a small tail.
Repeat for Extra Security (Optional). If you want the knot to be extra secure, repeat the process one more time.
This method ensures the knot is secure and tidy, preventing the button from coming loose.
Repeat for the Other Buttons
Sew on the other buttons in the same manner, ensuring they’re evenly spaced and aligned.
That’s it, your easy and classic everyday buttoned cowl is ready to wear or give as the perfect gift.
Video Tutorial and Photo Guide
For visual learners, check out our video tutorial and step-by-step photo tutorial included below. These resources will help clarify each step and ensure your success.
Video Tutorials for the Half Double Crochet Slip Stitch
The video tutorials show working through both loops on the top. However, the stitch itself is the same just worked in just the back loop.
Half Double Crochet Slip Stitch
Right hand video tutorial: https://youtu.be/GnfPxSQLC5Y
Left hand video tutorial: https://youtu.be/lUqVSK7lEXw
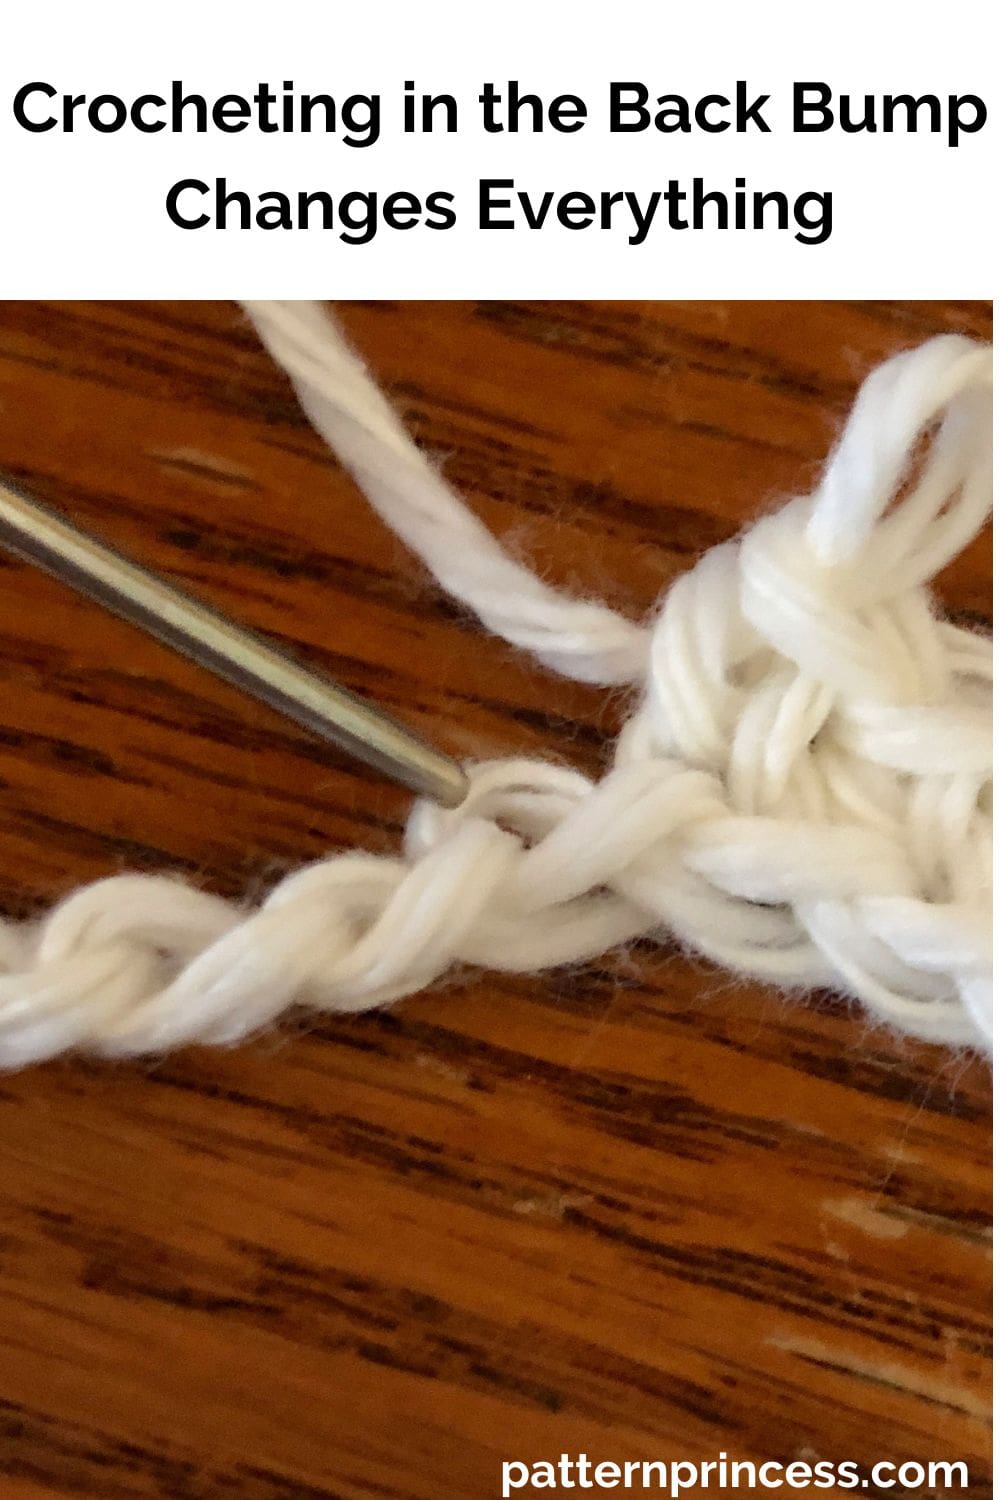
Crocheting in the Back Bump
This video shows working a single crochet in the back bump, but it is a nice way for you to see how to work in the back bump.
Right hand video tutorial. https://youtu.be/g36B4ruKeVI
Left hand video tutorial. https://youtu.be/XRYNWG1ZTac
Here are a few other free crochet patterns to help inspire your next project. Maybe another simple pattern for your winter wardrobe.

You can find Victoria crocheting, quilting, and creating recipes. She has cooked in restaurants for over 20 years, including many larger parties. She learned to crochet when she was just 11 years old and has been crocheting ever since; over 50 years now. Over 40 years ago, she loved her first class in sewing and continues to hone her skills in quilting. Many have enjoyed the handmade gifts over the years. In her professional career, she has worked in management in a wide variety of businesses including higher education as a dean of a division. All the while attending college part-time to achieve her doctorate in higher education with an emphasis in e-learning.