Last updated on October 3rd, 2024 at 02:01 pm
Learning how to crochet the chain stitch tutorial will help a beginner learn one of the essential stitches. This a great first stitch to learn.
In this post I’ll show you how to crochet a chain stitch. So, new crocheters can begin your first project. There is a photo tutorial through and a short video to help you get started.
This is an important skill and once you get started, you can begin expanding your crochet skills.
Easy Stitch to Learn for Beginners
If you are new to the hobby of crochet, it will take a bit of practice to get the chain stitches all looking the same. The key is keeping the tension the same for each stitch.
Don’t get discouraged if your string of chains looks a bit wonky. Believe me when I tell you how terrible mine looked when I first started.
So, be kind to yourself and keep practicing. Eventually, your stitches will start looking great!
What is a chain stitch used for in crochet?
A chain stitch is one of the basic stitches used to start a crochet project. Sometimes it is referred to as the starting chain or foundation chain. Additionally, it can be used throughout a crochet pattern to help create spaces between motifs. Often, chain stitches are combined with other crochet stitches to create shape and texture with the yarn.
Abbreviation for Chain Stitch
In crochet patterns, the abbreviation used to indicate a chain stitch is CH. Further, when starting a crochet project, it will often indicate the number of chains to work at the beginning.
Beginning Chain Stitch Count for a Pattern
An example of the number of chains to work at the beginning of a crochet pattern can look like this; CH 40. That means that you would work this chain stitch 40 times when beginning the pattern.
Crochet Chain Stitch for Beginners, Step-by-Step
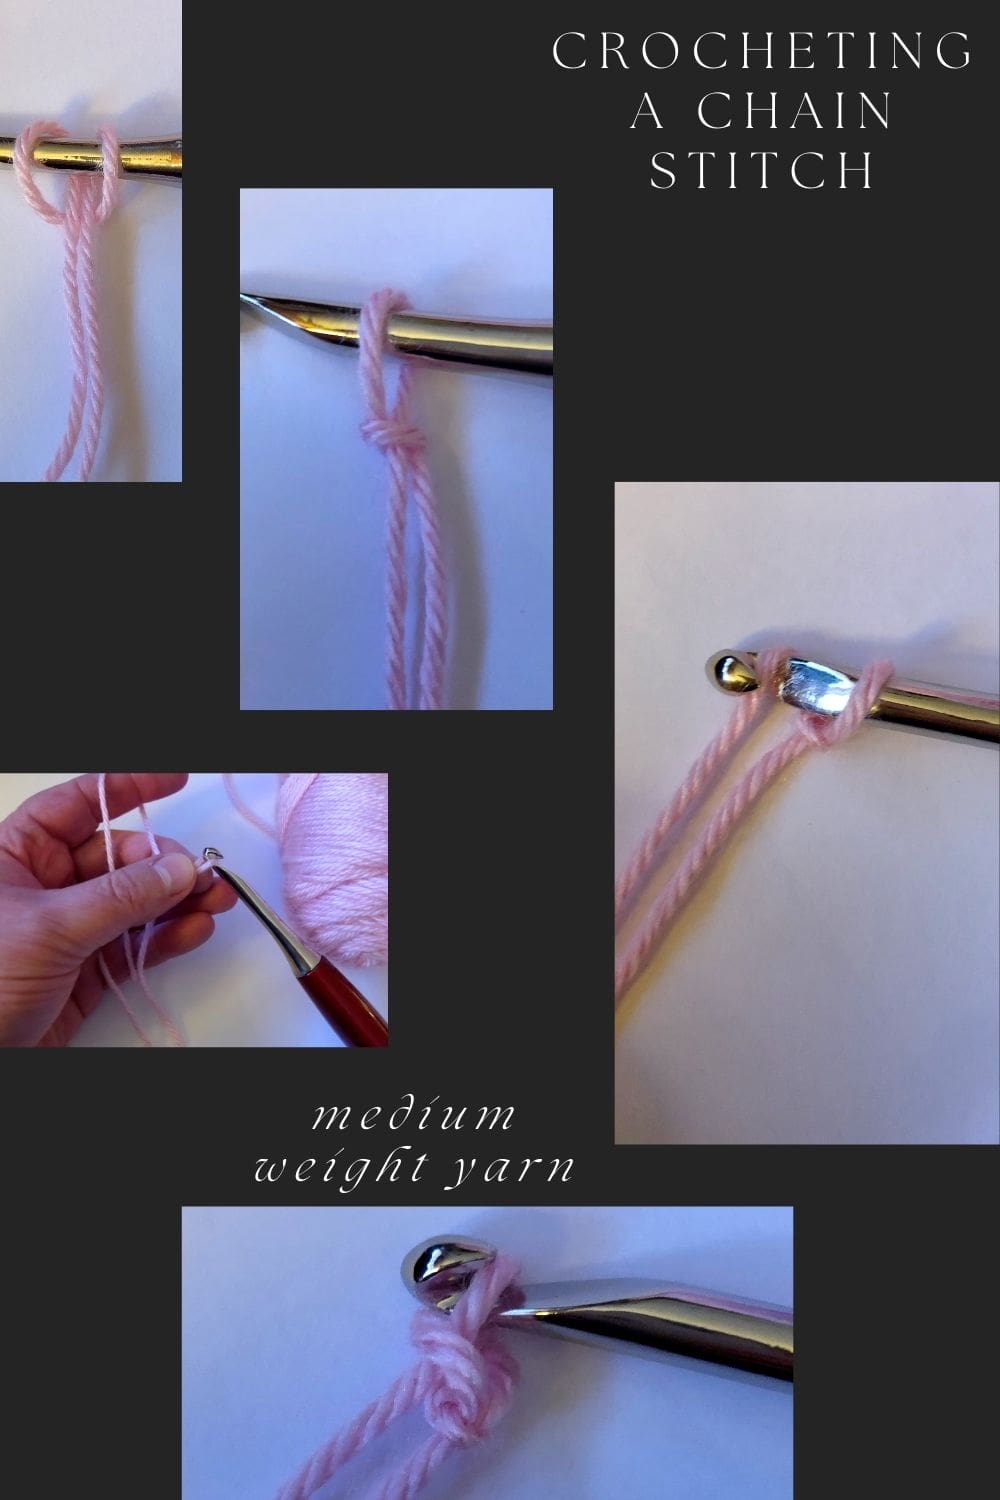
This chain stitch technique will work with all yarn types and all yarn weight from thread yarn to medium worsted weight yarn, and chunky yarn. With chunkier yarn, the larger hook is needed.
Tools
Crochet hook appropriate size for the yarn used.
For the medium weight Caron Simply Soft, I used a Size H Crochet Hook.
For the super bulky Lion Brand Hometown yarn, I used a Size N Crochet Hook.
Materials
Yarn
You can use any weight yarn to make a chain stitch. The crochet hook should be a suitable size to the yarn used.
For this tutorial, I used Caron Simply Soft yarn and a Lion Brand Hometown super bulky yarn.

Instructions
Step 1.
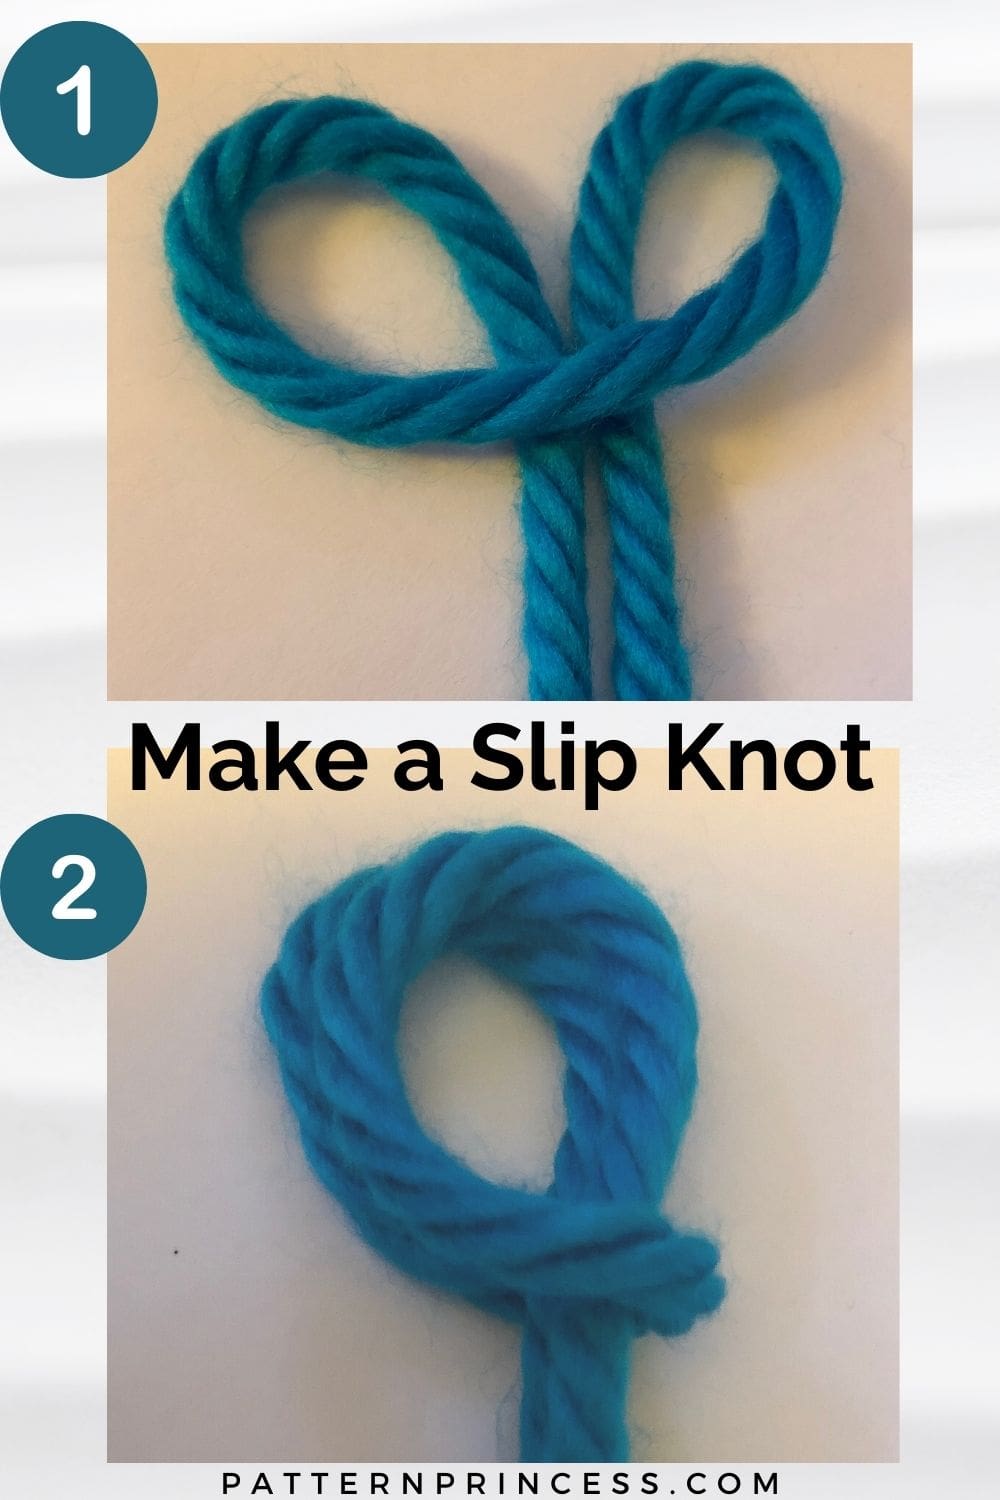
Make a slip knot in the yarn and put the loop on the crochet hook.
How to Make a Slip Knot?
If you are not familiar with how to work a slip knot, here is how I do it. There are most likely a few ways to create one, but this is how my grandmother taught me and it has served me well for years.
See the photo tutorial to help with understanding the written directions.
- Make a loop with the yarn and fold the top of the loop over the two yarn ends.
- Bring the two loops together.
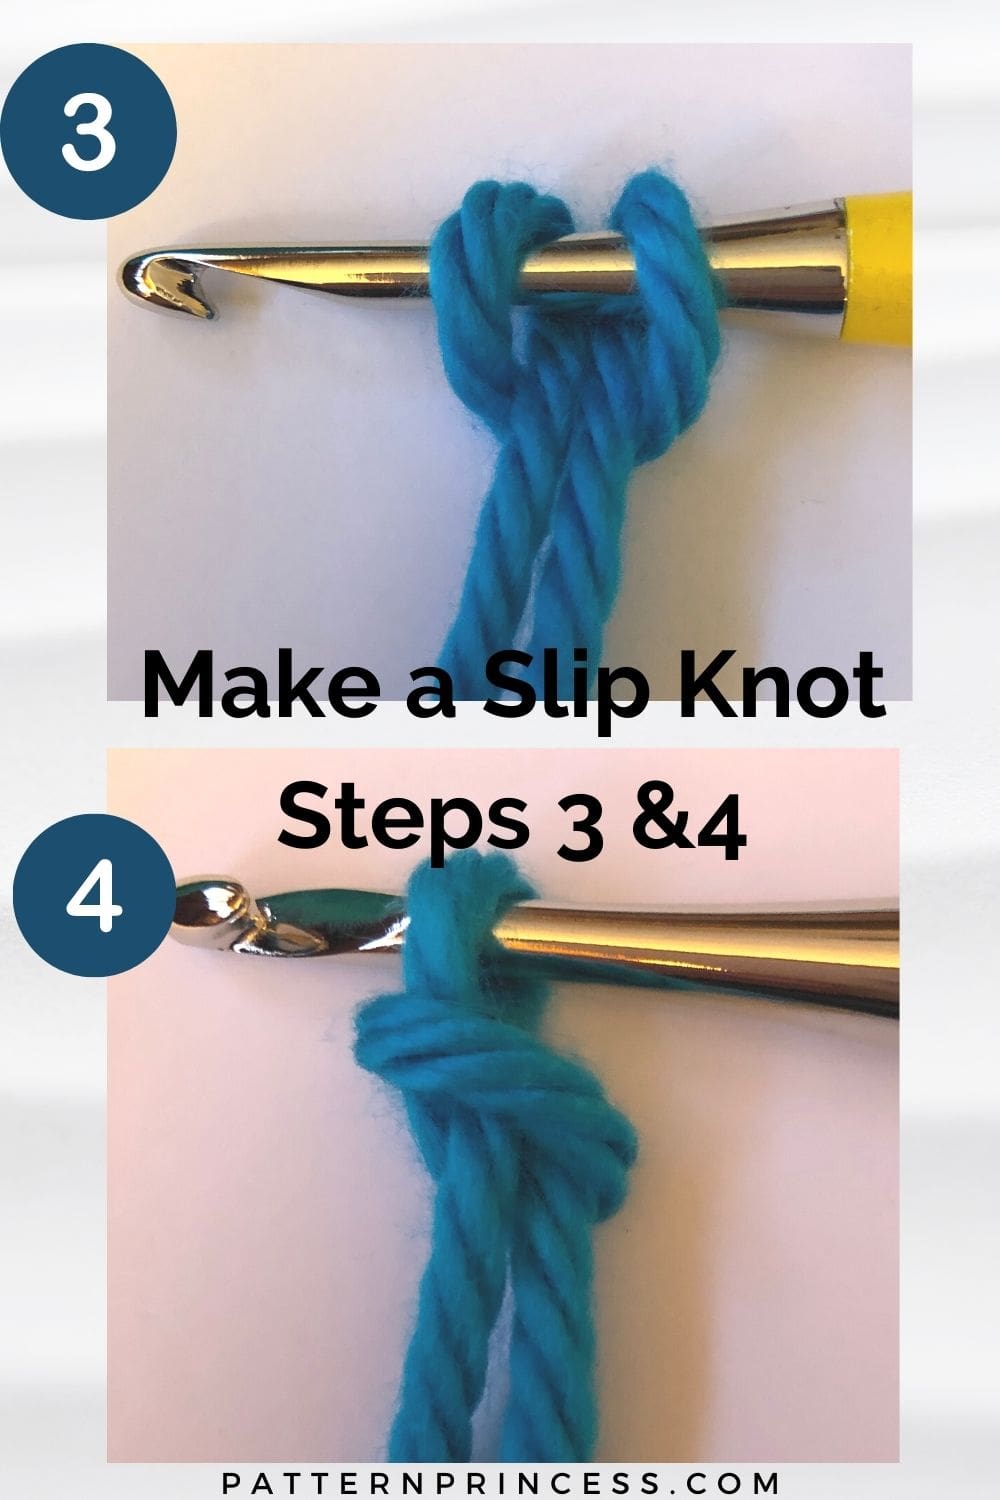
- Insert your crochet hook through the loops.
- Using the crochet hook, bring the loop that is closest to the hook end through the other loop that is on the hook.
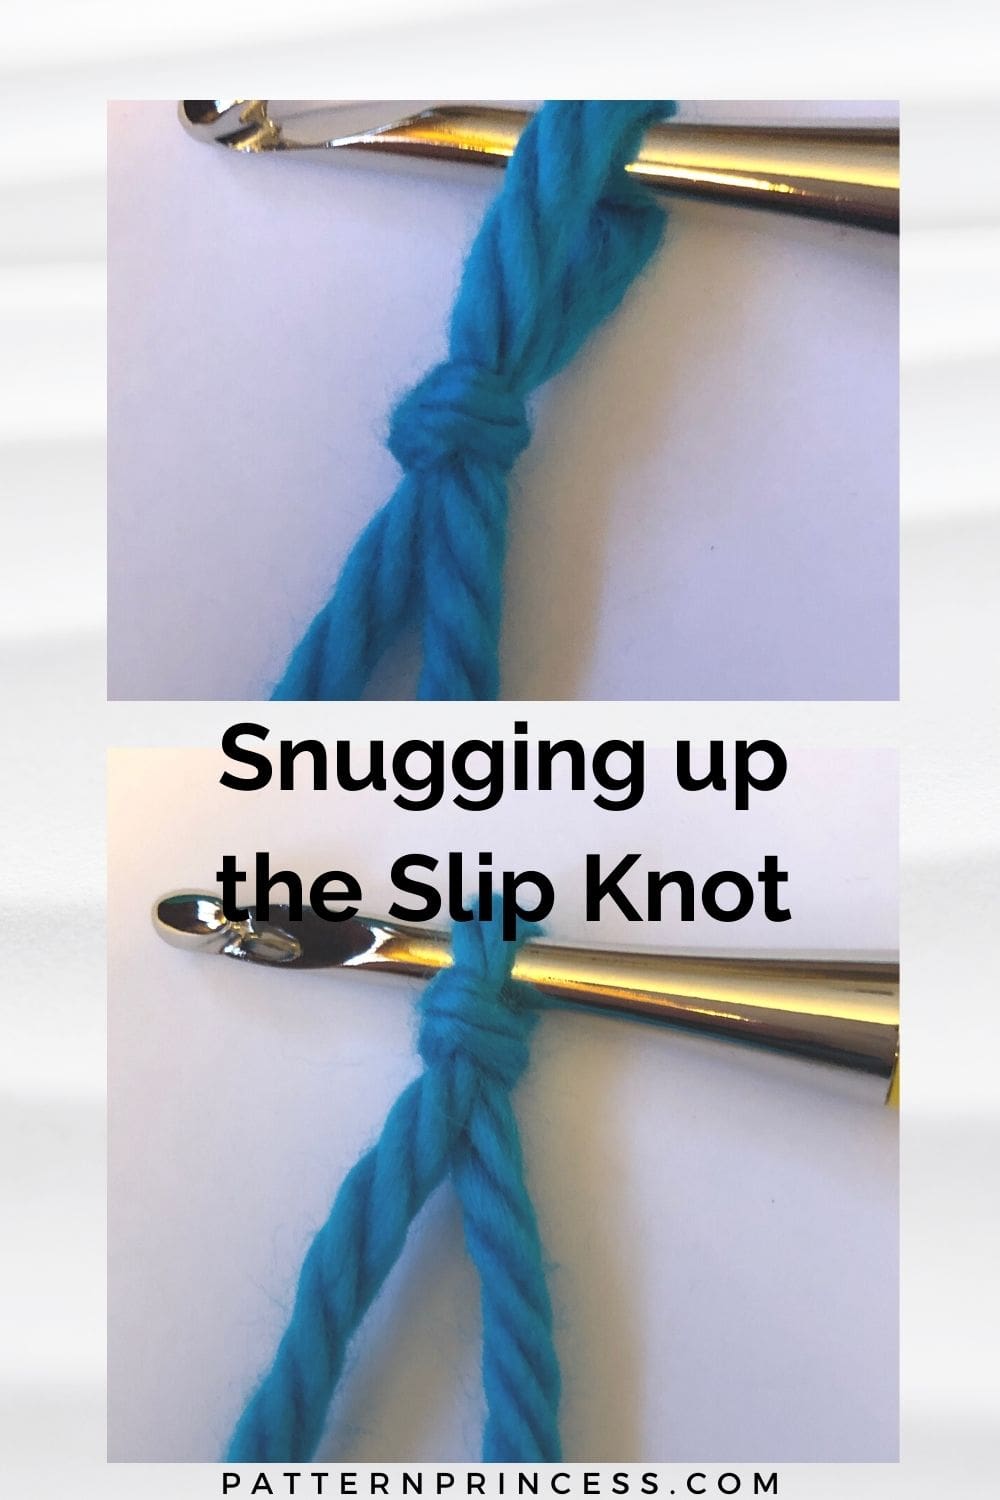
- Your slip knot is done. Just snug it up on the crochet hook.
Step 2.
Now that the slip knot is on the hook, it is time to learn how to hold the crochet hook and yarn to make your first stitch.

How to Hold Yarn When Crocheting?
String the strand of yarn between your ring and little finger. Then across your palm to your index finger. The yarn is between the index and middle finger and over the top of the index finger.
Finally grasp the knot between the thumb and middle finger.
If you are right-handed, hold your yarn in your left hand and use your right hand to work the crochet hook. If you are left-handed, the yarn will be in your right hand and the crochet hook in your left hand.
This method of holding the yarn helps control the tension of the yarn. As you work your series of chain stitches, continue removing yarn from the ball, and letting it flow through your fingers.
This may feel awkward when you first try holding your yarn and using your crochet hook all at the same time. Spend some time practicing and you will start to get muscle memory and it will start to feel natural.
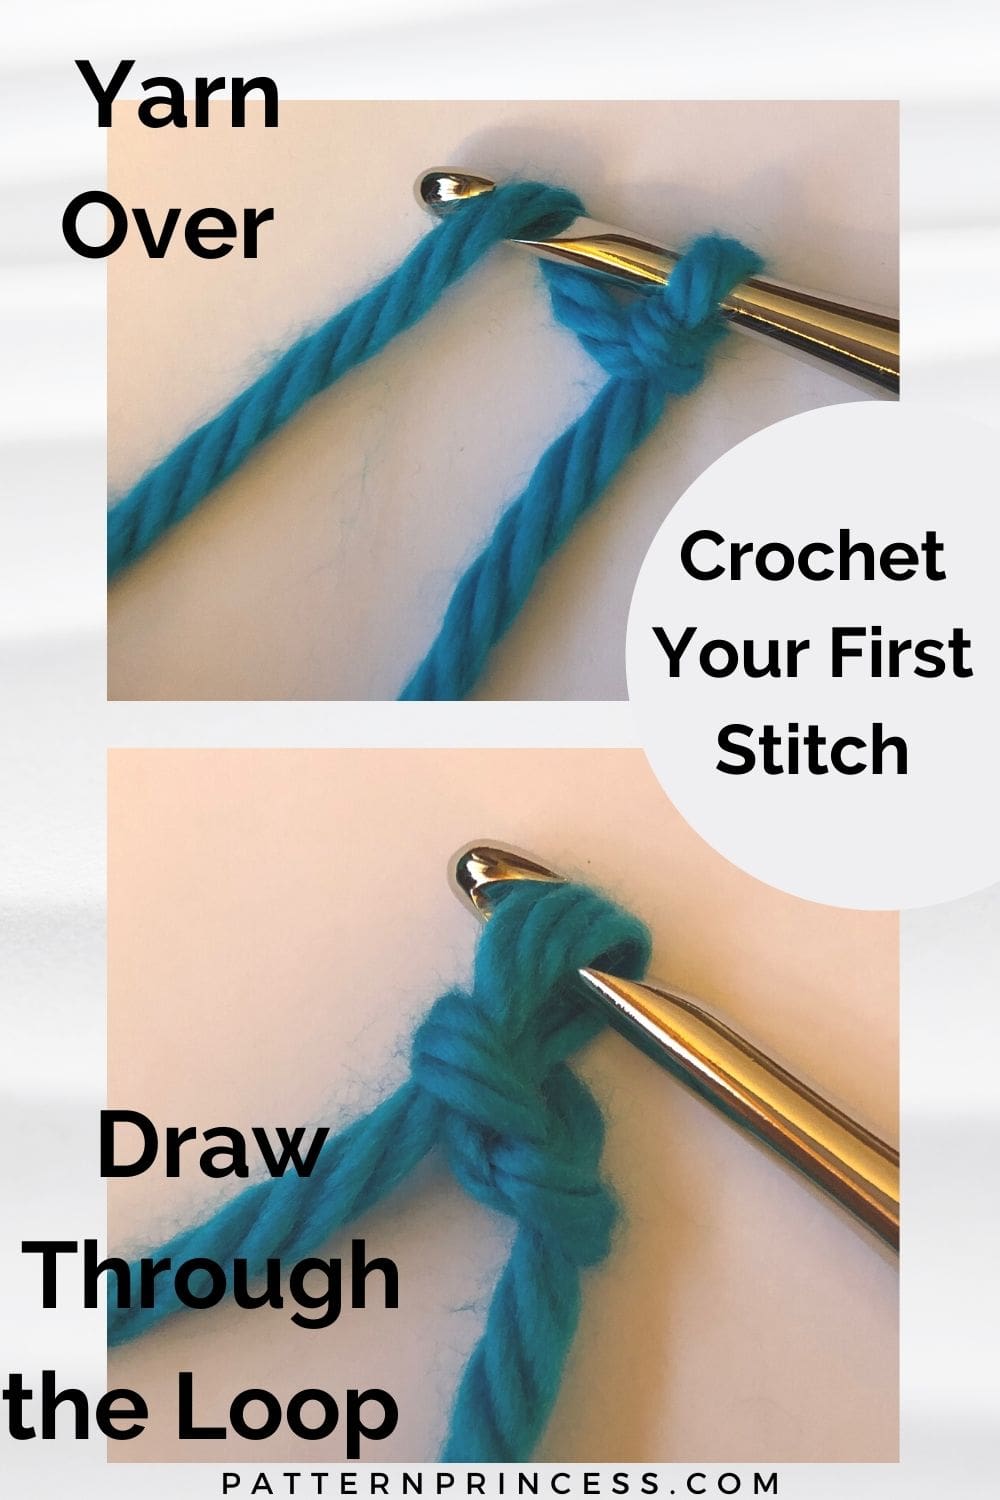
Crocheting Your First Stitch
Now that the slip stitch is on the crochet hook and you know how to hold the yarn, it is time to work that first stitch.
There are different ways of holding the crochet hook. Find the way that feels the most comfortable for you. Grip the hook tight enough so it does not slip out of your hand, yet loose enough to move easily. You will be rotating the hook as you use the hook work with the yarn making the chain stitches.
Yarn Over the Crochet Hook
Yarn over is the process of wrapping the yarn over the hook from the back to the front. This is the traditional way to yarn over.
Note. There are various crochet patterns and stitches that will have you yarn over from the front to the back for a different texture.
Draw Through the Loop on the Crochet Hook
Next, rotate the crochet hook counterclockwise about a quarter of a turn to help hold the yarn on the hook at you pull the yarn through the loop that is on the hook.
The first chain stitch is complete!
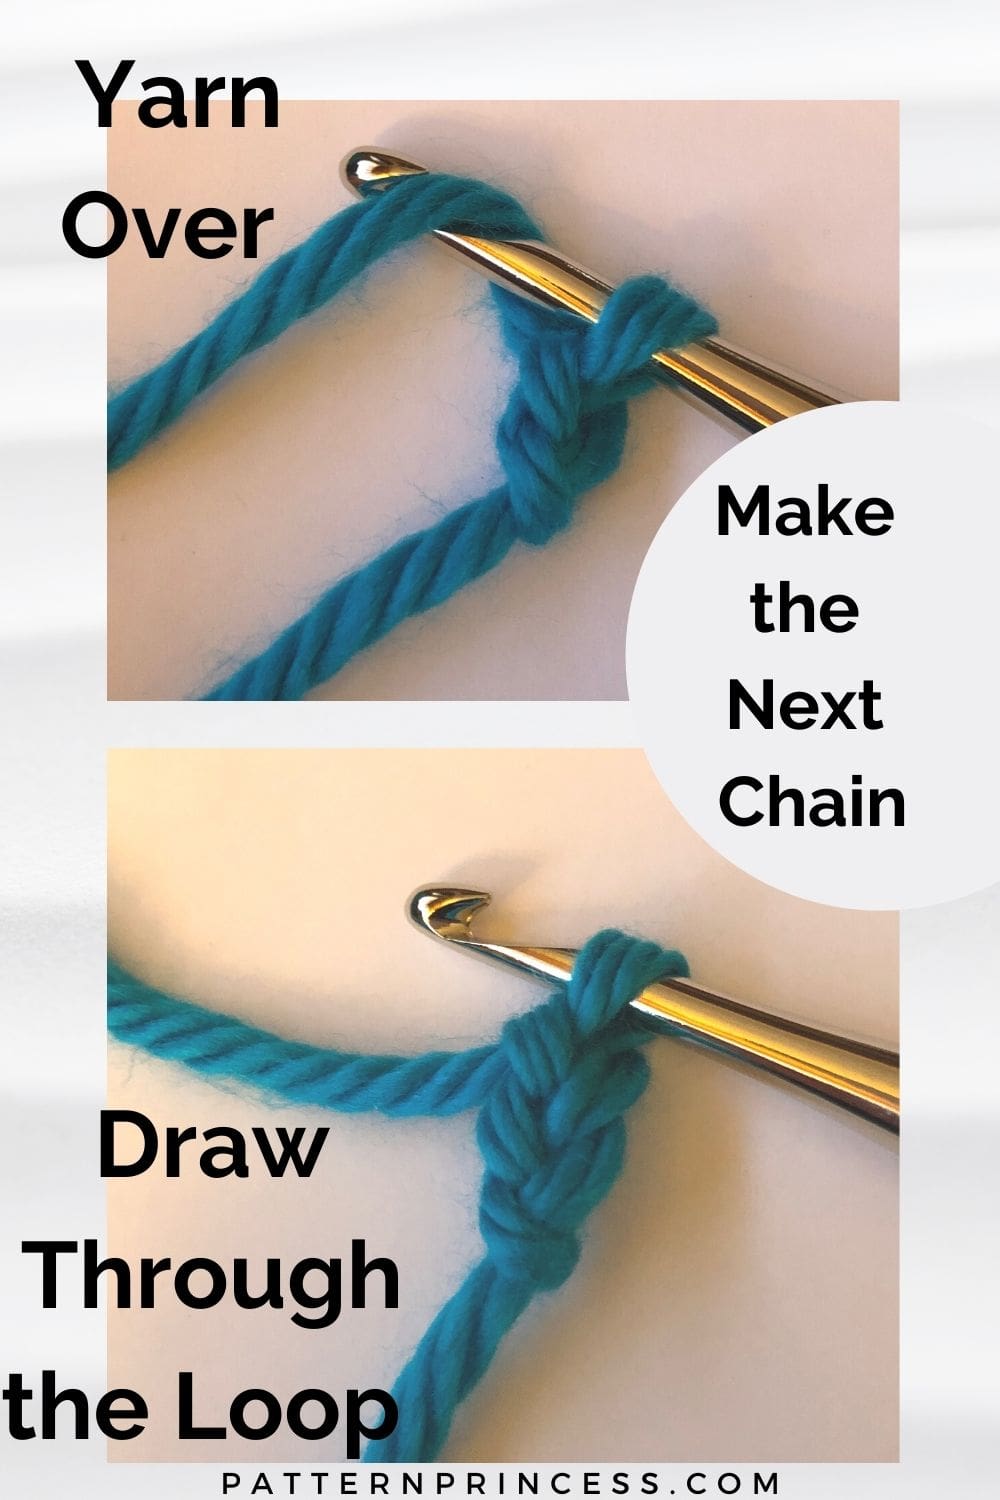
Making the Next Stitch
Now work your second chain stitch.
Return the hook to the original upward facing position. Yarn over from the back to the front. Draw the yarn through the look on the hook. Your second chain stitch is now complete.
Continue repeating this process and making crochet chains as long as needed.
Pro Tip. Continue taking yarn out of the skein, adjusting the yarn in your hand for good tension as needed, and grasping the yarn close to the hook for good control.
With practice, you will develop a rhythm to your crocheting. Try and maintain even tension for good even stitches. Pro Tip. Be careful not to pull stitches too tightly or leave them too loose. The loops should stay relatively the same size as they were when the crochet hook is pulled through the loop.
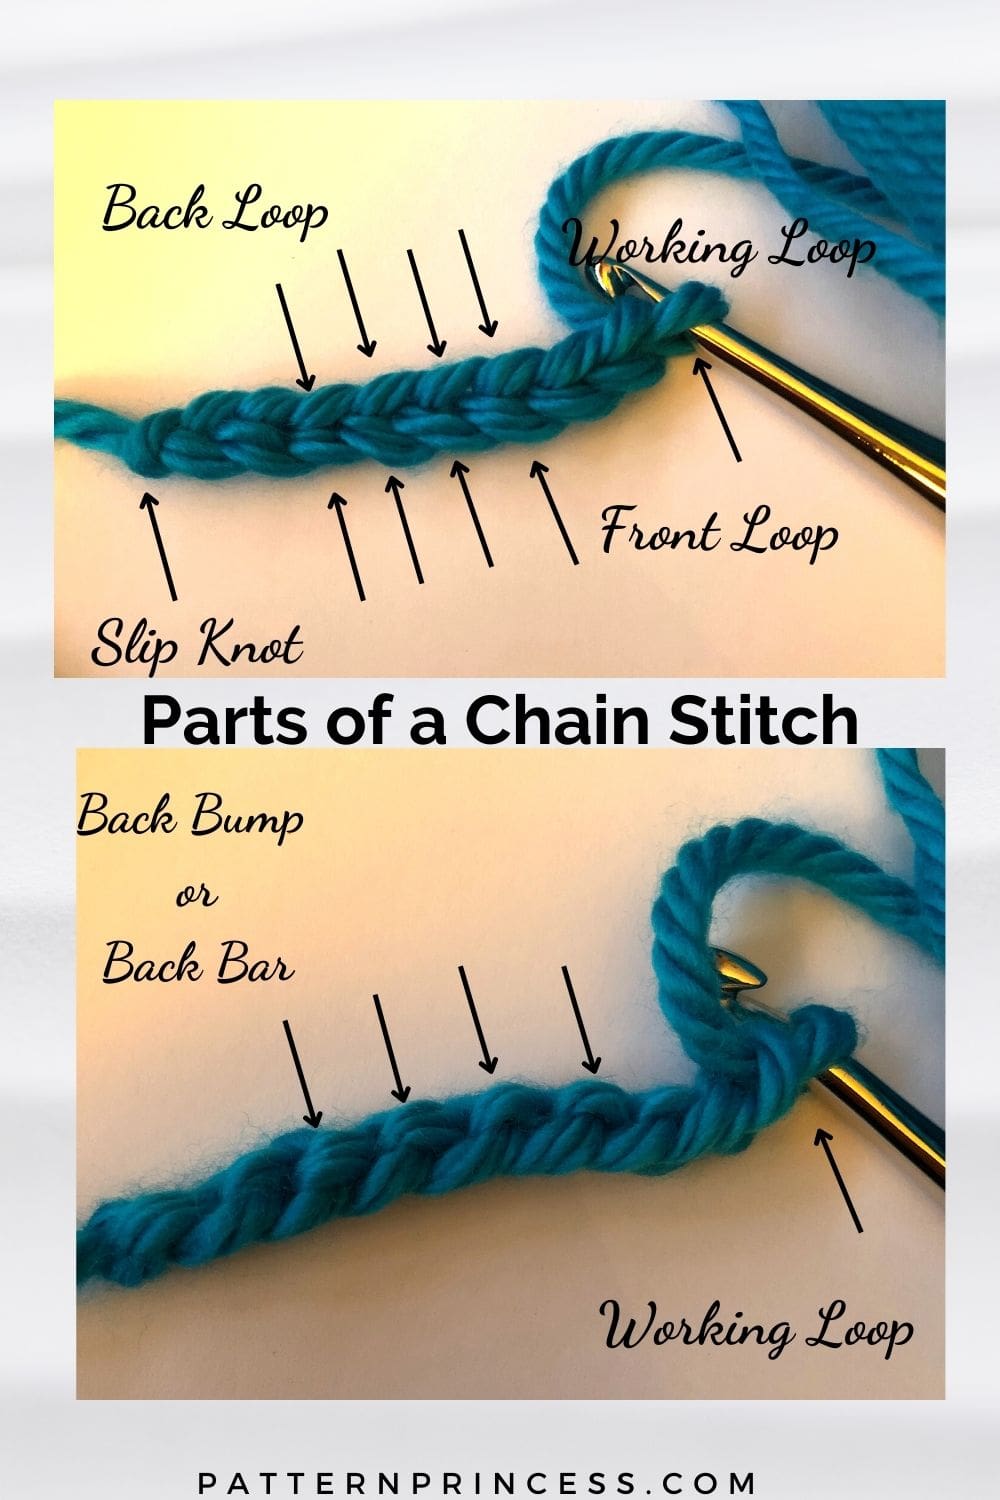
Parts of a Chain Stitch
The illustration shows the back loop, front loop, back bump or sometimes called the back bar, working loop, and slip knot.
Starting a New Row
The chain stitch if often used as a turning chain when starting a new row. Depending on the pattern you are following, it may or may not count as a stitch.
If the row uses taller stitches, the beginning chain for the row can be more than one. For instance, if crocheting double crochet stitches, the beginning chain is generally 2. If crocheting treble crochet stitches, the beginning chain is 3.
Make sure to read the crochet pattern carefully to determine the correct number of chains for starting out and each subsequent row.
Video Tutorial on How to Crochet the Chain Stitch
Right hand video tutorial

You can find Victoria crocheting, quilting, and creating recipes. She has cooked in restaurants for over 20 years, including many larger parties. She learned to crochet when she was just 11 years old and has been crocheting ever since; over 50 years now. Over 40 years ago, she loved her first class in sewing and continues to hone her skills in quilting. Many have enjoyed the handmade gifts over the years. In her professional career, she has worked in management in a wide variety of businesses including higher education as a dean of a division. All the while attending college part-time to achieve her doctorate in higher education with an emphasis in e-learning.