Last updated on July 5th, 2024 at 12:45 am
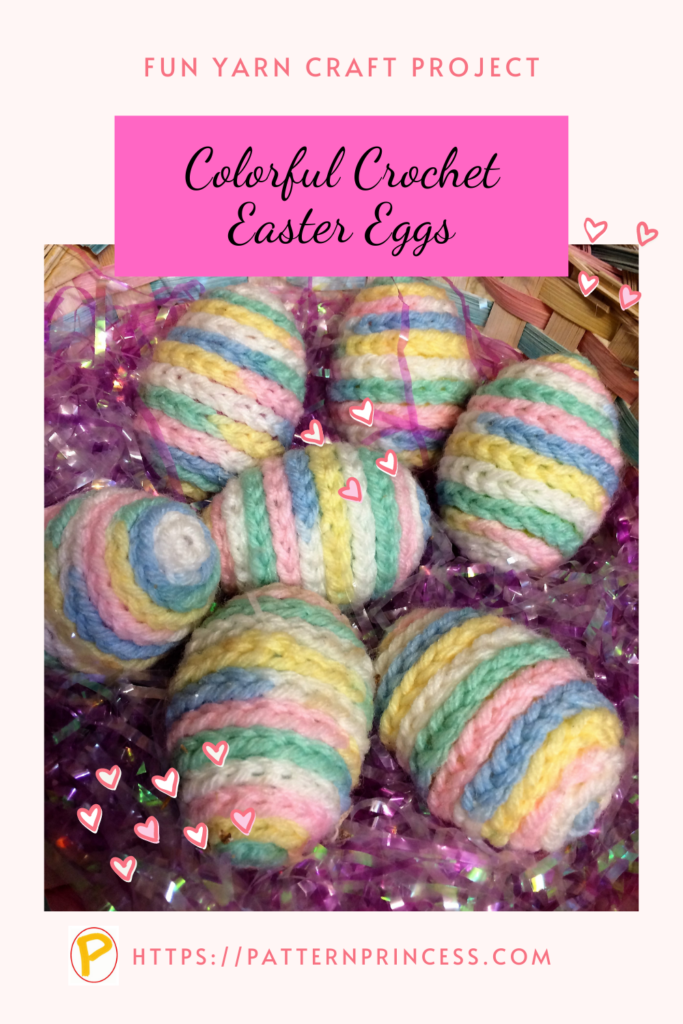
These colorful Crochet Easter Eggs are a great DIY project to make by yourself or with your children. This is a great project for a person just starting out crocheting. Getting ready for Easter has never been easier or more fun with this crochet craft.
Crocheting your own Easter egg is the perfect way to add a unique twist to your holiday decorations. With just some simple supplies, you can crochet an array of different colorful eggs that will stand out in your home or make great one-of-a kind gifts.
*Post contains affiliate links*at no additional cost to you for more information please read the disclaimer on the About Us page.
Simple Beginner Crochet Pattern
This DIY Crochet Easter Egg craft project is perfect for beginners and experienced crocheters alike. This stitch pattern yields an cute embellishment that looks beautiful any way you display your eggs.
The Easter holiday is just around the corner and it’s time to get crafting.
I made my first crochet egg when I was about ten years old. Once you make them you can reuse them year after year. They look so pretty on display.
Crochet Craft Project
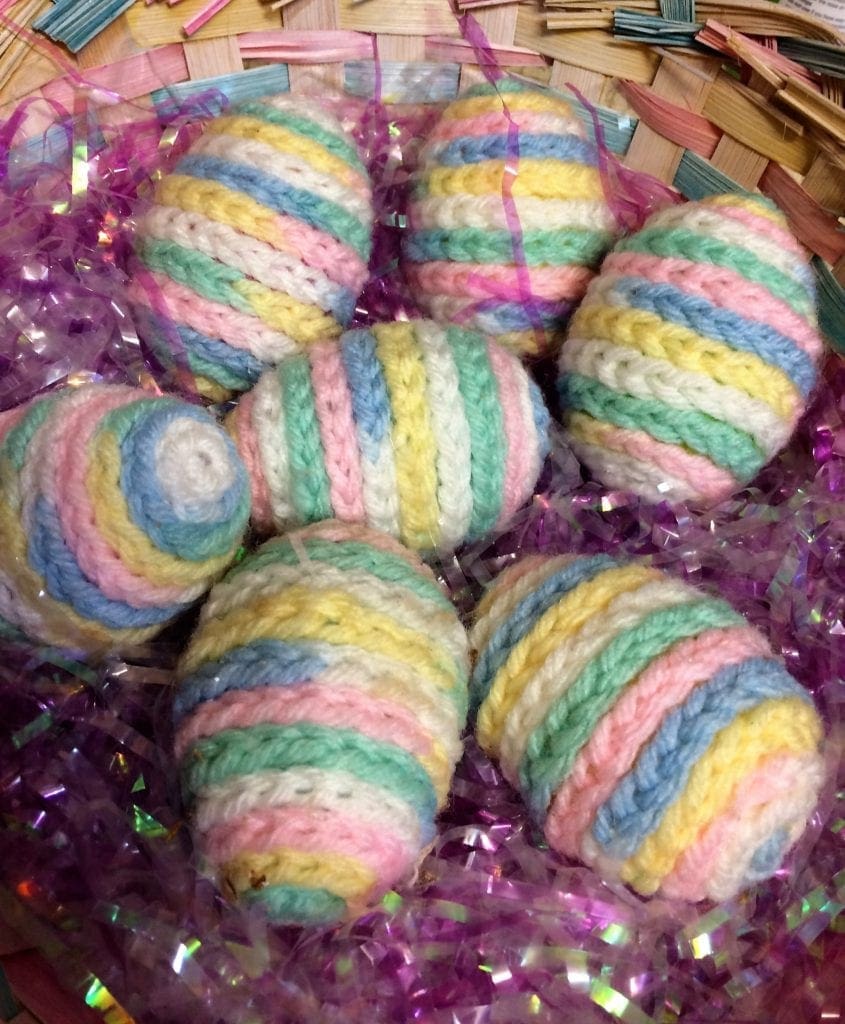
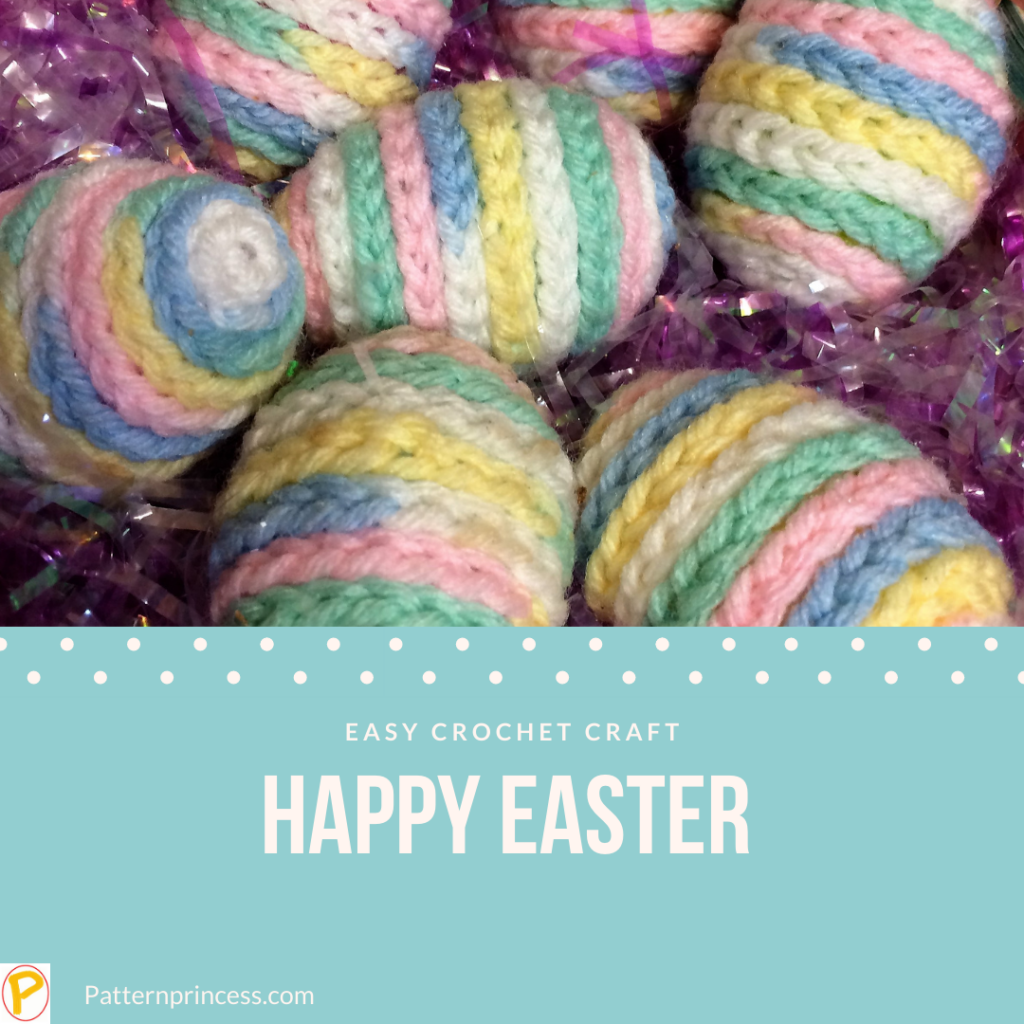
This egg below I used some pastel yarn. However, ou can use any color that you wish. Great for a yarn stash buster project. If you can chain stitch and use a hot glue gun, you can do this craft project. Make your own Easter Egg and use them for years.

Crochet Egg DIY Project
Here are the general directions to completing this reusable egg.
The reason I say general is because you might have a different size egg, your yarn might be thicker or thinner and that will make a difference in how many chains you need to do. Either way, you will get the hang of it.
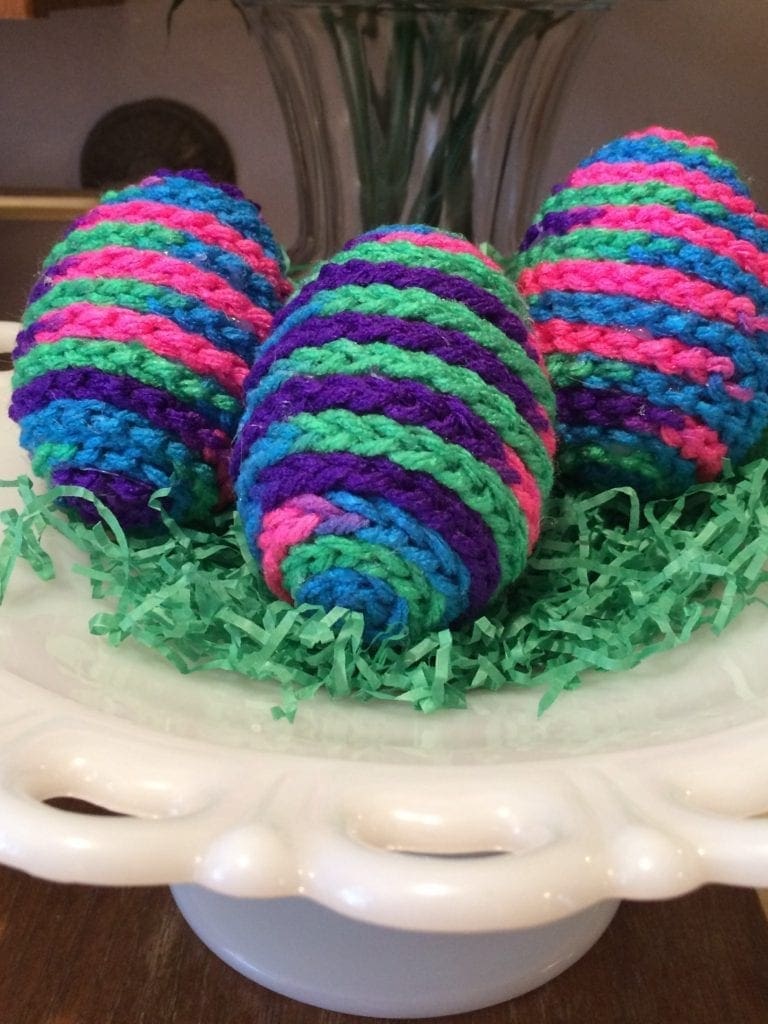
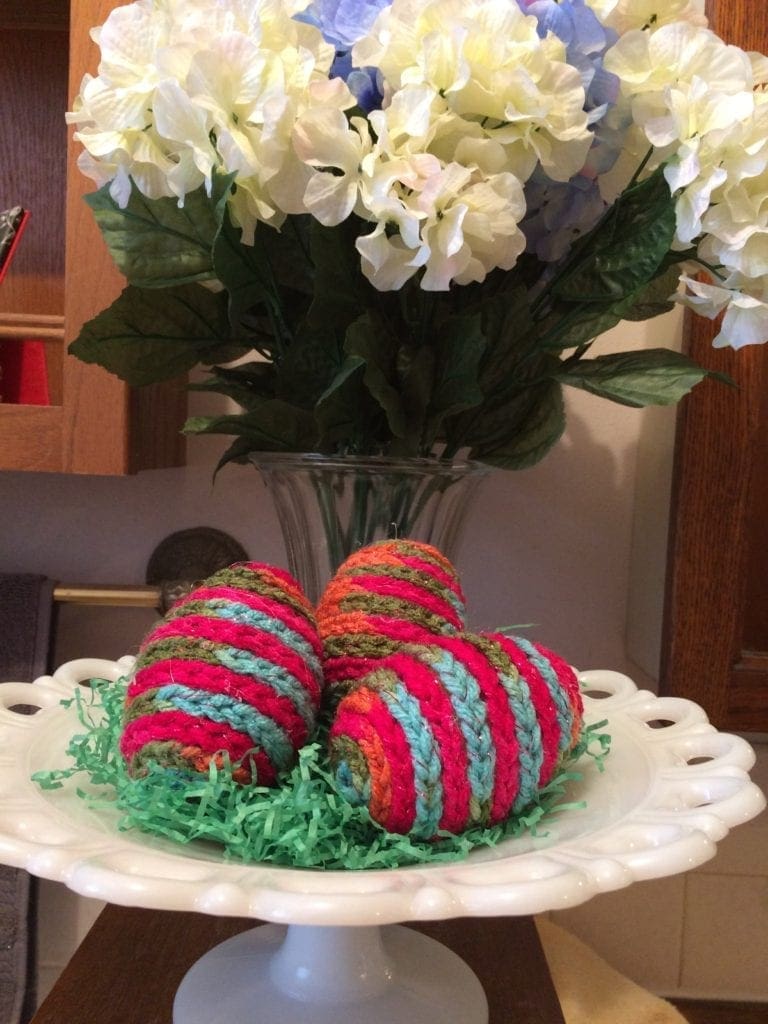
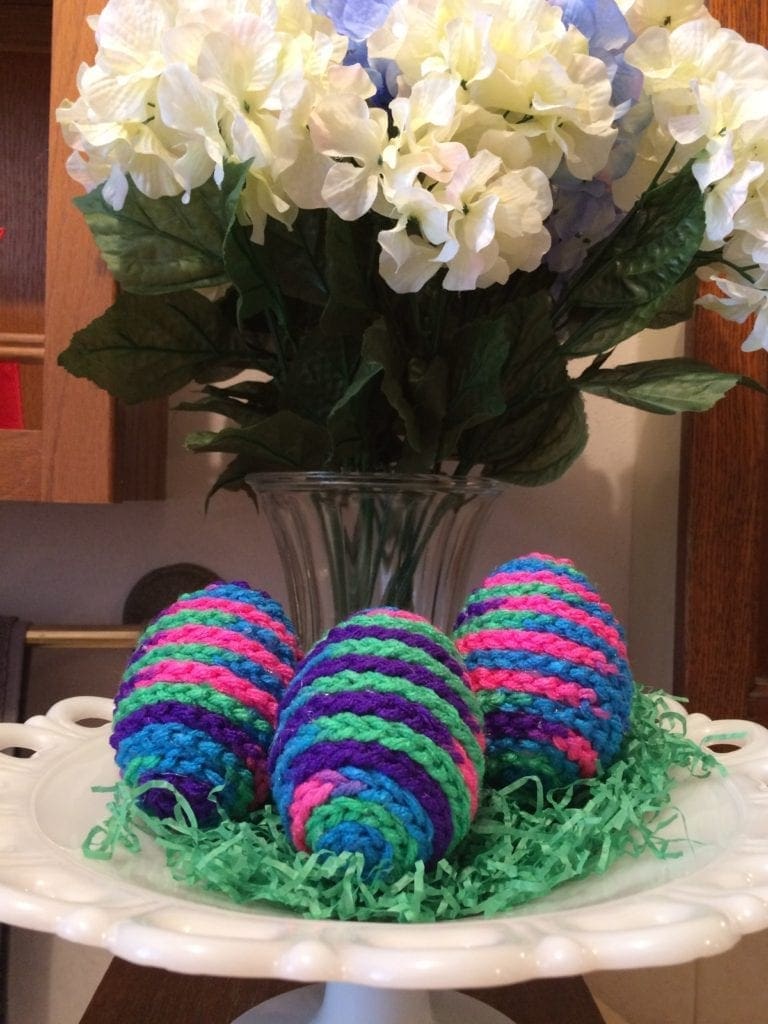
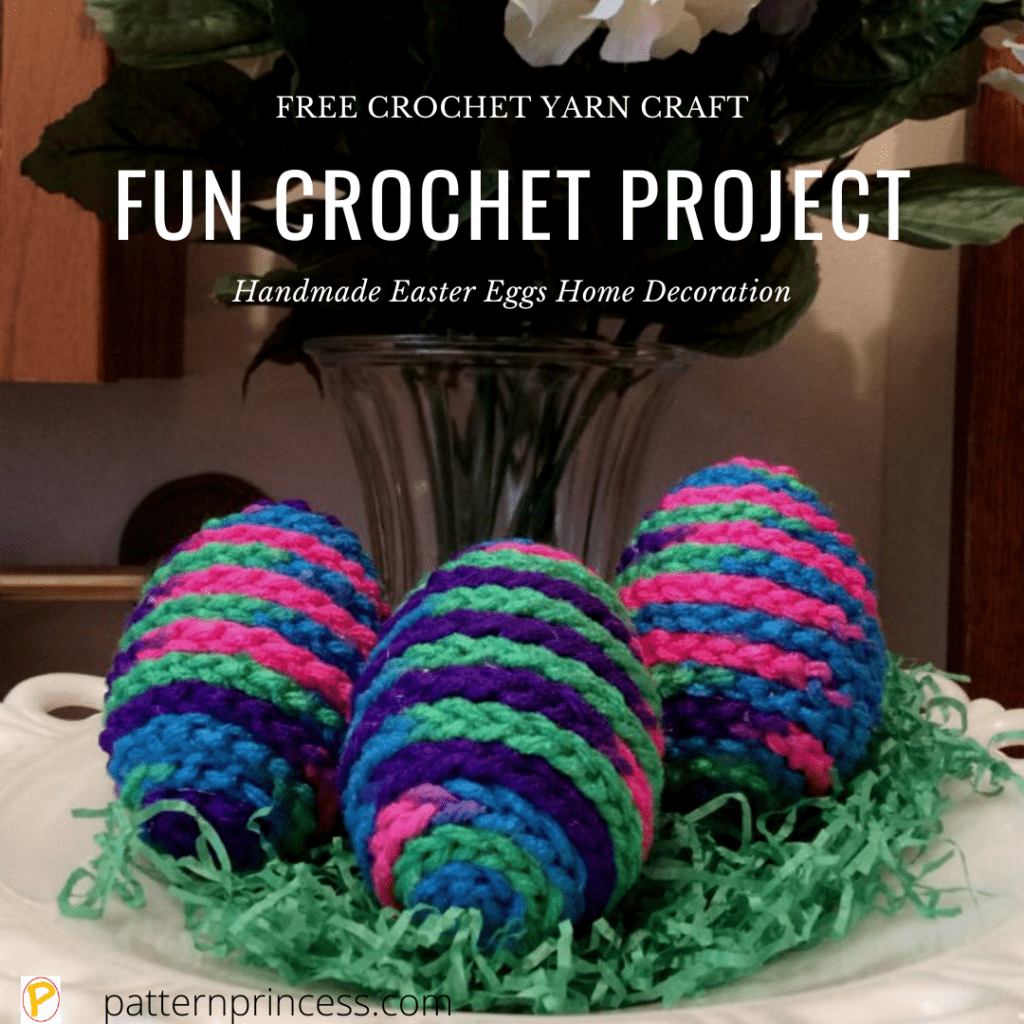
I made this craft project out of two different types of Red Heart yarn. They both turned out pretty. I have pictures of the final project later on in this post.
Craft Supplies Needed for Project
Here are the supplies that I used, yarn, plastic egg, scissors, glue stick, and hot glue gun. That is it. Very inexpensive decoration to make for your house.
Materials
- Yarn-any color. 1/2 skein can make over a dozen eggs.
- Plastic Eggs
- Scissors
- Glue Gun
- Glue Sticks
- Size J Crochet Hook
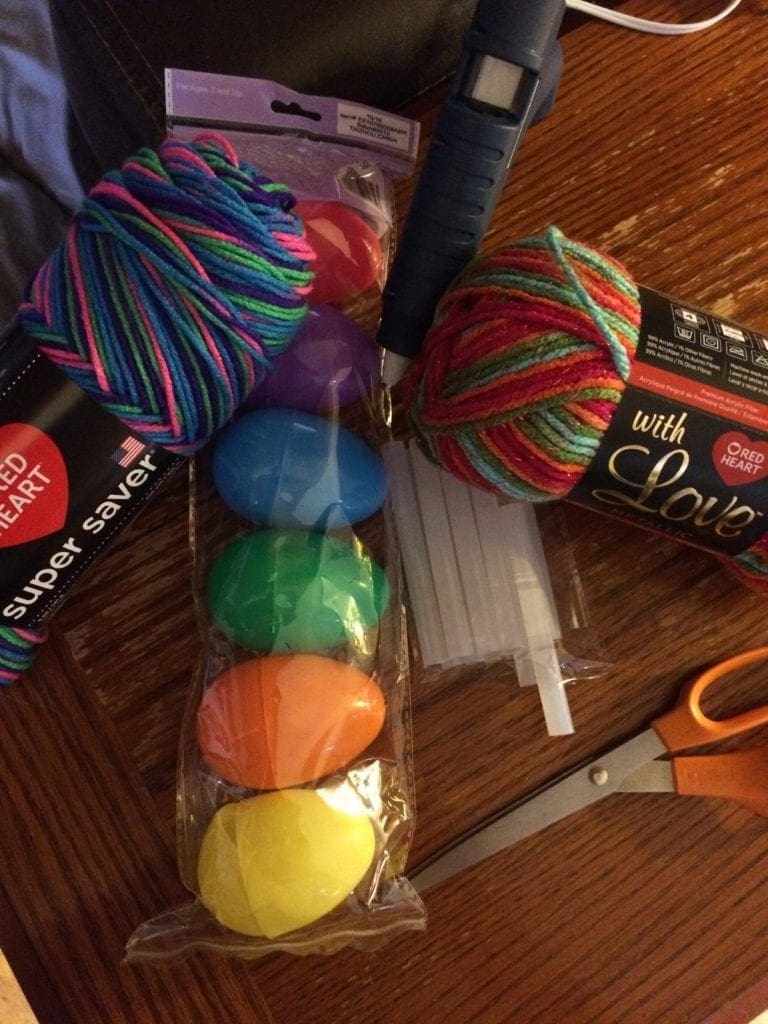
You can see the few simple items needed.
If you are not able to find the plastic eggs locally, you can find them here.
I used the following two colors to make my eggs today.
Yarn Used Today
RED HEART Super Saver Yarn, Bright Mix
Red Heart With Love Metallic Yarn, Fruity
The Bright Mix is the blue, pink, purple, and green and is a bit more springy looking. The Fruity Print has sparkles throughout and that works too. Really, any color that works with your taste will work on this project.
Length of Chain
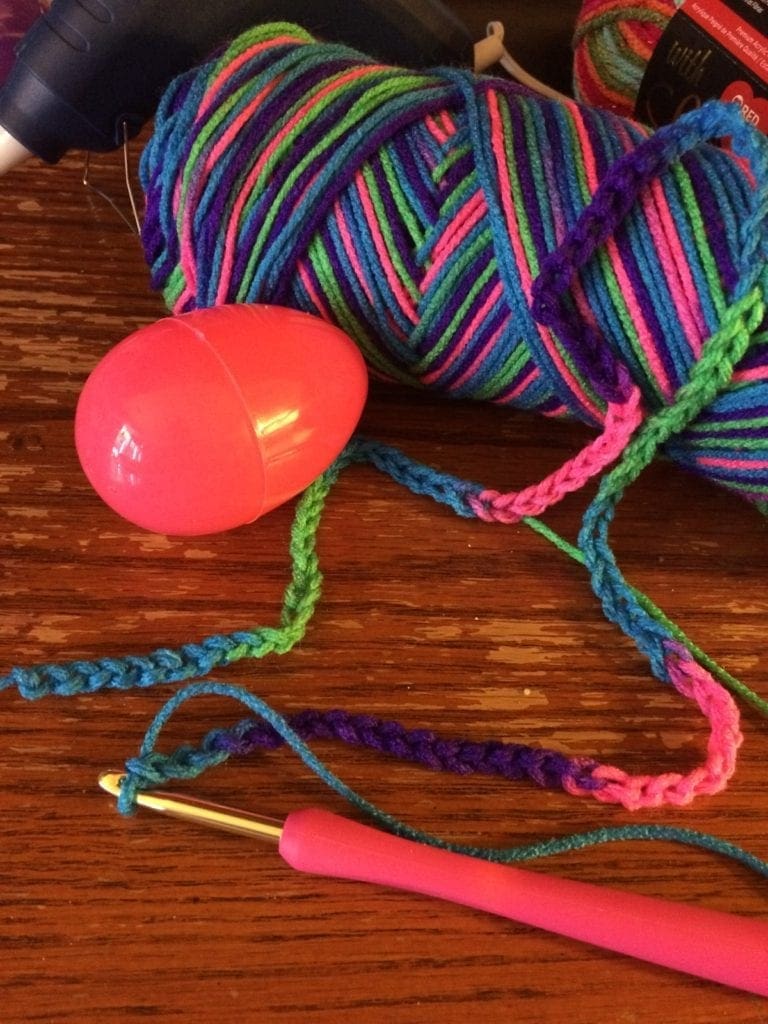
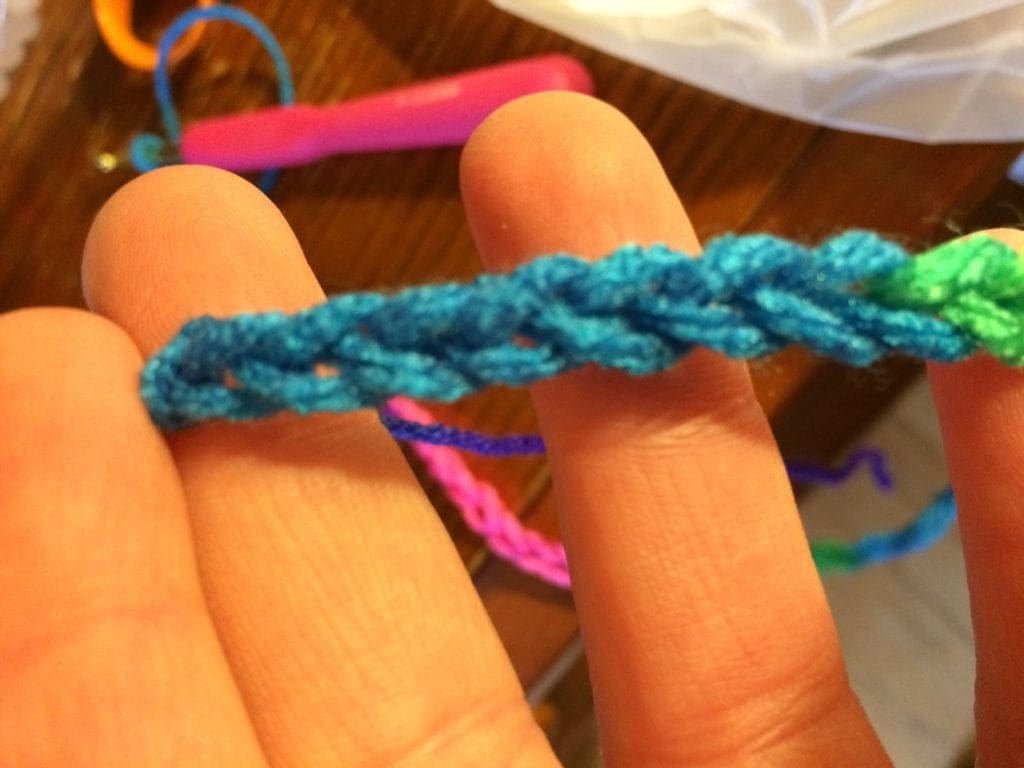
Start by making a chain.
I started with 290 chains.
Note: Depending on the thickness of your yarn and the size of the crochet hook used, you might need more or less.
However, this is easy to adjust as needed. Pull out chain stitches if you need less. If you need more, add a few more as you go along. Don’t cut off the yarn until you have finished gluing it to the plastic egg.
But do cut off the tail from the start of the chain.
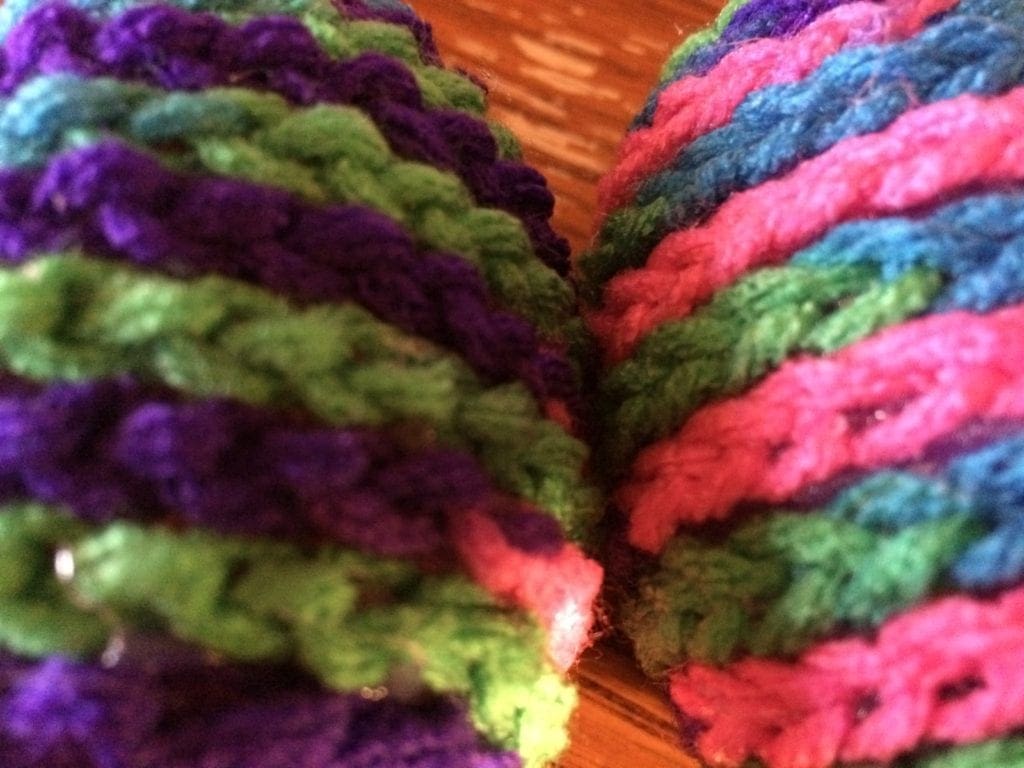
Flat Side or Raised Side of Chain
Once the chain is made, decide on the look you want.
Once side of the chain will be more flat, while the back has a raised bump along the center.
The one on the left shows the raised back side of the crochet chain and the one on the right shows the slat side. I will show an example of both on the finished egg to help you make your decision.
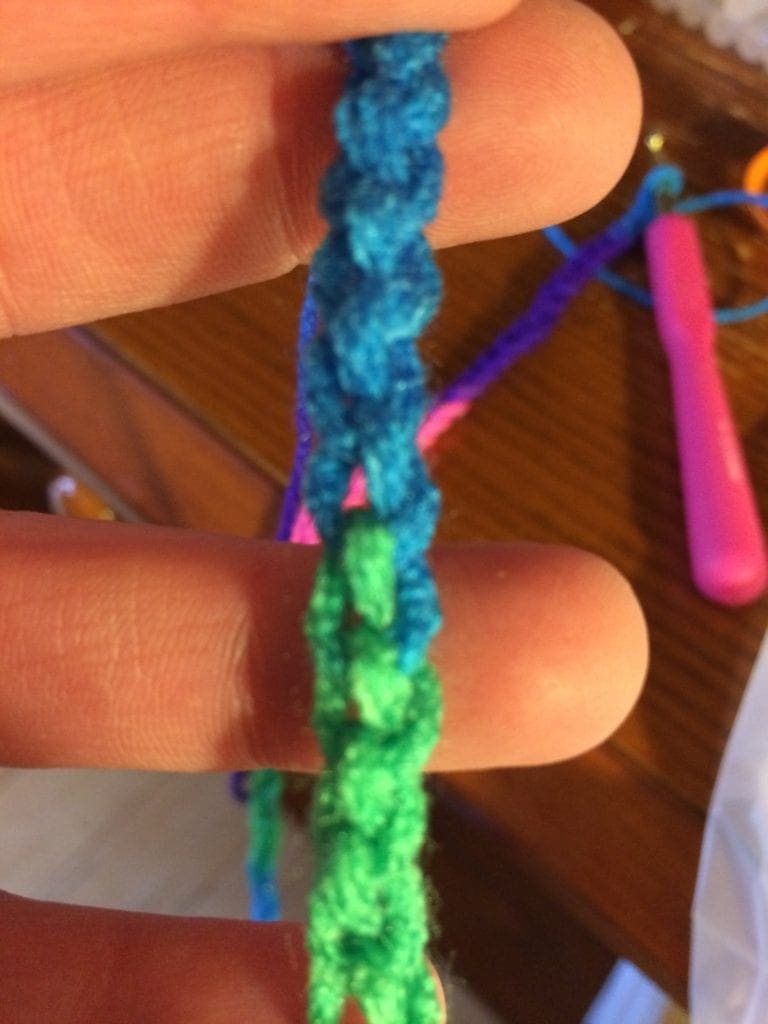
Depending on the look you desire for the finished product, choose either way to glue down to the plastic egg. If you look closely at the picture below, you may notice the raised on the left and the flat side on the right.
Time to Hot Glue
This makes it so easy to attach your crochet chain around the plastic egg.
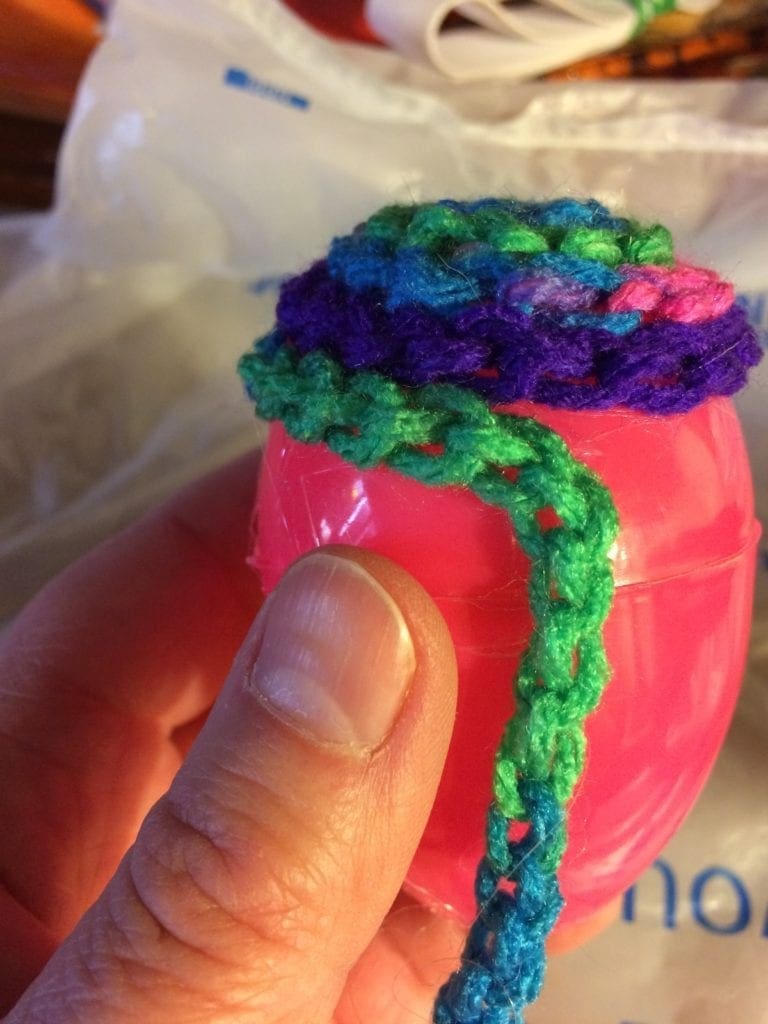
Coiling the Chain Around the Plastic Egg
Once you have your chain, you are ready to start hot gluing onto your egg.
I like to start at the fatter bottom side and end at the smaller top of the egg. I think you could start at either end. That is just my preference.
Put about a small amount of hot glue on the end and make a very small coil of the crochet chain on the end. Tip. Make sure that you have cut the tail off the begging end where you worked your first chain stitches. You can leave a tiny bit of the tail on though as you can hot glue it down and it will help cover the end.
Continue putting a line of hot glue and winding the crochet chain around the egg until you reach the other end.
On the end, just as you did when you started, coil around the chain and hot glue in place and snip off any excess tail. Making sure to put a dab of hot glue on any part of the tail to adhere to the egg as needed.
That’s it. Just let your crochet egg cool and dry a few minutes and you are ready to use for a pretty home decorative touch.
See the Pastel Easter Egg Details Here
Display Ideas for you Colorful Crochet Easter Eggs
If you loved this post, share on your fave social media links. It helps to show me that these types of posts are helpful – thank you!
Other ideas you might be interested in.

You can find Victoria crocheting, quilting, and creating recipes. She has cooked in restaurants for over 20 years, including many larger parties. She learned to crochet when she was just 11 years old and has been crocheting ever since; over 50 years now. Over 40 years ago, she loved her first class in sewing and continues to hone her skills in quilting. Many have enjoyed the handmade gifts over the years. In her professional career, she has worked in management in a wide variety of businesses including higher education as a dean of a division. All the while attending college part-time to achieve her doctorate in higher education with an emphasis in e-learning.
Pingback: Free Easter Crochet Patterns Round Up - Carroway Crochet Easter Crochet Patterns. Eight Free Easter Crochet Patterns gathered together in this great free pattern round up. % %
What a wonderful collection of Easter Crochet Patterns. Thanks for sharing the link with me and the readers.
Hi, I was wondering if when you are glueing the yarn to the egg, if it could be glued in such a way that it would still be able to open?
Thanks for any help you can provide.
Sincerely,
Linda
Thanks for asking. I had not thought of that. I think maybe it could. If I wanted to split the egg yet, I think I would actually take the egg apart and start gluing the yarn from the center out to the end on each one. So, it would be like covering the two halves of the egg separately. After the glue is dried, the halves could be put back together.