This Easy Jumbo Yarn Crochet Lounger with Rolled Pillow is designed with comfort and durability in mind. Looking for a soft, cozy place for your little ones to lounge, play, or nap? This floor lounger pattern uses super chunky jumbo yarn, and a simple one-row repeat to create a squishy, knit-look texture that’s both beautiful and functional.
Perfect for Kids and Adults
Whether you’re outfitting a hardwood floor or creating a soft space in a playroom, this lounger is a fun and practical crochet project for all skill levels. Whether you’re crocheting for a child, teen, or adult, this lounger is big enough to grow with them. The chunky texture works up quickly and adds a cozy, modern touch to any space.
If you’re looking for a relaxing project that’s equal parts practical and adorable, this crochet floor lounger is sure to become a favorite in your home too.

Chunky Pillow Bed Crochet Pattern Inspiration
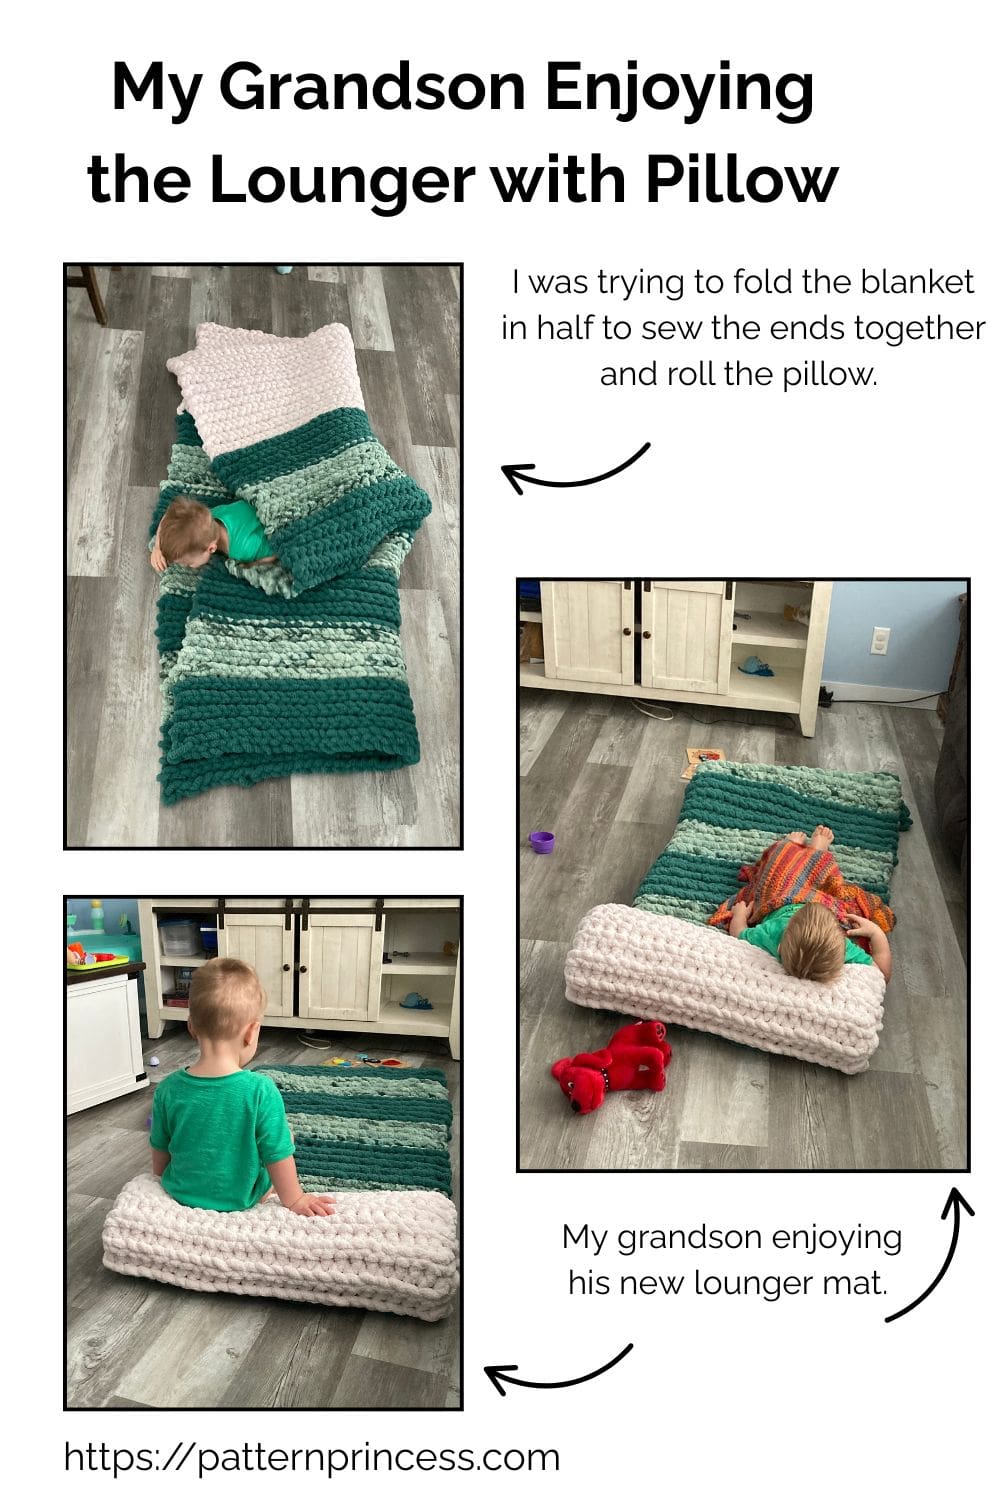
This lounger was inspired by a special request from my daughter, who wanted something plush and soft for her toddler to relax on.
Instead of sewing multiple pillows together, I designed a thick, double-layered crochet mat using the back loop slip stitch for that delightful, ridged texture.
Once the mat was finished, I rolled up one end and stitched it in place to form a built-in pillow. Perfect for lounging and watching TV or reading.
Thanks to the jumbo yarn, it works up surprisingly fast. A comfy spot for floor time, this crochet lounger is sure to be a hit. Your little ones (and maybe even you!) won’t want to get up.
Make this in a Solid Color or Striped
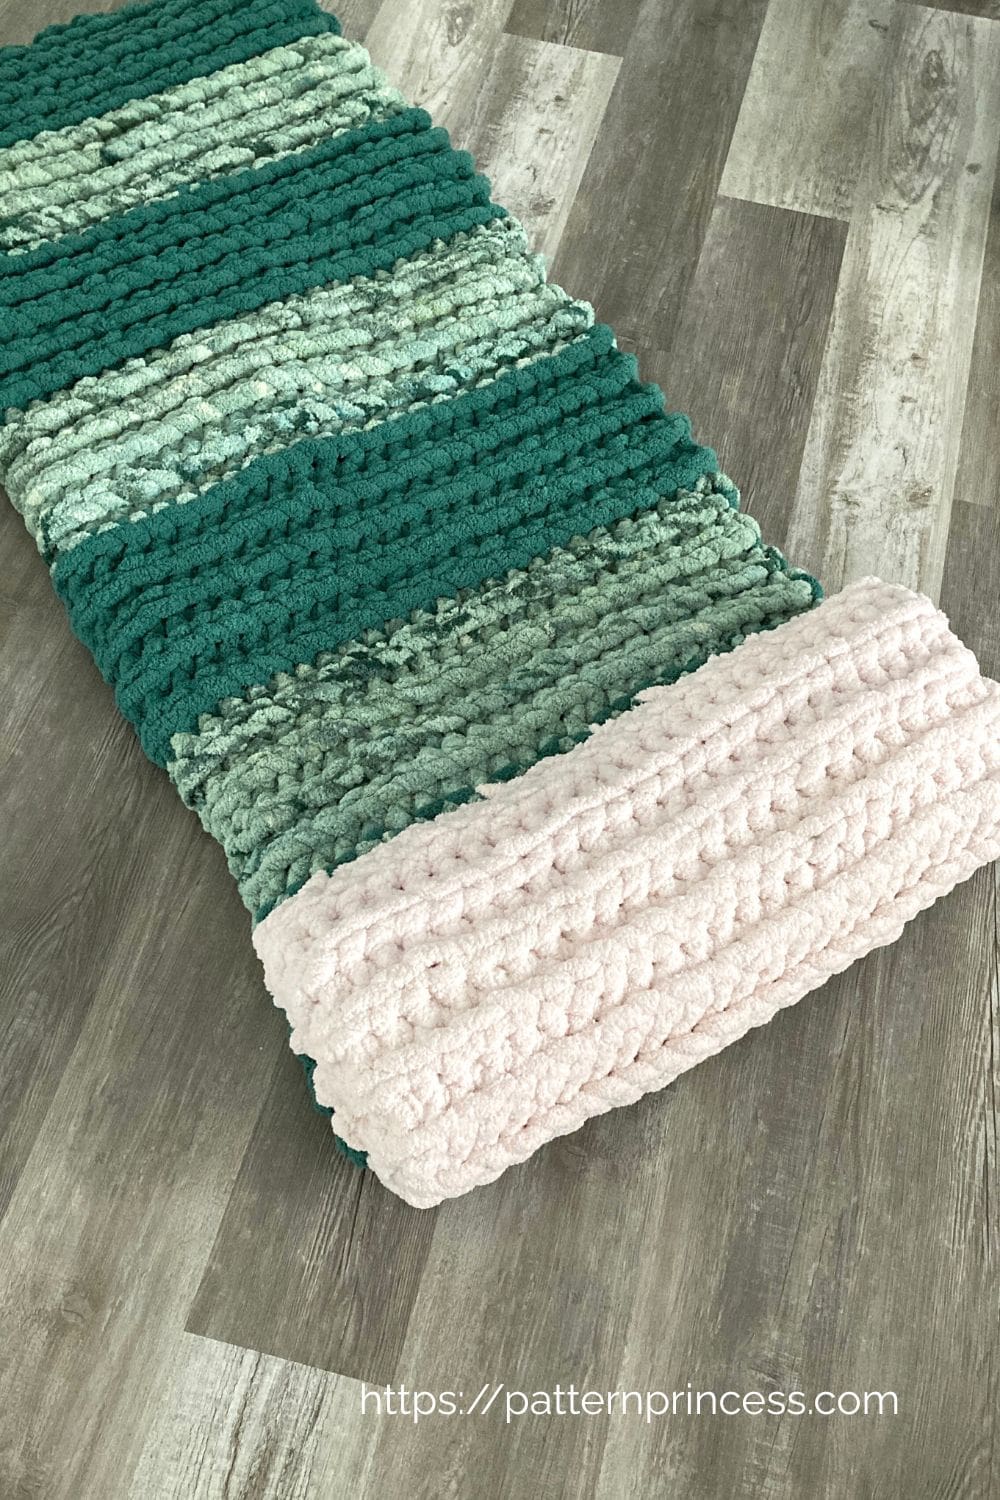
Today, I’ve chosen to showcase this pattern in a refreshing striped design using two shades of green yarn. I used white for the pillow area. When choosing colors for your lounger, you have endless possibilities.
If you prefer a solid neutral tone, such as cream, gray, taupe, or soft beige, your blanket will have a timeless and sophisticated look that fits seamlessly into any home décor. Neutral shades highlight the beautiful knit-look ridges created by the back loop slip stitch, making the texture the star of the show. Plus, a single-color design makes this blanket a versatile piece. Perfect for cozying up in the living room.
On the other hand, opting for a vibrant color or even bold stripes can turn your blanket into a statement piece. Bright shades like mustard yellow, deep teal, or a rich burgundy add personality and warmth, while playful color combinations can make the design pop.
Complete a Chunky Lounger with Rolled Pillow in a Weekend
It’s a modern and easy crochet pattern that’s quick to work up. Use Jumbo weight yarn and this beginner-friendly pattern and you’ll have a beautiful blanket in just one weekend.
Directions: Easy Jumbo Yarn Crochet Lounger with Rolled Pillow Pattern
Skill Level
Easy, Confident Beginner-Friendly
Size
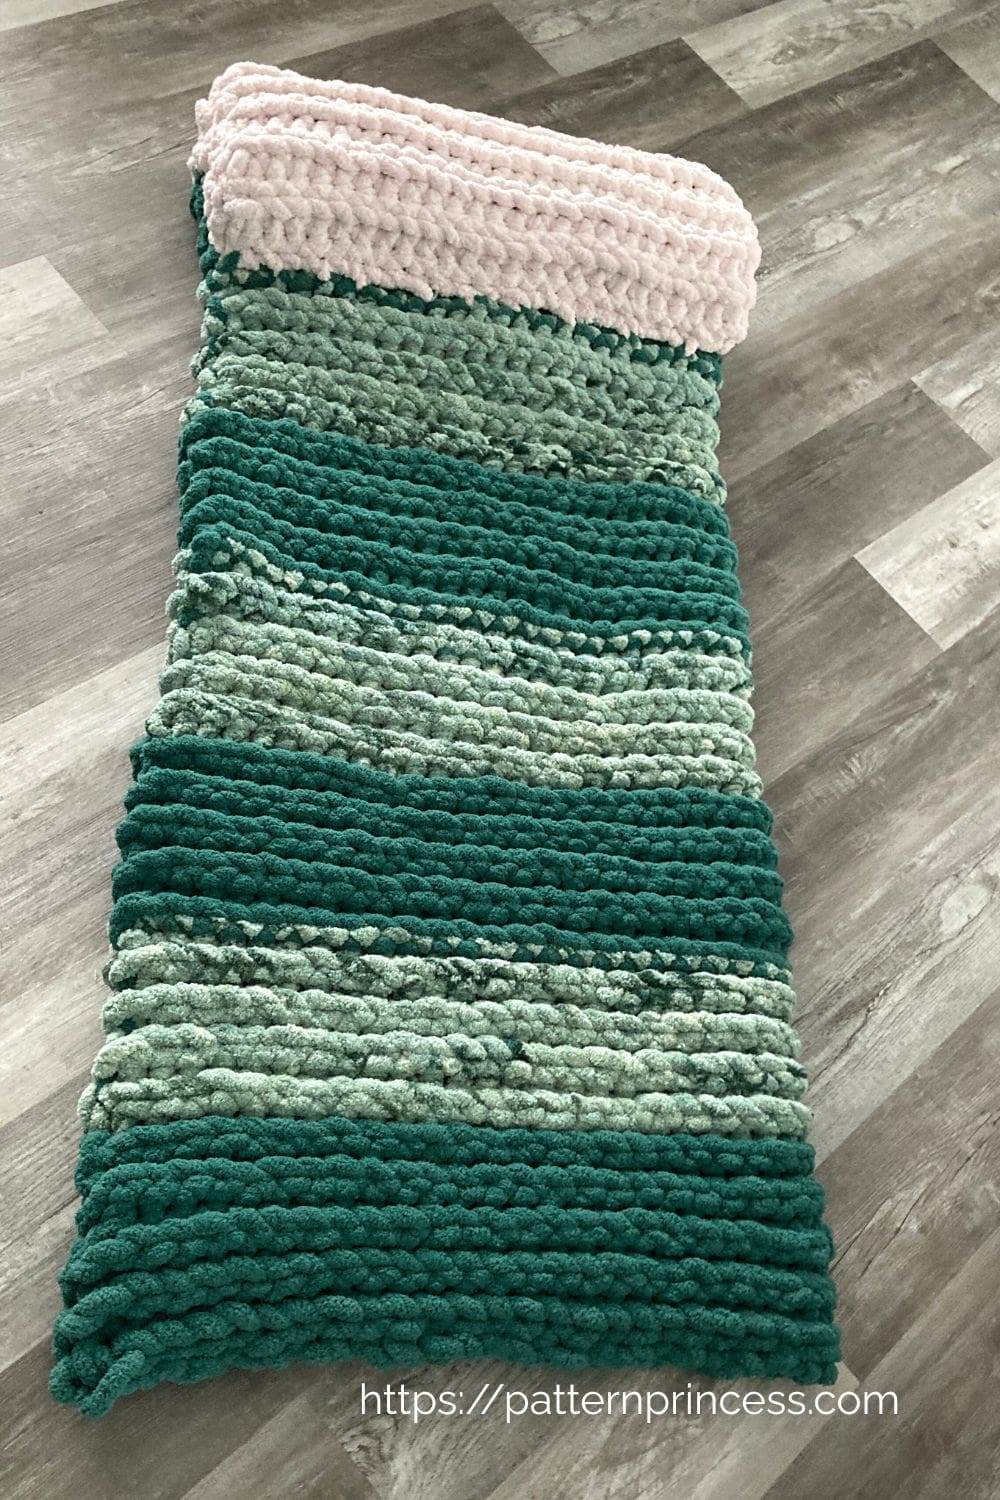
57 X 82 inches unfolded.
About 28 ½ wide X 82 inches long folded. Once the pillow is rolled, and sewn down, the length is about 60 inches long.
Gauge
4.75 stitches and 3.75 rows every 4 inches.
Make sure to check your gauge to see if your results are the exact size of mine. Because yours may be slightly different, which will change the blanket size.
Materials
Any Jumbo Weight Yarn #7. I used Bernat Blanket Big. 1 Ball is 300g/32 yards of yarn. I used two colors for the blanket. Malachite and Forest Splash. For the pillow portion, I used Sandy Cream.
For the Chunky Blanket. 14 Balls of yarn, 448 yards. I used 8 in the Malachite color and 6 in the Forest Splash color.
For the Pillow. 5 Balls of yarn, 160 yards.
Total skeins and yards. 19 skeins and608 yards.
If you are not able to find the yarn locally, you can order it online. Check out our links for Bernat yarn from Yarnspirations in our Savings Center.
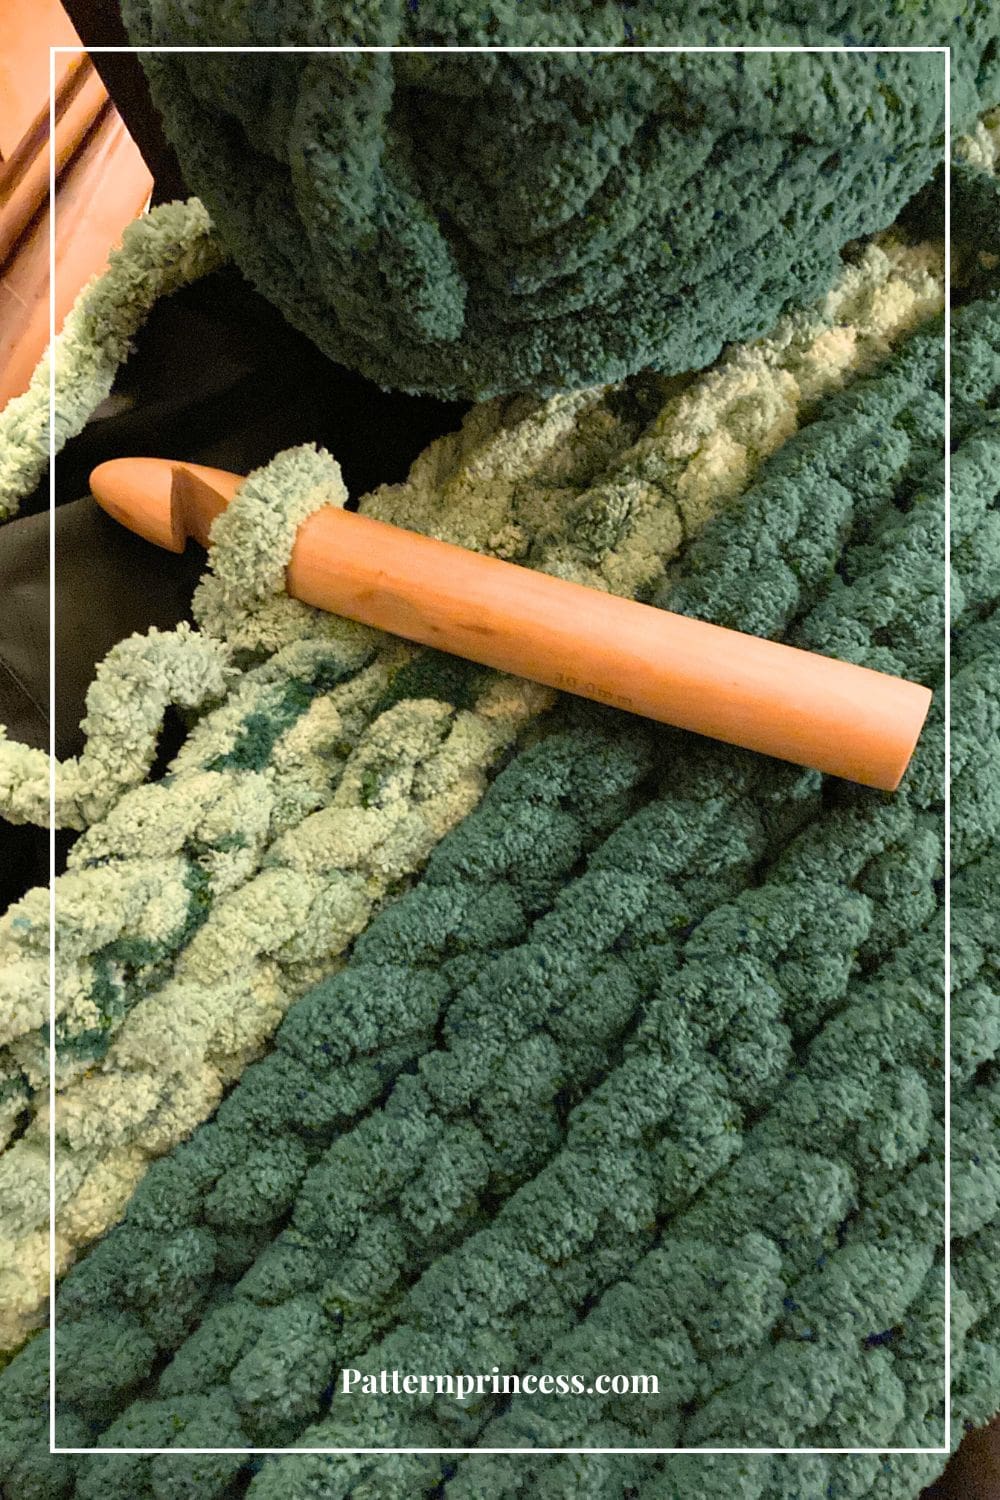
Crochet Hook US T/30mm
If you don’t have a hook that big, you can use a crochet hook US 50/25mm. However, it will change the gauge slightly.
Scissors
Tape Measure
Lighter to melt the ends of the acrylic yarn for joining new skeins and the ends of the yarn after weaving.
Abbreviations
- CH = Chain
- SL ST BLO = Slip Stitch Back Loop
- ST = Stitch
- STs = Stitches
Crochet Stitches
Slip Stitch in the Back Bump of the Chain Stitch
Insert the hook in the back bump of the chain stitch, pull loop back through the stitch and through loop on hook.
Slip Stitch Back Loop (SL ST BLO)
Insert the hook into back loop of stitch, yarn over, pull loop back through the stitch and through loop on hook.
Melting Ends (for synthetic yarn)
For synthetic yarns, such as acrylic or nylon, melting the ends can be an effective way to create a seamless join. This technique involves carefully melting the yarn ends with a flame, such as a lighter, to fuse them together.
I use this for super bulky yarn. I’ve found when trying to tie a knot or weave in super bulky yarn, the ends always pop out.
Melting the ends is a great way create a seamless join. This technique involves carefully melting the yarn ends with a flame, such as a lighter, to fuse them together.
- Hold the yarn ends in one hand with both ends pointing out. It is easier to light the yarn on fire this way.
- In the other hand use a lighter or a candle to light the ends of the yarn on fire.
- Put the lit ends of the yarn together and the flame will go out.
- Roll the joined yarn together between the palms of your hands a few times.
That’s it. You can keep crocheting with your chunky yarn.
Video for Joining Chunky yarn.
Pattern Notes
Written in US Terms.
Video Tutorial is located after the written pattern.
The first row I worked in the back bump. If you prefer, you can work the stitch in the top loop of the chain stitch.
Join new yarn at the end of the row.
When working with slip stitches, it is best to make loose stitches. It is easier to get your crochet hook into the stitch.
Crochet Pattern
Crocheting the Blanket/Lounger Portion
Change the yarn color every 9 rows. Starting with the Malachite and changing yarn color to the Forest Splash. Continue alternating colors every 9 rows.
Start by making a slip knot and adding the loop on the hook.
Chain 48
Row 1
In the 2nd CH from the hook work a SL ST into the back bump of the CH ST. Turn
Row 2
CH 1 (Does not could as a stitch). Work a back Loop Slip Stitch into the first stitch and each ST across. Turn
Row 3 through 63
Continue working the stitches for row 2.
Crocheting the Pillow Portion
Rows 64 through 87
Switch to the Sandy Cream yarn.
Continue working the stitches for row 2.
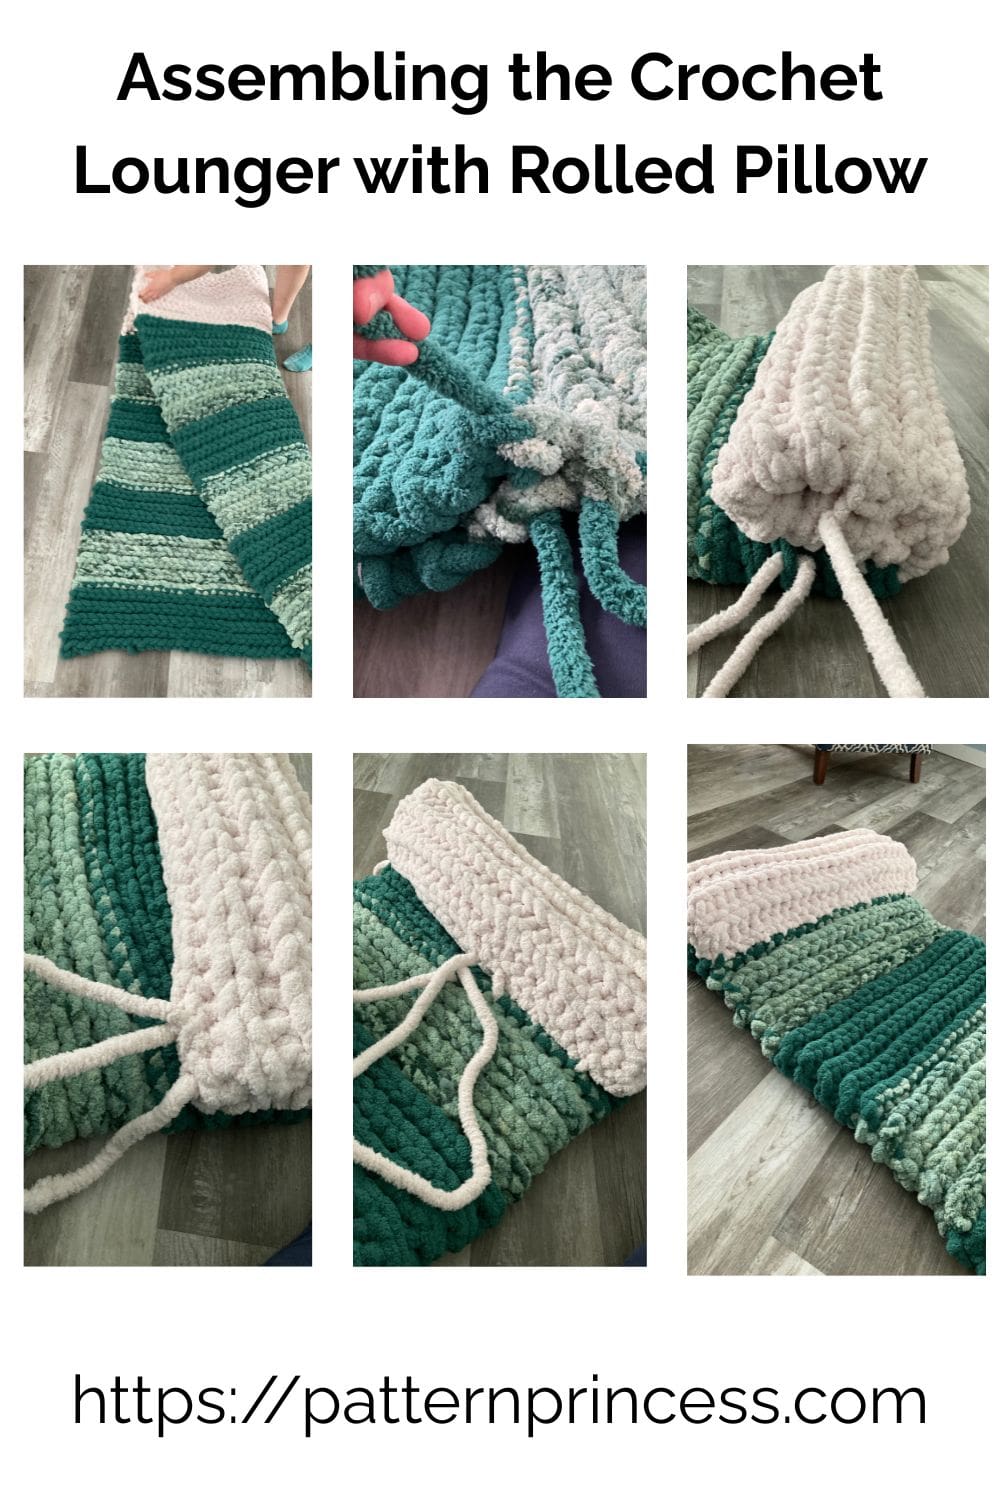
Assembling the Crochet Lounger with Rolled Pillow
When you have completed the last row, don’t cut the yarn. You will be using it to sew the pillow down to the blanket once rolled.
Fold the large blanket in half lengthwise. Join the green blanket part using some leftover Malachite. Starting at the bottom near the corner where the two ends meet, bring the yarn through both the top and bottom loops to secure. Once I got to the folded end, I worked back to the corner where I started.
Then continue joining the side using the same method. Once you get to the end of the green yarn, work back down to the corner where you started. Secure the yarn.
Secure the yarn. Weave the yarn through a few stitches. Then melt the end and stick it to a stitch in the blanket to secure.
Next roll up the pillow until just the mat/blanket part is on the floor. Use the Sandy Cream yarn to sew the rolled pillow down to the blanket.
Start where the yarn is still attached. There are a lot of layers to sew the yarn through. Just keep working up and down moving to the next set of stitches. Working the side, front, other side and work back to where you started. Secure the yarn.
Tip. When joining the front of the pillow, just bring through loops in the top of the mat. That way, the lighter color yarn is not poking through the bottom of the mat and making it unsightly.
Video Tutorial of Crocheting the Stitch for the Blanket Using the Jumbo Yarn
Left hand crochet tutorial: https://youtu.be/J6b_HBoVSPQ
Right hand crochet tutorial: https://youtu.be/6o0JrTnHyWQ
Caring For Your Jumbo Yarn Crochet Lounder with Rolled Pillow
Make sure to check the yarn label. Different jumbo yarns, such as a soft yarn like chenille yarn, merino wool, or tube yarn, have different washing requirements. Some may be machine washable, while others require hand washing. Always check the yarn label for specific care instructions.
Spot clean small spills with a damp cloth instead of washing the entire blanket.
If you must wash it, use a front-load washing machine is the best option for washing a large jumbo yarn crochet blanket, if machine washing is allowed.
Note. The lounger gets quite heavy when wet. We found it’s best to spot clean and only launder when needed. We like to wash in the front-loader washing machine and air dry over two clothes lines, as it is so heavy.
Why Use a Front-Load Washer?
Gentler on the Blanket. Front-loaders use a tumbling action instead of an agitator, which reduces the risk of stretching, snagging, or damaging the bulky yarn.
Larger Capacity. These washers typically have more space, allowing the blanket to move freely and get evenly cleaned.
Better Water Control. They use less water while still providing an effective wash, which helps prevent over-saturation that can stretch the yarn.
- Use a gentle cycle with cold water to prevent stretching or felting.
- Use a mild detergent that is safe for delicate fibers.
- If your washing machine has an extra rinse option, use it to remove all soap residue.
Hand Washing Option
Fill a large bathtub or a deep sink with cold or lukewarm water and a small amount of mild detergent.
- Submerge the blanket, swishing it around for a few minutes.
- Let it soak for 15–30 minutes, then rinse thoroughly with clean water.
Drying the Lounger
- Avoid the dryer unless the yarn label specifically says it’s dryer-safe. Heat can cause shrinkage or damage.
- Lay the blanket flat on a clean, dry towel or a mesh drying rack.
- Reshape it as needed to maintain its size and texture.
- If needed, roll the blanket in a dry towel and press gently to remove excess water.
- Allow it to air dry completely before use, as dampness can lead to mildew.
- Hand over a few clothes lines to dry outside for best results.
We hope you have enjoyed this free pattern. Here are a few more to inspire your next crochet project.

You can find Victoria crocheting, quilting, and creating recipes. She has cooked in restaurants for over 20 years, including many larger parties. She learned to crochet when she was just 11 years old and has been crocheting ever since; over 50 years now. Over 40 years ago, she loved her first class in sewing and continues to hone her skills in quilting. Many have enjoyed the handmade gifts over the years. In her professional career, she has worked in management in a wide variety of businesses including higher education as a dean of a division. All the while attending college part-time to achieve her doctorate in higher education with an emphasis in e-learning.