Last updated on September 28th, 2025 at 11:57 am
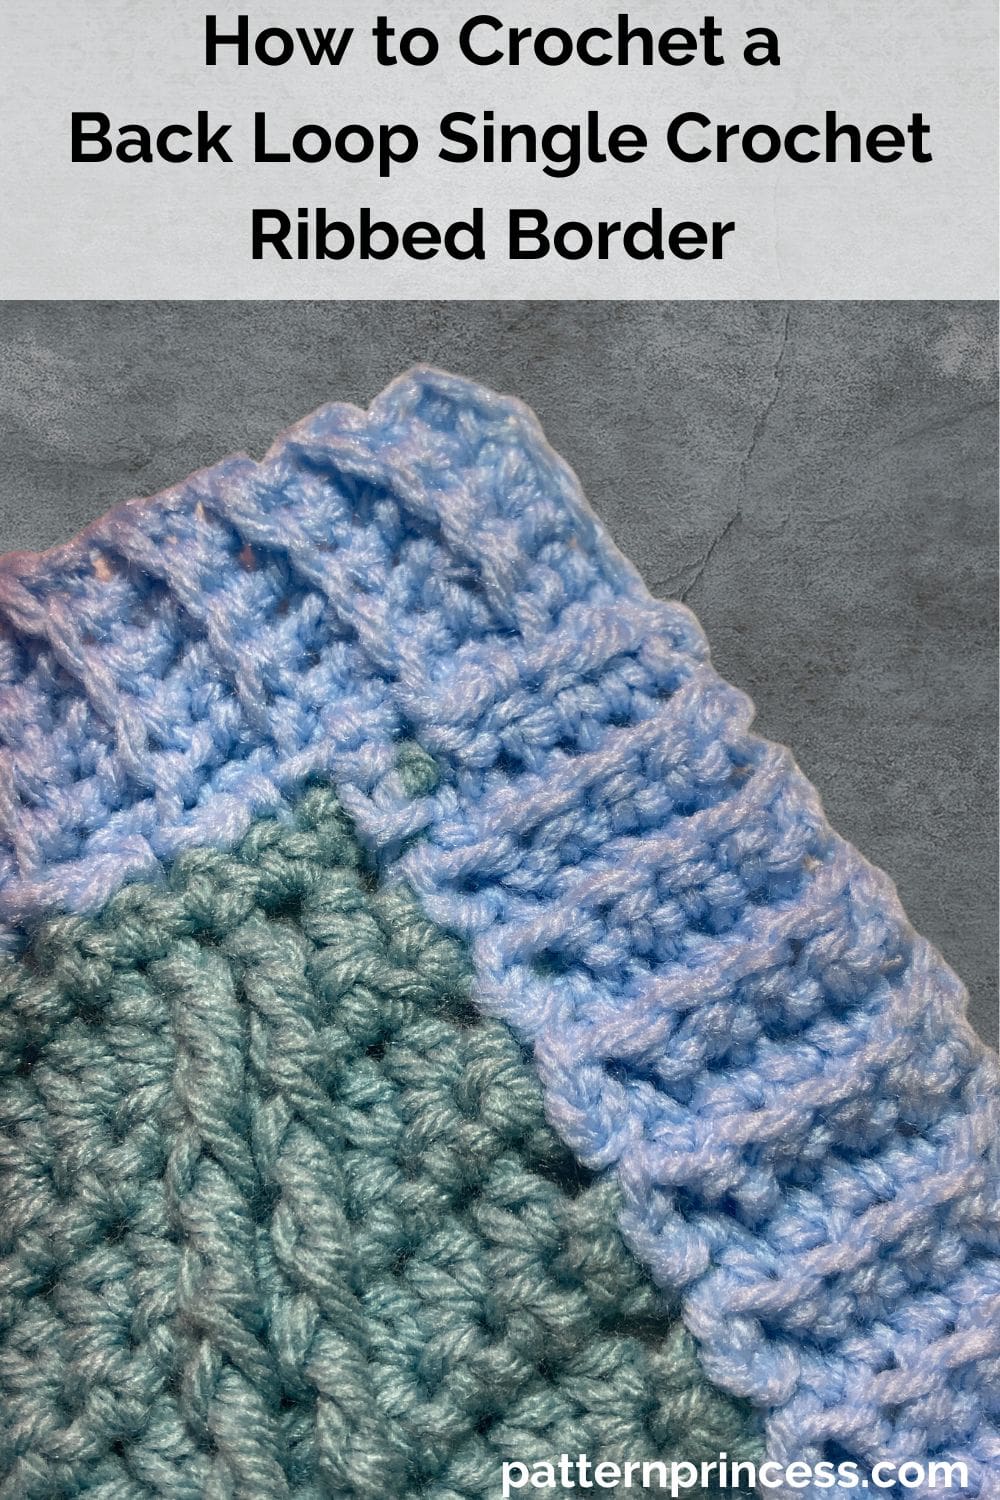
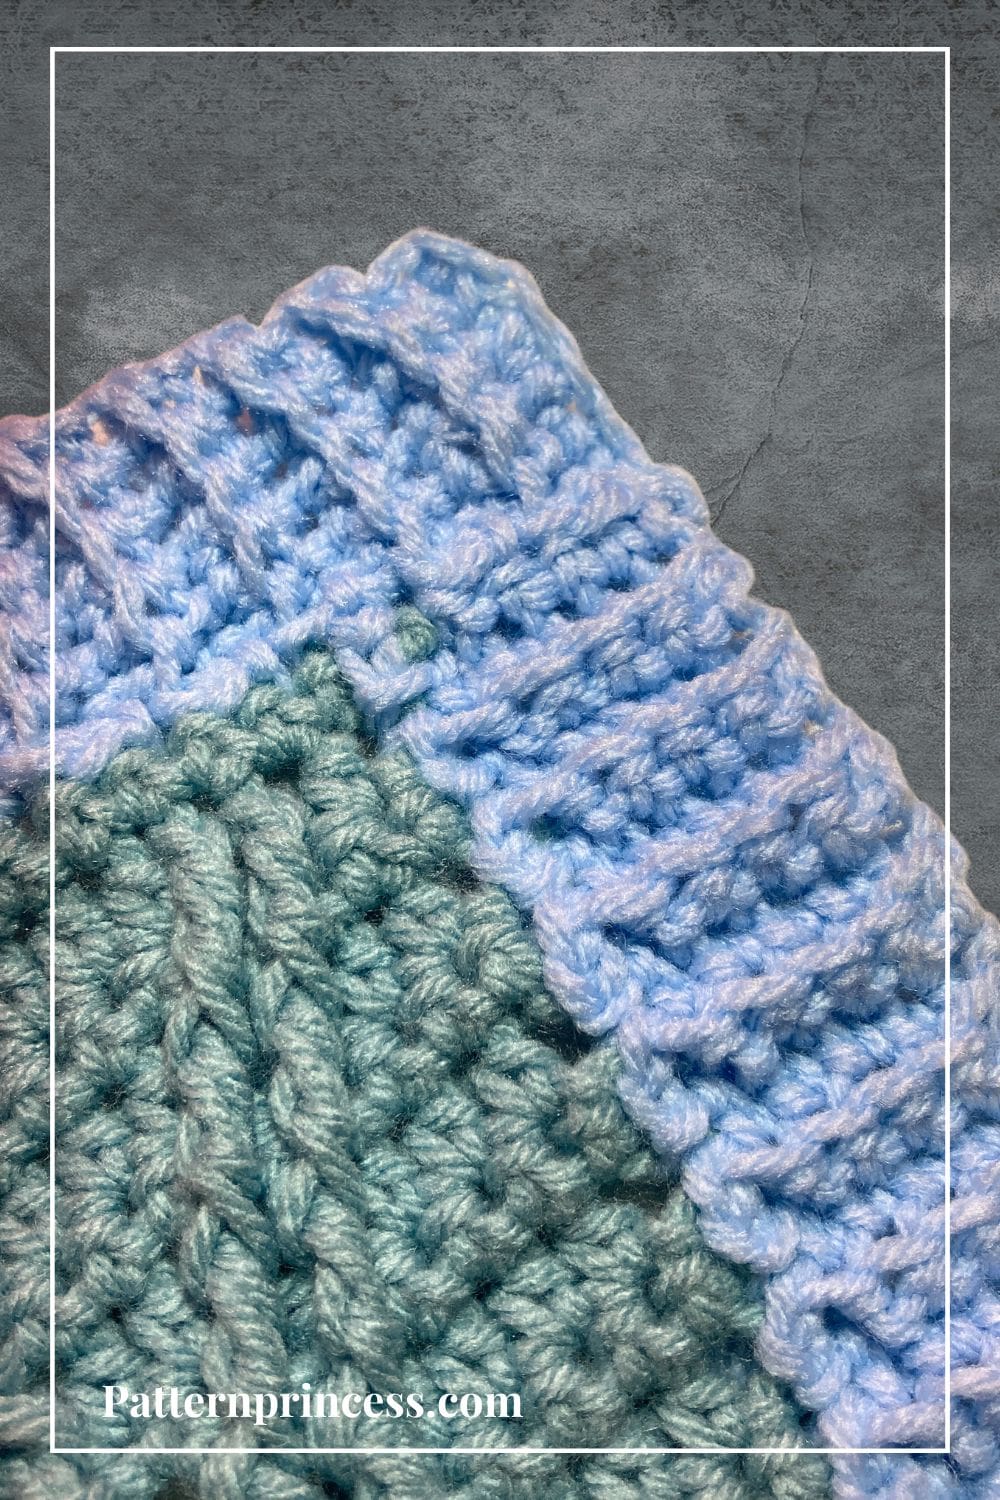
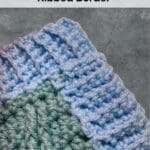
The back loop single crochet ribbed border is a simple yet effective technique that creates a stretchy, textured edge that mimics knitted ribbing. Perfect for a crochet blanket border. It gives a crochet project such a nice, polished look.
Why use a Ribbed Border?
A ribbed border is a fantastic way to add structure and texture to your crochet projects. By working only into the back loop, you create a subtle yet stretchy ribbing effect that pairs beautifully with blankets, hat brims, garments, and accessories.
A well-chosen border is a great way to elevate any crochet project. It’s a simple yet stunning way to finish off your crochet pieces. This textured edge that looks just like knitted ribbing and it looks great on cozy blankets, snuggly scarves, comfy cuffs, and more.
Easy Single Crochet Ribbing with a One Row Repeat
The back loop single crochet (BLO SC) ribbed border isn’t too hard to master, but it does take a bit of practice to get the rhythm. Once you’re comfortable with the basic single crochet stitch, it’s easy to master. It’s all about working in the back loop only, which gives it that textured, ribbed look.
I’ll walk you through everything you need to know: the materials, stitch abbreviations, and step-by-step instructions.
Directions: How to Crochet a Back Loop Single Crochet Ribbed Border
Skill Level
Easy – Confident Beginner
Size
The sample size made approximately a 1 ½ inch border using 6 chains in medium yarn.
The size will depend on the beginning chain stitch you use for the first row of stitches.
You can use any yarn weight and any number of starting chains for your crochet border.
Gauge
The gauge will depend on what yarn and crochet hook you use for this pattern.
Materials & Tools Needed
Before we begin, gather the following materials:
Yarn – Choose a yarn that complements your project. Worsted weight yarn is great for blankets, while a lighter weight is perfect for garments.
Crochet hook – Use the same size hook as your main project or go up one size for a stretchier border.
Scissors – For cutting yarn once finished.
Tapestry needle – To weave in ends neatly.
Stitch markers (optional) – To help keep track of rows if needed.
Abbreviations
- Body = The main of your project that the ribbing is being applied to
- CH = Chain
- Forward Row = The rows worked moving away from the body
- RS = Right Side. The front side of your project
- Return Row = The rows worked moving toward the body
- SC = Single Crochet
- SC BLO = Single Crochet Back Loop Only
- SL ST = Slip Stitch
- SP = Space
- ST = Stitch
- STs = Stitches
- WS = Wrong Side. The back side of your project
- [ ] = Repeat Between
Crochet Stitches
Chain Stitch (CH ST)
Begin the chain stitch by making a slip knot on the crochet hook. Leave about a 5-inch tail on the yarn. This will be weaved in later.
Next snug up the yarn loop that is on the crochet hook; while it should be firm, it should also be loose enough to slide on the hook with ease.
Keeping the loop on the hook, wrap the yarn over the crochet hook from back to front. Draw the yarn through the loop. You’ve just made a chain stitch. Yarn over again and draw the yarn through the loop on the hook. Continue yarning over and drawing the yarn through the loop on the hook to make more chain stitches.
HOW TO CROCHET THE CHAIN STITCH video tutorial
Single Crochet (SC)
Insert the hook, pull up a loop. Yarn over and pull through the two loops on the hook.
HOW TO CROCHET THE SINGLE CROCHET STITCH video tutorial
Pattern Notes
Turn at the end of each row.
This pattern is written in U S Crochet Terms.
There are links for video tutorials below the written pattern.
When working the stitches on the sides of the crochet project, ease the stitches along with side about the same width as you would be working in the stitches in the top and bottom of the project.
Count the stitches. Be sure you don’t accidentally omit stitches or add them. I found it necessary to count as I crocheted each row.
Helpful Tips Before We Get Started
Right Side and Wrong Side. This ribbing technique creates a distinct right and wrong side (or front and back side) to your fabric. Therefore, if your project has a distinct right and wrong side to it, you’ll need to attach your yarn for the ribbing with the front side facing you.
In the graphic below, you can see how the front or right side of the fabric looks much cleaner compared to the back or wrong side. If you use the same yarn color for the ribbing as you did for the body, this might not matter. But if you use a different color, it will be less attractive on the back side.
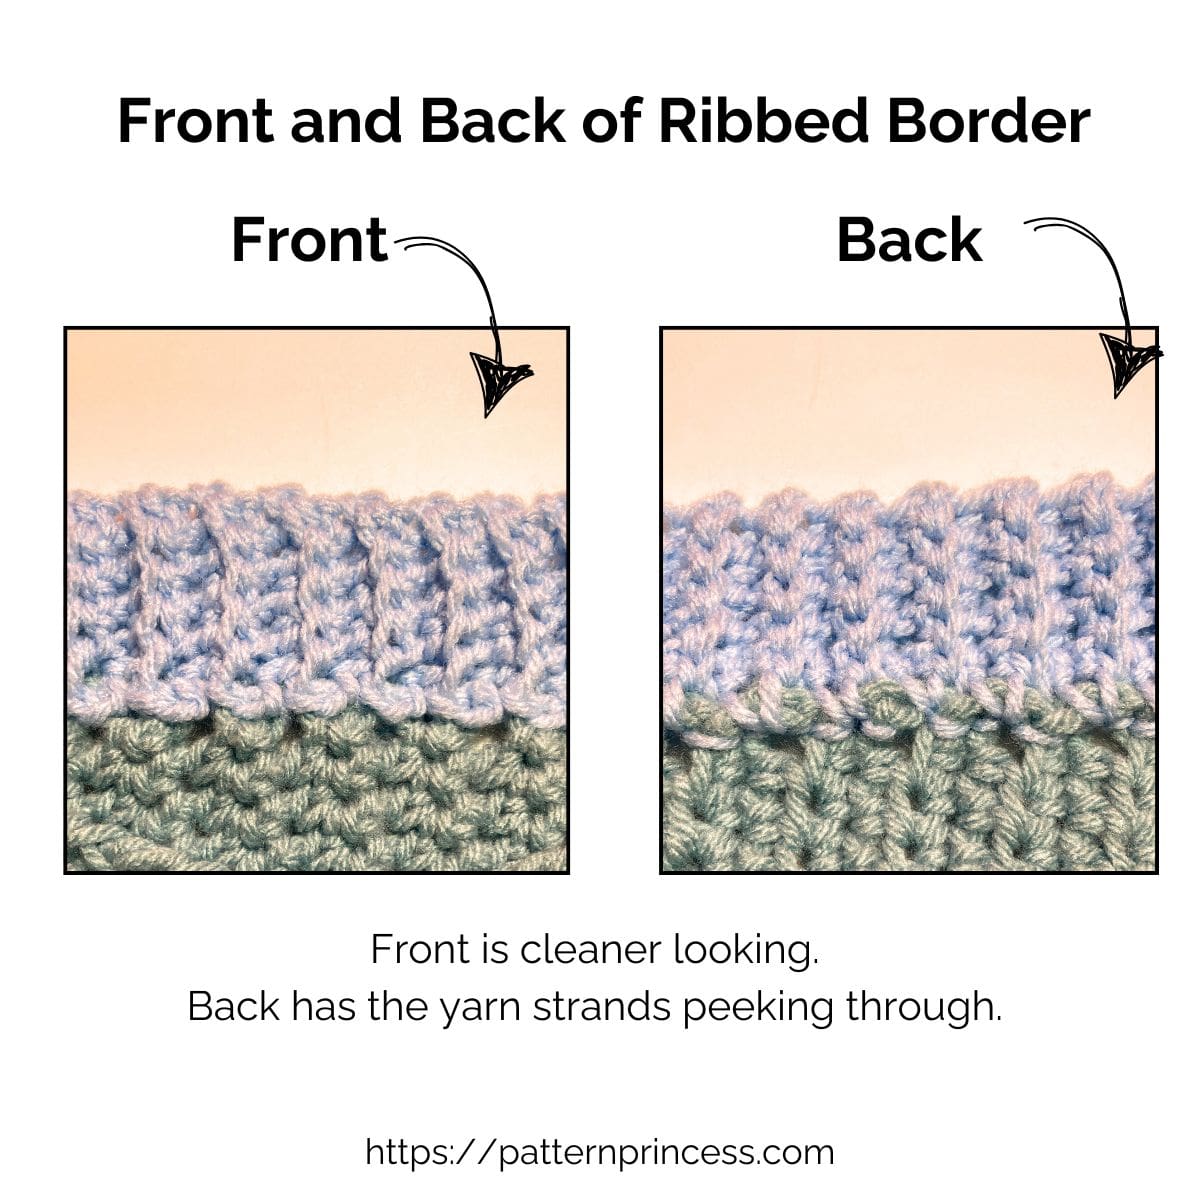
Therefore, I recommend attaching the yarn and working the ribbing pattern on the front side or right side of your crochet project.
Forward Rows and Return Rows. The forward rows are the rows worked while moving away from the body of the project. Return rows are those worked moving back toward the body.
Slip Stitches. Work 2 or 3 slip stitches at the end of the return rows. One is to anchor the return row and the next one or two are to set up for the next forward row.
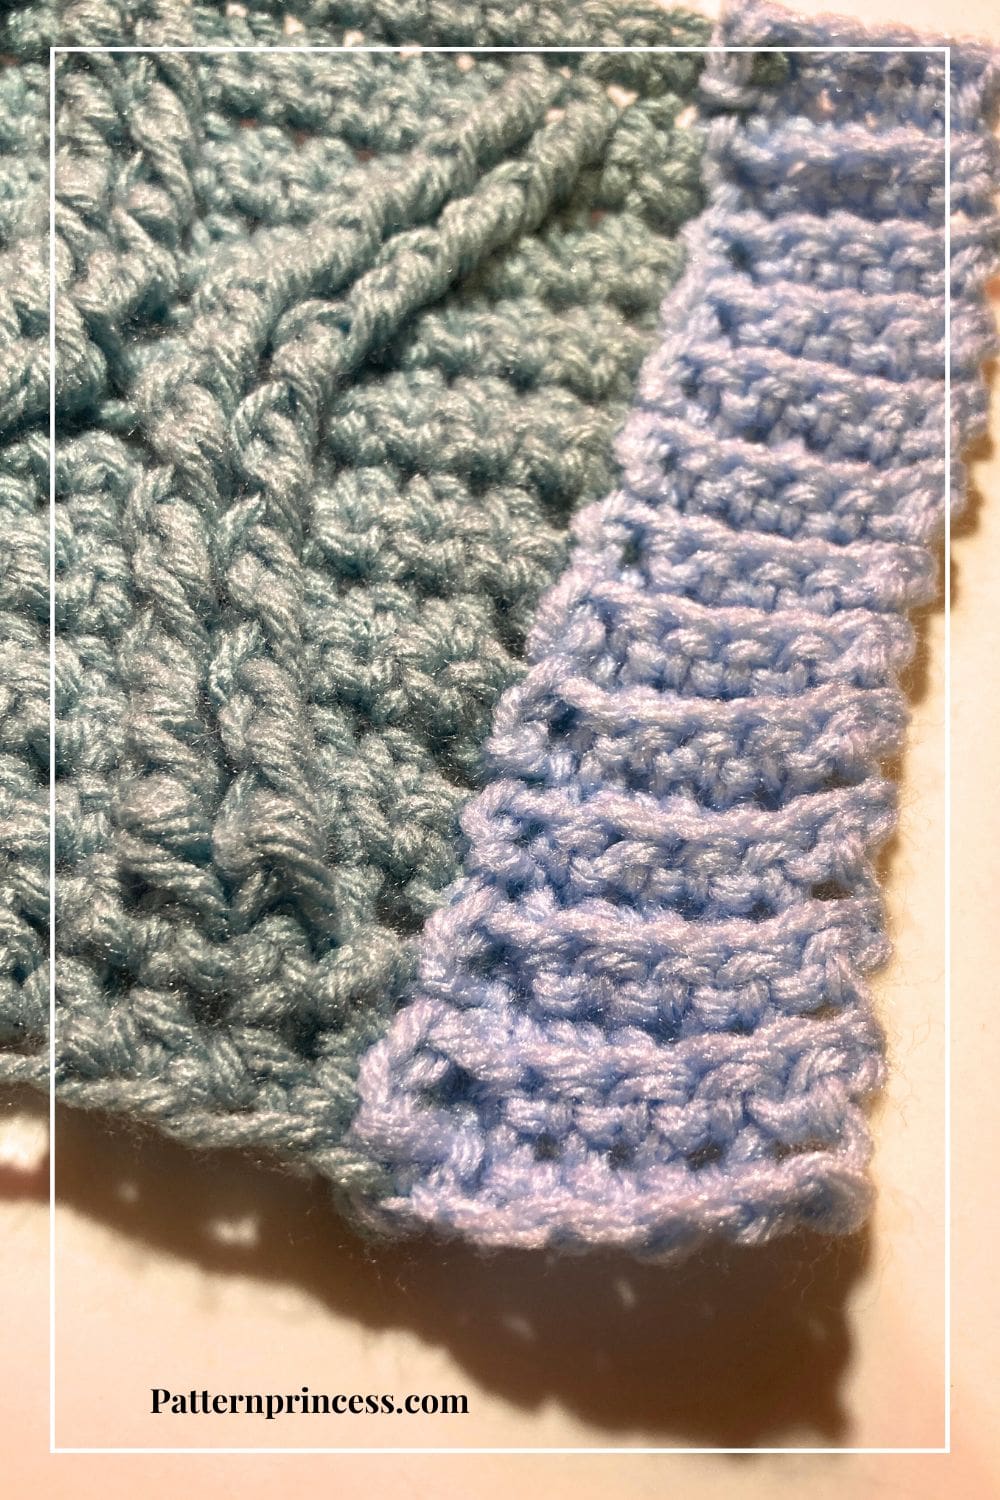
Changing the Width of the Ribbing. For this sample, I used a starting chain of 5 + 1 = 6. You can make this pattern using any desired number of chain stitches. Chain the desired length of ribbing +1 for the turning chain. For this sample, my beginning chain of 6 stitches will result in 5 single crochets. Just make sure that you start with the right side or front side of your work facing you and attach your ribbing yarn to the stitch you plan to begin your ribbing.
Step-by-Step Instructions
Begin Crochet Pattern
Start by making a slip knot and adding the loop on the hook.
Start with the Sides of your Project. Join the yarn to a corner on one of the sides of your crochet project. Attach your yarn for the ribbing with the front side facing you.
Chain your desired number of chains for your foundation chain.
For the sample in the video tutorial, I made a small swatch using a chain of 6 stitches.
Now we’ll work back down the chain toward the edge of the blanket or crochet project. Work a SC into the second chain and in each ST across. Next, work a SL ST back into the SP where we joined our yarn. Work 1 SL ST into the next 1 or 2 STs. (I used 2 stitches for a better foundation).
Row 1 completed
Row 2
Turn your work. SK the 2 or 3 SL STS (In my sample it is 3 SL STs). Work a SC BLO into each ST across. (Forward pass completed). Begin the return pass. CH 1, SC BLO into each ST across. Work a SL ST back into the base of the row in the body of the project. And work a SL ST into the next 1 or 2 STs. (I used 2 stitches).
*For my sample there should be 5 SC BLO and 3 SL STs.
Rows 3 and Beyond
Continue to repeat row 2. Working the forward and return rows as needed.
Crocheting the Top and Bottom Borders. When you are finished with the sides.
Fasten off and weave in ends securely with a tapestry needle.
Join the yarn to a corner on either the top or bottom of your crochet project with the front side facing you. (The outer edge where you just worked your side ribbing border).
Then continue working the forward and return passes of the pattern.
Finishing
Leave a 10-12-inch-long yarn tail. Pull through the last loop on the hook. Using your tapestry needle. Weave the yarn back and forth in the same color yarn until snug. Trim off any excess.
Tips for Success
- Maintain even tension. Loose tension creates a softer ribbing on the crochet fabric. While tighter tension results in a more defined texture on the border pattern.
- Increase stretchiness by using a slightly larger hook than the main project.
- Count stitches regularly to avoid accidentally increasing or decreasing the width.
- For a seamless look, try working the border in the round on projects like hats and cuffs.
Common Mistakes & How to Fix Them
- Border curling? Try going up a hook size or loosening tension.
- Uneven stitch count? Count every few rows to ensure consistency.
- Too tight? Loosen your grip on the yarn or switch to a larger hook.
Creative Variations
- Make it wider by adding extra foundation chain stitches. Another way is to work the back loop stitch using other stitches that are taller than single crochet stitches such as the half double crochet or double crochet stitches.
- Alternate colors every row for a striped effect.
- Combine with other stitches, like half-double crochet ribbing, for a unique texture.
- Use a slip stitch join to seamlessly connect ends when working in the round.
The Back Loop Single Crochet Ribbed Border creates a fun texture. It’s quickly becoming one of a favorite technique for adding ribbing. Whether you’re edging a blanket or adding structure to a garment, this technique is a must-know for every crocheter.
Crochet Video Tutorials
right hand video: https://youtu.be/sGSZ66c9CMY
left hand video: https://youtu.be/_7q4ikTa3lk
How to Crochet a back loop single crochet ribbed border
Equipment
- Crochet Hook:
- Scissors:
- Tapestry Needle
- Stitch markers (optional)
Materials
- Yarn Choose a yarn that complements your project. Worsted weight yarn is great for blankets, while a lighter weight is perfect for garments.
Instructions
Begin Crochet Pattern
- Start by making a slip knot and adding the loop on the hook.
- Start with the Sides of your Project. Join the yarn to a corner on one of the sides of your crochet project. Attach your yarn for the ribbing with the front side facing you.Yarn
- Chain your desired number of chains for your foundation chain.
- For the sample in the video tutorial, I made a small swatch using a chain of 6 stitches.
- Now we’ll work back down the chain toward the edge of the blanket or crochet project. Work a SC into the second chain and in each ST across. Work a SL ST back into the SP where we joined our yarn. Work 1 SL ST into the next 1 or 2 STs. (I used 2 stitches for a better foundation).
- Row 1 completed
Row 2
- Turn your work. SK the 2 or 3 SL STS (In my sample it is 3 SL STs). Work a SC BLO into each ST across. (Forward pass completed). Begin the return pass. CH 1, SC BLO into each ST across. Work a SL ST back into the base of the row in the body of the project. And work a SL ST into the next 1 or 2 STs. (I used 2 stitches).
- *For my sample there should be 5 SC BLO and 3 SL STs.
Rows 3 and Beyond
- Continue to repeat row 2. Working the forward and return rows as needed.
- Crocheting the Top and Bottom Borders. When you are finished with the sides.
- Fasten off and weave in ends securely with a tapestry needle.
- Join the yarn to a corner on either the top or bottom of your crochet project with the front side facing you. (The outer edge where you just worked your side ribbing border).
- Then continue working the forward and return passes of the pattern.
Finishing
- Leave a 10-12-inch-long yarn tail. Pull through the last loop on the hook. Using your tapestry needle. Weave the yarn back and forth in the same color yarn until snug. Trim off any excess.
Notes
Abbreviations
- Body = The main of your project that the ribbing is being applied to
CH = Chain
Forward Row = The rows worked moving away from the body
RS = Right Side. The front side of your project
Return Row = The rows worked moving toward the body
SC = Single Crochet
SC BLO = Single Crochet Back Loop Only
SL ST = Slip Stitch
SP = Space
ST = Stitch
STs = Stitches
WS = Wrong Side. The back side of your project
[ ] = Repeat Between
Pattern Notes
Turn at the end of each row.This pattern is written in U S Crochet Terms.
There are links for video tutorials below the written pattern.
When working the stitches on the sides of the crochet project, ease the stitches along with side about the same width as you would be working in the stitches in the top and bottom of the project.
Count the stitches. Be sure you don’t accidentally omit stitches or add them. I found it necessary to count as I crocheted each row.
Helpful Tips Before We Get Started
Right Side and Wrong Side. This ribbing technique creates a distinct right and wrong side (or front and back side) to your fabric. Therefore, if your project has a distinct right and wrong side to it, you’ll need to attach your yarn for the ribbing with the front side facing you. If you use the same yarn color for the ribbing as you did for the body, this might not matter. But if you use a different color, it will be less attractive on the back side.Therefore, I recommend attaching the yarn and working the ribbing pattern on the front side or right side of your crochet project. Forward Rows and Return Rows. The forward rows are the rows worked while moving away from the body of the project. Return rows are those worked moving back toward the body.
Slip Stitches. Work 2 or 3 slip stitches at the end of the return rows. One is to anchor the return row and the next one or two are to set up for the next forward row.
Changing the Width of the Ribbing. For this sample, I used a starting chain of 5 + 1 = 6. You can make this pattern using any desired number of chain stitches. Chain the desired length of ribbing +1 for the turning chain. For this sample, my beginning chain of 6 stitches will result in 5 single crochets. Just make sure that you start with the right side or front side of your work facing you and attach your ribbing yarn to the stitch you plan to begin your ribbing.
Here are other free crochet patterns for you to explore to inspire your next project.

You can find Victoria crocheting, quilting, and creating recipes. She has cooked in restaurants for over 20 years, including many larger parties. She learned to crochet when she was just 11 years old and has been crocheting ever since; over 50 years now. Over 40 years ago, she loved her first class in sewing and continues to hone her skills in quilting. Many have enjoyed the handmade gifts over the years. In her professional career, she has worked in management in a wide variety of businesses including higher education as a dean of a division. All the while attending college part-time to achieve her doctorate in higher education with an emphasis in e-learning.
An easy way to finish off a crochet blanket or other project.