Last updated on March 27th, 2026 at 09:10 pm
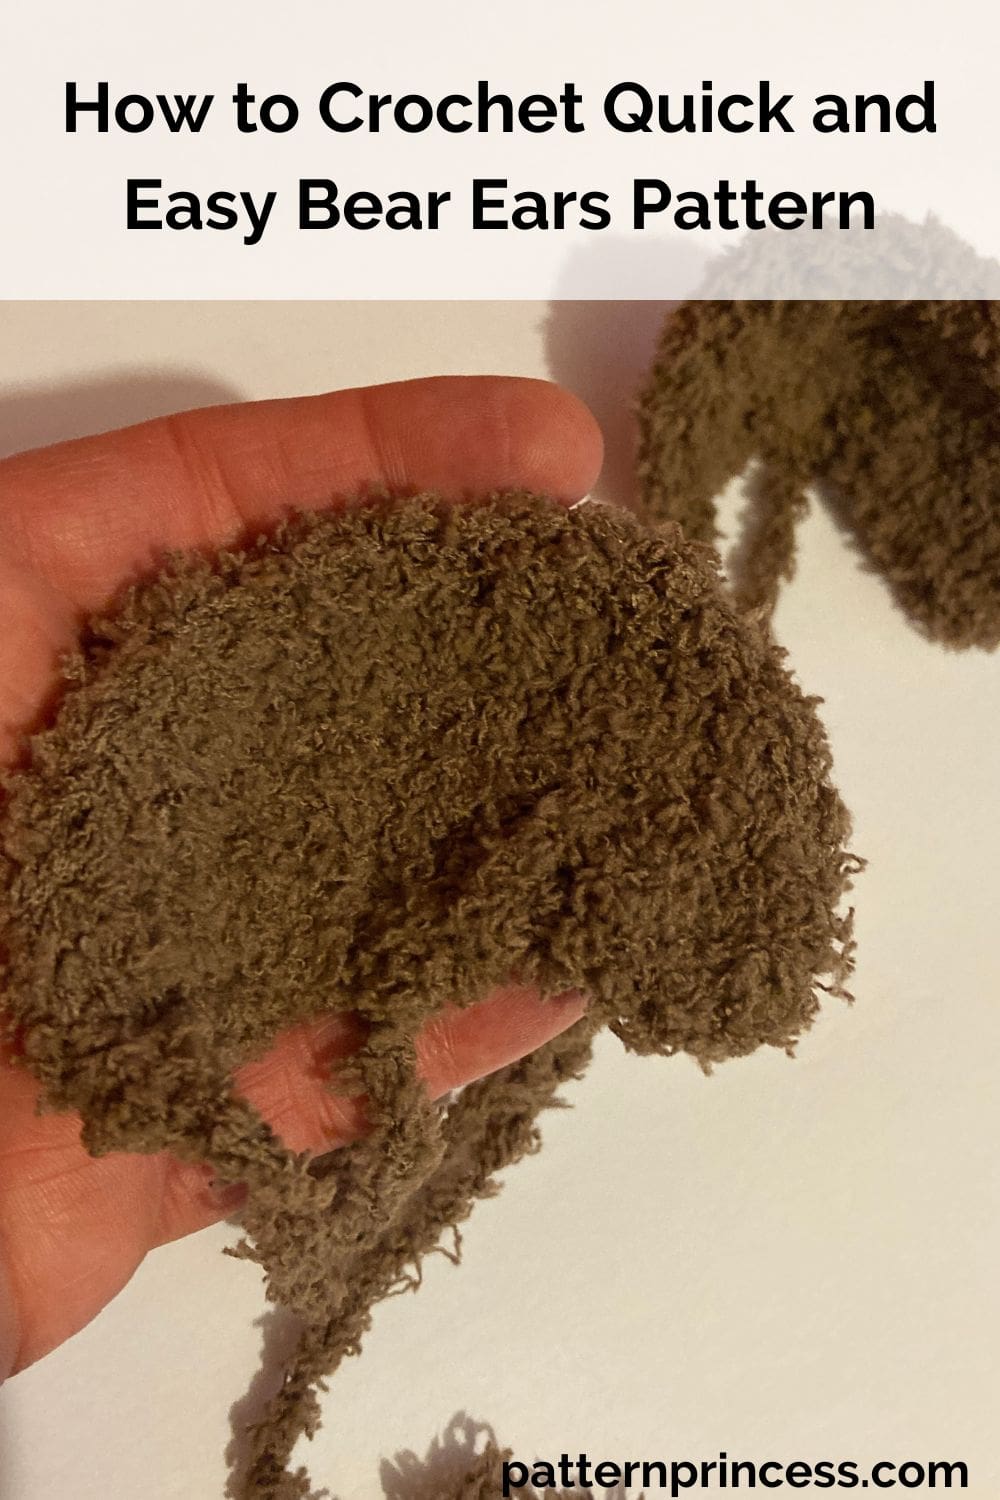
These teddy bear ears make a perfect addition to a beanie. Making it a fun gift for baby showers, birthdays, or even just for fun dress-up play. The pattern works great for newborns, toddlers, and kids when sewn onto a cute hat or animal headband. And if you’re making your first animal hat, don’t worry—we’ve got a video tutorial to help you every step of the way.
Beginner-Friendly Crochet Bear Ears
If you’re looking for a fast, beginner-friendly project, this Crochet Bear Ears Pattern is a great option. This is a one-size pattern that can be made using medium-weight or fluffy yarn and is perfect for adding to a crochet hat, baby beanie, or even a headband.
You’ll use basic stitches like single crochet and slip stitch, starting with a magic ring. The pattern includes instructions for forming the outer ear and the inner ears, which can be customized in traditional colors—such as brown yarn with a pink or white inner ear—or in any color combination to match a costume theme or holiday outfit.
This quick and easy crochet bear ears pattern is suitable for making animal headwear for a newborn baby, child, or toddler size hat. Although it’s just one size, the ears work well on various headwear bases. It’s a nice project for those trying an animal hat for the first time, and the free pattern includes a helpful video tutorial to guide you through each step.
Perfect for last-minute gifts or handmade dress-up accessories, this pattern is part of our growing collection of free crochet patterns. Try it out and see how simple and fun it can be to bring a little bear to life!
Directions: How to Crochet Quick and Easy Bear Ears Pattern
Skill Level
Beginner Friendly
Gauge
Gauge is not critical for this pattern.
Size
This sample pattern worked with a medium weight yarn and size I 5.5mm crochet hook, will make about 3” ear.
Made with a bulky number 5 yarn and size I 5.5 crochet hook, will make about a 4” ear.
To adjust the width size of the ear, simply add or decrease rows.
Abbreviations
- CH = Chain
- SC = Single Crochet
- SK = Skip
- SP = Space
- ST = Stitch
- STs = Stitches
- YO = Yarn Over
- [ ] = Repeat Between
Materials
Yarn. A medium weight yarn works well with this pattern. For my sample, I used Caron Simply Soft from Yarnspirations. Number 4 medium weight yarn.
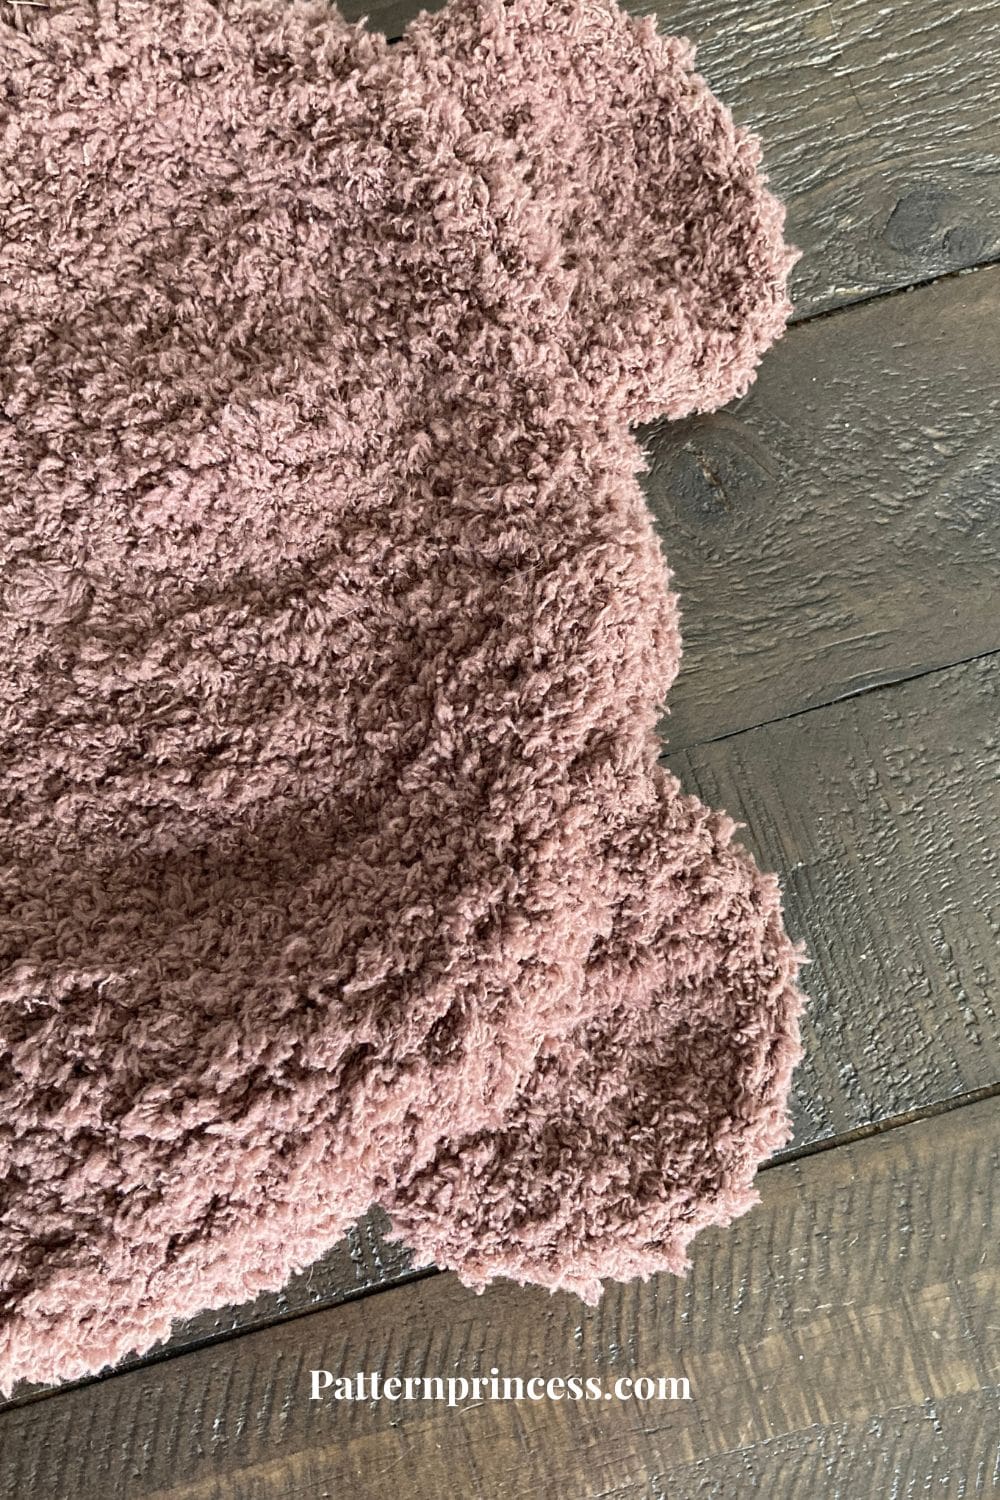
For the fluffy bear ears, I used Bernat Pipsqueak Yarn. Which is a number 5 bulky weight. In the color chocolate.
Plan for about 75 yards of yarn.
Crochet Hook. Choose a hook size that matches your yarn weight. I used a size I crochet hook 5.5 mm. Crochet hook size H 5.5mm would also work.
Scissors
Tapestry Needle
If you are not able to find this yarn locally, you can purchase it online. Check out our Savings Center page for a link to Yarnspirations.
Pattern Notes
Written in US Terms.
Turn at the end of each row.
You can stop at row 4 or continue to make the ears larger. If making the ears larger continue following the directions for rows 5 for larger ears to prevent too much curling.
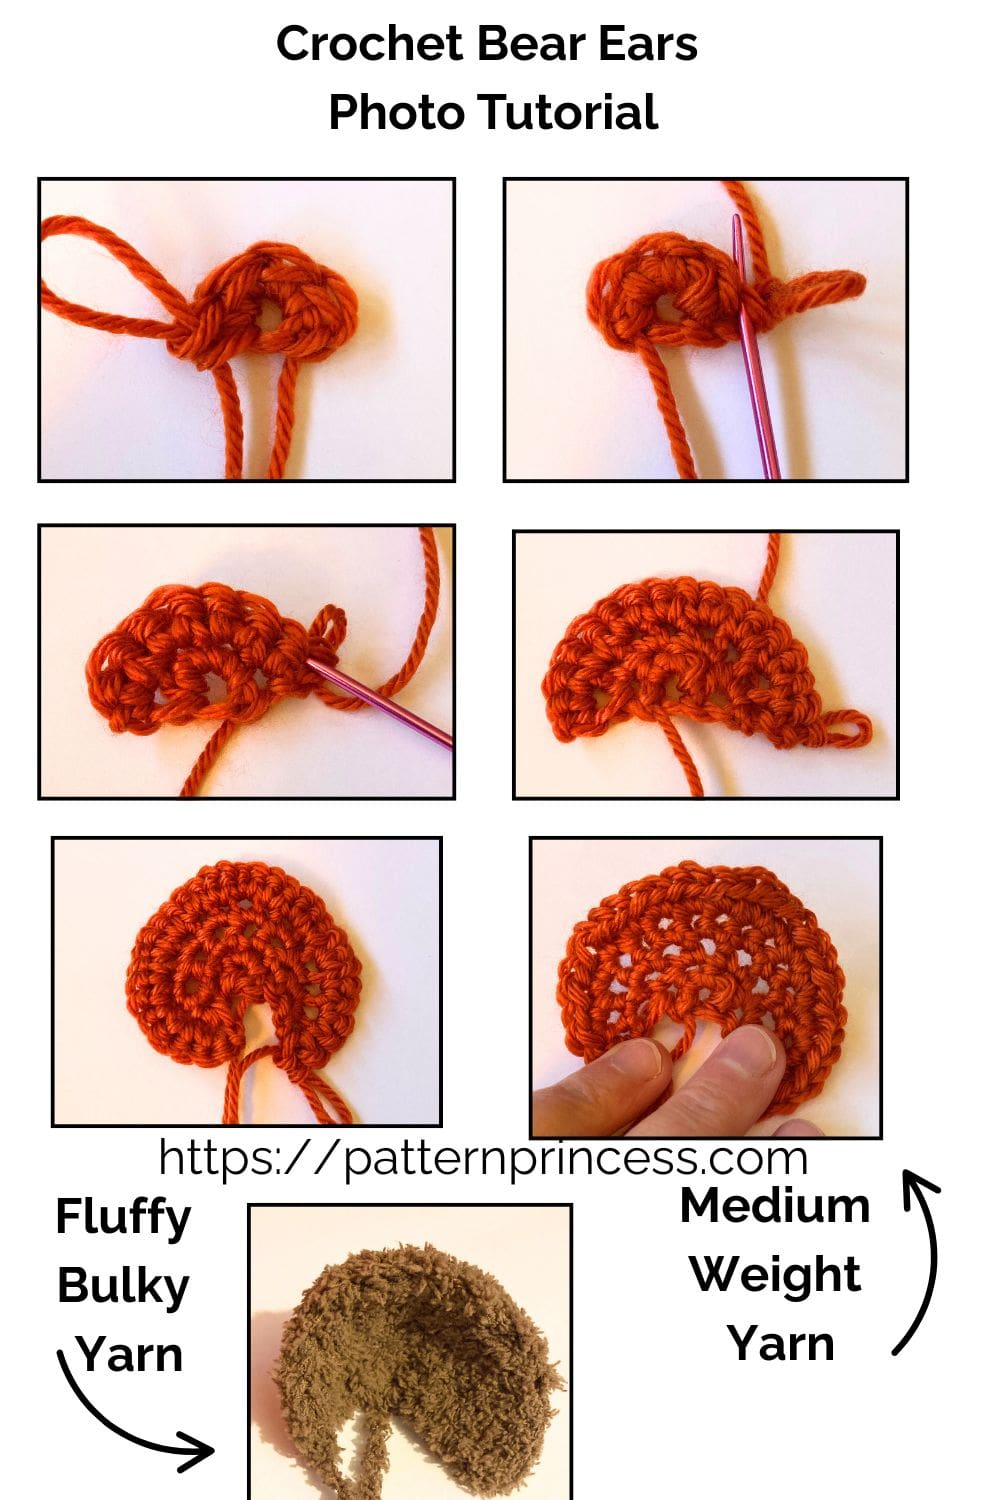
There are photo tutorials throughout the pattern and video tutorials after the written pattern.
Crochet Stitches Used
Chain Stitch (CH ST)
Begin the chain stitch by making a slip knot on the crochet hook. Leave about a 5-inch tail on the yarn. This will be weaved in later.
Next snug up the yarn loop that is on the crochet hook; while it should be firm, it should also be loose enough to slide on the hook with ease.
Keeping the loop on the hook, insert the hook in the stitch, wrap the yarn over the crochet hook from back to front. Draw the yarn through the loop. Yarn over again and draw the yarn through both loops that are currently on the hook. (The first chain stitch is complete).
HOW TO CROCHET THE CHAIN STITCH video tutorial
Single Crochet (SC)
Insert the hook, pull up a loop. Yarn over and pull through the two loops on the hook.
HOW TO CROCHET THE SINGLE CROCHET STITCH video tutorial
Begin Crochet Pattern
Leave a nice long tail so you can sew the ears into your project.
To begin, make a slip knot and then Chain 3. Going back to the first CH ST (the furthest CH from the hook). Work a SL ST. This forms a circle.
The next stitches will be worked inside the circle.
Row 1
CH 1 (Does Not Count as a ST). work 4 SC inside the circle. Turn (4 STs)
Note, we will not be working in the round, rather, we will be working back and forth in rows. We just started this pattern with that little circle.
Row 2
CH 1 (Does Not count as a ST). Work 2 SC in the first ST and each ST across. Turn (8 STs)
Row 3
CH 1 (Does Not count as a ST). Work 2 SC in the first ST and each ST across. Turn (16 STs)
Row 4
CH 1 (Does Not count as a ST). Work 2 SC in the first ST and each ST across. Turn (32 STs)
You can stop at this row or continue making your ear larger.
Row 5
CH 1 (Does Not count as a ST). Work [1 SC in the first ST and 2 SC in the next ST] Repeat between [ ] across. Turn (48 STs)
By working 1 SC and 2 SC alternatively, this prevents the ear from curling too much as you make it larger.
Finishing
After you work the last SC ST, cut off the yarn leaving about a 15-20-inch long tail. Pull the yarn tail through the last loop on the hook.
Thread the yarn needle with the yarn tails and weave them through the crochet stitches back and forth in your project until the yarn feels secure. Snip off the excess yarn.

Crochet Video Tutorials of How to Crochet Quick and Easy Bear Ears Pattern

How to Crochet Quick and Easy Bear Ears Pattern
Equipment
- Crochet Hook: Choose a hook size that matches your yarn weight. I used a size I crochet hook 5.5 mm. Crochet hook size H 5.5mm would also work.
- Scissors:
- Tapestry Needle
Materials
- 75 yards Yarn A medium weight yarn works well with this pattern. For mys ample, I used Caron Simply Soft from Yarnspirations. Number 4 medium weight yarn. For the fluffy bear ears, I used Bernat Pipsqueak Yarn. Which is a number 5 bulky weight. In the color chocolate.
Instructions
Begin Crochet Pattern
- Leave a nice long tail so you can sew the ears into your project.
- To begin, make a slip knot and then Chain 3. Going back to the first CH ST (the furthest CH from the hook). Work a SL ST. This forms a circle.
- The next stitches will be worked inside the circle.
Row 1
- CH 1 (Does Not Count as a ST). work 4 SC inside the circle. Turn (4 STs)
- Note, we will not be working in the round, rather, we will be working back and forth in rows. We just started this pattern with that little circle.
Row 2
- CH 1 (Does Not count as a ST). Work 2 SC in the first ST and each ST across. Turn (8 STs)
Row 3
- CH 1 (Does Not count as a ST). Work 2 SC in the first ST and each ST across. Turn (16 STs)
Row 4
- CH 1 (Does Not count as a ST). Work 2 SC in the first ST and each ST across. Turn (32 STs)
- You can stop at this row or continue making your ear larger.
Row 5
- CH 1 (Does Not count as a ST). Work [1 SC in the first ST and 2 SC in the next ST] Repeat between [ ] across. Turn (48 STs)
- By working 1 SC and 2 SC alternatively, this prevents the ear from curling too much as you make it larger.
Finishing
- After you work the last SC ST, cut off the yarn leaving about a 15-20-inch long tail. Pull the yarn tail through the last loop on the hook.
- Thread the yarn needle with the yarn tails and weave them through the crochet stitches back and forth in your project until the yarn feels secure. Snip off the excess yarn.
Notes
Abbreviations
- CH = Chain
- SC = Single Crochet
- SK = Skip
- SP = Space
- ST = Stitch
- STs = Stitches
- YO = Yarn Over
- [ ] = Repeat Between

You can find Victoria crocheting, quilting, and creating recipes. She has cooked in restaurants for over 20 years, including many larger parties. She learned to crochet when she was just 11 years old and has been crocheting ever since; over 50 years now. Over 40 years ago, she loved her first class in sewing and continues to hone her skills in quilting. Many have enjoyed the handmade gifts over the years. In her professional career, she has worked in management in a wide variety of businesses including higher education as a dean of a division. All the while attending college part-time to achieve her doctorate in higher education with an emphasis in e-learning.
A cute and fun pattern for adding bear ears onto stuffed animals too.