Last updated on July 4th, 2024 at 11:32 pm
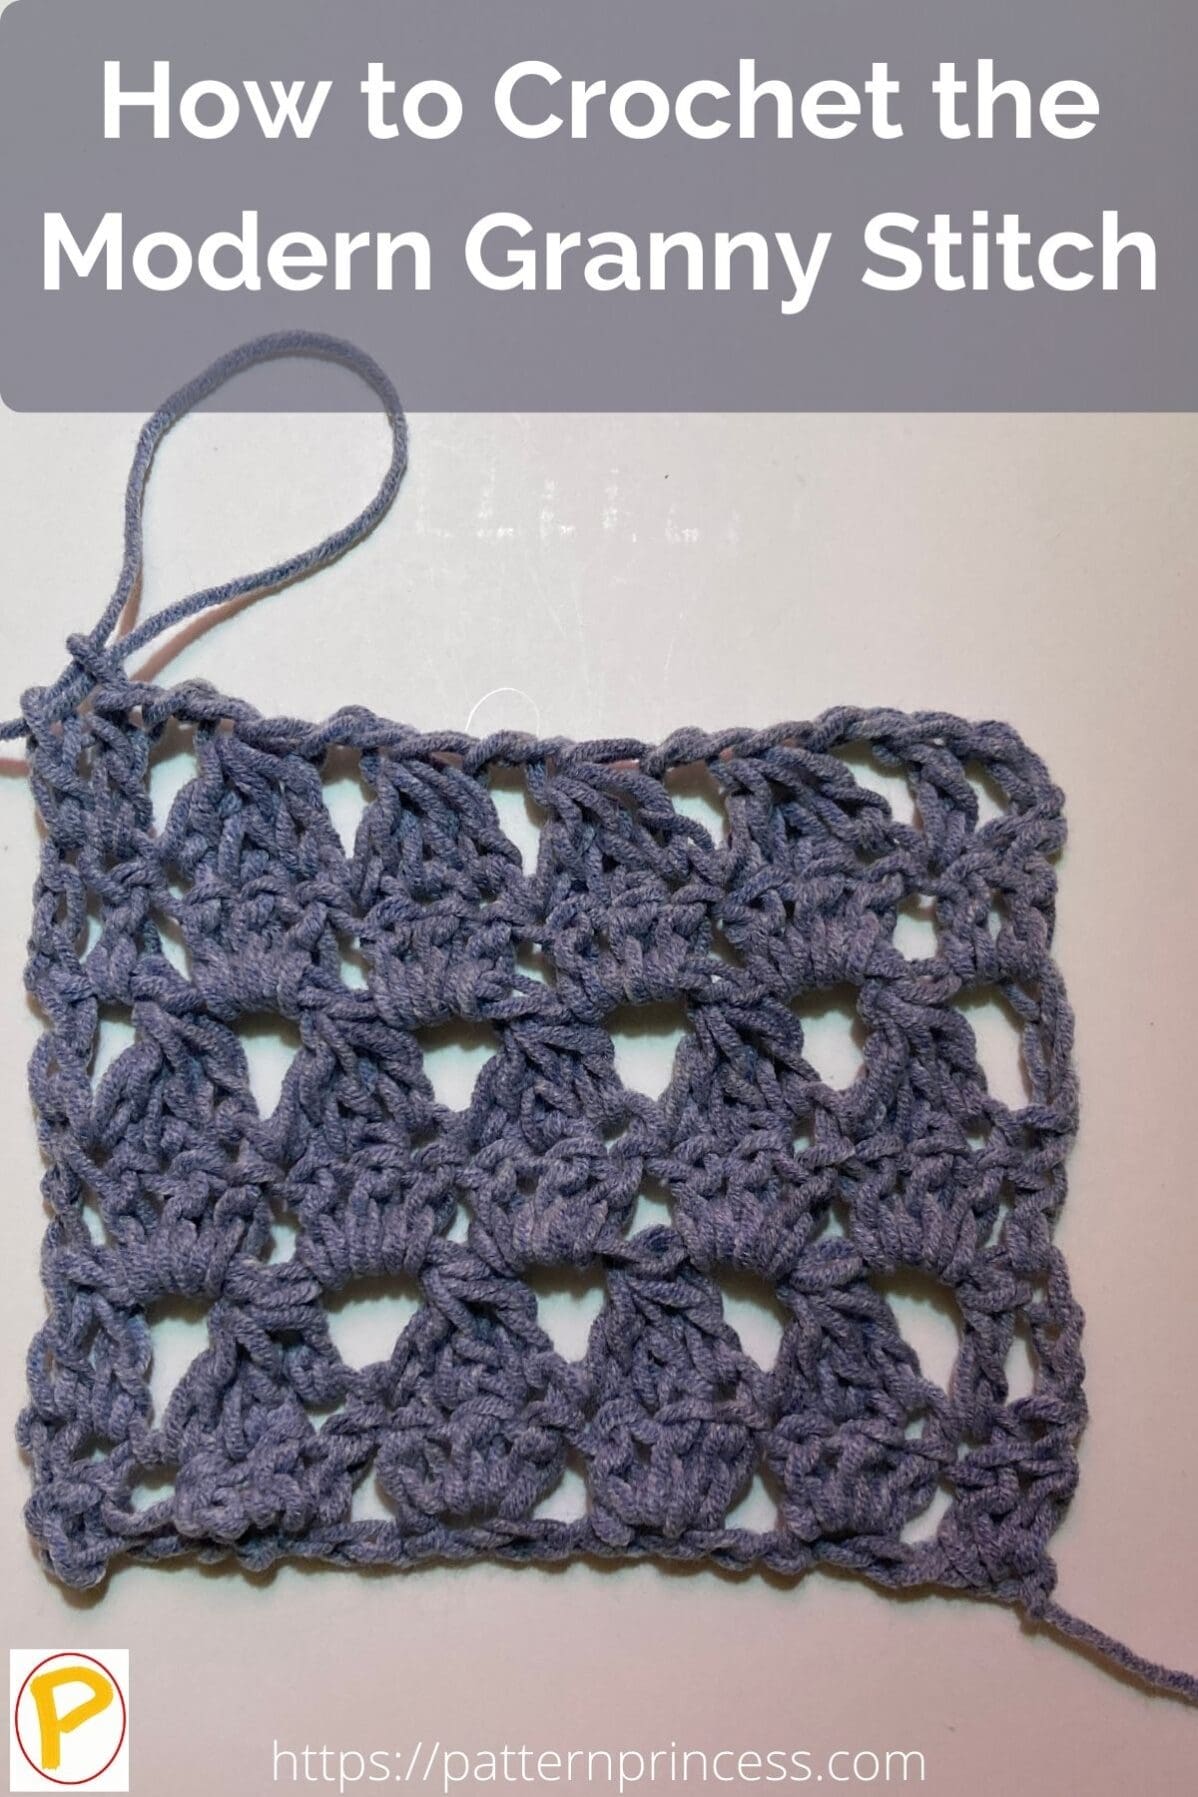
Learn how to crochet the modern granny stitch. It works up fast and is easy to memorize. Once you establish the foundation row, the subsequent stitches elegantly align with those of the preceding row, creating a logical and intuitive rhythm.
Every other row is a series of triangles nestled in between each other which gives this a modern feel. With this easy stitch pattern, crochet becomes an inviting journey for a beginner as each row seamlessly flows into the next. However, this pattern is a fun one to work on even if you are an advanced crocheter.
Crocheting is an art form that has stood the test of time, weaving its way through generations, captivating the hearts and hands of crafters worldwide. Among the classics, one stitch stands out as an icon of crochet tradition. The beloved Granny Stitch. However, just like any other craft, crochet evolves with time, and the Granny Stitch has undergone a modern makeover.
Post contains affiliate links, and we earn commissions if you shop through the links on this page. For more information, please read the disclosure section under the About Us page.
Introducing the Modern Crochet Granny Stitch.
A captivating masterpiece composed of interlocking triangles, exuding an undeniable contemporary allure.
This innovative take on the classic granny stitch delivers a fast-paced crochet experience, allowing you to effortlessly memorize the pattern and seamlessly resume your work.
With its sleek design and quick progress, this stitch promises both a modern aesthetic and an enjoyable journey from start to finish.
What is the modern granny stitch?
The modern granny stitch is perfect for a confident beginner. It is essentially a two-row repeat with the first row being a traditional granny stitch. The second is a series of three double crochet stitches on top of each granny stitch that are joined together to form a triangle.
The first row of the stitch pattern is the traditional granny stitch. Which is three double crochet worked into the same space.
The second row of this stitch pattern uses Double Crochet 3 Together (DC3TOG). It is worked into the tops of the three double crochet stitches of the granny stitch. It becomes the mirror image of the granny stitch row, with a tapered top. Or triangle shape.
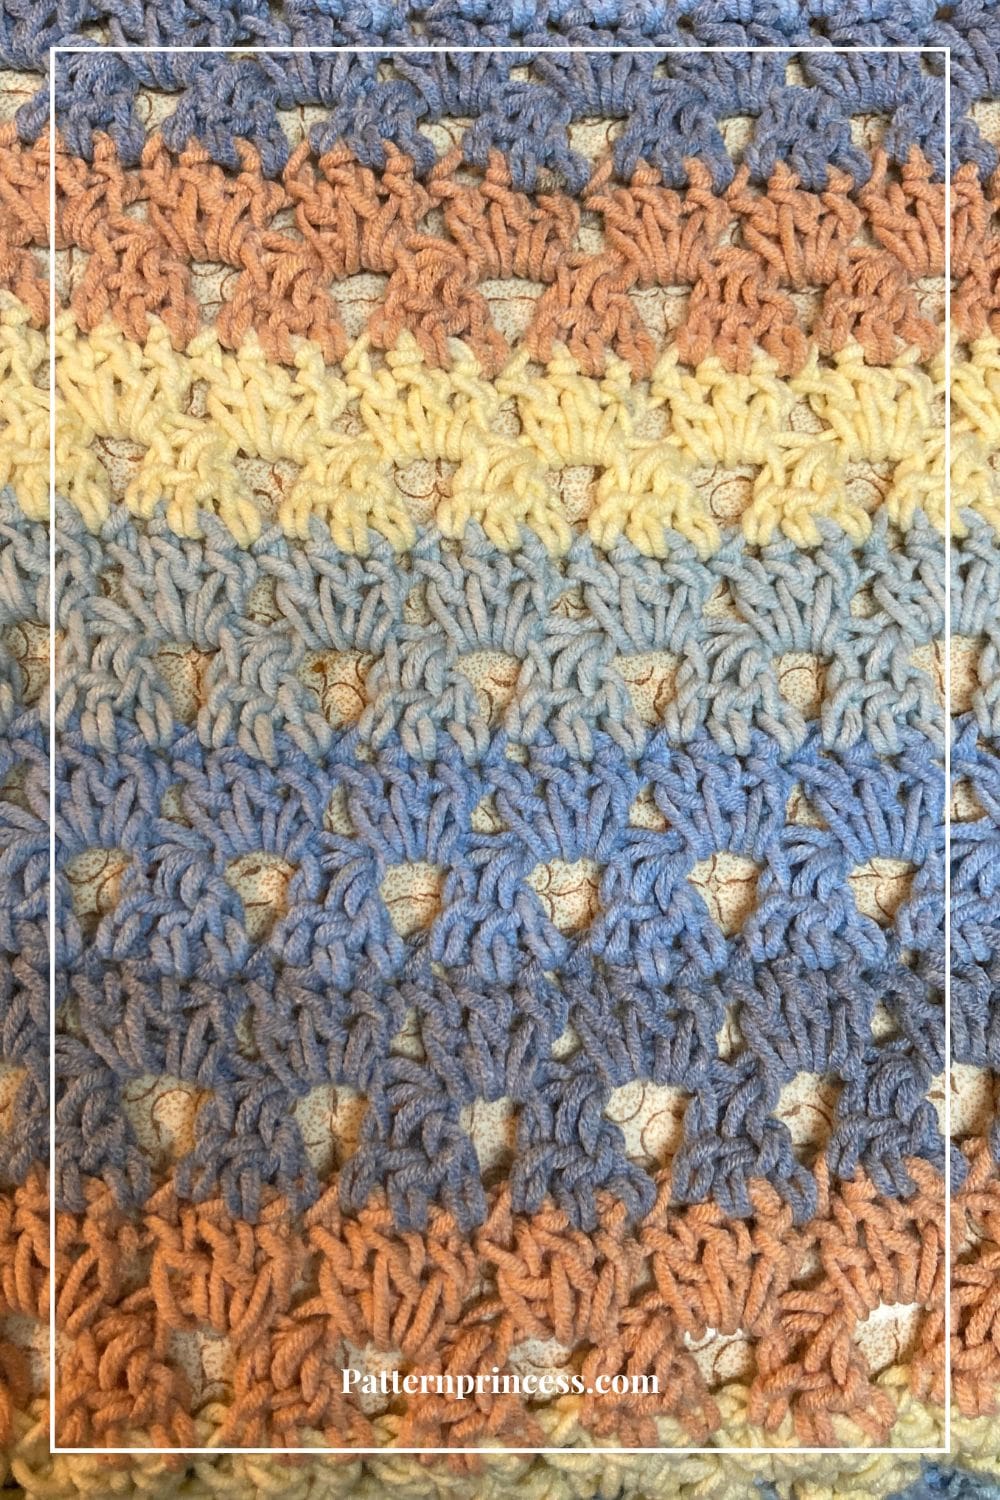
The pattern is a repeat of rows three through six. Because the beginning and ending of each row changes slightly to adjust for the placement of the stitches.
Finding this Up-to-Date Stitch Pattern
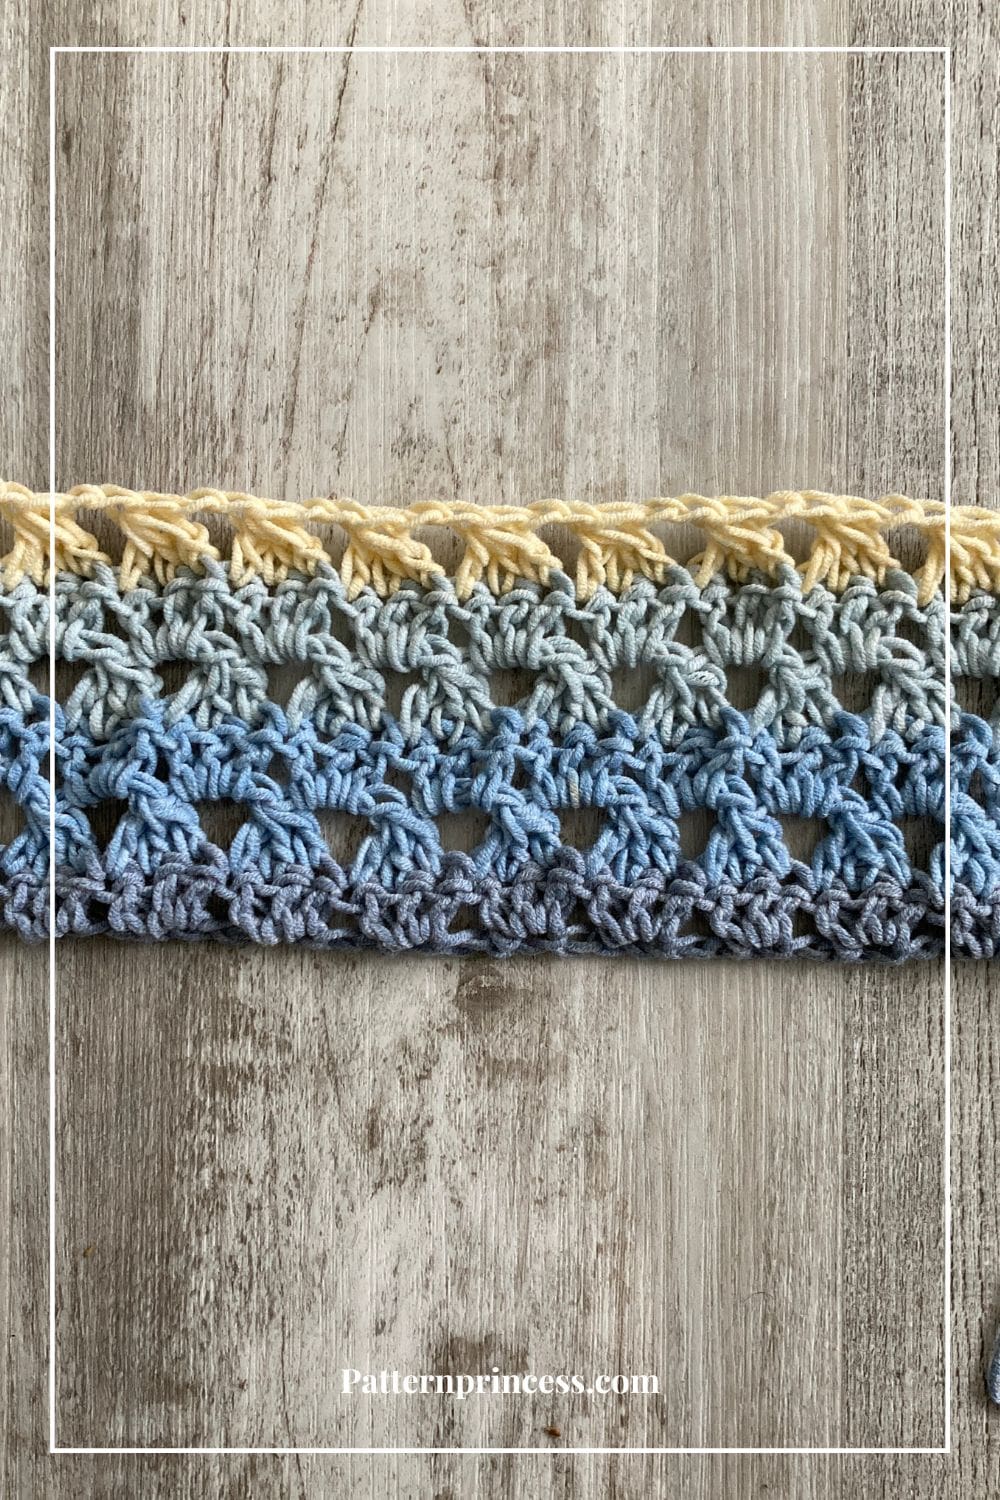
A while back, I noticed a crochet motif using this stitch showing it as a cupcake. With one color for the granny stitch row and another color for the frosting row. It was really cute.
I also saw a blanket pattern using this stitch on Daisy Farm Crafts. I just fell in love with the fresh take on the beginner stitch. It works up fast and it is one of those patterns that are wonderful to work while spending time with the family.
Photos and Video Tutorials
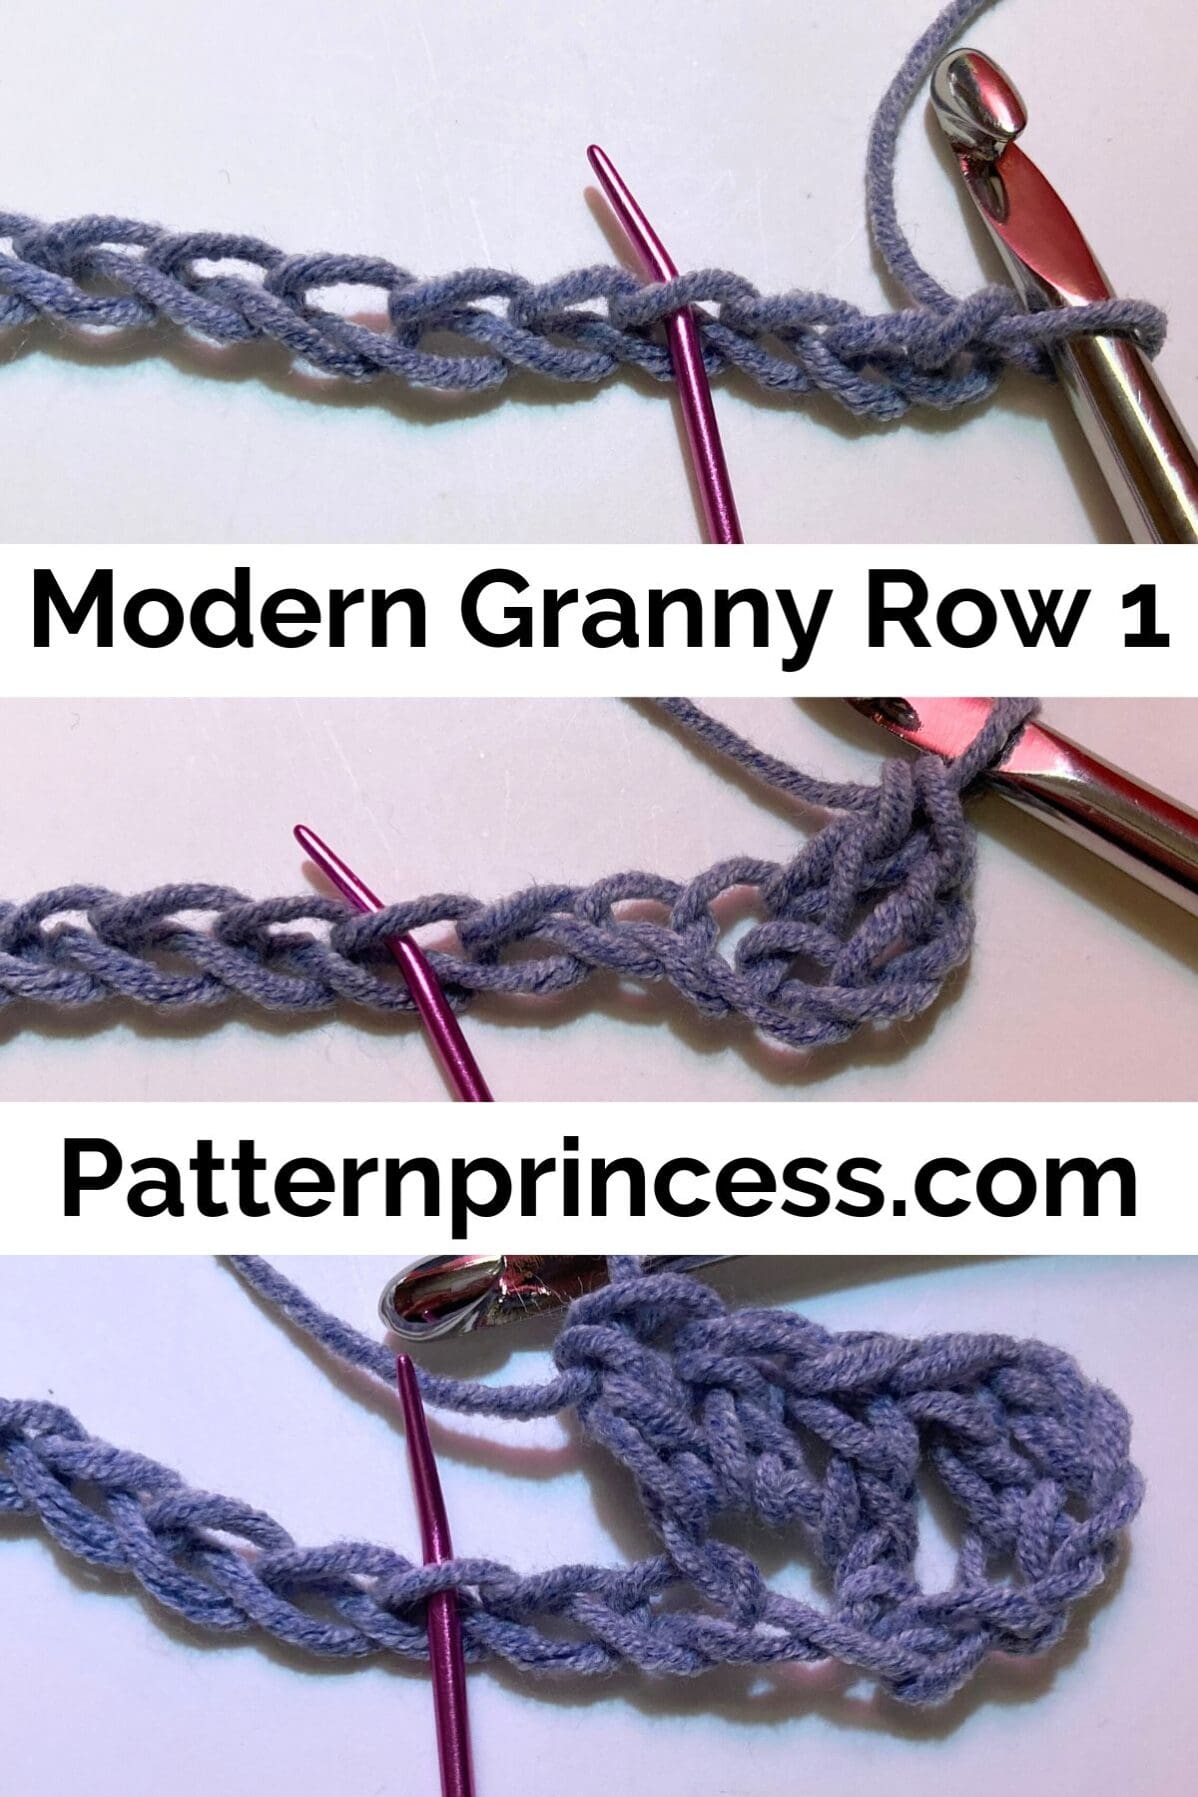
There are photos to help with working each row within the written pattern. Video tutorials for both left hand crocheters and right hand crocheters are located after the written pattern.
Crochet Pattern Directions: How to Crochet the Modern Granny Stitch
Skill Level
Confident Beginner. You should be able to work the Double Crochet stitch.
Size
The size of your project can easily be adjusted using multiples of 3 plus 1. That means your initial chain should be divisible by 3. Then add one more chain stitch.
Gauge
The gauge will depend on what yarn and crochet hook you use for this pattern.
Materials
Yarn. For the sample, I used Caron Cotton Cakes in Beach. However, this stitch would work nicely with any yarn weight.
Crochet Hook sized for the yarn
Tapestry Needle
Scissors
Abbreviations
CH = Chain
DC = Double Crochet
DC3TOG = Double Crochet Three Together
SK = Skip
SP = Space
ST = Stitch
STs = Stitches
[ ] = Repeat Between
Crochet Pattern Notes
Turn at the end of each row.
The chain three at the beginning of each row counts as a double crochet.
Repeat rows 3 through 6 throughout the pattern.
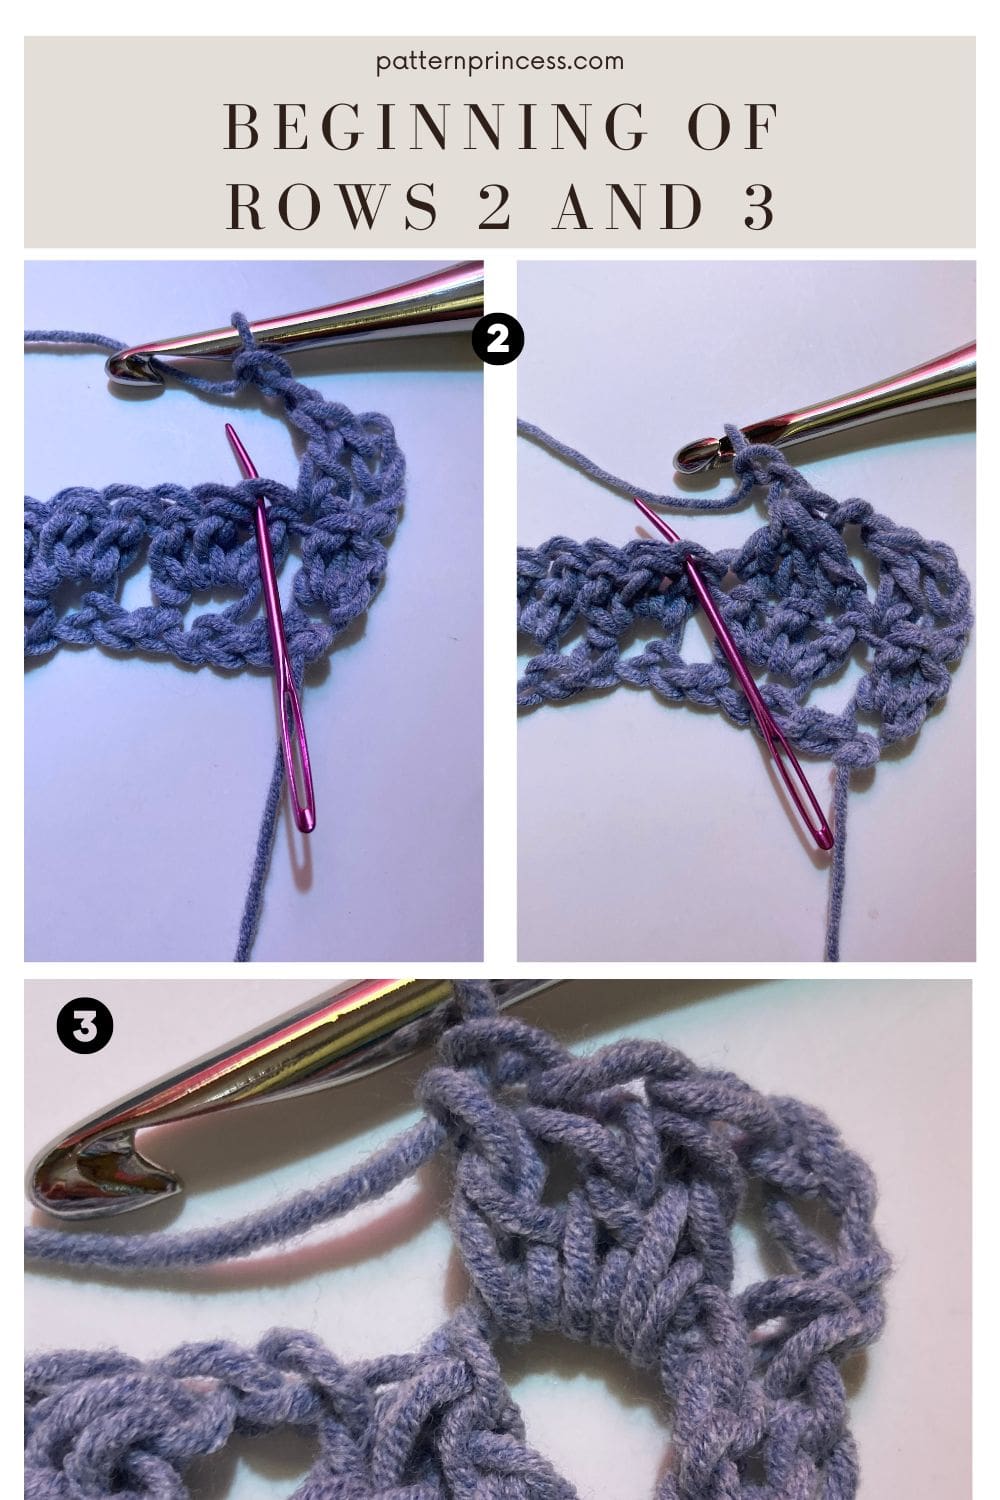
When the double crochet three together stitches are worked over the cluster of three double crochet below, they are worked directly over the top. Working in the top two loops of each double crochet.
The next row of granny stitches are worked between the triangle shaped
This pattern is written in U S Crochet Terms.
Stitches Used
Double Crochet (DC). Yarn over, insert the hook through both loops and pull up a loop. Next, yarn over and pull through two loops on the hook. Lastly, yarn over again and pull through the last two loops on the hook.
Double Crochet 3 Together (DC3TOG). This decreases the stitches by two double crochet stitches each time this is worked.
First. Yarn over, insert hook into next stitch and pull up a loop. There will be three loops on the crochet hook. Yarn over, pull through two loops on the hook. There should now be just two loops left on the hook.
Second. Yarn over and insert the hook into the next stitch and pull up a loop. There will be four loops on the hook. Yarn over, pull through two loops. There should now be just three loops on the hook.
Third. Yarn over and insert the hook into the next stitch and pull up a loop. There will be five loops on the hook. Yarn over, pull through two loops. There should now be just four loops on the hook.
Lastly yarn over and pull through the remaining four loops.
You can find more crochet stitch tutorials on the website too.
This first link has more of the beginner crochet stitches.
You will find dedicated blog posts to stitch tutorials using this second link as they are a bit more involved.
Crochet Pattern Directions
Begin
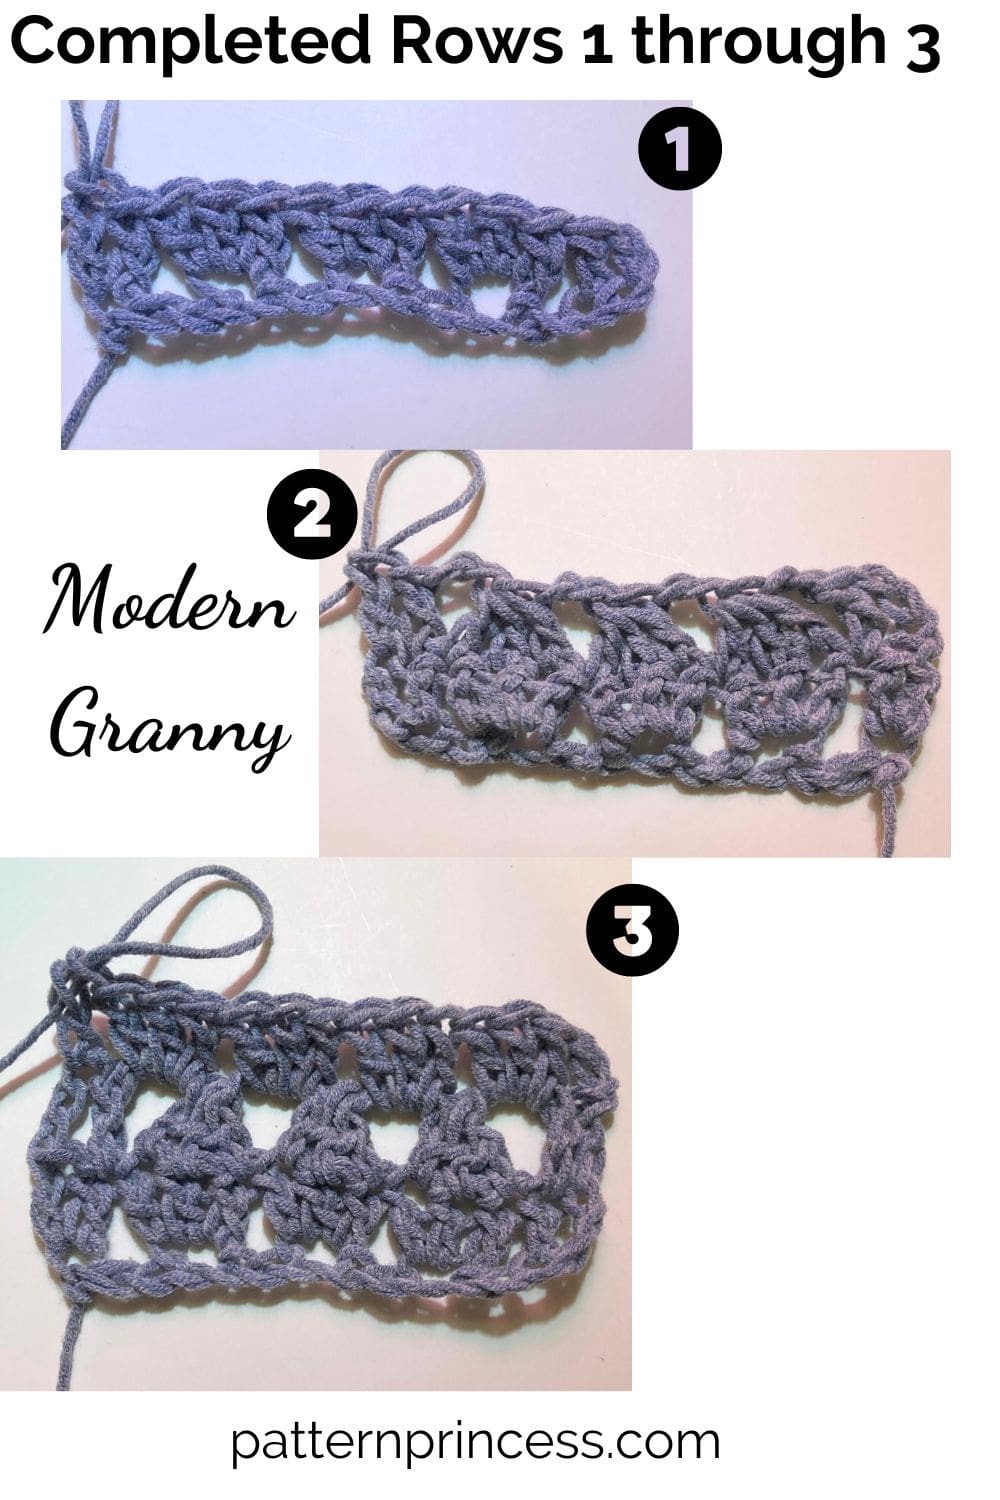
Chain your desired number of stitches.
For the sample in the video, I used a chain of 19. Which is 3 X 6 = 18 plus 1 = 19.
Row 1
1 DC in the 4th CH from hook (Counts as 2 DC). [SK next 2 CH, 3 DC in the next CH]. Repeat across between [ ]. End with 2 DC in the last CH. Turn
Row 2
CH 3 (Counts as DC) 1 DC in the next DC. [CH 2, DC3TOG]. Repeat across between [ ]. End with CH 2, DC in the next ST. DC into the top ST of the turning CH. Turn
Row 3
CH 3 (Counts as DC). SK 1 DC, 3 DC in the CH 2 SP between the last DC3TOG and 2 DC of the previous row. [3 DC into next CH 2 SP]. Repeat across between [ ]. End with SK 1 DC, and 1 DC into the top ST of the turning CH. Turn
Row 4
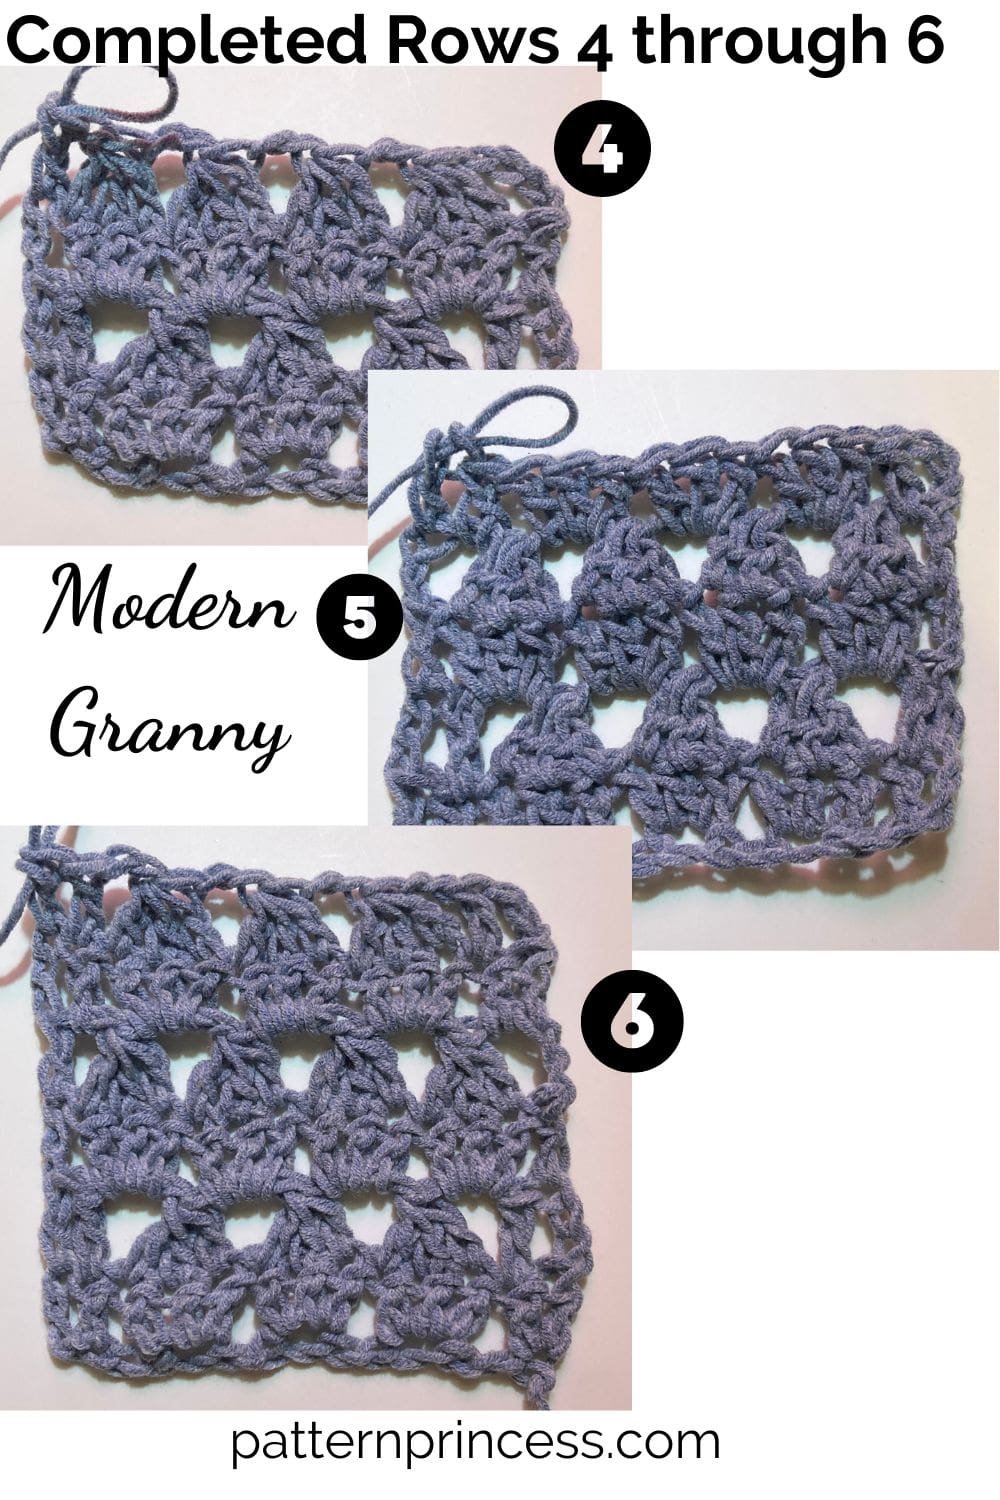
CH 4 (Counts as DC and CH 1). [DC3TOG in top of each 3 DC ST of the previous row, CH 2]. Repeat across between [ ]. End with a CH 1 and DC into the top ST of the turning CH. Turn
Row 5
CH 3 (Counts as DC). 1 DC into the CH 1 SP below. [3 DC in the next CH 2 SP]. Repeat across between [ ]. Ending with 1 DC in the CH 1 SP, and 1 DC into the top ST of the turning CH. Turn
Row 6
CH 3 (Counts as DC). 1 DC into the next DC ST. [CH 2, DC3TOG] Repeat across between [ ]. Ending with a CH 2, DC into the next DC ST, and 1 DC into the top ST of the turning CH. Turn
Rows 7 and Beyond
Repeat rows 3-6 until you have the desired length of your project.
Looking for more free crochet projects? Here are a few ideas. Take a bit and browse around. You just might find your next crochet project.
Crochet Video Tutorials
Right hand crochet video link
Left hand crochet video link

You can find Victoria crocheting, quilting, and creating recipes. She has cooked in restaurants for over 20 years, including many larger parties. She learned to crochet when she was just 11 years old and has been crocheting ever since; over 50 years now. Over 40 years ago, she loved her first class in sewing and continues to hone her skills in quilting. Many have enjoyed the handmade gifts over the years. In her professional career, she has worked in management in a wide variety of businesses including higher education as a dean of a division. All the while attending college part-time to achieve her doctorate in higher education with an emphasis in e-learning.
