Last updated on July 4th, 2024 at 11:32 pm
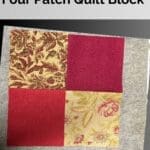
One of the easiest and most versatile quilt blocks is the four patch block, which consists of four equal-sized squares arranged in a grid. Quilting is a rewarding and relaxing hobby that allows you to create beautiful and functional objects with your own hands.
If you’re a beginner quilter, you may be looking for simple and fun projects to get started. It is a simple quilt block that you can make in different colors and different sizes. Even if you are a new quilter, you can make this square for your first project.
The four patch block can be combined with other blocks to create countless beautiful quilts, from classic to modern. They are versatile and can be used in a wide variety quilt designs from smaller squares to larger squares for a larger quilt.
In this tutorial, we’ll show you how to make a four-patch quilt block step-by-step, using basic sewing skills and materials.

Post contains affiliate links, and we earn commissions if you shop through the links on this page. For more information, please read the disclosure section under the About Us page.
Quilt Pattern Using This Four Patch Design
Introducing the Easy Four Patch Quilt Pattern Ombre Sunset
Directions: How to Make an Easy Four Patch Quilt Block
Skill Level
This quilt block is perfect for a beginner.
You should be comfortable with sewing squares together. Measuring and using a rotary cutter. Nesting seams together and pressing seams.
Finished Size
It depends upon the beginning squares and rectangles started with.
Materials
Four fabric squares same size, or fabric strips cut into rectangles. It is recommended to use at least two different fabrics for a nice contrast.
Thread
Equipment/Tools
Rotary Cutter
Quilting Ruler
Cutting Mat
Rotating Cutting Mat
Iron
Ironing Board or Pressing Mat
Pins
Sewing Machine
Quilt Block Notes
Use a ¼-inch seam allowance. I recommend using a special presser foot with a ¼-inch guide if you have one for your machine. This will help you get uniform seams, and matching seams.
Nest your seams. This means that the seams of each row are aligned, and the pieces fit together almost like the pieces of a puzzle.
Right Sides Together. Sew fabric together with right sides together.
Quilt Block Instructions
Using Four Squares for the Four-patch Blocks
You can either cut your own squares of fabric or use a charm pack. This is a fun way to use up those fabric scraps for a real scrappy look too.
Fabric Selection
Choose fabrics that complement each other and fit your desired color scheme. You’ll need two contrasting fabrics for each block.
Cutting Fabric
Determine the finished size of your four patch quilt blocks. For example, if you want a 6-inch finished block, you’ll need to cut two squares of each fabric measuring 3.5 inches (including a ¼ inch seam allowance). Make sure to cut accurately to ensure precise piecing.
Piecing
Take one square from each fabric and place them with the right sides together. Sew a ¼ inch seam along one side, then press the seam allowance towards the dark fabric. Repeat this process with the remaining two squares.
Joining the Pairs
Take the two pairs you created in the previous step and place them right sides together, aligning the seams. Sew a ¼ inch seam along one side, then press the seam allowance in any direction.
Finishing
Your four patch quilt block is complete! Trim any excess fabric to make it square and neat. Repeat the steps to create as many four patch blocks as you need for your quilt design.

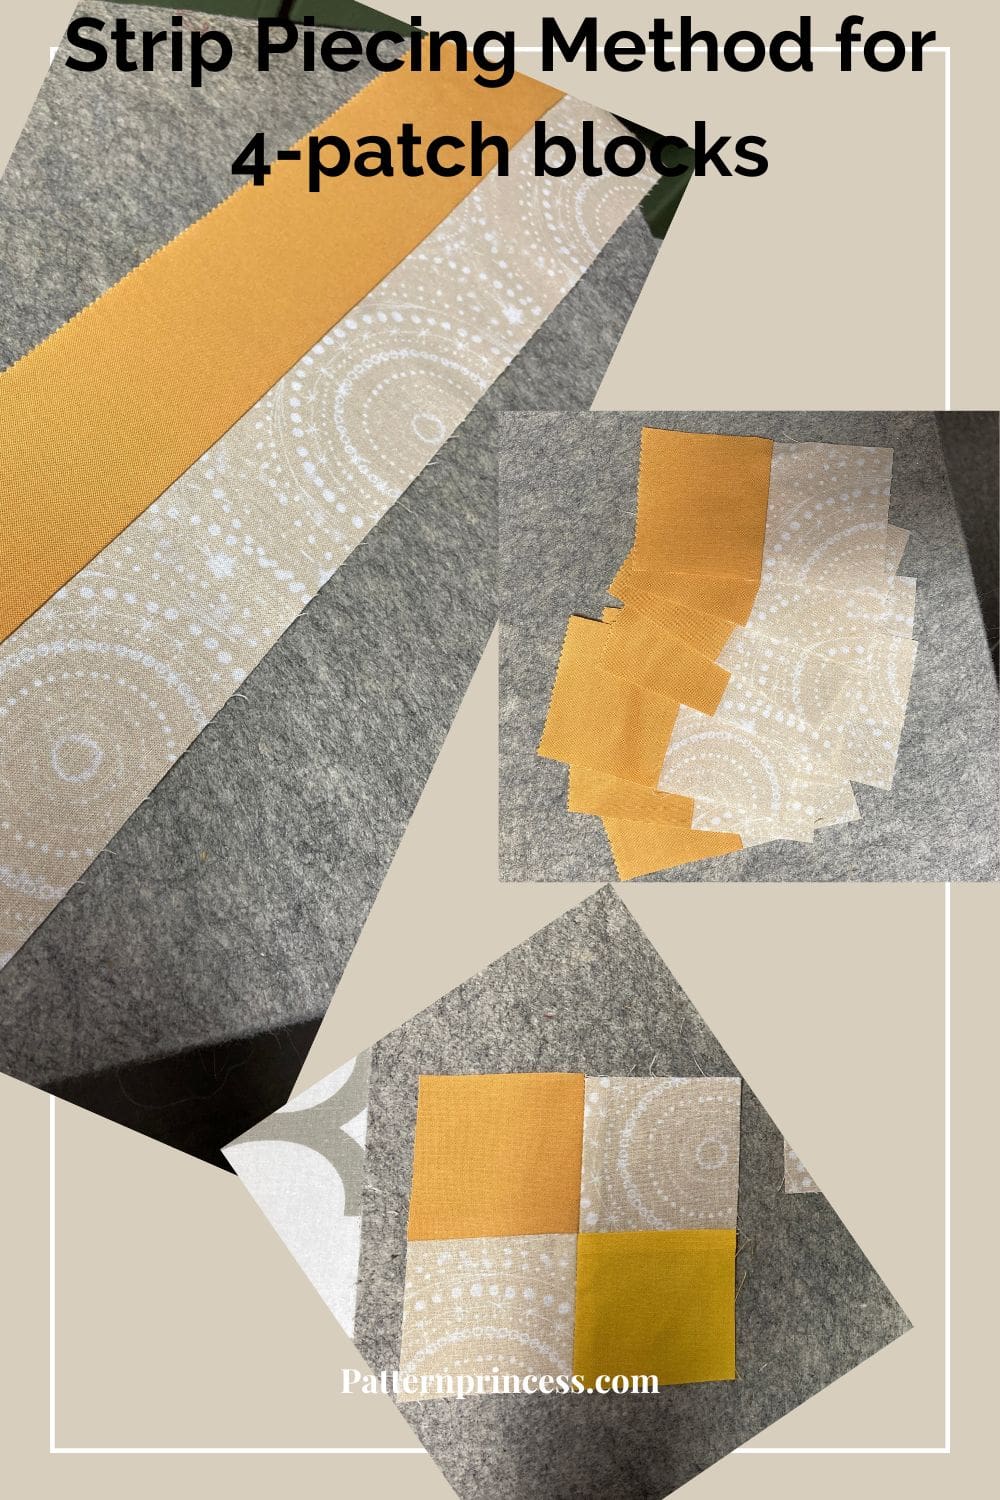
Strip Piecing Method for 4-patch blocks
Using this easy strip piecing method is a quick way to make many four-patch blocks at once. When you want to make a lot of four patch blocks, this method will save you a ton of time.
Choose different fabrics in any contrasting or complimenting colors of fabric. Use a jelly roll, fat quarters, or yards of fabric cut into strips. The strip size will depend on the finished quilt block size desired.
All sewing in this tutorial uses ¼” seam allowance.
All fabric is sewn right sides together unless otherwise noted.
How to Make the Four Patch Quilt Block using the Strip Piecing Method
Begin by cutting the Strips for The Four Patch Quilt Blocks
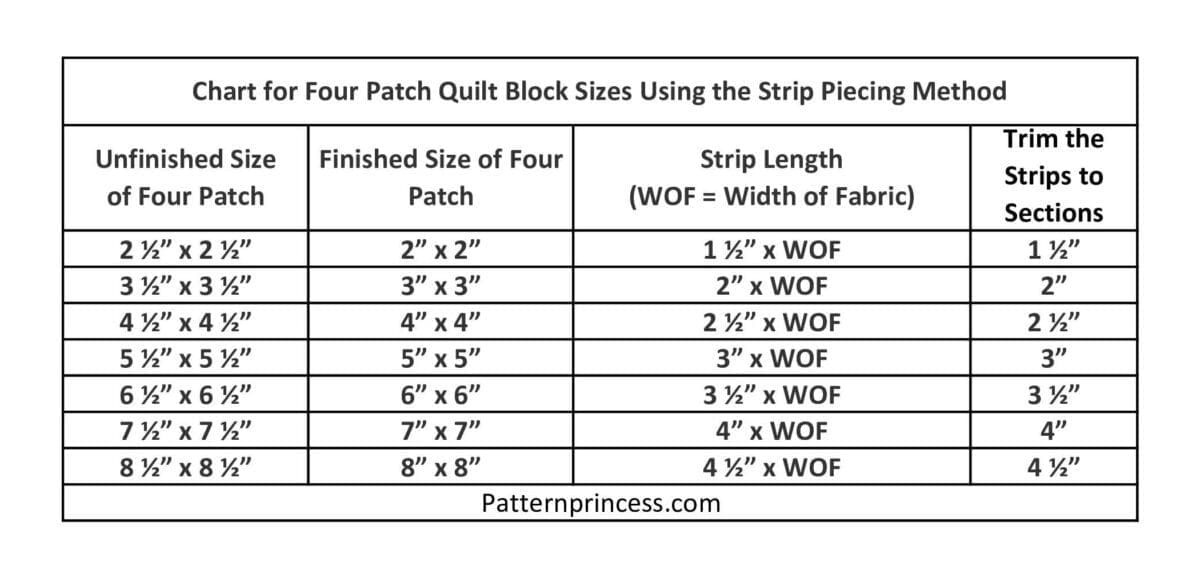
The size of the four patch quilt blocks determined the length and width of the strips. The chart below gives a few measurements of common sized blocks for you to follow.
When planning the fabric, you can either use the jelly rolls, full widths of fabric, or even fat quarter widths. The longer the width of fabric (WOF), the more two patch rectangles you’ll get.
For the strips, I used strips of fabric from a jelly roll, which measure 2 ½” X 42”. For the contrasting fabric, I used a printed cream fabric. I cut it into strips to the same size.
Sewing and Cutting the Strips into Rectangles
Take a darker colored strip of fabric and a light fabric strip and place the right sides together. Pin in place as needed along the length of the strip.
Sew together the length of the fabric strips using ¼” seam allowance on one side of the long edge. Remove the pins as you come up to them during sewing.
Press the seam to the side with the darker fabric. Pressing to the darker side keeps the seam allowance from showing through the quilt top when you’re finished.
Cutting the Strips into Rectangles
Use a smaller ruler and line up the center seam with one of the horizontal lines on the ruler. Square off one end of the strips by using a rotary cutter and cutting along the edge of the ruler.
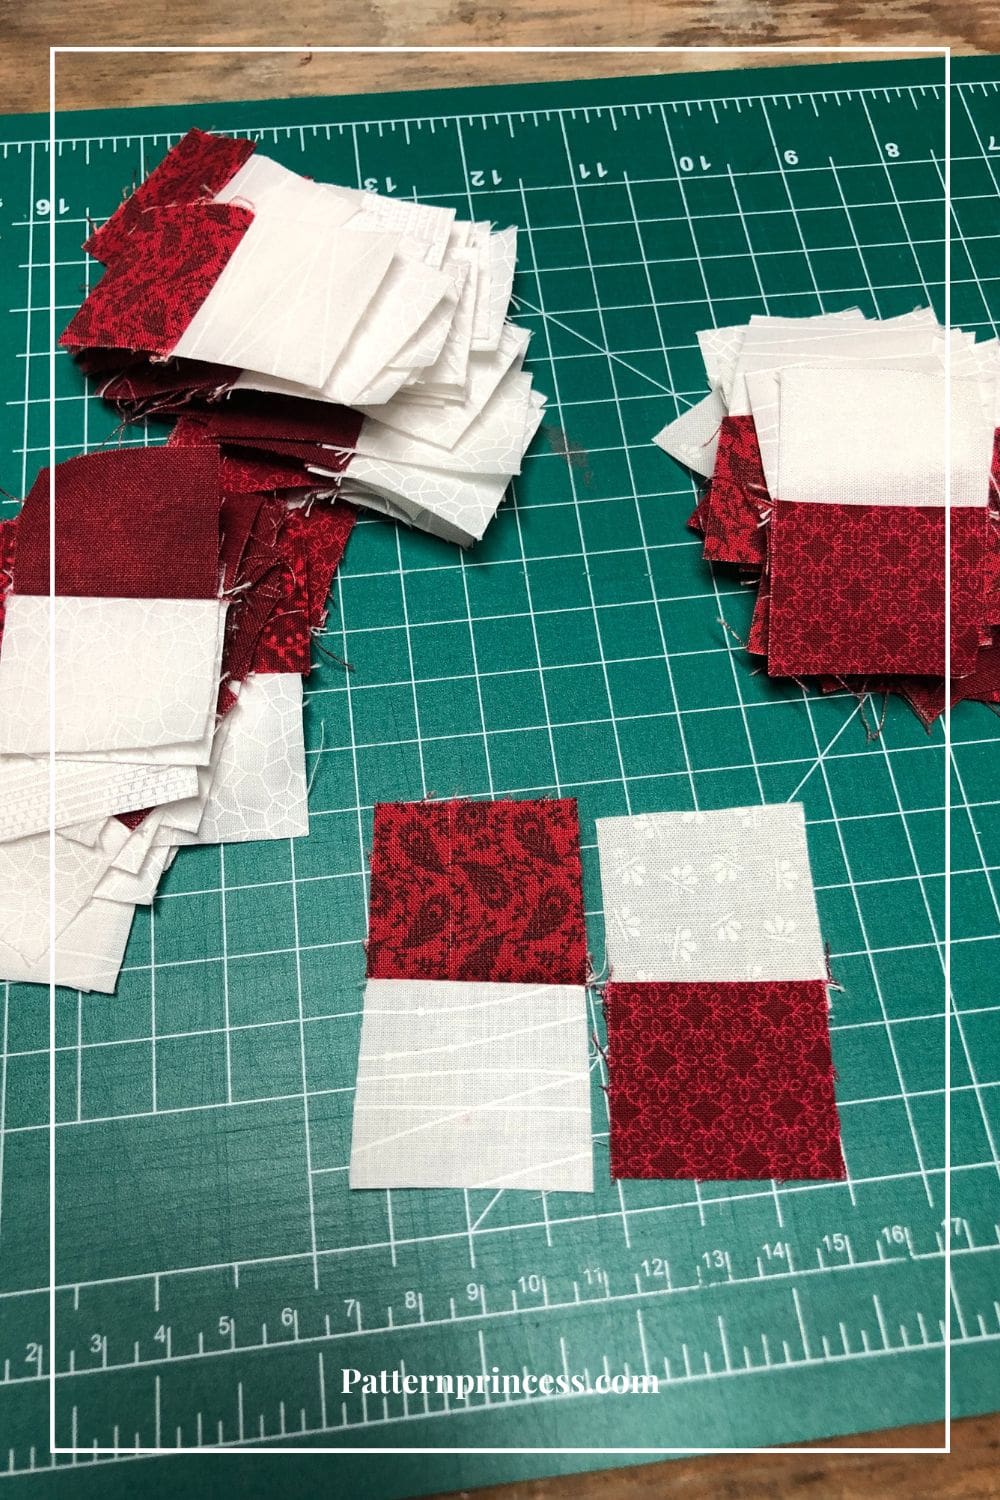
Next cut the strips apart to create two patch rectangles. Make sure to cut the rectangles to the same width as when you cut the two strips to sew together. My strips are 2 ½” side so I cut my rectangles at the 2 ½” mark. (These are sometimes referred to as a 2 patch at this point).
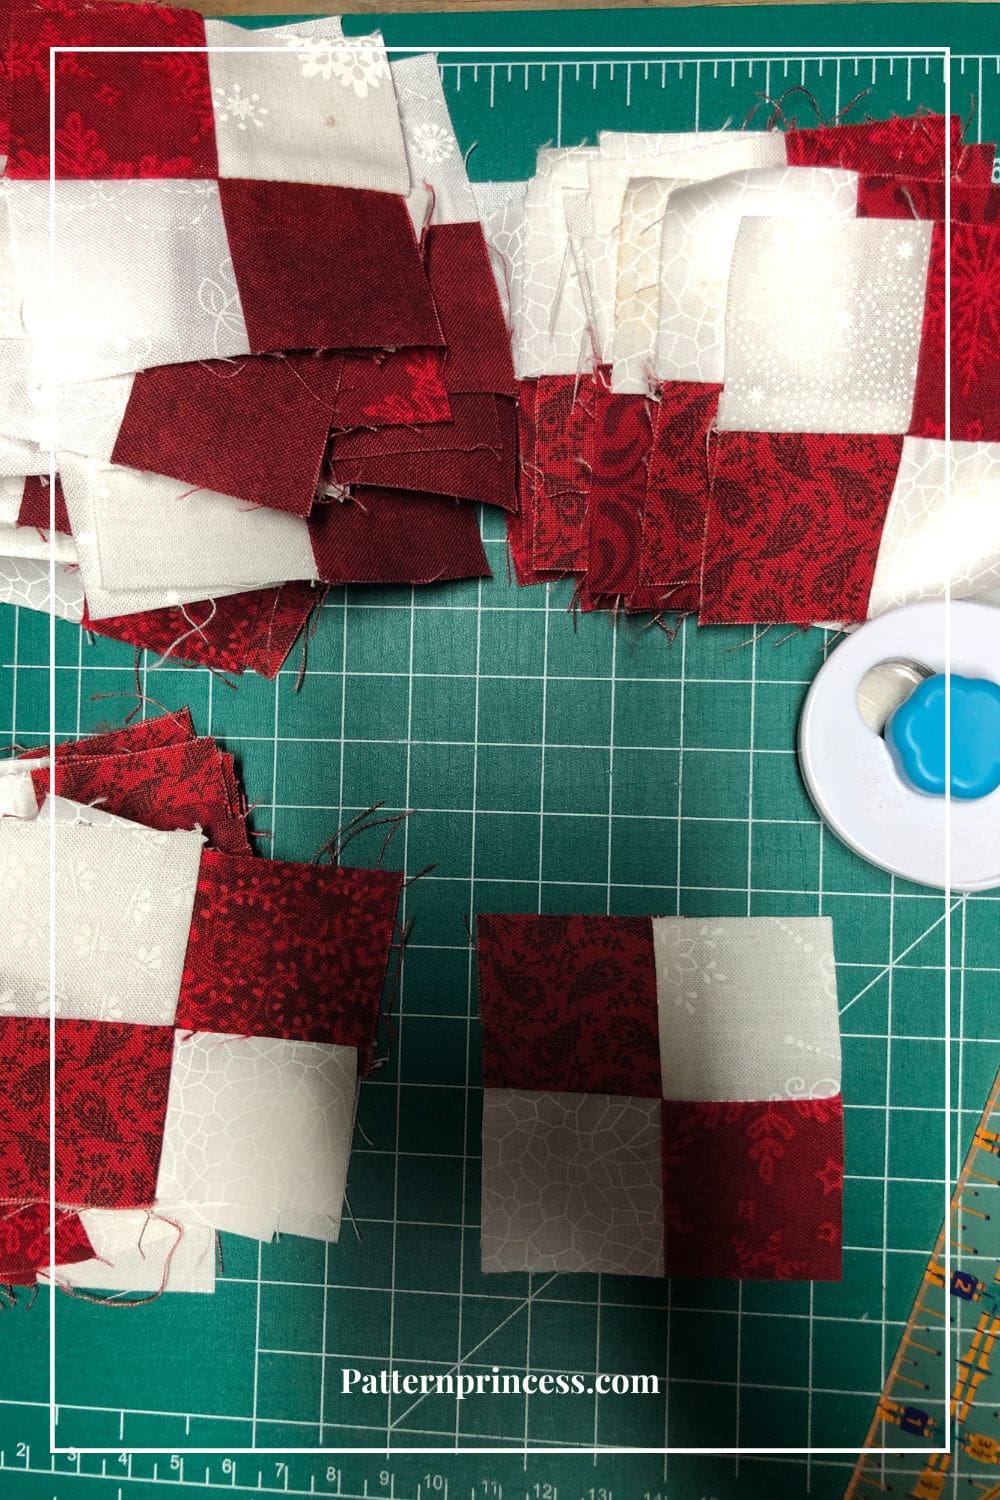
Side Note: I used the red and white quilt blocks for a red and white scrappy quilt. Had to make quite a few so the strip method worked nicely.
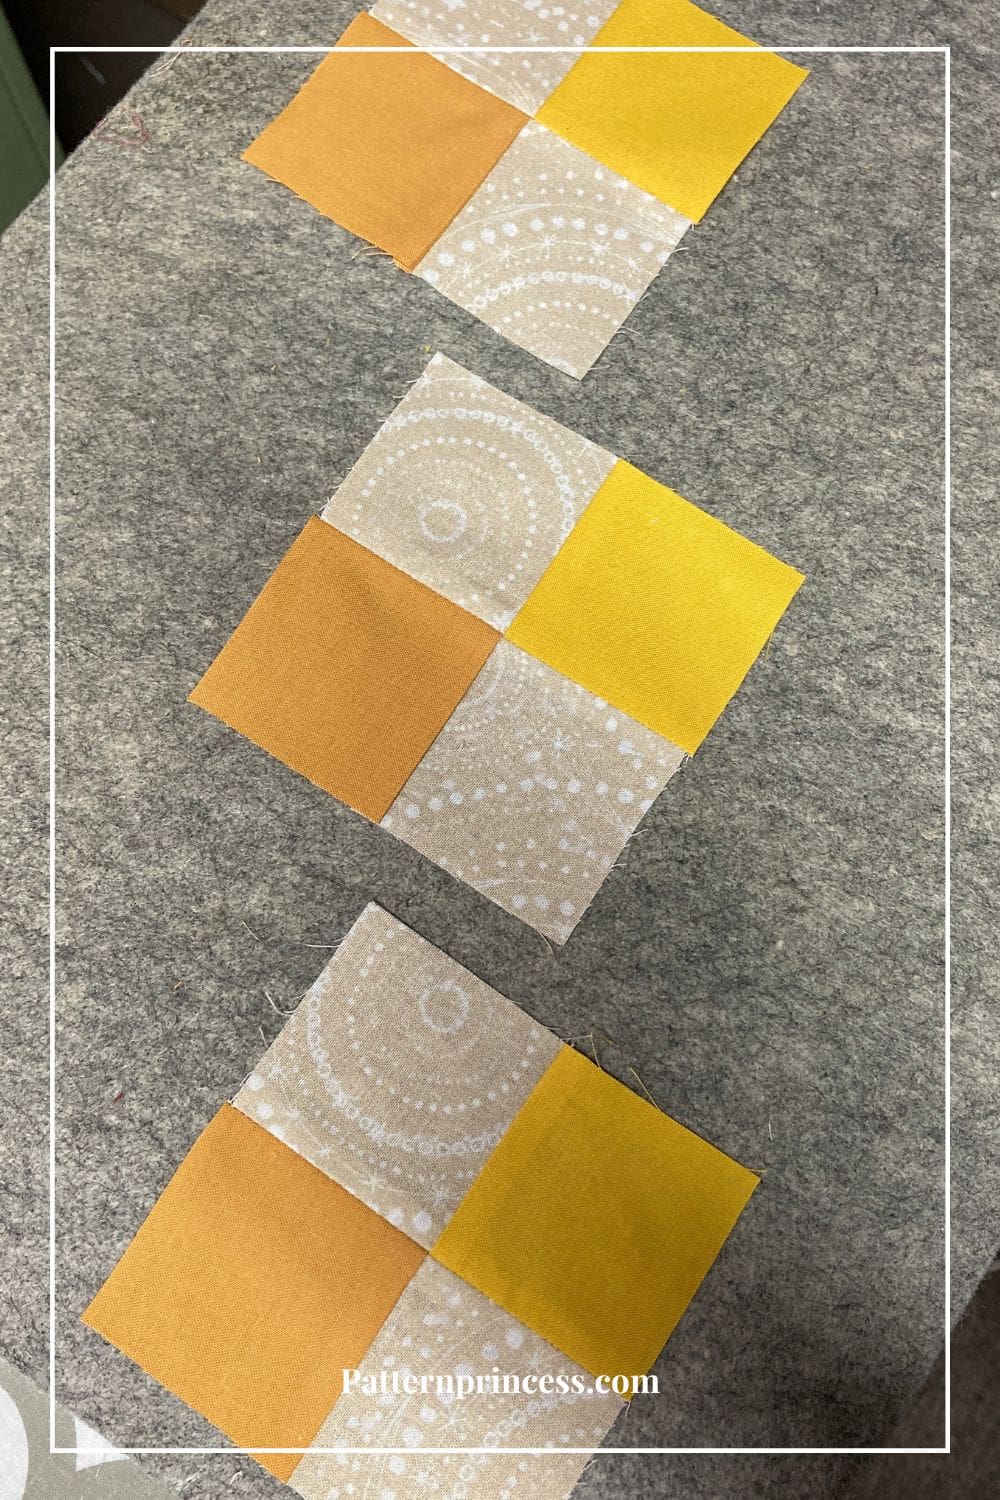
Make the Four Patch Quilt Block
Next, line up 2 two patch rectangles with the center seams nested together and the colors facing the opposite directions.
Pin at the center to hold in place. Using the ¼” seam allowance, sew the rectangles together, removing the pin as you sew up to it.
Press the four patch block open.
The four patch block is now ready to sew into your pattern.
Using the Quilt Block
Quilt Layout
Now that you have several four patch blocks, you can arrange them in various ways to create your desired quilt design. Experiment with different layouts, such as straight rows, on-point settings, or alternate with other block designs.
Piecing the Quilt
Once you have finalized your layout, join the four patch blocks together by sewing them along the sides with a ¼ inch seam allowance. Continue piecing until you complete the quilt top.
Quilting and Finishing
Layer the quilt top with batting and backing fabric, then quilt as desired. You can quilt by hand or use a sewing machine. Finally, bind the edges of the quilt to finish it off.
The possibilities are endless with four patch blocks. You can combine them with other block designs, add sashing, or create borders to further enhance your design. Have fun exploring different arrangements and techniques to make your project truly unique.
These are perfect for a table runner, baby quilt, or any quilt size you desire.
How to Make an Easy Four Patch Quilt Block
Equipment
- Thread
- Equipment/Tools
- Rotary Cutter
- Quilting Ruler
- Cutting Mat
- Rotating Cutting Mat
- Iron
- Ironing Board or Pressing Mat
- Pins
- Sewing Machine
Materials
- Four fabric squares same size or fabric strips cut into rectangles. It is recommended to use at least two different fabrics for a nice contrast.
- Thread
Instructions
Using Four Squares for the Four-patch Blocks
- You can either cut your own squares of fabric or use a charm pack. This is a fun way to use up those fabric scraps for a real scrappy look too.
- Choose fabrics that complement each other and fit your desired color scheme. You’ll need two contrasting fabrics for each block.
- Determine the finished size of your four patch quilt blocks. For example, if you want a 6-inch finished block, you’ll need to cut two squares of each fabric measuring 3.5 inches (including a ¼ inch seam allowance). Make sure to cut accurately to ensure precise piecing.
- Take one square from each fabric and place them with the right sides together. Sew a ¼ inch seam along one side, then press the seam allowance towards the dark fabric. Repeat this process with the remaining two squares.
- Take the two pairs you created in the previous step and place them right sides together, aligning the seams. Sew a ¼ inch seam along one side, then press the seam allowance in any direction.
How to Make the Four Patch Quilt Block using the Strip Piecing Method
- Begin by cutting the Strips for The Four Patch Quilt Blocks
- The size of the four patch quilt blocks determined the length and width of the strips. The chart below gives a few measurements of common sized blocks for you to follow.
- When planning the fabric, you can either use the jelly rolls, full widths of fabric, or even fat quarter widths. The longer the width of fabric (WOF), the more two patch rectangles you’ll get.
- For the strips, I used strips of fabric from a jelly roll, which measure 2 ½” X 42”. For the contrasting fabric, I used a printed cream fabric. I cut it into strips to the same size.
- Sewing and Cutting the Strips into Rectangles
- Take a darker colored strip of fabric and a light fabric strip and place the right sides together. Pin in place as needed along the length of the strip.
- Sew together the length of the fabric strips using ¼” seam allowance on one side of the long edge. Remove the pins as you come up to them during sewing.
- Press the seam to the side with the darker fabric. Pressing to the darker side keeps the seam allowance from showing through the quilt top when you’re finished.
- Cutting the Strips into Rectangles
- Use a smaller ruler and line up the center seam with one of the horizontal lines on the ruler. Square off one end of the strips by using a rotary cutter and cutting along the edge of the ruler.
- Next cut the strips apart to create two patch rectangles. Make sure to cut the rectangles to the same width as when you cut the two strips to sew together. My strips are 2 ½” side so I cut my rectangles at the 2 ½” mark. (These are sometimes referred to as a 2 patch at this point).
- Make the Four Patch Quilt Block
- Next, line up 2 two patch rectangles with the center seams nested together and the colors facing the opposite directions.
- Pin at the center to hold in place. Using the ¼” seam allowance, sew the rectangles together, removing the pin as you sew up to it.
- Press the four patch block open.
- The four patch block is now ready to sew into your pattern.
Notes
 Quilt Block Notes
Use a ¼-inch seam allowance. I recommend using a special presser foot with a ¼-inch guide if you have one for your machine. This will help you get uniform seams, and matching seams.
Nest your seams. This means that the seams of each row are aligned, and the pieces fit together almost like the pieces of a puzzle.
Right Sides Together. Sew fabric together with right sides together. Quilt Block Notes
You can find Victoria crocheting, quilting, and creating recipes. She has cooked in restaurants for over 20 years, including many larger parties. She learned to crochet when she was just 11 years old and has been crocheting ever since; over 50 years now. Over 40 years ago, she loved her first class in sewing and continues to hone her skills in quilting. Many have enjoyed the handmade gifts over the years. In her professional career, she has worked in management in a wide variety of businesses including higher education as a dean of a division. All the while attending college part-time to achieve her doctorate in higher education with an emphasis in e-learning.